VOLVO S60 CROSS COUNTRY 2018 Owner´s Manual
Manufacturer: VOLVO, Model Year: 2018, Model line: S60 CROSS COUNTRY, Model: VOLVO S60 CROSS COUNTRY 2018Pages: 394, PDF Size: 9.41 MB
Page 141 of 394
LOADING AND STORAGE
}}
139
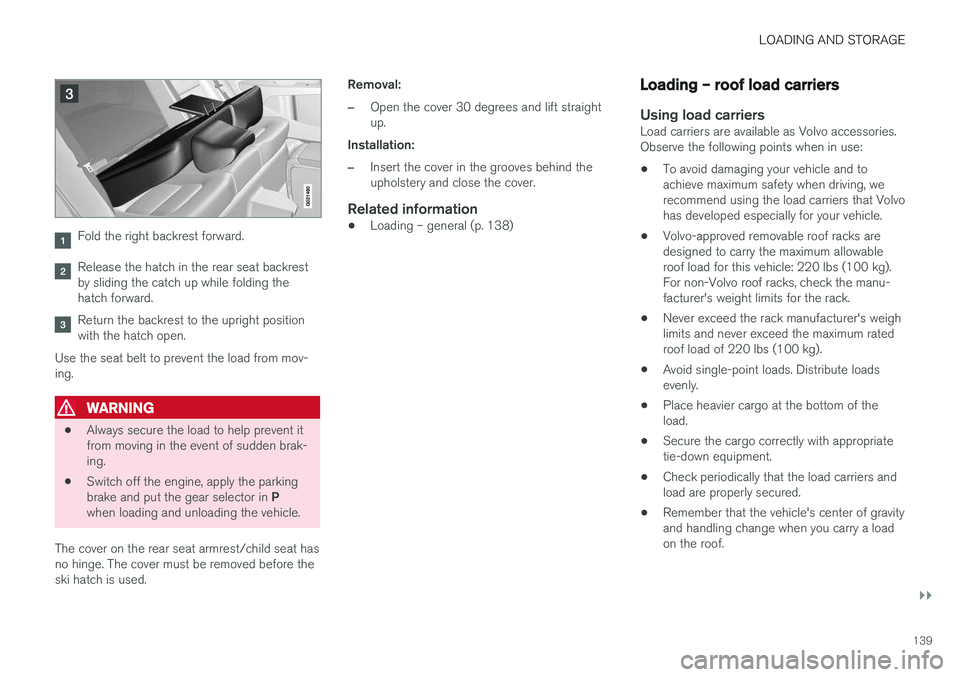
Fold the right backrest forward.
Release the hatch in the rear seat backrest by sliding the catch up while folding thehatch forward.
Return the backrest to the upright position with the hatch open.
Use the seat belt to prevent the load from mov-ing.
WARNING
• Always secure the load to help prevent it from moving in the event of sudden brak-ing.
• Switch off the engine, apply the parking brake and put the gear selector in
P
when loading and unloading the vehicle.
The cover on the rear seat armrest/child seat has no hinge. The cover must be removed before theski hatch is used. Removal:
–Open the cover 30 degrees and lift straight up.
Installation:
–Insert the cover in the grooves behind the upholstery and close the cover.
Related information
• Loading – general (p. 138)
Loading – roof load carriers
Using load carriersLoad carriers are available as Volvo accessories. Observe the following points when in use:
• To avoid damaging your vehicle and toachieve maximum safety when driving, werecommend using the load carriers that Volvohas developed especially for your vehicle.
• Volvo-approved removable roof racks aredesigned to carry the maximum allowableroof load for this vehicle: 220 lbs (100 kg).For non-Volvo roof racks, check the manu-facturer's weight limits for the rack.
• Never exceed the rack manufacturer's weighlimits and never exceed the maximum ratedroof load of 220 lbs (100 kg).
• Avoid single-point loads. Distribute loadsevenly.
• Place heavier cargo at the bottom of theload.
• Secure the cargo correctly with appropriatetie-down equipment.
• Check periodically that the load carriers andload are properly secured.
• Remember that the vehicle's center of gravityand handling change when you carry a loadon the roof.
Page 142 of 394
||
LOADING AND STORAGE
140•
The vehicle's wind resistance and fuel con- sumption will increase with the size of theload.
• Drive smoothly. Avoid rapid starts, fast cor-nering and hard braking.
Related information
• Loading – general (p. 138)
• Load anchoring eyelets (p. 140)
Load anchoring eyelets
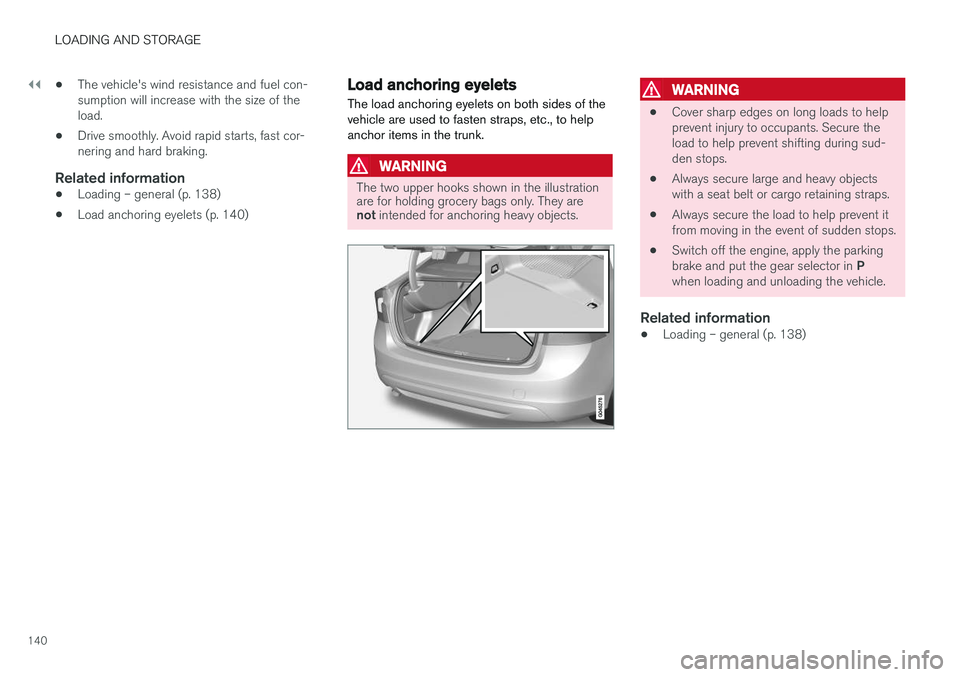
The load anchoring eyelets on both sides of the vehicle are used to fasten straps, etc., to helpanchor items in the trunk.
WARNING
The two upper hooks shown in the illustration are for holding grocery bags only. They are not intended for anchoring heavy objects.
WARNING
• Cover sharp edges on long loads to help prevent injury to occupants. Secure theload to help prevent shifting during sud-den stops.
• Always secure large and heavy objectswith a seat belt or cargo retaining straps.
• Always secure the load to help prevent itfrom moving in the event of sudden stops.
• Switch off the engine, apply the parking brake and put the gear selector in
P
when loading and unloading the vehicle.
Related information
• Loading – general (p. 138)
Page 143 of 394
LOADING AND STORAGE
141
Grocery bag holder
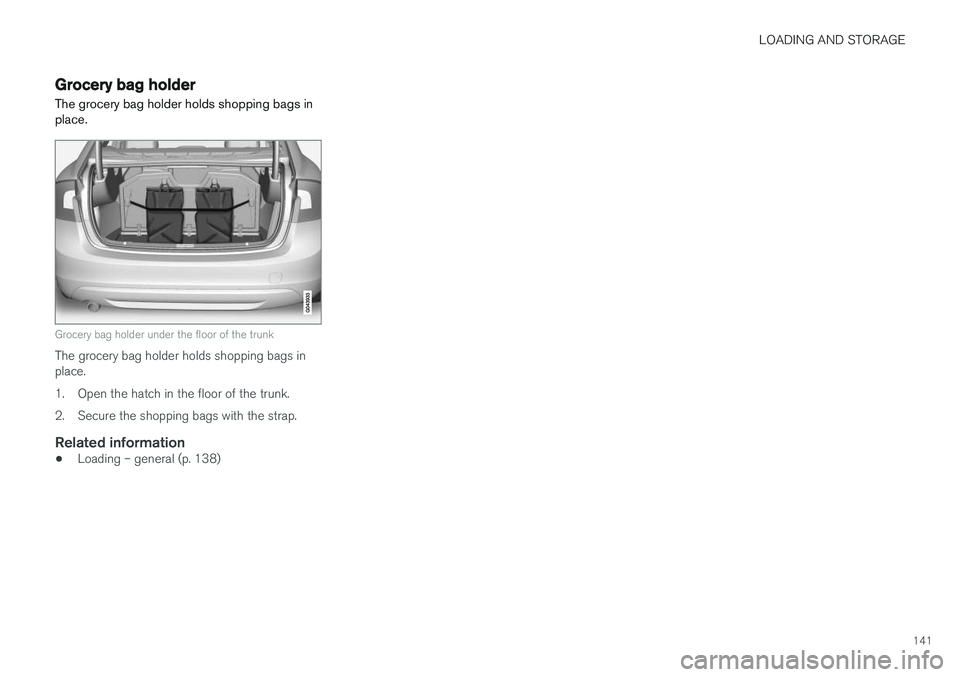
The grocery bag holder holds shopping bags in place.
Grocery bag holder under the floor of the trunk
The grocery bag holder holds shopping bags in place.
1. Open the hatch in the floor of the trunk.
2. Secure the shopping bags with the strap.
Related information
• Loading – general (p. 138)
Page 144 of 394

Page 145 of 394
L O C K S A N D A L A R M
Page 146 of 394
LOCKS AND ALARM
144
Remote key and key blade
Two remote keys are provided with your vehicle. They enable you to unlock the doors and trunk,and also function as ignition keys to start thevehicle or operate electrical components. Theremote keys contain detachable metal keyblades for manually locking or unlocking the driv-er's door and the glove compartment. The visibleends of these key blades are unique to make iteasier to identify "your" remote key. Up to sixremotes can be programmed for use on thesame vehicle.
WARNING
Never leave the remote key in the ignition slot if children are to remain in the vehicle.
For more information on the various ignition modes, see Ignition modes (p. 74).
Related information
• Remote key – functions (p. 147)
• Remote key – functions (p. 147)
• Remote key – range (p. 148)
Remote key – loss
If either of the remote keys (p. 144) is lost, the other should be taken with the vehicle to a Volvoretailer. As an anti-theft measure, the code of thelost remote key must be erased from the system.
NOTE
Additional or duplicate remote control keys can be obtained from any authorized Volvoretailer. You can also obtain additional or duplicate remote control keys from certain independentrepair facilities and locksmiths that are quali-fied to make remote control keys. Each keymust be programmed to work with your vehi-cle. California Only: A list of independent repair facilities and/or locksmiths known to Volvo that can cut andcode replacement keys can be found: • on the Volvo website at http://www.volvocars.com/us/keys
• by calling Volvo Customer Care at1-800-458-1552
The number of registered keys for the vehicle can be found by pressing
MY CAR and going into
SettingsInformationNumber of keys.For a description of the menu system, see My Car – introduction (p. 71). USA-5WK49264FCC ID:KR55WK49264 + Siemens VDO 5WK49236 FCC ID:KR55WK49236, 5WK49266FCC ID:KR55WK49266 + Siemens VDO 5WK49233 FCC ID:KR55WK49233This device complies with part 15 of the FCC rules and RSS-210. Operation is subject to thefollowing conditions: (1) This device may notcause harmful interference, and (2) this devicemust accept any interference received, includinginterference that may cause undesired operation. Canada-5WK49264IC:267T-5WK49264 + Siemens VDO 5WK49236 IC:267T-5WK49236, 5WK49266IC:267T-5WK49266 + Siemens VDO 5WK49233 IC:267T-5WK49233Operation is subject to the following conditions: (1) this device may not cause interference, and(2) this device must accept any interference,including interference that may cause undesiredoperation of the device.
Page 147 of 394
LOCKS AND ALARM
* Option/accessory.145
Related information
•Remote key – functions (p. 147)
Key memory
The memory in the remote key makes it possible to store certain personal settings.
The position of the side door mirrors, power driv- er's seat * and the selected instrument panel
theme 1
are stored in the remote keys when the
vehicle is locked . The next time the driver's door
is unlocked with the same remote key and the
door is opened within 2 minutes, the power driv-
er's seat and side door mirrors will automatically move to the position that they were in when thedoors were most recently locked with the sameremote key. If the seat/mirrors have not beenreadjusted since the vehicle was locked, they willalready be in the position stored in that particularremote key and will not move. For more informa-tion on this feature, see Front seats – power seat(p. 76). This feature can be activated or deactivated in the vehicle's menu by pressing MY CAR and
going into
SettingsCar settingsCar key
memory. For a description of the menu system,
see My Car – introduction (p. 71).
NOTE
If the vehicle is locked with the remote key or is left unlocked for more than 30 minutes, thekey memory function will be deactivated. To reactivate the key's memory:
• Press the unlock button on the remote key.
For information regarding vehicles with the optional keyless drive, see Keyless drive
*– lock-
ing/unlocking (p. 153).
Related information
• Locking/unlocking confirmation (p. 146)
1
Optional digital instrument panel only
Page 148 of 394

LOCKS AND ALARM
* Option/accessory.
146
Locking/unlocking confirmation Settings can be made in the menu system for audible and visual confirmation when the vehiclehas been locked or unlocked. With these func-tions activated, the following will occur when thevehicle is locked/unlocked:
Locking confirmation
• The turn signals flash once, an audible signal sounds and the door mirrors will fold
* in.
Confirmation will only be given when all doors and the trunk are properly closed and locked.
NOTE
If you do not receive confirmation when lock- ing the vehicle, check whether a door or thetrunk is ajar, or if this feature has been turnedoff in the menu.
Unlocking confirmation
• The turn signals will flash twice and the door mirrors will fold
* out.
Making a setting
Different alternatives for locking/unlocking con- firmation can be selected in the menus by press- ing MY CAR on the center console control panel.
• To activate visual confirmation: go to
SettingsCar settingsLight settingsand select Door lock confirmation light
and/or Unlock confirmation light by
pressing OK/MENU .
• To activate audible confirmation: go to
SettingsCar settingsLock settingsand select Audible confirmation by press-
ing OK/MENU .
For a description of the menu system, see My Car – introduction (p. 71).
Lock indicator
Lock/alarm indicator light
A flashing indicator light at the base of the wind- shield verifies that the vehicle is locked.
Related information
• Locking/unlocking – from the outside(p. 157)
• Locking/unlocking – from inside (p. 158)
• Locking/unlocking – trunk (p. 160)
Immobilizer (start inhibitor)
The immobilizer is a start inhibitor that helps pre- vent unauthorized persons from starting theengine. Each of the keys supplied with your vehicle con- tains a coded transponder. The code in the keyis transmitted to an antenna in the ignition slotwhere it is compared to the code stored in thestart inhibitor module. The vehicle will start onlywith a properly coded key. If you misplace a key,take the other keys to a trained and qualifiedVolvo service technician for reprogramming asan anti-theft measure. The following messages(which may appear in the instrument panel dis-play) are related to the immobilizer:
Page 149 of 394
LOCKS AND ALARM
}}
* Option/accessory.147
MessageMeaning
Insert car keyRemote key not recognized dur- ing start. Try to start the vehicleagain.
Car key not foundVehicles with keyless drive *
only. Remote key not recog- nized during start. Try to startthe vehicle again. If the problem continues, insert the remote key into the ignitionslot and try to start the vehicleagain.
Immobil- izer Trystart againRemote key fault during start. Contact an authorized Volvoworkshop.
CAUTION
Never use force when inserting the remote key in the ignition slot. The vehicle cannot bestarted if the transponder is damaged.
USA–FCC ID: LTQWFS 125VO This device complies with part 15 of the FCC rules. Operation is subject to the following condi-tion: (1) This device may not cause harmful inter-ference, and (2) this device must accept anyinterference received, including interference thatmay cause undesired operation. Canada–IC: 3659A-WFS125VO Operation is subject to the following conditions: (1) this device may not cause interference, and(2) this device must accept any interference,including interference that may cause undesiredoperation of the device. For information on starting the vehicle, see Star- ting the engine (p. 250).
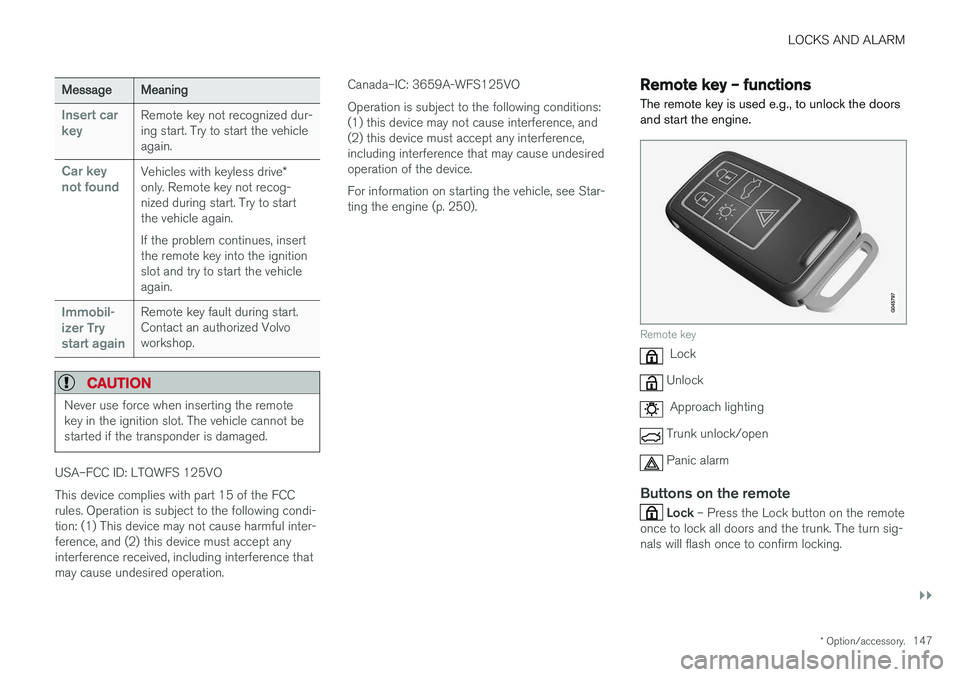
Remote key – functions
The remote key is used e.g., to unlock the doors and start the engine.
Remote key
Lock
Unlock
Approach lighting
Trunk unlock/open
Panic alarm
Buttons on the remote
Lock – Press the Lock button on the remote
once to lock all doors and the trunk. The turn sig- nals will flash once to confirm locking.
Page 150 of 394
||
LOCKS AND ALARM
* Option/accessory.
148
Unlock – Press the Unlock button on the
remote once to unlock the driver's door. After a short pause, press the Unlock button a second time within 10 seconds to unlock theother doors and the trunk. This function can be changed so that all doors unlock at the same time by pressing My Car and
going to
SettingsCar settingsLock
settings
Change doors unlock setting. For
a description of the menu system, see My Car – introduction (p. 71).
Approach lighting – As you approach the
vehicle, press the button on the remote key to light the interior lighting, parking lights, license plate lighting and the lights in the door mirrors *.
These lights will switch off automatically after 30, 60 or 90 seconds. For a description of the menusystem, see My Car – introduction (p. 71).
Unlock/open trunk
Press once: This unlocks the trunk (but does
not open it) and disarms the alarm (the alarm indicator light on the dashboard will go out). If thetrunk is not opened within two minutes it willautomatically relock and the alarm will berearmed. Press twice: This both unlocks the trunk and
pops it open slightly.
NOTE
Any excess weight (snow, etc.) on the trunk lid may prevent it from opening.
For information on opening the trunk from the passenger compartment, see Locking/unlocking– trunk (p. 160). After closing, the trunk will not automatically relock. Press Lock to relock it and rearm thealarm.
Panic alarm – This button can be used to
attract attention during emergency situations. To activate the panic alarm, press and hold this button for at least 3 seconds or press it twicewithin 3 seconds. The turn signals and horn willbe activated. The panic alarm will stop automati-cally after 2 minutes and 45 seconds. To deactivate, wait approximately 5 seconds and press the button again. The Panic alarm button will not unlock the vehi- cle.
Related information
• Locking/unlocking – from inside (p. 158)
• Locking/unlocking – from the outside(p. 157)
• Locking/unlocking confirmation (p. 146)
Remote key – range The remote key has a range of approximately 60 ft. (20 m) from the vehicle.
NOTE
Buildings or other obstacles may interfere with the function of the remote key. The vehi-cle can also be locked or unlocked with thekey blade, see Alarm-related functions(p. 164).
If the remote key is removed from the vehicle while the engine is running or if the ignition is in mode
I or II and all of the doors are closed, a
message will appear in the instrument panel dis- play and there will be an audible signal. When the remote key is returned to the vehicle, the message will be erased and the audible sig-nal will stop after one of the following has beendone:
• The remote key is inserted in the ignition slot
• The vehicle's speed exceeds 20 mph(30 km/h)
• The
OK button on the left steering wheel
lever is pressed
Related information
• Remote key – functions (p. 147)