key VOLVO S60 TWIN ENGINE 2019 User Guide
[x] Cancel search | Manufacturer: VOLVO, Model Year: 2019, Model line: S60 TWIN ENGINE, Model: VOLVO S60 TWIN ENGINE 2019Pages: 645, PDF Size: 13.96 MB
Page 91 of 645
DISPLAYS AND VOICE CONTROL
89
Displaying trip data in theinstrument panel
Data recorded and calculated by the trip com-puter can be displayed on the instrument panel.
This data is stored in a trip computer app. Youcan choose which information the instrumentpanel will display in the app menu.
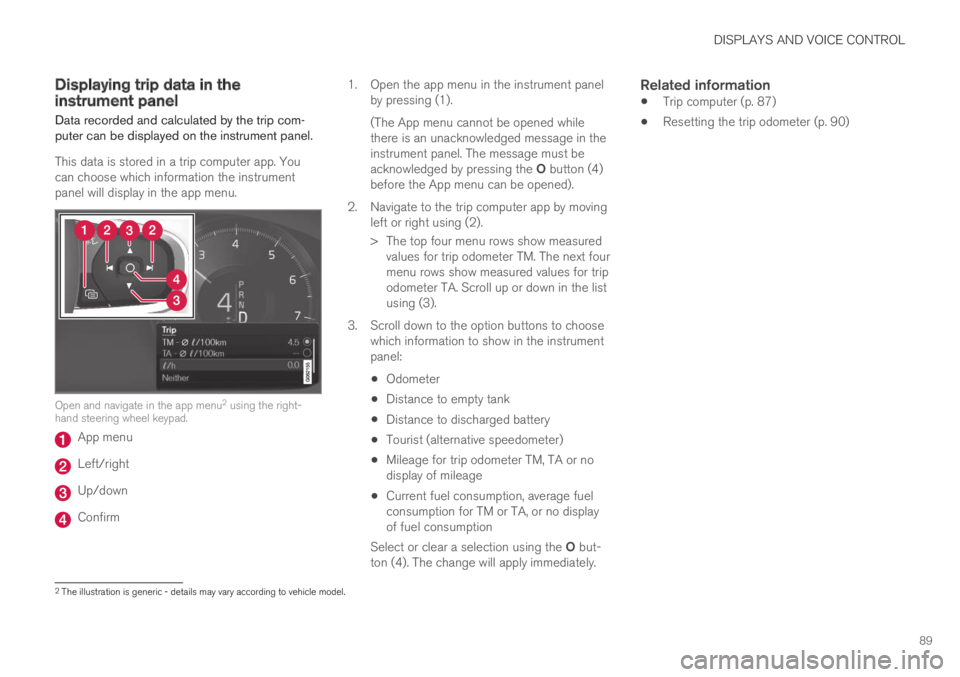
Open and navigate in the app menu2 using the right-hand steering wheel keypad.
App menu
Left/right
Up/down
Confirm
1.Open the app menu in the instrument panelby pressing (1).
(The App menu cannot be opened whilethere is an unacknowledged message in theinstrument panel. The message must beacknowledged by pressing the O button (4)before the App menu can be opened).
2. Navigate to the trip computer app by movingleft or right using (2).
> The top four menu rows show measuredvalues for trip odometer TM. The next fourmenu rows show measured values for tripodometer TA. Scroll up or down in the listusing (3).
3. Scroll down to the option buttons to choosewhich information to show in the instrumentpanel:
Odometer
Distance to empty tank
Distance to discharged battery
Tourist (alternative speedometer)
Mileage for trip odometer TM, TA or nodisplay of mileage
Current fuel consumption, average fuelconsumption for TM or TA, or no displayof fuel consumption
Select or clear a selection using the O but-ton (4). The change will apply immediately.
Related information
Trip computer (p. 87)
Resetting the trip odometer (p. 90)
2The illustration is generic - details may vary according to vehicle model.
Page 103 of 645
DISPLAYS AND VOICE CONTROL
}}
101
zlib License
The zlib/libpng License Copyright (c)
This software is provided 'as-is', without anyexpress or implied warranty. In no event will theauthors be held liable for any damages arisingfrom the use of this software.
Permission is granted to anyone to use thissoftware for any purpose, including commercialapplications, and to alter it and redistribute itfreely, subject to the following restrictions:
1. The origin of this software must not bemisrepresented; you must not claim that youwrote the original software. If you use thissoftware in a product, an acknowledgment inthe product documentation would beappreciated but is not required.
2. Altered source versions must be plainlymarked as such, and must not bemisrepresented as being the originalsoftware.
3. This notice may not be removed or alteredfrom any source distribution.
SGI Free Software B License Version 2.0.
SGI FREE SOFTWARE LICENSE B (Version 2.0,Sept. 18, 2008)
Copyright (C) [dates of first publication] SiliconGraphics, Inc. All Rights Reserved. Permission ishereby granted, free of charge, to any personobtaining a copy of this software and associated
documentation files (the "Software"), to deal inthe Software without restriction, including withoutlimitation the rights to use, copy, modify, merge,publish, distribute, sublicense, and/or sell copiesof the Software, and to permit persons to whomthe Software is furnished to do so, subject to thefollowing conditions: The above copyright noticeincluding the dates of first publication and eitherthis permission notice or a reference to http://oss.sgi.com/projects/FreeB/ shall be included inall copies or substantial portions of the Software.
THE SOFTWARE IS PROVIDED "AS IS",WITHOUT WARRANTY OF ANY KIND,EXPRESS OR IMPLIED, INCLUDING BUT NOTLIMITED TO THE WARRANTIES OFMERCHANTABILITY, FITNESS FOR APARTICULAR PURPOSE ANDNONINFRINGEMENT. IN NO EVENT SHALLSILICON GRAPHICS, INC. BE LIABLE FOR ANYCLAIM, DAMAGES OR OTHER LIABILITY,WHETHER IN AN ACTION OF CONTRACT,TORT OR OTHERWISE, ARISING FROM, OUTOF OR IN CONNECTION WITH THE SOFTWAREOR THE USE OR OTHER DEALINGS IN THESOFTWARE.
Except as contained in this notice, the name ofSilicon Graphics, Inc. shall not be used inadvertising or otherwise to promote the sale, useor other dealings in this Software without priorwritten authorization from Silicon Graphics, Inc.
Related information
Instrument panel (p. 82)
App menu in instrument panel
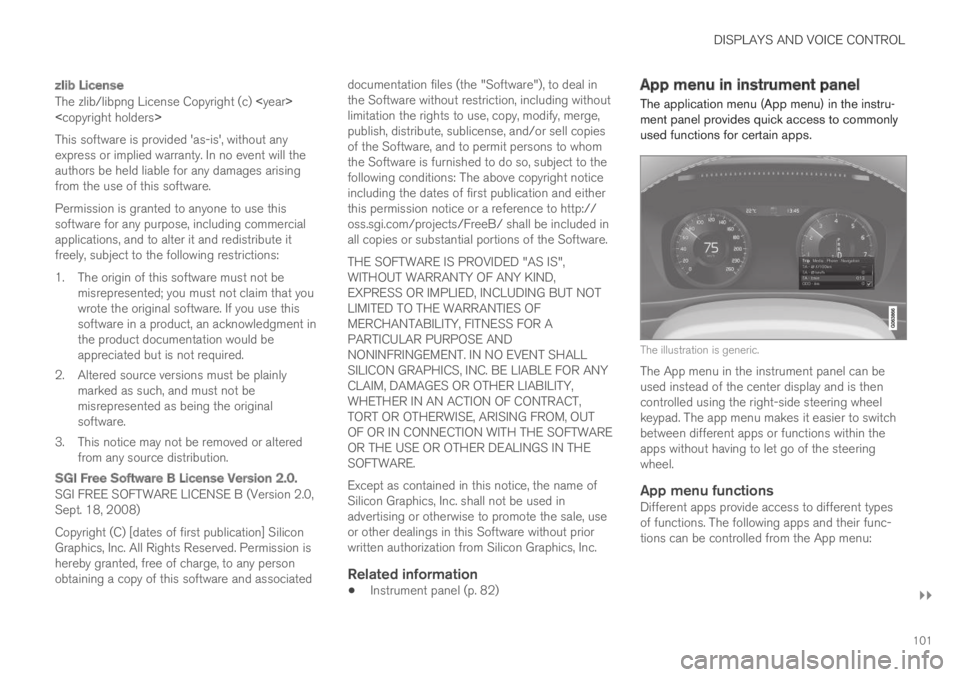
The application menu (App menu) in the instru-ment panel provides quick access to commonlyused functions for certain apps.
The illustration is generic.
The App menu in the instrument panel can beused instead of the center display and is thencontrolled using the right-side steering wheelkeypad. The app menu makes it easier to switchbetween different apps or functions within theapps without having to let go of the steeringwheel.
App menu functions
Different apps provide access to different typesof functions. The following apps and their func-tions can be controlled from the App menu:
Page 104 of 645
||
DISPLAYS AND VOICE CONTROL
102
AppFunctions
Trip com-puterSelect a trip odometer, changeinstrument panel display set-tings, etc.
Media playerSelect active source for mediaplayer.
Phone Call a contact from the call list.
Navigation Guide to destination, etc.
Related information
Instrument panel (p. 82)
Center display overview (p. 107)
Handling the App menu in the instrumentpanel (p. 102)
Handling the App menu in theinstrument panel
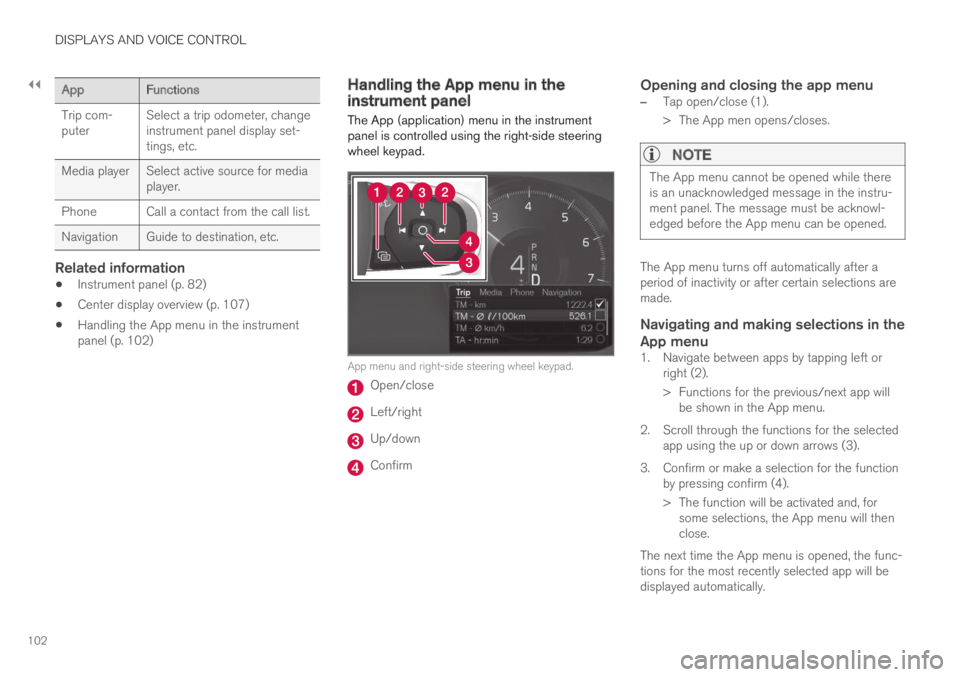
The App (application) menu in the instrumentpanel is controlled using the right-side steeringwheel keypad.
App menu and right-side steering wheel keypad.
Open/close
Left/right
Up/down
Confirm
Opening and closing the app menu
–Tap open/close (1).
>The App men opens/closes.
NOTE
The App menu cannot be opened while thereis an unacknowledged message in the instru-ment panel. The message must be acknowl-edged before the App menu can be opened.
The App menu turns off automatically after aperiod of inactivity or after certain selections aremade.
Navigating and making selections in the
App menu
1. Navigate between apps by tapping left orright (2).
> Functions for the previous/next app willbe shown in the App menu.
2. Scroll through the functions for the selectedapp using the up or down arrows (3).
3. Confirm or make a selection for the functionby pressing confirm (4).
> The function will be activated and, forsome selections, the App menu will thenclose.
The next time the App menu is opened, the func-tions for the most recently selected app will bedisplayed automatically.
Page 106 of 645
||
DISPLAYS AND VOICE CONTROL
104
MessageMeaning
Regular main-tenance
Maintenanceoverdue
Time for service - contact
a workshopB. Shown whenthe date for service haspassed.
Temporarily
offAA function has been tem-porarily deactivated andwill be reactivated auto-matically while driving orafter the engine is restar-ted.
APart of message, shown along with information on the locationof the problem.BAn authorized Volvo workshop is recommended.
Related information
Handling messages in the instrument panel(p. 104)
Handling messages saved from the instru-ment panel (p. 105)
Messages in the center display (p. 138)
Handling messages in theinstrument panel
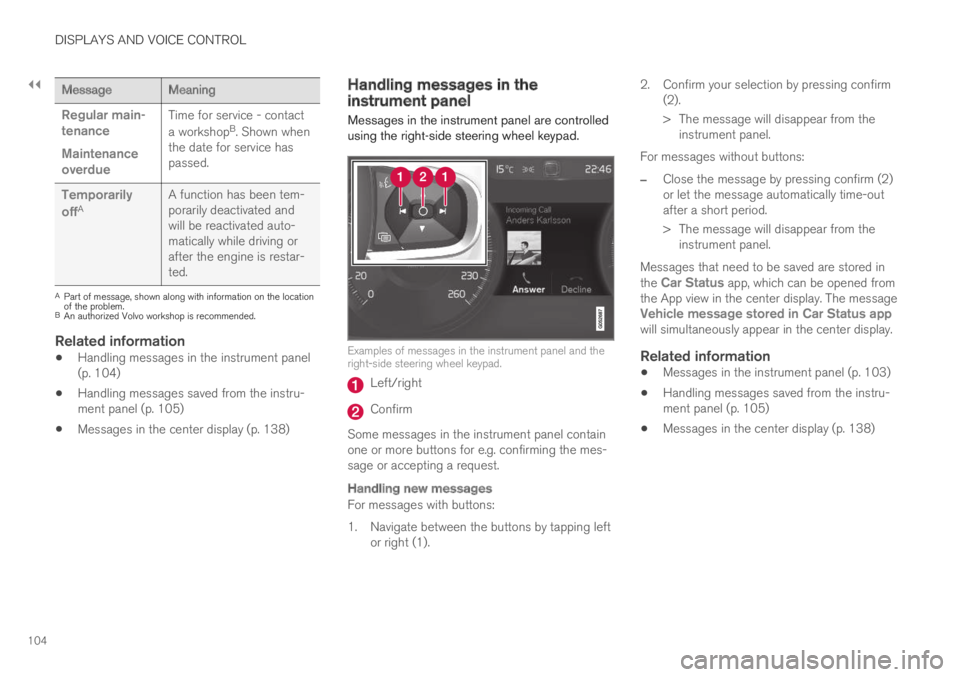
Messages in the instrument panel are controlledusing the right-side steering wheel keypad.
Examples of messages in the instrument panel and theright-side steering wheel keypad.
Left/right
Confirm
Some messages in the instrument panel containone or more buttons for e.g. confirming the mes-sage or accepting a request.
Handling new messages
For messages with buttons:
1. Navigate between the buttons by tapping leftor right (1).
2. Confirm your selection by pressing confirm(2).
> The message will disappear from theinstrument panel.
For messages without buttons:
–Close the message by pressing confirm (2)or let the message automatically time-outafter a short period.
>The message will disappear from theinstrument panel.
Messages that need to be saved are stored inthe Car Status app, which can be opened fromthe App view in the center display. The messageVehicle message stored in Car Status appwill simultaneously appear in the center display.
Related information
Messages in the instrument panel (p. 103)
Handling messages saved from the instru-ment panel (p. 105)
Messages in the center display (p. 138)
Page 111 of 645
DISPLAYS AND VOICE CONTROL
* Option/accessory.109
adjusted using the right-side steering wheelkeypad.
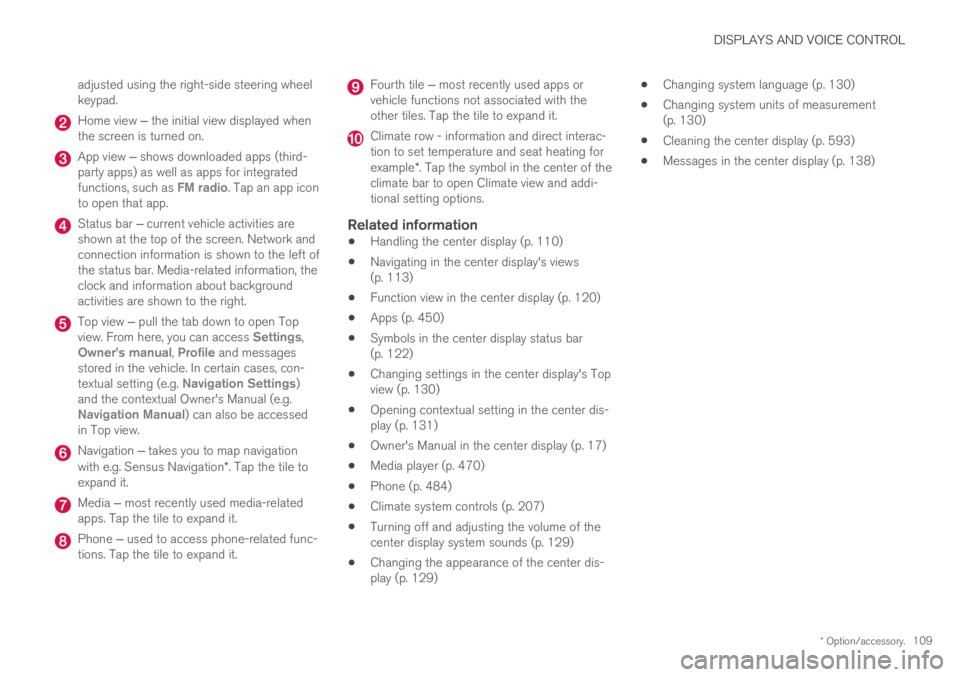
Home view ‒ the initial view displayed whenthe screen is turned on.
App view ‒ shows downloaded apps (third-party apps) as well as apps for integratedfunctions, such as FM radio. Tap an app iconto open that app.
Status bar ‒ current vehicle activities areshown at the top of the screen. Network andconnection information is shown to the left ofthe status bar. Media-related information, theclock and information about backgroundactivities are shown to the right.
Top view ‒ pull the tab down to open Topview. From here, you can access Settings,Owner's manual, Profile and messagesstored in the vehicle. In certain cases, con-textual setting (e.g. Navigation Settings)and the contextual Owner's Manual (e.g.Navigation Manual) can also be accessedin Top view.
Navigation ‒ takes you to map navigationwith e.g. Sensus Navigation*. Tap the tile toexpand it.
Media ‒ most recently used media-relatedapps. Tap the tile to expand it.
Phone ‒ used to access phone-related func-tions. Tap the tile to expand it.
Fourth tile ‒ most recently used apps orvehicle functions not associated with theother tiles. Tap the tile to expand it.
Climate row - information and direct interac-tion to set temperature and seat heating forexample*. Tap the symbol in the center of theclimate bar to open Climate view and addi-tional setting options.
Related information
Handling the center display (p. 110)
Navigating in the center display's views(p. 113)
Function view in the center display (p. 120)
Apps (p. 450)
Symbols in the center display status bar(p. 122)
Changing settings in the center display's Topview (p. 130)
Opening contextual setting in the center dis-play (p. 131)
Owner's Manual in the center display (p. 17)
Media player (p. 470)
Phone (p. 484)
Climate system controls (p. 207)
Turning off and adjusting the volume of thecenter display system sounds (p. 129)
Changing the appearance of the center dis-play (p. 129)
Changing system language (p. 130)
Changing system units of measurement(p. 130)
Cleaning the center display (p. 593)
Messages in the center display (p. 138)
Page 114 of 645
||
DISPLAYS AND VOICE CONTROL
112
Returning to Home view from another
view
1. Briefly press the home button below the cen-ter display.
> The most recent Home view mode will bedisplayed.
2. Press briefly again.
> All of the Home view's tiles will return tostandard mode.
NOTE
In Home view's standard mode – short presson the Home button. An animation describingaccess to the various views is shown on thescreen.
Scrolling in lists, articles or views
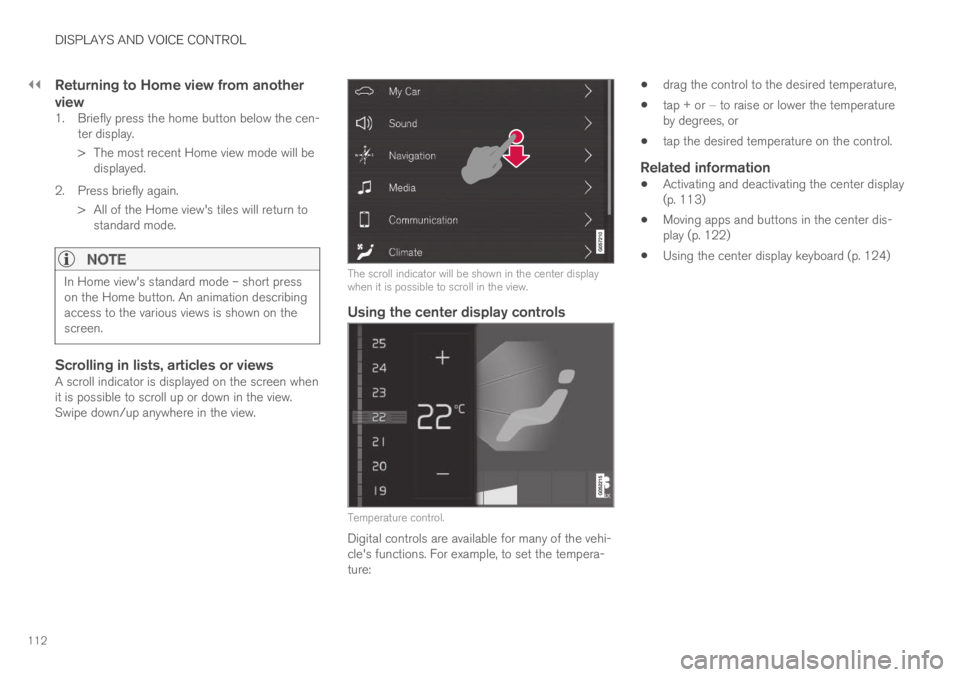
A scroll indicator is displayed on the screen whenit is possible to scroll up or down in the view.Swipe down/up anywhere in the view.
The scroll indicator will be shown in the center displaywhen it is possible to scroll in the view.
Using the center display controls
Temperature control.
Digital controls are available for many of the vehi-cle's functions. For example, to set the tempera-ture:
drag the control to the desired temperature,
tap + or − to raise or lower the temperatureby degrees, or
tap the desired temperature on the control.
Related information
Activating and deactivating the center display(p. 113)
Moving apps and buttons in the center dis-play (p. 122)
Using the center display keyboard (p. 124)
Page 116 of 645
||
DISPLAYS AND VOICE CONTROL
* Option/accessory.114
NOTE
In Home view's standard mode – short presson the Home button. An animation describingaccess to the various views is shown on thescreen.
NOTE
When the vehicle is moving:
Certain functions (e.g. using the centerdisplay's keyboard) may be deactivated.
Certain texts (e.g. those generated byapps) will be shortened to three rows.Tap the Read out button to have theentire message read aloud.
Text messages will be shortened to onerow. Tap the Read out button to havethe entire message read aloud.
Status bar
Current vehicle activities are shown at the top ofthe screen in the status bar. Network and con-nection information is shown to the left of thestatus bar. Media-related information, the clockand information about background activities areshown to the right.
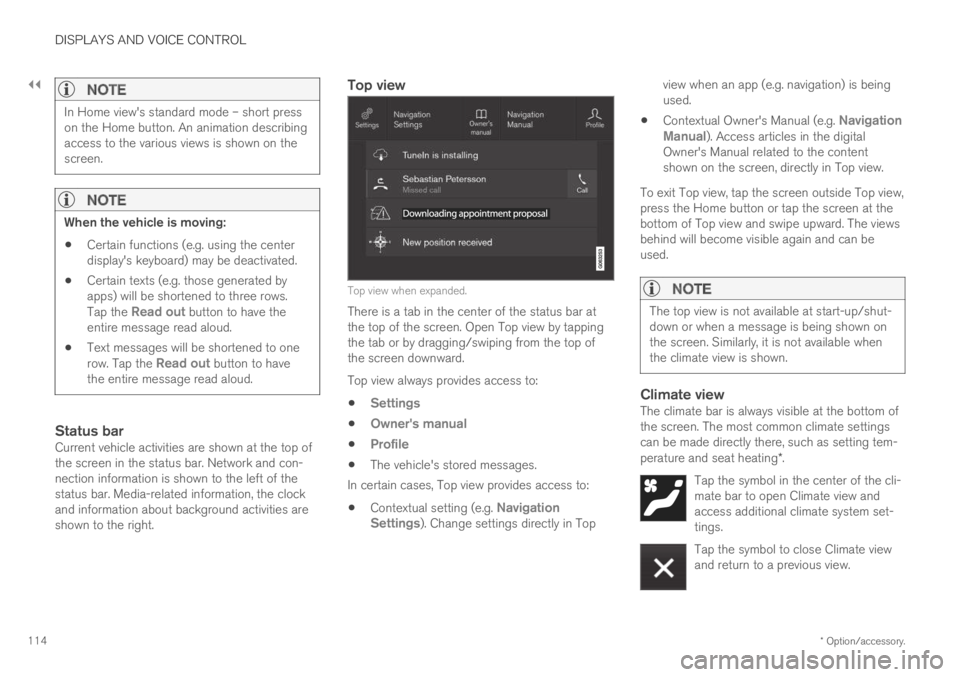
Top view
Top view when expanded.
There is a tab in the center of the status bar atthe top of the screen. Open Top view by tappingthe tab or by dragging/swiping from the top ofthe screen downward.
Top view always provides access to:
Settings
Owner's manual
Profile
The vehicle's stored messages.
In certain cases, Top view provides access to:
Contextual setting (e.g. NavigationSettings). Change settings directly in Top
view when an app (e.g. navigation) is beingused.
Contextual Owner's Manual (e.g. NavigationManual). Access articles in the digitalOwner's Manual related to the contentshown on the screen, directly in Top view.
To exit Top view, tap the screen outside Top view,press the Home button or tap the screen at thebottom of Top view and swipe upward. The viewsbehind will become visible again and can beused.
NOTE
The top view is not available at start-up/shut-down or when a message is being shown onthe screen. Similarly, it is not available whenthe climate view is shown.
Climate view
The climate bar is always visible at the bottom ofthe screen. The most common climate settingscan be made directly there, such as setting tem-perature and seat heating*.
Tap the symbol in the center of the cli-mate bar to open Climate view andaccess additional climate system set-tings.
Tap the symbol to close Climate viewand return to a previous view.
Page 126 of 645
DISPLAYS AND VOICE CONTROL
124
Using the center display keyboard
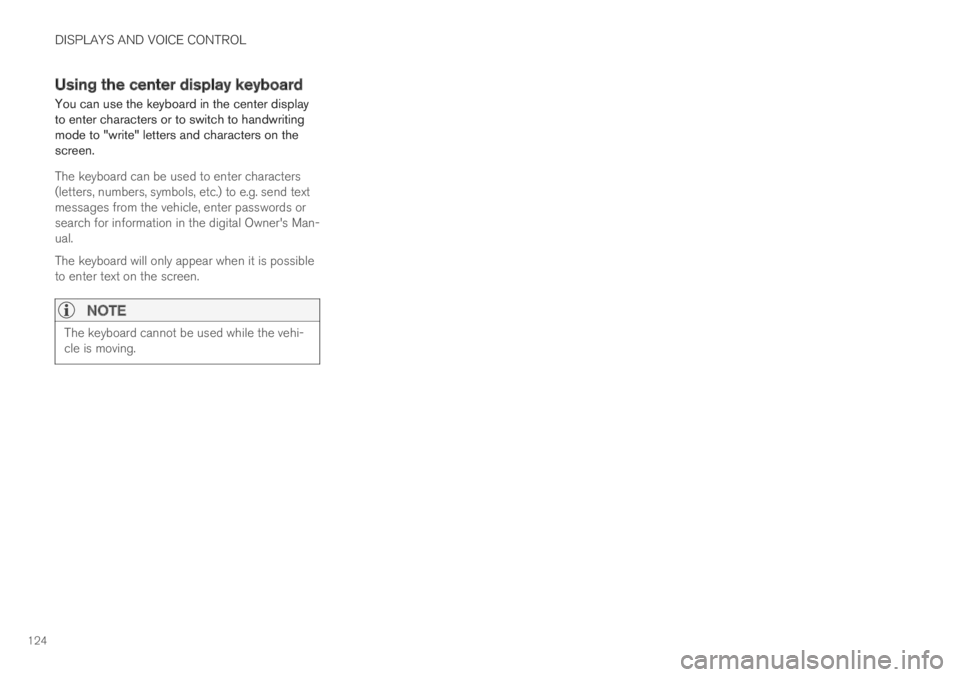
You can use the keyboard in the center displayto enter characters or to switch to handwritingmode to "write" letters and characters on thescreen.
The keyboard can be used to enter characters(letters, numbers, symbols, etc.) to e.g. send textmessages from the vehicle, enter passwords orsearch for information in the digital Owner's Man-ual.
The keyboard will only appear when it is possibleto enter text on the screen.
NOTE
The keyboard cannot be used while the vehi-cle is moving.
Page 127 of 645
DISPLAYS AND VOICE CONTROL
}}
125
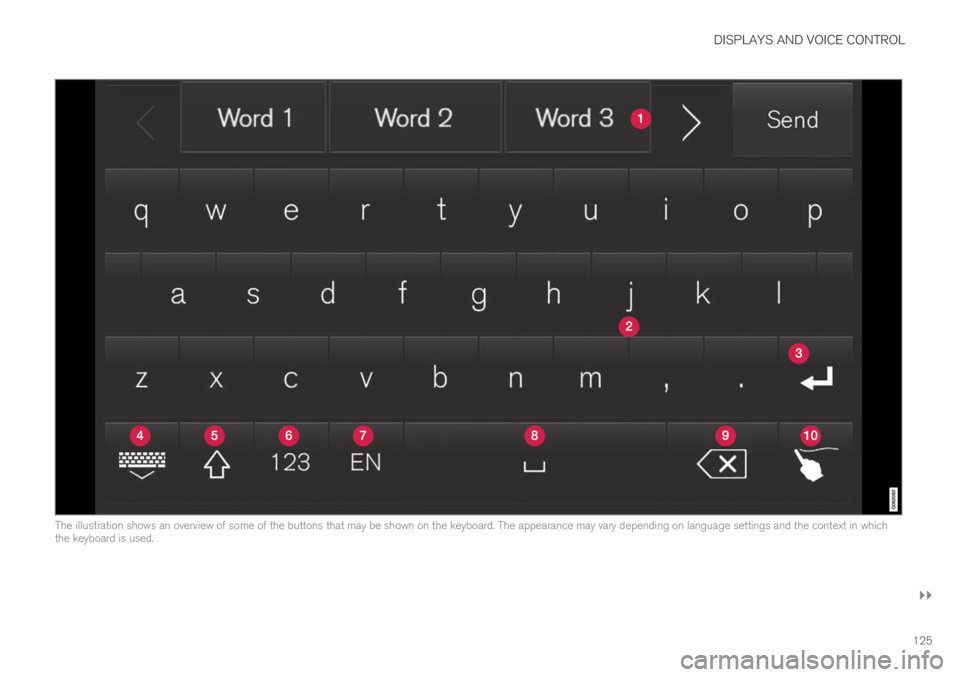
The illustration shows an overview of some of the buttons that may be shown on the keyboard. The appearance may vary depending on language settings and the context in whichthe keyboard is used.
Page 128 of 645
||
DISPLAYS AND VOICE CONTROL
126
Row showing suggestions for words or char-
acters10. The suggested words change asnew letters are entered. Scroll through thelist of suggested words by tapping the rightor left arrows. Tap a suggestion to select it.Please note that this function is not availablein all languages. When unavailable, this rowwill not be shown on the keyboard.
Available characters are adapted to the lan-guage selected for the keyboard (see num-ber 7 below). Tap a character to enter it.
Different buttons are displayed here depend-ing on the context in which the keyboard isused, e.g. @ to enter an email address or thereturn key to start a new line.
This button hides the keyboard. In caseswhere this is not possible, the button will notbe displayed.
Used to enter uppercase letters. Tap once toenter one uppercase letter and then con-tinue with lowercase letters. Tap twice forcaps lock (all text will be entered in upper-case letters). Tap again to return the key-board to lowercase letters. In this mode, thefirst letter after a period, exclamation point orquestion mark will be automatically enteredin uppercase form. The first letter entered intext fields will also be uppercase. In textfields intended for names or addresses, eachword will be automatically started with an
uppercase letter. In text fields intended forpasswords, website addresses or emailaddresses, all letters will automatically belowercase unless uppercase is selected.
Used to enter numbers. The number key-
board (2) will then be displayed. Tap ,
which is shown instead of in numbermode, to return to the keyboard with letters,
or to display the keyboard with specialcharacters.
Used to change the keyboard language, e.g.EN. The available characters and word sug-gestions (1) vary depending on the selectedlanguage. In order to toggle between key-board languages, the languages must first beadded under Settings.
Space bar.
Delete. Tap to delete characters one at atime. Press and hold to delete multiple char-acters quickly.
Used to change to handwriting mode.
Tap the confirm button over the keyboard (notshown in illustration) once to confirm the text thathas been entered. The button's appearance dif-fers depending on the context.
Variants of letters or characters
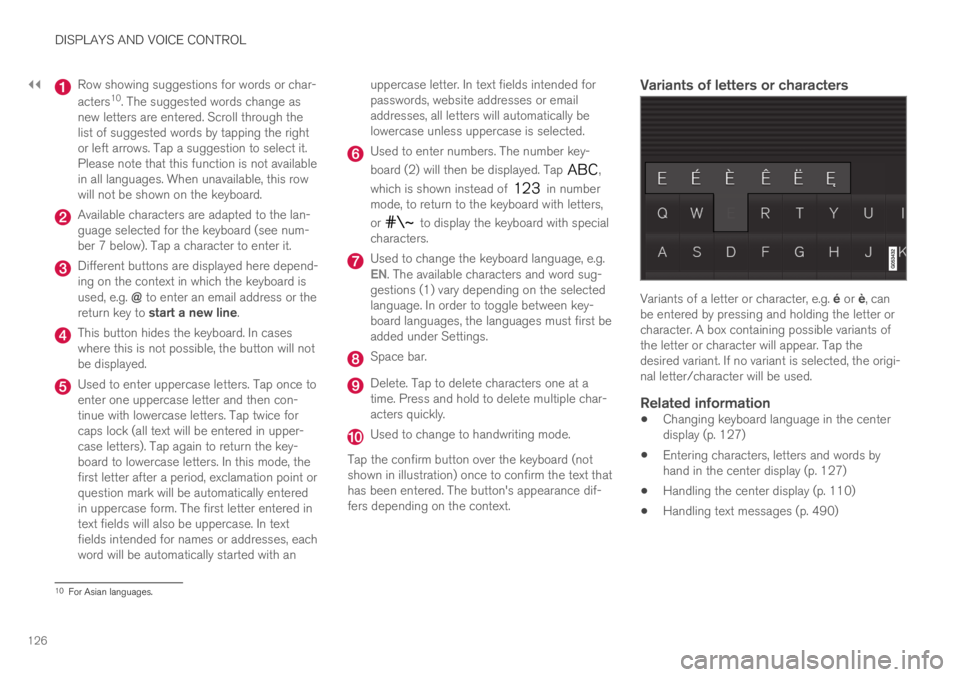
Variants of a letter or character, e.g. é or è, canbe entered by pressing and holding the letter orcharacter. A box containing possible variants ofthe letter or character will appear. Tap thedesired variant. If no variant is selected, the origi-nal letter/character will be used.
Related information
Changing keyboard language in the centerdisplay (p. 127)
Entering characters, letters and words byhand in the center display (p. 127)
Handling the center display (p. 110)
Handling text messages (p. 490)
10For Asian languages.