rear view mirror VOLVO S60 TWIN ENGINE 2019 User Guide
[x] Cancel search | Manufacturer: VOLVO, Model Year: 2019, Model line: S60 TWIN ENGINE, Model: VOLVO S60 TWIN ENGINE 2019Pages: 645, PDF Size: 13.96 MB
Page 188 of 645
||
SEATS AND STEERING WHEEL
* Option/accessory.186
2.Select Cushion extension in the seat set-tings view.
Push in the front part of the four-way but-
ton to extend the seat cushion.
Press the rear part of the four-way button
to shorten the seat cushion.
Manually adjusting seat cushion length
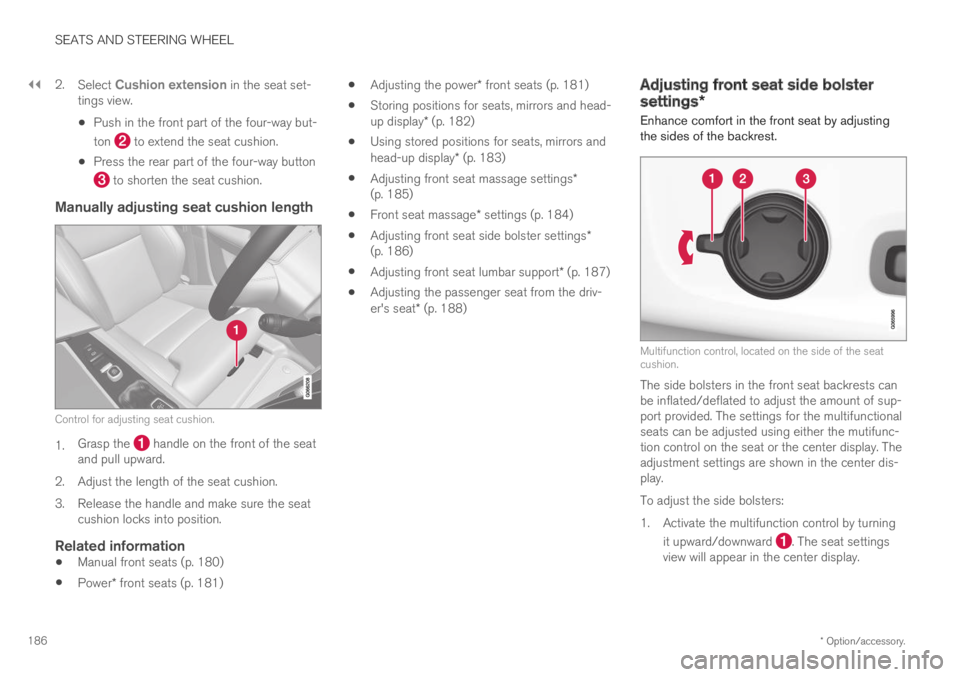
Control for adjusting seat cushion.
1.Grasp the handle on the front of the seatand pull upward.
2.Adjust the length of the seat cushion.
3. Release the handle and make sure the seatcushion locks into position.
Related information
Manual front seats (p. 180)
Power* front seats (p. 181)
Adjusting the power* front seats (p. 181)
Storing positions for seats, mirrors and head-up display* (p. 182)
Using stored positions for seats, mirrors andhead-up display* (p. 183)
Adjusting front seat massage settings*(p. 185)
Front seat massage* settings (p. 184)
Adjusting front seat side bolster settings*(p. 186)
Adjusting front seat lumbar support* (p. 187)
Adjusting the passenger seat from the driv-er's seat* (p. 188)
Adjusting front seat side bolster
settings*
Enhance comfort in the front seat by adjustingthe sides of the backrest.
Multifunction control, located on the side of the seatcushion.
The side bolsters in the front seat backrests canbe inflated/deflated to adjust the amount of sup-port provided. The settings for the multifunctionalseats can be adjusted using either the mutifunc-tion control on the seat or the center display. Theadjustment settings are shown in the center dis-play.
To adjust the side bolsters:
1.Activate the multifunction control by turning
it upward/downward . The seat settingsview will appear in the center display.
Page 189 of 645
SEATS AND STEERING WHEEL
}}
* Option/accessory.187
2.Select Side bolsters in the seat settingsview.
Press the front part of the four-way button
to increase side bolster support .
Press the rear part of the four-way button
to decrease side bolster support.
Related information
Manual front seats (p. 180)
Power* front seats (p. 181)
Adjusting the power* front seats (p. 181)
Storing positions for seats, mirrors and head-up display* (p. 182)
Using stored positions for seats, mirrors andhead-up display* (p. 183)
Adjusting front seat massage settings*(p. 185)
Adjusting* front seat cushion length (p. 185)
Front seat massage* settings (p. 184)
Adjusting front seat lumbar support* (p. 187)
Adjusting the passenger seat from the driv-er's seat* (p. 188)
Adjusting front seat lumbar
support*
Use the control on the side of the seat cushionto adjust the lumbar support.
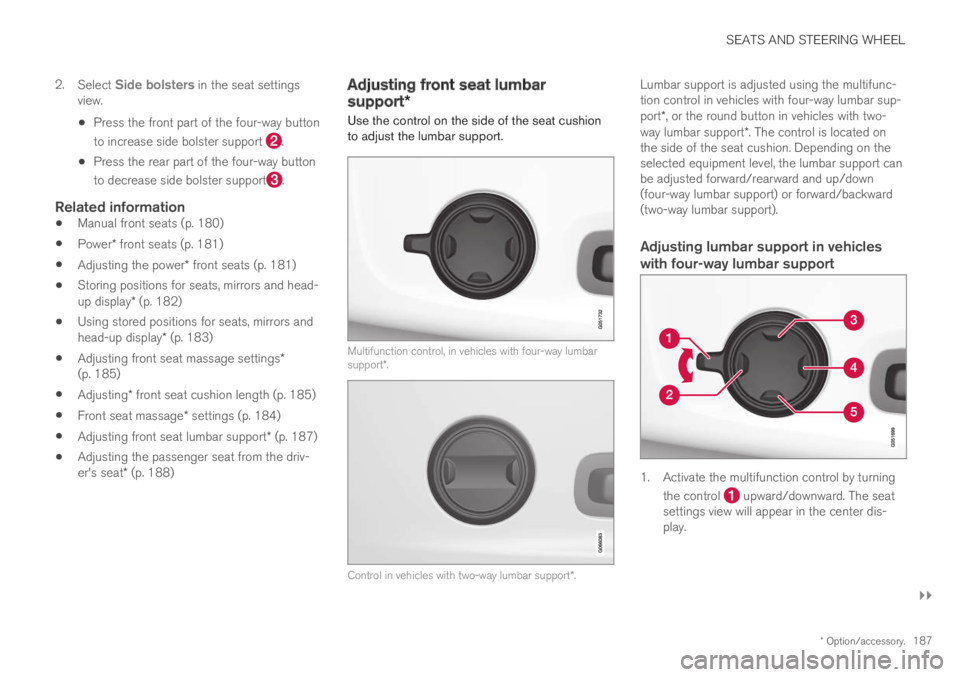
Multifunction control, in vehicles with four-way lumbarsupport*.
Control in vehicles with two-way lumbar support*.
Lumbar support is adjusted using the multifunc-tion control in vehicles with four-way lumbar sup-port*, or the round button in vehicles with two-way lumbar support*. The control is located onthe side of the seat cushion. Depending on theselected equipment level, the lumbar support canbe adjusted forward/rearward and up/down(four-way lumbar support) or forward/backward(two-way lumbar support).
Adjusting lumbar support in vehicles
with four-way lumbar support
1. Activate the multifunction control by turning
the control upward/downward. The seatsettings view will appear in the center dis-play.
Page 190 of 645
||
SEATS AND STEERING WHEEL
* Option/accessory.188
2.Select Lumbar in the seat settings view.
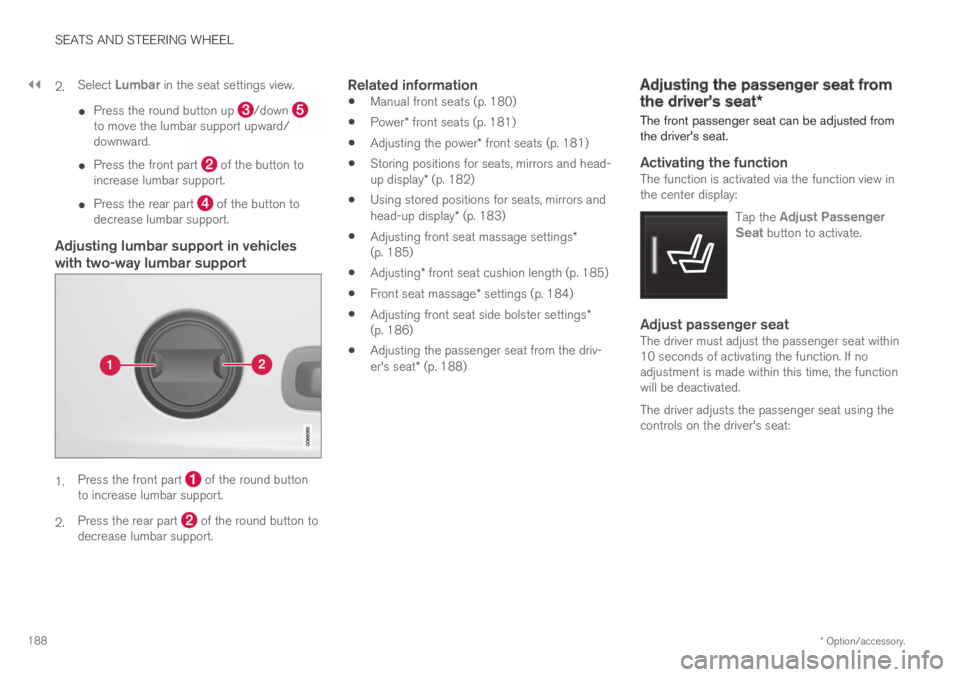
Press the round button up /down to move the lumbar support upward/downward.
Press the front part of the button toincrease lumbar support.
Press the rear part of the button todecrease lumbar support.
Adjusting lumbar support in vehicles
with two-way lumbar support
1.Press the front part of the round buttonto increase lumbar support.
2.Press the rear part of the round button todecrease lumbar support.
Related information
Manual front seats (p. 180)
Power* front seats (p. 181)
Adjusting the power* front seats (p. 181)
Storing positions for seats, mirrors and head-up display* (p. 182)
Using stored positions for seats, mirrors andhead-up display* (p. 183)
Adjusting front seat massage settings*(p. 185)
Adjusting* front seat cushion length (p. 185)
Front seat massage* settings (p. 184)
Adjusting front seat side bolster settings*(p. 186)
Adjusting the passenger seat from the driv-er's seat* (p. 188)
Adjusting the passenger seat from
the driver's seat*
The front passenger seat can be adjusted fromthe driver's seat.
Activating the function
The function is activated via the function view inthe center display:
Tap the Adjust PassengerSeat button to activate.
Adjust passenger seat
The driver must adjust the passenger seat within10 seconds of activating the function. If noadjustment is made within this time, the functionwill be deactivated.
The driver adjusts the passenger seat using thecontrols on the driver's seat:
Page 198 of 645

CLIMATE CONTROL
* Option/accessory.196
Climate
The vehicle is equipped with electronic climatecontrol. The climate system cools, heats anddehumidifies the air in the passenger compart-ment.
All of the climate system functions are controlledfrom the center display and the buttons on thecenter console.
Certain rear seat functions can also be controlledfrom the climate controls* on the rear of the tun-nel console.
Related information
Climate zones (p. 196)
Climate control sensors (p. 196)
Perceived temperature (p. 197)
Climate control system voice commands(p. 197)
Parking climate (p. 217)
Heater (p. 224)
Air quality (p. 198)
Air distribution (p. 201)
Climate system controls (p. 207)
Climate zones
The vehicle is divided into climate zones to makeit possible to set different temperatures for dif-ferent parts of the passenger compartment.
2-zone climate system
Climate zones with 2-zone climate system.
In 2-zone climate systems, the passenger com-partment temperature can be set separately forthe left and right sides of the vehicle.
Related information
Climate (p. 196)
Climate control sensors
The climate system has a number of sensors tohelp regulate the climate settings in the vehicle.
Location of the sensors
Sunlight sensors - on the upper side of thedashboard.
Humidity sensor - in the rearview mirror con-sole.
Ambient temperature sensor - in the right-side door mirror.
Passenger compartment temperature sensor- near the buttons in the center console.
NOTE
Do not cover or block the sensors with cloth-ing or other objects.
Page 209 of 645

CLIMATE CONTROL
}}
* Option/accessory.207
Climate system controls
The climate system functions are controlled fromphysical buttons on the center console, the cen-ter display, and the climate panel on the rearside of the tunnel console*.
Physical buttons in the center console
Button for max defroster.
Button for heated rear window and door mir-rors.
Climate bar in the center display
The most common climate system functions canbe controlled from the climate bar.
Temperature controls for driver and passen-ger side.
Controls for heated* and ventilated* driverand front passenger seat, as well as heatedsteering wheel*.
Button for opening Climate view. The graphicin the button shows activated climate systemsettings.
Climate view in the center display
Tap the symbol in the center of the cli-mate bar to open Climate view.
Depending on equipment level, Climateview may be divided into several tabs.Toggle between the tabs by swiping the screento the left/right or by tapping the desired head-ing.
Main climate
In addition to the functions in the climate bar,other main climate system functions can be con-trolled from the Main climate tab.
Max, Rear – Controls for defrosting windowsand door mirrors.
AC - Air conditioning controls.
Recirc - Air recirculation controls.
Air distribution controls.
Page 215 of 645
CLIMATE CONTROL
}}
213
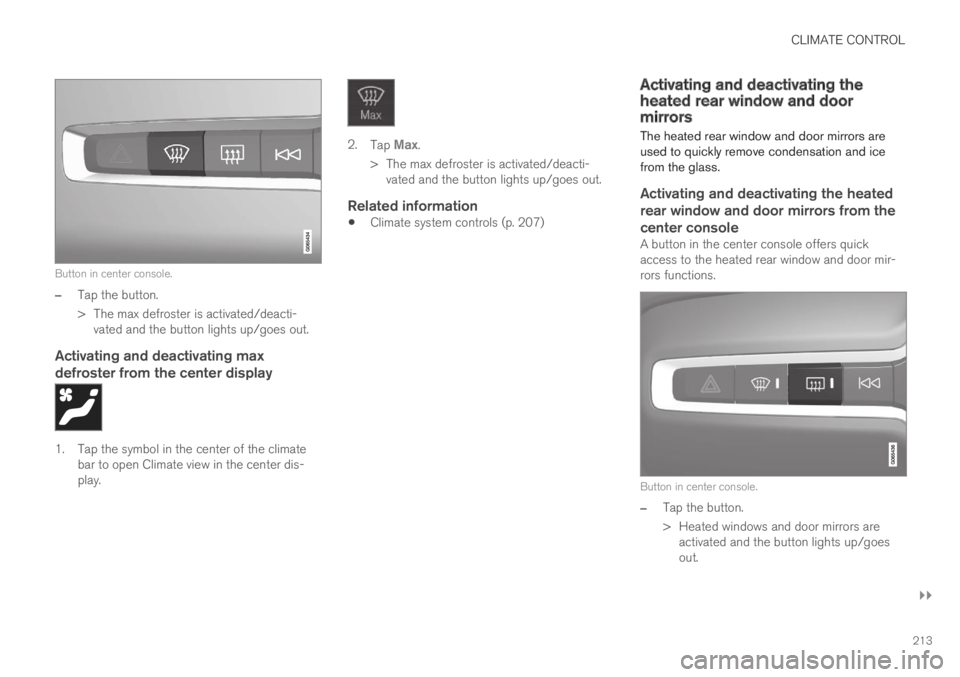
Button in center console.
–Tap the button.
>The max defroster is activated/deacti-vated and the button lights up/goes out.
Activating and deactivating max
defroster from the center display
1. Tap the symbol in the center of the climatebar to open Climate view in the center dis-play.
2.Tap Max.
>The max defroster is activated/deacti-vated and the button lights up/goes out.
Related information
Climate system controls (p. 207)
Activating and deactivating theheated rear window and doormirrors
The heated rear window and door mirrors areused to quickly remove condensation and icefrom the glass.
Activating and deactivating the heated
rear window and door mirrors from the
center console
A button in the center console offers quickaccess to the heated rear window and door mir-rors functions.
Button in center console.
–Tap the button.
>Heated windows and door mirrors areactivated and the button lights up/goesout.
Page 216 of 645

||
CLIMATE CONTROL
214
Activating and deactivating the heated
rear window and door mirrors from the
center display
1. Tap the symbol in the center of the climatebar to open Climate view in the center dis-play.
2.Tap Rear.
>Heated windows and door mirrors areactivated and the button lights up/goesout.
Related information
Climate system controls (p. 207)
Automatically activating and deactivating theheated rear window and door mirrors(p. 214)
Automatically activating anddeactivating the heated rear windowand door mirrors
The heated rear window and door mirrors areused to quickly remove condensation and icefrom the glass.
It is possible to select whether rear window anddoor mirror heating should be automatically acti-vated or deactivated when the engine is started.With automatic start activated, heating will beactivated when there is a risk of ice or condensa-tion on the windows or mirrors. Heating is auto-matically switched off when the window or doormirror is sufficiently warm and the condensationor ice is gone.
1.Tap Settings in the Top view in the centerdisplay.
2.Tap Climate.
3.Select Auto Rear Defroster to activate/deactivate automatic rear window and doorheating.
Related information
Activating and deactivating the heated rearwindow and door mirrors (p. 213)
Setting the blower speed for the
front seats2
The blower can be set to several different auto-matically controlled speeds for the front seat.
1. Tap the symbol in the center of the climatebar to open Climate view in the center dis-play.
Blower control buttons in Climate view.
2.Tap the desired blower speed: Off, 1-5 orMax.
>The blower speed will be changed and thebuttons for the set speed will light up.
2The same setting applies to the rear seats with the 2-zone climate system.
Page 219 of 645
CLIMATE CONTROL
}}
* Option/accessory.217
NOTE
The air conditioning cannot be activated whenthe fan speed is set to Off.
Related information
Climate system controls (p. 207)
Parking climate
Parking climate is an umbrella term for variousfunctions that improve the passenger compart-ment climate when the vehicle is parked, e.g.preconditioning.
Parking climate functions are con-trolled from the Parking climate tabin the center display's Climate view.Tap the symbol in the center of the cli-mate bar to open Climate view.
Related information
Climate (p. 196)
Preconditioning (p. 217)
Climate comfort retaining function (p. 222)
Parking climate symbols and messages(p. 223)
Preconditioning
Preconditioning is a climate function that, if pos-sible, attempts to achieve a comfortable tem-perature in the passenger compartment beforedriving.
Preconditioning can be started immediately orstarted at a preset time using a timer.
The function utilizes several of the vehicle's sys-tems:
In cold weather, the parking heater heats thepassenger compartment to a comfortabletemperature.
In warm weather, air conditioning cools thepassenger compartment to a comfortabletemperature.
The electrically heated steering wheel* andseats* can be activated.
Heating for the windshield, rear window anddoor mirrors are automatically activated asneeded.
During preconditioning in a hot climate, conden-sation from the air conditions may drip under thevehicle. This is normal.
Page 231 of 645

KEY, LOCKS AND ALARM
* Option/accessory.229
Rear door *
Lock button with indicator light in rear door.
Illuminated indicator lights in each door indicatethat that particular door is locked. If any door isunlocked and opened, the indicator light in thatdoor will go out. The lights in the other doors willremain illuminated.
Other indicators
The approach lighting and home safe lightingfunctions may be activated when locking andunlocking.
Related information
Lock confirmation settings (p. 229)
Welcome Light (p. 160)
Using home safe lighting (p. 160)
Lock confirmation settings
Settings for how the vehicle confirms lockingand unlocking can be adjusted in the center dis-play's Settings menu.
To change the locking response settings:
1.Tap Settings in the center display's Topview.
2.Tap My CarLocking.
3.Tap Visible Locking Feedback to selectwhen the vehicle should provide a visibleresponse:
Lock
Unlock
Both
Or turn off the function by marking Off .
4.Select to receive an audible response whenlocking the vehicle by marking AudibleLocking Feedback.
To change the settings for folding door mirrors*when locking:
1.Tap Settings in the center display's Topview.
2.Tap My CarMirrors and Convenience.
3.Select Fold Mirror When Locked to acti-vate or deactivate the function.
Related information
Lock indication (p. 228)
Page 305 of 645

DRIVER SUPPORT
* Option/accessory.303
Park Assist Camera *
Blind sectors
There are "blind" sectors between the cameras' fields ofvision.
With Park Assist Camera's 360° view* selected,objects/obstacles may not be detected if theyare located in the "joints" where the edges of theindividual camera views meet.
WARNING
Even if it seems as though only a fairly smallsection of the screen image is obstructed, thismay mean that a relatively large sector is hid-den and obstacles there may not be detecteduntil they are very near the vehicle.
Defective camera
If a camera sector is dark andcontains this symbol, this indi-cates that the camera is notfunctioning properly.
See the following illustration foran example.
The vehicle's left-side camera is malfunctioning.
A dark camera sector may also be displayed inthe following situations, but without the defectivecamera symbol:
a door is open
the trunk lid is open
a rearview mirror is folded in
Lighting conditions
The camera image is automatically adjustedaccording to the current lighting conditions. Thismeans that the brightness and quality of the
image may vary slightly. Poor lighting conditionsmay result in reduced image quality.
Rear Park Assist Camera
WARNING
Be extra cautious whenreversing if this symbol isshown when a trailer, bikecarrier or similar is attachedand electrically connectedto the vehicle.
The symbol indicates thatthe rear parking assist sensors are deacti-vated and will not warn of any obstacles.
NOTE
A bike carrier and other accessories mountedon the rear of the vehicle can obscure thecamera's view.
Related information
Camera (p. 299)
Radar sensor (p. 297)
Recommended camera and radar sensormaintenance (p. 304)
Park Assist Camera* (p. 355)