reset VOLVO S60 TWIN ENGINE 2019 Owner's Manual
[x] Cancel search | Manufacturer: VOLVO, Model Year: 2019, Model line: S60 TWIN ENGINE, Model: VOLVO S60 TWIN ENGINE 2019Pages: 645, PDF Size: 13.96 MB
Page 168 of 645

||
WINDOWS, GLASS AND MIRRORS
* Option/accessory.166
WARNING
Children, other passengers or objects can betrapped by the moving parts.
Always operate the windows with caution.
Do not allow children to play with theoperating controls.
Never leave a child alone in the vehicle.
Remember to always cut the current tothe power windows by setting the vehi-cle's electrical system to ignition mode 0and then taking the remote key with youwhen leaving the vehicle.
Never stick objects or body parts outthrough the windows, even if the vehicleelectrical system is completely turned off.
Related information
Operating the power windows (p. 166)
Pinch protection for windows and sun cur-tains (p. 164)
Reset procedure for pinch protection(p. 165)
Operating the power windows
All power windows can be operated using thecontrol panel in the driver's door. The controlpanels in the other doors can be used to oper-ate that particular door.
The power windows have pinch protection. Ifthere is any problem with the pinch protection, arest procedure can be tested.
WARNING
Children, other passengers or objects can betrapped by the moving parts.
Always operate the windows with caution.
Do not allow children to play with theoperating controls.
Never leave a child alone in the vehicle.
Remember to always cut the current tothe power windows by setting the vehi-cle's electrical system to ignition mode 0and then taking the remote key with youwhen leaving the vehicle.
Never stick objects or body parts outthrough the windows, even if the vehicleelectrical system is completely turned off.
Operating the power windows.
Operating manually. Move one of the controlsslightly up or down. The power windows goup or down while the control is held in posi-tion.
Operating with automatic controls. Move oneof the controls up or down to its end positionand release it. The window moves automati-cally to its fully closed/open position.
To use the power windows, the ignition must bein at least mode I or II. After the ignition hasbeen switched off, the power windows can beoperated for several minutes or until a door isopened. Only one control can be operated at atime.
It can also be operated using keyless opening*with the door handle.
Page 169 of 645

WINDOWS, GLASS AND MIRRORS
* Option/accessory.167
WARNING
Make sure that no child or other passengercomes into contact with the windows as theyare closing with keyless closing*.
NOTE
One way to reduce the pulsating wind noiseheard when the rear windows are open is toalso open the front windows slightly.
NOTE
The windows cannot be opened at speedsover approx. 180 km/h (ca112 mph), but theycan be closed.
The driver is always responsible for followingapplicable traffic regulations.
NOTE
It may not be possible to operate the windowsin low temperatures.
Related information
Power windows (p. 165)
Pinch protection for windows and sun cur-tains (p. 164)
Reset procedure for pinch protection(p. 165)
Keyless locking and unlocking* (p. 245)
Locking and unlocking using the remote key(p. 232)
Using sun curtains*
There is a sun curtain in the parcel shelf in therear window.
–Pull up the sun curtain and hook it into theceiling bracket using the two hooks on thesun curtain.
>The spring force in the curtain keeps thehooks hanging in place.
When the sun curtain is not being used, graspand unhook it and let the curtain slowly retractwhile still holding it.
Related information
Pinch protection for windows and sun cur-tains (p. 164)
Reset procedure for pinch protection(p. 165)
Power windows (p. 165)
Page 171 of 645
WINDOWS, GLASS AND MIRRORS
}}
* Option/accessory.169
which work together to identify and eliminateglare. The forward-pointing sensor monitorsambient light, while the rearward-pointing sensormonitors light from the headlights of followingvehicles.
For the door mirrors to be equipped with auto-dim, the rearview mirror must also be equippedwith auto-dim.
NOTE
If the sensors are obstructed by e.g. a parkingpermit, transponder, sunshade or objects onthe seats or parcel shelf in a way that pre-vents light from reaching the sensors, theauto-dim function in the rearview and doormirrors will be reduced.
Related information
Rearview/door mirrors (p. 168)
Adjusting the door mirrors (p. 169)
Adjusting the door mirrors
To improve visibility to the rear, the door mirrorsneed to be adjusted to the driver's height andseating position. There are several automaticsettings that can also be connected to the mem-ory function buttons for the power seat*.
Controls used for door mirrors
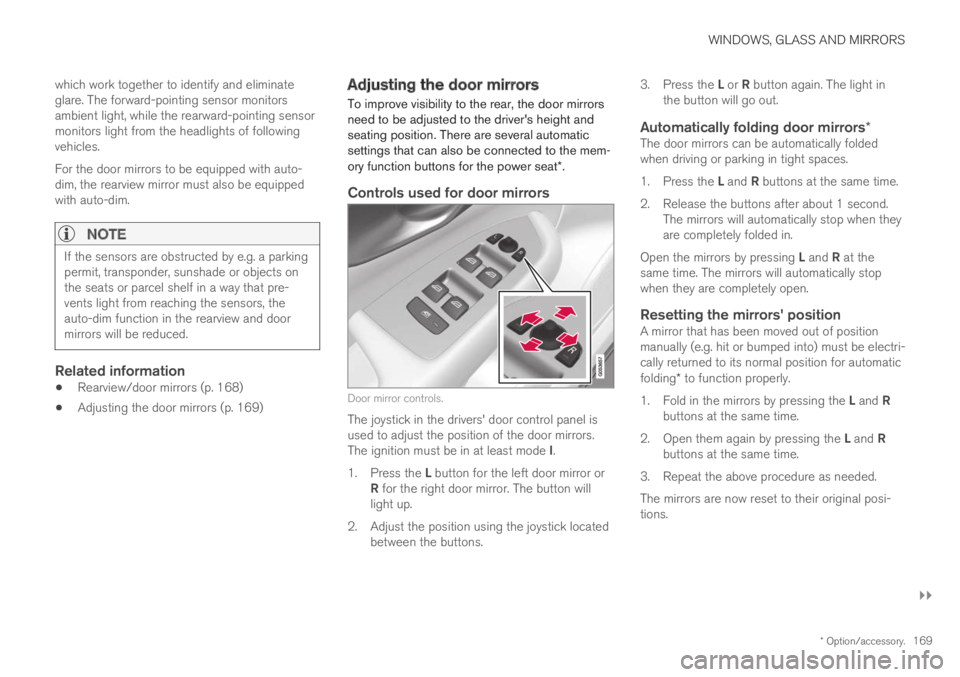
Door mirror controls.
The joystick in the drivers' door control panel isused to adjust the position of the door mirrors.The ignition must be in at least mode I.
1.Press the L button for the left door mirror orR for the right door mirror. The button willlight up.
2.Adjust the position using the joystick locatedbetween the buttons.
3.Press the L or R button again. The light inthe button will go out.
Automatically folding door mirrors *
The door mirrors can be automatically foldedwhen driving or parking in tight spaces.
1.Press the L and R buttons at the same time.
2. Release the buttons after about 1 second.The mirrors will automatically stop when theyare completely folded in.
Open the mirrors by pressing L and R at thesame time. The mirrors will automatically stopwhen they are completely open.
Resetting the mirrors' position
A mirror that has been moved out of positionmanually (e.g. hit or bumped into) must be electri-cally returned to its normal position for automaticfolding* to function properly.
1.Fold in the mirrors by pressing the L and Rbuttons at the same time.
2.Open them again by pressing the L and Rbuttons at the same time.
3. Repeat the above procedure as needed.
The mirrors are now reset to their original posi-tions.
Page 172 of 645
||
WINDOWS, GLASS AND MIRRORS
* Option/accessory.170
Tilting when parking 3
The door mirrors can be tilted down to help givethe driver a better view along the sides of thevehicle, e.g. of the curb when parking.
–Select reverse gear and press the L or R mir-ror button.
Please note that the button may need to bepressed twice depending on settings. When thedoor mirror is tilted down, the light in the buttonwill flash. When reverse gear is engaged, thedoor mirrors will automatically start to move after3 seconds and will reach their original positionafter about 8 seconds.
Automatically tilting when parking 3
With this setting, the door mirrors will automati-cally tilt down when reverse gear is engaged. Thefolded position is preset and cannot be adjusted.To immediately return the door mirrors to theiroriginal position, press the L or R button twice.
1.Tap Settings in the center display's Topview.
2.Tap My CarMirrors and Convenience.
3.Under Exterior Mirror Tilt at Reverse,select Off, Driver, Passenger or Both toactivate/deactivate and to select which mir-ror to tilt.
Automatic folding when the vehicle is
locked *
The door mirrors can automatically fold in whenthe vehicle is locked and open when the vehicleis unlocked using the remote key.
1.Tap Settings in the center display's Topview.
2.Tap My CarMirrors and Convenience.
3.Select Fold Mirror When Locked to acti-vate/deactivate.
Related information
Rearview/door mirrors (p. 168)
Adjusting the rearview mirror dimming func-tion (p. 168)
Storing positions for seats, mirrors and head-up display* (p. 182)
Activating and deactivating the heated rearwindow and door mirrors (p. 213)
Panoramic roof*
The panoramic roof is divided into two glasssections. The front section can be opened verti-cally at the rear edge (ventilation position) or hor-izontally (open position). The rear section cannotbe moved.
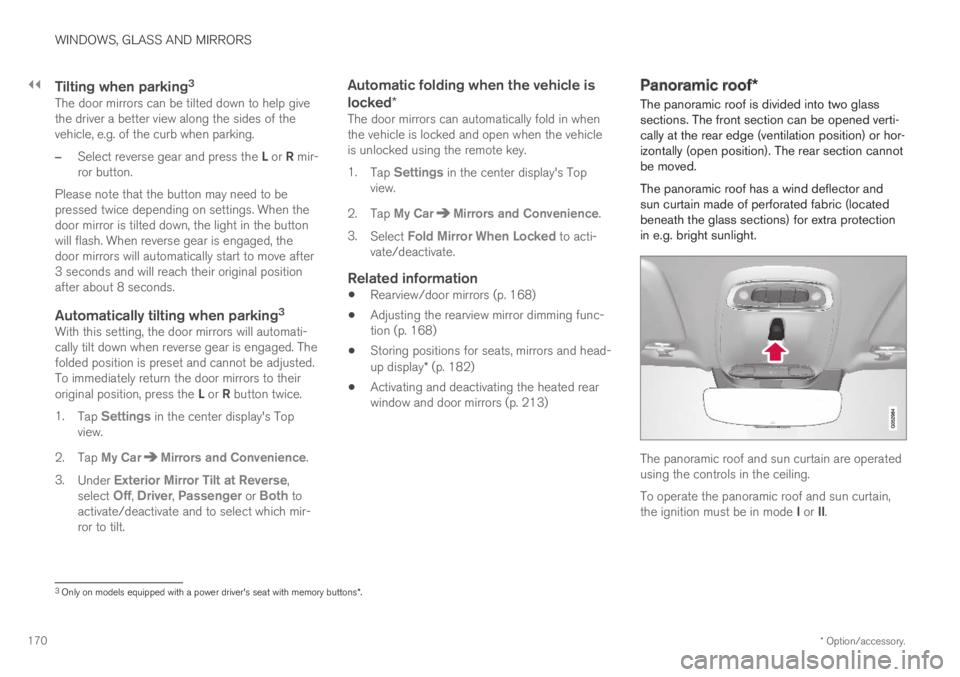
The panoramic roof has a wind deflector andsun curtain made of perforated fabric (locatedbeneath the glass sections) for extra protectionin e.g. bright sunlight.
The panoramic roof and sun curtain are operatedusing the controls in the ceiling.
To operate the panoramic roof and sun curtain,the ignition must be in mode I or II.
3
Only on models equipped with a power driver's seat with memory buttons * .
Page 186 of 645

SEATS AND STEERING WHEEL
* Option/accessory.184
Adjusting the power* front seats (p. 181)
Storing positions for seats, mirrors and head-up display* (p. 182)
Adjusting front seat massage settings*(p. 185)
Adjusting* front seat cushion length (p. 185)
Front seat massage* settings (p. 184)
Adjusting front seat side bolster settings*(p. 186)
Adjusting front seat lumbar support* (p. 187)
Adjusting the passenger seat from the driv-er's seat* (p. 188)
Adjusting the door mirrors (p. 169)
Head-up display settings* (p. 142)
Front seat massage* settings
The settings for the multifunctional seats can beadjusted using either the mutifunction control onthe side of the seat or the center display. Theadjustment settings are shown in the center dis-play.
Multifunction control, located on the side of the seatcushion.
Massage settings
The following massage settings are available:
On/Off: Select On/Off to turn on/off themassage function.
Programs 1-5: There are 5 preset massageprograms. Select Swell, Tread, Advanced,Lumbar or Shoulder.
Intensity: Select Low, Normal or High.
Speed: Select Slow, Normal or Fast.
Restarting the massage function
The massage function turns off automaticallyafter 20 minutes. The function is reactivatedmanually.
–Tap Restart, which is displayed in the centerdisplay, to restart the selected massage pro-gram.
>The massage program will restart. If noselection is made, the message will bestored in Top view.
Related information
Manual front seats (p. 180)
Power* front seats (p. 181)
Adjusting the power* front seats (p. 181)
Storing positions for seats, mirrors and head-up display* (p. 182)
Using stored positions for seats, mirrors andhead-up display* (p. 183)
Adjusting front seat massage settings*(p. 185)
Adjusting* front seat cushion length (p. 185)
Adjusting front seat side bolster settings*(p. 186)
Adjusting front seat lumbar support* (p. 187)
Adjusting the passenger seat from the driv-er's seat* (p. 188)
Page 219 of 645
CLIMATE CONTROL
}}
* Option/accessory.217
NOTE
The air conditioning cannot be activated whenthe fan speed is set to Off.
Related information
Climate system controls (p. 207)
Parking climate
Parking climate is an umbrella term for variousfunctions that improve the passenger compart-ment climate when the vehicle is parked, e.g.preconditioning.
Parking climate functions are con-trolled from the Parking climate tabin the center display's Climate view.Tap the symbol in the center of the cli-mate bar to open Climate view.
Related information
Climate (p. 196)
Preconditioning (p. 217)
Climate comfort retaining function (p. 222)
Parking climate symbols and messages(p. 223)
Preconditioning
Preconditioning is a climate function that, if pos-sible, attempts to achieve a comfortable tem-perature in the passenger compartment beforedriving.
Preconditioning can be started immediately orstarted at a preset time using a timer.
The function utilizes several of the vehicle's sys-tems:
In cold weather, the parking heater heats thepassenger compartment to a comfortabletemperature.
In warm weather, air conditioning cools thepassenger compartment to a comfortabletemperature.
The electrically heated steering wheel* andseats* can be activated.
Heating for the windshield, rear window anddoor mirrors are automatically activated asneeded.
During preconditioning in a hot climate, conden-sation from the air conditions may drip under thevehicle. This is normal.
Page 221 of 645
CLIMATE CONTROL
}}
219
Related information
Parking climate (p. 217)
Preconditioning (p. 217)
Preconditioning timer (p. 219)
Preconditioning timer
The timer can be set to finish preconditioning ata predetermined time.
The timer can store up to 8 preset times for:
A time on a particular date
A time on one or more days of the week, withor without the repeat function.
NOTE
Preconditioning is only available when the caris connected to an electrical outlet. A charg-ing post that is not always active, for examplebecause of a timer, can cause loss of functionfor preconditioning.
If the vehicle is not connected to an electricalsocket it is still possible in a warm climate toachieve brief cooling of the passenger com-partment by direct starting preconditioning.
Related information
Preconditioning (p. 217)
Adding and editing timer settings for precon-ditioning (p. 219)
Activating and deactivating preconditioningtimer (p. 220)
Deleting preconditioning timer settings(p. 221)
Adding and editing timer settingsfor preconditioning
The preconditioning timer can store up to 8 pre-set timer settings.
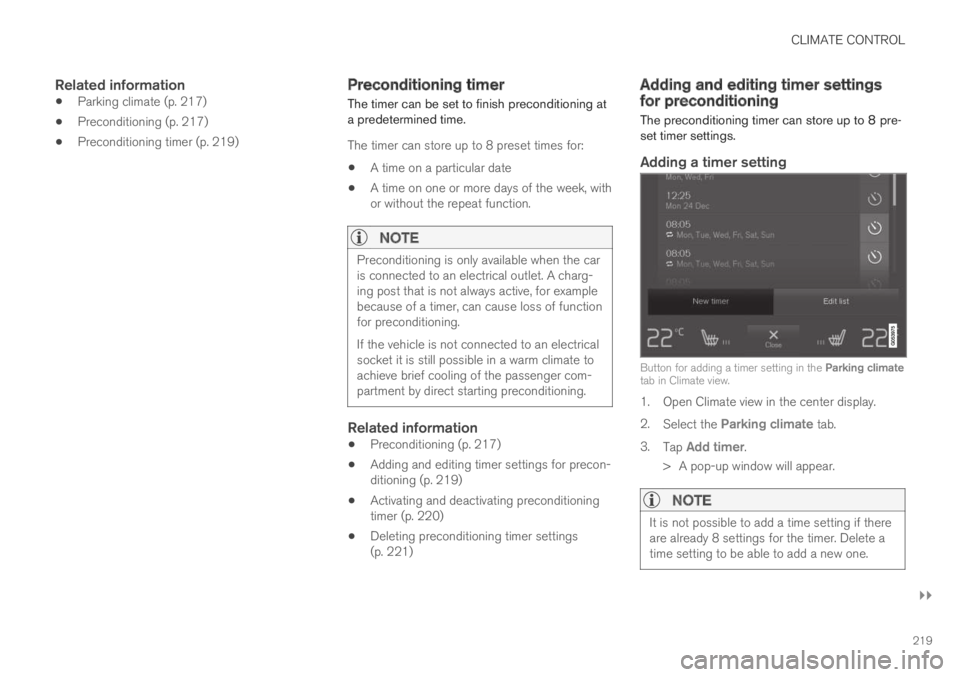
Adding a timer setting
Button for adding a timer setting in the Parking climatetab in Climate view.
1. Open Climate view in the center display.
2.Select the Parking climate tab.
3.Tap Add timer.
>A pop-up window will appear.
NOTE
It is not possible to add a time setting if thereare already 8 settings for the timer. Delete atime setting to be able to add a new one.
Page 272 of 645
||
DRIVER SUPPORT
* Option/accessory.270
3.Press the (2) button on the steeringwheel keypad again.
>Another function will be activated.
Related information
Cruise control (p. 266)
Switching between Cruise Control and Adap-tive Cruise Control* (p. 277)
Activating and starting Cruise Control(p. 267)
Reactivating Cruise Control from standbymode (p. 269)
Deactivating and putting Cruise Control instandby mode (p. 268)
Distance Alert*16
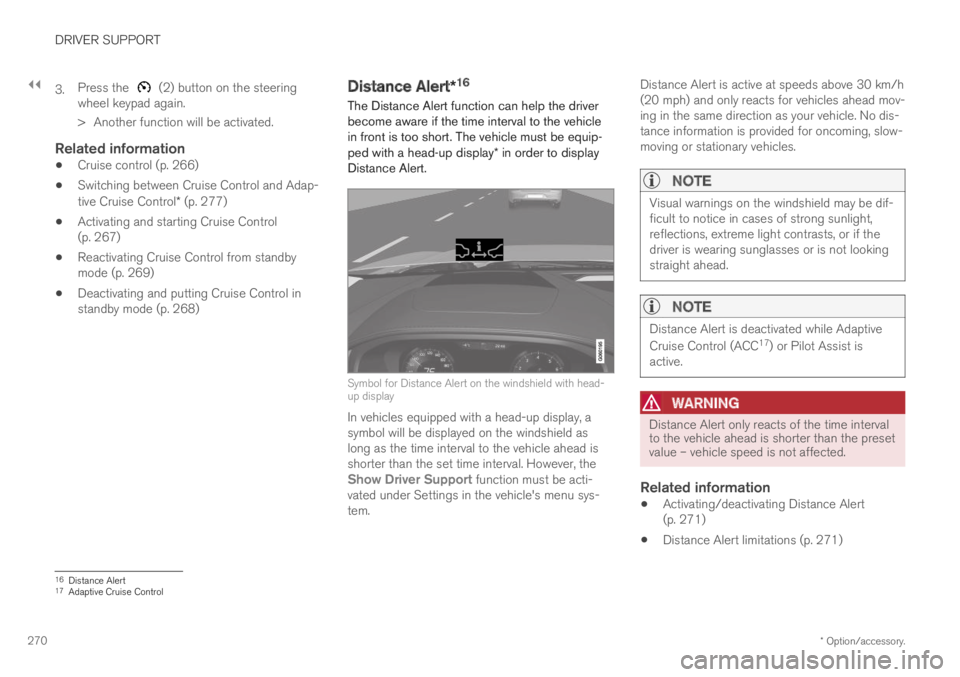
The Distance Alert function can help the driverbecome aware if the time interval to the vehiclein front is too short. The vehicle must be equip-ped with a head-up display* in order to displayDistance Alert.
Symbol for Distance Alert on the windshield with head-up display
In vehicles equipped with a head-up display, asymbol will be displayed on the windshield aslong as the time interval to the vehicle ahead isshorter than the set time interval. However, theShow Driver Support function must be acti-vated under Settings in the vehicle's menu sys-tem.
Distance Alert is active at speeds above 30 km/h(20 mph) and only reacts for vehicles ahead mov-ing in the same direction as your vehicle. No dis-tance information is provided for oncoming, slow-moving or stationary vehicles.
NOTE
Visual warnings on the windshield may be dif-ficult to notice in cases of strong sunlight,reflections, extreme light contrasts, or if thedriver is wearing sunglasses or is not lookingstraight ahead.
NOTE
Distance Alert is deactivated while Adaptive
Cruise Control (ACC17) or Pilot Assist isactive.
WARNING
Distance Alert only reacts of the time intervalto the vehicle ahead is shorter than the presetvalue – vehicle speed is not affected.
Related information
Activating/deactivating Distance Alert(p. 271)
Distance Alert limitations (p. 271)
16Distance Alert17Adaptive Cruise Control
Page 280 of 645

||
DRIVER SUPPORT
* Option/accessory.278
2.Tap the Cruise Control button in the centerdisplay's Function view. The button's indica-tor will change from GRAY to GREEN.
>The symbol in the instrument panel will
change from ACC to CC, indicating that Adaptive Cruise Con-trol is off and Cruise Control is in standbymode.
3.Pressing the button on the steeringwheel keypad.
>Cruise Control will start and the vehicle'scurrent speed will be set.
WARNING
Switching from ACC to CC means that thevehicle:
will no longer maintain a preset timeinterval to the vehicle ahead.
will only follow the stored speed and thedriver must therefore apply the brakeswhen necessary.
If CC is active when the engine is turned off, ACCwill be automatically activated the next time theengine is started.
Switching from CC to ACC
To do so:
1.Press the button on the steering wheelkeypad to put Cruise Control in standbymode.
2.Tap the Cruise Control button in Functionview. The button's indicator will change fromGREEN to GRAY.
>The symbols in the instrument panel will
switch from CC to ACCto indicate that Adaptive Cruise Control isin standby mode.
3.Pressing the button on the steeringwheel keypad.
>Adaptive Cruise Control will go into activemode and set the vehicle's current speedand the selected time interval to the vehi-cle ahead.
Related information
Adaptive Cruise Control* (p. 272)
Cruise control (p. 266)
Page 294 of 645

DRIVER SUPPORT
* Option/accessory.292
Set time interval for driver support
The time interval to the vehicle ahead can be set
for the functions Adaptive Cruise Control*37,Pilot Assist and Distance Alert*.
Different time intervals to thevehicle ahead can be selectedand are shown in the instru-ment panel as 1–5 horizontalbars. The more bars, the longerthe time interval. One bar rep-resents an interval ofapprox. 1 second to the vehicle ahead. 5 barsrepresents approx. 3 seconds.
NOTE
When the symbol in the instrument panelshows a vehicle and a steering wheel, PilotAssist follows a vehicle ahead at a presettime interval.
When only a steering wheel is shown, there isno vehicle ahead within a reasonable dis-tance.
NOTE
When the symbol in the instrument panelshows two vehicles, ACC is following the vehi-cle ahead at a preset time interval.
When only one vehicle is shown, there is novehicle ahead within a reasonable distance.
Controls for setting a time interval.
Reduce the time interval
Increase the time interval
Distance indicator
–Press the (1) or (2) button to decrease orincrease the time interval.
>The distance indicator (3) shows the cur-rent time interval.
In order to help your vehicle follow the vehicleahead as smoothly and comfortably as possible,Adaptive Cruise Control allows the time intervalto vary noticeably in certain situations. At lowspeeds, when the distance to the vehicle aheadis short, Adaptive Cruise Control increases thetime interval slightly.
NOTE
The greater the vehicles' speed, thegreater the distance between them for aset time interval.
Only use the time intervals permitted bylocal traffic regulations.
If driver support does not seem torespond with a speed increase when acti-vated, it may be because the time intervalto the vehicle ahead is shorter than theset time interval.
WARNING
Only use a time interval suitable for thecurrent traffic conditions.
The driver should be aware that shorttime intervals give them limited time toreact and act to any unforeseen trafficsituation.
37Adaptive Cruise Control