reset VOLVO S60 TWIN ENGINE 2019 User Guide
[x] Cancel search | Manufacturer: VOLVO, Model Year: 2019, Model line: S60 TWIN ENGINE, Model: VOLVO S60 TWIN ENGINE 2019Pages: 645, PDF Size: 13.96 MB
Page 91 of 645
DISPLAYS AND VOICE CONTROL
89
Displaying trip data in theinstrument panel
Data recorded and calculated by the trip com-puter can be displayed on the instrument panel.
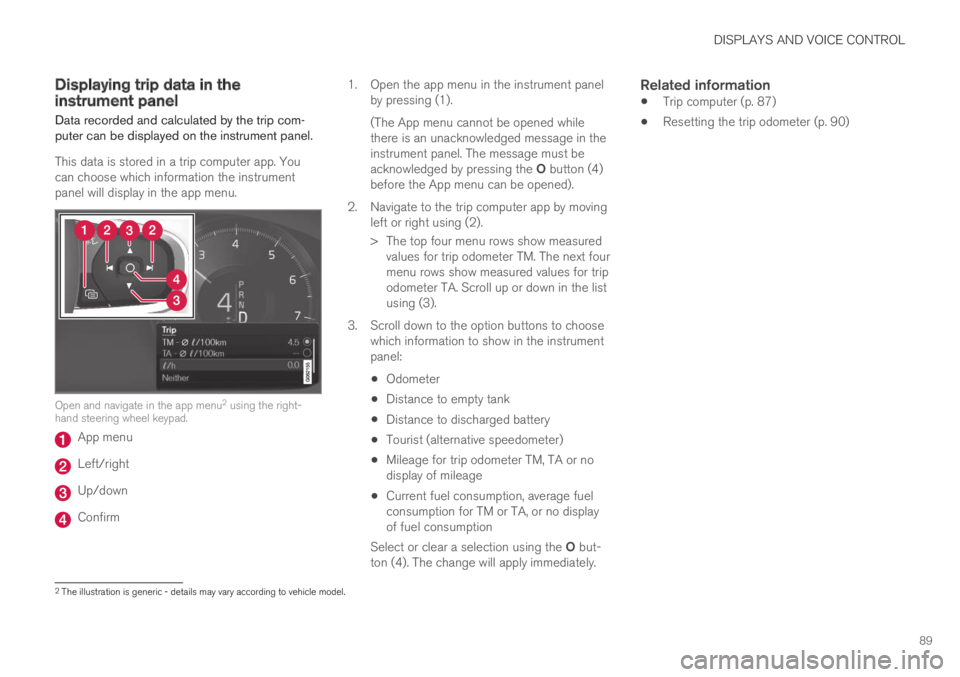
This data is stored in a trip computer app. Youcan choose which information the instrumentpanel will display in the app menu.
Open and navigate in the app menu2 using the right-hand steering wheel keypad.
App menu
Left/right
Up/down
Confirm
1.Open the app menu in the instrument panelby pressing (1).
(The App menu cannot be opened whilethere is an unacknowledged message in theinstrument panel. The message must beacknowledged by pressing the O button (4)before the App menu can be opened).
2. Navigate to the trip computer app by movingleft or right using (2).
> The top four menu rows show measuredvalues for trip odometer TM. The next fourmenu rows show measured values for tripodometer TA. Scroll up or down in the listusing (3).
3. Scroll down to the option buttons to choosewhich information to show in the instrumentpanel:
Odometer
Distance to empty tank
Distance to discharged battery
Tourist (alternative speedometer)
Mileage for trip odometer TM, TA or nodisplay of mileage
Current fuel consumption, average fuelconsumption for TM or TA, or no displayof fuel consumption
Select or clear a selection using the O but-ton (4). The change will apply immediately.
Related information
Trip computer (p. 87)
Resetting the trip odometer (p. 90)
2The illustration is generic - details may vary according to vehicle model.
Page 92 of 645
DISPLAYS AND VOICE CONTROL
90
Resetting the trip odometer
Resetting the trip odometer using the left-sidesteering wheel lever.
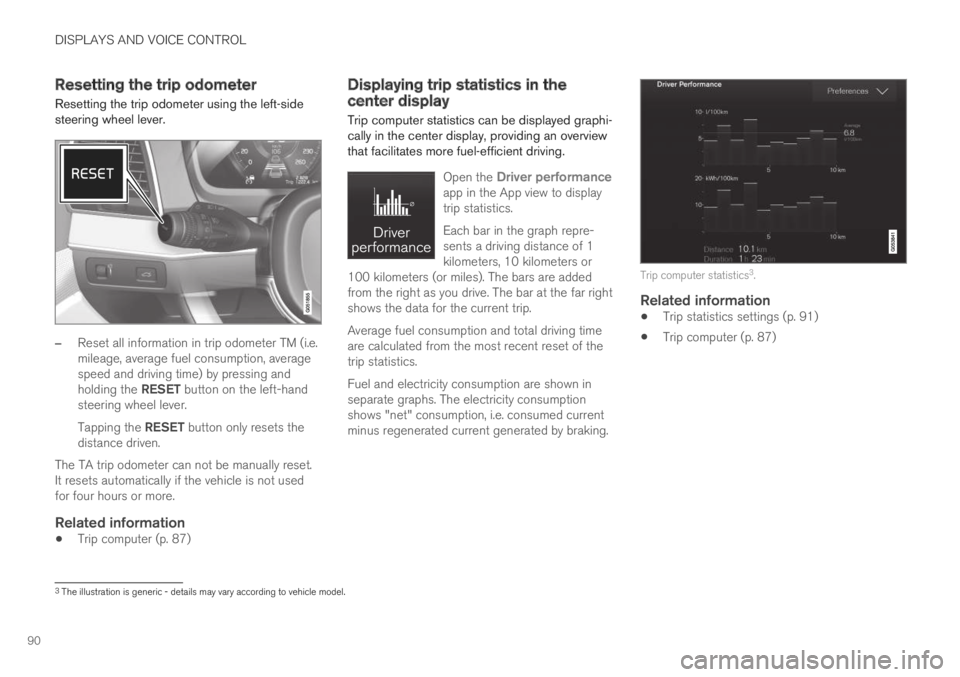
–Reset all information in trip odometer TM (i.e.mileage, average fuel consumption, averagespeed and driving time) by pressing andholding the RESET button on the left-handsteering wheel lever.
Tapping the RESET button only resets thedistance driven.
The TA trip odometer can not be manually reset.It resets automatically if the vehicle is not usedfor four hours or more.
Related information
Trip computer (p. 87)
Displaying trip statistics in thecenter display
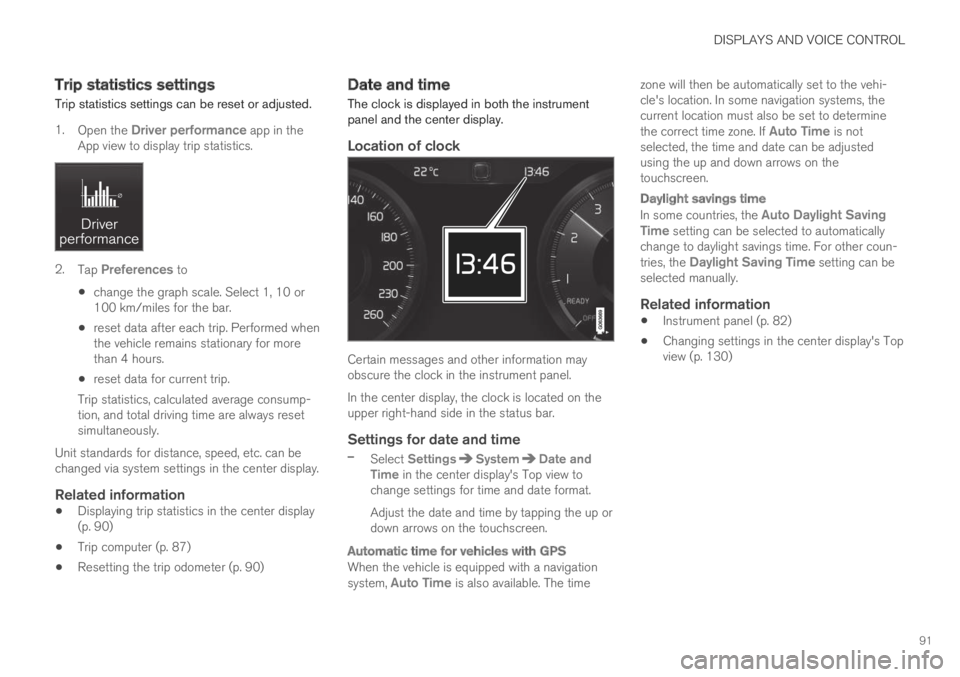
Trip computer statistics can be displayed graphi-cally in the center display, providing an overviewthat facilitates more fuel-efficient driving.
Open the Driver performanceapp in the App view to displaytrip statistics.
Each bar in the graph repre-sents a driving distance of 1kilometers, 10 kilometers or100 kilometers (or miles). The bars are addedfrom the right as you drive. The bar at the far rightshows the data for the current trip.
Average fuel consumption and total driving timeare calculated from the most recent reset of thetrip statistics.
Fuel and electricity consumption are shown inseparate graphs. The electricity consumptionshows "net" consumption, i.e. consumed currentminus regenerated current generated by braking.
Trip computer statistics3.
Related information
Trip statistics settings (p. 91)
Trip computer (p. 87)
3The illustration is generic - details may vary according to vehicle model.
Page 93 of 645
DISPLAYS AND VOICE CONTROL
91
Trip statistics settings
Trip statistics settings can be reset or adjusted.
1.Open the Driver performance app in theApp view to display trip statistics.
2.Tap Preferences to
change the graph scale. Select 1, 10 or100 km/miles for the bar.
reset data after each trip. Performed whenthe vehicle remains stationary for morethan 4 hours.
reset data for current trip.
Trip statistics, calculated average consump-tion, and total driving time are always resetsimultaneously.
Unit standards for distance, speed, etc. can bechanged via system settings in the center display.
Related information
Displaying trip statistics in the center display(p. 90)
Trip computer (p. 87)
Resetting the trip odometer (p. 90)
Date and time
The clock is displayed in both the instrumentpanel and the center display.
Location of clock
Certain messages and other information mayobscure the clock in the instrument panel.
In the center display, the clock is located on theupper right-hand side in the status bar.
Settings for date and time
–Select SettingsSystemDate andTime in the center display's Top view tochange settings for time and date format.
Adjust the date and time by tapping the up ordown arrows on the touchscreen.
Automatic time for vehicles with GPS
When the vehicle is equipped with a navigationsystem, Auto Time is also available. The time
zone will then be automatically set to the vehi-cle's location. In some navigation systems, thecurrent location must also be set to determinethe correct time zone. If Auto Time is notselected, the time and date can be adjustedusing the up and down arrows on thetouchscreen.
Daylight savings time
In some countries, the Auto Daylight SavingTime setting can be selected to automaticallychange to daylight savings time. For other coun-tries, the Daylight Saving Time setting can beselected manually.
Related information
Instrument panel (p. 82)
Changing settings in the center display's Topview (p. 130)
Page 133 of 645
DISPLAYS AND VOICE CONTROL
131
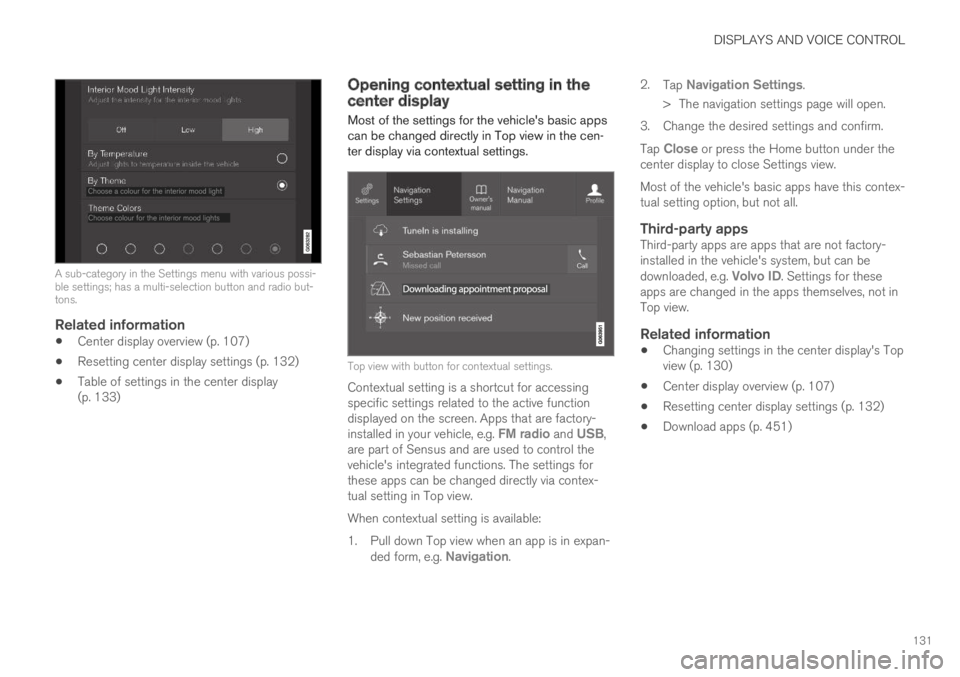
A sub-category in the Settings menu with various possi-ble settings; has a multi-selection button and radio but-tons.
Related information
Center display overview (p. 107)
Resetting center display settings (p. 132)
Table of settings in the center display(p. 133)
Opening contextual setting in thecenter display
Most of the settings for the vehicle's basic appscan be changed directly in Top view in the cen-ter display via contextual settings.
Top view with button for contextual settings.
Contextual setting is a shortcut for accessingspecific settings related to the active functiondisplayed on the screen. Apps that are factory-installed in your vehicle, e.g. FM radio and USB,are part of Sensus and are used to control thevehicle's integrated functions. The settings forthese apps can be changed directly via contex-tual setting in Top view.
When contextual setting is available:
1.Pull down Top view when an app is in expan-ded form, e.g. Navigation.
2.Tap Navigation Settings.
>The navigation settings page will open.
3. Change the desired settings and confirm.
Tap Close or press the Home button under thecenter display to close Settings view.
Most of the vehicle's basic apps have this contex-tual setting option, but not all.
Third-party apps
Third-party apps are apps that are not factory-installed in the vehicle's system, but can bedownloaded, e.g. Volvo ID. Settings for theseapps are changed in the apps themselves, not inTop view.
Related information
Changing settings in the center display's Topview (p. 130)
Center display overview (p. 107)
Resetting center display settings (p. 132)
Download apps (p. 451)
Page 134 of 645
DISPLAYS AND VOICE CONTROL
132
Resetting user data when thevehicle changes owners
If the vehicle changes owners, all user data andsystem settings should be reset to factorydefaults.
Vehicle settings can be reset at different levels.Reset all user data and system settings to theiroriginal factory defaults when the vehiclechanges owner. It is also important to change theowner of the Volvo On Call service.
Related information
Resetting center display settings (p. 132)
Resetting driver profile settings (p. 137)
Resetting center display settings
All settings made in the center display's Settingsmenu can be reset to default values.
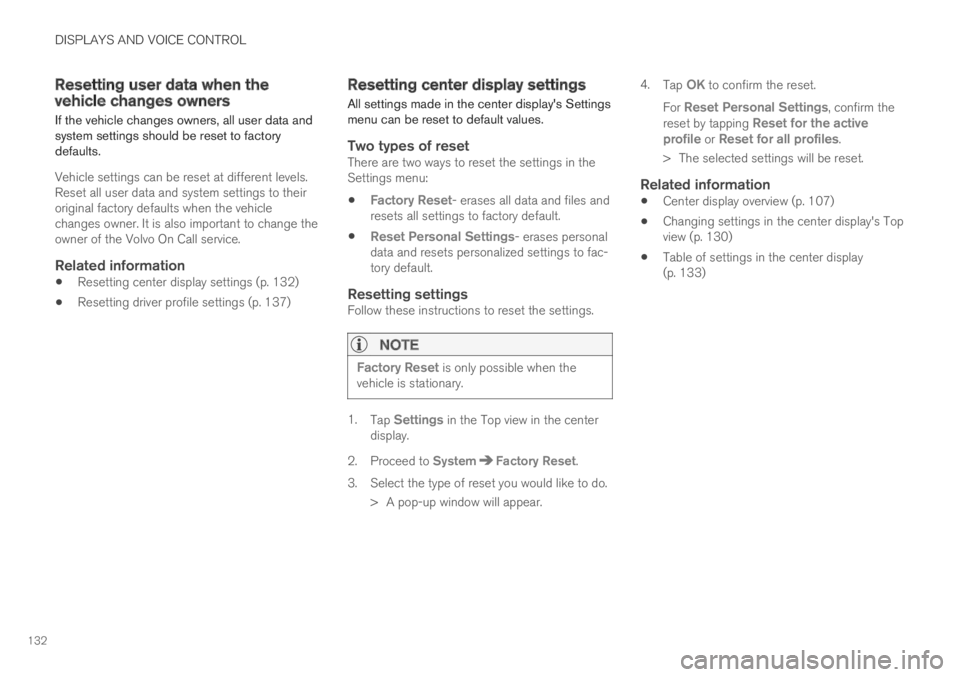
Two types of reset
There are two ways to reset the settings in theSettings menu:
Factory Reset- erases all data and files andresets all settings to factory default.
Reset Personal Settings- erases personaldata and resets personalized settings to fac-tory default.
Resetting settings
Follow these instructions to reset the settings.
NOTE
Factory Reset is only possible when thevehicle is stationary.
1.Tap Settings in the Top view in the centerdisplay.
2.Proceed to SystemFactory Reset.
3. Select the type of reset you would like to do.
> A pop-up window will appear.
4.Tap OK to confirm the reset.
For Reset Personal Settings, confirm thereset by tapping Reset for the activeprofile or Reset for all profiles.
>The selected settings will be reset.
Related information
Center display overview (p. 107)
Changing settings in the center display's Topview (p. 130)
Table of settings in the center display(p. 133)
Page 136 of 645

||
DISPLAYS AND VOICE CONTROL
* Option/accessory.134
System
Sub-categories
Driver Profile
Date and Time
System Languages and Units
Privacy and Data
Keyboard Layouts
Voice Control*
Factory Reset
System Information
Related information
Center display overview (p. 107)
Changing settings in the center display's Topview (p. 130)
Resetting center display settings (p. 132)
Driver profiles
Many of the vehicle's settings can be custom-ized to the driver's personal preferences andsaved in one or more driver profiles.
These personal settings are automatically savedin the active driver profile. Each key can be linkedto one driver profile. When the linked key is used,the vehicle is customized to the specific settingsof that driver profile.
Which settings are saved in driver
profiles?
Many of the settings made in the vehicle will beautomatically stored in the active driver profile ifthe profile is not protected. The vehicle has set-tings that can be made either personal or global.The personal settings are saved in driver profiles.
Settings that can be saved in a driver profileinclude, among other things, screens, mirrors,front seats, navigation*, audio and media system,language and voice control.
Some settings are global settings. These settingscan be changed but are not saved to a specificdriver profile. Changes to global settings affect allprofiles.
Global settings
Global settings and parameters do not changewhen driver profiles are changed. They remainthe same regardless of which driver profile is cur-rently active.
Keyboard layout is an example of a global setting.If driver profile X is used to add additional key-board languages, these languages will also beavailable for driver profile Y. The settings for key-board layout are not saved to a specific driverprofile - the settings are global.
Personal settings
If driver profile X has been used to e.g., set thebrightness for the center display, driver profile Ywill not be affected by this setting. It will only besaved to driver profile X because brightness set-ting is a personal setting.
Related information
Selecting a driver profile (p. 135)
Changing a driver profile's name (p. 135)
Linking a remote key to a driver profile(p. 136)
Protecting a driver profile (p. 136)
Resetting driver profile settings (p. 137)
Table of settings in the center display(p. 133)
Page 139 of 645

DISPLAYS AND VOICE CONTROL
137
2. Tap SystemDriver Profiles.
3. Mark the desired profile. The display willreturn to Home view. The Guest profile can-not be linked to a remote key.
4.Pull down Top view again and tap Settings
SystemDriver ProfilesEditProfile.
5.Select Connect key to link the profile withthe key. A driver profile can only be linked tothe key currently being used in the vehicle. Ifthere are any other keys in the vehicle, Morethan one key is found, put the key youwant to connect on backup reader will bedisplayed.
Location of the backup reader in the tunnel console.>When Profile connected to key is dis-played, the key and driver profile havebeen linked.
6.Tap OK.
>The key used is now linked to the driverprofile and will remain so as long as theConnect key box is not deselected.
Related information
Driver profiles (p. 134)
Changing a driver profile's name (p. 135)
Remote key (p. 230)
Resetting driver profile settings
Settings that have been saved for one or moredriver profiles can be reset when the vehicle isstationary.
NOTE
Factory Reset is only possible when thevehicle is stationary.
1.Tap Settings in the Top view.
2.Tap SystemFactory ResetResetPersonal Settings.
3.Select option Reset for the active profile,Reset for all profiles or Cancel.
Related information
Driver profiles (p. 134)
Resetting center display settings (p. 132)
Page 154 of 645
LIGHTING
* Option/accessory.152
Adjusting the headlight pattern
The headlight pattern can be reset from right-hand to left-hand traffic, and vice versa. Thefunction adapts the light pattern from the head-lights so that they do not cause a glare toapproaching traffic.
1.Tap Settings in the center display's Topview.
2.Tap My CarLights and LightingExterior Lights.
3.Select Temporary Right Hand Traffic/Temporary Left Hand Traffic.
NOTE
Active Bending Lights are not available whenthe headlight pattern is temporarily changedfrom left-hand to right-hand traffic, or viceversa.
Related information
Changing settings in the center display's Topview (p. 130)
Function view in the center display (p. 120)
Active Bending Lights* (p. 157)
Parking lights
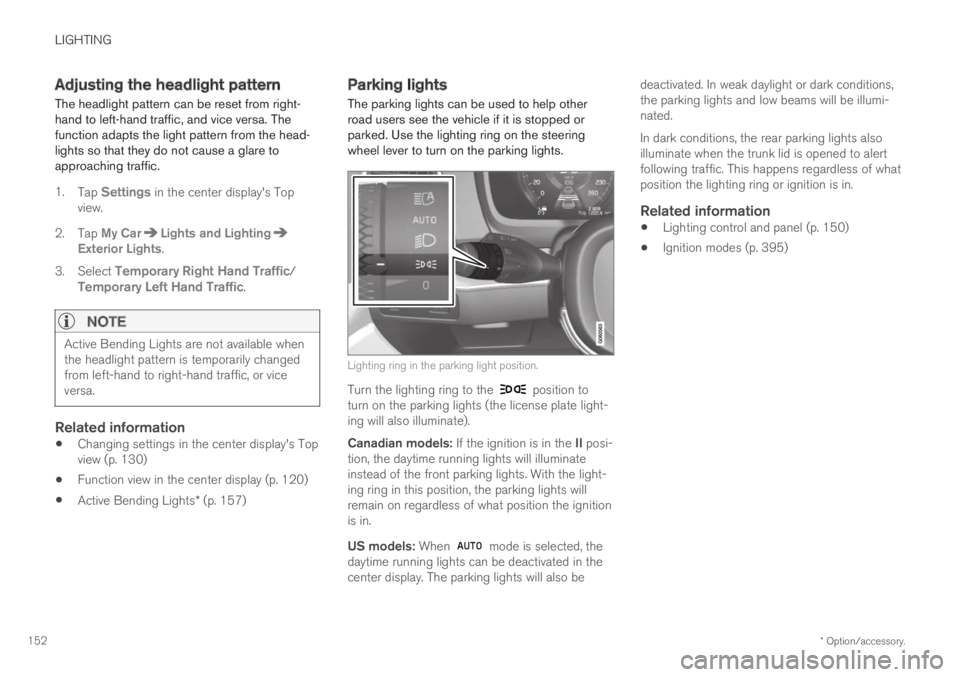
The parking lights can be used to help otherroad users see the vehicle if it is stopped orparked. Use the lighting ring on the steeringwheel lever to turn on the parking lights.
Lighting ring in the parking light position.
Turn the lighting ring to the position toturn on the parking lights (the license plate light-ing will also illuminate).
Canadian models: If the ignition is in the II posi-tion, the daytime running lights will illuminateinstead of the front parking lights. With the light-ing ring in this position, the parking lights willremain on regardless of what position the ignitionis in.
US models: When mode is selected, thedaytime running lights can be deactivated in thecenter display. The parking lights will also be
deactivated. In weak daylight or dark conditions,the parking lights and low beams will be illumi-nated.
In dark conditions, the rear parking lights alsoilluminate when the trunk lid is opened to alertfollowing traffic. This happens regardless of whatposition the lighting ring or ignition is in.
Related information
Lighting control and panel (p. 150)
Ignition modes (p. 395)
Page 166 of 645
WINDOWS, GLASS AND MIRRORS
* Option/accessory.164
Windows, glass and mirrors
The vehicle is equipped with controls for win-dows, glass and mirrors. Some of the windowsin the car are laminated.
Laminated glass
The windshield has laminated glass. Laminatedglass is also available as on option for someother glass surfaces. Laminated glass is rein-forced, which provides better protection againstbreak-ins and improved soundproofing in thepassenger compartment.
The panoramic roof* also has laminated glass.
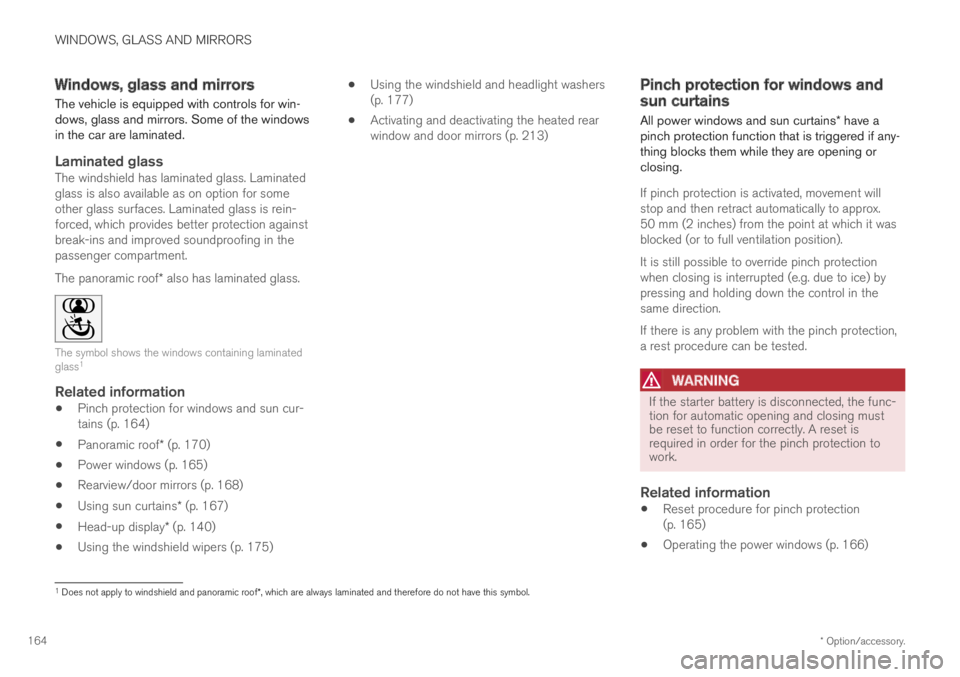
The symbol shows the windows containing laminatedglass1
Related information
Pinch protection for windows and sun cur-tains (p. 164)
Panoramic roof* (p. 170)
Power windows (p. 165)
Rearview/door mirrors (p. 168)
Using sun curtains* (p. 167)
Head-up display* (p. 140)
Using the windshield wipers (p. 175)
Using the windshield and headlight washers(p. 177)
Activating and deactivating the heated rearwindow and door mirrors (p. 213)
Pinch protection for windows andsun curtains
All power windows and sun curtains* have apinch protection function that is triggered if any-thing blocks them while they are opening orclosing.
If pinch protection is activated, movement willstop and then retract automatically to approx.50 mm (2 inches) from the point at which it wasblocked (or to full ventilation position).
It is still possible to override pinch protectionwhen closing is interrupted (e.g. due to ice) bypressing and holding down the control in thesame direction.
If there is any problem with the pinch protection,a rest procedure can be tested.
WARNING
If the starter battery is disconnected, the func-tion for automatic opening and closing mustbe reset to function correctly. A reset isrequired in order for the pinch protection towork.
Related information
Reset procedure for pinch protection(p. 165)
Operating the power windows (p. 166)
1Does not apply to windshield and panoramic roof*, which are always laminated and therefore do not have this symbol.
Page 167 of 645
WINDOWS, GLASS AND MIRRORS
}}
* Option/accessory.165
Using sun curtains* (p. 167)
Panoramic roof* (p. 170)
Reset procedure for pinchprotection
If you experience any problems with the electri-cal functions for the power windows, you can tryto perform a reset.
WARNING
If the starter battery is disconnected, the func-tion for automatic opening and closing mustbe reset to function correctly. A reset isrequired in order for the pinch protection towork.
If the problem persists or if it affects the panor-
amic roof or sunroof, contact a workshop2.
Resetting a power window
1. Start with the window in the closed position.
2. Then move the control in manual mode threetimes upward toward the closed position.
> The system will be automatically activated.
Related information
Pinch protection for windows and sun cur-tains (p. 164)
Operating the power windows (p. 166)
Using sun curtains* (p. 167)
Power windows
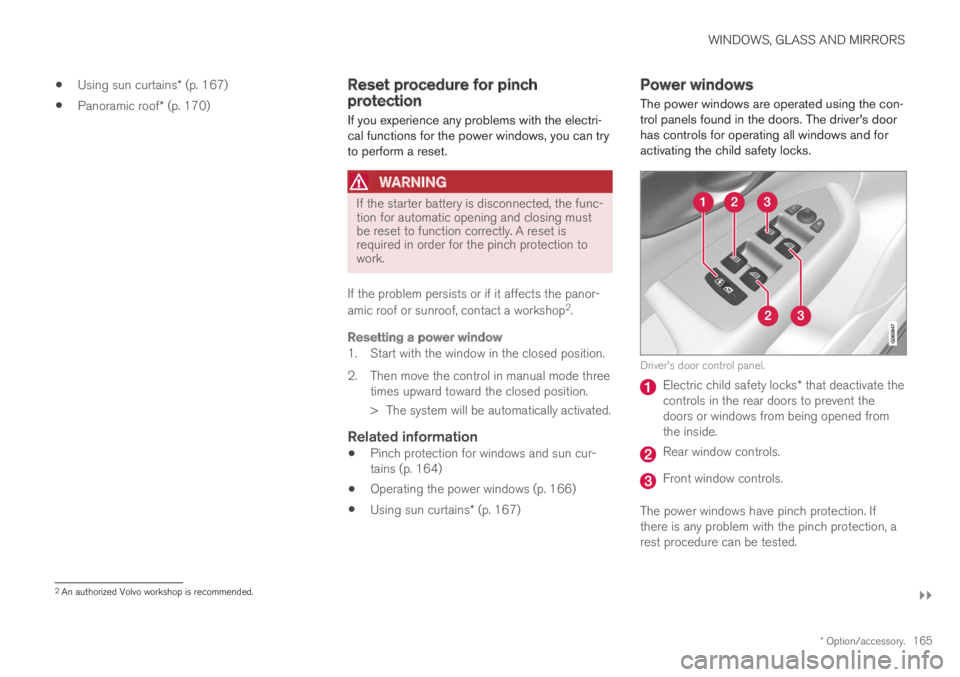
The power windows are operated using the con-trol panels found in the doors. The driver's doorhas controls for operating all windows and foractivating the child safety locks.
Driver's door control panel.
Electric child safety locks* that deactivate thecontrols in the rear doors to prevent thedoors or windows from being opened fromthe inside.
Rear window controls.
Front window controls.
The power windows have pinch protection. Ifthere is any problem with the pinch protection, arest procedure can be tested.
2An authorized Volvo workshop is recommended.