light VOLVO S60 TWIN ENGINE 2019 Owner's Guide
[x] Cancel search | Manufacturer: VOLVO, Model Year: 2019, Model line: S60 TWIN ENGINE, Model: VOLVO S60 TWIN ENGINE 2019Pages: 645, PDF Size: 13.96 MB
Page 156 of 645
LIGHTING
154
Low beams
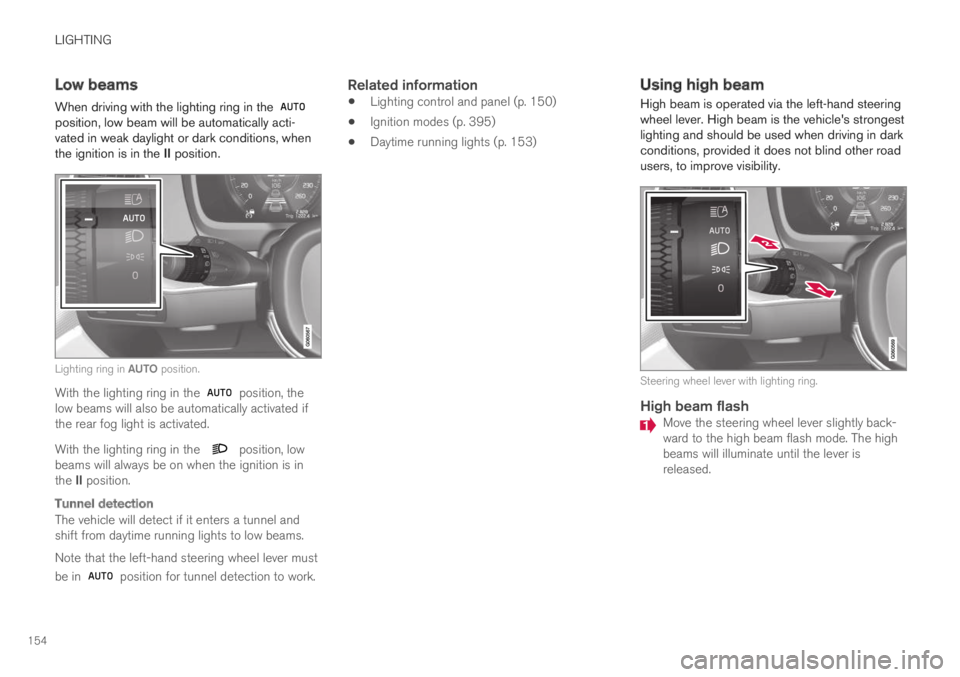
When driving with the lighting ring in the position, low beam will be automatically acti-vated in weak daylight or dark conditions, whenthe ignition is in the II position.
Lighting ring in AUTO position.
With the lighting ring in the position, thelow beams will also be automatically activated ifthe rear fog light is activated.
With the lighting ring in the position, lowbeams will always be on when the ignition is inthe II position.
Tunnel detection
The vehicle will detect if it enters a tunnel andshift from daytime running lights to low beams.
Note that the left-hand steering wheel lever must
be in position for tunnel detection to work.
Related information
Lighting control and panel (p. 150)
Ignition modes (p. 395)
Daytime running lights (p. 153)
Using high beam
High beam is operated via the left-hand steeringwheel lever. High beam is the vehicle's strongestlighting and should be used when driving in darkconditions, provided it does not blind other roadusers, to improve visibility.
Steering wheel lever with lighting ring.
High beam flash
Move the steering wheel lever slightly back-ward to the high beam flash mode. The highbeams will illuminate until the lever isreleased.
Page 157 of 645

LIGHTING
}}
155
High beams
The high beams can be activated when the
lighting ring is in mode 2 or .Activate high beams by moving the steeringwheel lever forward. Deactivate by movingthe steering wheel lever backward.
When the high beams are activated, the symbol will be illuminated in the instrument panel.
Related information
Lighting control and panel (p. 150)
Active high beam (p. 155)
Active high beam
Active high beams is a function that uses cam-era sensors in the upper edge of the windshieldto detect the headlights of approaching vehiclesor the taillights of the vehicle directly ahead.When either of these is detected, the vehicle'sheadlights will automatically switch from highbeams to low beams.
Active high beams is indicated by the symbol.
This function can be used in dark conditionswhen the vehicle's speed is approx. 20 km/h(approx. 12 mph) or higher. The function can alsodetect street lighting. When the camera sensorno longer detects an approaching vehicle or avehicle ahead, the headlights will return to highbeams after a second or two.
Activating active high beams
Active high beams can be activated and deacti-vated by turning the lighting ring on the right-side
steering wheel lever to position . The light-
ing ring will then return to . When active
high beams are activated, a white symbolwill be displayed in the instrument panel. Whenhigh beams are on, the symbol will be blue.
If active high beams are deactivated when thehigh beams are on, the headlights will automati-cally switch to low beams.
Limitations for active high beams
The camera sensor on which the function isbased has limitations.
If this symbol and the message ActiveHigh Beam Temporarilyunavailable is displayed in the instru-ment panel, switching between highand low beams must be done manually. The
symbol will go out when the message isdisplayed.
The same applies if this symbol alongwith the message Windscreensensor Sensor blocked, seeOwner's manual is displayed.
Active high beams may be temporarily unavailablein certain situations, e.g. heavy fog or rain. When
2When the low beams are on.
Page 158 of 645
||
LIGHTING
156
active high beams become available again, or thewindshield sensors are no longer blocked, the
message will disappear and the symbol willbe displayed.
WARNING
Automatic high beam is an aid in using thebest possible light based on prevailing condi-tions.
The driver is always responsible for manuallyswitching between high and low beam whentraffic situations or weather conditions requirethis.
Related information
Lighting control and panel (p. 150)
Using high beam (p. 154)
Camera/radar sensor limitations (p. 300)
Using turn signals
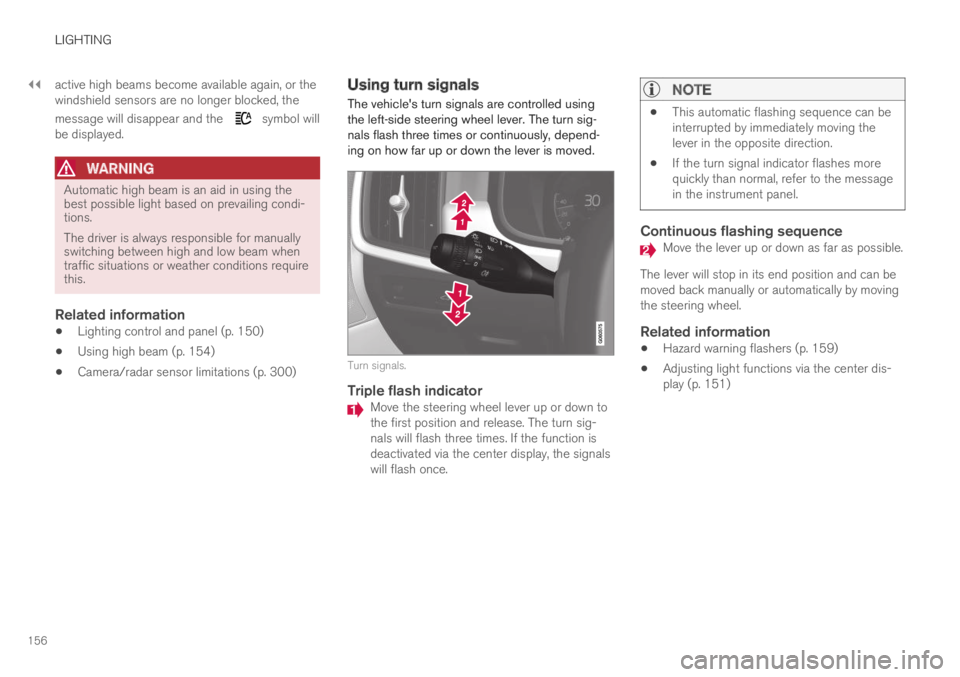
The vehicle's turn signals are controlled usingthe left-side steering wheel lever. The turn sig-nals flash three times or continuously, depend-ing on how far up or down the lever is moved.
Turn signals.
Triple flash indicator
Move the steering wheel lever up or down tothe first position and release. The turn sig-nals will flash three times. If the function isdeactivated via the center display, the signalswill flash once.
NOTE
This automatic flashing sequence can beinterrupted by immediately moving thelever in the opposite direction.
If the turn signal indicator flashes morequickly than normal, refer to the messagein the instrument panel.
Continuous flashing sequence
Move the lever up or down as far as possible.
The lever will stop in its end position and can bemoved back manually or automatically by movingthe steering wheel.
Related information
Hazard warning flashers (p. 159)
Adjusting light functions via the center dis-play (p. 151)
Page 159 of 645

LIGHTING
}}
* Option/accessory.157
Active Bending Lights*
Active Bending Lights (ABL) are designed tohelp provide maximum illumination in curves andintersections. Depending on equipment level,
vehicles with LED3 headlights* may be equippedwith Active Bending Lights.
Headlight pattern with function deactivated (left) andactivated (right).
Active Bending Lights follow the movement ofthe steering wheel to help provide maximum illu-mination in curves and intersections, helping toimprove visibility for the driver.
The function is automatically activated when theengine is started. If a fault is detected in the sys-
tem, the symbol will illuminate in theinstrument panel and a message will be dis-played.
The function is only active in weak daylight ordark conditions and only when the vehicle is mov-ing and the low beams are on.
Deactivating/activating the function
The function is activated as the default factorysetting and can be activated and deactivated inthe center display's Function view:
Tap the Active BendingLights button.
Related information
Adjusting light functions via the center dis-play (p. 151)
Front fog lights/cornering illumination*(p. 157)
Front fog lights/cornering
illumination*
The front fog lights have a stronger beam thanlow beam, making them particularly effective infog.
Front fog lights button.
The front fog lights can be turned on when theignition is in mode II and the lighting ring is in
position , or .
Tap the button to activate or deactivate the func-
tion. The symbol in the instrument panelcomes on when the front fog lights are on.
The front fog lights turn off automatically whenthe ignition is switched off or when the lighting
ring is in position .
3LED (Light Emitting Diode)
Page 160 of 645
||
LIGHTING
* Option/accessory.158
NOTE
Regulations concerning fog light use varyfrom country to country.
Cornering illumination *
The front fog lamps can include the corneringlights function, which temporarily illuminates thearea diagonally in front of the car in the directionthe steering wheel is turned on a sharp bend, orin the direction shown by the direction indicators.
The function is activated in weak daylight or dark
conditions when the lighting ring is in or
mode and the vehicle speed is less thanabout 30 km/h (about 20 mph).
Both cornering illumination are also illuminatedas a complement to the taillights when reversing.
The function is activated as the default factorysetting and can be activated and deactivatedusing the center display.
Related information
Lighting control and panel (p. 150)
Ignition modes (p. 395)
Rear fog light (p. 158)
Active Bending Lights* (p. 157)
Adjusting light functions via the center dis-play (p. 151)
Rear fog light
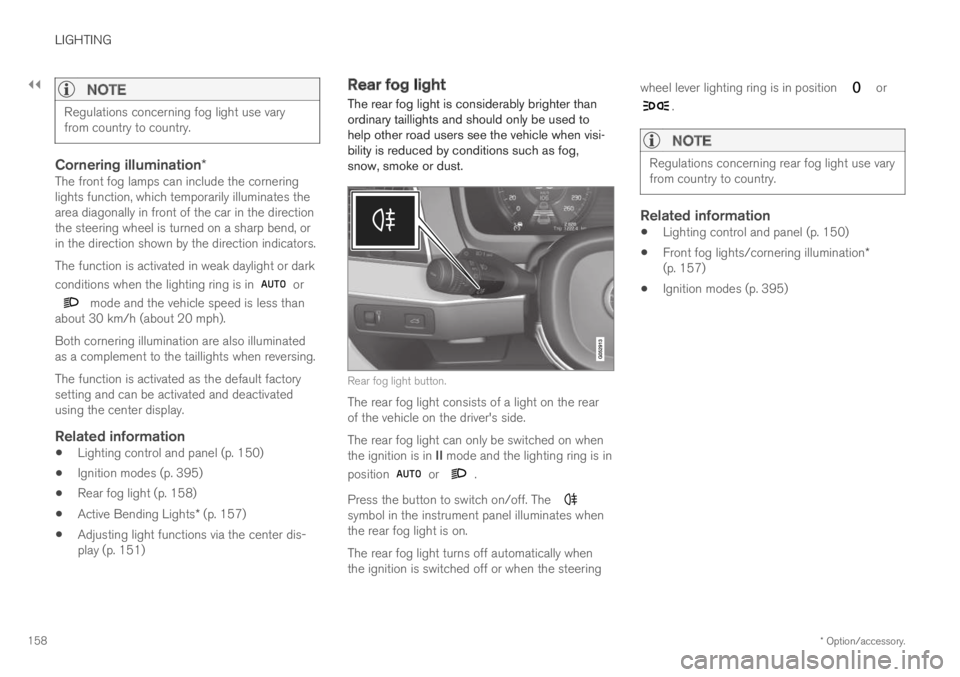
The rear fog light is considerably brighter thanordinary taillights and should only be used tohelp other road users see the vehicle when visi-bility is reduced by conditions such as fog,snow, smoke or dust.
Rear fog light button.
The rear fog light consists of a light on the rearof the vehicle on the driver's side.
The rear fog light can only be switched on whenthe ignition is in II mode and the lighting ring is in
position or .
Press the button to switch on/off. The symbol in the instrument panel illuminates whenthe rear fog light is on.
The rear fog light turns off automatically whenthe ignition is switched off or when the steering
wheel lever lighting ring is in position or
.
NOTE
Regulations concerning rear fog light use varyfrom country to country.
Related information
Lighting control and panel (p. 150)
Front fog lights/cornering illumination*(p. 157)
Ignition modes (p. 395)
Page 161 of 645
LIGHTING
159
Brake lights
The brake lights are automatically illuminatedwhen braking.
The brake lights are illuminated when the brakepedal is depressed and when the brakes areautomatically applied by a driver support system.
Related information
Emergency brake lights (p. 159)
Brake functions (p. 396)
Driver support systems (p. 260)
Emergency brake lights
The emergency brake lights are activated towarn following vehicles of hard braking.
This function causes an additional taillight oneach side of the vehicle to illuminate.
The emergency brake lights are activated in theevent of hard braking or if the ABS system isactivated and the vehicle is traveling at a highspeed.
After the driver decelerates to a low speed andthen releases the brake, the brake lights resumetheir normal brightness.
Related information
Brake lights (p. 159)
Brakes (p. 397)
Hazard warning flashers (p. 159)
Hazard warning flashers
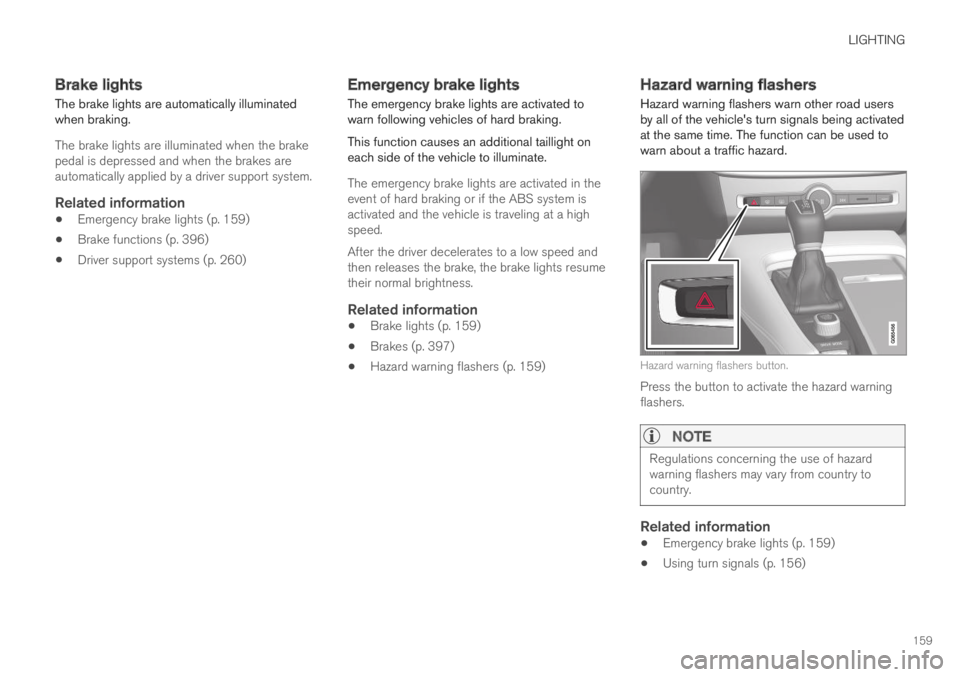
Hazard warning flashers warn other road usersby all of the vehicle's turn signals being activatedat the same time. The function can be used towarn about a traffic hazard.
Hazard warning flashers button.
Press the button to activate the hazard warningflashers.
NOTE
Regulations concerning the use of hazardwarning flashers may vary from country tocountry.
Related information
Emergency brake lights (p. 159)
Using turn signals (p. 156)
Page 162 of 645

LIGHTING
* Option/accessory.160
Using home safe lighting
Some of the exterior lights remain on to illumi-nate the area around the vehicle. This is calledhome safe lighting.
To activate home safe lighting:
1.Switch off the ignition.
2. Push the left-side steering wheel levertoward the dashboard and release.
3. Exit the vehicle and lock the doors.
When the function is activated, a symbol will beshown in the instrument panel and the parkinglights, outer door handle lights* and the licenseplate lights will be illuminated.
The length of time home safe lighting remainsilluminated can be set in the center display.
Related information
Adjusting light functions via the center dis-play (p. 151)
Welcome Light (p. 160)
Welcome Light
Approach lighting is activated when the vehicleis unlocked and can be used to provide light asyou walk toward the vehicle.
The function is activated when the remote key isused for unlocking. The parking lights, outer doorhandle lights*, license plate lights, interior ceilinglights, footwell lighting and trunk/cargo compart-ment lighting will be illuminated. If a door isopened while the function is activated, the light-ing in the outer door handle* and the interiorlighting will remain illuminated for a longer periodof time.
This function can be activated and deactivated inthe center display.
Related information
Adjusting light functions via the center dis-play (p. 151)
Using home safe lighting (p. 160)
Remote key (p. 230)
Interior Lighting
The interior is equipped with several differenttypes of lighting to improve the experience. Thisincludes reading lamps, glove box lighting andground lighting.
All lighting in the passenger compartment can beturned on and off manually within 5 minutesafter:
the engine has been switched off and theignition is in mode 0.
the vehicle is unlocked but the engine hasnot been started.
Front ceiling lighting
The controls in the ceiling console for the front readinglights and courtesy lighting.
Reading light left side
Passenger compartment lighting
Page 163 of 645
LIGHTING
}}
* Option/accessory.161
Courtesy lighting auto switch
Reading light right side
Reading lights
The reading lights on the right and left sides areswitched on and off by briefly pressing the but-tons in the ceiling console. To adjust the bright-ness, press and hold the button.
Passenger compartment lighting
Briefly press the button in the ceiling console toswitch on or off the footwell lighting and ceilinglighting.
Courtesy lighting auto switch
Activate the auto switch by briefly pressing theAUTO button in the ceiling console. With Autoactivated, the indicator light in the button and thecourtesy lighting come on and are turned off asfollows.
Courtesy lighting is switched on when:
the vehicle is unlocked
the vehicle is switched off
a side door is opened
remains on for 2 minutes if any of the sidedoors are open.
Courtesy lighting is switched off when:
the vehicle is locked
the engine is started
a side door is closed.
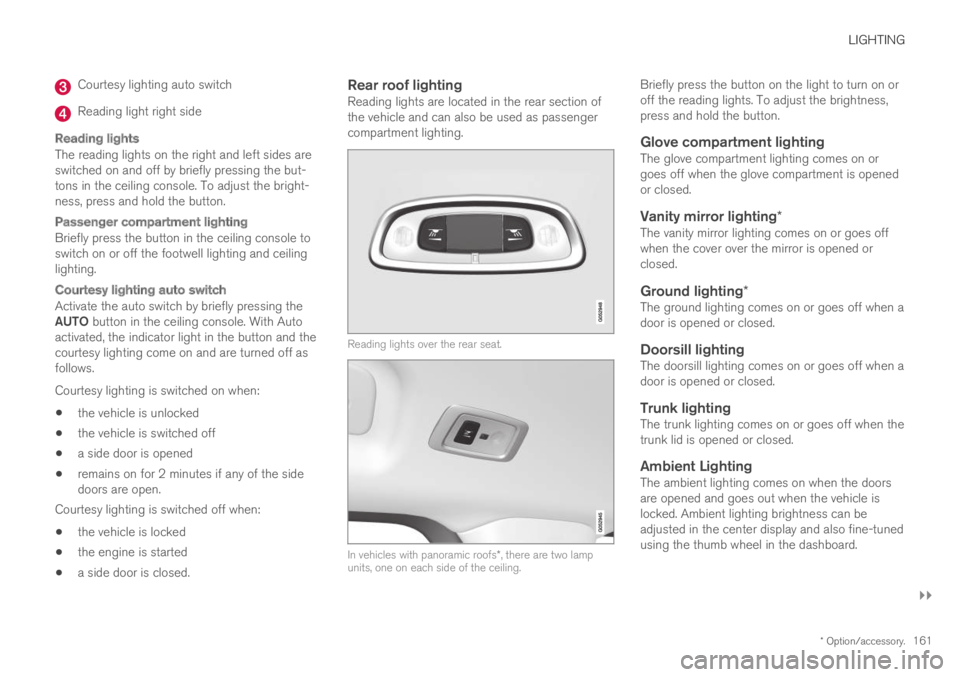
Rear roof lighting
Reading lights are located in the rear section ofthe vehicle and can also be used as passengercompartment lighting.
Reading lights over the rear seat.
In vehicles with panoramic roofs*, there are two lampunits, one on each side of the ceiling.
Briefly press the button on the light to turn on oroff the reading lights. To adjust the brightness,press and hold the button.
Glove compartment lighting
The glove compartment lighting comes on orgoes off when the glove compartment is openedor closed.
Vanity mirror lighting *
The vanity mirror lighting comes on or goes offwhen the cover over the mirror is opened orclosed.
Ground lighting *
The ground lighting comes on or goes off when adoor is opened or closed.
Doorsill lighting
The doorsill lighting comes on or goes off when adoor is opened or closed.
Trunk lighting
The trunk lighting comes on or goes off when thetrunk lid is opened or closed.
Ambient Lighting
The ambient lighting comes on when the doorsare opened and goes out when the vehicle islocked. Ambient lighting brightness can beadjusted in the center display and also fine-tunedusing the thumb wheel in the dashboard.
Page 164 of 645

||
LIGHTING
* Option/accessory.162
Mood lighting *
The vehicle is equipped with LEDs that providefaint lighting in various colors. This lighting is onwhen the engine is running. Mood lighting can beadjusted in the center display and also fine-tunedusing the thumb wheel in the dashboard.
Lighting in the door storage
compartments
Lighting in the door storage compartmentscomes on when the doors are opened and goesout when the vehicle is locked. The brightnesscan be adjusted using the thumb wheel in thedashboard.
Lighting in the tunnel console's front
cup holder
The lighting in front console cup holdersswitches on when the vehicle is unlocked and offwhen the vehicle is locked. The brightness canbe adjusted using the thumb wheel in the dash-board.
Related information
Adjusting interior lighting (p. 162)
Lighting control and panel (p. 150)
Ignition modes (p. 395)
Passenger compartment interior (p. 544)
Adjusting interior lighting
Illumination in the vehicle varies depending onignition mode. The interior lighting can beadjusted with a thumb wheel in the dashboardand certain light functions can also be adjustedvia the center display.
The thumb wheel on the dash-board to the left of the steeringwheel can be used to adjustthe brightness of the displaylighting, instrument lights,ambient lighting and moodlighting*.
Adjust ambient decor lighting
1.Tap Settings in the Top view in the centerdisplay.
2.Tap My CarLights and LightingInterior Lighting.
3. Choose from among the following settings:
Under Ambient Light Intensity, selectOff, Low or High.
Under Ambient Light Level, selectReduced or Full.
Adjusting mood lighting *
The vehicle is equipped with several LEDs thatprovide faint lighting in various colors. This light-ing is on when the engine is running.
Changing the brightness
1.Tap Settings in the Top view in the centerdisplay.
2.Tap My CarLights and Lighting
Interior LightingInterior Mood Lighting.
3.Under Interior Mood Light Intensity, selectOff, Low or High.
Changing the color of the light
1.Tap Settings in the Top view in the centerdisplay.
2.Tap My CarLights and Lighting
Interior LightingInterior Mood Lighting.
3.Choose By Temperature or By Color tochange the color of the light.
If By Temperature is selected, the light willchange according to the temperature set forthe passenger compartment.
If By Color is selected, the subcategoryTheme Colors can be used to make furtheradjustments.
Related information
Interior Lighting (p. 160)
Adjusting light functions via the center dis-play (p. 151)
Ignition modes (p. 395)
Page 166 of 645
WINDOWS, GLASS AND MIRRORS
* Option/accessory.164
Windows, glass and mirrors
The vehicle is equipped with controls for win-dows, glass and mirrors. Some of the windowsin the car are laminated.
Laminated glass
The windshield has laminated glass. Laminatedglass is also available as on option for someother glass surfaces. Laminated glass is rein-forced, which provides better protection againstbreak-ins and improved soundproofing in thepassenger compartment.
The panoramic roof* also has laminated glass.
The symbol shows the windows containing laminatedglass1
Related information
Pinch protection for windows and sun cur-tains (p. 164)
Panoramic roof* (p. 170)
Power windows (p. 165)
Rearview/door mirrors (p. 168)
Using sun curtains* (p. 167)
Head-up display* (p. 140)
Using the windshield wipers (p. 175)
Using the windshield and headlight washers(p. 177)
Activating and deactivating the heated rearwindow and door mirrors (p. 213)
Pinch protection for windows andsun curtains
All power windows and sun curtains* have apinch protection function that is triggered if any-thing blocks them while they are opening orclosing.
If pinch protection is activated, movement willstop and then retract automatically to approx.50 mm (2 inches) from the point at which it wasblocked (or to full ventilation position).
It is still possible to override pinch protectionwhen closing is interrupted (e.g. due to ice) bypressing and holding down the control in thesame direction.
If there is any problem with the pinch protection,a rest procedure can be tested.
WARNING
If the starter battery is disconnected, the func-tion for automatic opening and closing mustbe reset to function correctly. A reset isrequired in order for the pinch protection towork.
Related information
Reset procedure for pinch protection(p. 165)
Operating the power windows (p. 166)
1Does not apply to windshield and panoramic roof*, which are always laminated and therefore do not have this symbol.