light VOLVO S60 TWIN ENGINE 2019 User Guide
[x] Cancel search | Manufacturer: VOLVO, Model Year: 2019, Model line: S60 TWIN ENGINE, Model: VOLVO S60 TWIN ENGINE 2019Pages: 645, PDF Size: 13.96 MB
Page 82 of 645
DISPLAYS AND VOICE CONTROL
* Option/accessory.80
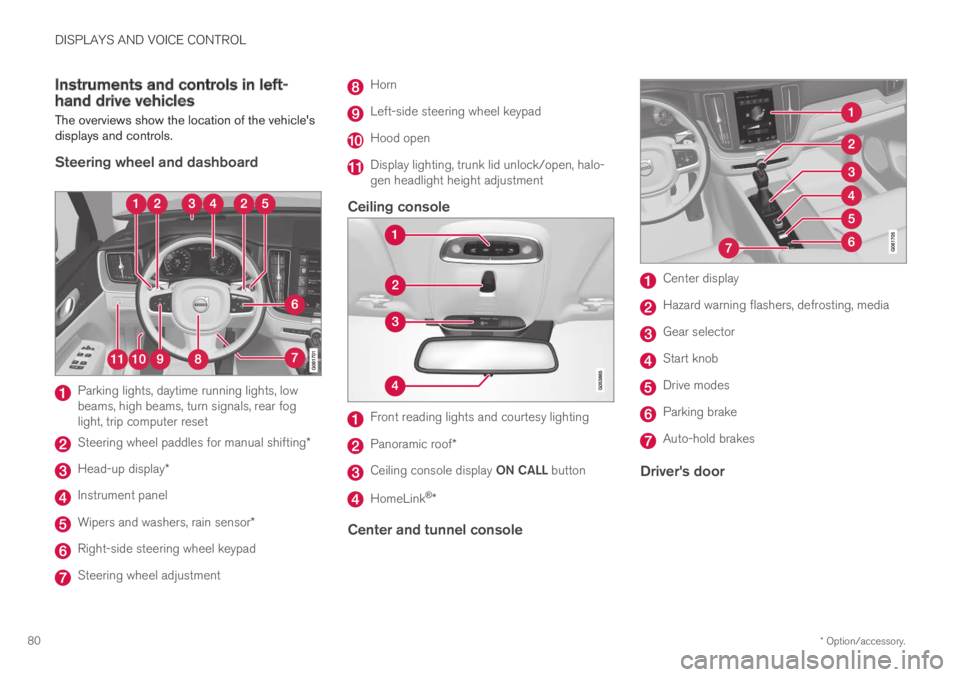
Instruments and controls in left-hand drive vehicles
The overviews show the location of the vehicle'sdisplays and controls.
Steering wheel and dashboard
Parking lights, daytime running lights, lowbeams, high beams, turn signals, rear foglight, trip computer reset
Steering wheel paddles for manual shifting*
Head-up display*
Instrument panel
Wipers and washers, rain sensor*
Right-side steering wheel keypad
Steering wheel adjustment
Horn
Left-side steering wheel keypad
Hood open
Display lighting, trunk lid unlock/open, halo-gen headlight height adjustment
Ceiling console
Front reading lights and courtesy lighting
Panoramic roof*
Ceiling console display ON CALL button
HomeLink®*
Center and tunnel console
Center display
Hazard warning flashers, defrosting, media
Gear selector
Start knob
Drive modes
Parking brake
Auto-hold brakes
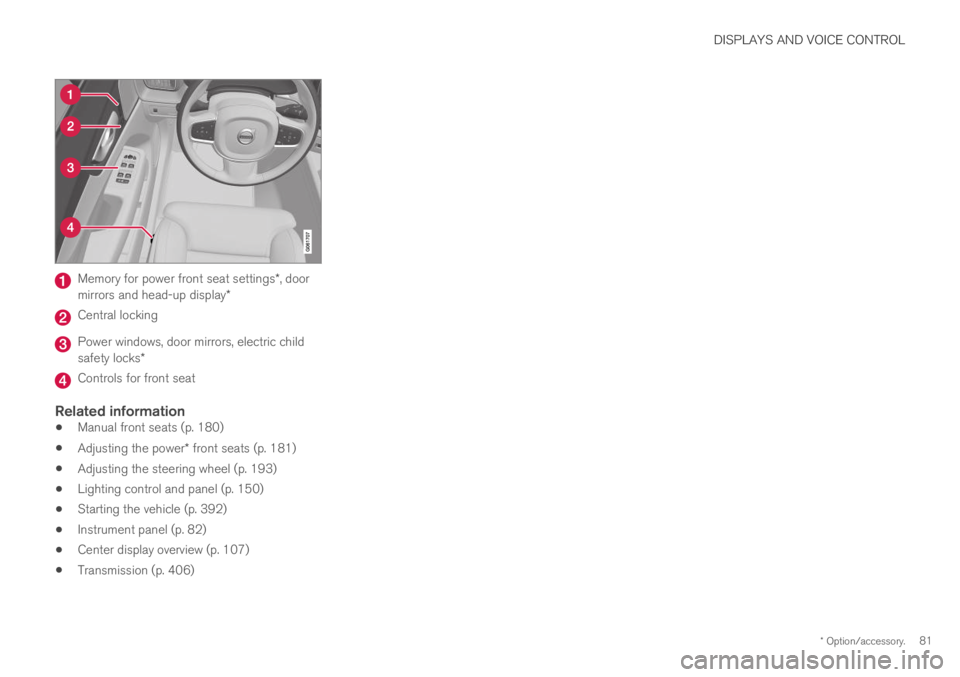
Driver's door
Page 83 of 645
DISPLAYS AND VOICE CONTROL
* Option/accessory.81
Memory for power front seat settings*, doormirrors and head-up display*
Central locking
Power windows, door mirrors, electric childsafety locks*
Controls for front seat
Related information
Manual front seats (p. 180)
Adjusting the power* front seats (p. 181)
Adjusting the steering wheel (p. 193)
Lighting control and panel (p. 150)
Starting the vehicle (p. 392)
Instrument panel (p. 82)
Center display overview (p. 107)
Transmission (p. 406)
Page 87 of 645

DISPLAYS AND VOICE CONTROL
}}
85
Fuel gauge
The fuel gauge in the instrument panel showsthe fuel level in the tank.
The beige area in the fuel gauge indicates theamount of fuel left in the tank.
When the fuel level is low and it is time to refuel,the fuel pump symbol will illuminate with anamber-colored light. The trip computer also indi-cates the approximate distance driven on the fuelremaining in the tank.
Related information
Instrument panel (p. 82)
Hybrid battery gauge (p. 86)
Refueling (p. 426)
Fuel tank volume (p. 622)
Hybrid gauge
In Hybrid and Pure drive modes, the instrumentpanel will display a hybrid gauge, which can helpthe driver achieve optimal driving economy.
The hybrid gauge shows the ratio between theelectric motor's current power consumption andthe remaining available power. This information isshown in various ways.
Symbols in the hybrid gauge
Indicates the current available powerfrom the electric motor. A solid symbolindicates that the electric motor isbeing used.
A hollow symbol indicates that theelectric motor is not being used.
Indicates the power level when theinternal combustion engine starts. Asolid symbol indicates that the internalcombustion engine is being used.
Indicates the power level when theinternal combustion engine will start. Ahollow symbol indicates that the inter-nal combustion engine is not beingused.
Indicates that the hybrid battery isbeing charged, e.g. by lightly pressingthe brake pedal.
Driver-requested power
The hybrid gauge displays the amount of powerrequested (utilized) by the driver through pres-sure on the accelerator pedal. The higher thereading on the scale, the more power utilized inthe current gear. The mark between the lightningsymbol and the drop symbol indicates the pointat which the combustion engine will start.
Page 88 of 645

||
DISPLAYS AND VOICE CONTROL
86
For example:
The vehicle has been started, but is stationary and nopower is being requested.
The electric motor cannot supply the requested powerand the internal combustion engine will start.
The vehicle is generating current to recharge the battery,e.g. during light braking or engine braking on a down-slope.
Related information
Drive modes (p. 412)
Instrument panel (p. 82)
Brakes (p. 397)
Starting and stopping the combustion enginein Twin Engine vehicles (p. 411)
Hybrid battery gauge
The hybrid battery gauge shows how much cur-rent is left in the hybrid battery.
The current in the hybrid battery is used to powerthe electric motor, but can also be used to heator cool the vehicle. The trip computer calculatesan approximate driving distance with the remain-ing current in the hybrid battery.
Page 93 of 645
DISPLAYS AND VOICE CONTROL
91
Trip statistics settings
Trip statistics settings can be reset or adjusted.
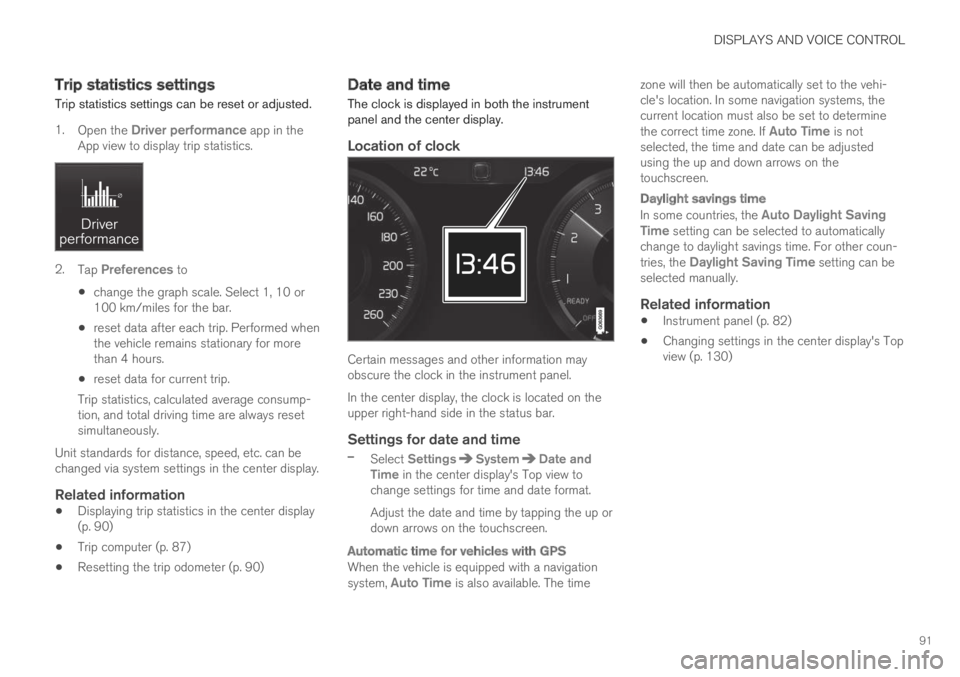
1.Open the Driver performance app in theApp view to display trip statistics.
2.Tap Preferences to
change the graph scale. Select 1, 10 or100 km/miles for the bar.
reset data after each trip. Performed whenthe vehicle remains stationary for morethan 4 hours.
reset data for current trip.
Trip statistics, calculated average consump-tion, and total driving time are always resetsimultaneously.
Unit standards for distance, speed, etc. can bechanged via system settings in the center display.
Related information
Displaying trip statistics in the center display(p. 90)
Trip computer (p. 87)
Resetting the trip odometer (p. 90)
Date and time
The clock is displayed in both the instrumentpanel and the center display.
Location of clock
Certain messages and other information mayobscure the clock in the instrument panel.
In the center display, the clock is located on theupper right-hand side in the status bar.
Settings for date and time
–Select SettingsSystemDate andTime in the center display's Top view tochange settings for time and date format.
Adjust the date and time by tapping the up ordown arrows on the touchscreen.
Automatic time for vehicles with GPS
When the vehicle is equipped with a navigationsystem, Auto Time is also available. The time
zone will then be automatically set to the vehi-cle's location. In some navigation systems, thecurrent location must also be set to determinethe correct time zone. If Auto Time is notselected, the time and date can be adjustedusing the up and down arrows on thetouchscreen.
Daylight savings time
In some countries, the Auto Daylight SavingTime setting can be selected to automaticallychange to daylight savings time. For other coun-tries, the Daylight Saving Time setting can beselected manually.
Related information
Instrument panel (p. 82)
Changing settings in the center display's Topview (p. 130)
Page 95 of 645

DISPLAYS AND VOICE CONTROL
}}
93
SymbolMeaning
A
B
Fault in ABS system
If this symbol is illuminated, theABS system is malfunctioning. Thevehicle's regular brakes will stillwork, but without the ABS function.
A
B
Auto-brake on
This symbol illuminates when thefunction is activated and the brakesor parking brakes are being used.The brakes hold the vehicle at astandstill after it has stopped.
SymbolMeaning
Tire pressure system
This symbol illuminates to indicatelow tire pressure. If there is a faultin the tire pressure system, thesymbol will first flash for approxi-mately 1 minute and then glowsteadily. This may occur if the sys-tem cannot detect or alert thedriver of low tire pressure asintended.
Emission control system
If this symbol illuminates after star-ting the engine, it could indicate afault in the vehicle's emission con-trol system. Have the vehiclechecked by a workshop. Volvo rec-ommends contacting an authorizedVolvo workshop.
Left/right turn signals
These symbols flash when the turnsignals are used.
SymbolMeaning
Parking lights
This symbol illuminates when theparking lights are on.
Fault in headlight system
This symbol illuminates if a faulthas been detected in the ABL(Active Bending Lights) function oranother fault in the headlight sys-tem.
Active high beams on
This symbol lights up in blue whenthe active high beams are on.
Active high beams off
This symbol lights up in white whenthe active high beams are off.
High beams on
This symbol illuminates when thehigh beams are on or flashed.
Active high beams on
This symbol lights up in blue whenthe active high beams are on. Park-ing lights are on.
Page 96 of 645

||
DISPLAYS AND VOICE CONTROL
94
SymbolMeaning
Active high beams off
This symbol lights up in white whenthe active high beams are off.Parking lights are on.
High beams on
This symbol illuminates when thehigh beams and parking lights areon.
Rear fog light on
This symbol illuminates when therear fog light is on.
Rain sensor on
This symbol illuminates when therain sensor is on.
Preconditioning on
This symbol illuminates when theengine block/passenger compart-ment heater or air conditioning arepreconditioning the vehicle.
Stability system
This symbol flashes when the sta-bility system is actively working tostabilize the vehicle. If the symbolglows steadily, there is a fault inthe system.
SymbolMeaning
Stability system, Sport mode
This symbol illuminates when Sportmode is activated. Sport modeoffers a more active driving experi-ence.
Lane Keeping Aid
White symbol: Lane Keeping Aid ison and lane marker lines aredetected.
Gray symbol: Lane Keeping Aid ison but no lane marker lines aredetected.
Amber-colored symbol: Lane Keep-ing Aid is alerting/intervening.
Lane Keeping Aid and rain sen-sor
White symbol: Lane Keeping Aid ison and lane marker lines aredetected. The rain sensor is on.
Gray symbol: Lane Keeping Aid ison but no lane marker lines aredetected. The rain sensor is on.
ACanadian models.BUS models.
Related information
Instrument panel (p. 82)
Warning symbols in the instrument panel(p. 95)
Page 112 of 645
DISPLAYS AND VOICE CONTROL
110
Handling the center display
Many of the vehicle's functions and features canbe controlled and adjusted from the center dis-play. The center display is a touchscreen thatreacts to taps and other gestures.
Using the center display's touchscreen
The touchscreen reacts differently depending onwhether the user taps, drags or swipes thescreen. It is possible to e.g. move between differ-
ent views, mark objects, scroll in a list and moveapps by touching the screen in various ways.
An infrared light curtain just above the surface ofthe screen enables the screen to detect when afinger is directly in front of the screen. This tech-nology makes it possible to use the screen evenwhile wearing gloves.
Two people can interact with the screen at thesame time, e.g. to adjust climate system settingsfor both the driver and passenger sides.
CAUTION
Do not use sharp objects on the screen asthis could cause scratches.
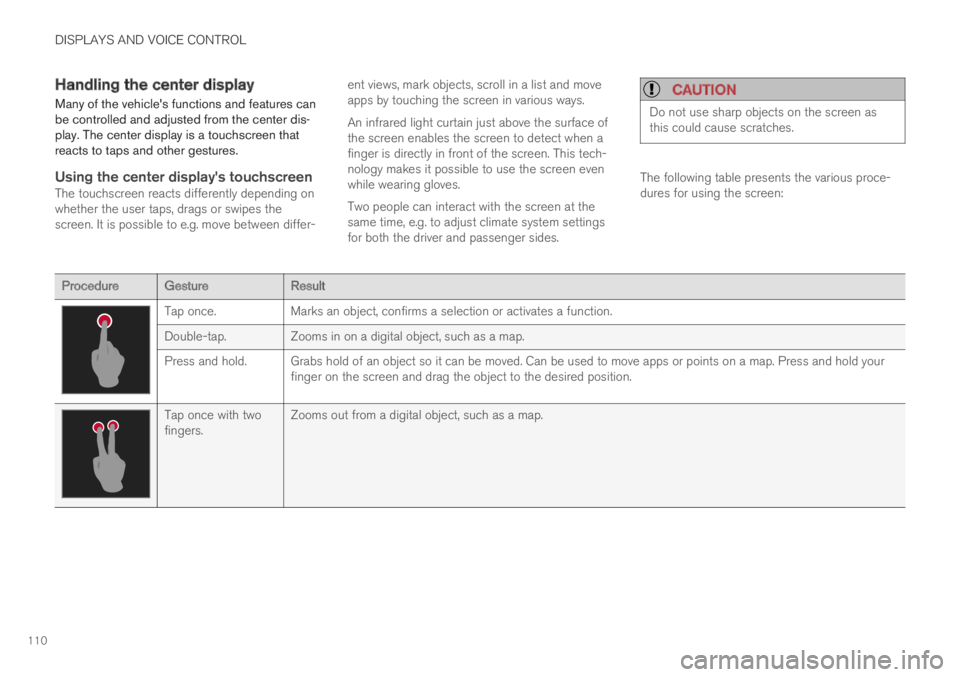
The following table presents the various proce-dures for using the screen:
ProcedureGestureResult
Tap once.Marks an object, confirms a selection or activates a function.
Double-tap.Zooms in on a digital object, such as a map.
Press and hold. Grabs hold of an object so it can be moved. Can be used to move apps or points on a map. Press and hold yourfinger on the screen and drag the object to the desired position.
Tap once with twofingers.Zooms out from a digital object, such as a map.
Page 122 of 645
DISPLAYS AND VOICE CONTROL
120
Function view in the center display
Function view, which is one of the center dis-play's basic views, contains all of the vehicle'sfunction buttons. From the Home view, navigate
to Function view by swiping from left to right
over the screen8.
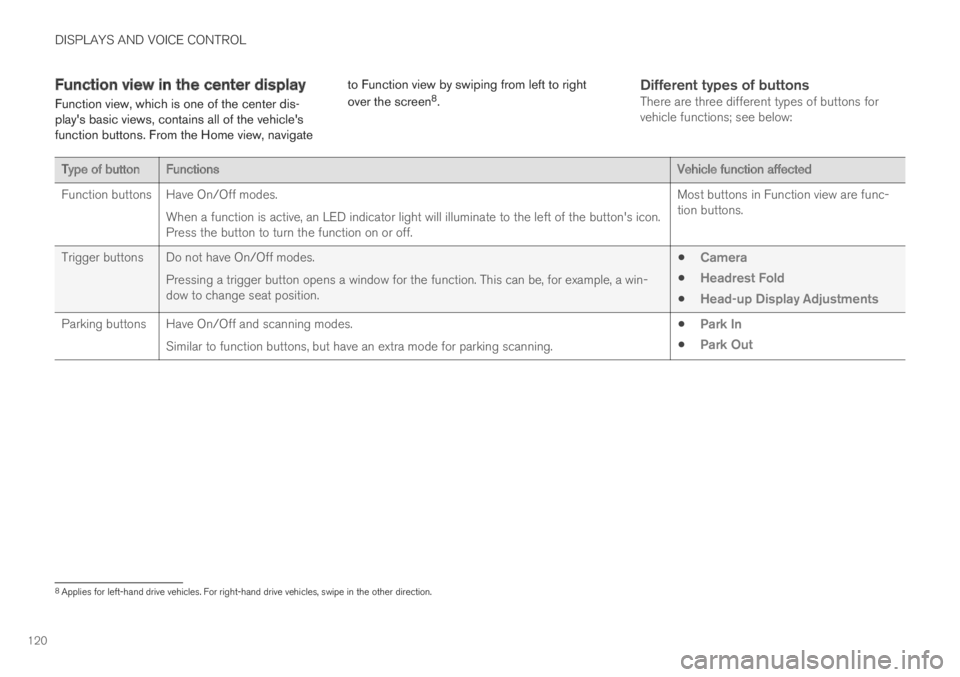
Different types of buttons
There are three different types of buttons forvehicle functions; see below:
Type of buttonFunctionsVehicle function affected
Function buttonsHave On/Off modes.
When a function is active, an LED indicator light will illuminate to the left of the button's icon.Press the button to turn the function on or off.
Most buttons in Function view are func-tion buttons.
Trigger buttons Do not have On/Off modes.
Pressing a trigger button opens a window for the function. This can be, for example, a win-dow to change seat position.
Camera
Headrest Fold
Head-up Display Adjustments
Parking buttons Have On/Off and scanning modes.
Similar to function buttons, but have an extra mode for parking scanning.
Park In
Park Out
8Applies for left-hand drive vehicles. For right-hand drive vehicles, swipe in the other direction.
Page 123 of 645
DISPLAYS AND VOICE CONTROL
121
Button modes
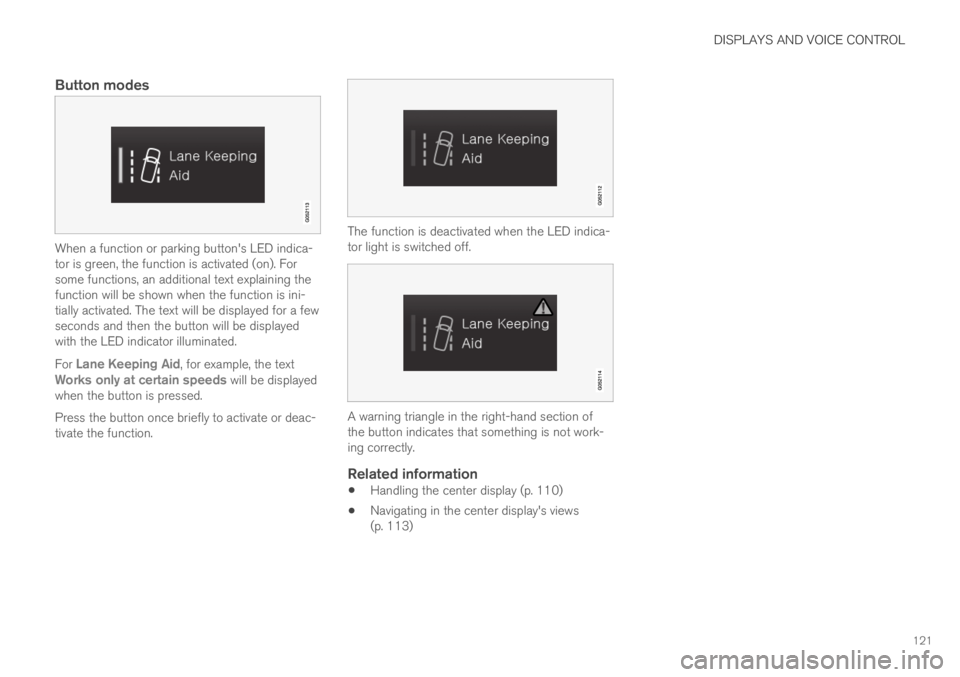
When a function or parking button's LED indica-tor is green, the function is activated (on). Forsome functions, an additional text explaining thefunction will be shown when the function is ini-tially activated. The text will be displayed for a fewseconds and then the button will be displayedwith the LED indicator illuminated.
For Lane Keeping Aid, for example, the textWorks only at certain speeds will be displayedwhen the button is pressed.
Press the button once briefly to activate or deac-tivate the function.
The function is deactivated when the LED indica-tor light is switched off.
A warning triangle in the right-hand section ofthe button indicates that something is not work-ing correctly.
Related information
Handling the center display (p. 110)
Navigating in the center display's views(p. 113)