window VOLVO S60 TWIN ENGINE 2019 Workshop Manual
[x] Cancel search | Manufacturer: VOLVO, Model Year: 2019, Model line: S60 TWIN ENGINE, Model: VOLVO S60 TWIN ENGINE 2019Pages: 645, PDF Size: 13.96 MB
Page 416 of 645

||
STARTING AND DRIVING
414
This drive mode is optimized for maximum drivingdistance with electric propulsion and is primarilyintended for use in city driving. Pure helps pro-vide the lowest possible consumption even whenthe hybrid battery is fully discharged. ECO climateis activated to control the climate in the passen-ger compartment, and in slippery road conditionsslightly more wheel spin may be permitted beforeall-wheel drive is automatically activated.
ECO Climate
In Pure mode, ECO climate is automatically acti-vated in the passenger compartment to helpreduce energy consumption.
NOTE
When the Pure drive mode is activated, set-tings for certain climate system and electricityconsuming functions are reduced. Some ofthese settings can be reset manually, but fullfunctionality will only be restored by leavingPure mode or adapting the Individual drivemode to full climate system functionality.
If condensation forms on the windows, tap themax defroster button, which will function normally.
Constant AWD
Improves the vehicle's traction and handlingby increasing all-wheel drive.
This drive mode locks the vehicle in all-wheeldrive. An optimal distribution between front andrear axle torque helps provide the best possible
control, stability and traction, e.g. on slipperyroads or when towing a heavy trailer or anothervehicle. The Constant AWD drive mode isalways available regardless of the hybrid battery'scharge status.
Both the combustion engine and the electricmotor are engaged to enable all-wheel drive,which results in higher fuel consumption.
In the other drive modes, the vehicle automati-cally adapts the need for all-wheel drive accord-ing to the road surface, and can activate the elec-tric motor or start the combustion engine as nee-ded.
Power
The vehicle gets sportier driving characteris-tics and a faster acceleration response.
This drive mode maximizes the combined powerfrom the combustion engine and the electricmotor by providing power to both the front andrear wheels. Gear shifting will be faster and moredistinct and the transmission will prioritize gearswith a higher traction force. Steering response isfaster and suspension is stiffer.
Both the combustion engine and the electricmotor are engaged to enable all-wheel drive,which results in higher fuel consumption.
This drive mode is optimized for maximum per-formance and throttle response. It changes thethrottle response, gear shifting program andturbo boost system. Chassis settings and steer-ing and brake response are also optimized. The
Power drive mode is always available regardlessof the hybrid battery's charge status.
Page 423 of 645

STARTING AND DRIVING
}}
* Option/accessory.421
Driving
Choose the Pure drive mode to help mini-mize electric power consumption.
Maintain a steady speed and a generous fol-lowing distance to traffic ahead to minimizebraking. This drive mode has the lowestpower consumption.
Balance energy requirements using theaccelerator pedal. Use the indicator on theinstrument panel to see available electricpower and avoid starting the combustionengine unnecessarily. The electric motor ismore effective than the combustion engine,especially at low speeds.
When braking is necessary, brake gentlyusing the brake pedal. This will help rechargethe hybrid battery. A regenerative function isintegrated in the brake pedal and can beaugmented by the electric motor's brakingcapacity when the gear selector is in modeB.
Higher speeds increase energy consumption- air resistance increases with speed.
Activate the Hold function in the Functionview at high speeds when traveling fartherthan is possible using the hybrid battery'scapacity.
Whenever possible, avoid using the Chargefunction to charge the hybrid battery. Charg-ing the battery using the combustion engine
increases fuel consumption and carbon diox-ide emissions.
In a cold climate, reduce heating of the wind-shield/rear window, mirrors, seats and thesteering wheel.
Maintain the correct pressure in the tires andcheck pressure regularly.
The type of tires used could affect energyconsumption - consult a retailer for advice onsuitable tires.
Remove unnecessary items from the vehicle- the heavier the load, the higher the fuelconsumption.
Roof loads increase air resistance andincrease fuel consumption. Remove roofboxes, ski racks, etc. that are not in use.
Avoid driving with the windows open.
Do not keep the vehicle still on an upwardgradient by using the accelerator pedal. Usethe brakes instead.
Related information
Drive-E ‒ purer driving pleasure (p. 27)
Energy distribution in hybrid mode using mapdata* (p. 417)
Factors affecting electric motor range(p. 421)
Hybrid gauge (p. 85)
Checking tire pressure (p. 519)
Factors affecting electric motorrange
A number of factors affect the electric motor'sdriving range. The ability to achieve a long driv-ing range varies according to the outside condi-tions and to how the vehicle is driven.
The certified value for the distance that can bedriven using the electric motor should not beconsidered an expected driving range. The actualrange is dependent on a number of factors.
Factors affecting driving range
The driver can influence some factors affectingdriving range, but not all.
The longest range is achieved under very favora-ble conditions when all factors positively influ-ence range.
Page 464 of 645

||
AUDIO, MEDIA AND INTERNET
* Option/accessory.462
Search
Tap the magnifying glass to display a screenwhere you can enter text using the center dis-play's keyboard or by writing in the free-text fieldto search for e.g., a station number, an artist,song title, etc.
Channels
Tap to display a complete list of the channelsincluded in your subscription. Tap a channelname to listen. If a subscription to a channel hasexpired, its name will be grayed-out on thescreen.
For quick access to a channel that you often lis-ten to, tap the star to the right of the channel'sname. It will then be added to your list of favor-ites.
Favorites
Tap to display the channels that you have addedto this list. Tap a channel name to listen.
Categories/Genres
Tap to display the categories available. Tap a cat-egory or genre name to display the channels thatit contains and then tap a channel to listen.
If you have activated alerts (see the “Alerts” sec-tion below) and an alert is activated for an artist,song or team, temporary virtual categories willalso be created and displayed. The channels cur-rently broadcasting the song, artist or broadcast-ing a program with the selected team will be lis-ted in a virtual category.
EPG (Electronic Program Guide)
On the center display's Home view, tap EPG forinformation about e.g., when a program is beingbroadcast and its name, description, artist, etc. Ifno information is currently available, Noinformation will be displayed.
Alerts
If this feature has been selected under SiriusXMSettings, the Alerts button will be displayed onthe Home view.
To add e.g. an artist's name, song title or a sportsteam to the list of alerts:
1.Tune to a channel that is broadcasting asong, game, etc., of your choice.
2.Tap the Alerts button.
3.A pop-up window will be displayed showing alist of alerts (nothing will be displayed if theselected channel does not support the alertfunction).
4. Select one of the alternatives in list (only onecan be selected at a time).
5. The song/artist/team will now be added tothe list of alerts. Favorite sports teams canalso be added to the list using “Game Alert”in the SiriusXM satellite radio settings.
> When your choice is being broadcast on achannel, you will be informed by a pop-up.
iTunes tagging
From the center display's Top view, tap SiriusXMSettings. Tap the iTunes Tagging menu. Tapthe iTunes Tagging box to activate/deactivatethis function and tap Close to return to Homeview. Tap Tags List to display a list of all taggedsongs.
If the function is activated, the iTunes tag buttonwill be displayed in Home view. If a song is playedthat you would like to buy in the iTunes store, tapthis button while the song is playing to tag it. If asong with iTunes Tagging information is availa-ble, the button will be selectable. Tap the buttonto tag the song. If you would like to buy a taggedsong via iTunes, Tap the iTunes tag button.
To buy a song in iTunes, begin by connecting aniPhone/iPod/iPad to the USB port in the tunnelconsole. The iTunes tagging list will automaticallybe transferred to the device and removed fromthe list in the vehicle. If the device is connectedwhen a song is tagged, the data will automaticallybe saved in the device. To purchase the song,consult the iTunes support page.
Related information
SiriusXM® Satellite radio* (p. 460)
Entering characters, letters and words byhand in the center display (p. 127)
Settings for SiriusXM® Satellite radio*(p. 463)
Page 482 of 645
||
AUDIO, MEDIA AND INTERNET
* Option/accessory.480
5. Tap the desired app.
> The app will start up.
Starting CarPlay
CarPlay can be started as follows after an iOSdevice is connected.
1. Connect an iOS device to the USB port. Ifthere are two USB ports, use the one withthe white frame.
>If the auto start setting is selected -the name of the device will be displayed.
2. Tap the name of the device – the CarPlay tilewill open and compatible apps will be dis-played.
3.If the CarPlay tile does not open, tap AppleCarPlay in App view.
>The CarPlay tile will open and compatibleapps will be displayed.
4. Tap the desired app.
> The app will start up.
CarPlay will run in the background if another appis started in the same tile. To display CarPlay inthe tile, tap the CarPlay icon in App view.
Switching connection between CarPlay
and iPod
CarPlay to iPod
1.Tap Settings in the Top view.
2.Proceed to CommunicationAppleCarPlay.
3.Uncheck the box for the iOS device thatshould no longer start CarPlay automaticallywhen the USB cable is connected.
4. Remove and then reinsert the iOS deviceinto the USB port.
5.Open the iPod app from App view.
iPod to CarPlay
1.Tap Apple CarPlay in App view.
2.Read the information in the pop-up windowand then tap OK.
3.Remove and then reinsert the iOS deviceinto the USB port.
> The Apple CarPlay tile will open and com-
patible apps will be displayed7.
Related information
Connecting a device via the USB port(p. 477)
Apple® CarPlay®* (p. 479)
Settings for Apple® CarPlay®* (p. 480)
Connecting the vehicle to the Internet via aphone (Wi-Fi) (p. 495)
Connecting the vehicle to the Internet viavehicle modem (SIM card) (p. 496)
Voice control (p. 143)
Settings for Apple® CarPlay®*
Settings for an iOS device connected through
CarPlay8.
Automatic start
1.Tap Settings in the Top view.
2.Tap CommunicationApple CarPlay andselect the desired setting:
Check the box - CarPlay will start auto-matically when the USB cable is con-nected.
Uncheck the box - CarPlay will not startautomatically when the USB cable is con-nected.
A maximum of 20 iOS devices can be stored inthe list, which may be worth noting if many peo-ple share the vehicle, e.g. in a car pool. When thelist is full and a new device is connected, the old-est one will be deleted.
To delete the list, the settings must be rest in thecenter display (factory reset).
System Volumes
1.Tap Settings in the Top view.
7Apple, CarPlay, iPhone and iPod are registered trademarks of Apple Inc.
Page 488 of 645
||
AUDIO, MEDIA AND INTERNET
486
Option 1 - searching for the phone from
the vehicle
1. Make the phone discoverable/visible usingits Bluetooth function.
2. Open the phone tile in the center display.
If no phone has been paired to the vehi-cle, tap Add phone.
If a phone has been paired to the vehicle,
tap Change. Tap Add phone in thepop-up window.
>A list of available Bluetooth devices will bedisplayed. The list will be updated as newdevices are discovered.
3. Tap the name of the phone you would like toconnect.
4. Make sure that the code displayed in thevehicle matches the one in the phone. If itdoes, confirm the code in both places.
5. In the phone, accept or cancel the optionsfor selecting the phone's contacts and textmessages.
NOTE
The message function must be activatedin certain phones.
Not all cell phones are fully compatibleand may not be able to display contactsand messages in the vehicle.
Option 2 - searching for the vehicle
from the phone
1. Open the phone tile in the center display.
If no phone has been paired to the vehi-
cle, tap Add phoneMake vehiclediscoverable.
If a phone has been paired to the vehicle,
tap Change. Tap Add phoneMake vehicle discoverable in the pop-up window.
2. Activate Bluetooth in the phone.
3. Search in the phone for Bluetooth devices.
> A list of available Bluetooth devices will bedisplayed.
4. Select the vehicle's name from the list ofdevices in the phone.
5. A pop-up window for the connection isshown in the car. Confirm the connection.
6. Make sure that the code displayed in thevehicle matches the one shown in the exter-nal device. If it does, confirm the code in bothplaces.
7. In the phone, accept or cancel the optionsfor selecting the phone's contacts and textmessages.
NOTE
The message function must be activatedin certain phones.
Not all cell phones are fully compatibleand may not be able to display contactsand messages in the vehicle.
NOTE
If the phone's operating system is beingupdated, it is possible that the connection willbe interrupted. Delete the phone from the carand reconnect.
Compatible phones
Many cellular phones on the market currentlyoffer wireless Bluetooth technology, but not allphones are fully compatible with the vehicle.
Related information
Phone (p. 484)
Connecting a phone to the car via Bluetoothautomatically (p. 487)
Connecting a phone to the car via Bluetoothmanually (p. 488)
Disconnecting a Bluetooth-connected phone(p. 488)
Switch between phones connected via Blue-tooth (p. 488)
Page 497 of 645
AUDIO, MEDIA AND INTERNET
}}
* Option/accessory.495
Connecting the vehicle to theInternet via a Bluetooth-connectedphone
Establish an Internet connection using Bluetoothand tethering from a phone and get access tomultiple connected services in your vehicle.
1. To connect the vehicle to the Internet via aBluetooth-connected phone, the phone mustfirst be paired with the vehicle via Bluetooth.
2.Make sure that the phone supports Internetsharing (tethering) and that the function isactivated. In an iPhone, the function is called"personal hotspot". In Android phones, thefunction can have different names, but isoften called "hotspot". For iPhone phones,the "personal hotspot" menu page must alsobe open until the Internet connection hasbeen made.
3. If the phone has been connected via Blue-tooth previously, tap Settings in the centerdisplay's Top view.
4.Tap CommunicationBluetoothDevices.
5.Mark the window for Bluetooth Internetconnection under the heading Internetconnection.
6.If a different connection is being used, con-firm the connection change.
> Your vehicle is now connected to theInternet via your Bluetooth-connectedphone.
NOTE
The cellular phone and network operatormust support tethering (sharing of Internetconnection) and the subscription mustinclude data traffic.
NOTE
When using Apple CarPlay, it is only possibleto connect the vehicle to the Internet usingWi-Fi or the vehicle's modem.
Related information
Internet-connected vehicle* (p. 494)
Connecting the vehicle to the Internet viavehicle modem (SIM card) (p. 496)
Connecting a phone to the car via Bluetoothfor the first time (p. 485)
Connecting the vehicle to the Internet via aphone (Wi-Fi) (p. 495)
Apple® CarPlay®* (p. 479)
No or poor Internet connection (p. 498)
Settings for Bluetooth devices (p. 493)
Connecting the vehicle to theInternet via a phone (Wi-Fi)
Establish an Internet connection using Wi-Fithrough Internet sharing (tethering) from a phoneand get access to the connected services inyour vehicle.
1. Make sure that the phone supports Internetsharing (tethering) and that the function isactivated. In an iPhone, the function is called"personal hotspot". In Android phones, thefunction can have different names, but isoften called "hotspot". For iPhone phones,the "personal hotspot" menu page must alsobe open until the Internet connection hasbeen made.
2.Tap Settings in the Top view.
3.Proceed to CommunicationWi-Fi.
4. Activate/deactivate by tapping to check/uncheck the Wi-Fi box.
5. If a different connection is being used, con-firm the connection change.
6. Tap the name of the network you would liketo connect.
7. Enter the network password.
> The vehicle will connect to the network.
Please note that certain cellular phones will disa-ble Internet sharing (tethering) when the connec-tion to the vehicle has been broken, e.g. when the
Page 502 of 645

AUDIO, MEDIA AND INTERNET
500
Terms of use and data sharing
The first time certain services and apps arestarted, a pop-up window with the headingTerms and conditions and Data sharing mayopen.
The aim is to inform the user about Volvo's termsof use and data sharing policy. By accepting datasharing, the user accepts that certain informationwill be sent from the vehicle. This is required forcertain services and apps to work with full func-tionality.
The data sharing function for connected servicesand apps is deactivated by default. For certainconnected services and apps in the vehicle towork, data sharing must be activated. Data shar-ing can be set from the center display's Settingsmenu.
NOTE
Settings for privacy and data sharing areunique for each driver profile.
Related information
Activating and deactivating data sharing(p. 500)
Activating and deactivating datasharing
Data sharing for relevant services and apps canbe set via the Settings menu in the center dis-play.
1.Tap Settings in the Top view in the centerdisplay.
2.Tap SystemPrivacy and data.
3. Select to activate or deactivate data sharingfor individual services and all apps.
If data sharing for a connected service or down-loaded apps is not activated, this can be donewhen they are started in the center display. If thisis the first time that a service is started, or e.g.after a factory reset or certain software updates,Volvo's terms and conditions for connected serv-ices must be accepted. Note that data sharingwill then also be activated for other services orapps that sharing has already been accepted for.
NOTE
After visiting a Volvo workshop, you may needto reactivate data sharing so that services andapps will work again.
Related information
Terms of use and data sharing (p. 500)
Hard disk storage space
It is possible to view how much space is remain-ing on the vehicle's hard disk.
Storage information for the vehicle's hard diskcan be shown, including total capacity, availablecapacity and how much space is used for instal-led apps. The information is found under
SettingsSystemSystem InformationStorage.
Related information
Apps (p. 450)
Page 553 of 645

LOADING, STORAGE AND PASSENGER COMPARTMENT
}}
* Option/accessory.551
Cargo compartment
Loads can be secured in the trunk to keep themin place while driving.
The folding* rear seat backrests can helpincrease the cargo capacity of the trunk. Loadanchoring eyelets and grocery bag holders areprovided to help secure objects in place.
If the vehicle is equipped with a temporary sparetire, this is secured to the cargo compartmentfloor under the cover. The towing eyelet and tiresealing system are located under the cargo com-partment floor.
Related information
Loading recommendations (p. 551)
Grocery bag holders (p. 553)
Load anchoring eyelets (p. 553)
Loading recommendations
There are a number of things that are importantto consider when carrying loads in or on thevehicle.
Load-carrying capacity is determined by the vehi-cle's curb weight. The total weight of all passen-gers and any installed accessories reduces thevehicle's load-carrying capacity by the corres-ponding amount.
WARNING
The vehicle's driving characteristics changedepending on the weight and position of theload.
Loading the cargo compartment/trunk
Keep the following in mind when loading:
Position objects so they are pressing againstthe rear seat backrests.
Heavy objects should be positioned as lowas possible. Avoid placing heavy objects onfolded-down seat backrests.
Cover sharp corners with a soft cloth or simi-lar to help prevent damage to the upholstery.
Use the load anchoring eyelets and tension-ing straps or similar to secure all objects.
WARNING
In a head-on collision at a speed of 50 km/h(30 mph), an unsecured object weighing20 kg (44 pounds) can reach a projectileweight equivalent to 1000 kg (2200 pounds).
WARNING
If objects are loaded higher than the upperedge of the side windows, leave a 10 cm(4 in.) space between the objects and thewindow. Objects placed closer to this couldimpede the function of the inflatable curtainconcealed inside the headlining.
WARNING
Always secure the load. Otherwise, it may shiftduring heavy braking and injure people in thevehicle.
Cover sharp edges and sharp corners withsomething soft.
Turn off the engine and apply the parkingbrake when loading/unloading long objects.Otherwise, it is possible for the load to reachthe gear lever or gear selector and move it toa drive position – which could cause the vehi-cle to begin rolling.
Page 596 of 645
||
MAINTENANCE AND SERVICE
* Option/accessory.594
CAUTION
The microfiber cloth must be free of sand anddirt when cleaning the center display.
CAUTION
When cleaning the center display, apply onlylight pressure to the screen. Pressing toohard could damage the screen.
CAUTION
Do not spray liquid or corrosive chemicalsdirectly onto the center display. Do not usewindow cleaners, cleaning agents, aerosolsprays, solvents, alcohol, ammonia or deter-gents that contain abrasives.
Never use abrasive cloths, paper towels or tis-sue paper, as these may scratch the centerdisplay.
Related information
Cleaning the interior (p. 593)
Cleaning fabric upholstery and ceiling liner(p. 595)
Cleaning the seat belt (p. 595)
Cleaning floor mats and inlay mats (p. 595)
Cleaning leather upholstery (p. 596)
Cleaning the leather steering wheel(p. 597)
Cleaning interior plastic, metal and wood sur-faces (p. 598)
Cleaning the head-up display*
Carefully wipe the glass covering the head-updisplay unit with a clean and dry microfiber cloth.If necessary, the cloth may be slightly moistened.
Never use strong stain removers. For difficultcleaning conditions, a special cleaning agent canbe purchased at a Volvo retailer.
Related information
Activating and deactivating the head-up dis-play* (p. 141)
Head-up display* (p. 140)
Page 605 of 645
MAINTENANCE AND SERVICE
* Option/accessory.603
Cleaning exterior plastic, rubber andtrim components
The vehicle should be washed as soon as itbecomes dirty. This makes the vehicle easier toclean because dirt does not attach as strongly. Italso reduces the risk of scratches and keeps thevehicle looking new. Wash the vehicle in a carwash or garage with an oil separator and use carwashing detergent.
Exterior plastic, rubber and trim
components
A special cleaning agent available from Volvoretailers is recommended for the cleaning andcare of colored plastic parts, rubber and trimcomponents, e.g. glossy trim. Follow the usageinstructions for the cleaning agent carefully.
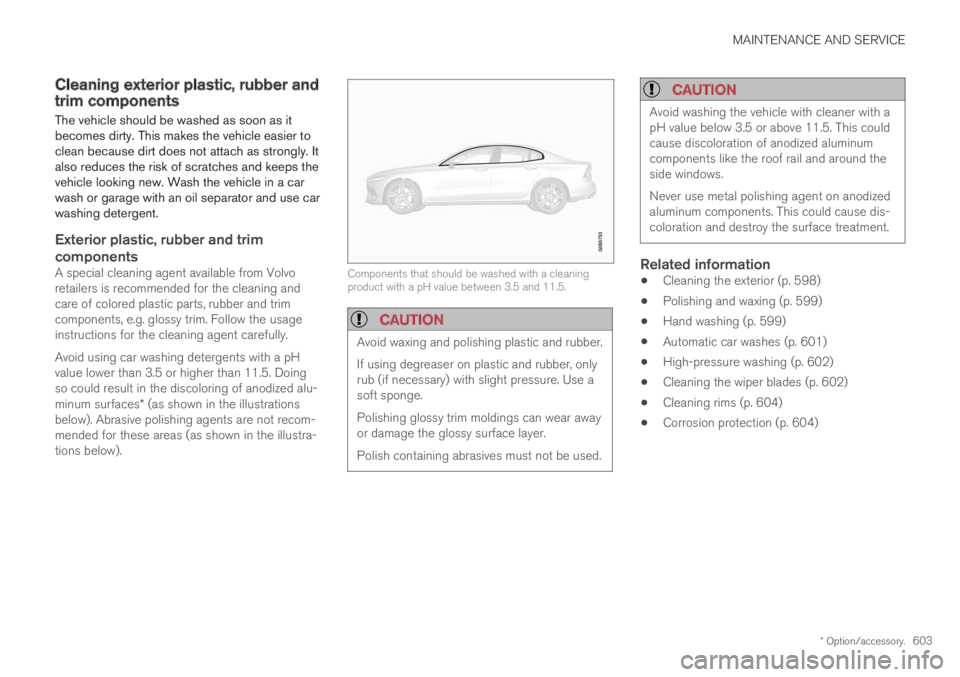
Avoid using car washing detergents with a pHvalue lower than 3.5 or higher than 11.5. Doingso could result in the discoloring of anodized alu-minum surfaces* (as shown in the illustrationsbelow). Abrasive polishing agents are not recom-mended for these areas (as shown in the illustra-tions below).
Components that should be washed with a cleaningproduct with a pH value between 3.5 and 11.5.
CAUTION
Avoid waxing and polishing plastic and rubber.
If using degreaser on plastic and rubber, onlyrub (if necessary) with slight pressure. Use asoft sponge.
Polishing glossy trim moldings can wear awayor damage the glossy surface layer.
Polish containing abrasives must not be used.
CAUTION
Avoid washing the vehicle with cleaner with apH value below 3.5 or above 11.5. This couldcause discoloration of anodized aluminumcomponents like the roof rail and around theside windows.
Never use metal polishing agent on anodizedaluminum components. This could cause dis-coloration and destroy the surface treatment.
Related information
Cleaning the exterior (p. 598)
Polishing and waxing (p. 599)
Hand washing (p. 599)
Automatic car washes (p. 601)
High-pressure washing (p. 602)
Cleaning the wiper blades (p. 602)
Cleaning rims (p. 604)
Corrosion protection (p. 604)