remote control VOLVO S60 TWIN ENGINE 2020 Owners Manual
[x] Cancel search | Manufacturer: VOLVO, Model Year: 2020, Model line: S60 TWIN ENGINE, Model: VOLVO S60 TWIN ENGINE 2020Pages: 657, PDF Size: 13.6 MB
Page 6 of 657
4
Changing settings in the center display's Top view129
Opening contextual setting in thecenter display 130
Resetting user data when thevehicle changes owners 131
Resetting center display settings 131
Table of settings in the center display 132
Driver profiles 133
Selecting a driver profile 134
Changing a driver profile's name 134
Protecting a driver profile 135
Linking a remote key to a driver profile 135
Resetting driver profile settings 137
Messages in the center display 137
Handling messages in the centerdisplay 138
Handling messages saved fromthe center display 138
Head-up display *
139
Activating and deactivating the head-up display * 141
Head-up display settings *
141
Voice Control 142
Use voice recognition 143
Voice control for cellular phones 145
Voice control for radio and media146
Voice control settings 147
LIGHTING
Lighting control and panel150
Adjusting light functions via the center display 151
Adjusting the headlight pattern 152
Parking lights 152
Daytime running lights 153
Low beams 154
Using high beam 154
Active high beam 155
Using turn signals 156
Active Bending Lights *
157
Front fog lights/corner illumination *
157
Rear fog light 158
Brake lights 159
Emergency brake lights 159
Hazard warning flashers 160
Using home safe lighting 160
Welcome Light 160
Interior Lighting 161
Adjusting interior lighting 162
Page 8 of 657
6
Activating and deactivating the heated steering wheel*212
Activating and deactivating auto-matic steering wheel heating *212
Activating auto climate control 213
Activating and deactivating recir- culation 213
Activating and deactivating therecirculation timer setting 214
Activating and deactivating maxdefroster 214
Activating and deactivating theheated rear window and door mirrors 215
Automatically activating and deac-tivating the heated rear windowand door mirrors 216
Setting the blower speed for thefront seats 216
Setting the temperature for thefront seats 217
Synchronize temperature 218
Activating and deactivating airconditioning 219
Parking climate 219
Preconditioning 220
Starting and stopping preconditioning 220
Preconditioning timer 221
Adding and editing timer settingsfor preconditioning 222
Activating and deactivating pre- conditioning timer223
Deleting preconditioning timersettings 223
Climate comfort retaining function 224
Starting and switching off the cli-mate retaining function when parking 224
Parking climate symbols and mes-sages 226
Heater 227
Parking heater 227
Additional heater 227
Activating and deactivating theauxiliary heater 228
KEY, LOCKS AND ALARM
Lock indication
230
Lock confirmation settings 231
Remote key 232
Locking and unlocking using the remote key 234
Settings for remote and insidedoor unlock 235
Remote key range 235
Replacing the remote key's battery 236
Ordering additional remote keys 239
Red Key - restricted remote key *
240
Settings for Red Key *
241
Detachable key blade 242
Locking and unlocking withdetachable key blade 243
Electronic immobilizer 244
Start and lock system type desig-nations 245
Keyless and touch-sensitive surfaces *
246
Keyless locking and unlocking *
247
Keyless unlock settings *
248
Keyless trunk lid unlock *
249
Antenna locations for the startand lock system 249
Locking and unlocking from insidethe vehicle 250
Page 66 of 657
||
SAFETY
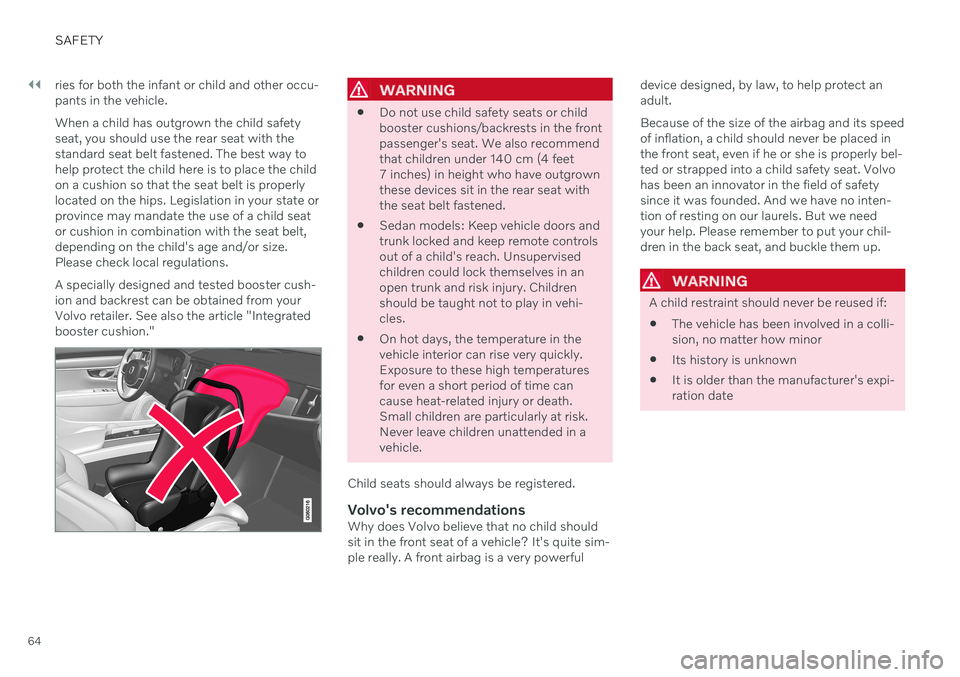
64ries for both the infant or child and other occu- pants in the vehicle. When a child has outgrown the child safety seat, you should use the rear seat with thestandard seat belt fastened. The best way tohelp protect the child here is to place the childon a cushion so that the seat belt is properlylocated on the hips. Legislation in your state orprovince may mandate the use of a child seator cushion in combination with the seat belt,depending on the child's age and/or size.Please check local regulations. A specially designed and tested booster cush- ion and backrest can be obtained from yourVolvo retailer. See also the article "Integratedbooster cushion."
WARNING
Do not use child safety seats or child booster cushions/backrests in the frontpassenger's seat. We also recommendthat children under 140 cm (4 feet7 inches) in height who have outgrownthese devices sit in the rear seat withthe seat belt fastened.
Sedan models: Keep vehicle doors andtrunk locked and keep remote controlsout of a child's reach. Unsupervisedchildren could lock themselves in anopen trunk and risk injury. Childrenshould be taught not to play in vehi-cles.
On hot days, the temperature in thevehicle interior can rise very quickly.Exposure to these high temperaturesfor even a short period of time cancause heat-related injury or death.Small children are particularly at risk.Never leave children unattended in avehicle.
Child seats should always be registered.
Volvo's recommendationsWhy does Volvo believe that no child shouldsit in the front seat of a vehicle? It's quite sim-ple really. A front airbag is a very powerful device designed, by law, to help protect anadult. Because of the size of the airbag and its speed of inflation, a child should never be placed inthe front seat, even if he or she is properly bel-ted or strapped into a child safety seat. Volvohas been an innovator in the field of safetysince it was founded. And we have no inten-tion of resting on our laurels. But we needyour help. Please remember to put your chil-dren in the back seat, and buckle them up.
WARNING
A child restraint should never be reused if:
The vehicle has been involved in a colli- sion, no matter how minor
Its history is unknown
It is older than the manufacturer's expi-ration date
Page 135 of 657
DISPLAYS AND VOICE CONTROL
* Option/accessory.133
System
Sub-categories
Driver Profile Date and TimeSystem Languages and UnitsPrivacy and DataKeyboard LayoutsVoice Control
*
Factory Reset System Information
Related information
Center display overview (p. 107)
Changing settings in the center display's Top view (p. 129)
Resetting center display settings (p. 131)
Driver profiles
Many of the vehicle's settings can be cus- tomized to the driver's personal preferencesand saved in one or more driver profiles.
These personal settings are automatically saved in the active driver profile. Each key canbe linked to one driver profile. When the linkedkey is used, the vehicle is customized to thespecific settings of that driver profile.
Which settings are saved in driver
profiles?
Many of the settings made in the vehicle willbe automatically stored in the active driverprofile if the profile is not protected. The vehi-cle has settings that can be made either per-sonal or global. The personal settings aresaved in driver profiles. Settings that can be saved in a driver profile include, among other things, screens, mirrors, front seats, navigation *, audio and media sys-
tem, language and voice control. Some settings are global settings. These set- tings can be changed but are not saved to aspecific driver profile. Changes to global set-tings affect all profiles.
Global settings
Global settings and parameters do not change when driver profiles are changed. They remainthe same regardless of which driver profile iscurrently active. Keyboard layout is an example of a global set-ting. If driver profile X is used to add additionalkeyboard languages, these languages will alsobe available for driver profile Y. The settingsfor keyboard layout are not saved to a specificdriver profile - the settings are global.
Personal settings
If driver profile X has been used to e.g., set the brightness for the center display, driver profileY will not be affected by this setting. It willonly be saved to driver profile X becausebrightness setting is a personal setting.
Related information
Selecting a driver profile (p. 134)
Changing a driver profile's name (p. 134)
Linking a remote key to a driver profile(p. 135)
Protecting a driver profile (p. 135)
Resetting driver profile settings (p. 137)
Table of settings in the center display(p. 132)
Page 136 of 657
DISPLAYS AND VOICE CONTROL
134
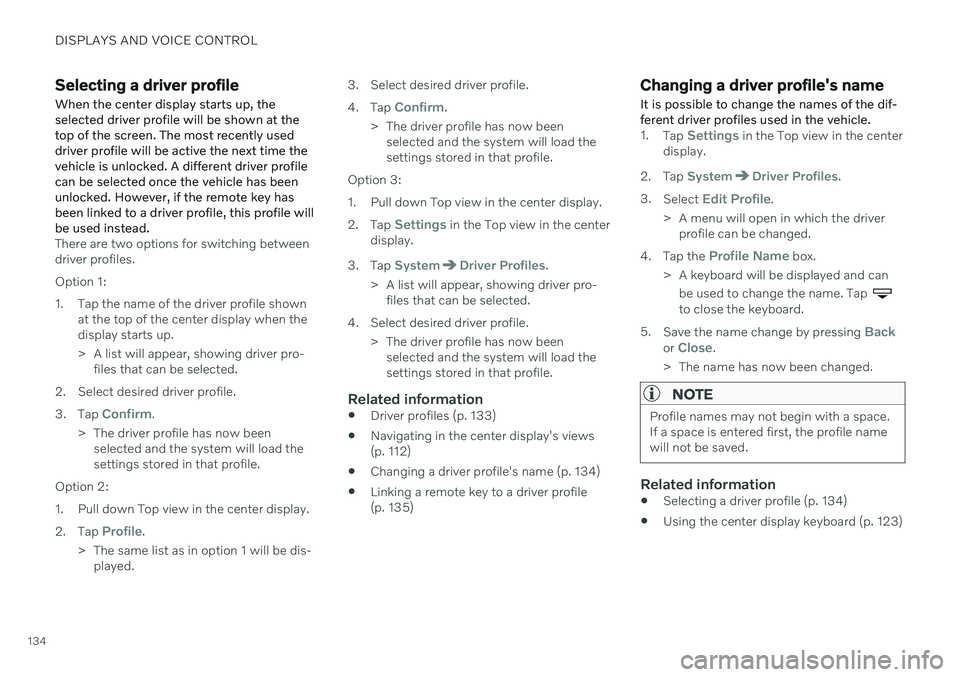
Selecting a driver profileWhen the center display starts up, the selected driver profile will be shown at thetop of the screen. The most recently useddriver profile will be active the next time thevehicle is unlocked. A different driver profilecan be selected once the vehicle has beenunlocked. However, if the remote key hasbeen linked to a driver profile, this profile willbe used instead.
There are two options for switching between driver profiles. Option 1:
1. Tap the name of the driver profile shown at the top of the center display when the display starts up.
> A list will appear, showing driver pro-files that can be selected.
2. Select desired driver profile. 3. Tap
Confirm.
> The driver profile has now been selected and the system will load the settings stored in that profile.
Option 2:
1. Pull down Top view in the center display.2. Tap
Profile.
> The same list as in option 1 will be dis- played. 3. Select desired driver profile. 4.
Tap
Confirm.
> The driver profile has now been selected and the system will load the settings stored in that profile.
Option 3:
1. Pull down Top view in the center display.2. Tap
Settings in the Top view in the center
display.
3. Tap
SystemDriver Profiles.
> A list will appear, showing driver pro- files that can be selected.
4. Select desired driver profile. > The driver profile has now beenselected and the system will load the settings stored in that profile.
Related information
Driver profiles (p. 133)
Navigating in the center display's views(p. 112)
Changing a driver profile's name (p. 134)
Linking a remote key to a driver profile(p. 135)
Changing a driver profile's name
It is possible to change the names of the dif- ferent driver profiles used in the vehicle.
1. Tap Settings in the Top view in the center
display.
2. Tap
SystemDriver Profiles.
3. Select
Edit Profile.
> A menu will open in which the driver profile can be changed.
4. Tap the
Profile Name box.
> A keyboard will be displayed and can be used to change the name. Tap
to close the keyboard.
5. Save the name change by pressing
Backor Close.
> The name has now been changed.
NOTE
Profile names may not begin with a space. If a space is entered first, the profile namewill not be saved.
Related information
Selecting a driver profile (p. 134)
Using the center display keyboard (p. 123)
Page 137 of 657
DISPLAYS AND VOICE CONTROL
}}
135
Protecting a driver profile
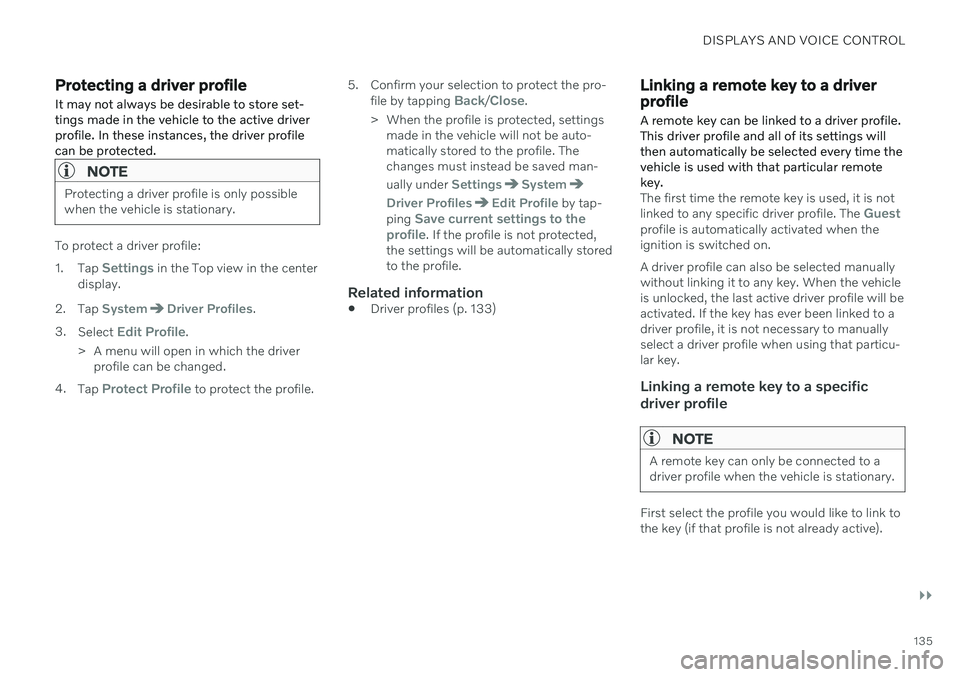
It may not always be desirable to store set- tings made in the vehicle to the active driverprofile. In these instances, the driver profilecan be protected.
NOTE
Protecting a driver profile is only possible when the vehicle is stationary.
To protect a driver profile: 1. Tap
Settings in the Top view in the center
display.
2. Tap
SystemDriver Profiles.
3. Select
Edit Profile.
> A menu will open in which the driver profile can be changed.
4. Tap
Protect Profile to protect the profile. 5. Confirm your selection to protect the pro-
file by tapping
Back/Close.
> When the profile is protected, settings made in the vehicle will not be auto- matically stored to the profile. Thechanges must instead be saved man- ually under
SettingsSystem
Driver ProfilesEdit Profile by tap-
ping Save current settings to the
profile. If the profile is not protected,
the settings will be automatically stored to the profile.
Related information
Driver profiles (p. 133)
Linking a remote key to a driver profile
A remote key can be linked to a driver profile. This driver profile and all of its settings willthen automatically be selected every time thevehicle is used with that particular remotekey.
The first time the remote key is used, it is not linked to any specific driver profile. The Guestprofile is automatically activated when the ignition is switched on. A driver profile can also be selected manually without linking it to any key. When the vehicleis unlocked, the last active driver profile will beactivated. If the key has ever been linked to adriver profile, it is not necessary to manuallyselect a driver profile when using that particu-lar key.
Linking a remote key to a specific driver profile
NOTE
A remote key can only be connected to a driver profile when the vehicle is stationary.
First select the profile you would like to link to the key (if that profile is not already active).
Page 138 of 657
||
DISPLAYS AND VOICE CONTROL
136The active profile can then be linked to the key. 1.
Tap
Settings in the Top view in the center
display.
2. Tap
SystemDriver Profiles.
3. Mark the desired profile. The display will return to Home view. The
Guest profile
cannot be linked to a remote key.
4. Pull down Top view again and tap
SettingsSystemDriver ProfilesEdit Profile. 5.
Select
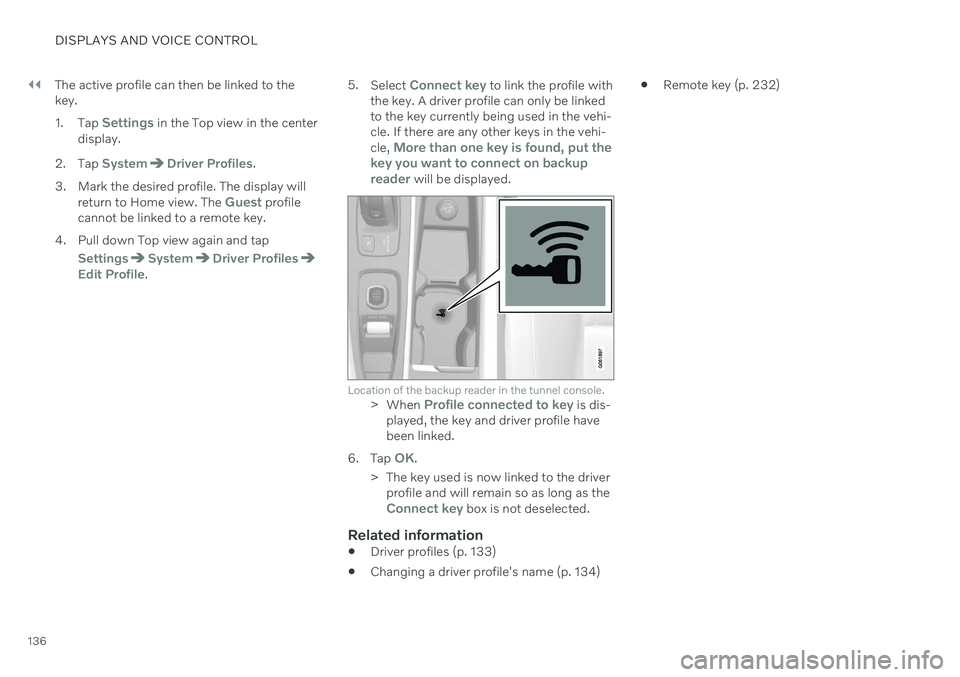
Connect key to link the profile with
the key. A driver profile can only be linked to the key currently being used in the vehi-cle. If there are any other keys in the vehi- cle,
More than one key is found, put the
key you want to connect on backup reader
will be displayed.
Location of the backup reader in the tunnel console.> When Profile connected to key is dis-
played, the key and driver profile have been linked.
6. Tap
OK.
> The key used is now linked to the driver profile and will remain so as long as the
Connect key box is not deselected.
Related information
Driver profiles (p. 133)
Changing a driver profile's name (p. 134)
Remote key (p. 232)
Page 170 of 657
||
WINDOWS, GLASS AND MIRRORS
* Option/accessory.
168
WARNING
Children, other passengers or objects can be trapped by the moving parts.
Always operate the windows with cau- tion.
Do not allow children to play with theoperating controls.
Never leave a child alone in the vehicle.
Remember to always cut the current tothe power windows by setting thevehicle's electrical system to ignitionmode
0 and then taking the remote
key with you when leaving the vehicle.
Never stick objects or body parts outthrough the windows, even if the vehi-cle electrical system is completelyturned off.
Related information
Operating the power windows (p. 168)
Pinch protection for windows and sun cur-tains (p. 166)
Reset procedure for pinch protection(p. 167)
Operating the power windows
All power windows can be operated using the control panel in the driver's door. The controlpanels in the other doors can be used tooperate that particular door.
The power windows have pinch protection. If there is any problem with the pinch protection,a rest procedure can be tested.
WARNING
Children, other passengers or objects can be trapped by the moving parts.
Always operate the windows with cau- tion.
Do not allow children to play with theoperating controls.
Never leave a child alone in the vehicle.
Remember to always cut the current tothe power windows by setting thevehicle's electrical system to ignitionmode
0 and then taking the remote
key with you when leaving the vehicle.
Never stick objects or body parts outthrough the windows, even if the vehi-cle electrical system is completelyturned off.
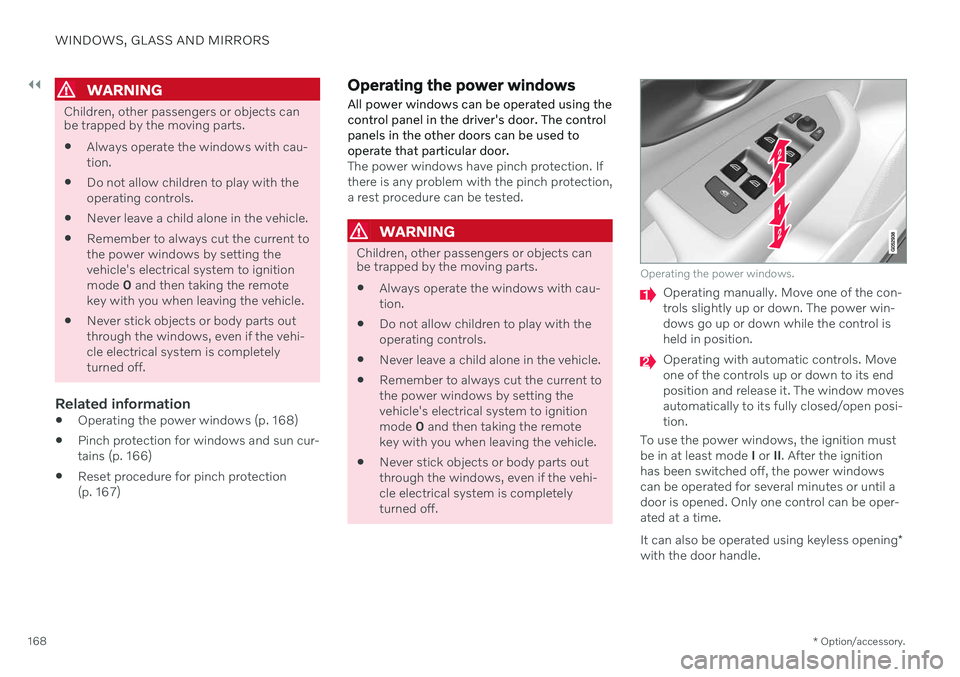
Operating the power windows.
Operating manually. Move one of the con- trols slightly up or down. The power win-dows go up or down while the control isheld in position.
Operating with automatic controls. Move one of the controls up or down to its endposition and release it. The window movesautomatically to its fully closed/open posi-tion.
To use the power windows, the ignition mustbe in at least mode I or II. After the ignition
has been switched off, the power windowscan be operated for several minutes or until adoor is opened. Only one control can be oper-ated at a time. It can also be operated using keyless opening *
with the door handle.
Page 174 of 657
||
WINDOWS, GLASS AND MIRRORS
* Option/accessory.
172
Tilting when parking 3The door mirrors can be tilted down to help give the driver a better view along the sides ofthe vehicle, e.g. of the curb when parking.
–Select reverse gear and press the
L or R
mirror button.
Please note that the button may need to be pressed twice depending on settings. Whenthe door mirror is tilted down, the light in thebutton will flash. When reverse gear isengaged, the door mirrors will automaticallystart to move after 3 seconds and will reachtheir original position after about 8 seconds.
Automatically tilting when parking 3With this setting, the door mirrors will auto-matically tilt down when reverse gear isengaged. The folded position is preset andcannot be adjusted. 1.
Tap
Settings in the center display's Top
view.
2. Tap
My CarMirrors and Convenience.
3. Under
Exterior Mirror Tilt at Reverse,
select Off, Driver, Passenger or Both to
activate/deactivate and to select which mirror to tilt.
To immediately return the door mirrors to theiroriginal position, press the L or R button
twice.
Automatic folding when the vehicle is locked *
The door mirrors can automatically fold in when the vehicle is locked and open when thevehicle is unlocked using the remote key. Ifthe mirrors have been folded in manually, theymust be folded out manually as well. 1.
Tap
Settings in the center display's Top
view.
2. Tap
My CarMirrors and Convenience.
3. Select
Fold Mirror When Locked to acti-
vate/deactivate.
Related information
Rearview/door mirrors (p. 170)
Adjusting the rearview mirror dimming function (p. 170)
Storing positions for seats, mirrors and head-up display
* (p. 184)
Activating and deactivating the heated rear window and door mirrors (p. 215)
Panoramic roof
*
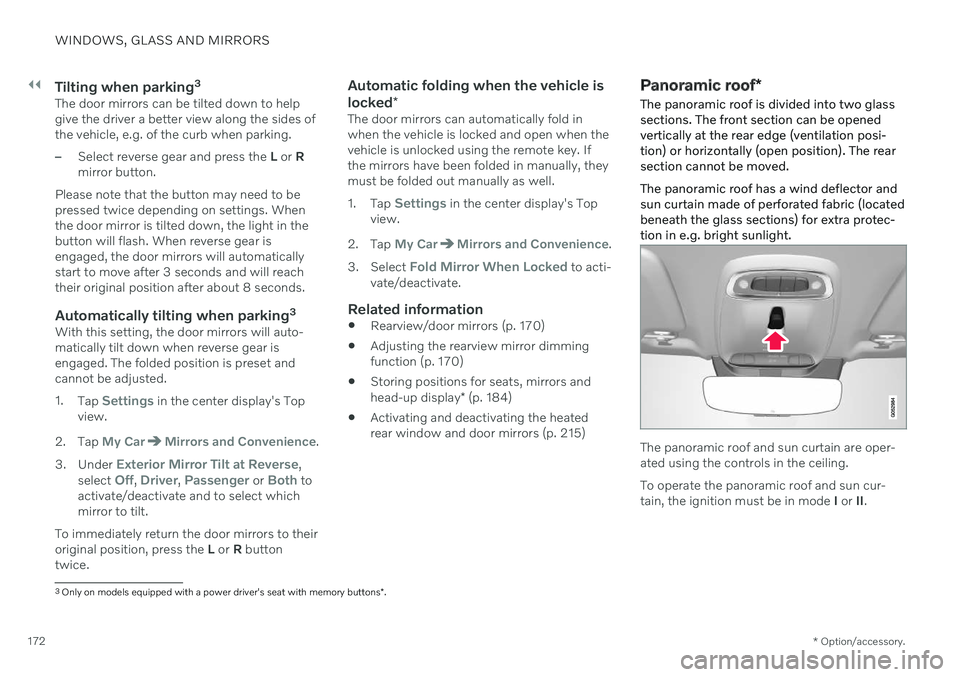
The panoramic roof is divided into two glass sections. The front section can be openedvertically at the rear edge (ventilation posi-tion) or horizontally (open position). The rearsection cannot be moved. The panoramic roof has a wind deflector and sun curtain made of perforated fabric (locatedbeneath the glass sections) for extra protec-tion in e.g. bright sunlight.
The panoramic roof and sun curtain are oper- ated using the controls in the ceiling. To operate the panoramic roof and sun cur- tain, the ignition must be in mode I or II.
3
Only on models equipped with a power driver's seat with memory buttons *.
Page 175 of 657
WINDOWS, GLASS AND MIRRORS
* Option/accessory.173
WARNING
Children, other passengers or objects can be trapped by the moving parts.
Always operate the windows with cau- tion.
Do not allow children to play with theoperating controls.
Never leave a child alone in the vehicle.
Remember to always cut the current tothe power windows by setting thevehicle's electrical system to ignitionmode
0 and then taking the remote
key with you when leaving the vehicle.
Never stick objects or body parts outthrough the windows, even if the vehi-cle electrical system is completelyturned off.
CAUTION
Do not open the panoramic roof when load carriers are installed.
Never place heavy objects on the pan-oramic roof.
CAUTION
Remove ice and snow before opening the panoramic roof. Be careful not toscratch any surfaces or damage thetrim.
Do not operate the panoramic roof if itis frozen in place.
Wind blocker
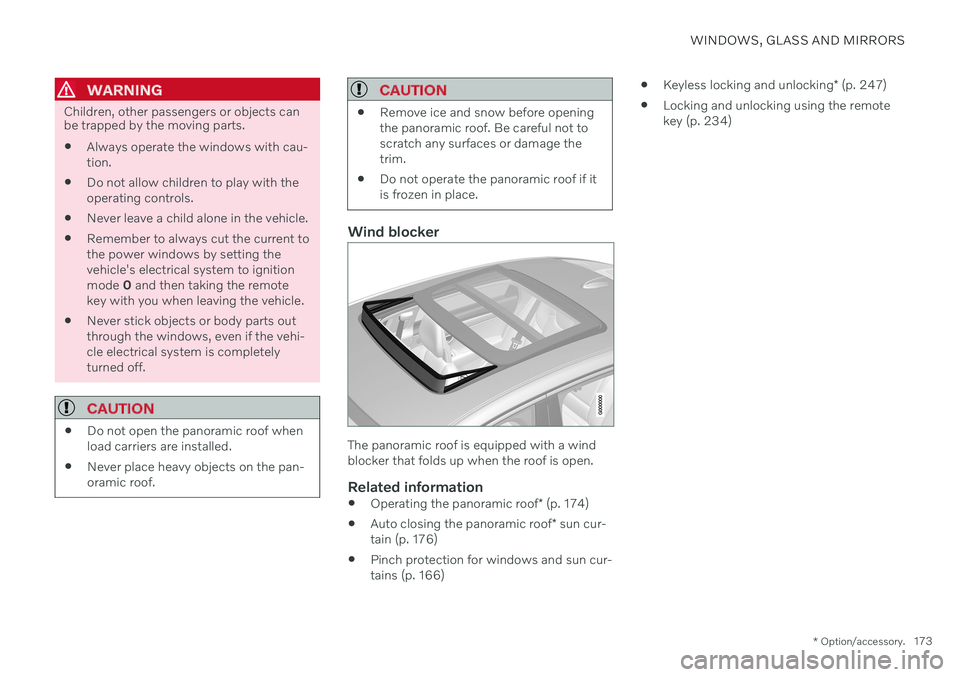
The panoramic roof is equipped with a wind blocker that folds up when the roof is open.
Related information
Operating the panoramic roof
* (p. 174)
Auto closing the panoramic roof
* sun cur-
tain (p. 176)
Pinch protection for windows and sun cur- tains (p. 166)
Keyless locking and unlocking
* (p. 247)
Locking and unlocking using the remote key (p. 234)