ECO mode VOLVO S80 2007 User Guide
[x] Cancel search | Manufacturer: VOLVO, Model Year: 2007, Model line: S80, Model: VOLVO S80 2007Pages: 251, PDF Size: 5.7 MB
Page 86 of 251
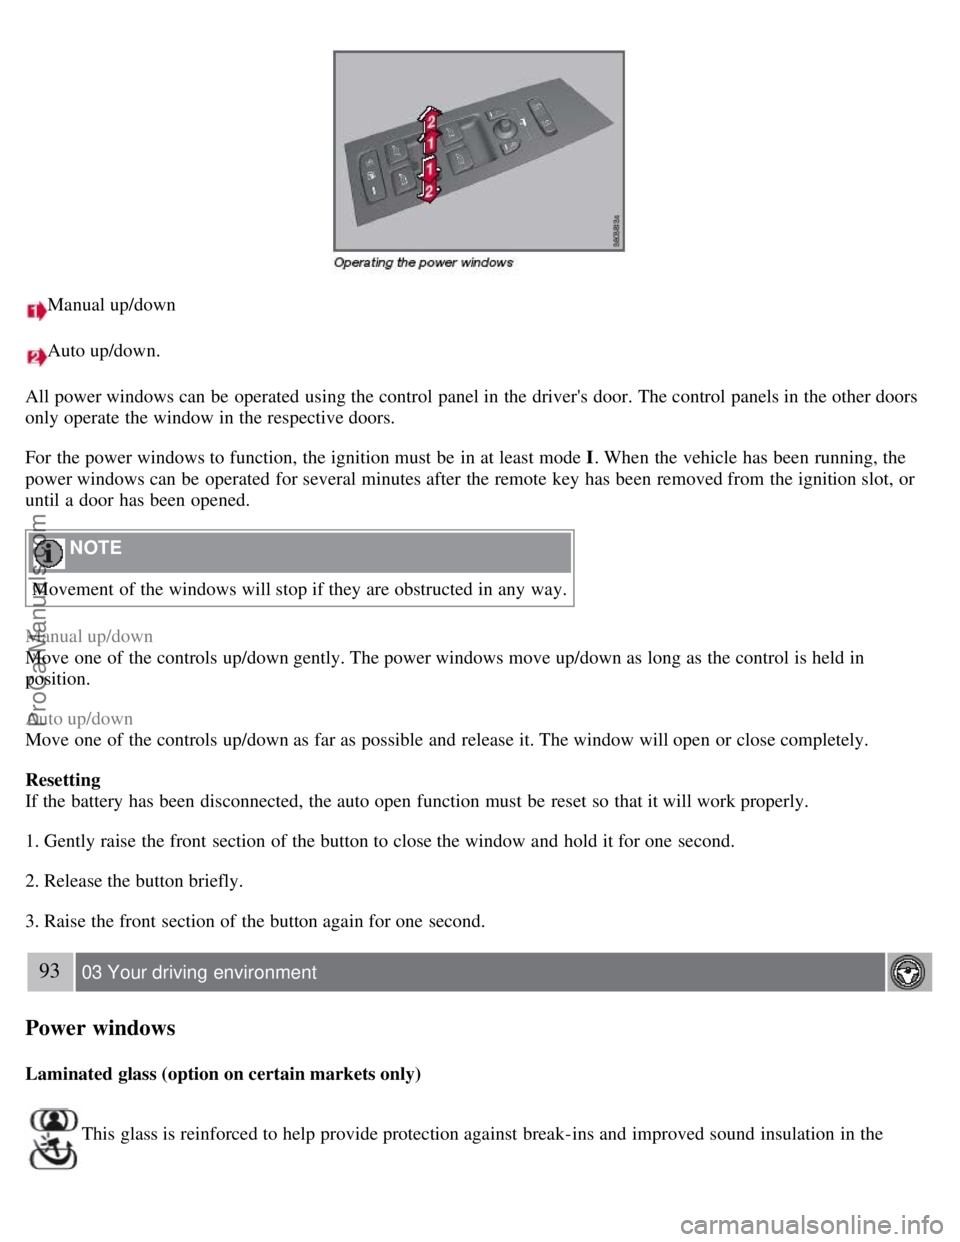
Manual up/down
Auto up/down.
All power windows can be operated using the control panel in the driver's door. The control panels in the other doors
only operate the window in the respective doors.
For the power windows to function, the ignition must be in at least mode I . When the vehicle has been running, the
power windows can be operated for several minutes after the remote key has been removed from the ignition slot, or
until a door has been opened.
NOTE
Movement of the windows will stop if they are obstructed in any way.
Manual up/down
Move one of the controls up/down gently. The power windows move up/down as long as the control is held in
position.
Auto up/down
Move one of the controls up/down as far as possible and release it. The window will open or close completely.
Resetting
If the battery has been disconnected, the auto open function must be reset so that it will work properly.
1. Gently raise the front section of the button to close the window and hold it for one second.
2. Release the button briefly.
3. Raise the front section of the button again for one second.
93 03 Your driving environment
Power windows
Laminated glass (option on certain markets only)
This glass is reinforced to help provide protection against break-ins and improved sound insulation in the
ProCarManuals.com
Page 91 of 251
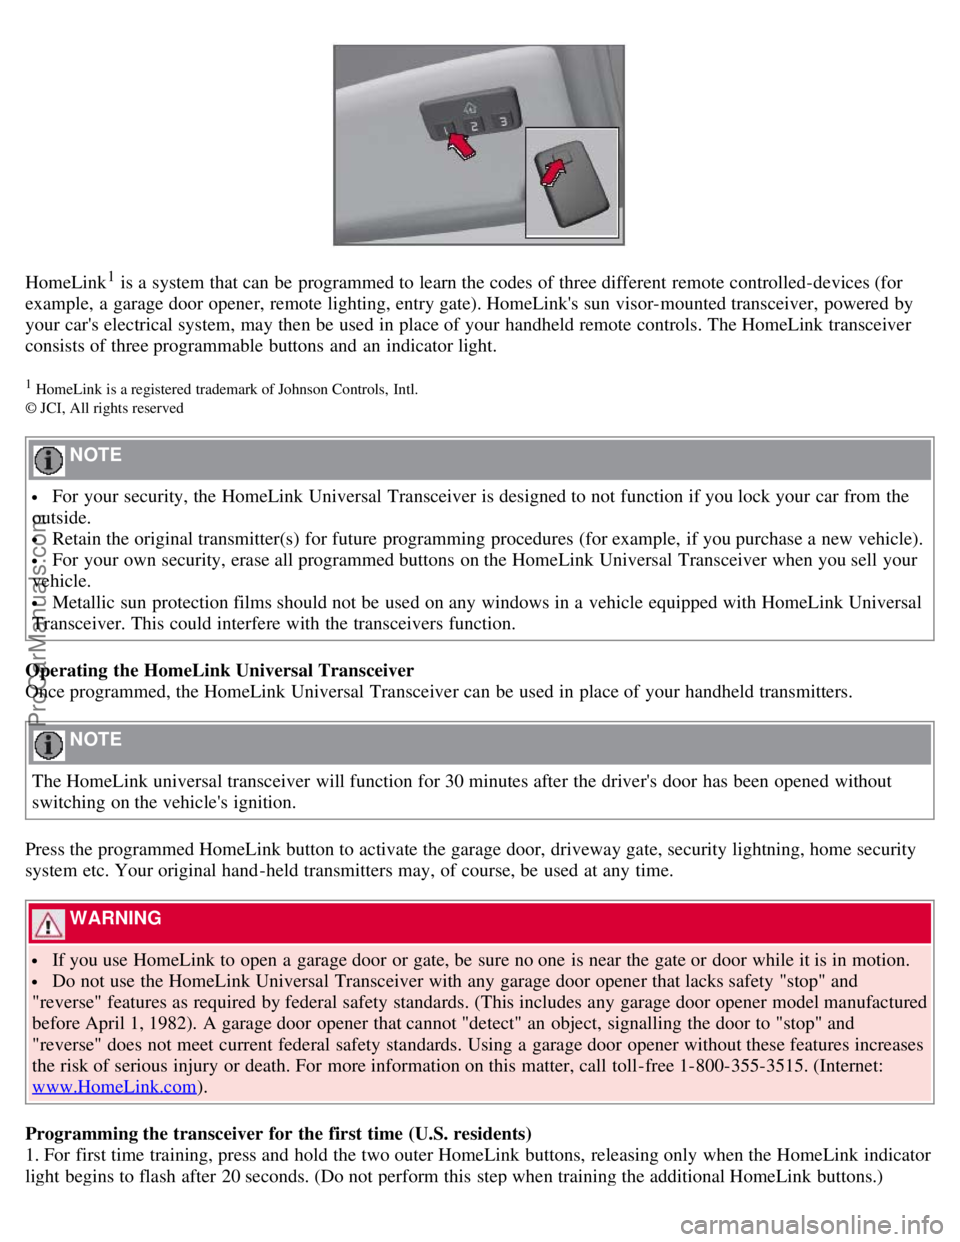
HomeLink1 is a system that can be programmed to learn the codes of three different remote controlled-devices (for
example, a garage door opener, remote lighting, entry gate). HomeLink's sun visor-mounted transceiver, powered by
your car's electrical system, may then be used in place of your handheld remote controls. The HomeLink transceiver
consists of three programmable buttons and an indicator light.
1 HomeLink is a registered trademark of Johnson Controls, Intl.
© JCI, All rights reserved
NOTE
For your security, the HomeLink Universal Transceiver is designed to not function if you lock your car from the
outside.
Retain the original transmitter(s) for future programming procedures (for example, if you purchase a new vehicle).
For your own security, erase all programmed buttons on the HomeLink Universal Transceiver when you sell your
vehicle.
Metallic sun protection films should not be used on any windows in a vehicle equipped with HomeLink Universal
Transceiver. This could interfere with the transceivers function.
Operating the HomeLink Universal Transceiver
Once programmed, the HomeLink Universal Transceiver can be used in place of your handheld transmitters.
NOTE
The HomeLink universal transceiver will function for 30 minutes after the driver's door has been opened without
switching on the vehicle's ignition.
Press the programmed HomeLink button to activate the garage door, driveway gate, security lightning, home security
system etc. Your original hand -held transmitters may, of course, be used at any time.
WARNING
If you use HomeLink to open a garage door or gate, be sure no one is near the gate or door while it is in motion.
Do not use the HomeLink Universal Transceiver with any garage door opener that lacks safety "stop" and
"reverse" features as required by federal safety standards. (This includes any garage door opener model manufactured
before April 1, 1982). A garage door opener that cannot "detect" an object, signalling the door to "stop" and
"reverse" does not meet current federal safety standards. Using a garage door opener without these features increases
the risk of serious injury or death. For more information on this matter, call toll-free 1-800-355-3515. (Internet:
www.HomeLink.com
).
Programming the transceiver for the first time (U.S. residents)
1. For first time training, press and hold the two outer HomeLink buttons, releasing only when the HomeLink indicator
light begins to flash after 20 seconds. (Do not perform this step when training the additional HomeLink buttons.)
ProCarManuals.com
Page 94 of 251
vary by garage door opener brand. If there is difficulty locating the training button, reference the garage door opener
owner's manual or please visit our Web site at www.HomeLink.com.
2. Press the training button on the garage door opener motor head unit (which activates the "training light").
NOTE
Following step 2, there are 30 seconds in which to initiate step 3.
3. Firmly press and release the programmed HomeLink® button. Press and release the HomeLink button a second time
to complete the training process. (Some garage door openers may require
101 03 Your driving environment
HomeLink® Universal Transceiver (option)
you to do this procedure a third time to complete the training.)
The garage door opener should now recognize the HomeLink Wireless Control System. The remaining two buttons
may now be trained if this has not previously been done. Refer to the Programming portion of this text. The
HomeLink Wireless Control System (once programmed) or the original handheld transmitter may be used to activate
the garage door. In the event that there are still difficulties in programming the HomeLink Wireless Control System,
please visit our Web site, www.HomeLink.com
.
Reprogramming a Single HomeLink Button
To program a device to HomeLink using a HomeLink button previously trained, follow these steps:
1. Press and hold the desired HomeLink button. Do NOT release until step 4 has been completed.
2. When the indicator light begins to flash slowly (after 20 seconds), position the handheld transmitter 1 to 3 inches
away from the HomeLink surface.
3. Press and hold the handheld transmitter button. The HomeLink indicator light will flash, first slowly and then
rapidly.
4. When the indicator light begins to flash rapidly, release both buttons.
The previous device has now been erased and the new device can be activated by pushing the HomeLink button that
has just been programmed. This procedure will not affect any other programmed HomeLink.
Erasing Channels
Individual buttons cannot be erased. However, to erase all three programmed buttons:
1. Press and hold the two outside buttons until the indicator light begins to flash (after 20 seconds).
2. Release both buttons.
The HomeLink® Wireless Control System is now in the training (learning) mode and can be programmed at any time
following steps 2 through 4 in the Programming section.
102 03 Your driving environment
ProCarManuals.com
Page 122 of 251
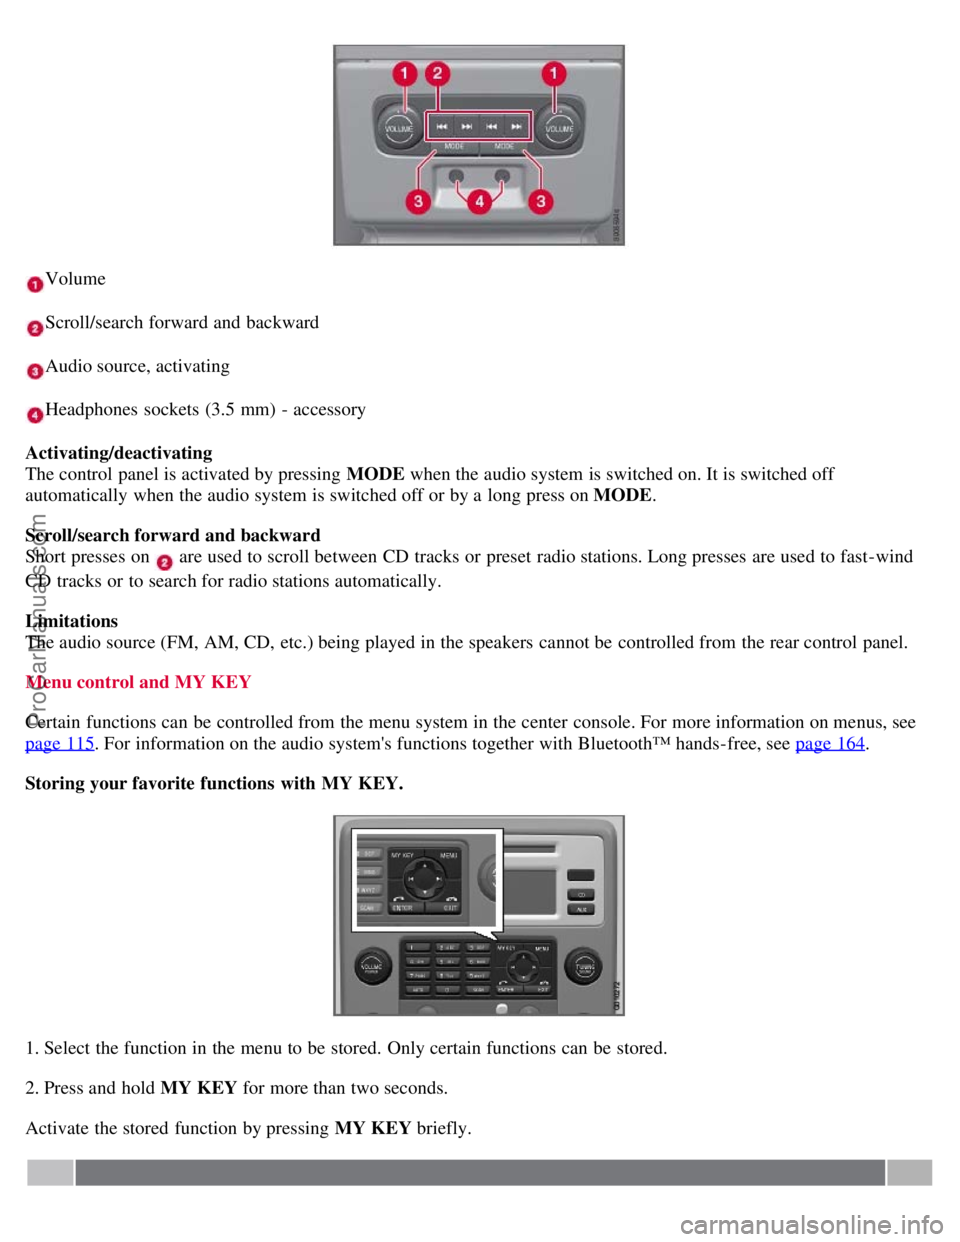
Volume
Scroll/search forward and backward
Audio source, activating
Headphones sockets (3.5 mm) - accessory
Activating/deactivating
The control panel is activated by pressing MODE when the audio system is switched on. It is switched off
automatically when the audio system is switched off or by a long press on MODE .
Scroll/search forward and backward
Short presses on
are used to scroll between CD tracks or preset radio stations. Long presses are used to fast -wind
CD tracks or to search for radio stations automatically.
Limitations
The audio source (FM, AM, CD, etc.) being played in the speakers cannot be controlled from the rear control panel.
Menu control and MY KEY
Certain functions can be controlled from the menu system in the center console. For more information on menus, see
page 115
. For information on the audio system's functions together with Bluetooth™ hands-free, see page 164.
Storing your favorite functions with MY KEY.
1. Select the function in the menu to be stored. Only certain functions can be stored.
2. Press and hold MY KEY for more than two seconds.
Activate the stored function by pressing MY KEY briefly.
ProCarManuals.com
Page 125 of 251
Scan CD
Playing a CD (CD player1)
If a music CD is in the player when CD is pressed, it will be played automatically. Otherwise, insert a disc and press
CD .
1Certain markets only.
Playing a CD (CD changer)
If a CD position with a music CD is already selected when CD is pressed, it will be played automatically. Otherwise
select a disc with the number buttons 1-6 or
/ on the navigation button.
Insert a CD (CD changer)
1. Select an empty position with the number buttons 1-6 or
/ on the navigation button.
An empty position is marked on the display. The text Insert disc shows that a new disc can be inserted. The CD
changer can hold up to six CDs.
2. Insert a CD in the CD changer slot.
Disc eject
For reasons of traffic safety, an ejected CD must be removed within 12 seconds or it will be automatically drawn back
into the slot and the CD player will enter pause mode. Press the CD button to restart the disc.
Eject individual discs by pressing the eject button.
Eject all discs with a long press on the eject button. The entire magazine is emptied disc by disc.
NOTE
The Eject all function can only be used while the vehicle is at a standstill and will be cancelled if the vehicle begins
to move.
Pause
When the audio system volume is turned off completely, the CD player will pause and will resume playing when the
volume is turned up again.
Sound files
In addition to playing normal music CDs, the CD player/changer can also play discs containing files in mp3 or wma
format.
NOTE
Some copy protected sound files may not be read by the player.
When a CD containing sound files is inserted into the player the disc's directory structure is scanned before the CD
begins playing. The length of time that this takes depends on the quality of the disc.
129 04 Comfort and driving pleasure
Audio system
ProCarManuals.com
Page 126 of 251
Navigating the disc and playing tracks
If a disc containing sound files is inside the CD player, press ENTER to display the disc's directory structure. The
directory structure is navigated in the same way as the audio system's menu structure. Sound files have the symbol and
directories have the
symbol. Press ENTER to play a selected folder or a file.
When the music file has been played, the player will continue to play the rest of the files in the current folder. When
all of the files in the folder have been played, the player will automatically go to the next folder and play the files in it.
Fast-forward/change CD tracks and sound files
Short presses
/ on the navigation button are used to scroll between CD tracks/ sound files. Long presses are
used to search within CD tracks/sound files. TUNING (or the steering wheel keypad) can also be used for this
purpose.
Scan CD
This function plays the first ten seconds of each CD track/sound file. Press SCAN to activate. Interrupt with EXIT or
SCAN to continue playing the current CD track/ sound file.
Random
This function plays the tracks in random order (shuffle). The random CD tracks/sound files can be scrolled through in
the normal way.
NOTE
It is only possible to scroll between random CD tracks on the current disc.
Different messages are displayed depending on which random function has been selected:
RANDOM means that the tracks from only one music CD are played
RND ALL means that all tracks on all music CDs in the optional CD changer are played.
RANDOM FOLDER means that the sound files in a directory on the current CD are played.
CD player
If a normal music CD is being played, activate/deactivate under Random .
If a disc with sound files is being played, activate/deactivate under Random
Folder .
CD changer
If a normal music CD is being played under Random
Single disc or Random All discs. The option All discs only
applies to the music CDs in the changer.
If a CD with sound files is being played, activate/ deactivate instead under Random
Folder . If you select another
CD the function is deactivated.
Disc text
If title information is stored on a music CD it can be shown on the display
1. Activate/deactivate in CD mode under CD
settings
Disc text.
1Only applies to CD changer.
130 04 Comfort and driving pleasure
Audio system
ProCarManuals.com
Page 128 of 251
1. Select a wave band using FM or AM.
2. Hold in AUTO until Autostoring... appears on the display.
Once Autostoring... disappears from the display, the stations are stored. The radio continues in Auto mode and Auto
appears on the display. The automatically stored presets can now be selected using the preset buttons. Automatic
preset storage can be cancelled using EXIT .
Auto mode is cancelled by pressing for example AUTO or FM.
Returning to Auto mode provides access to the autostored presets:
1. Press AUTO .
Auto appears on the display.
2. Press a preset button.
Scan
The function automatically searches the current wave band for strong stations. When a station is found, it is played for
approx. eight seconds before scanning is resumed. While the station is playing it can be stored as a preset as usual.
1. Select a wave band using AM or FM.
2. Press SCAN .
SCAN appears on the display. Close using SCAN or EXIT.
131 04 Comfort and driving pleasure
Audio system
Radio text
Some stations transmit information on program content, artists, etc. This information can be shown on the display.
Activate/deactivate in FM mode under Radio text.
132 04 Comfort and driving pleasure
Audio system
Sirius satellite radio (option)
Listening to satellite radio
The Sirius satellite system consists of a number of high elevation satellites in geosynchronous orbit.
NOTE
The digital signals from the Sirius satellites are line-of-sight, which means that physical obstructions such as bridges,
tunnels, etc, may temporarily interfere with signal reception.
Selecting Sirius radio mode
ProCarManuals.com
Page 134 of 251
Current speed in mph (Canadian models only)
This function provides the driver with an instantaneous conversion of the car's current speed from km/h to mph.
Current fuel consumption (Instantaneous)
Current fuel consumption is calculated every second. The information on the display is updated every few seconds.
When the vehicle is stationary, "----" appears on the display.
Average fuel consumption
The average fuel consumption since the last reset. Reset using RESET.
Driving distance on current fuel reserve
The calculation is based on the average fuel consumption over the last 20 miles (30 km) and the remaining fuel in the
tank. This shows the approximate distance that can be driven with the fuel quantity remaining in the tank. When the
driving distance on the current fuel reserve is less than 12 miles (20 km), "----" is shown on the display.
Resetting
1. Select Average speed or Average fuel consumption.
2. Press and hold RESET for approx. 1 second to reset the selected function. If RESET is kept depressed for at 3 three
seconds, Average speed and Average fuel consumption are reset simultaneously.
137 04 Comfort and driving pleasure
Compass
Operation
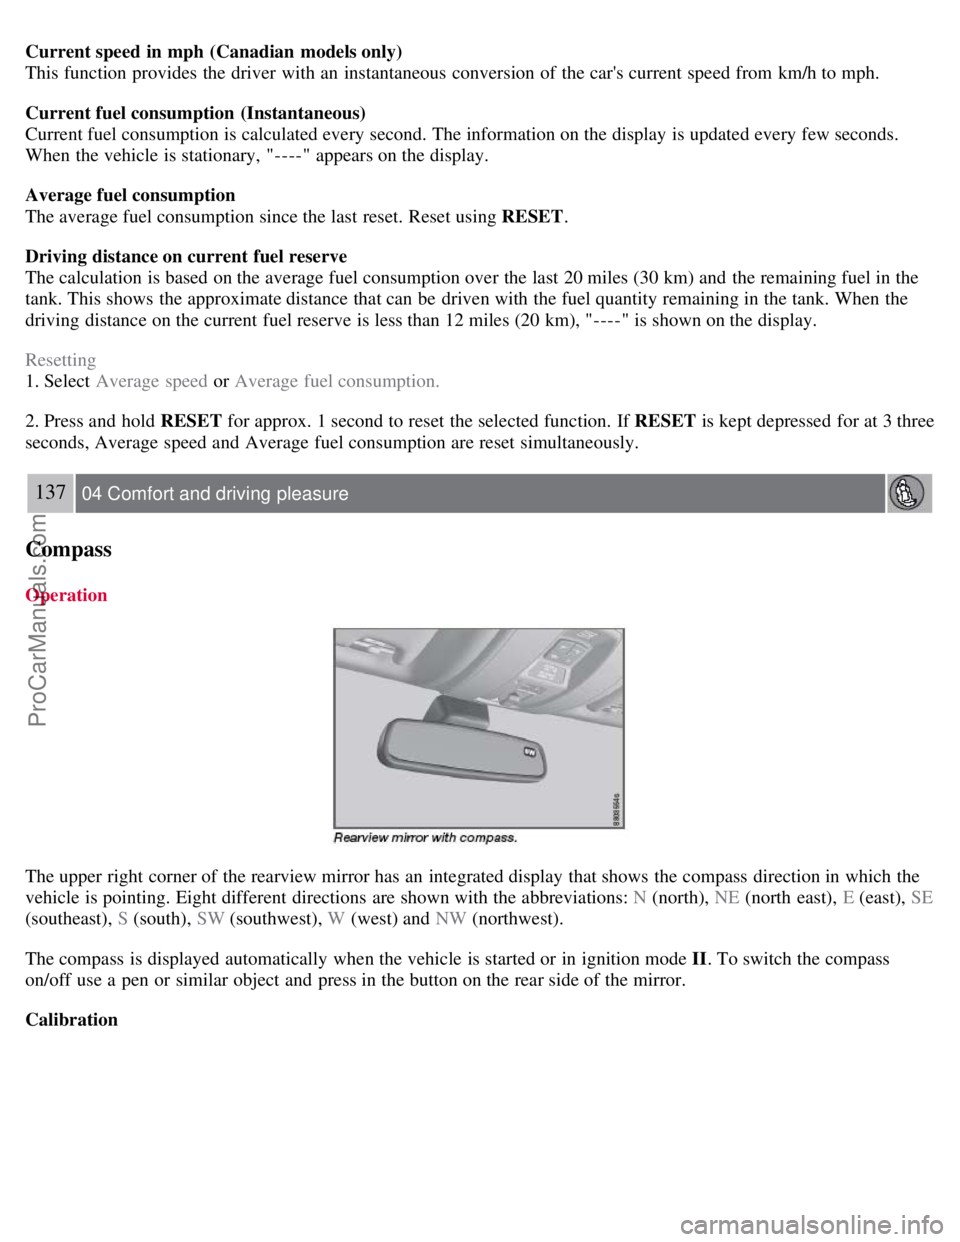
The upper right corner of the rearview mirror has an integrated display that shows the compass direction in which the
vehicle is pointing. Eight different directions are shown with the abbreviations: N (north), NE (north east), E (east), SE
(southeast), S (south), SW (southwest), W (west) and NW (northwest).
The compass is displayed automatically when the vehicle is started or in ignition mode II . To switch the compass
on/off use a pen or similar object and press in the button on the rear side of the mirror.
Calibration
ProCarManuals.com
Page 135 of 251
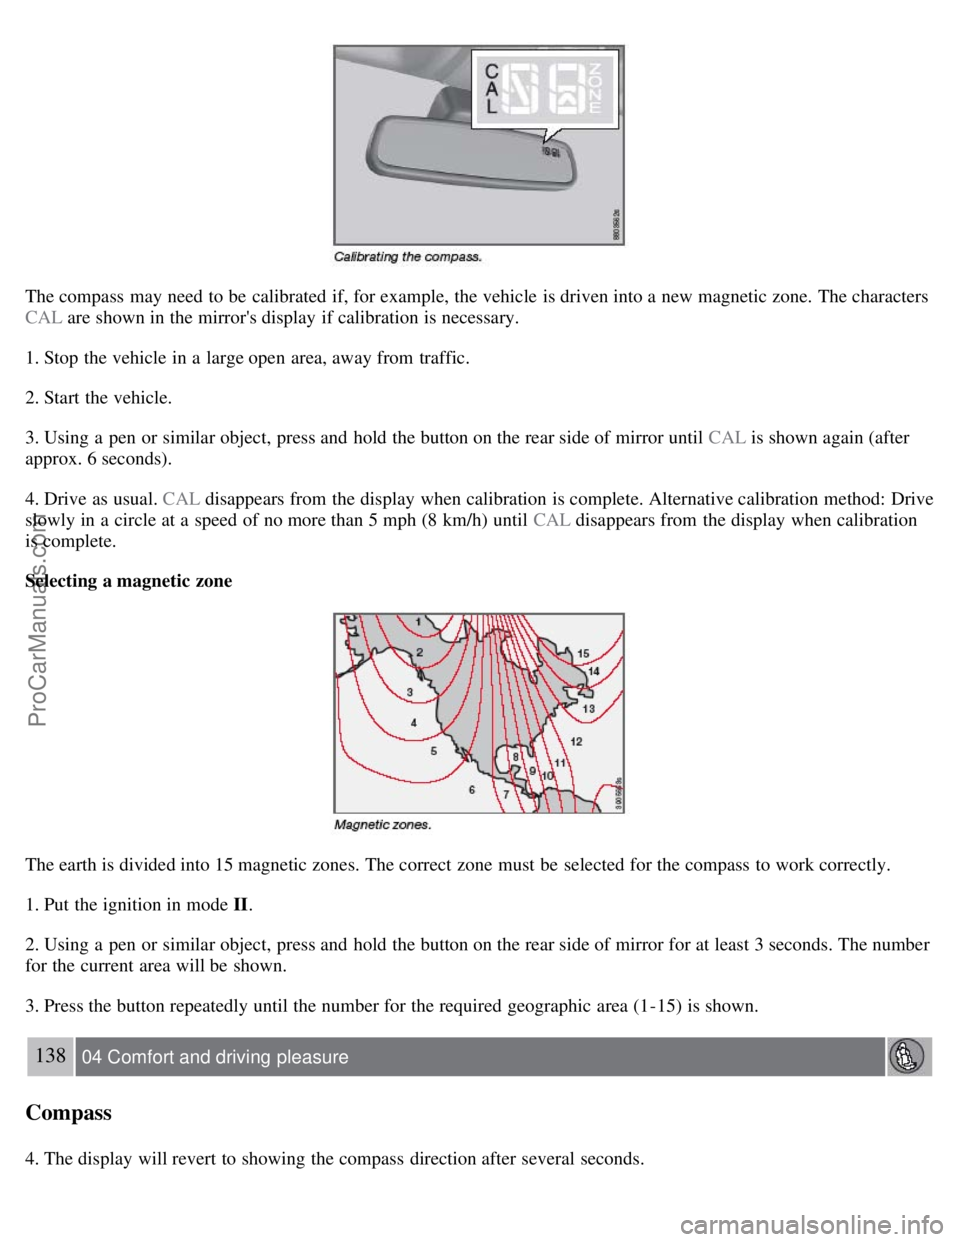
The compass may need to be calibrated if, for example, the vehicle is driven into a new magnetic zone. The characters
CAL are shown in the mirror's display if calibration is necessary.
1. Stop the vehicle in a large open area, away from traffic.
2. Start the vehicle.
3. Using a pen or similar object, press and hold the button on the rear side of mirror until CAL is shown again (after
approx. 6 seconds).
4. Drive as usual. CAL disappears from the display when calibration is complete. Alternative calibration method: Drive
slowly in a circle at a speed of no more than 5 mph (8 km/h) until CAL disappears from the display when calibration
is complete.
Selecting a magnetic zone
The earth is divided into 15 magnetic zones. The correct zone must be selected for the compass to work correctly.
1. Put the ignition in mode II.
2. Using a pen or similar object, press and hold the button on the rear side of mirror for at least 3 seconds. The number
for the current area will be shown.
3. Press the button repeatedly until the number for the required geographic area (1-15) is shown.
138 04 Comfort and driving pleasure
Compass
4. The display will revert to showing the compass direction after several seconds.
ProCarManuals.com
Page 137 of 251
2. Hold down the RESET button to toggle between DSTC SPIN CONTROL ON or OFF.
Messages in the information display
DSTC Temporarily OFF - system function has been temporarily reduced due to high brake disc temperature. The
function is activated automatically when the brakes have cooled.
DSTC Service required - the system has been disabled due to a fault. If this occurs:
140 04 Comfort and driving pleasure
Stability system
1. Stop the vehicle in a safe place and turn off the engine.
2. Restart the engine.
If the message remains when the engine is restarted, drive to an authorized Volvo workshop to have the system
inspected.
Symbols in the instrument panel
If the symbols
and are displayed at the same time, read the message in the information display.
If the symbol
appears alone, it may appear as follows:
If the symbol flashes, this indicates that the stability system is actively functioning to help counteract wheel spin
and/or a skid.
If the symbol remains on for approximately 2 seconds after the engine has been started, this indicates that the system
is performing a self -diagnostic test.
WARNING
The stability system is intended to help improve driving safety. It supplements, but can never replace, the driver's
judgment and responsibility when operating the vehicle. Speed and driving style should always be adapted to traffic
and road conditions.
141 04 Comfort and driving pleasure
Active chassis system-Four C
Active chassis (Four C)-option
Active chassis, Four-C (Continuously Controlled Chassis Concept), regulates the characteristics of the shock absorbers
so that the car's driving characteristics can be adjusted. There are three settings: Comfort, Sport and Advanced.
Comfort
The Comfort mode chassis setting offers the greatest amount of shock absorption and the softest ride. This mode is
recommended for long-distance driving, or when driving in slippery conditions. The indicator light in the button will
be on when this mode is selected.
Sport
In this mode, shock absorption is stiffer to reduce the vehicle's body sway during cornering and to provide more
ProCarManuals.com