clock VOLVO S80 2007 Owners Manual
[x] Cancel search | Manufacturer: VOLVO, Model Year: 2007, Model line: S80, Model: VOLVO S80 2007Pages: 251, PDF Size: 5.7 MB
Page 46 of 251
approximately 300 ft (100 m) from the vehicle.
Buildings or other obstacles may interfere with the function of the PCC.
Outside of the PCC's range
If the PCC is more than approximately 300 ft (100 m) from the vehicle when the information button is pressed, no new
information will be received. The PCC most recently used to lock or unlock the vehicle will show the vehicle's most
recently received status. The indicator lights will not flash when the information button is pressed while the PCC is out
of range.
NOTE
If none of the indicator lights illuminate when the information button is pressed, this may be because the most recent
transmission between the vehicle and the PCC was interrupted or impeded by buildings or other objects.
Heartbeat Sensor
The heartbeat sensor function
is a complement to the vehicle's standard alarm, and indicates at a distance of up to
300 ft (100 m) that someone may be in the vehicle. The heartbeat sensor only functions if the alarm has been triggered.
NOTE
The heartbeat sensor registers a person's heartbeat in the form of vibrations in the vehicle's chassis. For this reason,
the sensor's function may be impaired in areas with high levels of noise or vibrations.
Keyless drive
Vehicles equipped with the optional Personal Car Communicator have the keyless drive function. See page 56
for
detailed information.
53 02 Locks and alarm
Remote key and key blade
Detachable key blade
The key blade can be removed from the remote control. When removed, the key blade can be used as follows:
To lock/unlock the driver's door
To lock/unlock the trunk (see page 61)
To lock/unlock the glove compartment (see page 60)
To enable/disable the valet locking function (see page 54)
Unlocking the doors with the detached key blade
Insert the key blade as far as possible in the driver's door lock. Turn the key blade clockwise approximately one -
quarter turn to unlock the driver's door only.
NOTE
After unlocking the driver's door with the key blade, opening the door will trigger the alarm.
To disable the alarm:
Insert the remote key in the ignition slot.
ProCarManuals.com
Page 47 of 251
Locking the doors with the detached key blade
1. Lock the rear doors and the front passenger's door by pressing the lock button on each door.
2. Turn the key blade one -quarter turn counter-clockwise to lock the driver's door.
NOTE
This does not arm the alarm or lock the trunk. The trunk has a separate lock that can be locked with the key blade,
see page 61
.
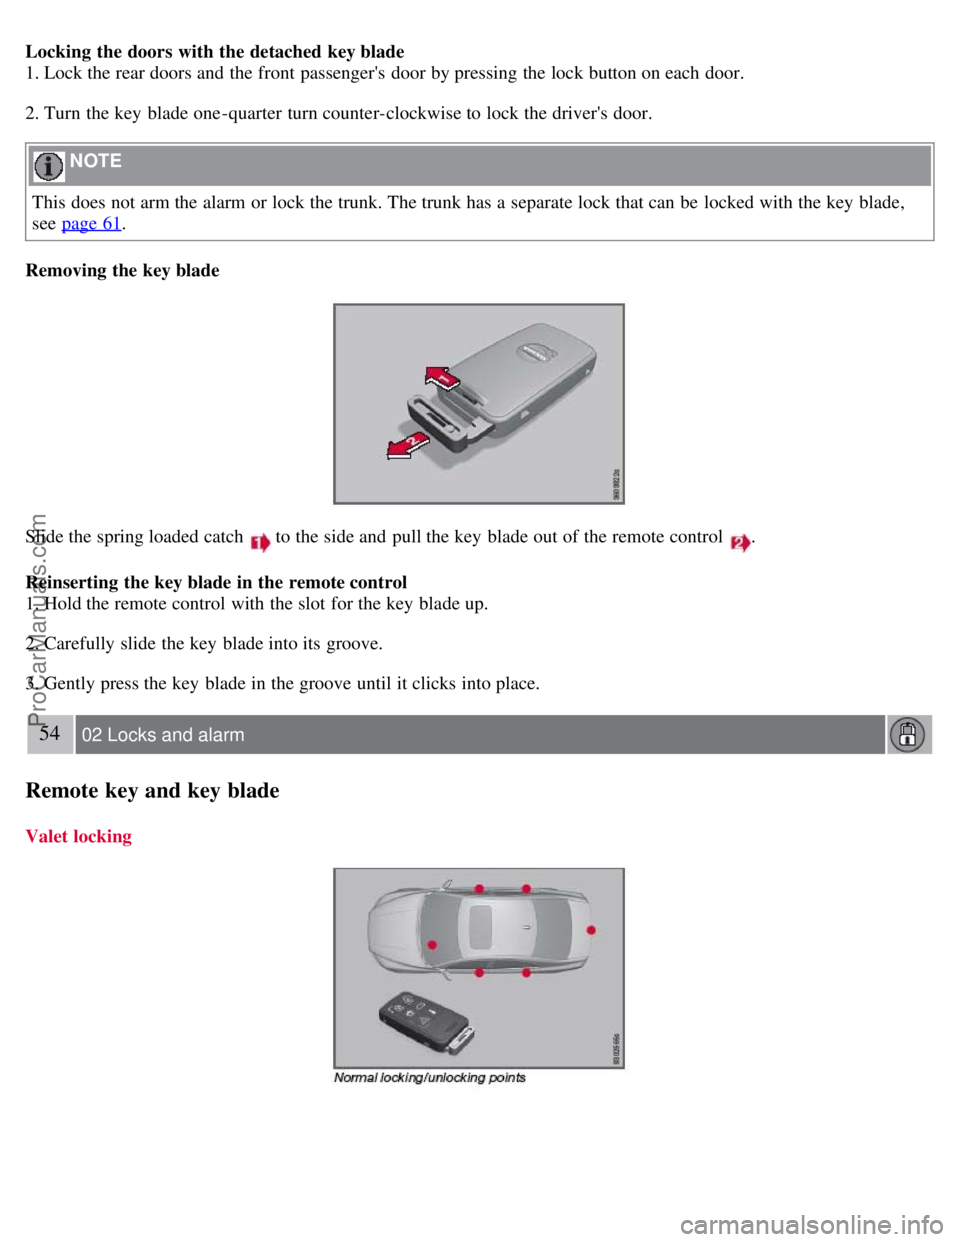
Removing the key blade
Slide the spring loaded catch to the side and pull the key blade out of the remote control .
Reinserting the key blade in the remote control
1. Hold the remote control with the slot for the key blade up.
2. Carefully slide the key blade into its groove.
3. Gently press the key blade in the groove until it clicks into place.
54 02 Locks and alarm
Remote key and key blade
Valet locking
ProCarManuals.com
Page 48 of 251
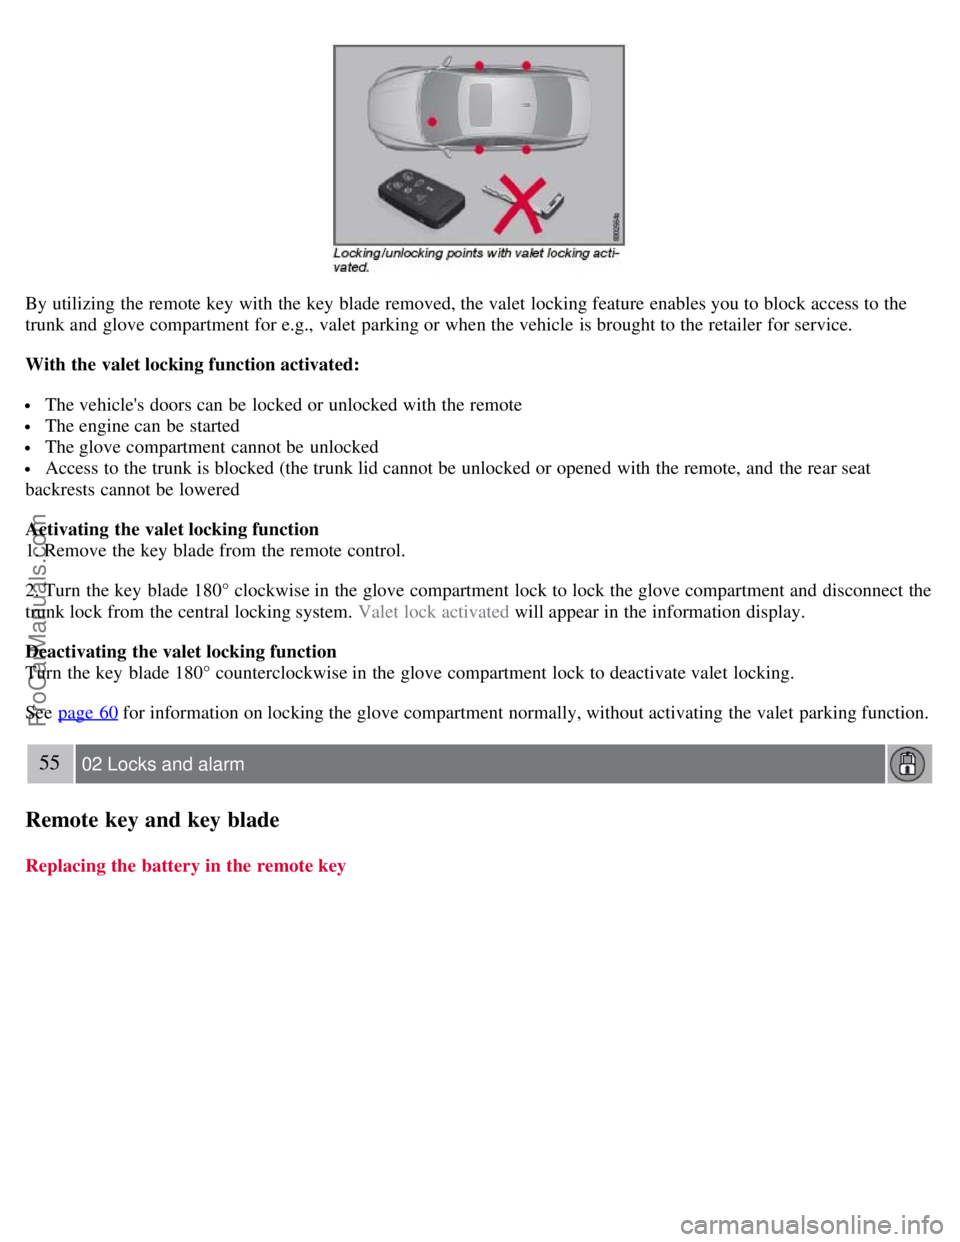
By utilizing the remote key with the key blade removed, the valet locking feature enables you to block access to the
trunk and glove compartment for e.g., valet parking or when the vehicle is brought to the retailer for service.
With the valet locking function activated:
The vehicle's doors can be locked or unlocked with the remote
The engine can be started
The glove compartment cannot be unlocked
Access to the trunk is blocked (the trunk lid cannot be unlocked or opened with the remote, and the rear seat
backrests cannot be lowered
Activating the valet locking function
1. Remove the key blade from the remote control.
2. Turn the key blade 180° clockwise in the glove compartment lock to lock the glove compartment and disconnect the
trunk lock from the central locking system. Valet lock activated will appear in the information display.
Deactivating the valet locking function
Turn the key blade 180° counterclockwise in the glove compartment lock to deactivate valet locking.
See page 60
for information on locking the glove compartment normally, without activating the valet parking function.
55 02 Locks and alarm
Remote key and key blade
Replacing the battery in the remote key
ProCarManuals.com
Page 53 of 251
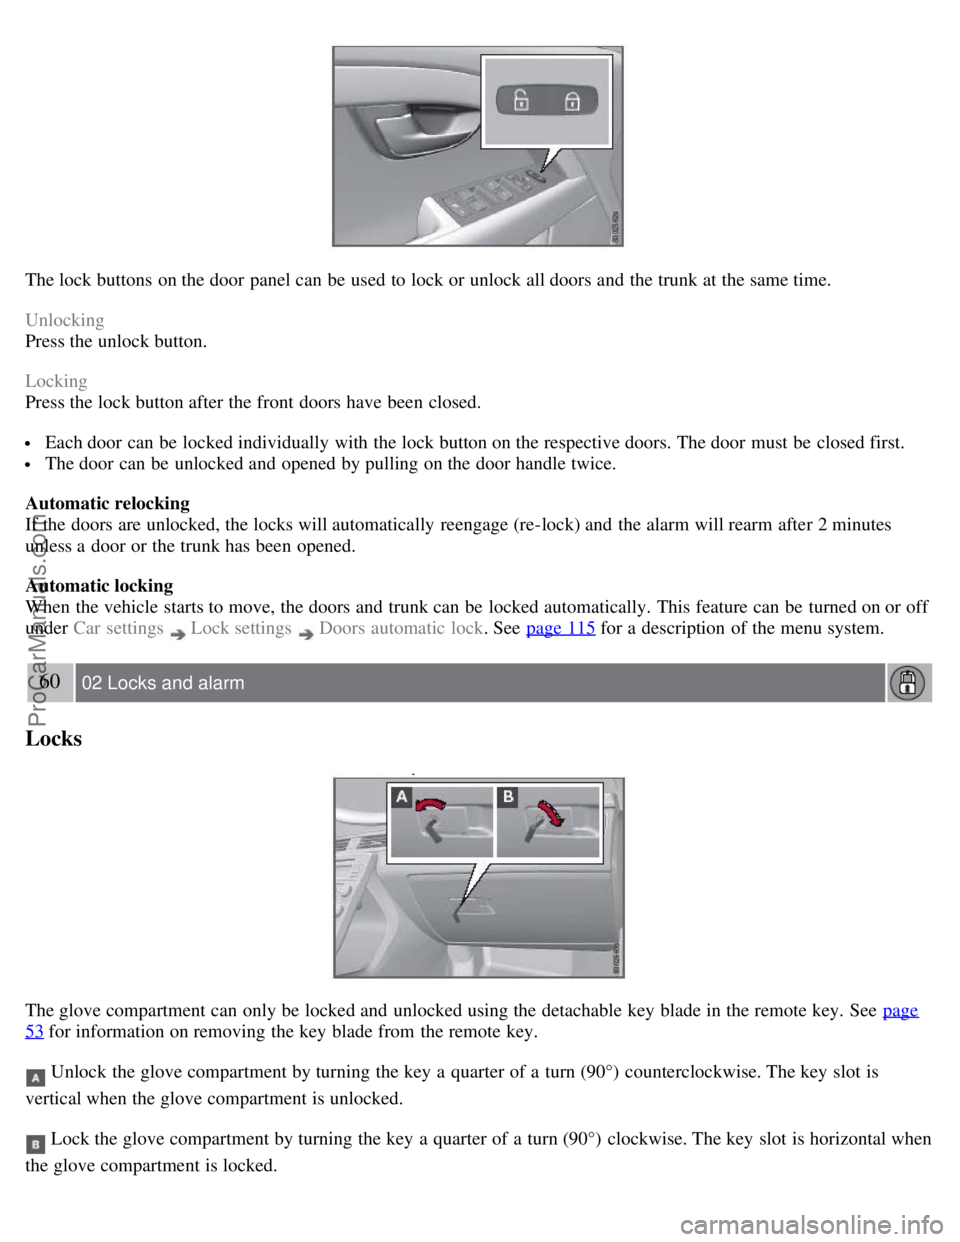
The lock buttons on the door panel can be used to lock or unlock all doors and the trunk at the same time.
Unlocking
Press the unlock button.
Locking
Press the lock button after the front doors have been closed.
Each door can be locked individually with the lock button on the respective doors. The door must be closed first.
The door can be unlocked and opened by pulling on the door handle twice.
Automatic relocking
If the doors are unlocked, the locks will automatically reengage (re-lock) and the alarm will rearm after 2 minutes
unless a door or the trunk has been opened.
Automatic locking
When the vehicle starts to move, the doors and trunk can be locked automatically. This feature can be turned on or off
under Car settings
Lock settings Doors automatic lock . See page 115 for a description of the menu system.
60 02 Locks and alarm
Locks
The glove compartment can only be locked and unlocked using the detachable key blade in the remote key. See page
53 for information on removing the key blade from the remote key.
Unlock the glove compartment by turning the key a quarter of a turn (90°) counterclockwise. The key slot is
vertical when the glove compartment is unlocked.
Lock the glove compartment by turning the key a quarter of a turn (90°) clockwise. The key slot is horizontal when
the glove compartment is locked.
ProCarManuals.com
Page 55 of 251
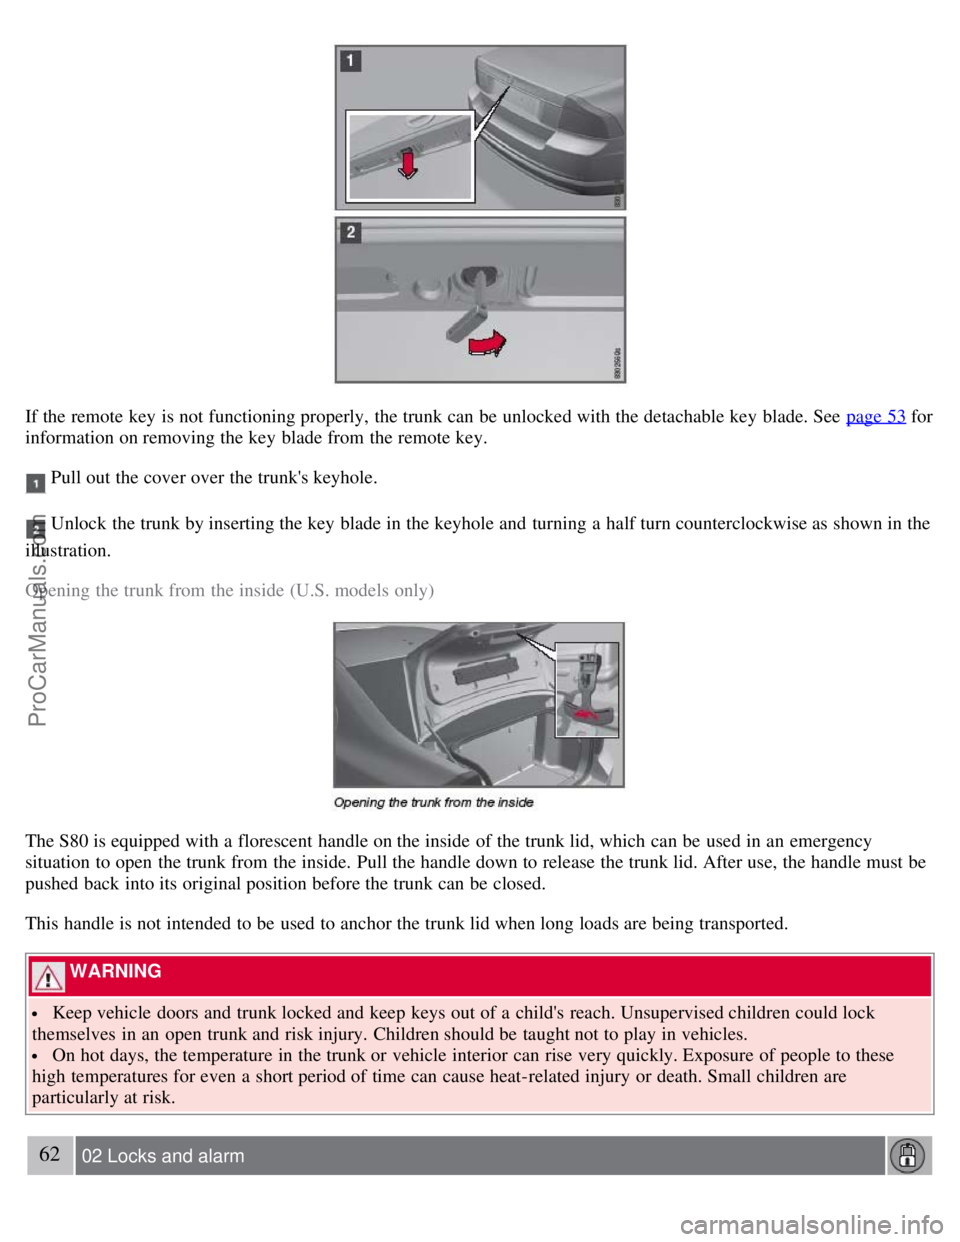
If the remote key is not functioning properly, the trunk can be unlocked with the detachable key blade. See page 53 for
information on removing the key blade from the remote key.
Pull out the cover over the trunk's keyhole.
Unlock the trunk by inserting the key blade in the keyhole and turning a half turn counterclockwise as shown in the
illustration.
Opening the trunk from the inside (U.S. models only)
The S80 is equipped with a florescent handle on the inside of the trunk lid, which can be used in an emergency
situation to open the trunk from the inside. Pull the handle down to release the trunk lid. After use, the handle must be
pushed back into its original position before the trunk can be closed.
This handle is not intended to be used to anchor the trunk lid when long loads are being transported.
WARNING
Keep vehicle doors and trunk locked and keep keys out of a child's reach. Unsupervised children could lock
themselves in an open trunk and risk injury. Children should be taught not to play in vehicles.
On hot days, the temperature in the trunk or vehicle interior can rise very quickly. Exposure of people to these
high temperatures for even a short period of time can cause heat-related injury or death. Small children are
particularly at risk.
62 02 Locks and alarm
ProCarManuals.com
Page 66 of 251
Reminder - doors not closed
If one of the doors, the hood or trunk lid is not closed properly, the information or warning symbol comes on together
with an explanatory text message in the instrument panel. Stop the vehicle in a safe place as soon as possible and close
the door, hood or trunk.
If the vehicle is driven at a speed lower than approximately 5 mph (7 km/h), the information symbol comes on.
If the vehicle is driven at a speed higher than approximately 5 mph (7 km/h), the warning symbol comes on.
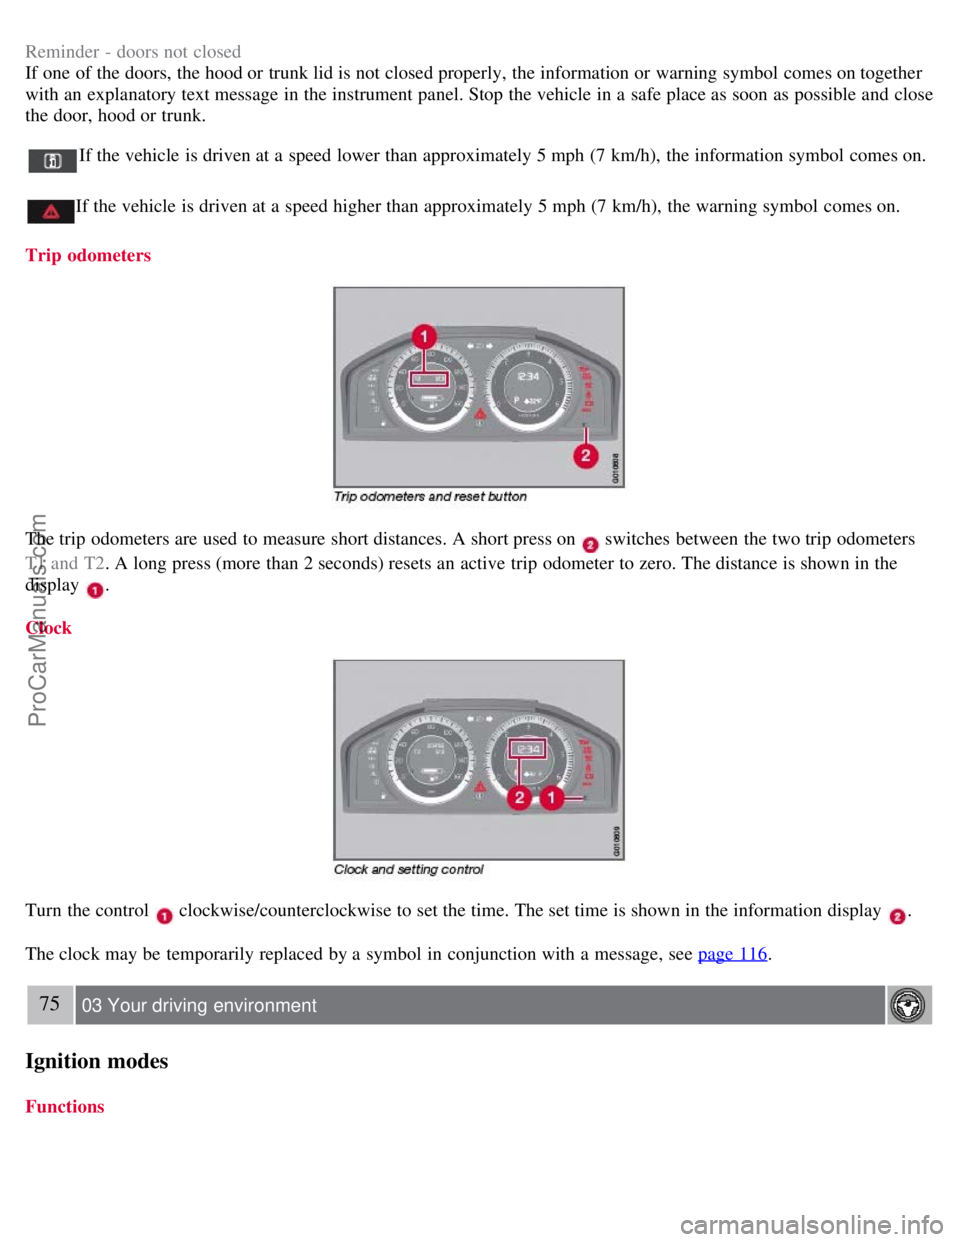
Trip odometers
The trip odometers are used to measure short distances. A short press on switches between the two trip odometers
T1 and T2 . A long press (more than 2 seconds) resets an active trip odometer to zero. The distance is shown in the
display
.
Clock
Turn the control clockwise/counterclockwise to set the time. The set time is shown in the information display .
The clock may be temporarily replaced by a symbol in conjunction with a message, see page 116
.
75 03 Your driving environment
Ignition modes
Functions
ProCarManuals.com
Page 116 of 251
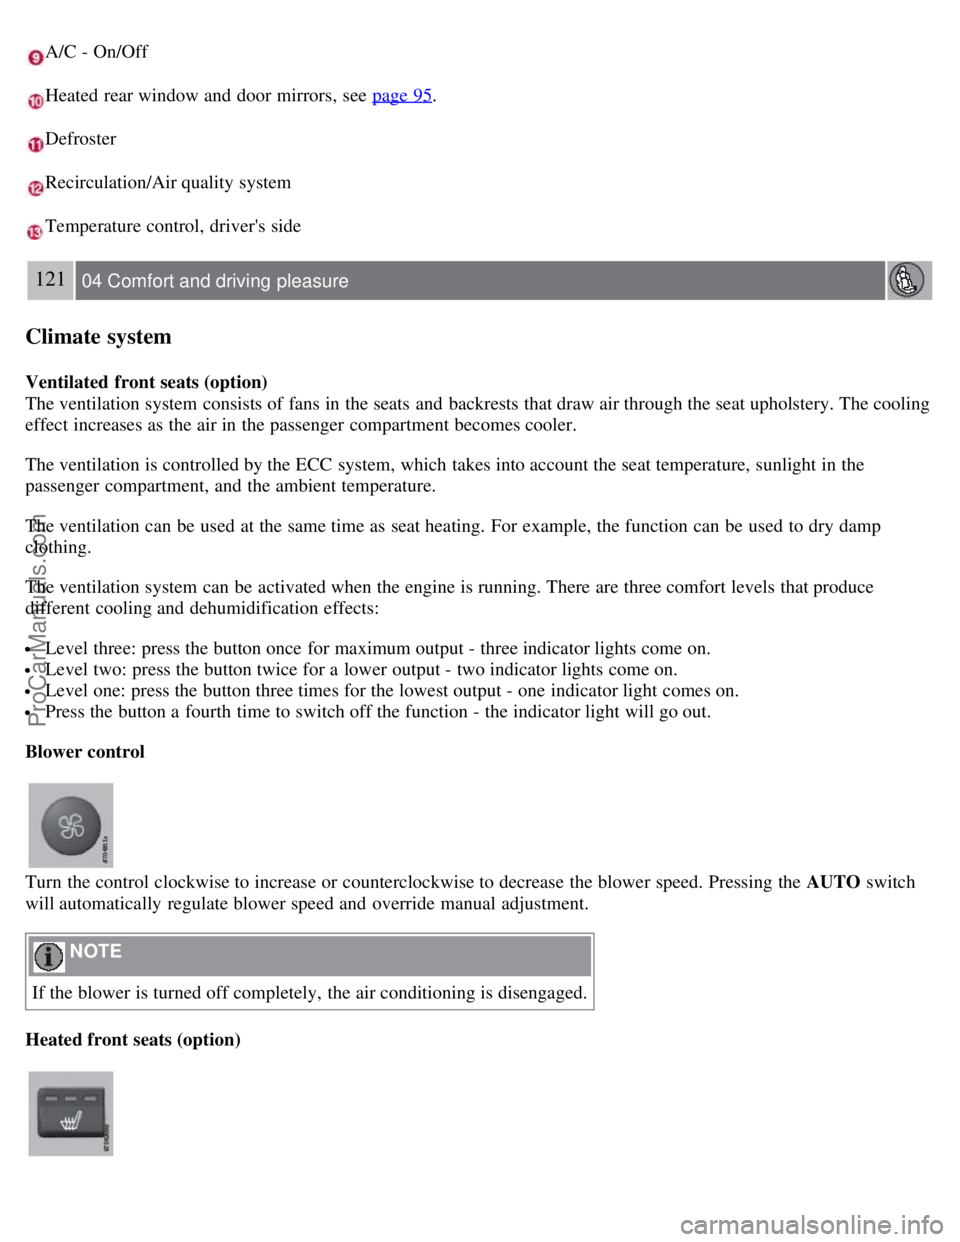
A/C - On/Off
Heated rear window and door mirrors, see page 95.
Defroster
Recirculation/Air quality system
Temperature control, driver's side
121 04 Comfort and driving pleasure
Climate system
Ventilated front seats (option)
The ventilation system consists of fans in the seats and backrests that draw air through the seat upholstery. The cooling
effect increases as the air in the passenger compartment becomes cooler.
The ventilation is controlled by the ECC system, which takes into account the seat temperature, sunlight in the
passenger compartment, and the ambient temperature.
The ventilation can be used at the same time as seat heating. For example, the function can be used to dry damp
clothing.
The ventilation system can be activated when the engine is running. There are three comfort levels that produce
different cooling and dehumidification effects:
Level three: press the button once for maximum output - three indicator lights come on.
Level two: press the button twice for a lower output - two indicator lights come on.
Level one: press the button three times for the lowest output - one indicator light comes on.
Press the button a fourth time to switch off the function - the indicator light will go out.
Blower control
Turn the control clockwise to increase or counterclockwise to decrease the blower speed. Pressing the AUTO switch
will automatically regulate blower speed and override manual adjustment.
NOTE
If the blower is turned off completely, the air conditioning is disengaged.
Heated front seats (option)
ProCarManuals.com
Page 173 of 251
177 05 During your trip
Refueling
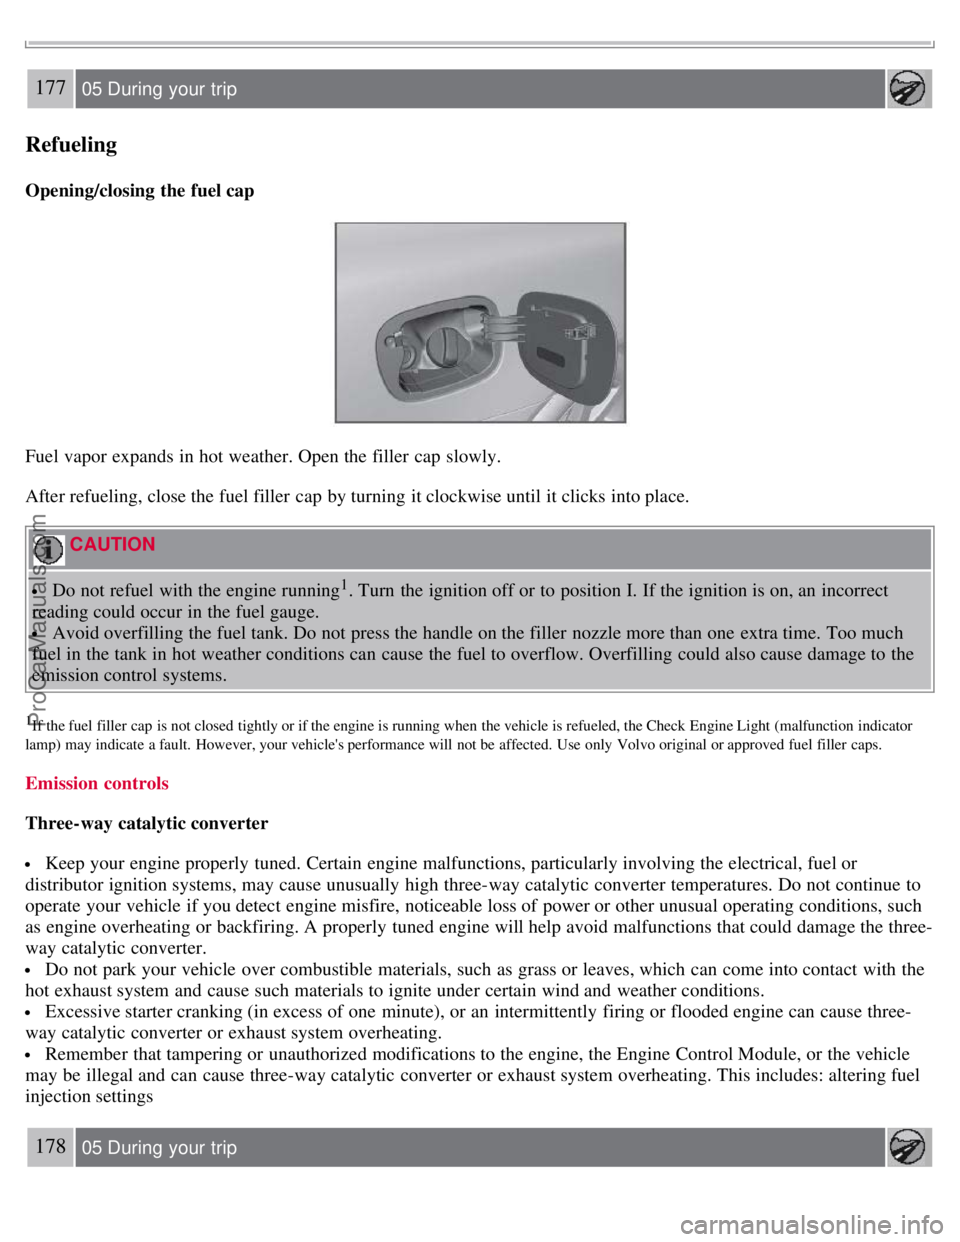
Opening/closing the fuel cap
Fuel vapor expands in hot weather. Open the filler cap slowly.
After refueling, close the fuel filler cap by turning it clockwise until it clicks into place.
CAUTION
Do not refuel with the engine running1. Turn the ignition off or to position I. If the ignition is on, an incorrect
reading could occur in the fuel gauge.
Avoid overfilling the fuel tank. Do not press the handle on the filler nozzle more than one extra time. Too much
fuel in the tank in hot weather conditions can cause the fuel to overflow. Overfilling could also cause damage to the
emission control systems.
1If the fuel filler cap is not closed tightly or if the engine is running when the vehicle is refueled, the Check Engine Light (malfunction indicator
lamp) may indicate a fault. However, your vehicle's performance will not be affected. Use only Volvo original or approved fuel filler caps.
Emission controls
Three-way catalytic converter
Keep your engine properly tuned. Certain engine malfunctions, particularly involving the electrical, fuel or
distributor ignition systems, may cause unusually high three-way catalytic converter temperatures. Do not continue to
operate your vehicle if you detect engine misfire, noticeable loss of power or other unusual operating conditions, such
as engine overheating or backfiring. A properly tuned engine will help avoid malfunctions that could damage the three-
way catalytic converter.
Do not park your vehicle over combustible materials, such as grass or leaves, which can come into contact with the
hot exhaust system and cause such materials to ignite under certain wind and weather conditions.
Excessive starter cranking (in excess of one minute), or an intermittently firing or flooded engine can cause three-
way catalytic converter or exhaust system overheating.
Remember that tampering or unauthorized modifications to the engine, the Engine Control Module, or the vehicle
may be illegal and can cause three-way catalytic converter or exhaust system overheating. This includes: altering fuel
injection settings
178 05 During your trip
ProCarManuals.com
Page 195 of 251
3. Pull the wire to withdraw the bulb holder.
4. Pull out the burned out bulb and install a new one. It can only be secured in one position.
5. Press the bulb holder into the socket and press until it clicks into place.
6. Press the cover until it clicks into position.
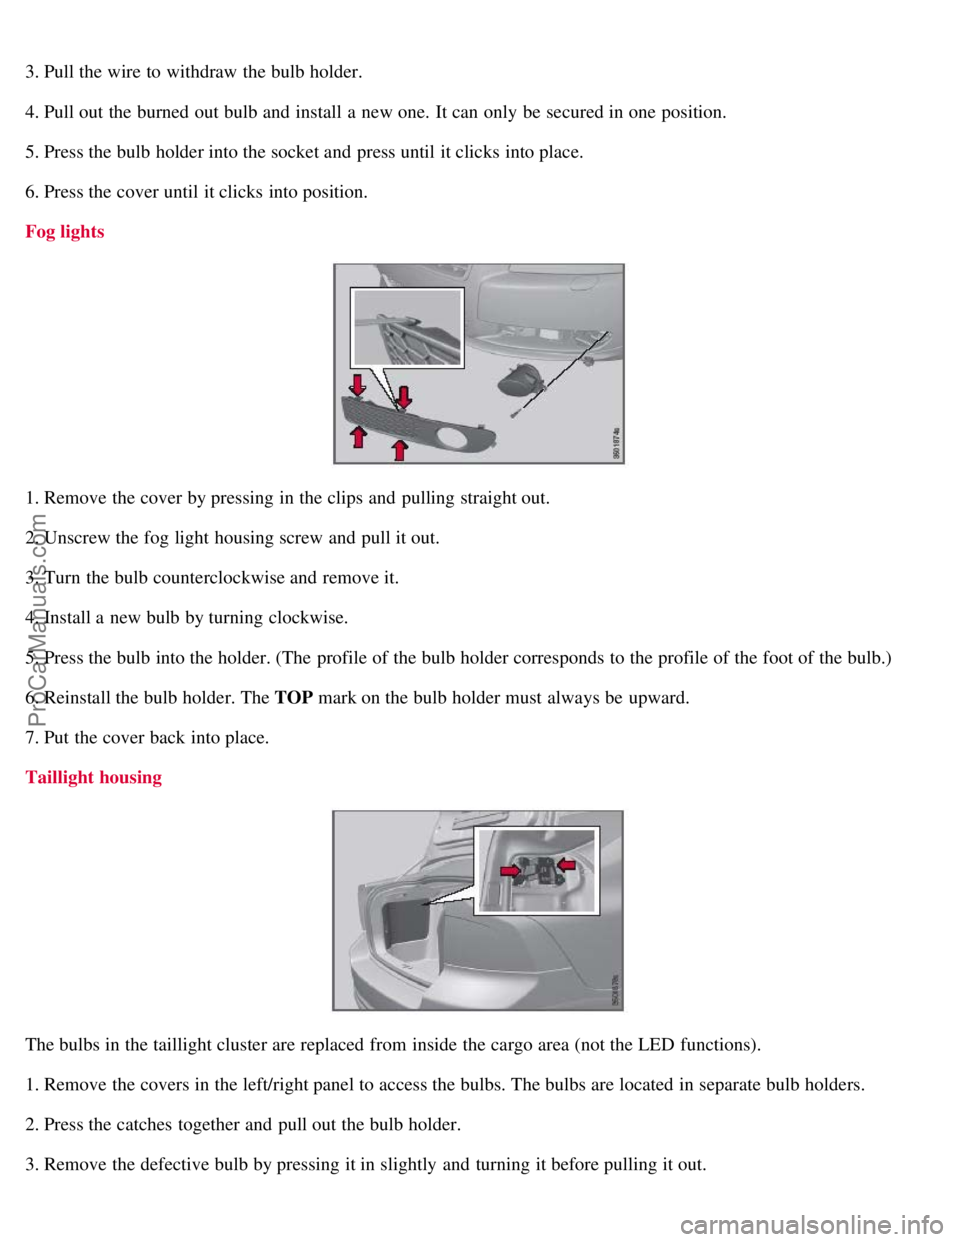
Fog lights
1. Remove the cover by pressing in the clips and pulling straight out.
2. Unscrew the fog light housing screw and pull it out.
3. Turn the bulb counterclockwise and remove it.
4. Install a new bulb by turning clockwise.
5. Press the bulb into the holder. (The profile of the bulb holder corresponds to the profile of the foot of the bulb.)
6. Reinstall the bulb holder. The TOP mark on the bulb holder must always be upward.
7. Put the cover back into place.
Taillight housing
The bulbs in the taillight cluster are replaced from inside the cargo area (not the LED functions).
1. Remove the covers in the left/right panel to access the bulbs. The bulbs are located in separate bulb holders.
2. Press the catches together and pull out the bulb holder.
3. Remove the defective bulb by pressing it in slightly and turning it before pulling it out.
ProCarManuals.com
Page 227 of 251
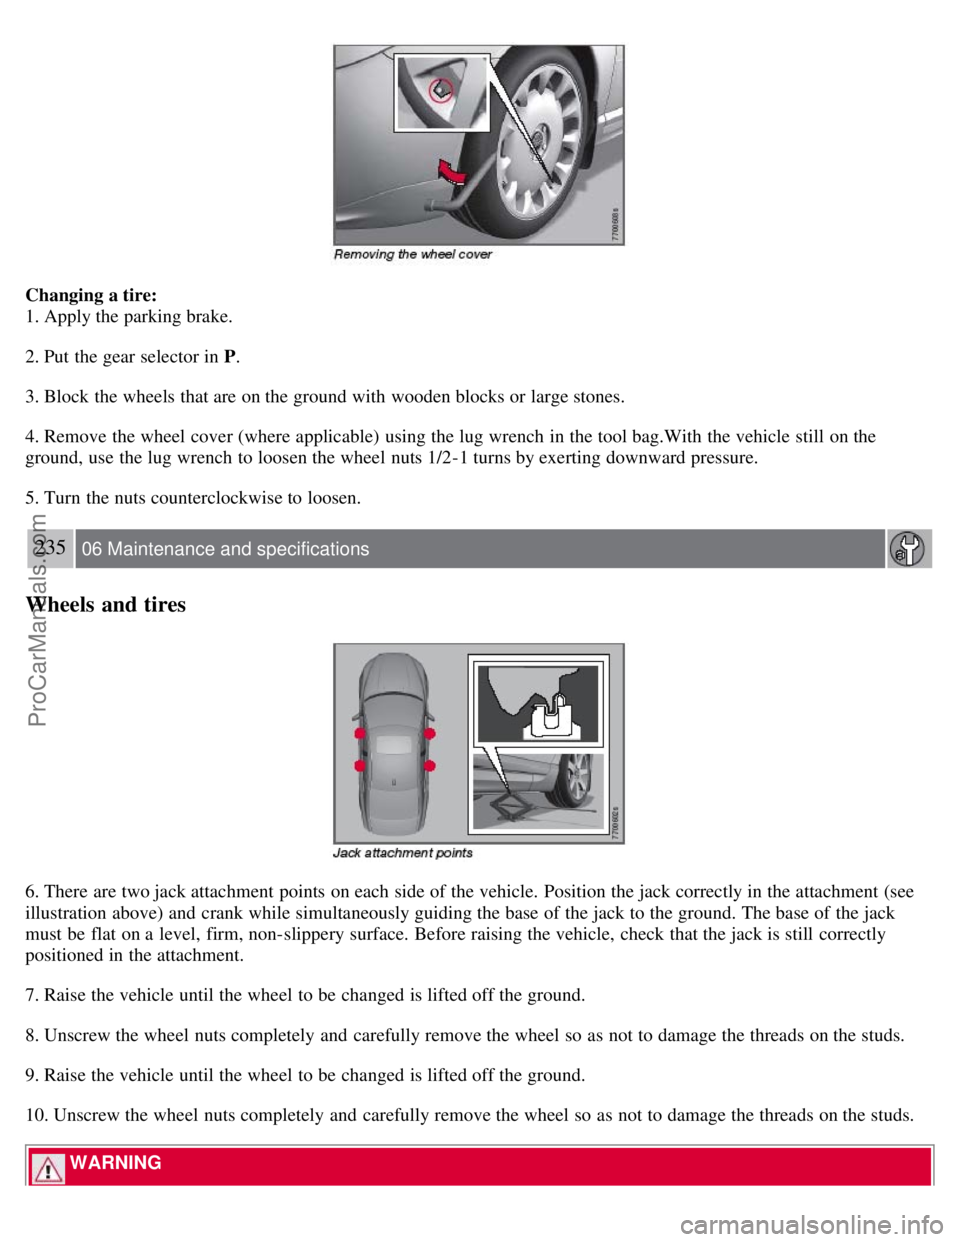
Changing a tire:
1. Apply the parking brake.
2. Put the gear selector in P.
3. Block the wheels that are on the ground with wooden blocks or large stones.
4. Remove the wheel cover (where applicable) using the lug wrench in the tool bag.With the vehicle still on the
ground, use the lug wrench to loosen the wheel nuts 1/2-1 turns by exerting downward pressure.
5. Turn the nuts counterclockwise to loosen.
235 06 Maintenance and specifications
Wheels and tires
6. There are two jack attachment points on each side of the vehicle. Position the jack correctly in the attachment (see
illustration above) and crank while simultaneously guiding the base of the jack to the ground. The base of the jack
must be flat on a level, firm, non-slippery surface. Before raising the vehicle, check that the jack is still correctly
positioned in the attachment.
7. Raise the vehicle until the wheel to be changed is lifted off the ground.
8. Unscrew the wheel nuts completely and carefully remove the wheel so as not to damage the threads on the studs.
9. Raise the vehicle until the wheel to be changed is lifted off the ground.
10. Unscrew the wheel nuts completely and carefully remove the wheel so as not to damage the threads on the studs.
WARNING
ProCarManuals.com