center console VOLVO S80 2014 Owner´s Manual
[x] Cancel search | Manufacturer: VOLVO, Model Year: 2014, Model line: S80, Model: VOLVO S80 2014Pages: 380, PDF Size: 10.83 MB
Page 178 of 380
04 Driver support
Park assist*
04
176* Option/accessory, for more information, see Introduction.
Introduction
The park assist system is designed to assist you when driving into parking spaces,garages, etc. It utilizes ultrasound sensors inthe front bumper and rear bumper(s) to meas-ure the distance to a vehicle or an object thatmay be close to the front or rear of your vehi-cle. An audible signal and symbols in theaudio system’s display indicate the distanceto the object.
NOTE
A trailer hitch whose wiring is integrated with the vehicle's electrical system will beincluded in the measurement of the availa-ble space behind the vehicle.
WARNING
Park Assist is an information system, NOT a safety system. This system is designedto be a supplementary aid when parkingthe vehicle. It is not, however, intended toreplace the driver's attention and judge-ment.
Function
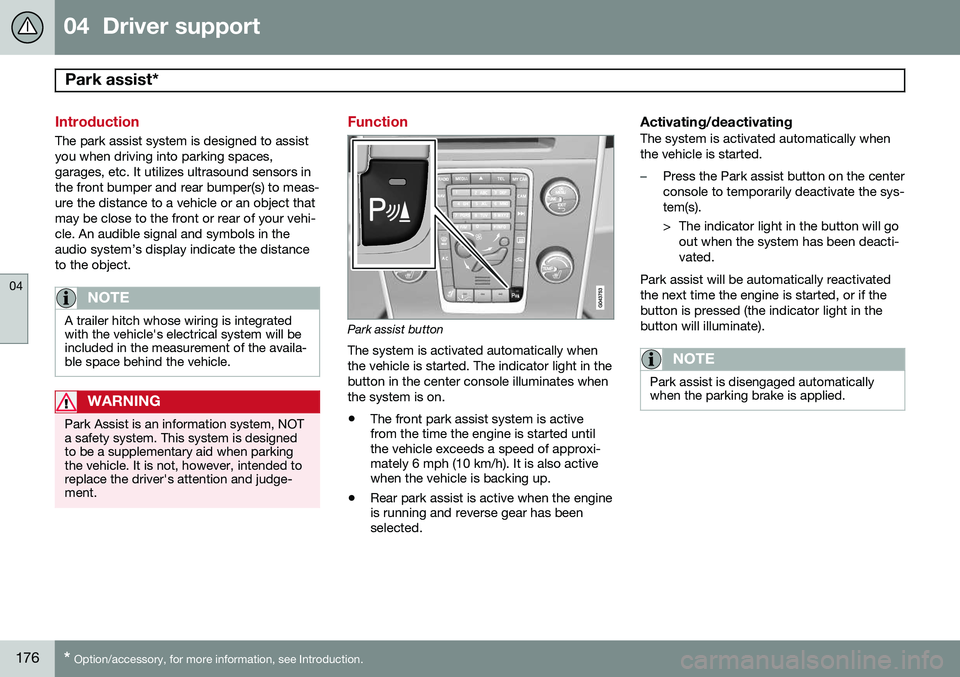
Park assist button
The system is activated automatically when the vehicle is started. The indicator light in thebutton in the center console illuminates whenthe system is on.
• The front park assist system is active from the time the engine is started untilthe vehicle exceeds a speed of approxi-mately 6 mph (10 km/h). It is also activewhen the vehicle is backing up.
• Rear park assist is active when the engineis running and reverse gear has beenselected.
Activating/deactivatingThe system is activated automatically when the vehicle is started.
–Press the Park assist button on the center console to temporarily deactivate the sys-tem(s).
> The indicator light in the button will go
out when the system has been deacti- vated.
Park assist will be automatically reactivatedthe next time the engine is started, or if thebutton is pressed (the indicator light in thebutton will illuminate).
NOTE
Park assist is disengaged automatically when the parking brake is applied.
Page 182 of 380
04 Driver support
Rear Park Assist Camera (PAC)*
04
180* Option/accessory, for more information, see Introduction.
Introduction
The Park Assist Camera uses the display in the center console to show the area behindthe car while you are backing up. PAC also shows guiding lines in the on- screen image to indicate the direction that thevehicle will take as it moves rearward, whichhelps simplify parallel parking, backing into atight space or when attaching a trailer to thevehicle.
NOTE
A trailer hitch whose wiring is integrated with the vehicle's electrical system will beincluded in the measurement of the availa-ble space behind the vehicle.
WARNING
• PAC is designed to be a supplemen- tary aid when parking the vehicle. It isnot, however, intended to replace thedriver’s attention and judgment.
• The camera has blind spots where itcannot detect objects or peoplebehind the vehicle.
• Pay particular attention to people oranimals that are close to the vehicle.
Function
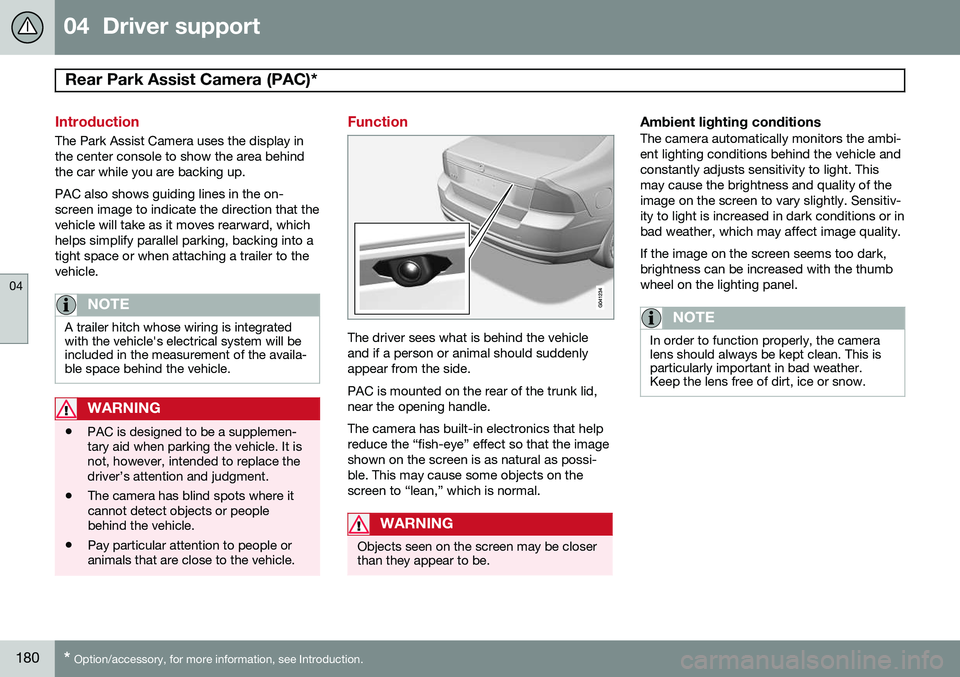
The driver sees what is behind the vehicle and if a person or animal should suddenlyappear from the side. PAC is mounted on the rear of the trunk lid, near the opening handle. The camera has built-in electronics that help reduce the “fish-eye” effect so that the imageshown on the screen is as natural as possi-ble. This may cause some objects on thescreen to “lean,” which is normal.
WARNING
Objects seen on the screen may be closer than they appear to be.
Ambient lighting conditionsThe camera automatically monitors the ambi- ent lighting conditions behind the vehicle andconstantly adjusts sensitivity to light. Thismay cause the brightness and quality of theimage on the screen to vary slightly. Sensitiv-ity to light is increased in dark conditions or inbad weather, which may affect image quality. If the image on the screen seems too dark, brightness can be increased with the thumbwheel on the lighting panel.
NOTE
In order to function properly, the camera lens should always be kept clean. This isparticularly important in bad weather.Keep the lens free of dirt, ice or snow.
Page 183 of 380
04 Driver support
Rear Park Assist Camera (PAC)*
04
* Option/accessory, for more information, see Introduction.181
Using PAC
Activation
PAC is activated when the gear selector is moved to R if the system is selected in the
MY CAR menu system or by pressing the
CAM button in the center console. See page
193 for a description of the menu system. If the Volvo Navigation System (VNS) is in use, PAC will automatically override the navi-gation system to show the camera's imageon the screen instead of navigation informa-tion, for as long as reverse gear is selected.
DeactivationMove the gear selector from R to another
position. There is a slight delay in the PACsystem, which means that the view from behind the vehicle will remain on the screenfor approximately 15 seconds after the gearselector has been moved from the
R position
or until the vehicle reaches a forward speedof 6 mph (10 km/h). The screen will thenrevert to the mode that it was in before R was
selected and will, for example, display navi-gation system information.
NOTE
If any button on the center console control panel is pressed, the camera image willdisappear from the display. Pressing CAM
will return the camera image to the display.
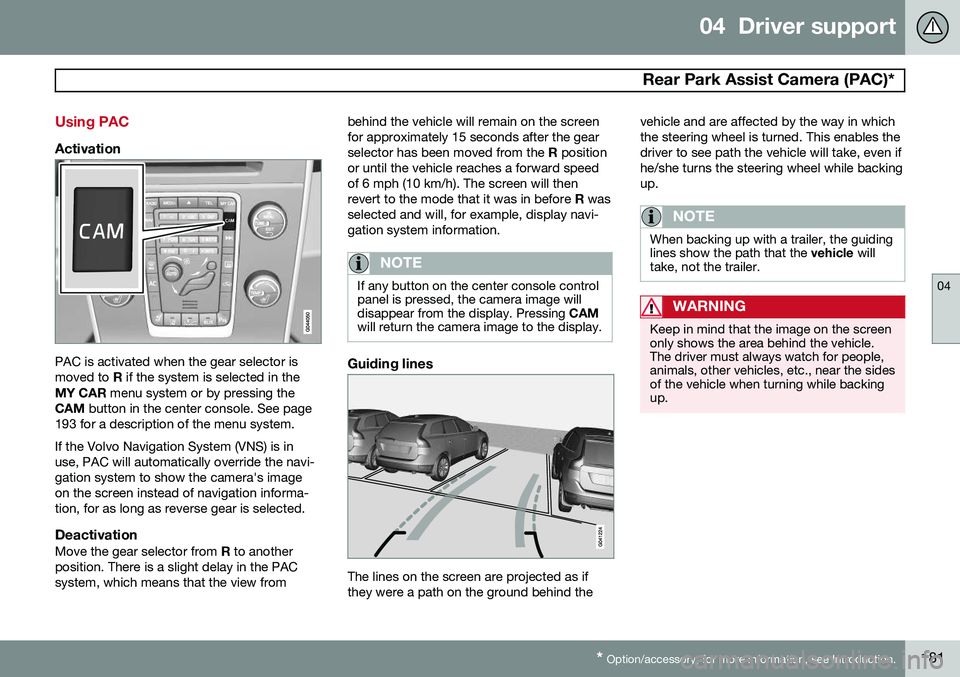
Guiding lines
The lines on the screen are projected as if they were a path on the ground behind the vehicle and are affected by the way in whichthe steering wheel is turned. This enables thedriver to see path the vehicle will take, even ifhe/she turns the steering wheel while backingup.
NOTE
When backing up with a trailer, the guiding lines show the path that the
vehicle will
take, not the trailer.
WARNING
Keep in mind that the image on the screen only shows the area behind the vehicle.The driver must always watch for people,animals, other vehicles, etc., near the sidesof the vehicle when turning while backingup.
Page 184 of 380
04 Driver support
Rear Park Assist Camera (PAC)*
04
182* Option/accessory, for more information, see Introduction.
Marker lines
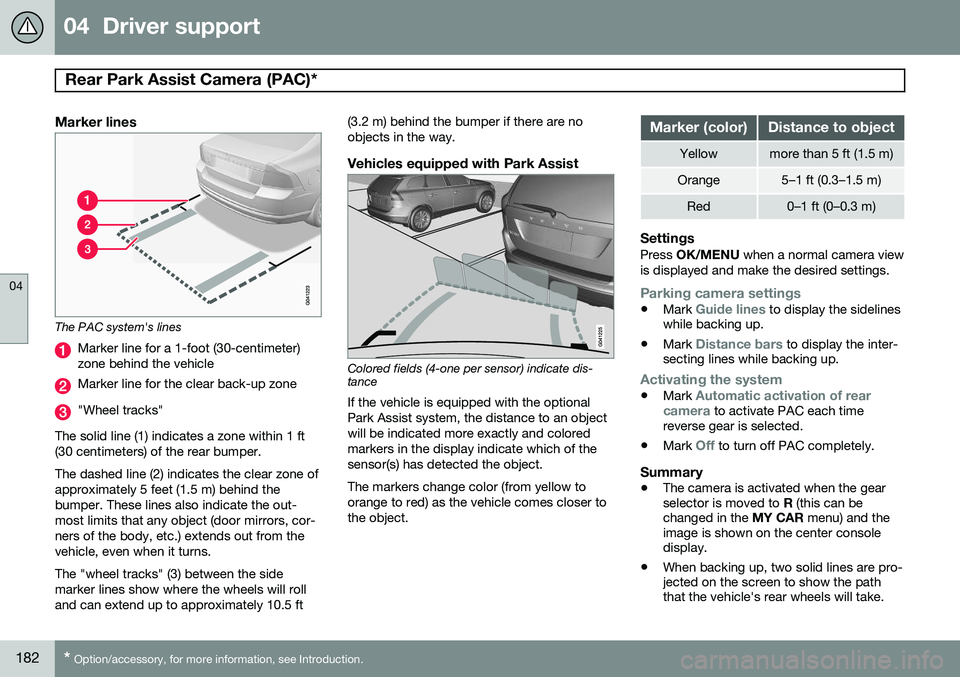
The PAC system's lines
Marker line for a 1-foot (30-centimeter) zone behind the vehicle
Marker line for the clear back-up zone
"Wheel tracks"
The solid line (1) indicates a zone within 1 ft (30 centimeters) of the rear bumper. The dashed line (2) indicates the clear zone of approximately 5 feet (1.5 m) behind thebumper. These lines also indicate the out-most limits that any object (door mirrors, cor-ners of the body, etc.) extends out from thevehicle, even when it turns. The "wheel tracks" (3) between the side marker lines show where the wheels will rolland can extend up to approximately 10.5 ft (3.2 m) behind the bumper if there are noobjects in the way.
Vehicles equipped with Park Assist
Colored fields (4-one per sensor) indicate dis- tance If the vehicle is equipped with the optional Park Assist system, the distance to an objectwill be indicated more exactly and coloredmarkers in the display indicate which of thesensor(s) has detected the object. The markers change color (from yellow to orange to red) as the vehicle comes closer tothe object.
Marker (color)Distance to object
Yellowmore than 5 ft (1.5 m)
Orange5–1 ft (0.3–1.5 m)
Red0–1 ft (0–0.3 m)
SettingsPress
OK/MENU when a normal camera view
is displayed and make the desired settings.
Parking camera settings
• Mark Guide lines to display the sidelines
while backing up.
• Mark
Distance bars to display the inter-
secting lines while backing up.
Activating the system
• Mark Automatic activation of rear
camera to activate PAC each time
reverse gear is selected.
• Mark
Off to turn off PAC completely.
Summary
•The camera is activated when the gear selector is moved to
R (this can be
changed in the MY CAR menu) and the
image is shown on the center consoledisplay.
• When backing up, two solid lines are pro-jected on the screen to show the paththat the vehicle's rear wheels will take.
Page 185 of 380
04 Driver support
Rear Park Assist Camera (PAC)*
04
* Option/accessory, for more information, see Introduction.183
These lines are affected by movements of the steering wheel. The vehicle's approxi-mate outer dimension are shown by twodashed lines.
• The graphic lines will not be displayedwhen backing up with a trailer that is con-nected to the vehicle's electrical system.
• Objects on the ground that are closerthan 1 ft (30 centimeters) cannot bedetected by the camera.
• The camera is active for approx.5 seconds after the gear selector ismoved to
R or until the vehicle's speed
exceeds 6 mph (10 km/h).
• The optional Park Assist sensors and theparking camera work together and infor-mation from the sensors is shown graphi-cally on the display.
• The graphic lines shown on the screenwhen the vehicle backs up can be disa-bled in the settings menu.
• The system can be switched off by press-ing
CAM . By default, the system is acti-
vated when the gear selector is moved toR . This setting can be changed in the MY
CAR menu.
• If there are two cameras installed on thevehicle*, to switch between cameras, turnTUNE
(at least one of the cameras has to
be active), press CAM repeatedly or use
the center console controls. If the front camera is on, it overrides the optionalpark assist system's visual indicator butthere will still be an audible signal.
Limitations
Even if a fairly small section of the screen image appears to be obstructed, this maymean that a relatively large area behind thevehicle is hidden and objects there may notbe detected until they are very near the vehi-cle.
NOTE
Bicycle carriers or other accessories mounted on the trunk may obstruct thecamera's field of view.
Keep in mind
•
Keep the camera's lens free of dirt, ice and snow. Remove ice and snow care-fully to avoid scratching the lens.
• Clean the lens regularly with warm waterand a suitable car washing detergent.
Page 188 of 380
04 Driver support
Blind Spot Information System (BLIS)*
04
186* Option/accessory, for more information, see Introduction.
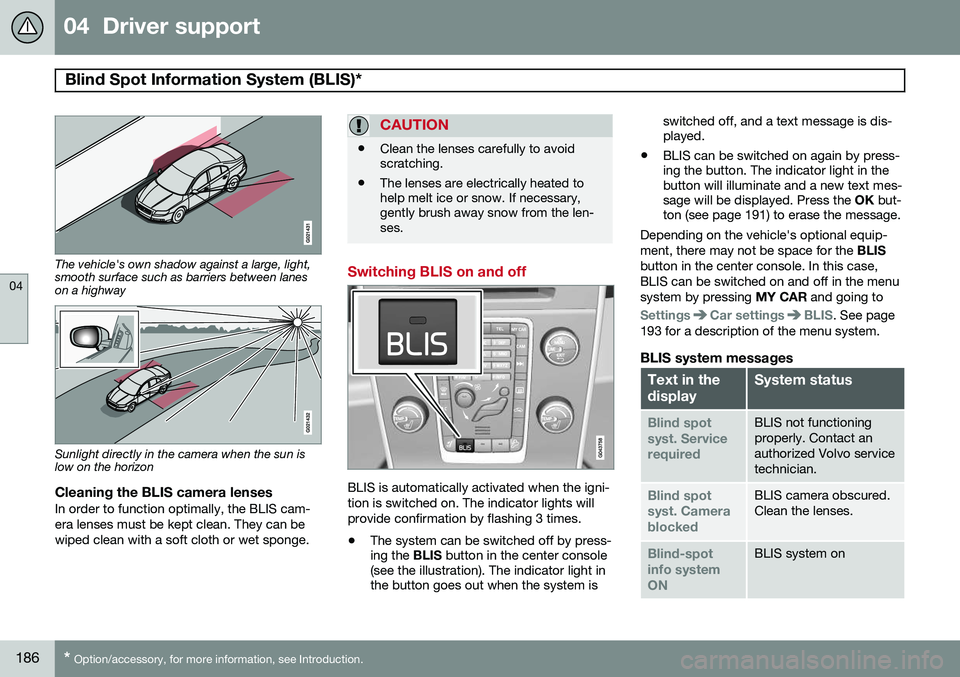
The vehicle's own shadow against a large, light, smooth surface such as barriers between laneson a highway
Sunlight directly in the camera when the sun is low on the horizon
Cleaning the BLIS camera lensesIn order to function optimally, the BLIS cam- era lenses must be kept clean. They can bewiped clean with a soft cloth or wet sponge.
CAUTION
• Clean the lenses carefully to avoid scratching.
• The lenses are electrically heated tohelp melt ice or snow. If necessary,gently brush away snow from the len-ses.
Switching BLIS on and off
BLIS is automatically activated when the igni- tion is switched on. The indicator lights willprovide confirmation by flashing 3 times.
• The system can be switched off by press- ing the
BLIS button in the center console
(see the illustration). The indicator light inthe button goes out when the system is switched off, and a text message is dis-played.
• BLIS can be switched on again by press-ing the button. The indicator light in thebutton will illuminate and a new text mes-sage will be displayed. Press the
OK but-
ton (see page 191) to erase the message.
Depending on the vehicle's optional equip- ment, there may not be space for the BLIS
button in the center console. In this case,BLIS can be switched on and off in the menusystem by pressing MY CAR and going to
SettingsCar settingsBLIS. See page
193 for a description of the menu system.
BLIS system messages
Text in the displaySystem status
Blind spot syst. ServicerequiredBLIS not functioning properly. Contact anauthorized Volvo servicetechnician.
Blind spot syst. CamerablockedBLIS camera obscured. Clean the lenses.
Blind-spot info systemONBLIS system on
Page 192 of 380
05 Comfort and driving pleasure
Volvo Sensus
05
190* Option/accessory, for more information, see Introduction.
Introduction
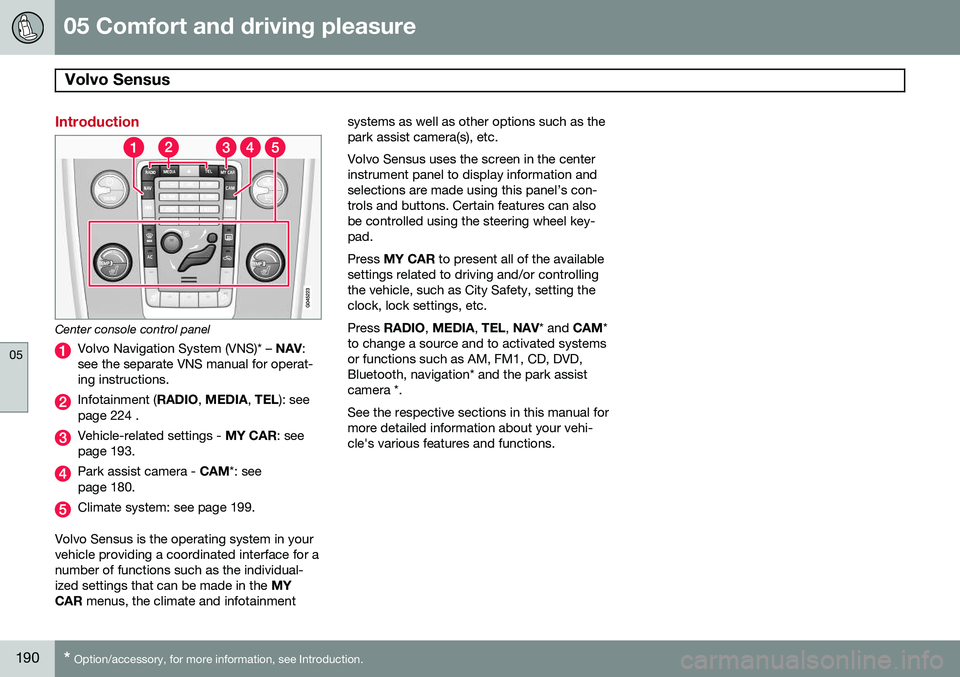
Center console control panel
Volvo Navigation System (VNS)* – NAV:
see the separate VNS manual for operat- ing instructions.
Infotainment ( RADIO, MEDIA , TEL ): see
page 224 .
Vehicle-related settings - MY CAR: see
page 193.
Park assist camera - CAM*: see
page 180.
Climate system: see page 199.
Volvo Sensus is the operating system in your vehicle providing a coordinated interface for anumber of functions such as the individual-ized settings that can be made in the MY
CAR menus, the climate and infotainment systems as well as other options such as thepark assist camera(s), etc. Volvo Sensus uses the screen in the center instrument panel to display information andselections are made using this panel’s con-trols and buttons. Certain features can alsobe controlled using the steering wheel key-pad. Press
MY CAR to present all of the available
settings related to driving and/or controlling the vehicle, such as City Safety, setting theclock, lock settings, etc. Press RADIO , MEDIA , TEL , NAV * and CAM*
to change a source and to activated systems or functions such as AM, FM1, CD, DVD,Bluetooth, navigation* and the park assistcamera *. See the respective sections in this manual for more detailed information about your vehi-cle's various features and functions.
Page 195 of 380
05 Comfort and driving pleasure
The MY CAR menus
05
}}
193
Introduction
The menu system provides access to menus for operating many of the vehi-cle's functions, such as setting the
clock, door mirrors, locks, etc.
Navigating in the menus is done using the buttons on the center console control panelor with the right-side steering wheel keypad. Some of the features mentioned in this sec- tion are optional.
Operation
Center console controls
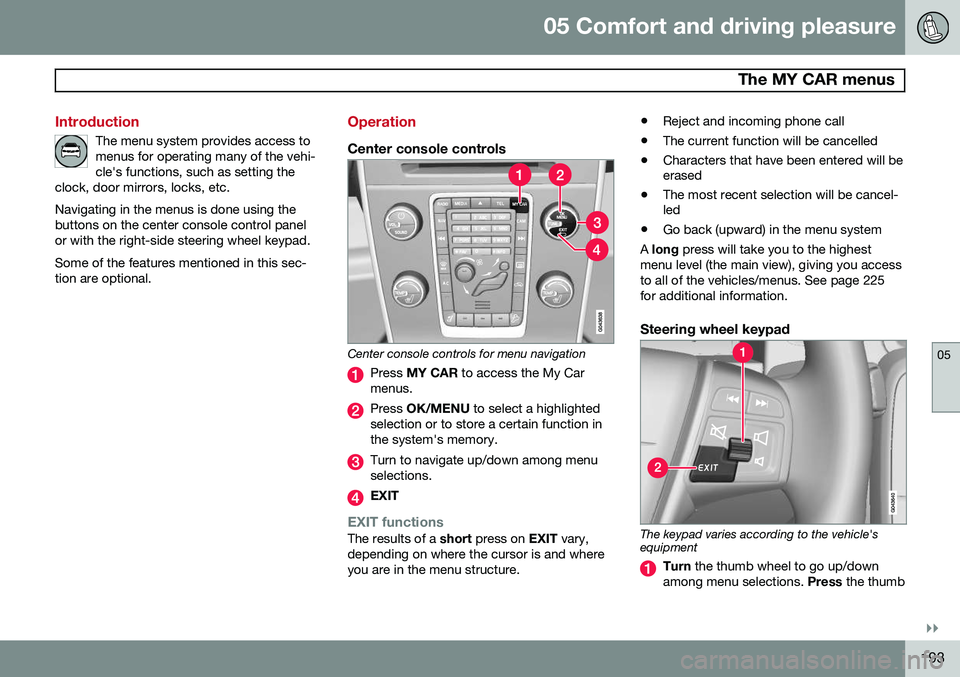
Center console controls for menu navigation
Press MY CAR to access the My Car
menus.
Press OK/MENU to select a highlighted
selection or to store a certain function in the system's memory.
Turn to navigate up/down among menu selections.
EXIT
EXIT functionsThe results of a short press on EXIT vary,
depending on where the cursor is and where you are in the menu structure. •
Reject and incoming phone call
• The current function will be cancelled
• Characters that have been entered will be erased
• The most recent selection will be cancel-led
• Go back (upward) in the menu system
A long press will take you to the highest
menu level (the main view), giving you access to all of the vehicles/menus. See page 225for additional information.
Steering wheel keypad
The keypad varies according to the vehicle's equipment
Turn the thumb wheel to go up/down
among menu selections. Press the thumb
Page 196 of 380
05 Comfort and driving pleasure
The MY CAR menus
05
194
wheel to make a selection or store a func- tion in the system's memory.
EXIT.
PathsThe current menu level is displayed at the upper right of the center console display.Menu paths are displayed as follows, forexample:
SettingsCar settingsLock settings
Doors unlockDriver door, then all
The following is an example of how to set a function in the menu system:
1. Press the MY CAR button on the center
console control panel.
2. Navigate to a menu, for example
Settings using the thumb wheel (1) and
press it to open a submenu.
3. Navigate to the desired submenu such as
Car settings.
4. Navigate to
Lock settings and press the
thumb wheel to open a new submenu.
5. Navigate to
Doors unlock and press the
thumb wheel to open a submenu with alternatives that can be selected. 6. Use the thumb wheel to move to the
desired choice and press the thumbwheel to put an X in the box.
7. Finish by exiting the menu system either one step at a time with short presses onEXIT (2) or press and hold this button to
return to the main menu.
The OK/MENU (2), EXIT (4) and control (3) in
the center console can be used in the sameway.
MY CAR
When the MY CAR symbol has been
selected, the following menu alternatives are displayed.
•My S80
•Trip statistics
•Support systems
•Settings
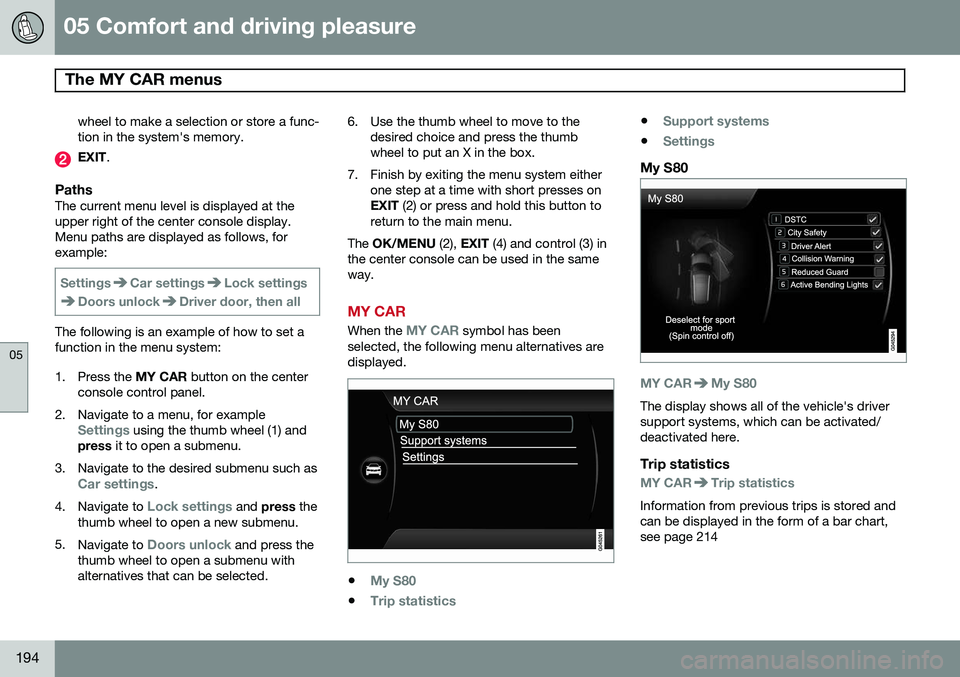
My S80
MY CARMy S80
The display shows all of the vehicle's driver support systems, which can be activated/deactivated here.
Trip statistics
MY CARTrip statistics
Information from previous trips is stored and can be displayed in the form of a bar chart,see page 214
Page 205 of 380
05 Comfort and driving pleasure
Climate system
05
}}
* Option/accessory, for more information, see Introduction.203
The ventilation can be used at the same time as seat heating. The ventilation system can be activated when the engine is running. There are three comfortlevels that produce different cooling anddehumidifying effects:
• Level three: press the button once for maximum output – three indicator lightscome on.
• Level two: press the button twice for alower output – two indicator lights comeon.
• Level one: press the button three timesfor the lowest output – one indicator lightcomes on.
• Press the button a fourth time to switchoff the function – the indicator light will goout.
Heated front seats*
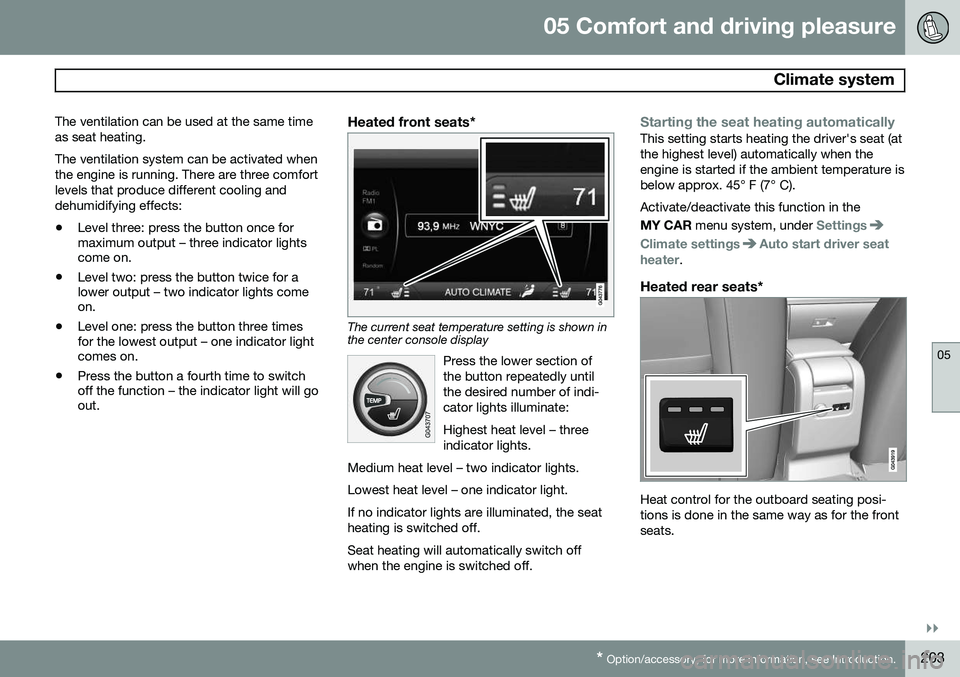
The current seat temperature setting is shown in the center console display
Press the lower section of the button repeatedly untilthe desired number of indi-cator lights illuminate: Highest heat level – three indicator lights.
Medium heat level – two indicator lights. Lowest heat level – one indicator light.If no indicator lights are illuminated, the seat heating is switched off.
Seat heating will automatically switch off when the engine is switched off.
Starting the seat heating automaticallyThis setting starts heating the driver's seat (at the highest level) automatically when theengine is started if the ambient temperature isbelow approx. 45° F (7° C). Activate/deactivate this function in the MY CAR menu system, under
Settings
Climate settingsAuto start driver seat
heater.
Heated rear seats*
Heat control for the outboard seating posi- tions is done in the same way as for the frontseats.