ECU VOLVO S90 2020 Quick Guide
[x] Cancel search | Manufacturer: VOLVO, Model Year: 2020, Model line: S90, Model: VOLVO S90 2020Pages: 643, PDF Size: 13.68 MB
Page 482 of 643
AUDIO, MEDIA AND INTERNET
* Option/accessory.
480
Internet-connected vehicle *
When the vehicle is connected to the Inter- net, it is possible to use web radio and musicservices via apps, download software andcontact retailers from the vehicle.
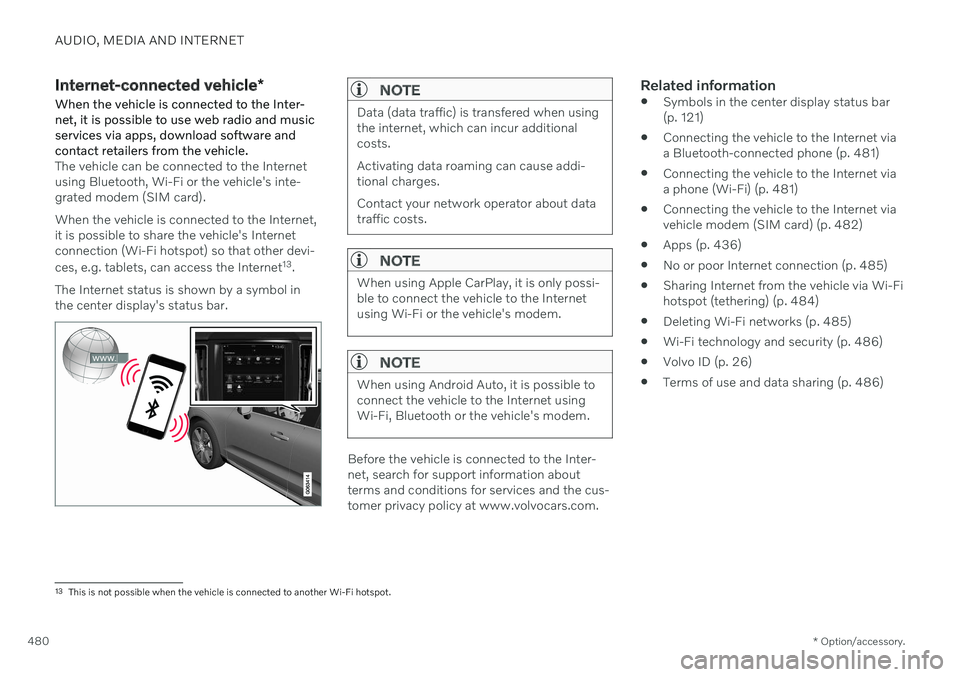
The vehicle can be connected to the Internet using Bluetooth, Wi-Fi or the vehicle's inte-grated modem (SIM card). When the vehicle is connected to the Internet, it is possible to share the vehicle's Internetconnection (Wi-Fi hotspot) so that other devi- ces, e.g. tablets, can access the Internet 13
.
The Internet status is shown by a symbol in the center display's status bar.
NOTE
Data (data traffic) is transfered when using the internet, which can incur additionalcosts. Activating data roaming can cause addi- tional charges. Contact your network operator about data traffic costs.
NOTE
When using Apple CarPlay, it is only possi- ble to connect the vehicle to the Internetusing Wi-Fi or the vehicle's modem.
NOTE
When using Android Auto, it is possible to connect the vehicle to the Internet usingWi-Fi, Bluetooth or the vehicle's modem.
Before the vehicle is connected to the Inter- net, search for support information aboutterms and conditions for services and the cus-tomer privacy policy at www.volvocars.com.
Related information
Symbols in the center display status bar(p. 121)
Connecting the vehicle to the Internet viaa Bluetooth-connected phone (p. 481)
Connecting the vehicle to the Internet viaa phone (Wi-Fi) (p. 481)
Connecting the vehicle to the Internet viavehicle modem (SIM card) (p. 482)
Apps (p. 436)
No or poor Internet connection (p. 485)
Sharing Internet from the vehicle via Wi-Fihotspot (tethering) (p. 484)
Deleting Wi-Fi networks (p. 485)
Wi-Fi technology and security (p. 486)
Volvo ID (p. 26)
Terms of use and data sharing (p. 486)
13
This is not possible when the vehicle is connected to another Wi-Fi hotspot.
Page 484 of 643
||
AUDIO, MEDIA AND INTERNET
* Option/accessory.
482 the vehicle. The phone's tethering function will then need to be reactivated the next time thephone's hotspot is used to connect to theInternet. When a phone is connected to the vehicle, it will be saved for future use. To display a list ofsaved networks or to manually delete saved networks, tap
SettingsCommunication
Wi-FiSaved networks.
NOTE
The cellular phone and network operator must support tethering (sharing of Internetconnection) and the subscription mustinclude data traffic.
Technical and security requirements for Wi-Fi connection are described in a separate sec-tion.
Related information
Internet-connected vehicle
* (p. 480)
Deleting Wi-Fi networks (p. 485)
No or poor Internet connection (p. 485)
Wi-Fi technology and security (p. 486)
Connecting the vehicle to the Internet via vehicle modem (SIMcard)
It is possible to establish an Internet connec- tion via the vehicle modem and a personal
SIM card (P-SIM).
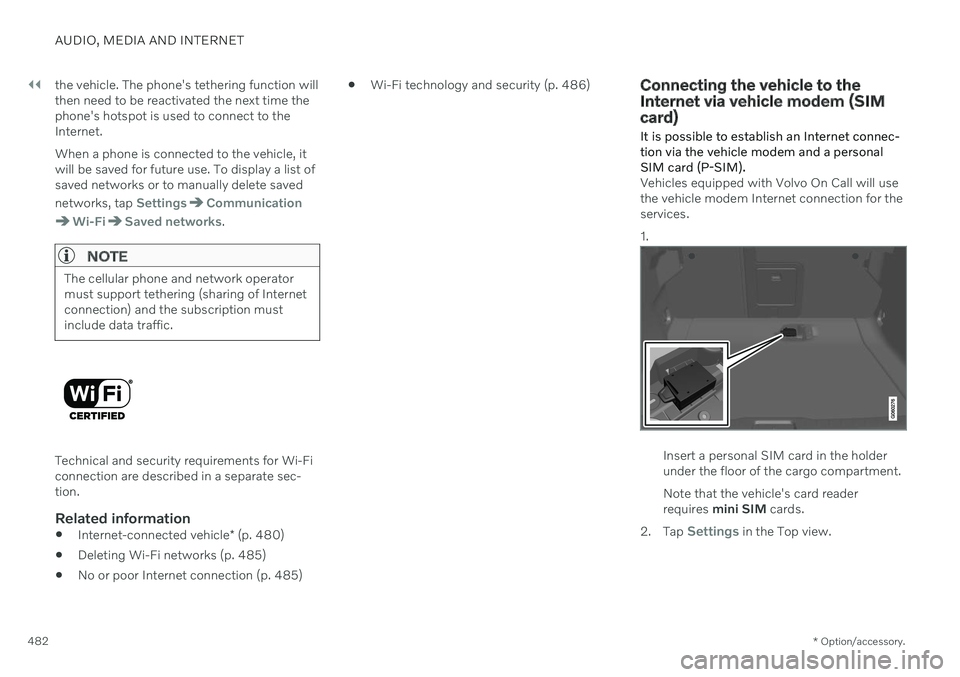
Vehicles equipped with Volvo On Call will use the vehicle modem Internet connection for theservices. 1.
Insert a personal SIM card in the holder under the floor of the cargo compartment. Note that the vehicle's card reader requires mini SIM cards.
2. Tap
Settings in the Top view.
Page 487 of 643
AUDIO, MEDIA AND INTERNET
* Option/accessory.485
No or poor Internet connection Factors affecting the Internet connection.
The amount of data transmitted depends on the services or apps currently in use in thevehicle. Streaming music, for example,involves the transmission of a large amount ofdata, and this requires a good connection anda strong signal.
Phone to vehicleInternet connection speed may vary depend-ing on the location of the cellular phone in thevehicle. Move the phone closer to the centerdisplay to increase signal strength. Make surethat nothing is between the phone and centerdisplay that could be blocking the signal.
Phone to network operatorThe speed of the mobile network variesdepending on the coverage in the vehicle'scurrent location. Coverage may be poorer ine.g. tunnels, mountainous areas, deep valleysor indoors. Connection speed is also depend-ent on the subscription you have with yourservice provider.
NOTE
If you experience any problems with data traffic, contact your network service pro-vider.
Restarting the phoneIf you experience any Internet connection problems, it may help to restart your phone.
Related information
Internet-connected vehicle
* (p. 480)
Wi-Fi technology and security (p. 486)
Deleting Wi-Fi networks
Networks that are not needed can be deleted.
1. Tap Settings in the Top view.
2. Proceed to
CommunicationWi-FiSaved networks.
3. Tap
Forget to delete the network.
4. Confirm the selection. > The vehicle will no longer connect tothe deleted network.
Deleting all networksAll networks can be deleted at once by per- forming a factory reset. Please note that alluser data and system settings will be restoredto original default factory settings.
Related information
Internet-connected vehicle
* (p. 480)
No or poor Internet connection (p. 485)
Resetting center display settings (p. 131)
Connecting the vehicle to the Internet viaa phone (Wi-Fi) (p. 481)
Page 488 of 643
AUDIO, MEDIA AND INTERNET
* Option/accessory.
486
Wi-Fi technology and security
Networks must meet certain criteria in order for the vehicle to connect.
It is possible to connect to the following types of networks:
Frequency - 2.4 or 5 GHz 15
.
Standards - 802.11 a/b/g/n.
Security type - WPA2-AES-CCMP.
The vehicle's Wi-Fi system is designed to han-dle Wi-Fi devices inside the vehicle. Performance may be impaired if multiple devi- ces are using a frequency at the same time.
Related information
Internet-connected vehicle
* (p. 480)
Terms of use and data sharing The first time certain services and apps are started, a pop-up window with the heading
Terms and conditions and Data sharingmay open.The aim is to inform the user about Volvo's terms of use and data sharing policy. Byaccepting data sharing, the user accepts thatcertain information will be sent from the vehi-cle. This is required for certain services andapps to work with full functionality. The data sharing function for connected servi- ces and apps is disabled by default 16
. For cer-
tain connected services and apps in the vehi- cle to work, data sharing must be activated.Data sharing can be set from the center dis-play's settings menu or when the services orapps are started in the center display.
Privacy and data sharingThe software update that became available inNovember 2017 introduced privacy and datasharing settings for connected services anddownloaded apps. These settings can be found under
Privacy and data in the settings
menu in the vehicle's center display. There, you can choose which connected servi- ces will be allowed to share data. Data sharingfor downloaded apps can also be disabled there. Note that services and apps cannot beused as intended if data sharing is disabled. After a factory reset or e.g. a workshop visit or a software update, your data sharing preferen-ces may be reset to default settings. You willthen need to reactivate data sharing for con-nected services and downloaded apps.
NOTE
Settings for privacy and data sharing are unique for each driver profile.
Related information
Activating and deactivating data sharing (p. 487)
15
Selecting a frequency is not possible on all markets.
16 Does not apply to Volvo On Call.
Page 496 of 643

||
AUDIO, MEDIA AND INTERNET
494
Country/ Area Brazil:
Este equipamento opera em caráter secundário isto e, náo tem direito a protecão contra interferéncia prejudicial, mesmo tipo, e não pode causar interferéncia a sistemas operando em caráter primário. Para consultas, visite: www.anatel.gov.br
EU:
Manufacturer: Mitsubishi Electric Corporation Sanda Works 2-3-33, Miwa, Sanda-city. Hyogo, 669-1513, Japan Mitsubishi Electric Corporation hereby declares that this type of radio equipment [Audio Navigation Unit] conforms with directive 2014/53/EU. For further details, search for support information on www.volvocars.com.
United Arab Emi-rates:
Page 520 of 643

WHEELS AND TIRES
* Option/accessory.
518
Installing a wheel Wheel changes must always be carried out correctly. The following instructions showhow to install a wheel and what is importantto keep in mind.
CAUTION
When not in use, the jack
* should be
kept in its storage compartment under the cargo compartment floor.
The jack provided with your vehicle isintended to be used only in temporarysituations such as changing wheels inthe event of a flat tire. Only the jackthat came with your particular modelshould be used to lift the vehicle. If thevehicle needs to be lifted more fre-quently or for a prolonged period, usinga garage jack or hoist is recommended.Always follow this device's instructionsfor use.
WARNING
Apply the parking brake and put the gear selector in the Park (
P) position.
Block the wheels standing on theground, use rigid wooden blocks orlarge stones.
Check that the jack is not damaged,the threads are properly lubricated andit is free from dirt.
Be sure the jack is on a firm, level, non-slippery surface and that it is uprightand not leaning.
The jack must correctly engage in thejack attachment.
No objects should be placed betweenthe base of the jack and the ground, orbetween the jack and the attachmentbar on the vehicle.
Never let anyone remain in the vehiclewhen it is raised on a jack.
If a tire must be changed near passingtraffic, make sure all passengers moveto a safe location.
Use a jack intended for the vehiclewhen changing a tire. For any otherjob, use stands to support the vehicle.
Never crawl under or allow any part of your body to be extended under a vehi-cle supported by a jack.
The vehicle must be raised high enough sothat the wheel you are removing can turnfreely.
1. Clean the contact surfaces between the wheel and the wheel hub.
2. Lift the wheel into place. Tighten the wheel bolts securely.Do not grease the wheel bolt threads.
3. Lower the vehicle so that the wheel can- not rotate.
Page 521 of 643

WHEELS AND TIRES
}}
* Option/accessory.519
4. Tighten the wheel bolts in a crisscross pat-
tern (as shown in illustration). It is impor- tant that the wheel bolts are securelytightened. Tighten to 140 Nm (103 ft. lbs.).Use a torque wrench to check torque.
5. Press the plastic covers onto the wheelbolts.
6. Check the tire inflation pressure and store the new inflation pressure in the tire pres- sure monitoring system *.
WARNING
The wheel bolts may need to be tightened again several days after a wheel change.Temperature fluctuations and vibrationscan cause them to loosen slightly.
NOTE
After inflating a tire, always replace the valve cap to help prevent valve damagecaused by gravel, dirt, etc.
Use plastic valve caps only. Metal capscould corrode and become difficult toremove.
Related information
When changing wheels (p. 514)
Hoisting the vehicle (p. 549)
Jack
* (p. 515)
Tool kit (p. 514)
Removing a wheel (p. 516)
Saving a new inflation pressure in the monitoring system
* (p. 511)
Checking tire pressure (p. 507)
Spare wheel 13
The spare wheel is a Temporary Spare and can be used to temporarily replace a punc- tured tire on one of the vehicle's regularwheels.
The spare tire is only intended for temporary use. Replace it with a normal wheel as soon aspossible. The driving characteristics of the vehicle change and ground clearance reduces whenthe spare wheel is used. Do not wash the vehi-cle in an automatic car wash while using theTemporary Spare. The recommended tire pressure must be maintained regardless of at which position thetemporary spare wheel is used on the vehicle. If the spare wheel is damaged, a new one can be purchased from a Volvo retailer.
WARNING
Current legislation prohibits the use of the "Temporary Spare" tire other than as atemporary replacement for a puncturedtire. It must be replaced as soon as possi-ble by a standard tire. Road holding andhandling may be affected with the "Tempo-rary Spare" in use. Do not drive faster than80 km/h (50 mph).
13 Not available on all models.
Page 522 of 643

||
WHEELS AND TIRES
520
WARNING
The vehicle must never be driven with more than one "Temporary Spare" tiremounted.
Driving with a spare wheel may alterthe driving characteristics of the vehi-cle. Replace the spare wheel with anormal wheel as soon as possible.
The spare wheel is smaller than thenormal wheel, which affects the vehi-cle's ground clearance. Watch for highcurbs and do not wash the vehicle inan automatic car wash when a sparewheel is mounted.
Follow the manufacturer's recom-mended tire inflation pressure for thespare wheel.
On all-wheel drive vehicles, the driveon the rear axle can be disconnected.
If the spare wheel is mounted on thefront axle, snow chains must not beused.
The spare wheel must not be repaired.
CAUTION
The vehicle must not be driven with wheels of different dimensions or with a spare tireother than the one that came with the vehi-cle. The use of different size wheels canseriously damage your vehicle's transmis-sion.
Related information
When changing wheels (p. 514)
Recommended tire pressure (p. 509)
Handling spare tires Follow these instructions regarding handling the spare wheel.
Accessing the spare wheel
This illustration is generic and appearance may vary.
The spare tire is located in the spare wheel well under the cargo compartment with theoutside of the wheel facing downward. Thespare tire is secured with a bolt that goesthrough the tire and attaches it to the body.The foam block contains all tools needed tochange a wheel.
1. Lift the rear edge of the cargo compart-
ment floor.
2. Unscrew the retaining bolt.
3. Lift out the spare wheel.
Page 523 of 643
WHEELS AND TIRES
521
Stowing a flat tire1. Screw the spare tire's retaining bolt backon.
CAUTION
Do not attempt to unscrew the lower part of the retaining bolt if it is attached to thebody, as this could cause it to break. If the retaining bolt becomes dislodged from its lower attachment point in thebody under the spare tire, replace it in thehole and turn clockwise to secure it again.
2. Put the tools back in their correct posi-tions in the foam block.
3. Then lower the trunk/cargo compartment floor and place the punctured tire in the trunk/cargo compartment.
Related information
Spare wheel (p. 519)
Tool kit (p. 514)
Removing a wheel (p. 516)
Snow tires
Snow tires are designed for winter driving conditions.
Volvo recommends snow tires with specific dimensions. The tire dimensions vary depend-ing on engine type. When driving with snowtires, the correct type of tires must be moun-ted on all four wheels.
NOTE
Contact a Volvo dealer for advice on the best choice of rims and tires.
Tips for changing snow tiresWhen switching between regular tires and snow tires, mark the tires according to whichside they were mounted on, e.g. L for left and
R for right.
Studded tiresStudded tires should be broken in by driving500–1000 km (300–600 miles) slowly andgently to help the studs settle properly in thetires. This gives the tire, and especially thestuds, a longer service life.
NOTE
Regulations regarding the use of studded tires vary from country to country.
Tread depthRoad conditions with ice, slush and low tem- peratures place considerably higher demandson tires than summer conditions. Volvo there-fore recommends not driving on snow tiresthat have a tread depth of less than 4 mm(0.15 inch).
Related information
When changing wheels (p. 514)
Winter driving (p. 412)
Tread wear indicator (p. 503)
Page 539 of 643

LOADING, STORAGE AND PASSENGER COMPARTMENT
* Option/accessory.537
Sun visors
In the ceiling in front of the driver's and front passenger's seats, there are sun visors thatcan be lowered and angled to the side asnecessary.
The illustration is generic – the design may vary.
The mirror lighting * comes on automatically
when the visor is lifted up. The mirror frame has a holder for e.g. cards or tickets.
Related information
Passenger compartment interior (p. 532)
Folding down the armrest in the rear seat
*
The rear seat armrest * can be folded down for
increased comfort.
The armrest is locked in the raised position and needs to be unlocked before it is foldeddown. The handle for unlocking the armrest islocated directly underneath the head restraint.
1. Grasp the handle and rotate it toward you to unlock the armrest.
2. When the handle is rotated to its maxi-mum position, the armrest is unlocked and can be folded down.
CAUTION
Before moving down the armrest, make sure to unlock it by rotating the handle.Do not pull the handle if the armrest islocked.
Make sure the armrest is securelylocked into position after it is folded up.