battery location VOLVO S90 2020 Quick Guide
[x] Cancel search | Manufacturer: VOLVO, Model Year: 2020, Model line: S90, Model: VOLVO S90 2020Pages: 643, PDF Size: 13.68 MB
Page 8 of 643

6
Parking climate*
223
Preconditioning *
224
Starting and stopping precondi- tioning * 224
Preconditioning timer *
225
Adding and editing timer settingsfor preconditioning * 225
Activating and deactivating pre-conditioning timer * 226
Deleting preconditioning timersettings * 227
Climate comfort retaining function *
227
Starting and switching off the cli-mate retaining function when parking *228
Parking climate symbols and mes-sages * 229
KEY, LOCKS AND ALARM
Lock indication
232
Lock confirmation settings 233
Remote key 234
Locking and unlocking using the remote key 236
Settings for remote and insidedoor unlock 237
Remote key range 237
Replacing the remote key's battery 238
Ordering additional remote keys 241
Red Key - restricted remote key *
242
Settings for Red Key *
243
Detachable key blade 244
Locking and unlocking withdetachable key blade 245
Electronic immobilizer 246
Start and lock system type desig-nations 247
Keyless and touch-sensitive surfaces *
248
Keyless locking and unlocking *
249
Keyless unlock settings *
250
Keyless trunk lid unlock *
251
Antenna locations for the startand lock system 251
Locking and unlocking from insidethe vehicle 252
Unlocking the trunk lid from inside the vehicle253
Opening the trunk lid from insidethe trunk 254
Activating and deactivating childsafety locks 254
Automatic locking when driving 256
Opening and closing the power trunk lid * 256
Opening and closing the trunk lidwith foot movement * 259
Private Locking 260
Activating and deactivating pri- vate locking 260
Alarm 261
Arming and disarming the alarm 262
Page 14 of 643

12
LOADING, STORAGE AND PASSENGER COMPARTMENT
Passenger compartment interior532
Tunnel console 533
Electrical outlets 534
Using the electrical outlets 534
Using the glove compartment 535
Sun visors 537
Folding down the armrest in the rear seat * 537
Cargo compartment 538
Loading recommendations 538
Roof loads and load carriers 539
Grocery bag holders 540
Load anchoring eyelets 540
Rear seat ski hatch *
540
MAINTENANCE AND SERVICE
Volvo's service program
542
Data transfer between vehicle and workshop over Wi-Fi 544
Download Center 545
Handling system updates viaDownload Center 545
Vehicle status 546
Scheduling service and repairs 547
Sending vehicle information to theworkshop 548
Hoisting the vehicle 549
Climate control system service 551
Replacing a windshield with head- up display * 551
Opening and closing the hood 552
Engine compartment overview 553
Engine oil 554
Checking and filling engine oil 555
Refilling coolant 556
Replacing bulbs 558
Removing the plastic cover to replace bulbs 559
Location of exterior lights 559
Replacing the low beam headlightbulbs 560
Replacing the high beam headlightbulbs 561
Replacing daytime running lights/ front parking light bulbs562
Replacing front turn signal bulbs 563
Replacing the rear fog light bulb 563
Bulb specifications 566
Start battery 567
Support battery 571
Battery symbols 572
Battery recycling 573
Fuses and fuseboxes 573
Replacing fuses 574
Fuses in the engine compartment 575
Fuses under the glove compartment 580
Fuses in the trunk 586
Cleaning the interior 591
Cleaning the center display 591
Cleaning the head-up display *
592
Cleaning fabric upholstery andceiling liner 593
Cleaning the seat belt 593
Cleaning floor mats and inlay mats 593
Cleaning leather upholstery *
594
Cleaning the leather steering wheel 595
Cleaning interior plastic, metal andwood surfaces 595
Page 240 of 643

||
KEY, LOCKS AND ALARM
* Option/accessory.
238 approx. 1.5 meter (5 feet) along the sides of the vehicle or approx. 1 meter (3 feet) from thetrunk lid.
NOTE
The functions of the remote control key can be disrupted by ambient radio waves,buildings, topographical conditions, etc.The vehicle can always be locked/unlockedusing the key blade.
If the remote key is removed from the vehicle
If the remote key is removed from the vehicle while the engine is run- ning, the warning message
Vehicle
key not found Removed from
vehicle will be displayed in the instrument
panel and an audible signal will sound when the last door is closed.
The message will disappear when the key is returned to the vehicle and the O button on
the right-side steering wheel keypad ispressed or when the last door is closed again.
Related information
Remote key (p. 234)
Antenna locations for the start and locksystem (p. 251)
Keyless and touch-sensitive surfaces
*
(p. 248)
Replacing the remote key's battery
The battery in the remote key must be replaced when it is discharged.
NOTE
All batteries have a limited service life and must eventually be replaced (does notapply for Key Tag). The battery's service lifevaries depending on how often thevehicle/key is used.
The remote key battery should be replaced if
the information symbol illuminates and the message
Vehicle key bat. low is dis-
played in the instrument panel
the locks do not react after several attempts to lock or unlock the vehicleusing the remote key within approx.20 meter (65 feet) from the vehicle.
NOTE
Move closer to the vehicle and try to unlock it again.
The battery in the smaller key without but- tons 7
(the Key Tag) cannot be replaced. A new key can be ordered from an authorized Volvo workshop.
CAUTION
An end-of-life Key Tag must be turned in to an authorized Volvo workshop. The keymust be deleted from the vehicle becauseit can still be used to start the vehicle viabackup start.
Opening the key and replacing the battery
Hold the remote key with the front side
(with the Volvo logo) facing up and move the button on the key ring section to theright. Slide the front cover slightly upward.
The cover will loosen and can be
removed from the key.
Page 247 of 643

KEY, LOCKS AND ALARM
}}
245
Locking and unlocking with detachable key blade
The detachable key blade can be used to unlock the vehicle from the outside, e.g. if thebattery in the remote key is discharged.
Unlocking
Pull the front left-hand door handle to its end position to access the lock cylinder.
Put the key in the lock cylinder.
Turn the key clockwise 45 degrees so that the key blade is pointing straight rear-ward.
Turn the key blade back 45 degrees to its original position. Remove the key from thelock cylinder and release the handle sothat it returns to its original positionagainst the vehicle.
5. Pull the door handle. > The door will open. Lock the door in the same way, but turn thekey 45 degrees counterclockwise in step (3).
Disarming the alarm and starting the vehicle
NOTE
When the door is unlocked using the detachable key blade and then opened, thealarm will be triggered.
Location of the backup key reader in the cup holder.
Turn off the alarm by:
1. Place the remote control key on the key
symbol in the backup reader in the bottom of the cup holder in the tunnel console.
2. Turn the start knob clockwise and release it.
> The alarm signal will stop and the alarmwill switch off.
LockingThe vehicle can also be locked using the remote key's detachable key blade, e.g. ifeither the vehicle's or remote key's batteriesare discharged. The left-hand front door can be locked by inserting the detachable key into the door'slock cylinder. This is the only door with a lock cylinder. The other doors have lock mechanisms in the sideof the door that must be pushed in using thekey blade. The door will then be lockedmechanically and cannot be opened from theoutside. The doors can still be opened from inside.
Manual door lock. This is not the child lock.
Page 265 of 643

KEY, LOCKS AND ALARM
* Option/accessory.263
Disarming the alarmUnlock and disarm the vehicle alarm by
pressing the unlock button on the remote key
.
grip a door handle or lightly press the trunk lid's rubberized button 16
.
Disarming the alarm without a functioning
remote key
The vehicle can be unlocked and disarmed even if the remote key is not functioning, e.g. ifthe battery is discharged.
1. Open the driver's door using the detacha- ble key blade.
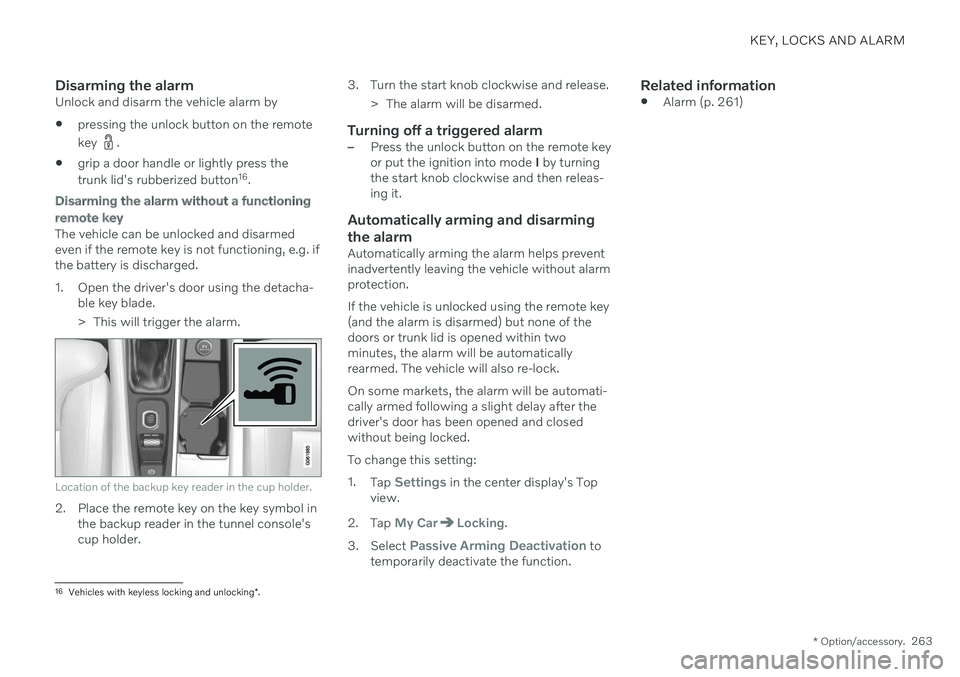
> This will trigger the alarm.
Location of the backup key reader in the cup holder.
2. Place the remote key on the key symbol inthe backup reader in the tunnel console's cup holder. 3. Turn the start knob clockwise and release.
> The alarm will be disarmed.
Turning off a triggered alarm–Press the unlock button on the remote key or put the ignition into mode I by turning
the start knob clockwise and then releas-ing it.
Automatically arming and disarming the alarm
Automatically arming the alarm helps prevent inadvertently leaving the vehicle without alarmprotection. If the vehicle is unlocked using the remote key (and the alarm is disarmed) but none of thedoors or trunk lid is opened within twominutes, the alarm will be automaticallyrearmed. The vehicle will also re-lock. On some markets, the alarm will be automati- cally armed following a slight delay after thedriver's door has been opened and closedwithout being locked. To change this setting:1. Tap
Settings in the center display's Top
view.
2. Tap
My CarLocking.
3. Select
Passive Arming Deactivation to
temporarily deactivate the function.
Related information
Alarm (p. 261)
16
Vehicles with keyless locking and unlocking *.
Page 381 of 643

STARTING AND DRIVING
}}
379
Location of the backup reader in the tunnel console.
NOTE
When the remote key is placed in the backup reader, make sure that no othervehicle keys, metal objects or electronicdevices (e.g. cellular phones, tablets, lap-tops or chargers) are in the backup reader.Multiple vehicle keys close to each other inthe backup reader can disrupt their func-tionality.
CAUTION
If the engine has not responded after 3 attempts – wait for 3 minutes before star-ting a new attempt. Starting capabilityincreases if the starter battery is given timeto recover.
WARNING
Never remove the remote control key from
the vehicle while driving or the vehicle is being towed.
WARNING
Always remove the remote key from the passenger compartment when youleave the vehicle and make sure theignition is in mode
0.
Always put the gear selector in
P and
apply the parking brake before leavingthe vehicle. Never leave the vehicleunsupervised while the engine is run-ning.
Always open the garage door fully andmake sure that ventilation is very goodbefore starting the engine in a garage.The exhaust fumes produced by thevehicle contain carbon monoxide,which is invisible and odorless but verytoxic.
CAUTION
When starting in cold weather, the automatic transmission may shift up atslightly higher engine speeds than nor-mal until the automatic transmissionfluid reaches normal operating tem-perature.
Do not race a cold engine immediatelyafter starting. This could prevent fluidsfrom properly lubricating vital compo-nents in the engine before it hasreached the proper operating tempera-ture.
The engine should be idling when thegear selector is moved. Never acceler-ate until the gear is fully engaged.Accelerating rapidly before a gear isproperly engaged could lead to harderwear of components.
To help prevent the transmission oilfrom overheating, select
P or N when
idling at a standstill for prolonged peri-ods of time.
Page 571 of 643

MAINTENANCE AND SERVICE
}}
569
Location
The start battery is located in the trunk.
WARNING
If the starter battery is disconnected, the function for automatic opening and closingmust be reset to function correctly. A resetis required in order for the pinch protectionto work.
CAUTION
On certain models, the battery is secured with a tensioning strap. Make sure that thetensioning strap is always securely tight-ened.
Specifications for start battery
Battery type H7 AGMH8 AGM
Voltage (V) 12 12
Cold start capacity A
- CCA B
(A) 800
850
Dimensions, L×W×H 315×175×190 mm (12.4×6.9×7.5 inches) 353×175×190 mm (13.9×6.9×7.5 inches)
Capacity (Ah) 80 95
A
According to EN standard.
B Cold Cranking Amperes.
Volvo recommends that batteries are replaced by an authorized Volvo workshop.
Page 575 of 643

MAINTENANCE AND SERVICE
573
Battery recycling Start batteries and support batteries contain lead and must be recycled in an environmen-tally sound manner at the end of their servicelife.
Consult a workshop if you are uncertain of how to dispose of this type of waste ‒ an
authorized Volvo workshop is recommended.
Related information
Start battery (p. 567)
Support battery (p. 571)
Battery symbols (p. 572)
Fuses and fuseboxes All electrical functions and components are protected by a number of fuses in order toprotect the vehicle's electrical system fromdamage by short circuiting or overloading.
WARNING
Never use a foreign object or a fuse with a higher amperage than that specified toreplace a fuse. This could cause significantdamage to the electrical system and possi-bly lead to a fire.
If any electrical component or function is not responding, the component may have blown afuse due to temporary overload. If the samefuse blows repeatedly, there may be a prob-lem with the component. Volvo recommendscontacting an authorized Volvo workshop tohave the component checked.
Location of fuseboxes
The illustration is generic - appearance may vary according to vehicle model.
Engine compartment
Under the glove compartment
Trunk/cargo compartment
Related information
Replacing fuses (p. 574)
Fuses in the trunk (p. 586)
Fuses in the engine compartment (p. 575)
Fuses under the glove compartment(p. 580)
Page 632 of 643

INDEX
630emergency brake lights 157
front fog lights 155
Hazard warning flashers 157
high beams 152, 153
home safe lighting 158
in passenger compartment 158
light locations 559
low beams 151
position lights 150
rear fog light 156
settings 149
Turn signals 154
Lighting, replacing bulbs 558 daytime running lights/front parking
lights 562
front turn signals 563
high beams 561
light bulbs, specifications 566
low beams 560
rear fog light 563
remove plastic cover 559
Limp home 391 Load anchoring eyelets cargo compartment 540
Load anchoring hooks 540
Load carriers 539
Load index 504
Loading general 538
load anchoring eyelets 540
long load 539
Lock indication 232 setting 233
Locking/unlocking trunk lid 251
Locking wheel bolts 515 Locks locking/unlocking 236
Low battery charge level start battery 419
Low beams 151
Low oil level 555
M
Maintained climate comfort 227 start/stop 228
Maintenance 542 corrosion protection 602
Max. axle weight 615
Max. roof load 615
Media player 455, 456, 457 compatible file formats 463
voice control 145
Messages and symbols Adaptive Cruise Control 283
Assistance at risk of collision 354
BLIS 330
City Safety 325
Cross Traffic Alert 334
Lane Keeping Aid 346
Park Assist Camera 367
Park Assist Pilot 375
Parking Assist 359
Pilot Assist 293
stability and traction control system 270
Messages in display 103, 137 handling 104, 137
saved 105, 138
Mileage 85 Misting condensation in headlights 596, 599
Mood lighting 159 adjusting 160
O
Occupant safety 43
Occupant weight sensor 56