fuel consumption VOLVO S90 2020 Quick Guide
[x] Cancel search | Manufacturer: VOLVO, Model Year: 2020, Model line: S90, Model: VOLVO S90 2020Pages: 643, PDF Size: 13.68 MB
Page 83 of 643

DISPLAYS AND VOICE CONTROL
}}
* Option/accessory.81
Left side In the center Right side
Ambient temperature sensor – Current fuel consumption
Indicator and warning symbols – OdometerB
– – Trip odometer
– – Indicator and warning symbols
– – Voice Control
– – Engine temperature gauge
– – Message (also graphics in some cases)
A
Depends on selected drive mode.
B Total distance.
Instrument panel 12" *
The illustration is generic - details may vary accord- ing to vehicle model.
Page 84 of 643
||
DISPLAYS AND VOICE CONTROL
* Option/accessory.
82 Location in the instrument panel:
Left side In the center Right side
Speedometer Indicator and warning symbols
Tachometer/ECO gaugeA
Trip odometer Ambient temperature sensor Gear indicator Odometer B
Clock Drive Mode
Cruise control/speed limiter information Message (also graphics in some cases) Fuel gauge Road sign information * Door and seat belt status Start/Stop function status
– Media player Distance to empty tank
– Navigation system map*Current fuel consumption
– PhoneApp menu (activated using steering wheel keypad)
– Voice Control –
A
Depends on selected drive mode.
B Total distance.
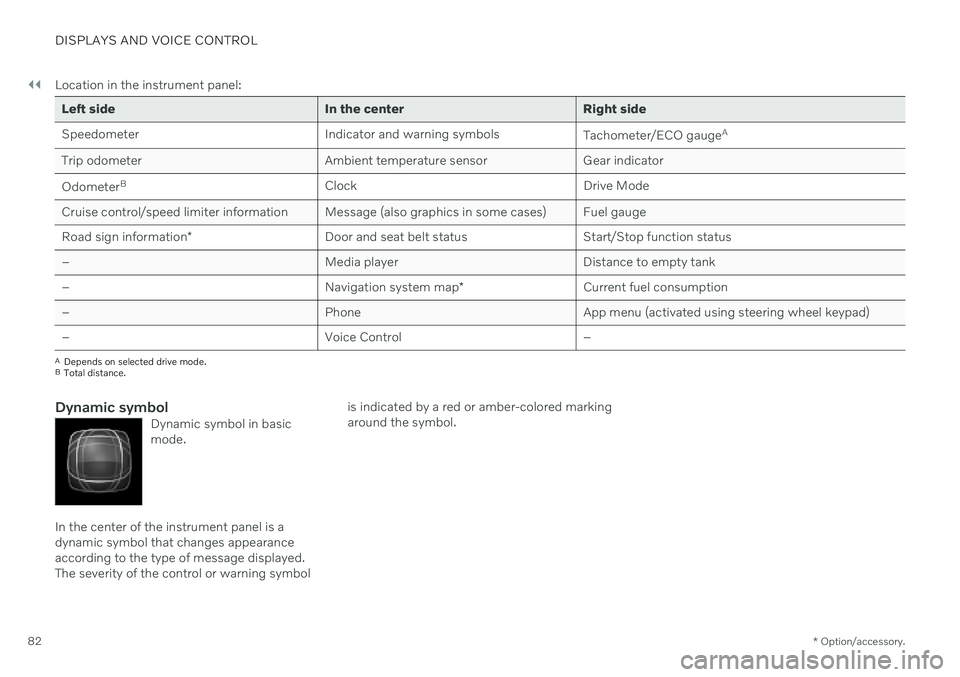
Dynamic symbolDynamic symbol in basic mode.
In the center of the instrument panel is a dynamic symbol that changes appearanceaccording to the type of message displayed.The severity of the control or warning symbol is indicated by a red or amber-colored markingaround the symbol.
Page 87 of 643
DISPLAYS AND VOICE CONTROL
}}
85
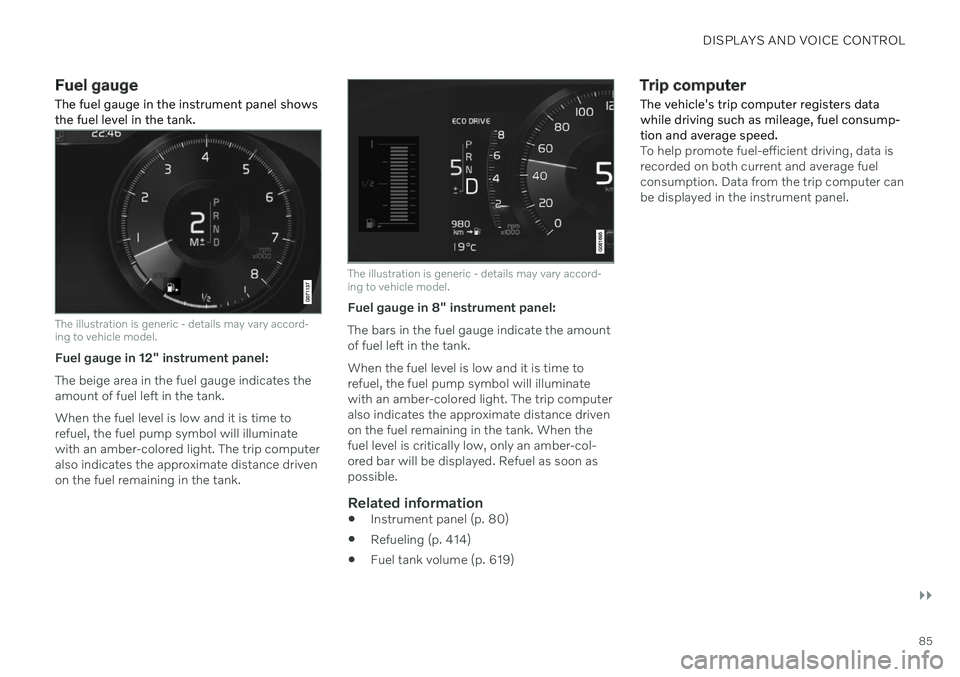
Fuel gauge The fuel gauge in the instrument panel shows the fuel level in the tank.
The illustration is generic - details may vary accord- ing to vehicle model.
Fuel gauge in 12" instrument panel: The beige area in the fuel gauge indicates the amount of fuel left in the tank. When the fuel level is low and it is time to refuel, the fuel pump symbol will illuminatewith an amber-colored light. The trip computeralso indicates the approximate distance drivenon the fuel remaining in the tank.
The illustration is generic - details may vary accord- ing to vehicle model.
Fuel gauge in 8" instrument panel: The bars in the fuel gauge indicate the amount of fuel left in the tank. When the fuel level is low and it is time to refuel, the fuel pump symbol will illuminatewith an amber-colored light. The trip computeralso indicates the approximate distance drivenon the fuel remaining in the tank. When thefuel level is critically low, only an amber-col-ored bar will be displayed. Refuel as soon aspossible.
Related information
Instrument panel (p. 80)
Refueling (p. 414)
Fuel tank volume (p. 619)
Trip computer
The vehicle's trip computer registers data while driving such as mileage, fuel consump-tion and average speed.
To help promote fuel-efficient driving, data is recorded on both current and average fuelconsumption. Data from the trip computer canbe displayed in the instrument panel.
Page 88 of 643
||
DISPLAYS AND VOICE CONTROL
* Option/accessory.
86
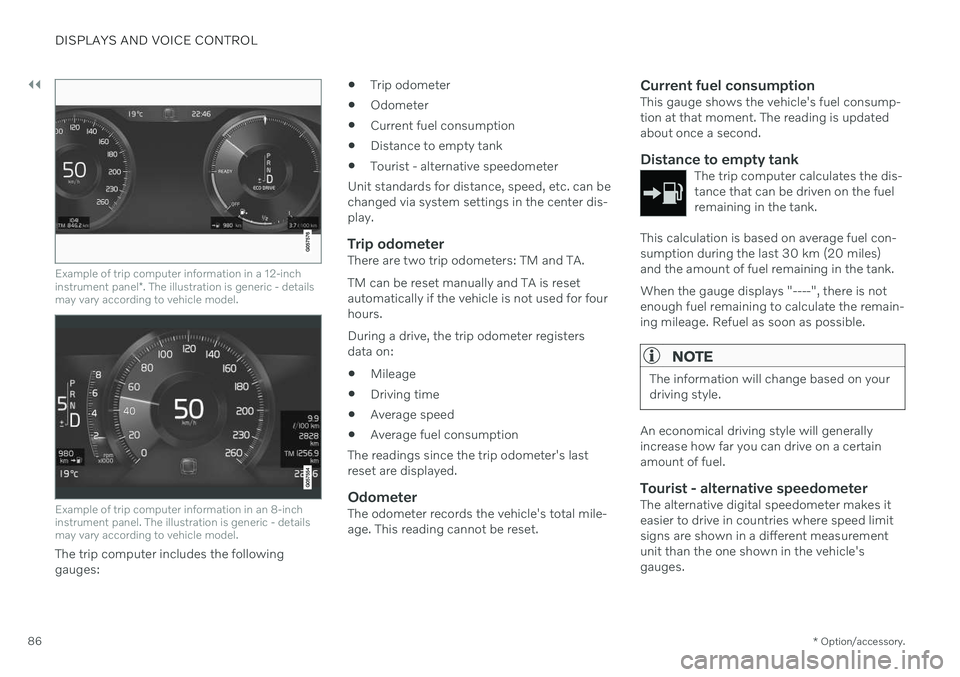
Example of trip computer information in a 12-inch instrument panel *. The illustration is generic - details
may vary according to vehicle model.
Example of trip computer information in an 8-inch instrument panel. The illustration is generic - detailsmay vary according to vehicle model.
The trip computer includes the following gauges:
Trip odometer
Odometer
Current fuel consumption
Distance to empty tank
Tourist - alternative speedometer
Unit standards for distance, speed, etc. can bechanged via system settings in the center dis-play.
Trip odometerThere are two trip odometers: TM and TA. TM can be reset manually and TA is reset automatically if the vehicle is not used for fourhours. During a drive, the trip odometer registers data on:
Mileage
Driving time
Average speed
Average fuel consumption
The readings since the trip odometer's lastreset are displayed.
OdometerThe odometer records the vehicle's total mile-age. This reading cannot be reset.
Current fuel consumptionThis gauge shows the vehicle's fuel consump-tion at that moment. The reading is updatedabout once a second.
Distance to empty tankThe trip computer calculates the dis-tance that can be driven on the fuelremaining in the tank.
This calculation is based on average fuel con- sumption during the last 30 km (20 miles)and the amount of fuel remaining in the tank. When the gauge displays "----", there is not enough fuel remaining to calculate the remain-ing mileage. Refuel as soon as possible.
NOTE
The information will change based on your driving style.
An economical driving style will generally increase how far you can drive on a certainamount of fuel.
Tourist - alternative speedometerThe alternative digital speedometer makes iteasier to drive in countries where speed limitsigns are shown in a different measurementunit than the one shown in the vehicle'sgauges.
Page 90 of 643
||
DISPLAYS AND VOICE CONTROL
883. Scroll down to the option buttons to
choose which information to show in the instrument panel: Odometer
Distance to empty tank
Tourist (alternative speedometer)
Mileage for trip odometer TM, TA or no display of mileage
Current fuel consumption, average fuelconsumption for TM or TA, or no dis-play of fuel consumption
Select or clear a selection using the O but-
ton (4). The change will apply immedi-ately.
Related information
Trip computer (p. 85)
Resetting the trip odometer (p. 88)
Resetting the trip odometer Resetting the trip odometer using the left- side steering wheel lever.
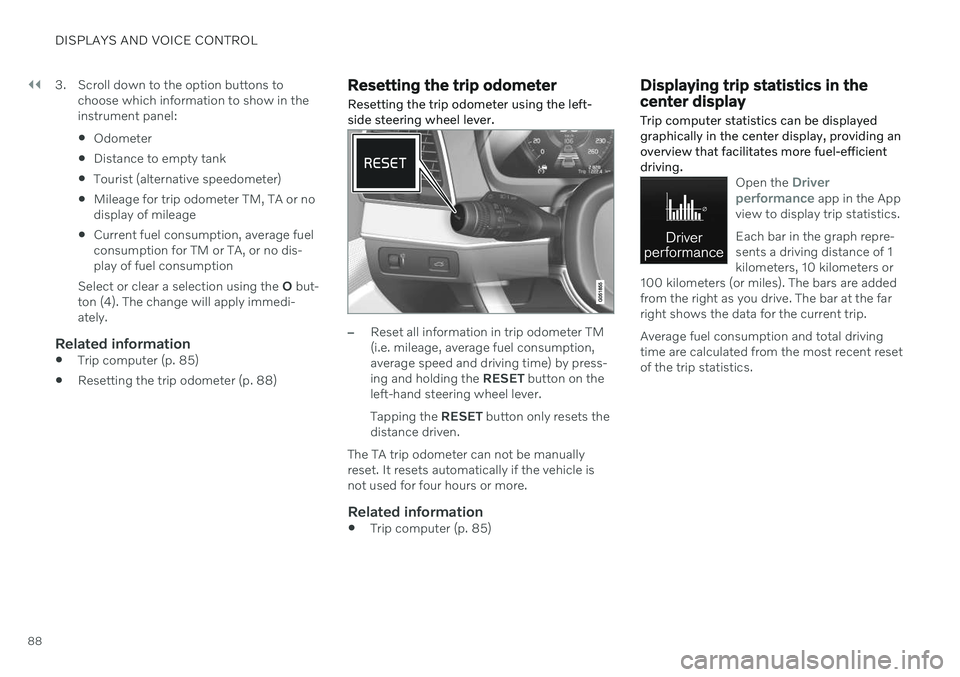
–Reset all information in trip odometer TM (i.e. mileage, average fuel consumption,average speed and driving time) by press-ing and holding the
RESET button on the
left-hand steering wheel lever. Tapping the RESET button only resets the
distance driven.
The TA trip odometer can not be manually reset. It resets automatically if the vehicle isnot used for four hours or more.
Related information
Trip computer (p. 85)
Displaying trip statistics in the center display Trip computer statistics can be displayed graphically in the center display, providing anoverview that facilitates more fuel-efficientdriving.
Open the Driver
performance app in the App
view to display trip statistics. Each bar in the graph repre- sents a driving distance of 1kilometers, 10 kilometers or
100 kilometers (or miles). The bars are addedfrom the right as you drive. The bar at the farright shows the data for the current trip. Average fuel consumption and total driving time are calculated from the most recent resetof the trip statistics.
Page 403 of 643
STARTING AND DRIVING
}}
* Option/accessory.401
Changing drive mode *
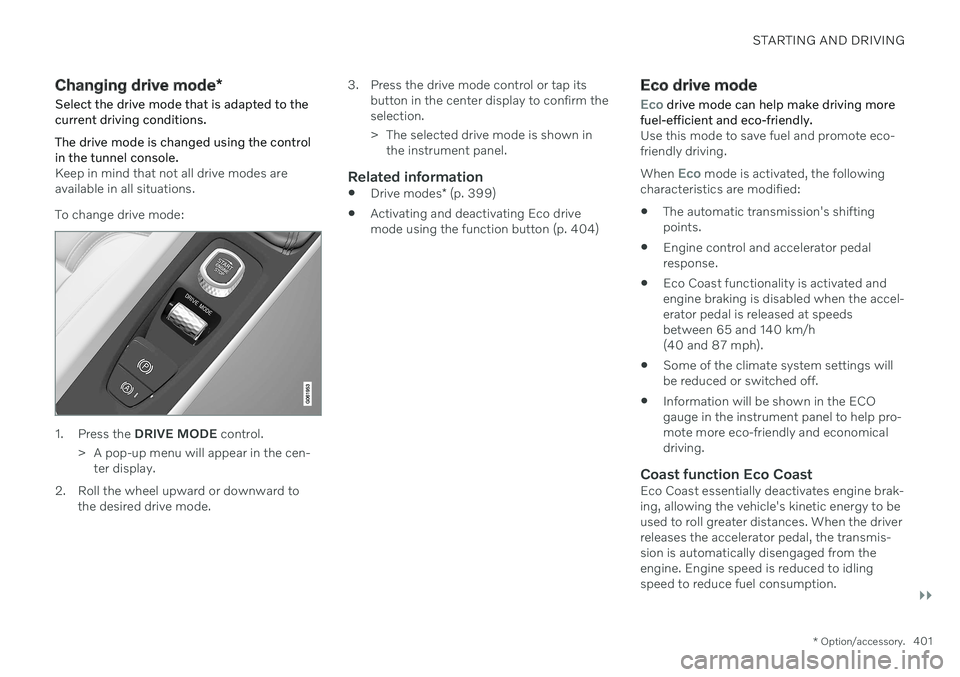
Select the drive mode that is adapted to the current driving conditions. The drive mode is changed using the control in the tunnel console.
Keep in mind that not all drive modes are available in all situations. To change drive mode:
1. Press the DRIVE MODE control.
> A pop-up menu will appear in the cen- ter display.
2. Roll the wheel upward or downward to the desired drive mode. 3. Press the drive mode control or tap its
button in the center display to confirm the selection.
> The selected drive mode is shown inthe instrument panel.
Related information
Drive modes
* (p. 399)
Activating and deactivating Eco drive mode using the function button (p. 404)
Eco drive mode
Eco drive mode can help make driving more
fuel-efficient and eco-friendly.
Use this mode to save fuel and promote eco- friendly driving. When
Eco mode is activated, the following
characteristics are modified:
The automatic transmission's shifting points.
Engine control and accelerator pedalresponse.
Eco Coast functionality is activated andengine braking is disabled when the accel-erator pedal is released at speedsbetween 65 and 140 km/h(40 and 87 mph).
Some of the climate system settings willbe reduced or switched off.
Information will be shown in the ECOgauge in the instrument panel to help pro-mote more eco-friendly and economicaldriving.
Coast function Eco CoastEco Coast essentially deactivates engine brak-ing, allowing the vehicle's kinetic energy to beused to roll greater distances. When the driverreleases the accelerator pedal, the transmis-sion is automatically disengaged from theengine. Engine speed is reduced to idlingspeed to reduce fuel consumption.
Page 413 of 643
STARTING AND DRIVING
}}
* Option/accessory.411
Leveling control settings *
Turn off leveling control before lifting the vehicle with a jack to help avoid problemswith the pneumatic suspension.
Center display settings
Disable Leveling Control
In certain situations, this function must be turned off, e.g. before the vehicle is raised using a jack *. The level difference caused by
raising the vehicle with a jack could cause problems with the pneumatic suspension. Turning off the function in the center display:1. Tap
Settings in the Top view.
2. Tap
My CarParking Brake and
Suspension.
3. Select
Disable Leveling Control.
Related information
Leveling control
* and suspension (p. 408)
Loading recommendations (p. 538)
Economical driving
Drive economically and more environmentally conscious by thinking ahead and avoidingrapid starts and stops.
Adapt your driving style and speed to the cur- rent traffic conditions. Observe the following rules:
For lower fuel consumption, activate
Ecodrive mode.
Use the Eco Coast function in drive mode
Eco - engine braking is deactivated, allow-
ing the vehicle's kinetic energy to be used to roll greater distances.
Use gear
D as often as possible and avoid
using the kick-down function.
For manual gear shifting, use the highestpossible gear for the current traffic situa-tion and road conditions - fuel consump-tion is reduced at lower engine speeds (rpm). Use the gear indicator 13
.
Maintain a steady speed and a generous following distance to traffic ahead to mini-mize braking.
Fuel consumption is increased at highspeeds - air resistance increases withspeed.
The trip computer's current fuel consump-tion indicator can help promote more fuel-efficient driving.
Do not warm up the engine by idling. It isbetter to begin driving normally immedi-ately after starting the engine. A coldengine uses more fuel than a warmengine.
Whenever possible, avoid using the vehi-cle to drive short distances. The enginedoes not have time to reach a normaloperating temperature and this leads toincreased fuel consumption.
Use engine braking to brake the vehicle,when this is safe for other road users.
Maintain the correct pressure in the tiresand check pressure regularly.
The type of tires used could affect fuelconsumption - consult a retailer for adviceon suitable tires.
Remove unnecessary items from the vehi-cle - the heavier the load, the higher thefuel consumption.
Roof loads increase air resistance andincrease fuel consumption. Remove roofboxes, ski racks, etc. that are not in use.
Avoid driving with the windows open.
13
Only available in certain markets.
Page 414 of 643
||
STARTING AND DRIVING
* Option/accessory.
412
WARNING
Never turn off the engine while the vehicle is moving, e.g. when driving downhill. Thisdeactivates certain important systemssuch as power steering and brakes.
Other factors that decrease fuel consumption
Dirty air cleaner.
Dirty engine oil and clogged oil filter.
Incorrect front-end alignment.
Incorrect wheel alignment.
Some of the above items and others are checked as part of Volvo's standard mainte-nance schedule.
Related information
Drive-E
‒ purer driving pleasure (p. 28)
Eco drive mode (p. 401)
Checking tire pressure (p. 507)
Preparing for a long trip
It is important to have the vehicle's systems and equipment checked carefully before driv-ing long distances.
Check that
the engine is running properly and that fuel consumption is normal
there are no leaks (fuel, oil or other fluid)
the brake pedal is functioning properly
all lights are working
‒ adjust the head-
light height if the vehicle is carrying aheavy load
tire tread depth and air pressure are atcorrect levels. Change to snow tires whendriving in areas where there is a risk ofsnowy or icy roads
the start battery is sufficiently charged
the wiper blades are in good condition
Related information
Checking tire pressure (p. 507)
Filling washer fluid (p. 607)
Winter driving (p. 412)
Economical driving (p. 411)
Vehicle modem settings (p. 483)
Loading recommendations (p. 538)
Pilot Assist
* (p. 285)
Tire sealing system (p. 523)
Winter driving
It is important to check the vehicle before driving in cold/snowy conditions to makesure it can be driven safely.
Before the cold season arrives: Make sure the engine coolant contains 50% antifreeze. This mixture helps pro-tect the engine from frost erosion down toapprox. –35 °C (–31 °F). Do not mix dif-ferent types of antifreeze as this couldpose a health risk.
Keep the fuel tank well filled to preventcondensation from forming.
Check the viscosity of the engine oil. Oilwith low viscosity (thinner oil) improvescold-weather starting and reduces fuelconsumption when driving with a coldengine.
CAUTION
Low-viscosity oil should not be used with hard driving or in hot weather.
Check the condition and charge level of the start battery. Cold weather placesgreater demands on the start battery andreduces its capacity.
Use washer fluid containing antifreeze tohelp prevent ice from forming in thewasher fluid reservoir.
Page 502 of 643
WHEELS AND TIRES
500
TiresThe function of the tires is to carry loads, pro- vide traction on road surfaces, reduce vibra-tions and protect the wheels from wear.
The tires significantly influence the vehicle's driving characteristics. The type, dimensions,tire pressure and speed rating have a consid-erable impact on how the vehicle performs. Your vehicle is equipped with tires according to the vehicle's tire information placard on theB-pillar (the structural member at the side ofthe vehicle, at the rear of the driver's dooropening).
WARNING
A damaged tire could cause the driver to lose control of the vehicle.
CAUTION
Some Volvo models are equipped with an Ultra High Performance tire and wheelcombination designed to provide maxi-mum dry pavement performance with con-sideration for hydroplaning resistance.They may be more susceptible to road haz-ard damage and, depending on drivingconditions, may achieve a tread life of lessthan 30,000 km (20,000 miles). Even ifthis vehicle is equipped with Volvo'sadvanced AWD or stability system, thesetires are not designed for winter driving,and should be replaced with winter tireswhen weather conditions dictate.
The tires have good road holding characteris- tics and offer good handling on dry and wetsurfaces. It should be noted however that thetires have been developed to give these fea-tures on snow/ice-free surfaces. Most models are equipped with "all-season" tires, which provide a somewhat higherdegree of roadholding on slippery road surfa-ces than tires without the "all-season" rating.However, for optimal roadholding on icy orsnow-covered roads, Volvo recommendssnow tires on all four wheels. When replacing tires, be sure that the newtires are the same size designation, type(radial) and preferably from the same manu-facturer, on all four wheels. Otherwise there isa risk of altering the vehicle's roadholding andhandling characteristics.
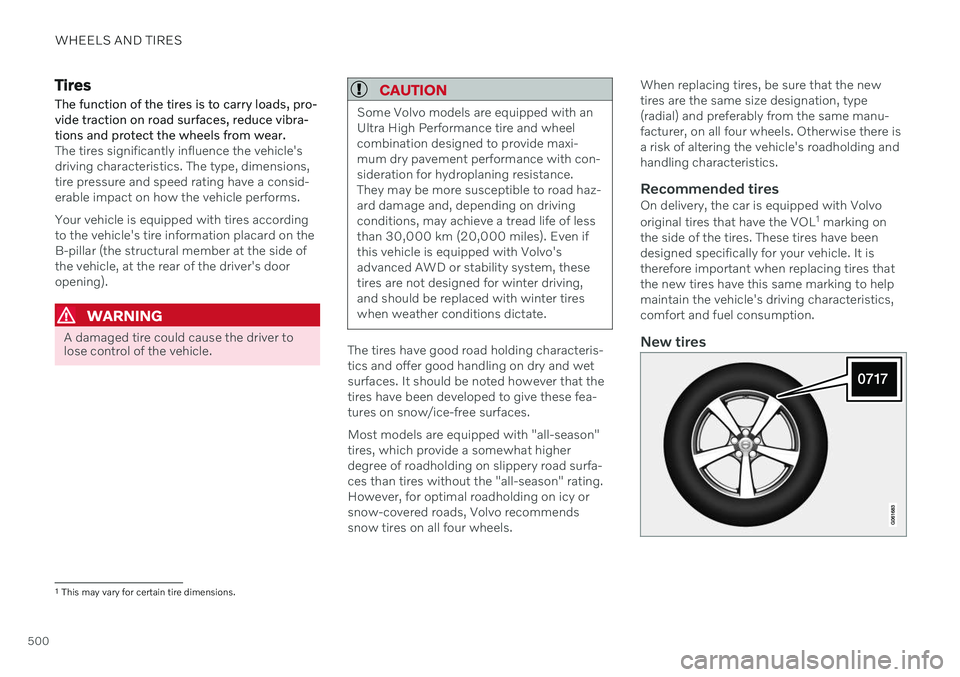
Recommended tiresOn delivery, the car is equipped with Volvo original tires that have the VOL
1
marking on
the side of the tires. These tires have been designed specifically for your vehicle. It istherefore important when replacing tires thatthe new tires have this same marking to helpmaintain the vehicle's driving characteristics,comfort and fuel consumption.
New tires
1 This may vary for certain tire dimensions.
Page 541 of 643

LOADING, STORAGE AND PASSENGER COMPARTMENT
* Option/accessory.539
Extra cargo space
The rear seat backrests can be folded down *
to increase cargo space in the cargo compart- ment/trunk and simplify loading. If the rearseat backrests are folded down, make surethat no objects loaded into the vehicle preventthe WHIPS system for the front seats fromfunctioning correctly. The ski hatch * in the rear seat can be folded
down to carry skis or other long, thin objects.
Related information
Load anchoring eyelets (p. 540)
Rear seat ski hatch
* (p. 540)
Roof loads and load carriers (p. 539)
Leveling control
* and suspension (p. 408)
Weights (p. 615)
Roof loads and load carriers
Volvo-developed load carriers are recom- mended for carrying loads on the roof of thevehicle.
Volvo load carriers are specially designed to help prevent damage to your vehicle and helpensure maximum safety while driving. Volvoload carriers are available from authorizedVolvo retailers. Carefully follow the installation instructions provided with the load carriers. Distribute the load evenly throughout the load carriers. Place heavier cargo at thebottom of the load.
Check periodically to ensure that the loadcarriers and load are properly secured.Secure the load firmly using tie straps orsimilar.
If the load is longer than the vehicle, suchas a canoe or kayak, attach the towingeyelet in its front outlet and secure the tiestraps in it.
The vehicle's wind resistance and fuelconsumption increase with the size of theload.
Drive smoothly. Avoid rapid acceleration,hard braking and fast cornering.
WARNING
The vehicle's center of gravity and driving characteristics are altered by roof loads. Follow the vehicle's specifications regar- ding weights and maximum permittedload.
Related information
Loading recommendations (p. 538)
Weights (p. 615)