light VOLVO S90 T8 2018 Quick Guide
[x] Cancel search | Manufacturer: VOLVO, Model Year: 2018, Model line: S90 T8, Model: VOLVO S90 T8 2018Pages: 46, PDF Size: 8.64 MB
Page 7 of 46
EXTERIOR OVERVIEW
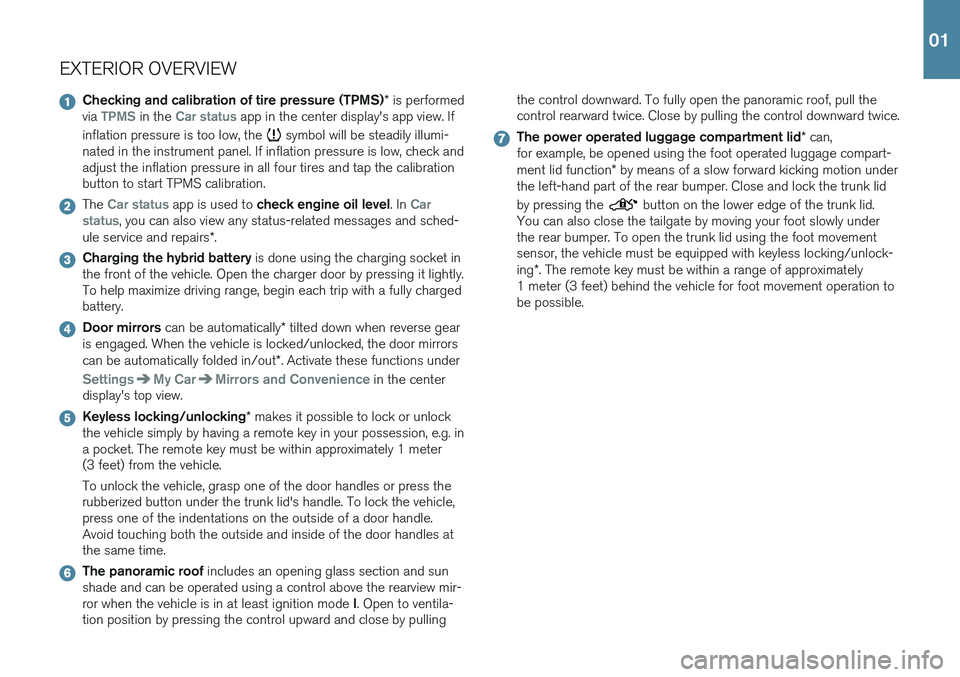
Checking and calibration of tire pressure (TPMS)* is performed
via TPMS in the Car status app in the center display's app view. If
inflation pressure is too low, the
symbol will be steadily illumi-
nated in the instrument panel. If inflation pressure is low, check and adjust the inflation pressure in all four tires and tap the calibrationbutton to start TPMS calibration.
The Car status app is used to check engine oil level . In Car
status, you can also view any status-related messages and sched-
ule service and repairs *.
Charging the hybrid battery is done using the charging socket in
the front of the vehicle. Open the charger door by pressing it lightly. To help maximize driving range, begin each trip with a fully chargedbattery.
Door mirrors can be automatically * tilted down when reverse gear
is engaged. When the vehicle is locked/unlocked, the door mirrors can be automatically folded in/out *. Activate these functions under
SettingsMy CarMirrors and Convenience in the center
display's top view.
Keyless locking/unlocking * makes it possible to lock or unlock
the vehicle simply by having a remote key in your possession, e.g. in a pocket. The remote key must be within approximately 1 meter(3 feet) from the vehicle. To unlock the vehicle, grasp one of the door handles or press the rubberized button under the trunk lid's handle. To lock the vehicle,press one of the indentations on the outside of a door handle.Avoid touching both the outside and inside of the door handles atthe same time.
The panoramic roof includes an opening glass section and sun
shade and can be operated using a control above the rearview mir- ror when the vehicle is in at least ignition mode I. Open to ventila-
tion position by pressing the control upward and close by pulling the control downward. To fully open the panoramic roof, pull the control rearward twice. Close by pulling the control downward twice.
The power operated luggage compartment lid
* can,
for example, be opened using the foot operated luggage compart- ment lid function * by means of a slow forward kicking motion under
the left-hand part of the rear bumper. Close and lock the trunk lid by pressing the
button on the lower edge of the trunk lid.
You can also close the tailgate by moving your foot slowly under the rear bumper. To open the trunk lid using the foot movementsensor, the vehicle must be equipped with keyless locking/unlock- ing *. The remote key must be within a range of approximately
1 meter (3 feet) behind the vehicle for foot movement operation to be possible.
01
Page 11 of 46

INTERIOR OVERVIEW
Center display is used to control many of the vehicle's main func-
tions, e.g. media, navigation *, climate control, driver support systems
and in-vehicle apps.
The instrument panel displays most of the information related to
driving such as speed, rpm, navigation * and active driver support
functions. Via the app menu, you can choose which information should be shown on the driver display. Open and navigate in theapp menu using the steering wheel's right-hand keypad. Settings can also be made via
SettingsMy CarDisplays in the center
display's top view.
The head-up display * supplements the vehicle's instrument panel
and projects information on the windshield. It can be activated in the center display's function view.
Start knob is used to start the vehicle. Turn clockwise and release
into the ignition position I. Hold the brake pedal depressed and turn
the start knob clockwise to start the vehicle. Switch off the vehicle by turning the start knob clockwise.
Drive modes * are selected using the control in the tunnel console,
between the front seats. Press the control and roll it to choose between
Pure, AWD, Hybrid, Power and Individual in the center
display. Confirm your choice by pressing the control. Individualdrive mode enables you to customize a drive mode's characteristics to your own preferences. To activate this drive mode, tap
Settings
My CarIndividual Drive Mode in the center display's top
view.
The parking brake is activated by pulling up the control. A
symbol will appear in the instrument panel. Release it manually by pressing the control down while depressing the brake pedal. Auto- hold brakes (
) keep the vehicle stationary when it is stopped, e.g.
at a traffic light, even if the brake pedal is not depressed. Before driving the vehicle into a car wash, deactivate the Automatic Braking and Automatic Parking Brake Application functions. This is done in the center display's top view by tapping
SettingsMy
Car
Parking Brake and Suspension.
Passenger airbag : a sensor system determines what is occupying
the front passenger seat and activates/deactivates the front pas- senger side's airbag. See the Owner's Manual for important safety-related information regarding this.
01
Page 13 of 46

CENTER DISPLAYThe center display is used to adjust settings and control most of the
vehicle's functions. The center display has three main views: home view, function view and app view. You can reach the function view and appview from the home view by swiping right or left. There is also a topview that you can access by swiping down the top section of the dis-play. Change the appearance of the center display and the instrument panel by choosing a theme in
SettingsMy CarDisplays in top
view. You can also select a dark or light background for the center dis- play. Return to the home view from another view by means of a short
press on the physical home button under the display. The last mode used for the home view will then be shown. A further short press on thehome button sets all of the home view's tiles in standard mode. To clean the center display, press and hold the home button under the
display to lock the touchscreen function. Press the home button briefly to reactivate the display. The status bar at the top of the display shows the status of current
vehicle activities and functions. Shown on the left is network and con- nection information, with media-related information; the time and back-ground activity indicator shown on the right. In the climate row at the bottom you can set temperature and seat
comfort by tapping on the respective icon. Open the climate view by tapping on the center button in the climate row.
01
Page 15 of 46
CHARGING THE HYBRID BATTERY
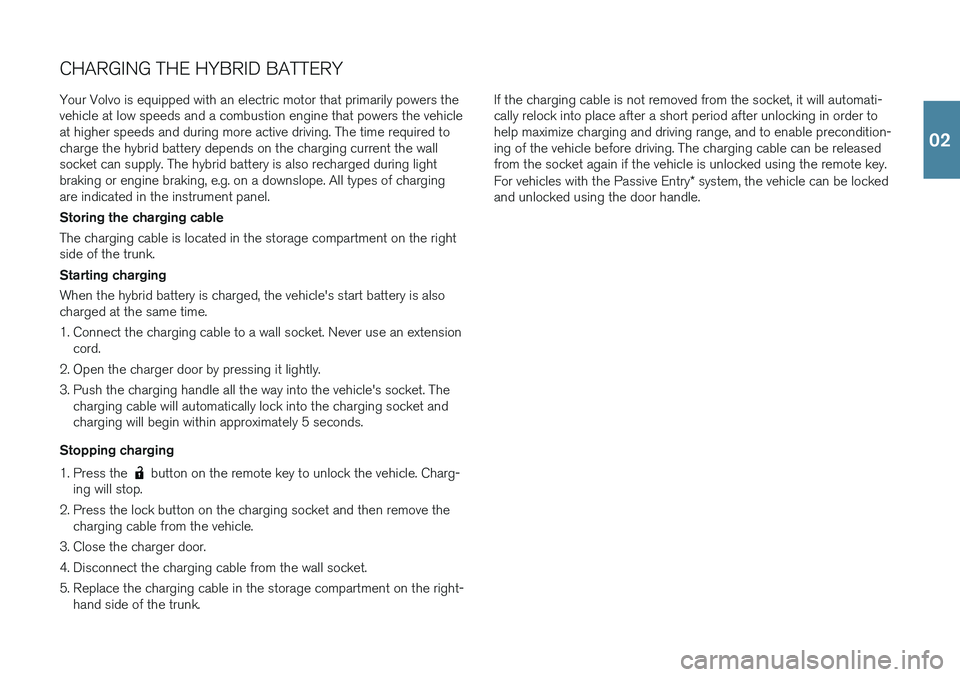
Your Volvo is equipped with an electric motor that primarily powers the vehicle at low speeds and a combustion engine that powers the vehicleat higher speeds and during more active driving. The time required tocharge the hybrid battery depends on the charging current the wallsocket can supply. The hybrid battery is also recharged during light
braking or engine braking, e.g. on a downslope. All types of chargingare indicated in the instrument panel. Storing the charging cable The charging cable is located in the storage compartment on the right side of the trunk. Starting charging When the hybrid battery is charged, the vehicle's start battery is also charged at the same time.
1. Connect the charging cable to a wall socket. Never use an extension cord.
2. Open the charger door by pressing it lightly.
3. Push the charging handle all the way into the vehicle's socket. The charging cable will automatically lock into the charging socket and charging will begin within approximately 5 seconds.
Stopping charging
1. Press the
button on the remote key to unlock the vehicle. Charg-
ing will stop.
2. Press the lock button on the charging socket and then remove the charging cable from the vehicle.
3. Close the charger door.
4. Disconnect the charging cable from the wall socket.
5. Replace the charging cable in the storage compartment on the right- hand side of the trunk. If the charging cable is not removed from the socket, it will automati- cally relock into place after a short period after unlocking in order tohelp maximize charging and driving range, and to enable precondition-ing of the vehicle before driving. The charging cable can be releasedfrom the socket again if the vehicle is unlocked using the remote key. For vehicles with the Passive Entry
* system, the vehicle can be locked
and unlocked using the door handle.
02
Page 16 of 46

HYBRID BATTERY CHARGE STATUS The hybrid battery's charge status can be checked in the charging socket, via the charge module, in the instrument panel and in the Volvo On Call app. Via the indicator lights in the charging module When the charging cable is plugged into a wall socket, an indicator light on the charge module (the device connected to the wall socket) will flash red once. A safety check will be performed. When the charg-ing cable is ready to be used, the indicator light will glow steadily blue.The light will flash blue while charging is in progress. When the lightglows steadily blue, charging is complete. Flashing red - a fault hasbeen detected. Via the charging socket indicator lights
•White - courtesy light.
•Yellow - standby mode (waiting for charging to begin).
•Flashing green - charging is in progress.
•Steady green - charging completed (the light will go out after a short time).
•Steady red - a fault has been detected.
Via the instrument panel The symbol's color indicates the hybrid battery's charging status.
Blue light - charging is in progress. Green light - the battery is fully charged.Red light - a fault has occurred. Check that the charging cable is properly connected to the vehicle's charging socket and tothe 120/240-volt wall socket.
02
Page 17 of 46

304.5
HYBRID-RELATED INFORMATION IN THE INSTRUMENT PANEL
Various symbols and animations will be displayed in the instrument panel, depending on the drive mode selected. Electrical current and fuel consumption are indicated in a gauge to the right. Consumption is affected by driving style. When the white indicatorline passes the white arrow at the top of the gauge, the combustionengine will start. When the indicator line is in the orange section of thegauge, the hybrid battery is being charged, e.g. during light braking. Distance to discharged battery
This indicator shows the approximate distance that can be driven before the hybrid battery is discharged. This distance is affectedby a number of factors, e.g. driving style, speed and ambient tem-perature, and may vary during the course of a drive. In normal con-ditions, you can expect a range of 24-40 km (15-25 miles). Theinitial value displayed when the hybrid battery is fully chargedshows a maximum possible distance instead of an estimate of therange on electrical power and is adjusted during your drive. When"---" is displayed in the instrument panel, there is no guaranteedelectrical current remaining in the battery.
Symbols in the instrument panel
A solid white symbol indicates which power source is being used. A "lightning" symbol indicates that the electric motor is beingused and a "drop" symbol indicates the combustion engine isbeing used.
Indicates that the battery is being charged, e.g. during engine braking.
This gauge indicates the current charge level in the hybrid battery. Electrical current is also used by the climate system.
Indicates that the Charge or Hold functions are active. These are
activated from the center display's function view. Charge means that the hybrid battery is being charged if its charge level is low.
Hold means that the battery level is being retained for later use.
Starting and stopping the combustion engine The vehicle calculates when the combustion engine, electric motor or both need to be used. When running on the electric motor, the vehiclemay sometimes need to start the engine automatically due to externalfactors, e.g. low ambient temperatures. The combustion engine willalways start when the hybrid battery has reached its lowest chargelevel.
02
Page 18 of 46
POWER* FRONT SEATS
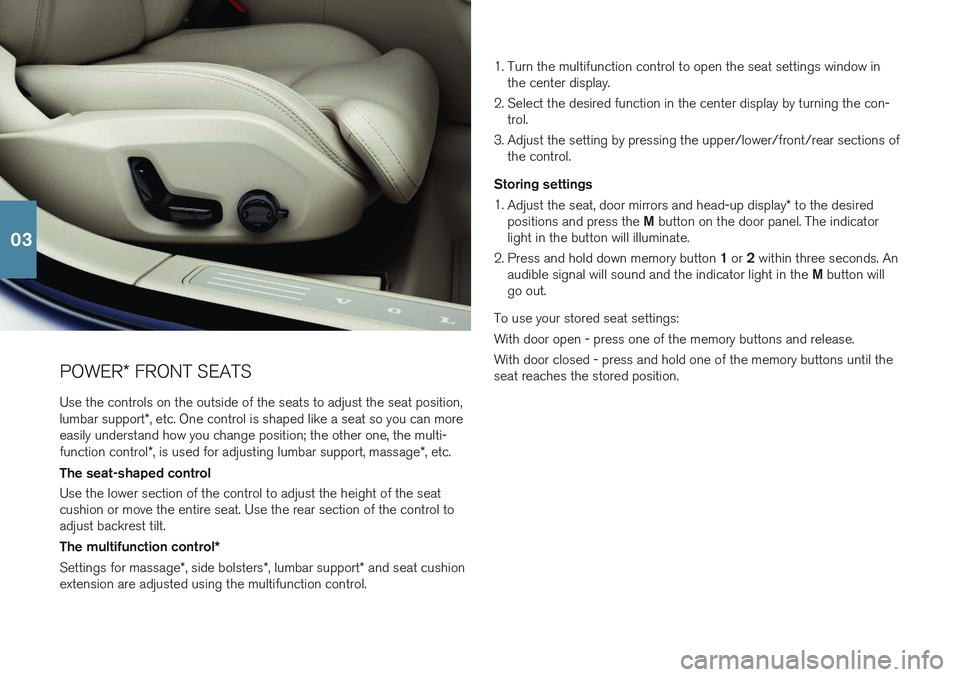
Use the controls on the outside of the seats to adjust the seat position, lumbar support *, etc. One control is shaped like a seat so you can more
easily understand how you change position; the other one, the multi-function control *, is used for adjusting lumbar support, massage *, etc.
The seat-shaped control Use the lower section of the control to adjust the height of the seat cushion or move the entire seat. Use the rear section of the control toadjust backrest tilt. The multifunction control *
Settings for massage *, side bolsters *, lumbar support * and seat cushion
extension are adjusted using the multifunction control. 1. Turn the multifunction control to open the seat settings window in
the center display.
2. Select the desired function in the center display by turning the con- trol.
3. Adjust the setting by pressing the upper/lower/front/rear sections of the control.
Storing settings 1. Adjust the seat, door mirrors and head-up display * to the desired
positions and press the M button on the door panel. The indicator
light in the button will illuminate.
2. Press and hold down memory button 1 or 2 within three seconds. An
audible signal will sound and the indicator light in the M button will
go out.
To use your stored seat settings: With door open - press one of the memory buttons and release. With door closed - press and hold one of the memory buttons until the seat reaches the stored position.
03
Page 22 of 46
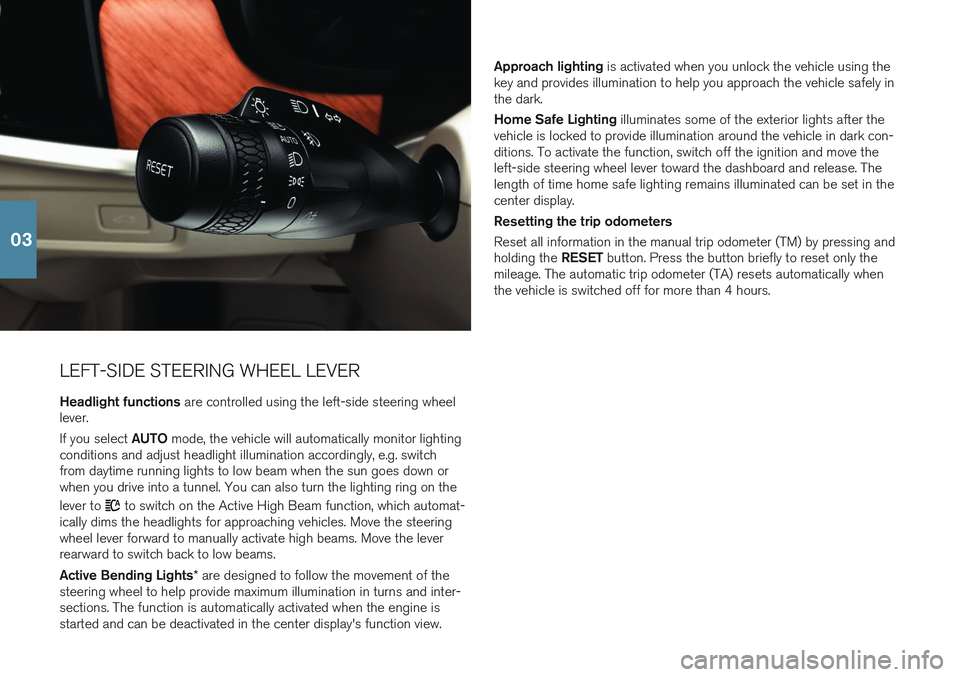
LEFT-SIDE STEERING WHEEL LEVERHeadlight functions are controlled using the left-side steering wheel
lever. If you select AUTO mode, the vehicle will automatically monitor lighting
conditions and adjust headlight illumination accordingly, e.g. switch from daytime running lights to low beam when the sun goes down orwhen you drive into a tunnel. You can also turn the lighting ring on the lever to
to switch on the Active High Beam function, which automat-
ically dims the headlights for approaching vehicles. Move the steering wheel lever forward to manually activate high beams. Move the leverrearward to switch back to low beams. Active Bending Lights * are designed to follow the movement of the
steering wheel to help provide maximum illumination in turns and inter- sections. The function is automatically activated when the engine isstarted and can be deactivated in the center display's function view. Approach lighting
is activated when you unlock the vehicle using the
key and provides illumination to help you approach the vehicle safely inthe dark. Home Safe Lighting illuminates some of the exterior lights after the
vehicle is locked to provide illumination around the vehicle in dark con- ditions. To activate the function, switch off the ignition and move theleft-side steering wheel lever toward the dashboard and release. Thelength of time home safe lighting remains illuminated can be set in thecenter display. Resetting the trip odometers Reset all information in the manual trip odometer (TM) by pressing and holding the RESET button. Press the button briefly to reset only the
mileage. The automatic trip odometer (TA) resets automatically when the vehicle is switched off for more than 4 hours.
03
Page 23 of 46
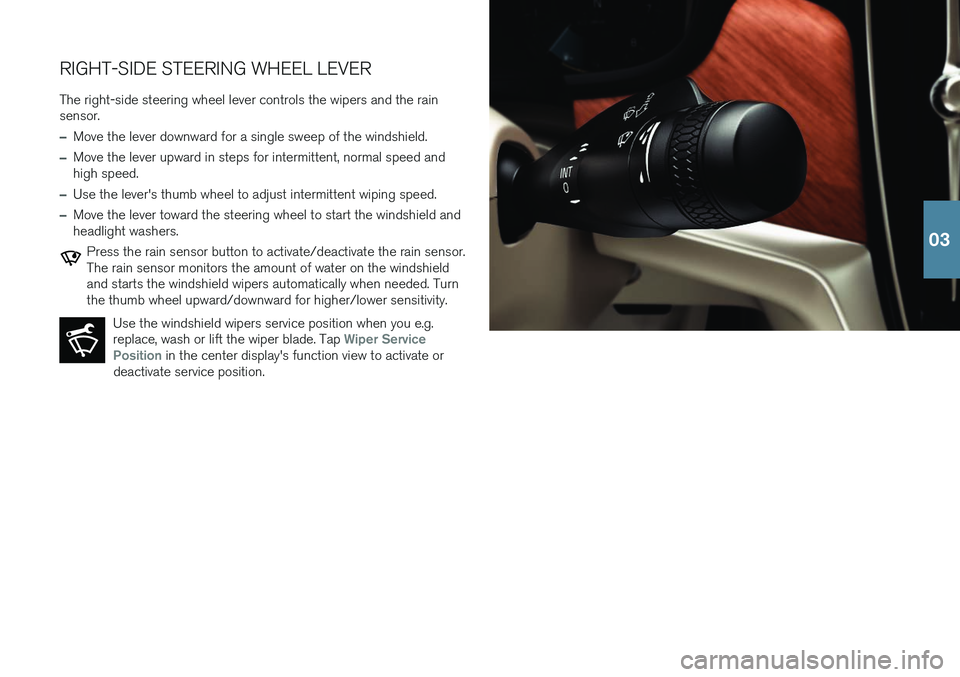
RIGHT-SIDE STEERING WHEEL LEVERThe right-side steering wheel lever controls the wipers and the rain sensor.
–Move the lever downward for a single sweep of the windshield.
–Move the lever upward in steps for intermittent, normal speed and high speed.
–Use the lever's thumb wheel to adjust intermittent wiping speed.
–Move the lever toward the steering wheel to start the windshield and headlight washers.
Press the rain sensor button to activate/deactivate the rain sensor. The rain sensor monitors the amount of water on the windshieldand starts the windshield wipers automatically when needed. Turnthe thumb wheel upward/downward for higher/lower sensitivity. Use the windshield wipers service position when you e.g.replace, wash or lift the wiper blade. Tap
Wiper Service
Position in the center display's function view to activate or
deactivate service position.
03
Page 44 of 46
SUPPLEMENTARY INFORMATIONThe Owner's Manual and other manuals contain safety instructions and all warning, caution and notetexts, which must be read. Some functions onlyapply to certain markets.
WARNING
GETTING STARTED Volvo On Call - For vehicles with Volvo On Call, the
services only function in areas where the vehicle has adequate cellular coverage and on marketswhere the service is available. Just as with cellularphones, atmospheric disturbances or areas withfewer transmitters, e.g. sparsely populated ruralareas, can make connection impossible. For warning, caution and note texts for Volvo On Call services, see the Owner's Manual and theapplicable agreement for the Volvo On Call sub-scription. Sensus Navigation * - Direct all your attention to
the road and make sure that your concentration is focused on driving. Follow applicable traffic lawsand use good judgment while driving. Road condi-tions can be affected by weather or season, whichmay make certain recommendations less reliable. EXTERIOR OVERVIEW Trunk lid - Be aware of the risk of serious injury
when operating the trunk lid. Make sure that no one is in the path of the trunk lid who could be injuredby its movement. Always operate the trunk lid withcaution. INTERIOR OVERVIEW Passenger airbag - Volvo recommends that all
occupants (adults and children) shorter than 140 cm (4 foot 7 inches) be seated in the rear seatof any vehicle with a front passenger side airbagand be properly restrained for their height andweight. Occupant Weight Sensor (OWS) •
No objects that add to the total weight on the seat should be placed on the front passenger'sseat. If a child is seated in the front passenger'sseat with any additional weight, this extra weightcould cause the OWS system to enable the air-bag, which might cause it to deploy in the eventof a collision, thereby injuring the child.
• The seat belt should never be wrapped around anobject on the front passenger's seat. This couldinterfere with the OWS system's function.
• The front passenger's seat belt should never beused in a way that exerts more pressure on thepassenger than normal. This could increase thepressure exerted on the weight sensor by a child,and could result in the airbag being enabled,which might cause it to deploy in the event of acollision, thereby injuring the child.
Always take along the remote key when leaving
the vehicle and make sure that the vehicle's electri- cal system is in ignition mode 0 – especially if there
are children in the vehicle. Always apply the parking brake when parking on
an incline. Selecting a gear or putting the automatic transmission in P may not be sufficient to keep the
vehicle stationary in all situations. CHARGING THE HYBRID BATTERY
• Charging the hybrid battery may only be done from approved, grounded 120/240 V outlets(AC, alternating current). If the electrical circuit orelectrical socket's capacity is not known, let alicensed electrician inspect the electrical circuit'scapacity. Using a charge level that exceeds theelectrical circuit's or electrical outlet's capacitymay start a fire or damage the electrical circuit.
• The charging cable must be grounded when inuse. It is equipped with a cord with a groundingconductor and a grounding plug. The plug mustbe inserted into an appropriate outlet that isproperly installed and grounded in accordancewith all local codes and ordinances and is notdamaged in any way.
• Children should be supervised when in the vicin-ity of the charging cable when it is plugged in.
• High voltage is present in your electric meterhousing and power distribution service panel. Contact with high voltage can cause death orserious personal injury.
• Do not use the charging cable if it is damaged inany way. A damaged or malfunctioning chargingcable may only be repaired by a workshop – anauthorized Volvo workshop is recommended.
• Always position the charging cable so that it willnot be driven over, stepped on, tripped over orotherwise damaged, or cause personal injury.
• Disconnect the charger from the wall outletbefore cleaning it.
• Never connect the charging cable to an exten-sion cord or a multiple plug socket.
• Avoid visibly worn or damaged electrical outletssince they may lead to fire damage and/or per-sonal injury if used.
Also, refer to the manufacturer's instructions forusing the charging cable and its components. POWER FRONT SEATS Do not adjust the seat while driving. The seat must be positioned in a way that allows the driver to fullydepress the brake pedal. Adjust the seat as farrearward as comfort and control allow. After adjust-ing the seat, make sure that it is securely lockedinto position before starting to drive. DRIVER SUPPORT The vehicle's driver support systems are designed to offer supplementary assistance to the driver, butcannot handle all situations in all traffic, weatherand road conditions. They are never a substitute forthe driver's attention and judgment. The driver isalways responsible for ensuring the vehicle is drivenin a safe manner, at the appropriate speed, with anappropriate distance to other vehicles, and inaccordance with current traffic rules and regula-tions. The driver always has ultimate responsibilityfor braking and steering the vehicle. Before driving your vehicle, read all sections of the Owner's Manual concerning driver support systemsin the vehicle. PARKING ASSISTANCE SYSTEMS Park Assist Pilot is a supplementary driver support
but cannot handle all situations. It is only intended to assist the driver when parallel and perpendicularparking. The driver bears full responsibility for park- ing the vehicle safely and braking when necessary.Objects located far into the parking space may notbe detected when scanning. The driver is alwaysresponsible for assessing whether the space sug-gested by Park Assist Pilot is suitable for parking. Park Assist Camera
is supplementary driver sup-
port intended to assist when parking the vehicle. It is never a substitute for the driver's attention andjudgment. The cameras have dead/blind spotswhere objects cannot be detected. Pay particularattention to people and animals near the vehicle.Objects/obstacles may be closer to the vehiclethan they appear on the screen. Before driving your vehicle, read all sections of the Owner's Manual concerning driver support systemsin the vehicle. VOICE COMMANDS The driver is always responsible for ensuring that the vehicle is operated in a safe manner and that allapplicable traffic regulations are followed.
CAUTION
INTERIOR OVERVIEW The information is projected from a head-up dis-
play unit * located in the dashboard. To help pre-
vent damage to the display unit's glass cover, do not place any objects on the glass and preventobjects from falling onto it. CENTER DISPLAY When cleaning the center display, use a microfiber
cloth that is free from sand and similar debris. When cleaning the center display, apply only lightpressure to the display. Pressing too hard coulddamage the display. Do not spray liquid or corrosive chemicals directly onto the center display. Do not use window clean-ers, cleaning agents, aerosol sprays, solvents, alco-hol, ammonia or detergents that contain abrasives.Never use abrasive cloths, paper towels or tissuepaper, as these may scratch the display. CHARGING THE HYBRID BATTERY Charging cable - Never connect the charging
cable if there is a risk of a thunderstorm or there is lightning. Never detach the charging cable from the
07