VOLVO V60 2014 Owners Manual
Manufacturer: VOLVO, Model Year: 2014, Model line: V60, Model: VOLVO V60 2014Pages: 442, PDF Size: 13.85 MB
Page 141 of 442
05 Loading and storage
05
* Option/accessory, for more information, see Introduction.139
Jacket holder
The coat hanger is located on the left-hand side of the passenger seat's head restraint. The jacket holder is only designed for light clothing.
Related information
• Storage spaces (p. 137)
Tunnel console
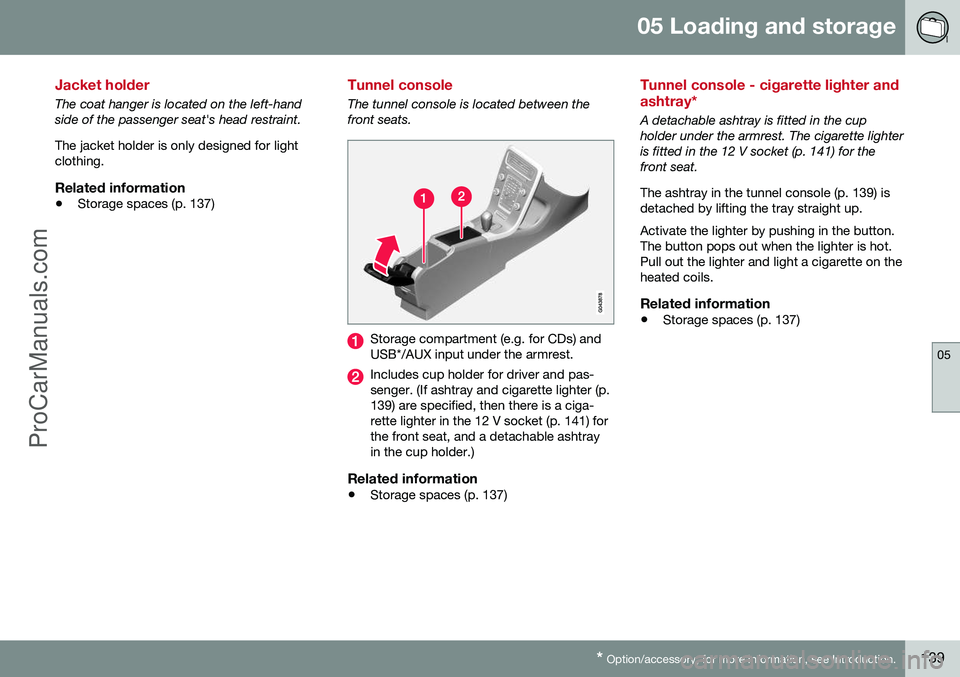
The tunnel console is located between the front seats.
Storage compartment (e.g. for CDs) and USB*/AUX input under the armrest.
Includes cup holder for driver and pas- senger. (If ashtray and cigarette lighter (p.139) are specified, then there is a ciga-rette lighter in the 12 V socket (p. 141) forthe front seat, and a detachable ashtrayin the cup holder.)
Related information
•Storage spaces (p. 137)
Tunnel console - cigarette lighter and ashtray*
A detachable ashtray is fitted in the cup holder under the armrest. The cigarette lighteris fitted in the 12 V socket (p. 141) for thefront seat. The ashtray in the tunnel console (p. 139) is detached by lifting the tray straight up. Activate the lighter by pushing in the button. The button pops out when the lighter is hot.Pull out the lighter and light a cigarette on theheated coils.
Related information
• Storage spaces (p. 137)
ProCarManuals.co’
Page 142 of 442
05 Loading and storage
05
140* Option/accessory, for more information, see Introduction.
Glovebox
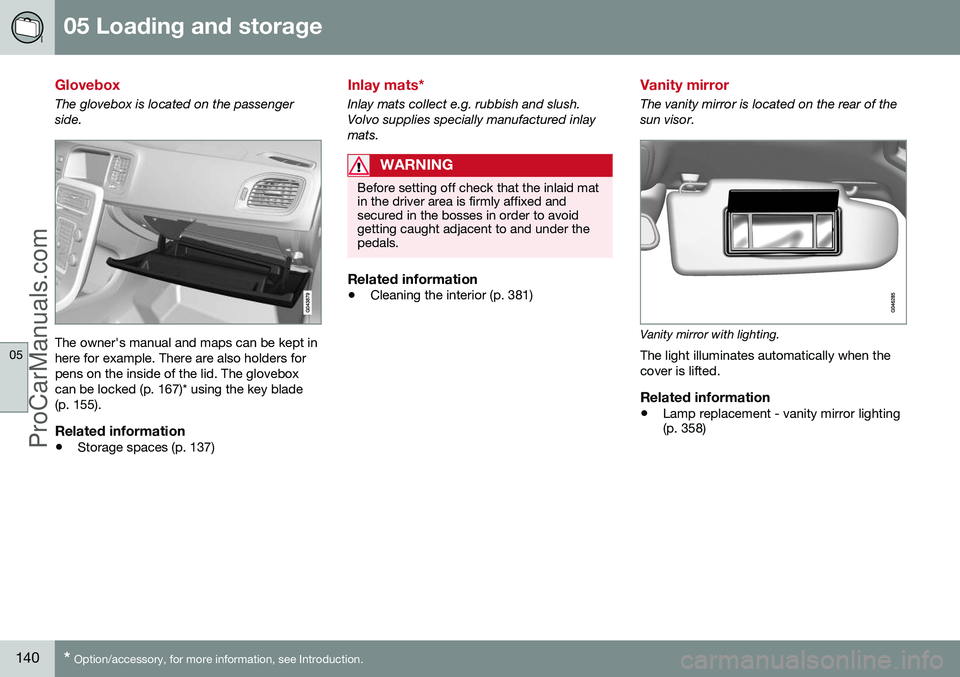
The glovebox is located on the passenger side.
The owner's manual and maps can be kept in here for example. There are also holders forpens on the inside of the lid. The gloveboxcan be locked (p. 167)* using the key blade(p. 155).
Related information
• Storage spaces (p. 137)
Inlay mats*
Inlay mats collect e.g. rubbish and slush. Volvo supplies specially manufactured inlaymats.
WARNING
Before setting off check that the inlaid mat in the driver area is firmly affixed andsecured in the bosses in order to avoidgetting caught adjacent to and under thepedals.
Related information
•Cleaning the interior (p. 381)
Vanity mirror
The vanity mirror is located on the rear of the sun visor.
Vanity mirror with lighting.
The light illuminates automatically when the cover is lifted.
Related information
• Lamp replacement - vanity mirror lighting (p. 358)
ProCarManuals.co’
Page 143 of 442
05 Loading and storage
05
* Option/accessory, for more information, see Introduction.141
Tunnel console - 12 V-sockets
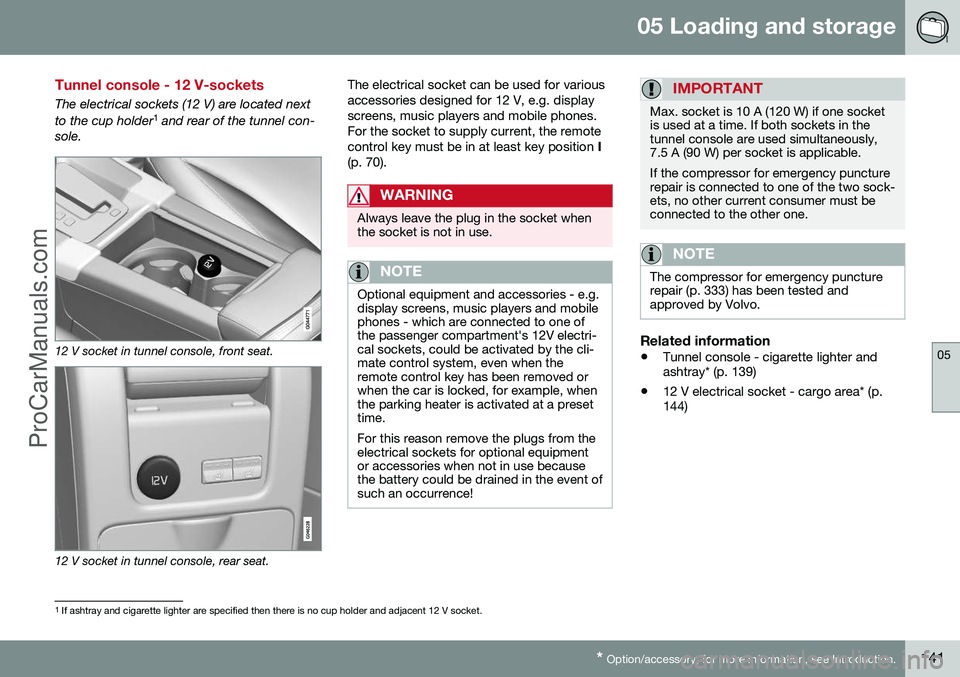
The electrical sockets (12 V) are located next to the cup holder 1
and rear of the tunnel con-
sole.
12 V socket in tunnel console, front seat.
12 V socket in tunnel console, rear seat. The electrical socket can be used for various accessories designed for 12 V, e.g. displayscreens, music players and mobile phones.For the socket to supply current, the remotecontrol key must be in at least key position
I
(p. 70).
WARNING
Always leave the plug in the socket when the socket is not in use.
NOTE
Optional equipment and accessories - e.g. display screens, music players and mobilephones - which are connected to one ofthe passenger compartment's 12V electri-cal sockets, could be activated by the cli-mate control system, even when theremote control key has been removed orwhen the car is locked, for example, whenthe parking heater is activated at a presettime. For this reason remove the plugs from the electrical sockets for optional equipmentor accessories when not in use becausethe battery could be drained in the event ofsuch an occurrence!
IMPORTANT
Max. socket is 10 A (120 W) if one socket is used at a time. If both sockets in thetunnel console are used simultaneously,7.5 A (90 W) per socket is applicable. If the compressor for emergency puncture repair is connected to one of the two sock-ets, no other current consumer must beconnected to the other one.
NOTE
The compressor for emergency puncture repair (p. 333) has been tested andapproved by Volvo.
Related information
• Tunnel console - cigarette lighter and ashtray* (p. 139)
• 12 V electrical socket - cargo area* (p.144)
1
If ashtray and cigarette lighter are specified then there is no cup holder and adjacent 12 V socket.
ProCarManuals.co’
Page 144 of 442
05 Loading and storage
05
142* Option/accessory, for more information, see Introduction.
Loading
Payload depends on the car's kerb weight. Payload depends on the car's kerb weight. The total of the weight of the passengers andall accessories reduces the car's payload bya corresponding weight. For more detailedinformation on weights, see Weights (p. 390).
The tailgate is opened via a buttonon the lighting panel or the remotecontrol key, see Locking/unlocking -
tailgate (p. 167).
WARNING
The car’s driving properties change depending on the weight and positioningof the load.
To bear in mind when loading
• Position the load firmly against the rear seat's backrest.
Note that objects must not prevent the func- tion of the WHIPS system for the front seats ifany of the rear seat's backrests is foldeddown, seeWHIPS - seating position (p. 35).
• Centre the load.
• Heavy objects should be placed as low as possible. Avoid placing heavy loads onlowered backrests.
• Cover sharp edges with something soft toavoid damaging the upholstery. •
Secure all loads to the load retaining eye-lets with straps or web lashings.
WARNING
A loose object weighing 20 kg can, in a frontal collision at a speed of 50 km/h,carry the impact of an item weighing1000 kg.
WARNING
The protection provided by the inflatable curtain in the headlining may be compro-mised or eliminated by high loads.
• Never load cargo above the backrest.
WARNING
Always secure the load. During heavy braking the load may otherwise shift, caus-ing injury to the car's occupants. Cover sharp edges and sharp corners with something soft. Switch off the engine and apply the park- ing brake when loading/unloading longitems. Otherwise you may accidentallyknock the gear lever or gear selector withthe load into a drive position - and the carcould then move off.
Related information
•
Load retaining eyelets (p. 143)
• Safety net* (p. 145) •
Loading - long load (p. 143)
• Roof load (p. 143)
ProCarManuals.co’
Page 145 of 442
05 Loading and storage
05
143
Loading - long load
To simplify loading (p. 142) in the cargo area, the rear seat backrest can be folded down.The passenger seat backrest can also be folded for an extra long load2
.
Lowering the rear seat backrestTo simplify loading in the cargo area, the rear seat backrest can be folded down, see Seats,rear (p. 74).
Roof load
The load carriers recommended for roof loads are the ones developed by Volvo. This is inorder to avoid damage to the car and in orderto achieve the maximum possible safety dur-ing a journey. Carefully follow the installation instructions supplied with the carriers.
• Check periodically that the load carriers and load are properly secured. Lash theload securely with retaining straps.
• Distribute the load evenly over the loadcarriers. Put the heaviest objects at thebottom.
• The size of the area exposed to the wind,and therefore fuel consumption, increasewith the size of the load.
• Drive gently. Avoid quick acceleration,heavy braking and hard cornering.
WARNING
The car's centre of gravity and driving cha- racteristics are altered by roof loads. Forinformation about the maximum allowableload on the roof, including load carriersand any space box, Weights (p. 390).
Related information
•
Loading (p. 142)
Load retaining eyelets
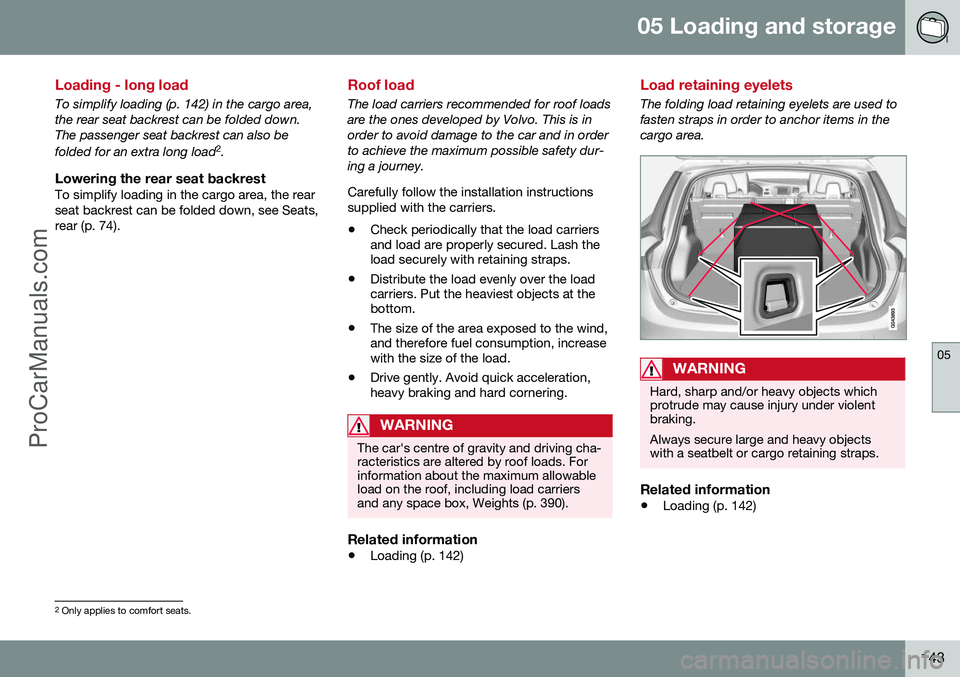
The folding load retaining eyelets are used to fasten straps in order to anchor items in thecargo area.
WARNING
Hard, sharp and/or heavy objects which protrude may cause injury under violentbraking. Always secure large and heavy objects with a seatbelt or cargo retaining straps.
Related information
• Loading (p. 142)
2
Only applies to comfort seats.
ProCarManuals.co’
Page 146 of 442
05 Loading and storage
05
144* Option/accessory, for more information, see Introduction.
Loading - bag holder
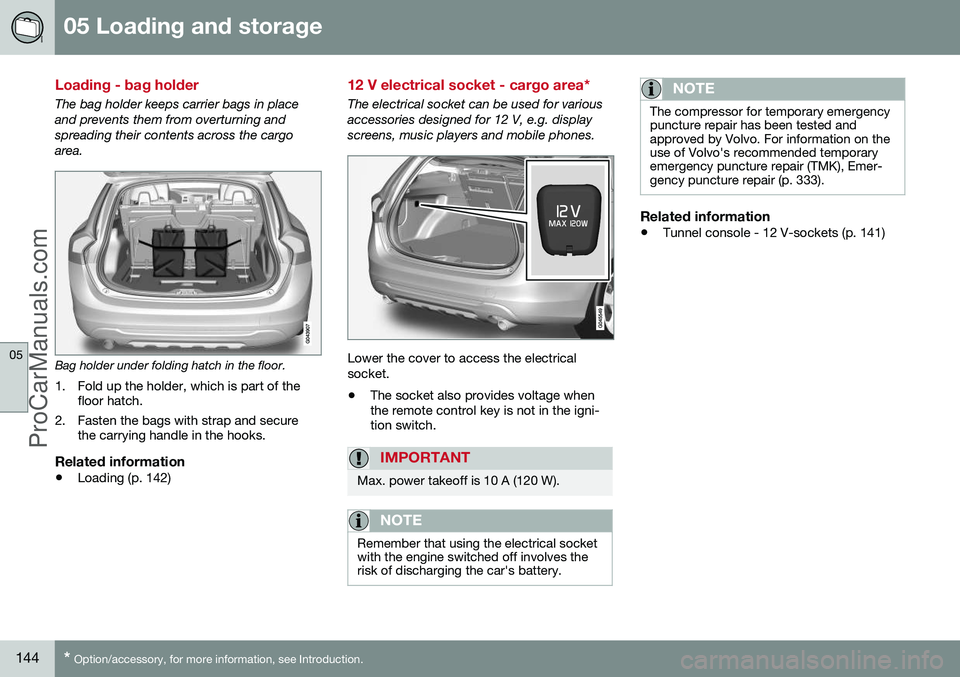
The bag holder keeps carrier bags in place and prevents them from overturning andspreading their contents across the cargoarea.
Bag holder under folding hatch in the floor.
1. Fold up the holder, which is part of the floor hatch.
2. Fasten the bags with strap and secure the carrying handle in the hooks.
Related information
• Loading (p. 142)
12 V electrical socket - cargo area*
The electrical socket can be used for various accessories designed for 12 V, e.g. displayscreens, music players and mobile phones.
Lower the cover to access the electrical socket. •The socket also provides voltage when the remote control key is not in the igni-tion switch.
IMPORTANT
Max. power takeoff is 10 A (120 W).
NOTE
Remember that using the electrical socket with the engine switched off involves therisk of discharging the car's battery.
NOTE
The compressor for temporary emergency puncture repair has been tested andapproved by Volvo. For information on theuse of Volvo's recommended temporaryemergency puncture repair (TMK), Emer-gency puncture repair (p. 333).
Related information
• Tunnel console - 12 V-sockets (p. 141)
ProCarManuals.co’
Page 147 of 442
05 Loading and storage
05
}}
* Option/accessory, for more information, see Introduction.145
Safety net*
A safety net prevents loads from being thrown forward in the passenger compartment in theevent of sudden braking.
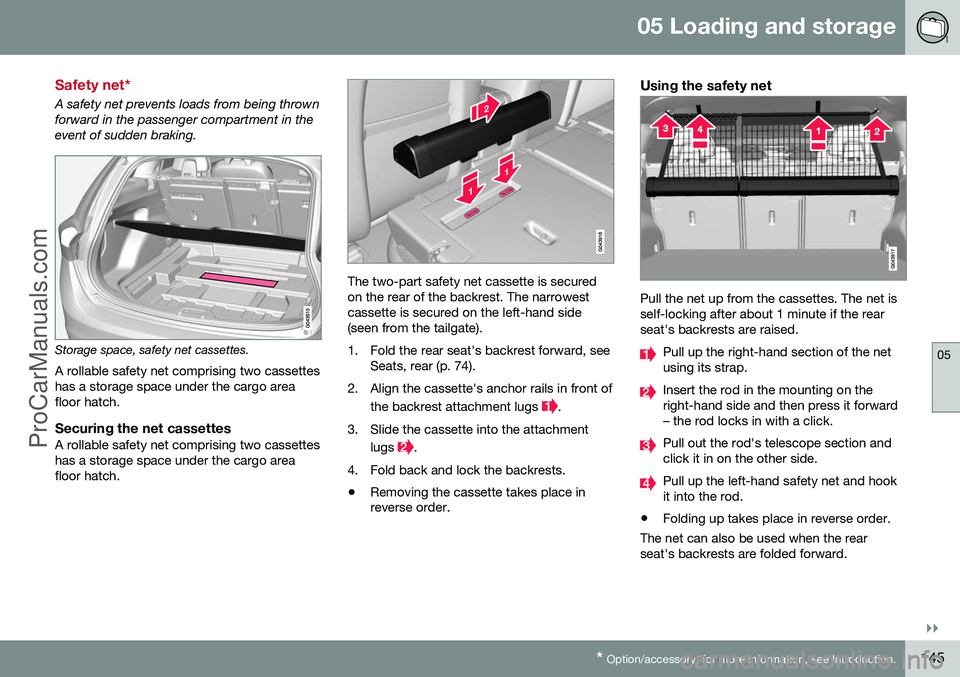
Storage space, safety net cassettes.
A rollable safety net comprising two cassettes has a storage space under the cargo areafloor hatch.
Securing the net cassettesA rollable safety net comprising two cassetteshas a storage space under the cargo areafloor hatch.
The two-part safety net cassette is secured on the rear of the backrest. The narrowestcassette is secured on the left-hand side (seen from the tailgate).
1. Fold the rear seat's backrest forward, see Seats, rear (p. 74).
2. Align the cassette's anchor rails in front of the backrest attachment lugs
.
3. Slide the cassette into the attachment lugs
.
4. Fold back and lock the backrests.
• Removing the cassette takes place in reverse order.
Using the safety net
Pull the net up from the cassettes. The net is self-locking after about 1 minute if the rearseat's backrests are raised.
Pull up the right-hand section of the net using its strap.
Insert the rod in the mounting on the right-hand side and then press it forward– the rod locks in with a click.
Pull out the rod's telescope section and click it in on the other side.
Pull up the left-hand safety net and hook it into the rod.
• Folding up takes place in reverse order.
The net can also be used when the rearseat's backrests are folded forward.
ProCarManuals.co’
Page 148 of 442
||
05 Loading and storage
05
146* Option/accessory, for more information, see Introduction.
Removing the net cassettes1. Roll the safety nets into the cassettes in
accordance with the procedure in the section entitled "Using the safety net",but in reverse.
2. Fold the whole backrest forward.
3. Slide the cassettes out until they loosen from the anchor rails.
Store the cassettes in their compartment under the cargo area floor hatch.
WARNING
Loads in the luggage compartment must be anchored well, and also using a cor-rectly fitted safety net.
Related information
• Loading (p. 142)
• Safety grille (p. 146)
Safety net* combined with cargo cover
A safety net prevents loads from being thrown
forward in the passenger compartment in the event of sudden braking.
Puller-straps for raising the net.
The safety net can also be raised from the rear seat when the cargo cover is extended. Follow the procedure described in the section "Using the safety net" (p. 145). The straps forfolding up are located by the arrows.
Related information
• Safety net* (p. 145)
• Loading (p. 142)
• Load retaining eyelets (p. 143)
Safety grille
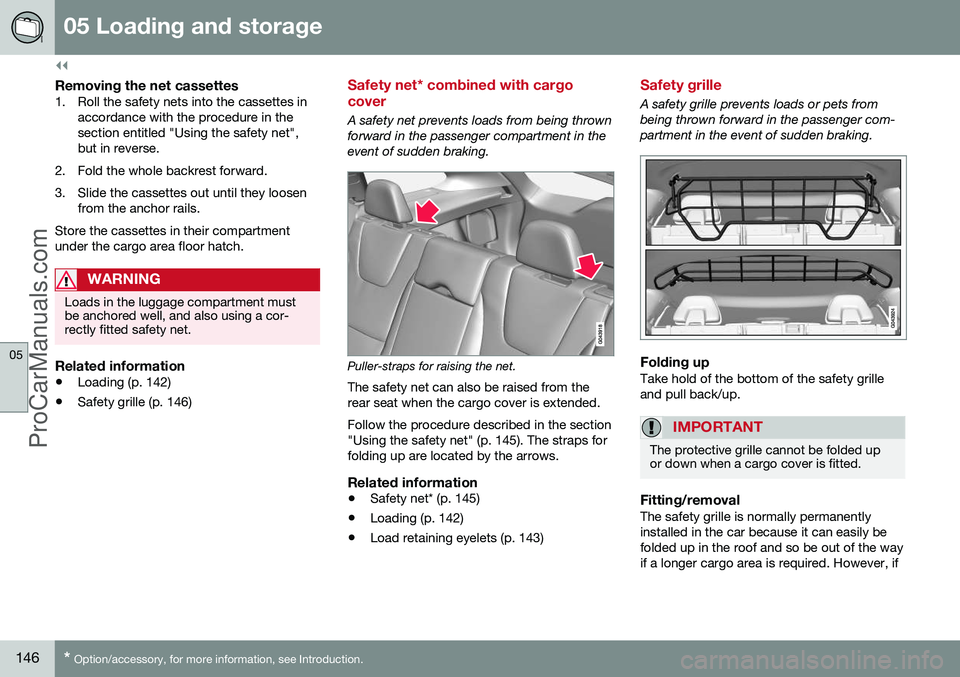
A safety grille prevents loads or pets from being thrown forward in the passenger com-partment in the event of sudden braking.
Folding upTake hold of the bottom of the safety grille and pull back/up.
IMPORTANT
The protective grille cannot be folded up or down when a cargo cover is fitted.
Fitting/removalThe safety grille is normally permanently installed in the car because it can easily befolded up in the roof and so be out of the wayif a longer cargo area is required. However, if
ProCarManuals.co’
Page 149 of 442
05 Loading and storage
05
* Option/accessory, for more information, see Introduction.147
desired, the safety grille can be dismantled and removed from the car. For information about the tools required and methods for fitting/removal, see the installa- tion instructions
3
that were included with the
initial purchase. For safety reasons, the safety grille must always be correctly fastened and securedwhen being refitted.
Related information
• Safety net* (p. 145)
• Loading (p. 142)
• Load retaining eyelets (p. 143)
Cargo cover
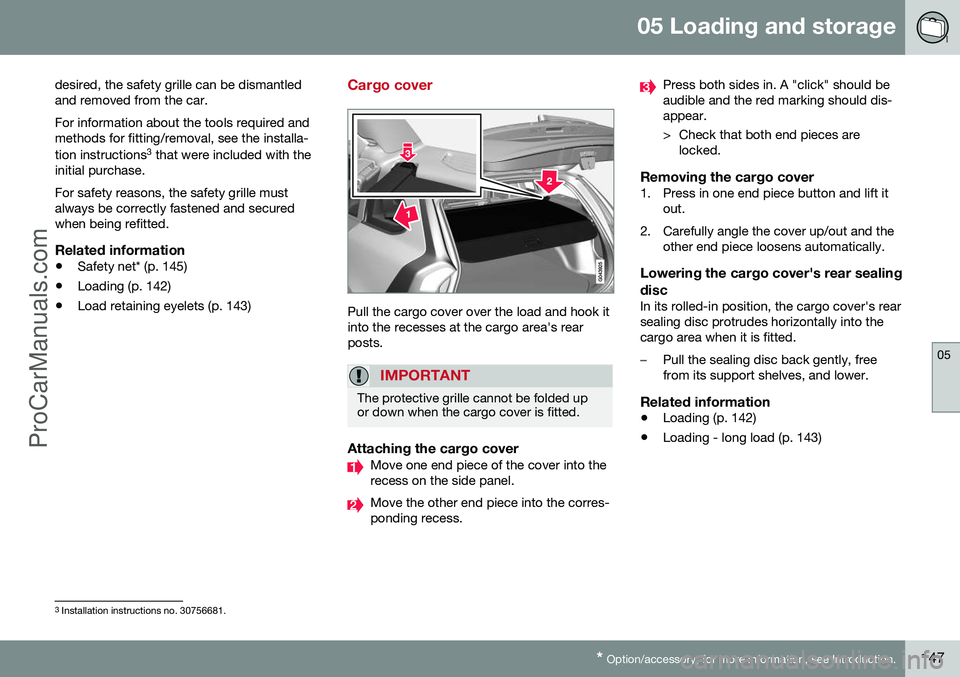
Pull the cargo cover over the load and hook it into the recesses at the cargo area's rearposts.
IMPORTANT
The protective grille cannot be folded up or down when the cargo cover is fitted.
Attaching the cargo coverMove one end piece of the cover into the recess on the side panel.
Move the other end piece into the corres- ponding recess.
Press both sides in. A "click" should be audible and the red marking should dis-appear.
> Check that both end pieces are
locked.
Removing the cargo cover1. Press in one end piece button and lift it out.
2. Carefully angle the cover up/out and the other end piece loosens automatically.
Lowering the cargo cover's rear sealing disc
In its rolled-in position, the cargo cover's rear sealing disc protrudes horizontally into thecargo area when it is fitted.
–Pull the sealing disc back gently, free from its support shelves, and lower.
Related information
• Loading (p. 142)
• Loading - long load (p. 143)
3
Installation instructions no. 30756681.
ProCarManuals.co’
Page 150 of 442
L O C K S A N D A L A R M
ProCarManuals.co’