audio VOLVO V60 2014 Owners Manual
[x] Cancel search | Manufacturer: VOLVO, Model Year: 2014, Model line: V60, Model: VOLVO V60 2014Pages: 442, PDF Size: 13.85 MB
Page 16 of 442
||
01 Introduction
01
14* Option/accessory, for more information, see Introduction.
Options/accessoriesAll types of option/accessory are marked with an asterisk*. In addition to standard equipment, the owner's manual also describes options (fac-tory fitted equipment) and certain accessories(retrofitted extra equipment). The equipment described in the owner's manual is not available in all cars - they havedifferent equipment depending on adapta-tions for the needs of different markets andnational or local laws and regulations. In the event of uncertainty over what is stand- ard or an option/accessory, contact a Volvodealer.
Special texts
WARNING
Warning texts appear if there is a risk of injury.
IMPORTANT
"Important" texts appear if there is a risk of damage.
NOTE
NOTE texts give advice or tips that facili- tate the use of e.g. features and functions.
FootnoteThere is footnote information in the owner's manual that is located at the bottom of thepage. This information is an addition to thetext that it refers to via a number. If the foot-note refers to text in a table then letters areused instead of numbers for referral.
Message textsThere are displays in the car that show textmessages. These text messages are high-lighted in the owner's manual by means ofthe text being slightly larger and printed ingrey. Examples of this are in menu texts andmessage texts on the information display (e.g.
Audio settings).
DecalsThe car contains different types of decal which are designed to convey importantinformation in a simple and clear manner. Thedecals in the car have the following descend-ing degree of importance for the warning/information.
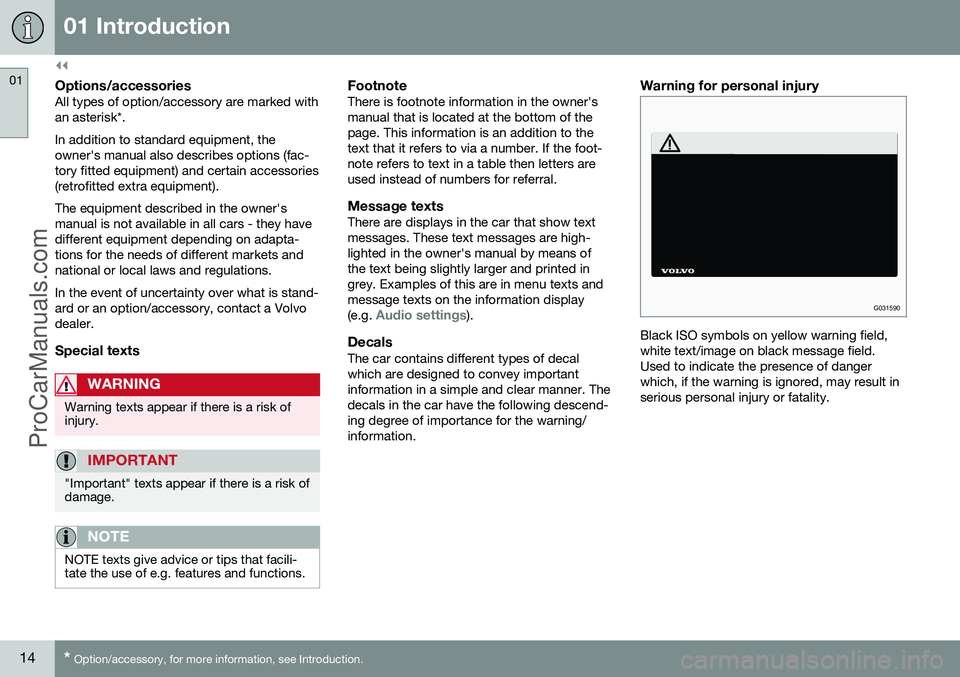
Warning for personal injury
G031590
Black ISO symbols on yellow warning field, white text/image on black message field.Used to indicate the presence of dangerwhich, if the warning is ignored, may result inserious personal injury or fatality.
ProCarManuals.co’
Page 25 of 442
02 Safety
02
23
General information on seatbelts
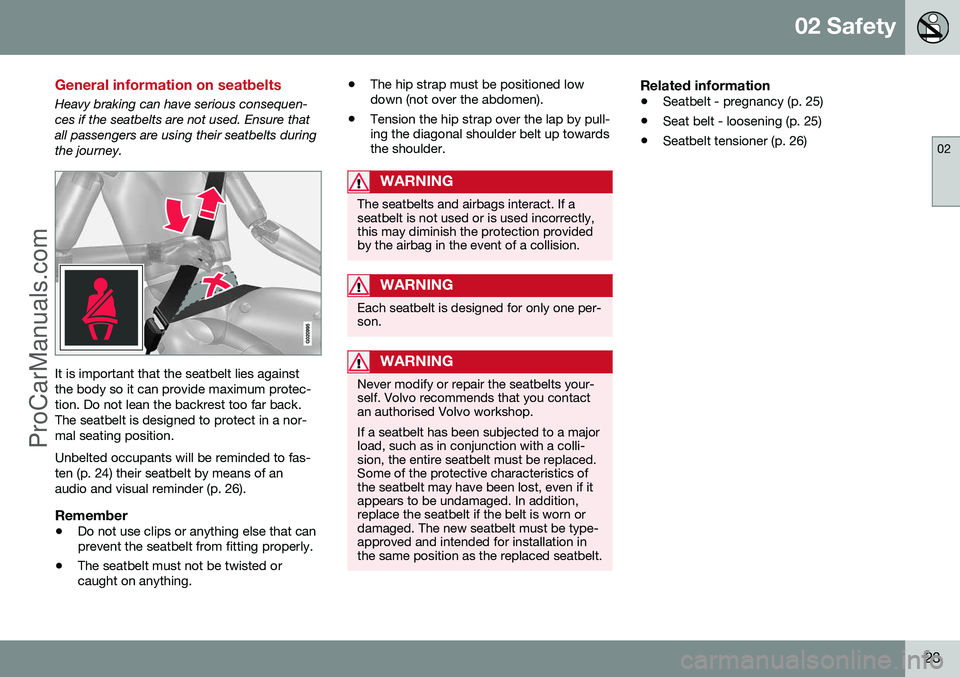
Heavy braking can have serious consequen- ces if the seatbelts are not used. Ensure thatall passengers are using their seatbelts duringthe journey.
It is important that the seatbelt lies against the body so it can provide maximum protec-tion. Do not lean the backrest too far back.The seatbelt is designed to protect in a nor-mal seating position. Unbelted occupants will be reminded to fas- ten (p. 24) their seatbelt by means of anaudio and visual reminder (p. 26).
Remember
•Do not use clips or anything else that can prevent the seatbelt from fitting properly.
• The seatbelt must not be twisted orcaught on anything. •
The hip strap must be positioned lowdown (not over the abdomen).
• Tension the hip strap over the lap by pull-ing the diagonal shoulder belt up towardsthe shoulder.
WARNING
The seatbelts and airbags interact. If a seatbelt is not used or is used incorrectly,this may diminish the protection providedby the airbag in the event of a collision.
WARNING
Each seatbelt is designed for only one per- son.
WARNING
Never modify or repair the seatbelts your- self. Volvo recommends that you contactan authorised Volvo workshop. If a seatbelt has been subjected to a major load, such as in conjunction with a colli-sion, the entire seatbelt must be replaced.Some of the protective characteristics ofthe seatbelt may have been lost, even if itappears to be undamaged. In addition,replace the seatbelt if the belt is worn ordamaged. The new seatbelt must be type-approved and intended for installation inthe same position as the replaced seatbelt.
Related information
• Seatbelt - pregnancy (p. 25)
• Seat belt - loosening (p. 25)
• Seatbelt tensioner (p. 26)
ProCarManuals.co’
Page 28 of 442
02 Safety
02
26
Seatbelt reminder
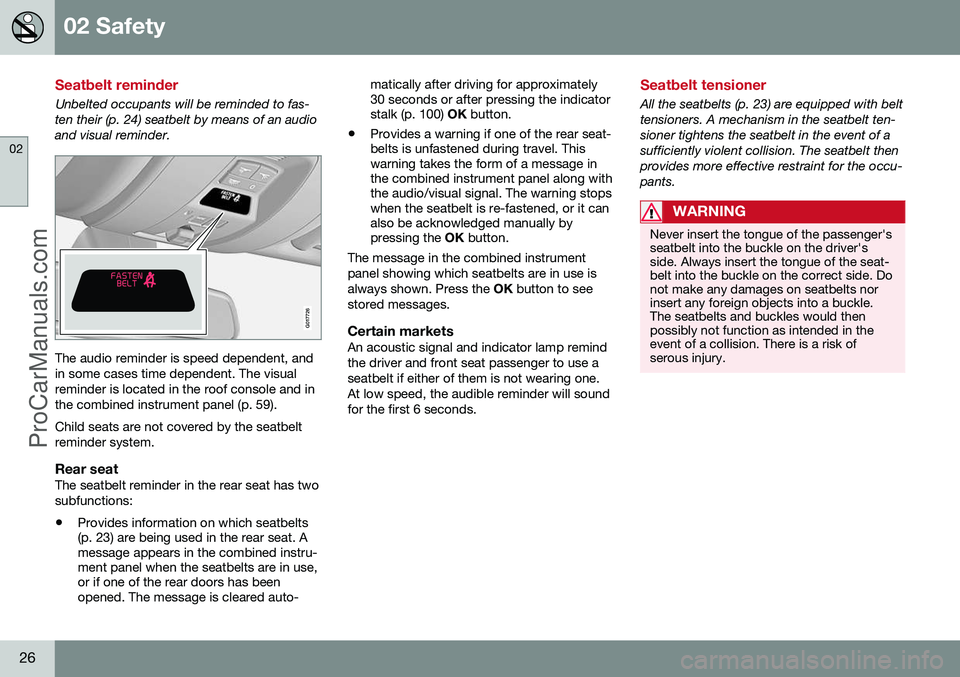
Unbelted occupants will be reminded to fas-ten their (p. 24) seatbelt by means of an audio and visual reminder.
G017726
The audio reminder is speed dependent, and in some cases time dependent. The visualreminder is located in the roof console and inthe combined instrument panel (p. 59). Child seats are not covered by the seatbelt reminder system.
Rear seatThe seatbelt reminder in the rear seat has twosubfunctions:
• Provides information on which seatbelts (p. 23) are being used in the rear seat. Amessage appears in the combined instru-ment panel when the seatbelts are in use,or if one of the rear doors has beenopened. The message is cleared auto- matically after driving for approximately30 seconds or after pressing the indicatorstalk (p. 100)
OK button.
• Provides a warning if one of the rear seat-belts is unfastened during travel. Thiswarning takes the form of a message inthe combined instrument panel along withthe audio/visual signal. The warning stopswhen the seatbelt is re-fastened, or it canalso be acknowledged manually bypressing the
OK button.
The message in the combined instrument panel showing which seatbelts are in use isalways shown. Press the OK button to see
stored messages.
Certain marketsAn acoustic signal and indicator lamp remindthe driver and front seat passenger to use aseatbelt if either of them is not wearing one.At low speed, the audible reminder will soundfor the first 6 seconds.
Seatbelt tensioner
All the seatbelts (p. 23) are equipped with belt tensioners. A mechanism in the seatbelt ten-sioner tightens the seatbelt in the event of asufficiently violent collision. The seatbelt thenprovides more effective restraint for the occu-pants.
WARNING
Never insert the tongue of the passenger's seatbelt into the buckle on the driver'sside. Always insert the tongue of the seat-belt into the buckle on the correct side. Donot make any damages on seatbelts norinsert any foreign objects into a buckle.The seatbelts and buckles would thenpossibly not function as intended in theevent of a collision. There is a risk ofserous injury.
ProCarManuals.co’
Page 57 of 442
03 Instruments and controls
03
* Option/accessory, for more information, see Introduction.55
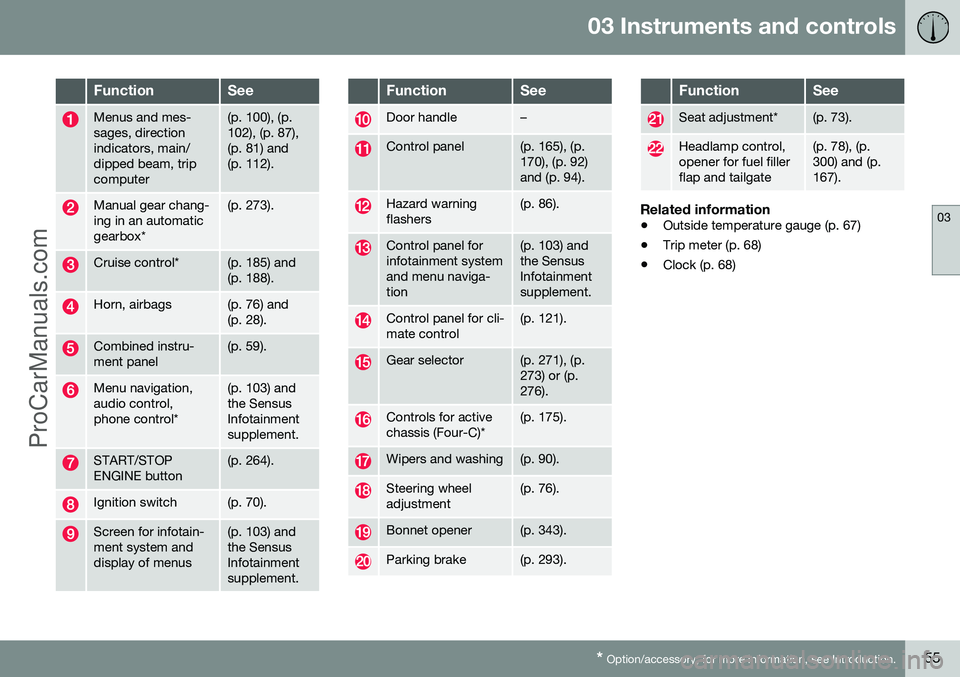
FunctionSee
Menus and mes- sages, directionindicators, main/dipped beam, tripcomputer(p. 100), (p. 102), (p. 87),(p. 81) and(p. 112).
Manual gear chang- ing in an automaticgearbox*(p. 273).
Cruise control*(p. 185) and (p. 188).
Horn, airbags(p. 76) and (p. 28).
Combined instru- ment panel(p. 59).
Menu navigation, audio control,phone control*(p. 103) and the SensusInfotainmentsupplement.
START/STOP ENGINE button(p. 264).
Ignition switch(p. 70).
Screen for infotain- ment system anddisplay of menus(p. 103) and the SensusInfotainmentsupplement.
FunctionSee
Door handle–
Control panel(p. 165), (p. 170), (p. 92)and (p. 94).
Hazard warning flashers(p. 86).
Control panel for infotainment systemand menu naviga-tion(p. 103) and the SensusInfotainmentsupplement.
Control panel for cli- mate control(p. 121).
Gear selector(p. 271), (p. 273) or (p.276).
Controls for active chassis (Four-C)*(p. 175).
Wipers and washing(p. 90).
Steering wheel adjustment(p. 76).
Bonnet opener(p. 343).
Parking brake(p. 293).
FunctionSee
Seat adjustment*(p. 73).
Headlamp control, opener for fuel fillerflap and tailgate(p. 78), (p. 300) and (p.167).
Related information
• Outside temperature gauge (p. 67)
• Trip meter (p. 68)
• Clock (p. 68)
ProCarManuals.co’
Page 60 of 442
||
03 Instruments and controls
03
58* Option/accessory, for more information, see Introduction.
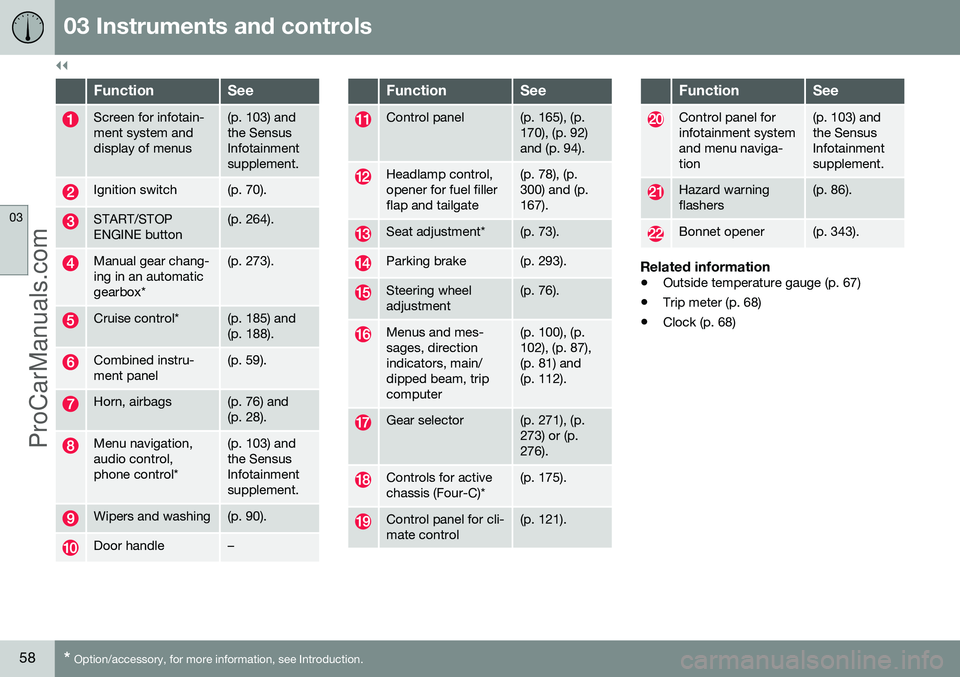
FunctionSee
Screen for infotain- ment system anddisplay of menus(p. 103) and the SensusInfotainmentsupplement.
Ignition switch(p. 70).
START/STOP ENGINE button(p. 264).
Manual gear chang- ing in an automaticgearbox*(p. 273).
Cruise control*(p. 185) and (p. 188).
Combined instru- ment panel(p. 59).
Horn, airbags(p. 76) and (p. 28).
Menu navigation, audio control,phone control*(p. 103) and the SensusInfotainmentsupplement.
Wipers and washing(p. 90).
Door handle–
FunctionSee
Control panel(p. 165), (p. 170), (p. 92)and (p. 94).
Headlamp control, opener for fuel fillerflap and tailgate(p. 78), (p. 300) and (p.167).
Seat adjustment*(p. 73).
Parking brake(p. 293).
Steering wheel adjustment(p. 76).
Menus and mes- sages, directionindicators, main/dipped beam, tripcomputer(p. 100), (p. 102), (p. 87),(p. 81) and(p. 112).
Gear selector(p. 271), (p. 273) or (p.276).
Controls for active chassis (Four-C)*(p. 175).
Control panel for cli- mate control(p. 121).
FunctionSee
Control panel for infotainment systemand menu naviga-tion(p. 103) and the SensusInfotainmentsupplement.
Hazard warning flashers(p. 86).
Bonnet opener(p. 343).
Related information
• Outside temperature gauge (p. 67)
• Trip meter (p. 68)
• Clock (p. 68)
ProCarManuals.co’
Page 70 of 442

03 Instruments and controls
03
68* Option/accessory, for more information, see Introduction.
Trip meter
The trip meter display appears in the com- bined instrument panel.
Trip meter, digital instrument.
Display for trip meter 11
The two trip meters
T1 and T2 are used for
measuring short distances. The distance is shown in the display. Turn the left stalk switch thumbwheel to show the required meter. A long press (until the change occurs) on the left-hand stalk switch's RESET button resets
the trip meter shown. For more information,see Trip computer - supplementary informa-tion (p. 112).
Related information
• Combined instrument panel (p. 59)
Clock
The clock display appears in the combined instrument panel.
Clock, digital instrument panel.
Display for showing the time 12
Set the clockThe clock can be adjusted in the menu sys- tem MY CAR, see MY CAR (p. 103).
Related information
•
Combined instrument panel (p. 59)
Volvo Sensus
Volvo Sensus is the heart of your personal Volvo experience. It is Sensus that providesinformation, entertainment and functions tosimplify your ownership.
When you are sitting in your car you want control, and in today's interconnected world,this includes information, communication andentertainment when it is most suitable foryou. Sensus covers all our solutions that ena-ble connection* to the outside world, at thesame time providing you with intuitive controlover all the car's capabilities. Volvo Sensus combines and presents many functions in several of the car's systems onthe centre console's display screen. WithVolvo Sensus the car can be personalised bymeans of an intuitive user interface. Settingscan be made in Car settings, Audio andmedia, Climate control, etc.
11
Display appearance may differ depending on instrument variant.
ProCarManuals.co’
Page 71 of 442
03 Instruments and controls
03
* Option/accessory, for more information, see Introduction.69
With the centre console buttons and controls or the steering wheel's right-hand keypad*functions can be activated or deactivated andmany different settings can be made. With a press on
MY CAR all settings related
to the driving and control of the car are pre- sented, such as City Safety, locks and alarm,automatic fan speed, setting the clock, etc. With a press on the respective function RADIO , MEDIA , TEL *,
*, NAV * and CAM*
other sources, systems and functions can be activated, e.g. AM, FM, CD, DVD*, TV*, Blue-tooth*, navigation* and park assist camera*. For more information about all functions/ systems, see the relevant section in theowner's manual or its supplement.
Overview
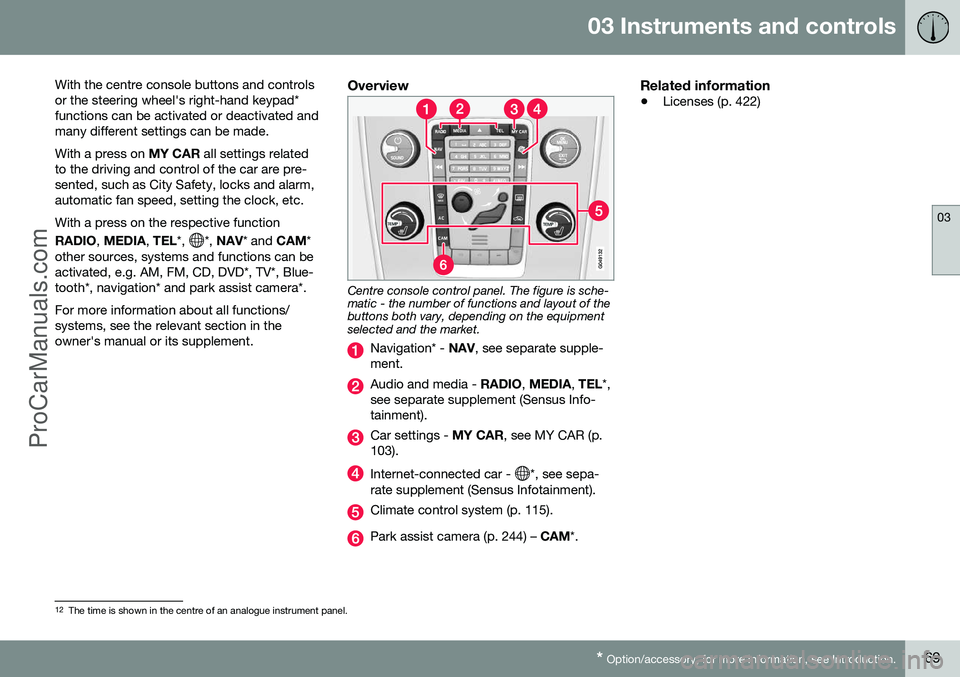
Centre console control panel. The figure is sche- matic - the number of functions and layout of thebuttons both vary, depending on the equipmentselected and the market.
Navigation* - NAV, see separate supple-
ment.
Audio and media - RADIO, MEDIA , TEL *,
see separate supplement (Sensus Info- tainment).
Car settings - MY CAR, see MY CAR (p.
103).
Internet-connected car - *, see sepa-
rate supplement (Sensus Infotainment).
Climate control system (p. 115).
Park assist camera (p. 244) – CAM*.
Related information
•Licenses (p. 422)
12
The time is shown in the centre of an analogue instrument panel.
ProCarManuals.co’
Page 73 of 442
03 Instruments and controls
03
* Option/accessory, for more information, see Introduction.71
LevelFunctions
0• Odometer, clock and tem- perature gauge are illumi-nated.
• Power seats can be adjusted.
• The audio system can beused for a limited time - seethe Sensus Infotainment sup-plement.
I•Sunroof, power windows, 12V socket in the passenger com-partment, navigation, phone,ventilation fan and wind-screen wipers can be used.
II•The headlamps come on.
• Warning/indicator lamps illu- minate for 5 seconds.
• Several other systems areactivated. However, heating inseat cushions and the rearwindow can only be activatedafter the engine has beenstarted.
This key position consumes a lot of current from the batteryand should therefore be avoi-ded!
Choosing key position/level
• Key position 0
- Unlock the car - This
means that the car's electrical system is at level 0.
• Key position I
- With the remote control
key fully inserted into the ignition switch 13
- Briefly press START/STOP ENGINE .
NOTE
To reach level I or II without starting the
engine - do not depress the brake/clutch
pedal when these key positions are due to be selected.
• Key position II
- With the remote control
key fully inserted into the ignition switch 13
- Give a long 14
press on START/STOP
ENGINE .
• Back to key position 0 -
To return to key
position 0 from position II and I - Briefly
press on START/STOP ENGINE .
Audio systemFor information on audio system functions with remote control key removed, see theSensus Infotainment supplement.
Starting and stopping the engineFor information about starting/stopping theengine, see Starting the engine (p. 264).
TowingFor important information about the remotecontrol key during towing, see Towing (p.313).
Related information
•Key positions (p. 70)
13
Not necessary for cars with the Keyless* function.
14 Approx. 2 seconds.
ProCarManuals.co’
Page 78 of 442
||
03 Instruments and controls
03
76* Option/accessory, for more information, see Introduction.
NOTE
When the backrest has been raised, the red indicator should no longer be showing.If it is still showing then the backrest is notlocked in place.
WARNING
Check that the backrests and head restraints in the rear seat are locked prop-erly after being folded up.
Electrical lowering of the rear seat's
outer head restraints*
1. The remote control key must be in key
position II.
2. Press the button to lower the rear outer head restraints to improve rearward visi- bility.
WARNING
Do not lower the outer head restraints if there are any passengers using of theouter seats.
Move the head restraint back manually until a click is heard.
WARNING
The head restraints must be in locked position after being raised.
Related information
• Seats, front (p. 72)
• Seats, front - electrically operated (p. 73)
Steering wheel
The steering wheel can be adjusted in differ- ent positions and has controls for horn andcruise control, as well as menu, audio andphone control.
Adjusting
G021138
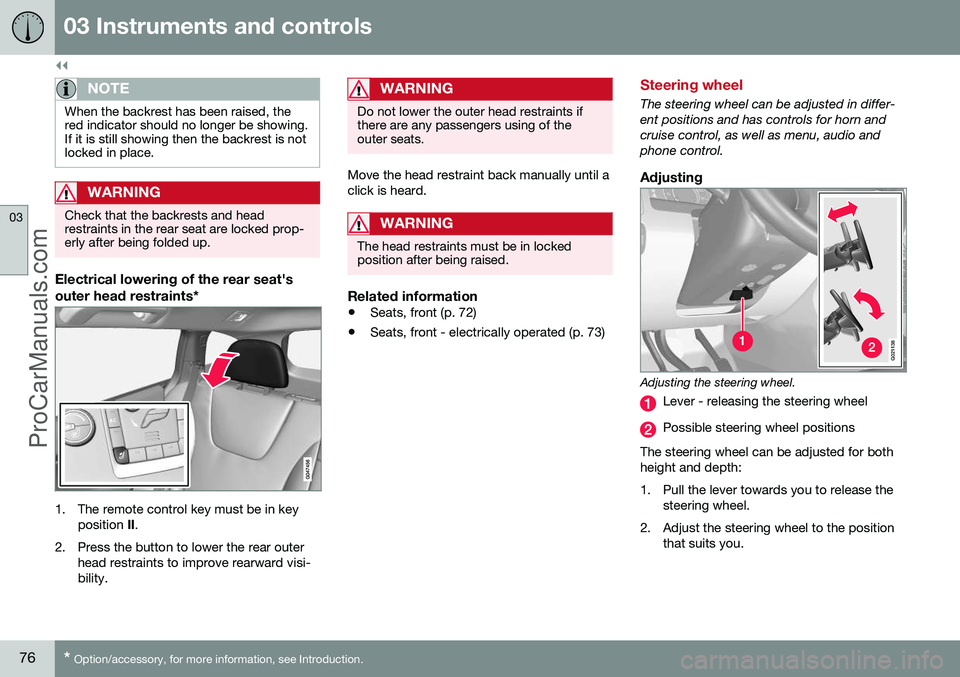
Adjusting the steering wheel.
Lever - releasing the steering wheel
Possible steering wheel positions
The steering wheel can be adjusted for both height and depth:
1. Pull the lever towards you to release the steering wheel.
2. Adjust the steering wheel to the position that suits you.
ProCarManuals.co’
Page 79 of 442
03 Instruments and controls
03
* Option/accessory, for more information, see Introduction.77
3. Push back the lever to fix the steering
wheel in place. If the lever is stiff, press the steering wheel lightly at the same timeas you push the lever back.
WARNING
Adjust the steering wheel and fix it before driving away.
With speed related power steering* the level of steering force can be adjusted, see Adjust-able steering force* (p. 257).
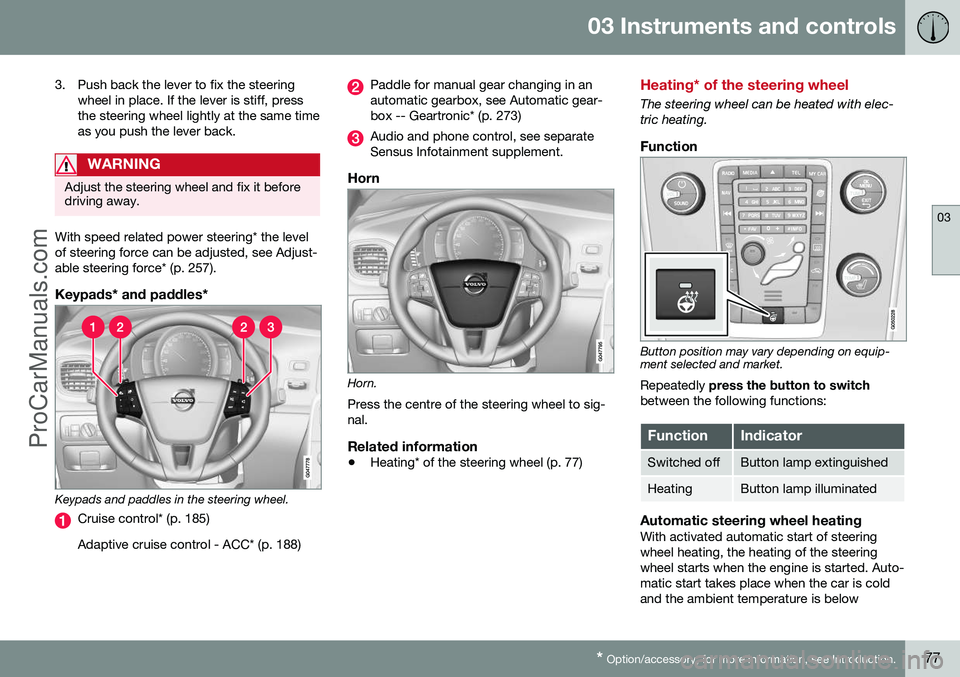
Keypads* and paddles*
Keypads and paddles in the steering wheel.
Cruise control* (p. 185) Adaptive cruise control - ACC* (p. 188)
Paddle for manual gear changing in an automatic gearbox, see Automatic gear-box -- Geartronic* (p. 273)
Audio and phone control, see separate Sensus Infotainment supplement.
Horn
Horn. Press the centre of the steering wheel to sig- nal.
Related information
• Heating* of the steering wheel (p. 77)
Heating* of the steering wheel
The steering wheel can be heated with elec- tric heating.
Function
Button position may vary depending on equip- ment selected and market.
Repeatedly press the button to switch
between the following functions:
FunctionIndicator
Switched offButton lamp extinguished
HeatingButton lamp illuminated
Automatic steering wheel heatingWith activated automatic start of steering wheel heating, the heating of the steeringwheel starts when the engine is started. Auto-matic start takes place when the car is coldand the ambient temperature is below
ProCarManuals.co’