headlamp VOLVO V60 2014 Owners Manual
[x] Cancel search | Manufacturer: VOLVO, Model Year: 2014, Model line: V60, Model: VOLVO V60 2014Pages: 442, PDF Size: 13.85 MB
Page 5 of 442
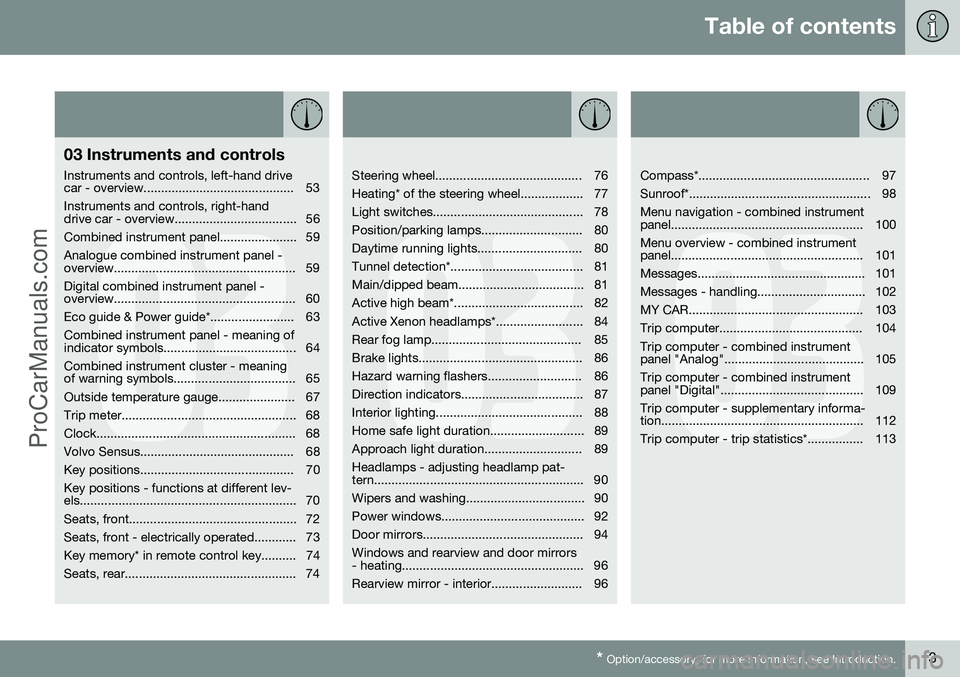
Table of contents
* Option/accessory, for more information, see Introduction.3
03
03 Instruments and controls
Instruments and controls, left-hand drive
car - overview........................................... 53 Instruments and controls, right-hand
drive car - overview................................... 56
Combined instrument panel...................... 59Analogue combined instrument panel -
overview.................................................... 59 Digital combined instrument panel -
overview.................................................... 60
Eco guide & Power guide*........................ 63Combined instrument panel - meaning of
indicator symbols...................................... 64 Combined instrument cluster - meaning
of warning symbols................................... 65
Outside temperature gauge...................... 67
Trip meter.................................................. 68
Clock......................................................... 68
Volvo Sensus............................................ 68
Key positions............................................ 70Key positions - functions at different lev-
els.............................................................. 70
Seats, front................................................ 72
Seats, front - electrically operated............ 73
Key memory* in remote control key.......... 74
Seats, rear................................................. 74
03
Steering wheel.......................................... 76
Heating* of the steering wheel.................. 77
Light switches........................................... 78
Position/parking lamps............................. 80
Daytime running lights.............................. 80
Tunnel detection*...................................... 81
Main/dipped beam.................................... 81
Active high beam*..................................... 82
Active Xenon headlamps*......................... 84
Rear fog lamp........................................... 85
Brake lights............................................... 86
Hazard warning flashers........................... 86
Direction indicators................................... 87
Interior lighting.......................................... 88
Home safe light duration........................... 89
Approach light duration............................ 89Headlamps - adjusting headlamp pat-
tern............................................................ 90
Wipers and washing.................................. 90
Power windows......................................... 92
Door mirrors.............................................. 94Windows and rearview and door mirrors
- heating.................................................... 96
Rearview mirror - interior.......................... 96
03
Compass*................................................. 97
Sunroof*.................................................... 98Menu navigation - combined instrument
panel....................................................... 100 Menu overview - combined instrument
panel....................................................... 101
Messages................................................ 101
Messages - handling............................... 102
MY CAR.................................................. 103
Trip computer......................................... 104Trip computer - combined instrument
panel "Analog"........................................ 105 Trip computer - combined instrument
panel "Digital"......................................... 109 Trip computer - supplementary informa-
tion.......................................................... 112
Trip computer - trip statistics*................ 113
ProCarManuals.co’
Page 11 of 442

Table of contents
9
10
10 Maintenance and service
Volvo service programme....................... 340
Raising the car........................................ 341
Bonnet - opening and closing................. 343
Engine compartment - overview............. 343
Engine compartment - checking............. 344
Engine oil - general................................. 345
Engine oil - checking and filling.............. 346
Coolant - level......................................... 349
Brake and clutch fluid - level.................. 350
Power steering fluid - level...................... 351Climate control system - fault tracing and
repair....................................................... 352
Lamp replacement.................................. 352
Lamp replacement - headlamps............. 353Lamp replacement - cover for main/
dipped beam bulbs................................. 354
Lamp replacement - dipped beam......... 355
Lamp replacement - main beam............. 355
Lamp replacement - extra main beam.... 355Lamp replacement - direction indicators
front......................................................... 356
Lamp replacement - rear lamp............... 356Lamp replacement - location of rear
lamps...................................................... 357
10
Lamp replacement - number plate light-
ing........................................................... 357 Lamp replacement - lighting in cargo
area......................................................... 357 Lamp replacement - vanity mirror light-
ing........................................................... 358
Lamps - specifications ........................... 358
Wiper blades........................................... 359
Washer fluid - filling................................ 361
Battery..................................................... 361
Battery - symbols.................................... 362
Starter battery - replacement.................. 363
Battery - Start/Stop................................. 365
Fuses - general....................................... 367
Fuses - in engine compartment.............. 368
Fuses - under glovebox.......................... 372Fuses - in the control module under the
glovebox................................................. 374
Fuses - in cargo area.............................. 376Fuses - in the engine compartment's
cold zone................................................ 377
Car washing............................................ 379
Polishing and waxing.............................. 380
Water and dirt-repellent coating............. 381
Rustproofing........................................... 381
10
Cleaning the interior................................ 381
Paint damage.......................................... 383
ProCarManuals.co’
Page 57 of 442
03 Instruments and controls
03
* Option/accessory, for more information, see Introduction.55
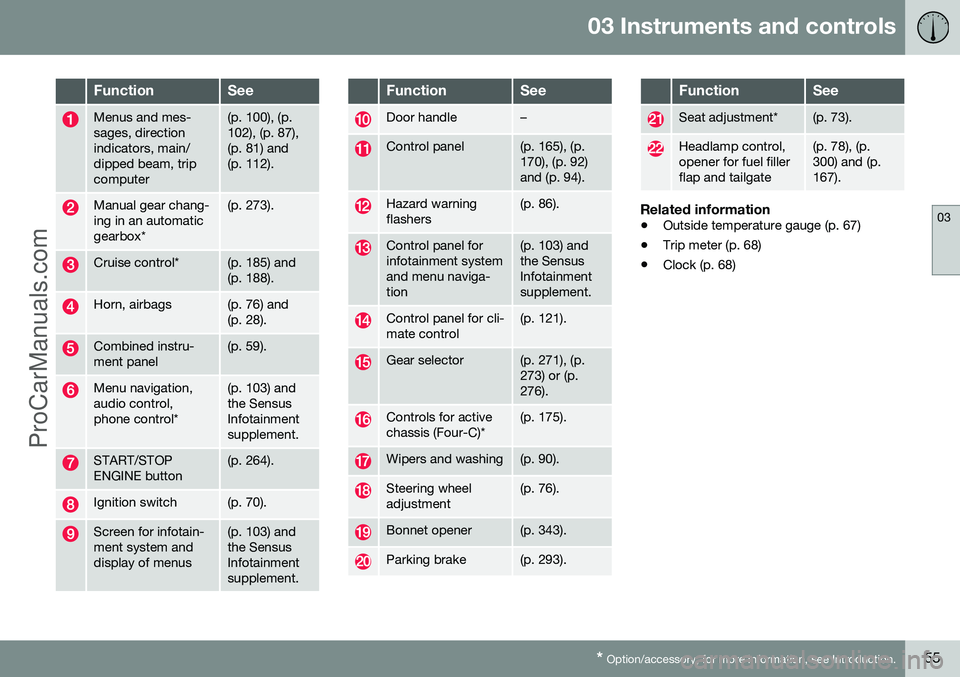
FunctionSee
Menus and mes- sages, directionindicators, main/dipped beam, tripcomputer(p. 100), (p. 102), (p. 87),(p. 81) and(p. 112).
Manual gear chang- ing in an automaticgearbox*(p. 273).
Cruise control*(p. 185) and (p. 188).
Horn, airbags(p. 76) and (p. 28).
Combined instru- ment panel(p. 59).
Menu navigation, audio control,phone control*(p. 103) and the SensusInfotainmentsupplement.
START/STOP ENGINE button(p. 264).
Ignition switch(p. 70).
Screen for infotain- ment system anddisplay of menus(p. 103) and the SensusInfotainmentsupplement.
FunctionSee
Door handle–
Control panel(p. 165), (p. 170), (p. 92)and (p. 94).
Hazard warning flashers(p. 86).
Control panel for infotainment systemand menu naviga-tion(p. 103) and the SensusInfotainmentsupplement.
Control panel for cli- mate control(p. 121).
Gear selector(p. 271), (p. 273) or (p.276).
Controls for active chassis (Four-C)*(p. 175).
Wipers and washing(p. 90).
Steering wheel adjustment(p. 76).
Bonnet opener(p. 343).
Parking brake(p. 293).
FunctionSee
Seat adjustment*(p. 73).
Headlamp control, opener for fuel fillerflap and tailgate(p. 78), (p. 300) and (p.167).
Related information
• Outside temperature gauge (p. 67)
• Trip meter (p. 68)
• Clock (p. 68)
ProCarManuals.co’
Page 60 of 442
||
03 Instruments and controls
03
58* Option/accessory, for more information, see Introduction.
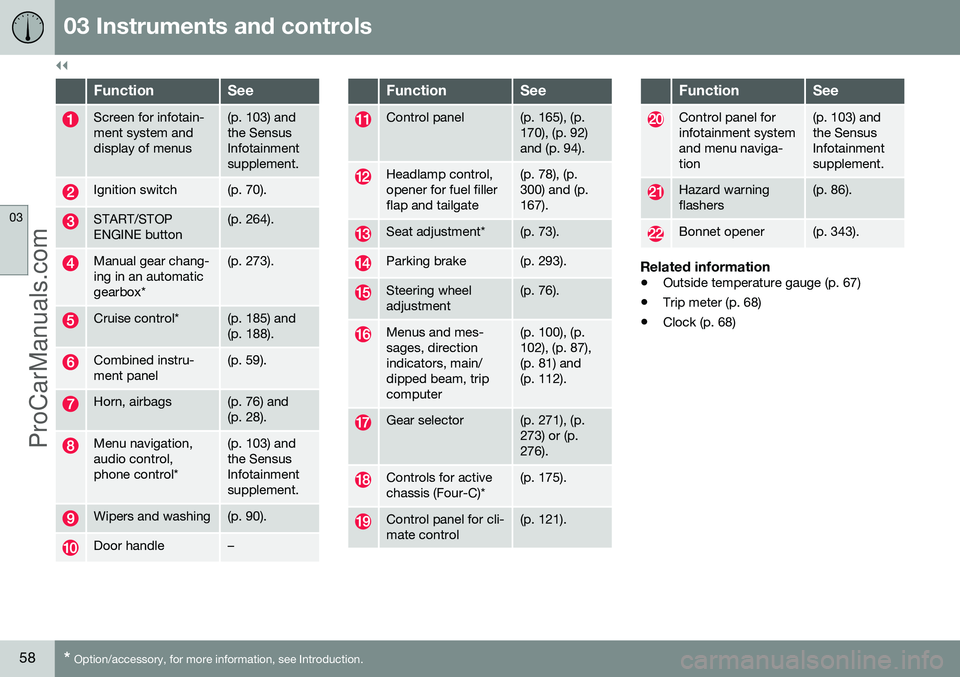
FunctionSee
Screen for infotain- ment system anddisplay of menus(p. 103) and the SensusInfotainmentsupplement.
Ignition switch(p. 70).
START/STOP ENGINE button(p. 264).
Manual gear chang- ing in an automaticgearbox*(p. 273).
Cruise control*(p. 185) and (p. 188).
Combined instru- ment panel(p. 59).
Horn, airbags(p. 76) and (p. 28).
Menu navigation, audio control,phone control*(p. 103) and the SensusInfotainmentsupplement.
Wipers and washing(p. 90).
Door handle–
FunctionSee
Control panel(p. 165), (p. 170), (p. 92)and (p. 94).
Headlamp control, opener for fuel fillerflap and tailgate(p. 78), (p. 300) and (p.167).
Seat adjustment*(p. 73).
Parking brake(p. 293).
Steering wheel adjustment(p. 76).
Menus and mes- sages, directionindicators, main/dipped beam, tripcomputer(p. 100), (p. 102), (p. 87),(p. 81) and(p. 112).
Gear selector(p. 271), (p. 273) or (p.276).
Controls for active chassis (Four-C)*(p. 175).
Control panel for cli- mate control(p. 121).
FunctionSee
Control panel for infotainment systemand menu naviga-tion(p. 103) and the SensusInfotainmentsupplement.
Hazard warning flashers(p. 86).
Bonnet opener(p. 343).
Related information
• Outside temperature gauge (p. 67)
• Trip meter (p. 68)
• Clock (p. 68)
ProCarManuals.co’
Page 73 of 442
03 Instruments and controls
03
* Option/accessory, for more information, see Introduction.71
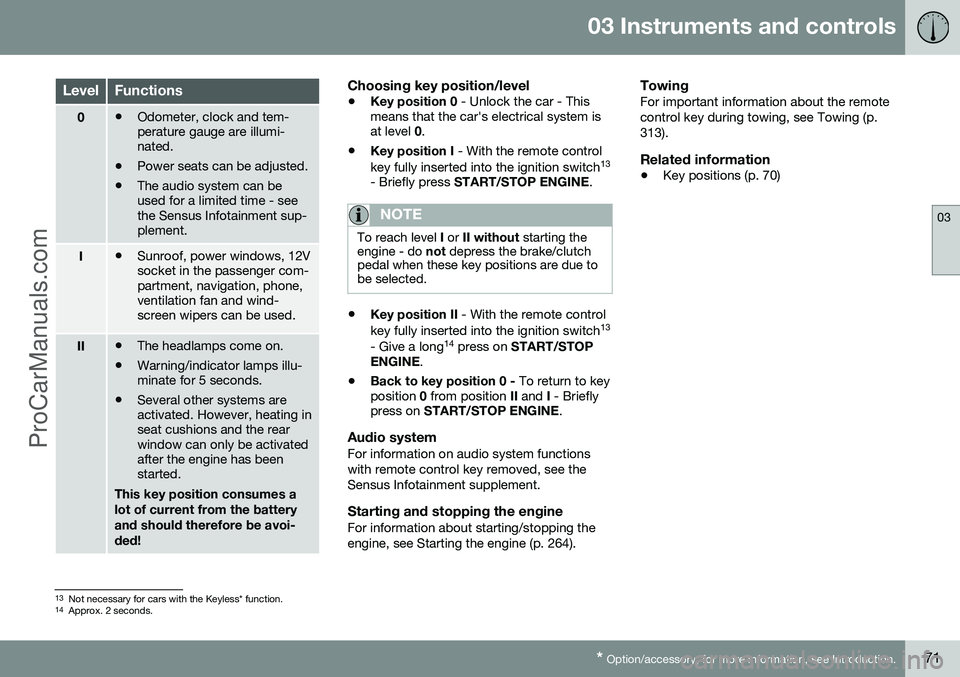
LevelFunctions
0• Odometer, clock and tem- perature gauge are illumi-nated.
• Power seats can be adjusted.
• The audio system can beused for a limited time - seethe Sensus Infotainment sup-plement.
I•Sunroof, power windows, 12V socket in the passenger com-partment, navigation, phone,ventilation fan and wind-screen wipers can be used.
II•The headlamps come on.
• Warning/indicator lamps illu- minate for 5 seconds.
• Several other systems areactivated. However, heating inseat cushions and the rearwindow can only be activatedafter the engine has beenstarted.
This key position consumes a lot of current from the batteryand should therefore be avoi-ded!
Choosing key position/level
• Key position 0
- Unlock the car - This
means that the car's electrical system is at level 0.
• Key position I
- With the remote control
key fully inserted into the ignition switch 13
- Briefly press START/STOP ENGINE .
NOTE
To reach level I or II without starting the
engine - do not depress the brake/clutch
pedal when these key positions are due to be selected.
• Key position II
- With the remote control
key fully inserted into the ignition switch 13
- Give a long 14
press on START/STOP
ENGINE .
• Back to key position 0 -
To return to key
position 0 from position II and I - Briefly
press on START/STOP ENGINE .
Audio systemFor information on audio system functions with remote control key removed, see theSensus Infotainment supplement.
Starting and stopping the engineFor information about starting/stopping theengine, see Starting the engine (p. 264).
TowingFor important information about the remotecontrol key during towing, see Towing (p.313).
Related information
•Key positions (p. 70)
13
Not necessary for cars with the Keyless* function.
14 Approx. 2 seconds.
ProCarManuals.co’
Page 80 of 442
03 Instruments and controls
03
78* Option/accessory, for more information, see Introduction.
approx. 10 °C. Activate/deactivate the func- tion in the menu system MY CAR (p. 103).Light switches
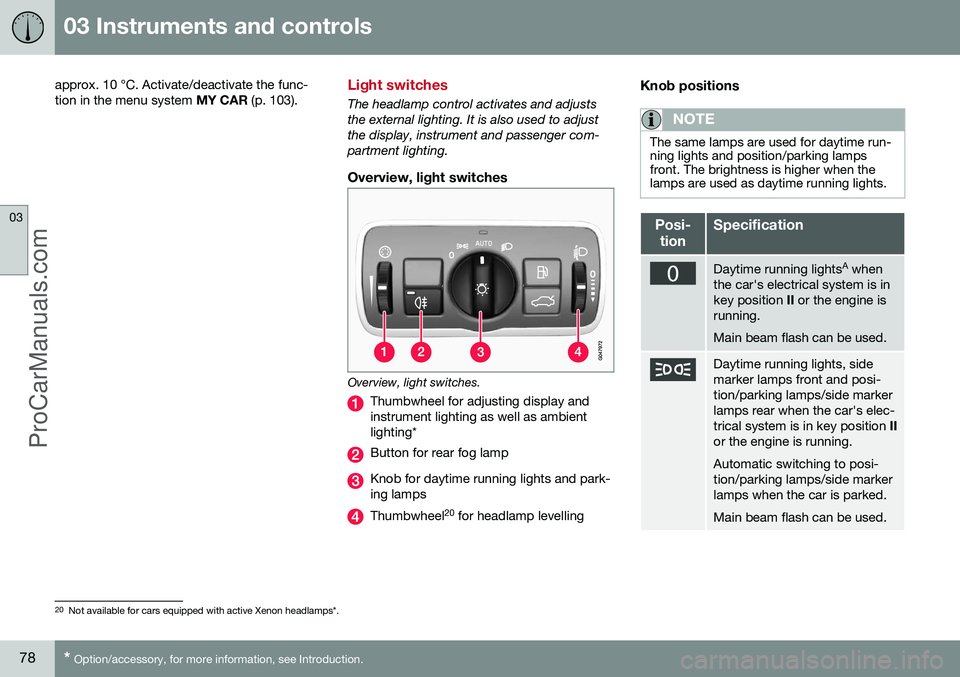
The headlamp control activates and adjusts the external lighting. It is also used to adjustthe display, instrument and passenger com-partment lighting.
Overview, light switches
Overview, light switches.
Thumbwheel for adjusting display and instrument lighting as well as ambientlighting*
Button for rear fog lamp
Knob for daytime running lights and park- ing lamps
Thumbwheel 20
for headlamp levelling
Knob positions
NOTE
The same lamps are used for daytime run- ning lights and position/parking lampsfront. The brightness is higher when thelamps are used as daytime running lights.
Posi-
tionSpecification
Daytime running lights A
when
the car's electrical system is in key position II or the engine is
running. Main beam flash can be used.
Daytime running lights, side marker lamps front and posi-tion/parking lamps/side markerlamps rear when the car's elec-trical system is in key position II
or the engine is running. Automatic switching to posi- tion/parking lamps/side markerlamps when the car is parked. Main beam flash can be used.
20 Not available for cars equipped with active Xenon headlamps*.
ProCarManuals.co’
Page 81 of 442
03 Instruments and controls
03
* Option/accessory, for more information, see Introduction.79
Posi-
tionSpecification
Daytime running lights, side marker lamps front and posi-tion/parking lamps/side markerlamps rear during the day whenthe car's electrical system is inkey position II or the engine is
running. Automatic switching to dipped beam and position/parkinglamps/side marker lamps inpoor light conditions or whenthe windscreen wipers or rearfog lamps are activated. The tunnel detection (p. 81)* function is activated. The active high beam (p. 82)* function can be used. Main beam can be activated when dipped beam is switchedon. Main beam flash can be used.
Posi-
tionSpecification
Dipped beam and position/ parking lamps/side markerlamps. Main beam can be activated.Main beam flash can be used.
A Fitted in or under the front bumper.
Volvo recommends that
mode is used
when the car is being driven, as long as traffic situations or weather conditions are unfavour-able for the active high beam function*.
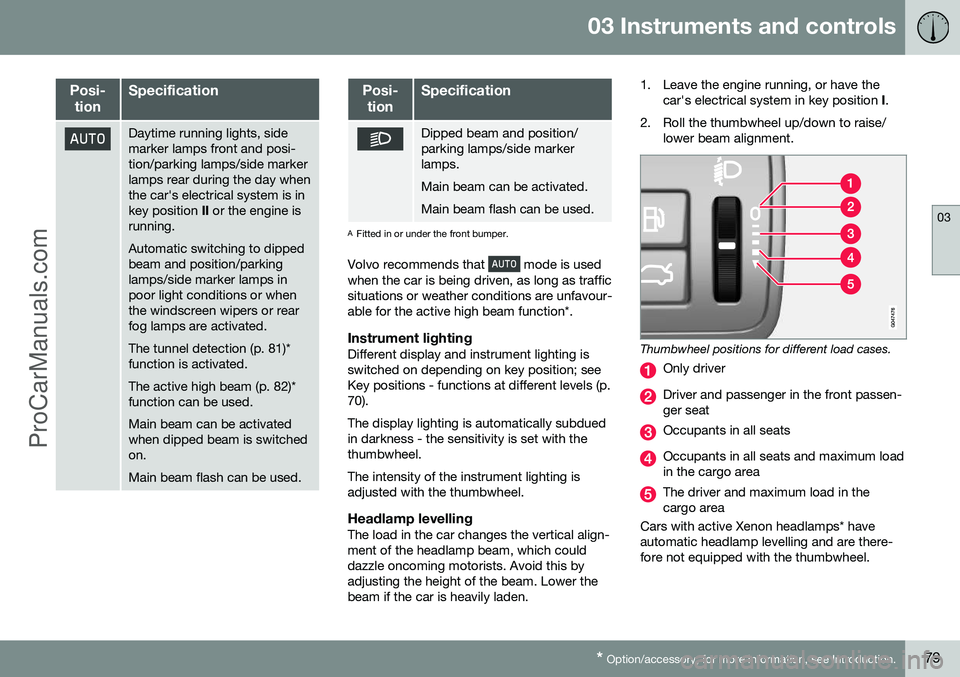
Instrument lightingDifferent display and instrument lighting isswitched on depending on key position; seeKey positions - functions at different levels (p.70). The display lighting is automatically subdued in darkness - the sensitivity is set with thethumbwheel. The intensity of the instrument lighting is adjusted with the thumbwheel.
Headlamp levellingThe load in the car changes the vertical align-ment of the headlamp beam, which coulddazzle oncoming motorists. Avoid this byadjusting the height of the beam. Lower thebeam if the car is heavily laden. 1. Leave the engine running, or have the
car's electrical system in key position I.
2. Roll the thumbwheel up/down to raise/ lower beam alignment.
Thumbwheel positions for different load cases.
Only driver
Driver and passenger in the front passen- ger seat
Occupants in all seats
Occupants in all seats and maximum load in the cargo area
The driver and maximum load in the cargo area
Cars with active Xenon headlamps* haveautomatic headlamp levelling and are there-fore not equipped with the thumbwheel.
ProCarManuals.co’
Page 82 of 442
03 Instruments and controls
03
80
Position/parking lamps
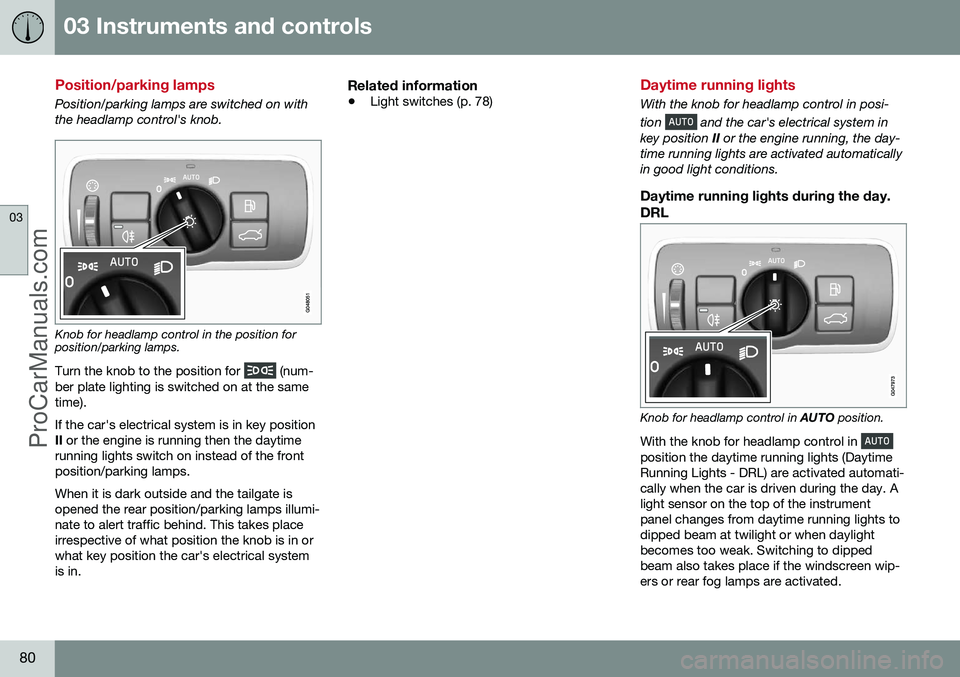
Position/parking lamps are switched on with the headlamp control's knob.
Knob for headlamp control in the position for position/parking lamps.
Turn the knob to the position for
(num-
ber plate lighting is switched on at the same time). If the car's electrical system is in key position II or the engine is running then the daytime
running lights switch on instead of the frontposition/parking lamps. When it is dark outside and the tailgate is opened the rear position/parking lamps illumi-nate to alert traffic behind. This takes placeirrespective of what position the knob is in orwhat key position the car's electrical systemis in.
Related information
• Light switches (p. 78)
Daytime running lights
With the knob for headlamp control in posi- tion
and the car's electrical system in
key position II or the engine running, the day-
time running lights are activated automatically in good light conditions.
Daytime running lights during the day.
DRL
Knob for headlamp control in AUTO position.
With the knob for headlamp control in
position the daytime running lights (Daytime Running Lights - DRL) are activated automati-cally when the car is driven during the day. Alight sensor on the top of the instrumentpanel changes from daytime running lights todipped beam at twilight or when daylightbecomes too weak. Switching to dippedbeam also takes place if the windscreen wip-ers or rear fog lamps are activated.
ProCarManuals.co’
Page 83 of 442
03 Instruments and controls
03
* Option/accessory, for more information, see Introduction.81
WARNING
This system help to save energy - it cannot determine in all situations when daylight istoo weak or sufficiently strong, e.g. in mistand rain. The driver is always responsible for ensur- ing that the car is driven with its lights in acorrect state and in accordance with appli-cable traffic regulations.
Tunnel detection*
In markets without automatic dipped beam, tunnel detection activates dipped beam whendriving into a tunnel. Dipped beam is deacti-vated approx. 20 seconds after the car hasbeen driven out of the tunnel. The tunnel detection function is available in cars with rain sensor*. The sensor detects theentrance to a tunnel and resets the lightingfrom daytime running lights to dipped beam.Approx. 20 seconds after the car has left thetunnel, the lighting returns to daytime runninglights. If the car is driven into another tunnelwithin this time period then dipped beam iskept switched on. This avoids repeatedchanges to the car's light settings. Note that the headlamp control's knob must remain in
position for tunnel detection
to work.
Related information
• Main/dipped beam (p. 81)
• Light switches (p. 78)
Main/dipped beam
With the knob for headlamp control in posi- tion
and the car's electrical system in
key position II or the engine running, the
dipped beam is activated automatically in poor light conditions. With the knob for headlamp control in posi- tion
dipped beam is always switched on
when the engine is running or when key posi- tion II is active.
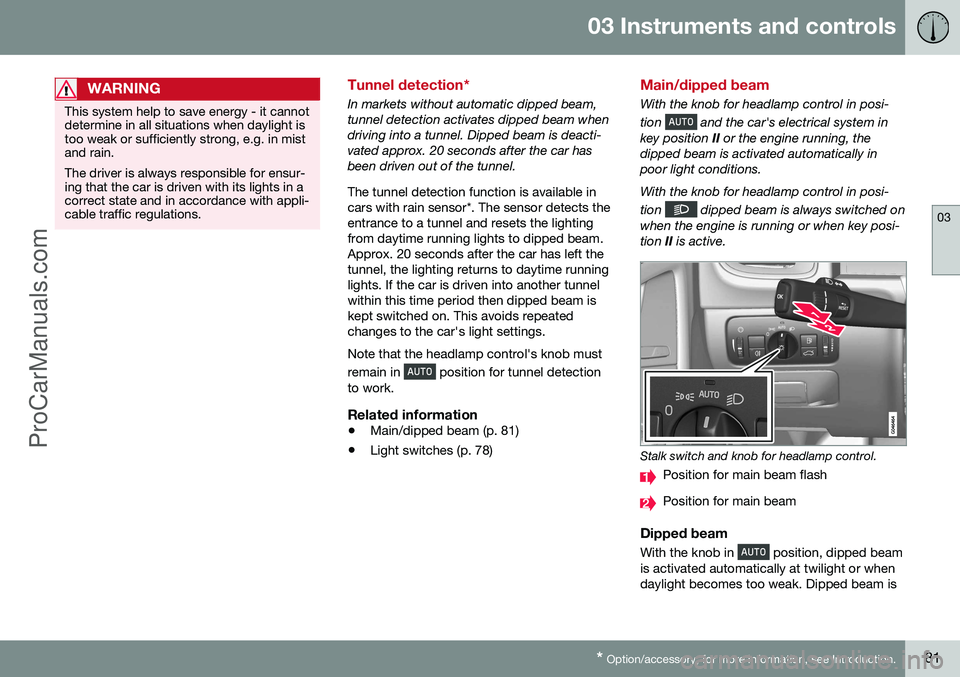
Stalk switch and knob for headlamp control.
Position for main beam flash
Position for main beam
Dipped beam
With the knob in position, dipped beam
is activated automatically at twilight or when daylight becomes too weak. Dipped beam is
ProCarManuals.co’
Page 84 of 442
||
03 Instruments and controls
03
82* Option/accessory, for more information, see Introduction.
also activated automatically if the windscreen wipers or rear fog lamps are activated. With the knob in position
dipped beam
is always switched on when the engine is run- ning or when key position II is active.
Main beam flashMove the stalk switch gently towards thesteering wheel to the position for main beamflash. Main beam comes on until the stalkswitch is released.
Main beamMain beam can be activated when the knob is in position 21
or . Activate/deac-
tivate main beam by moving the stalk switch towards the steering wheel to the end posi-tion and then releasing. Alternatively, themain beam can be deactivated by a lightpress of the stalk switch toward the steeringwheel. When main beam has been activated the
symbol illuminates in the combined
instrument panel.
Auxiliary lamps*If the car has auxiliary lamps, the driver can use the MY CAR menu system to choosewhether they should be deactivated orswitched on/off simultaneously with the main beam 22
, see MY CAR (p. 103).
Related information
• Active Xenon headlamps* (p. 84)
• Active high beam* (p. 82)
• Light switches (p. 78)
• Headlamps - adjusting headlamp pattern (p. 90)
• Tunnel detection* (p. 81)
Active high beam*
The Active High Beam function detects the headlamp beams of oncoming traffic or therear lights of vehicles in front, and switchesthe lighting from main beam to dipped beam.Xenon headlamps only dim the portion of thelight beam that points directly to the vehicle.The lighting returns to main beam when theincoming light has stopped.
Active high beam - AHBActive high beam (Active High Beam - AHB) isa function which uses a camera sensor at thetop edge of the windscreen to detect theheadlamp beams of oncoming traffic or therear lights of vehicles in front, and thenswitches from main beam to dipped beam.The function can also take streetlights intoaccount. Car with halogen headlamps The lighting returns to main beam about a second after the camera sensor no longerdetects the headlamp beams from oncomingtraffic or the rear lights from vehicles in front. Car with Xenon headlamps Unlike what happens during conventional dimming, the light beam continues with mainbeam on both sides of oncoming traffic orvehicles ahead - only the part of the light
21
When dipped beam is switched on.
22 Auxiliary lamps must be connected to the electrical system by a workshop. Volvo recommends that you contact an authorised Volvo workshop.
ProCarManuals.co’