tailgate VOLVO V60 2014 Owners Manual
[x] Cancel search | Manufacturer: VOLVO, Model Year: 2014, Model line: V60, Model: VOLVO V60 2014Pages: 442, PDF Size: 13.85 MB
Page 7 of 442
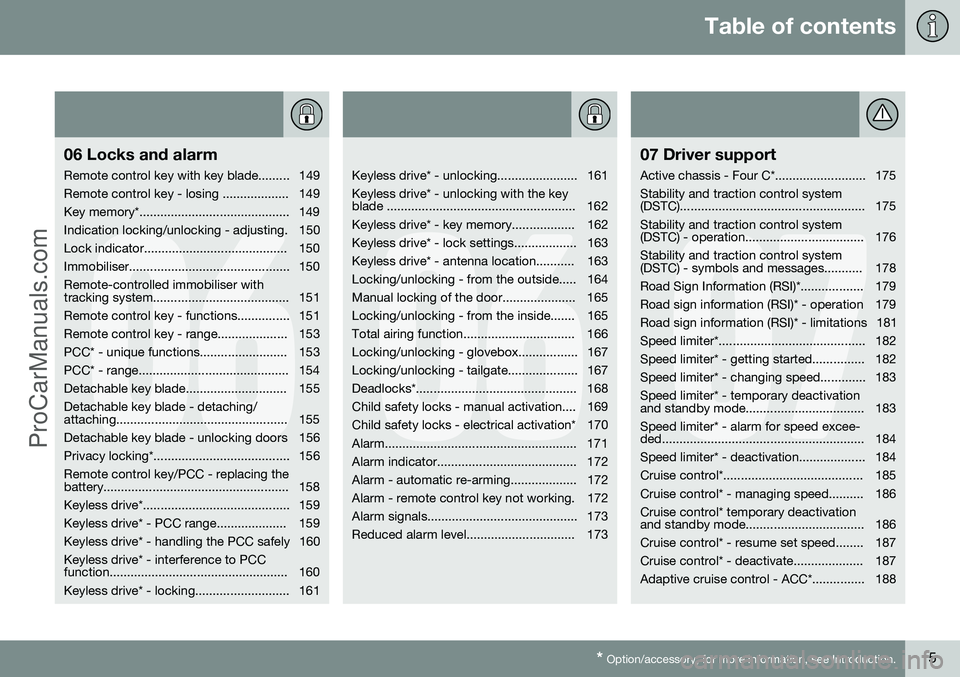
Table of contents
* Option/accessory, for more information, see Introduction.5
06
06 Locks and alarm
Remote control key with key blade......... 149
Remote control key - losing ................... 149
Key memory*........................................... 149
Indication locking/unlocking - adjusting. 150
Lock indicator......................................... 150
Immobiliser.............................................. 150Remote-controlled immobiliser with
tracking system....................................... 151
Remote control key - functions............... 151
Remote control key - range.................... 153
PCC* - unique functions......................... 153
PCC* - range........................................... 154
Detachable key blade............................. 155Detachable key blade - detaching/
attaching................................................. 155
Detachable key blade - unlocking doors 156
Privacy locking*....................................... 156Remote control key/PCC - replacing the
battery..................................................... 158
Keyless drive*.......................................... 159
Keyless drive* - PCC range.................... 159
Keyless drive* - handling the PCC safely 160Keyless drive* - interference to PCC
function................................................... 160
Keyless drive* - locking........................... 161
06
Keyless drive* - unlocking....................... 161 Keyless drive* - unlocking with the key
blade ...................................................... 162
Keyless drive* - key memory.................. 162
Keyless drive* - lock settings.................. 163
Keyless drive* - antenna location........... 163
Locking/unlocking - from the outside..... 164
Manual locking of the door..................... 165
Locking/unlocking - from the inside....... 165
Total airing function................................ 166
Locking/unlocking - glovebox................. 167
Locking/unlocking - tailgate.................... 167
Deadlocks*.............................................. 168
Child safety locks - manual activation.... 169
Child safety locks - electrical activation* 170
Alarm....................................................... 171
Alarm indicator........................................ 172
Alarm - automatic re-arming................... 172
Alarm - remote control key not working. 172
Alarm signals........................................... 173
Reduced alarm level............................... 173
07
07 Driver support
Active chassis - Four C*.......................... 175 Stability and traction control system
(DSTC)..................................................... 175 Stability and traction control system
(DSTC) - operation.................................. 176 Stability and traction control system
(DSTC) - symbols and messages........... 178
Road Sign Information (RSI)*.................. 179
Road sign information (RSI)* - operation 179
Road sign information (RSI)* - limitations 181
Speed limiter*.......................................... 182
Speed limiter* - getting started............... 182
Speed limiter* - changing speed............. 183Speed limiter* - temporary deactivation
and standby mode.................................. 183 Speed limiter* - alarm for speed excee-
ded.......................................................... 184
Speed limiter* - deactivation................... 184
Cruise control*........................................ 185
Cruise control* - managing speed.......... 186Cruise control* temporary deactivation
and standby mode.................................. 186
Cruise control* - resume set speed........ 187
Cruise control* - deactivate.................... 187
Adaptive cruise control - ACC*............... 188
ProCarManuals.co’
Page 9 of 442
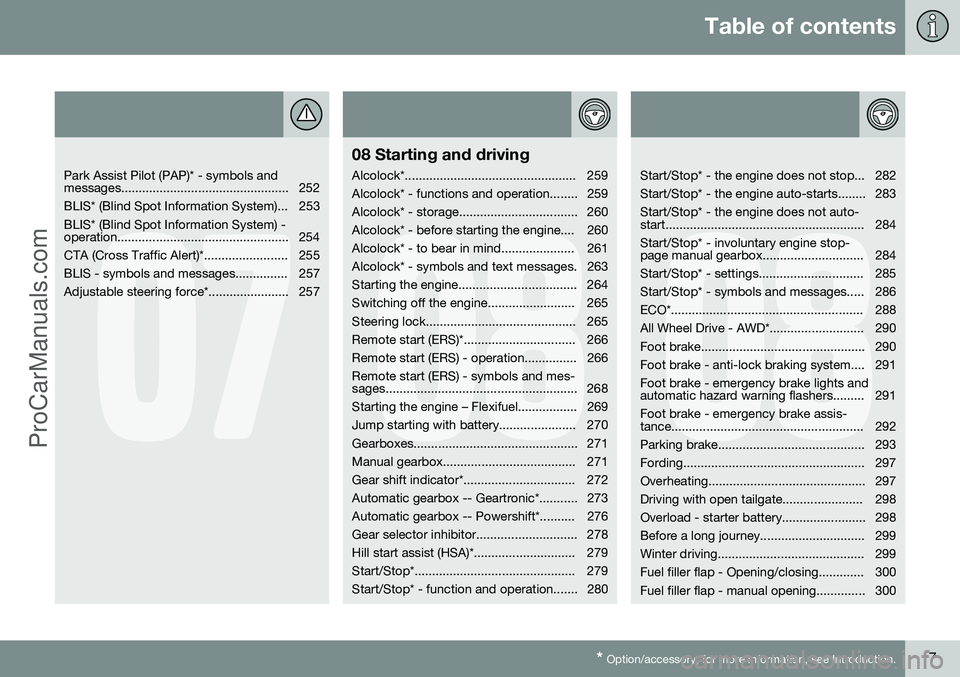
Table of contents
* Option/accessory, for more information, see Introduction.7
07
Park Assist Pilot (PAP)* - symbols and
messages................................................ 252
BLIS* (Blind Spot Information System)... 253BLIS* (Blind Spot Information System) -
operation................................................. 254
CTA (Cross Traffic Alert)*........................ 255
BLIS - symbols and messages............... 257
Adjustable steering force*....................... 257
08
08 Starting and driving
Alcolock*................................................. 259
Alcolock* - functions and operation........ 259
Alcolock* - storage.................................. 260
Alcolock* - before starting the engine.... 260
Alcolock* - to bear in mind..................... 261
Alcolock* - symbols and text messages. 263
Starting the engine.................................. 264
Switching off the engine......................... 265
Steering lock........................................... 265
Remote start (ERS)*................................ 266
Remote start (ERS) - operation............... 266Remote start (ERS) - symbols and mes-
sages....................................................... 268
Starting the engine – Flexifuel................. 269
Jump starting with battery...................... 270
Gearboxes............................................... 271
Manual gearbox...................................... 271
Gear shift indicator*................................ 272
Automatic gearbox -- Geartronic*........... 273
Automatic gearbox -- Powershift*.......... 276
Gear selector inhibitor............................. 278
Hill start assist (HSA)*............................. 279
Start/Stop*.............................................. 279
Start/Stop* - function and operation....... 280
08
Start/Stop* - the engine does not stop... 282
Start/Stop* - the engine auto-starts........ 283Start/Stop* - the engine does not auto-
start......................................................... 284 Start/Stop* - involuntary engine stop-
page manual gearbox............................. 284
Start/Stop* - settings.............................. 285
Start/Stop* - symbols and messages..... 286
ECO*....................................................... 288
All Wheel Drive - AWD*........................... 290
Foot brake............................................... 290
Foot brake - anti-lock braking system.... 291Foot brake - emergency brake lights and
automatic hazard warning flashers......... 291 Foot brake - emergency brake assis-
tance....................................................... 292
Parking brake.......................................... 293
Fording.................................................... 297
Overheating............................................. 297
Driving with open tailgate....................... 298
Overload - starter battery........................ 298
Before a long journey.............................. 299
Winter driving.......................................... 299
Fuel filler flap - Opening/closing............. 300
Fuel filler flap - manual opening.............. 300
ProCarManuals.co’
Page 57 of 442
03 Instruments and controls
03
* Option/accessory, for more information, see Introduction.55
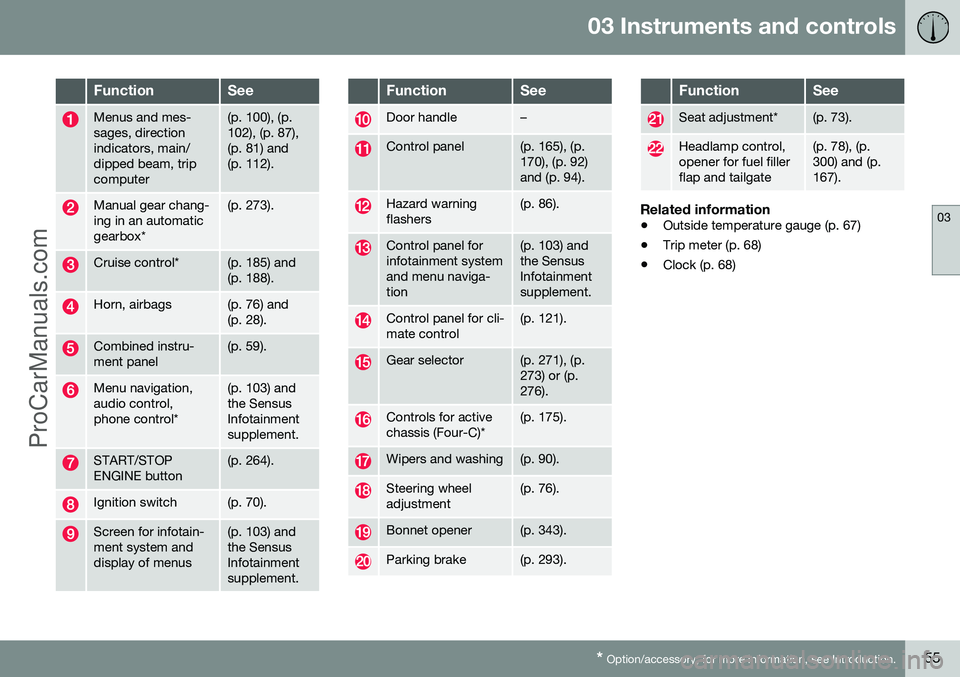
FunctionSee
Menus and mes- sages, directionindicators, main/dipped beam, tripcomputer(p. 100), (p. 102), (p. 87),(p. 81) and(p. 112).
Manual gear chang- ing in an automaticgearbox*(p. 273).
Cruise control*(p. 185) and (p. 188).
Horn, airbags(p. 76) and (p. 28).
Combined instru- ment panel(p. 59).
Menu navigation, audio control,phone control*(p. 103) and the SensusInfotainmentsupplement.
START/STOP ENGINE button(p. 264).
Ignition switch(p. 70).
Screen for infotain- ment system anddisplay of menus(p. 103) and the SensusInfotainmentsupplement.
FunctionSee
Door handle–
Control panel(p. 165), (p. 170), (p. 92)and (p. 94).
Hazard warning flashers(p. 86).
Control panel for infotainment systemand menu naviga-tion(p. 103) and the SensusInfotainmentsupplement.
Control panel for cli- mate control(p. 121).
Gear selector(p. 271), (p. 273) or (p.276).
Controls for active chassis (Four-C)*(p. 175).
Wipers and washing(p. 90).
Steering wheel adjustment(p. 76).
Bonnet opener(p. 343).
Parking brake(p. 293).
FunctionSee
Seat adjustment*(p. 73).
Headlamp control, opener for fuel fillerflap and tailgate(p. 78), (p. 300) and (p.167).
Related information
• Outside temperature gauge (p. 67)
• Trip meter (p. 68)
• Clock (p. 68)
ProCarManuals.co’
Page 60 of 442
||
03 Instruments and controls
03
58* Option/accessory, for more information, see Introduction.
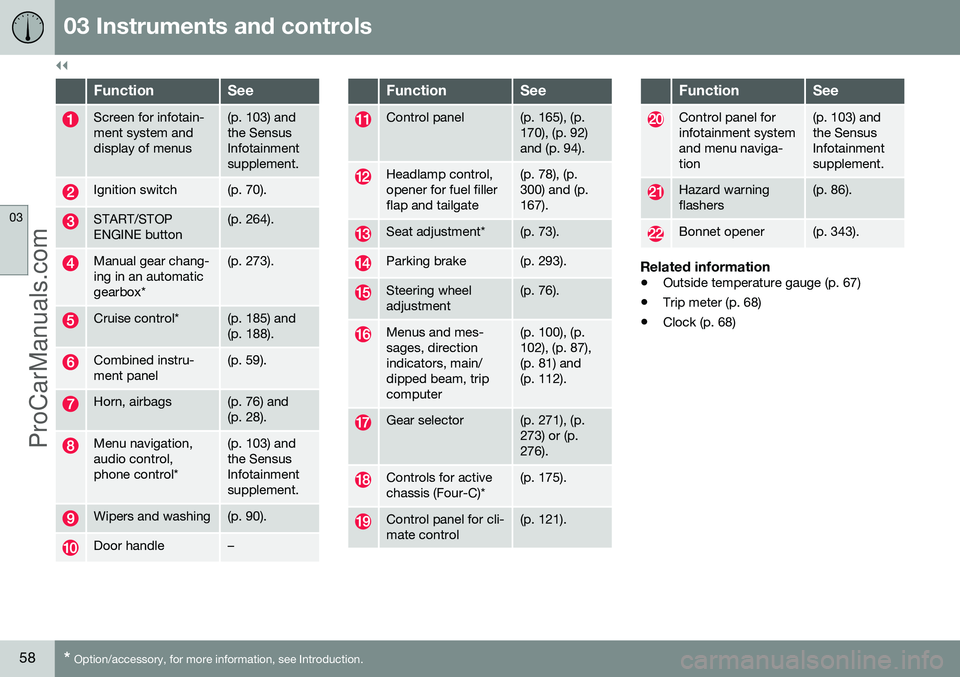
FunctionSee
Screen for infotain- ment system anddisplay of menus(p. 103) and the SensusInfotainmentsupplement.
Ignition switch(p. 70).
START/STOP ENGINE button(p. 264).
Manual gear chang- ing in an automaticgearbox*(p. 273).
Cruise control*(p. 185) and (p. 188).
Combined instru- ment panel(p. 59).
Horn, airbags(p. 76) and (p. 28).
Menu navigation, audio control,phone control*(p. 103) and the SensusInfotainmentsupplement.
Wipers and washing(p. 90).
Door handle–
FunctionSee
Control panel(p. 165), (p. 170), (p. 92)and (p. 94).
Headlamp control, opener for fuel fillerflap and tailgate(p. 78), (p. 300) and (p.167).
Seat adjustment*(p. 73).
Parking brake(p. 293).
Steering wheel adjustment(p. 76).
Menus and mes- sages, directionindicators, main/dipped beam, tripcomputer(p. 100), (p. 102), (p. 87),(p. 81) and(p. 112).
Gear selector(p. 271), (p. 273) or (p.276).
Controls for active chassis (Four-C)*(p. 175).
Control panel for cli- mate control(p. 121).
FunctionSee
Control panel for infotainment systemand menu naviga-tion(p. 103) and the SensusInfotainmentsupplement.
Hazard warning flashers(p. 86).
Bonnet opener(p. 343).
Related information
• Outside temperature gauge (p. 67)
• Trip meter (p. 68)
• Clock (p. 68)
ProCarManuals.co’
Page 69 of 442
03 Instruments and controls
03
* Option/accessory, for more information, see Introduction.67
2. Read the information on the information
display. Implement the action in accord- ance with the message in the display.Clear the message using the OK button.
Reminder – doors not closedIf one of the doors is not closed properly thenthe information or warning symbol illuminatestogether with an explanatory image in theinformation display. Stop the car in a safeplace as soon as possible and close the doorthat is open.
If the car is driven at a speed lowerthan approx. 7 km/h then the informa-
tion symbol illuminates.
If the car is driven at a speed higher than approx. 7 km/h then the warning
symbol illuminates.
If the bonnet 10
is not closed properly then the
warning symbol illuminates together with an explanatory image in the information display.Stop the car in a safe place as soon as possi-ble and close the bonnet. If the tailgate is not closed properly then the information symbol illuminates together withan explanatory image in the information dis-play. Stop the car in a safe place as soon aspossible and close the tailgate.
Related information
• Combined instrument panel (p. 59)
• Combined instrument panel - meaning of indicator symbols (p. 64)
• Digital combined instrument panel - over-view (p. 60)
Outside temperature gauge
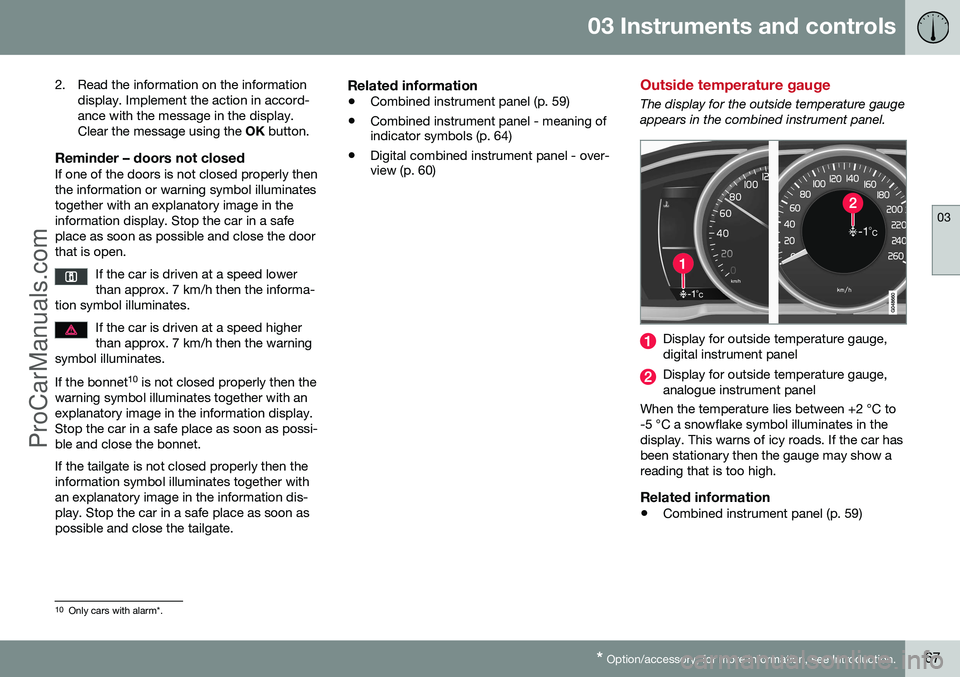
The display for the outside temperature gauge appears in the combined instrument panel.
Display for outside temperature gauge, digital instrument panel
Display for outside temperature gauge, analogue instrument panel
When the temperature lies between +2 °C to-5 °C a snowflake symbol illuminates in thedisplay. This warns of icy roads. If the car hasbeen stationary then the gauge may show areading that is too high.
Related information
• Combined instrument panel (p. 59)
10
Only cars with alarm*.
ProCarManuals.co’
Page 82 of 442
03 Instruments and controls
03
80
Position/parking lamps
Position/parking lamps are switched on with the headlamp control's knob.
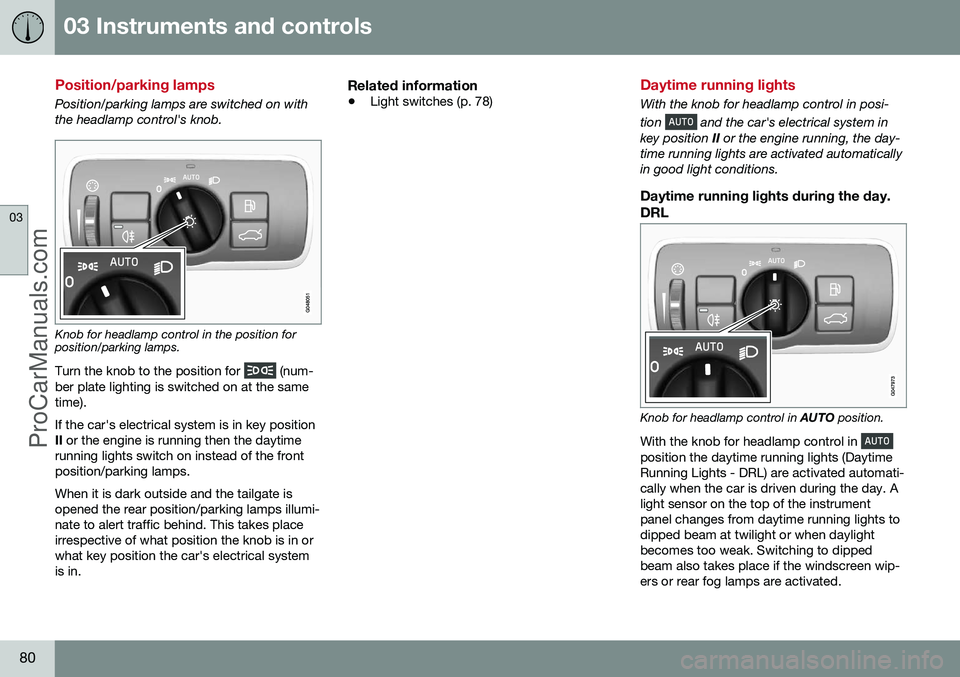
Knob for headlamp control in the position for position/parking lamps.
Turn the knob to the position for
(num-
ber plate lighting is switched on at the same time). If the car's electrical system is in key position II or the engine is running then the daytime
running lights switch on instead of the frontposition/parking lamps. When it is dark outside and the tailgate is opened the rear position/parking lamps illumi-nate to alert traffic behind. This takes placeirrespective of what position the knob is in orwhat key position the car's electrical systemis in.
Related information
• Light switches (p. 78)
Daytime running lights
With the knob for headlamp control in posi- tion
and the car's electrical system in
key position II or the engine running, the day-
time running lights are activated automatically in good light conditions.
Daytime running lights during the day.
DRL
Knob for headlamp control in AUTO position.
With the knob for headlamp control in
position the daytime running lights (Daytime Running Lights - DRL) are activated automati-cally when the car is driven during the day. Alight sensor on the top of the instrumentpanel changes from daytime running lights todipped beam at twilight or when daylightbecomes too weak. Switching to dippedbeam also takes place if the windscreen wip-ers or rear fog lamps are activated.
ProCarManuals.co’
Page 90 of 442
03 Instruments and controls
03
88
Interior lighting
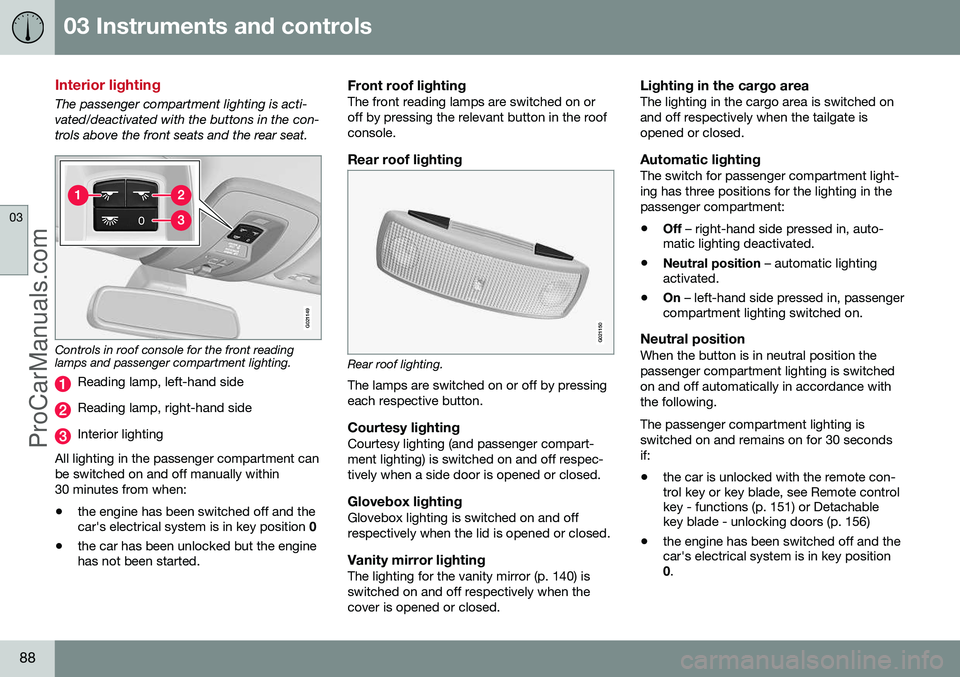
The passenger compartment lighting is acti- vated/deactivated with the buttons in the con-trols above the front seats and the rear seat.
G021149
Controls in roof console for the front reading lamps and passenger compartment lighting.
Reading lamp, left-hand side
Reading lamp, right-hand side
Interior lighting
All lighting in the passenger compartment can be switched on and off manually within30 minutes from when:
• the engine has been switched off and the car's electrical system is in key position
0
• the car has been unlocked but the enginehas not been started.
Front roof lightingThe front reading lamps are switched on or off by pressing the relevant button in the roofconsole.
Rear roof lighting
G021150
Rear roof lighting.
The lamps are switched on or off by pressing each respective button.
Courtesy lightingCourtesy lighting (and passenger compart-ment lighting) is switched on and off respec-tively when a side door is opened or closed.
Glovebox lightingGlovebox lighting is switched on and offrespectively when the lid is opened or closed.
Vanity mirror lightingThe lighting for the vanity mirror (p. 140) isswitched on and off respectively when thecover is opened or closed.
Lighting in the cargo areaThe lighting in the cargo area is switched onand off respectively when the tailgate isopened or closed.
Automatic lightingThe switch for passenger compartment light-ing has three positions for the lighting in thepassenger compartment:
• Off
– right-hand side pressed in, auto-
matic lighting deactivated.
• Neutral position
– automatic lighting
activated.
• On
– left-hand side pressed in, passenger
compartment lighting switched on.
Neutral positionWhen the button is in neutral position thepassenger compartment lighting is switchedon and off automatically in accordance withthe following. The passenger compartment lighting is switched on and remains on for 30 secondsif:
• the car is unlocked with the remote con- trol key or key blade, see Remote control key - functions (p. 151) or Detachable key blade - unlocking doors (p. 156)
• the engine has been switched off and thecar's electrical system is in key position0
.
ProCarManuals.co’
Page 101 of 442

03 Instruments and controls
03
}}
99
OpeningFor maximum sunroof opening, move the control back to the position for automaticopening and release. Open manually by pulling the control back- wards to the point of resistance for manualopening. The sunroof moves to maximumopen position as long as the button is keptdepressed.
ClosingClose manually by pushing the control for-wards to the point of resistance for manualclosing. The sunroof moves to closed posi-tion as long as the button is kept depressed.
WARNING
Risk of crushing when the sunroof is closed. The sunroof's pinch-protectionfunction only operates during automaticclosing, not manual.
Close automatically by pressing the control to the position for automatic closing and thenrelease it. The power supply to the sunroof is switched off by selecting key position 0 and removing
the remote control key from the ignitionswitch.
WARNING
If there are children in the car: Remember to always switch off the power supply to the sunroof by selecting keyposition 0 and then take the remote con-
trol key with you when leaving the car. Forinformation on key positions - see Keypositions - functions at different levels (p.70).
Vertical opening
G028900
Vertical opening, raised at the rear edge.
Open by pressing the rear edge of the control upward.
Close by pulling the rear edge of the con- trol down.
Closing using the remote control key or central locking button
G021345
One long press on the lock button closes the sunroof and all the windows, see Remotecontrol key - functions (p. 151) and Locking/unlocking - from the inside (p. 165). Thedoors and the tailgate are locked. To interruptclosing, press the lock button again.
WARNING
If the sunroof is closed with the remote control key, check that no one risks beingtrapped.
SunscreenThe sunroof features a manual, sliding interior sunscreen. The sunscreen slides back auto-matically when the sunroof is opened. Gripthe handle and slide the screen forward toclose it.
ProCarManuals.co’
Page 144 of 442
05 Loading and storage
05
142* Option/accessory, for more information, see Introduction.
Loading
Payload depends on the car's kerb weight. Payload depends on the car's kerb weight. The total of the weight of the passengers andall accessories reduces the car's payload bya corresponding weight. For more detailedinformation on weights, see Weights (p. 390).
The tailgate is opened via a buttonon the lighting panel or the remotecontrol key, see Locking/unlocking -
tailgate (p. 167).
WARNING
The car’s driving properties change depending on the weight and positioningof the load.
To bear in mind when loading
• Position the load firmly against the rear seat's backrest.
Note that objects must not prevent the func- tion of the WHIPS system for the front seats ifany of the rear seat's backrests is foldeddown, seeWHIPS - seating position (p. 35).
• Centre the load.
• Heavy objects should be placed as low as possible. Avoid placing heavy loads onlowered backrests.
• Cover sharp edges with something soft toavoid damaging the upholstery. •
Secure all loads to the load retaining eye-lets with straps or web lashings.
WARNING
A loose object weighing 20 kg can, in a frontal collision at a speed of 50 km/h,carry the impact of an item weighing1000 kg.
WARNING
The protection provided by the inflatable curtain in the headlining may be compro-mised or eliminated by high loads.
• Never load cargo above the backrest.
WARNING
Always secure the load. During heavy braking the load may otherwise shift, caus-ing injury to the car's occupants. Cover sharp edges and sharp corners with something soft. Switch off the engine and apply the park- ing brake when loading/unloading longitems. Otherwise you may accidentallyknock the gear lever or gear selector withthe load into a drive position - and the carcould then move off.
Related information
•
Load retaining eyelets (p. 143)
• Safety net* (p. 145) •
Loading - long load (p. 143)
• Roof load (p. 143)
ProCarManuals.co’
Page 147 of 442
05 Loading and storage
05
}}
* Option/accessory, for more information, see Introduction.145
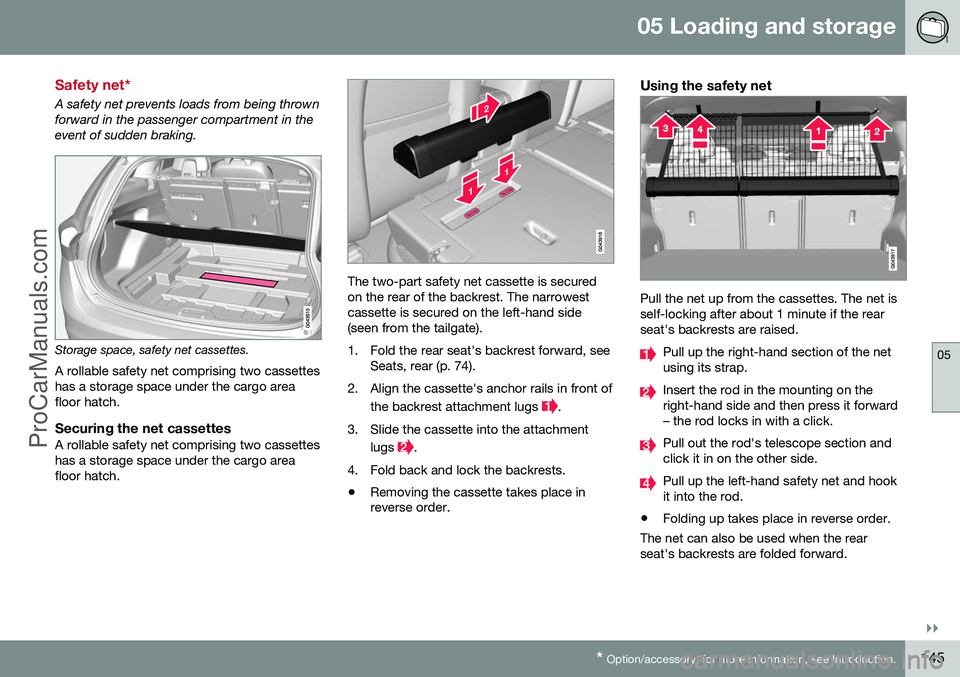
Safety net*
A safety net prevents loads from being thrown forward in the passenger compartment in theevent of sudden braking.
Storage space, safety net cassettes.
A rollable safety net comprising two cassettes has a storage space under the cargo areafloor hatch.
Securing the net cassettesA rollable safety net comprising two cassetteshas a storage space under the cargo areafloor hatch.
The two-part safety net cassette is secured on the rear of the backrest. The narrowestcassette is secured on the left-hand side (seen from the tailgate).
1. Fold the rear seat's backrest forward, see Seats, rear (p. 74).
2. Align the cassette's anchor rails in front of the backrest attachment lugs
.
3. Slide the cassette into the attachment lugs
.
4. Fold back and lock the backrests.
• Removing the cassette takes place in reverse order.
Using the safety net
Pull the net up from the cassettes. The net is self-locking after about 1 minute if the rearseat's backrests are raised.
Pull up the right-hand section of the net using its strap.
Insert the rod in the mounting on the right-hand side and then press it forward– the rod locks in with a click.
Pull out the rod's telescope section and click it in on the other side.
Pull up the left-hand safety net and hook it into the rod.
• Folding up takes place in reverse order.
The net can also be used when the rearseat's backrests are folded forward.
ProCarManuals.co’