battery VOLVO V60 2021 Owners Manual
[x] Cancel search | Manufacturer: VOLVO, Model Year: 2021, Model line: V60, Model: VOLVO V60 2021Pages: 661, PDF Size: 12.68 MB
Page 8 of 661
6
Parking climate*
226
Preconditioning *
226
Starting and stopping precondi- tioning * 226
Preconditioning timer *
227
Adding and editing timer settingsfor preconditioning * 227
Activating and deactivating pre-conditioning timer * 228
Deleting preconditioning timersettings * 229
Pre-cleaning *
230
Starting and stopping pre-cleaning *
230
Climate comfort retaining function *
231
Starting and switching off the cli-mate retaining function when parking *231
Parking climate symbols and mes-sages * 233
KEY, LOCKS AND ALARM
Locking and unlocking
236
Lock indication 236
Lock confirmation settings 238
Remote key 238
Locking and unlocking using the remote key 241
Settings for remote and insidedoor unlock 242
Unlocking the tailgate using theremote key 243
Remote key range 243
Replacing the remote key's battery 244
Ordering additional remote keys 248
Care Key – restricted remote key 248
Care Key settings 249
Detachable key blade 249
Locking and unlocking withdetachable key blade 250
Electronic immobilizer 252
Start and lock system type desig-nations 252
Keyless and touch-sensitive surfaces *
254
Keyless locking and unlocking *
255
Keyless unlock settings *
256
Keyless tailgate unlock *
256
Antenna locations for the start and lock system 257
Locking and unlocking from insidethe vehicle 258
Unlocking the tailgate from insidethe vehicle 259
Activating and deactivating child locks 259
Automatic locking when driving 260
Closing and locking the tailgate using the buttons * 261
Setting maximum opening heightfor the power tailgate *263
Operating the tailgate with a footmovement * 263
Private Locking 264
Activating and deactivating pri- vate locking 265
Alarm 266
Arming and disarming the alarm 267
Page 11 of 661
9
STARTING AND DRIVING
Starting the vehicle392
Switching off the vehicle 394
Ignition modes 395
Selecting ignition mode 396
Brake functions 397
Brakes 397
Brake Assist System 398
Braking on wet roads 399
Braking on salted roads 399
Maintenance of the brake system 399
Parking brake 400
Activating and deactivating the parking brake 400
Settings for automatically activat-ing the parking brake 402
Parking on a hill 402
Parking brake malfunction 402
Auto-hold brakes 403
Activating and deactivating Auto-hold at a standstill 404
Hill Start Assist 405
Braking assist after a collision 405
Regenerative braking *
405
Transmission 406
Automatic transmission 406
Shifting gears with automatic transmission 407
Using the steering wheel paddles *
to shift 409
Shiftlock 411
Deactivating the automatic shiftlock 411
The kickdown function 412
The Launch function *
412
Automatic transmission symbolsand messages 413
All Wheel Drive (AWD) *
413
Drive modes *
413
Changing drive mode *
415
Eco drive mode 416
Activating and deactivating Ecodrive mode using the function button 418
Start/Stop function 418
Driving with the Start/Stop function 418
Deactivating the Start/Stop function 420
Conditions for the Start/Stop function 420
Leveling control * and suspension
422
Economical driving 423
Preparing for a long trip 424
Winter driving 424
Driving through standing water 425
Opening/closing the fuel filler door 425
Refueling426
Fuel 427
Octane rating 428
Emission controls 429
Overheating of engine and trans- mission 430
Battery drain 431
Jump starting using another battery 431
Driving with a trailer 434
Trailer Stability Assist *
436
Checking trailer lights 437
Towing using a towline 438
Attaching and removing the tow-ing eyelet 439
Recovery 440
HomeLink ®
* 441
Programming HomeLink ®
* 442
Using HomeLink ®
* 443
Type approval for HomeLink ®
* 444
Compass *
445
Activating and deactivating the compass * 445
Calibrating the compass *
445
Page 14 of 661
12
LOADING, STORAGE AND PASSENGER COMPARTMENT
Passenger compartment interior550
Tunnel console 551
Electrical outlets 552
Using the electrical outlets 553
Using the glove compartment 554
Sun visors 555
Cargo compartment 555
Loading recommendations 556
Roof loads and load carriers 557
Grocery bag holders 557
Load anchoring eyelets 558
Rear seat ski hatch 559
Installing and removing the cargo compartment cover * 559
Operating the cargo compartmentcover * 560
Installing and removing the steelcargo grid * 561
Installing and removing the cargo net *
563
MAINTENANCE AND SERVICE
Volvo's service program
566
Data transfer between vehicle and workshop over Wi-Fi 568
Download Center 569
Handling system updates viaDownload Center 569
Vehicle status 570
Scheduling service and repairs 571
Sending vehicle information to theworkshop 572
Hoisting the vehicle 573
Climate control system service 576
Replacing a windshield with head- up display * 576
Opening and closing the hood 576
Engine compartment overview 578
Engine oil 579
Checking and filling engine oil 580
Coolant 581
Refilling coolant 582
Starter battery 584
Support battery 586
Battery symbols 588
Battery recycling 588
Fuses and fuseboxes 589
Replacing fuses 589
Fuses in the engine compartment 591
Fuses under the glove compartment 596
Fuses in the cargo compartment 602
Replacing bulbs 607
Cleaning the interior 607
Cleaning the center display 608
Cleaning the head-up display * and
instrument panel 609
Cleaning fabric upholstery and ceiling liner 609
Cleaning the seat belt 610
Cleaning textile floor and inlay mats 611
Cleaning leather upholstery *
611
Cleaning the leather steering wheel 612
Cleaning interior plastic, metal andwood surfaces 613
Cleaning the exterior 613
Polishing and waxing 614
Hand washing 615
Automatic car washes 616
High-pressure washing 617
Cleaning the wiper blades 618
Cleaning exterior plastic, rubberand trim components 618
Cleaning rims 619
Corrosion protection 620
Page 57 of 661
SAFETY
55
Airbags
The vehicle is equipped with airbags and inflatable curtains for the driver and passen-gers.
WARNING
If the airbag warning light stays on after the engine has started or if it illu-minates while you are driving, have thevehicle inspected by a trained andqualified Volvo service technician assoon as possible.
Never attempt to alter or repair any ofthe vehicle's safety systems yourself.Incorrectly performed repairs to anysystem could impair function and leadto serious injury. All work on these sys-tems should be performed by a trainedand qualified Volvo service technician.
WARNING
If your vehicle has become water-damaged in any way (e.g., soaked floor mats/stand-ing water on the floor of the vehicle), donot attempt to start the engine. This maycause airbag deployment, which couldresult in serious injury. Volvo recommendstowing the vehicle directly to an authorizedVolvo workshop. Before attempting to tow the vehicle:
1. Switch off the ignition for at least 10
minutes and disconnect the battery.
2. Follow the instructions for manually overriding the shiftlock system.
Deployed airbags
WARNING
If any of the airbags have deployed:
Do not attempt to drive the vehicle. Have it towed to an authorized work-shop.
If necessary, seek medical attention.
Related information
Safety (p. 44)
Driver/passenger side front airbags (p. 56)
Side airbags (p. 62)
Inflatable curtain (p. 63)
Page 166 of 661
WINDOWS, GLASS AND MIRRORS
* Option/accessory.
164
Windows, glass and mirrors The vehicle is equipped with several different types of windows, glass and mirrors. Some ofthe windows in the car are laminated.
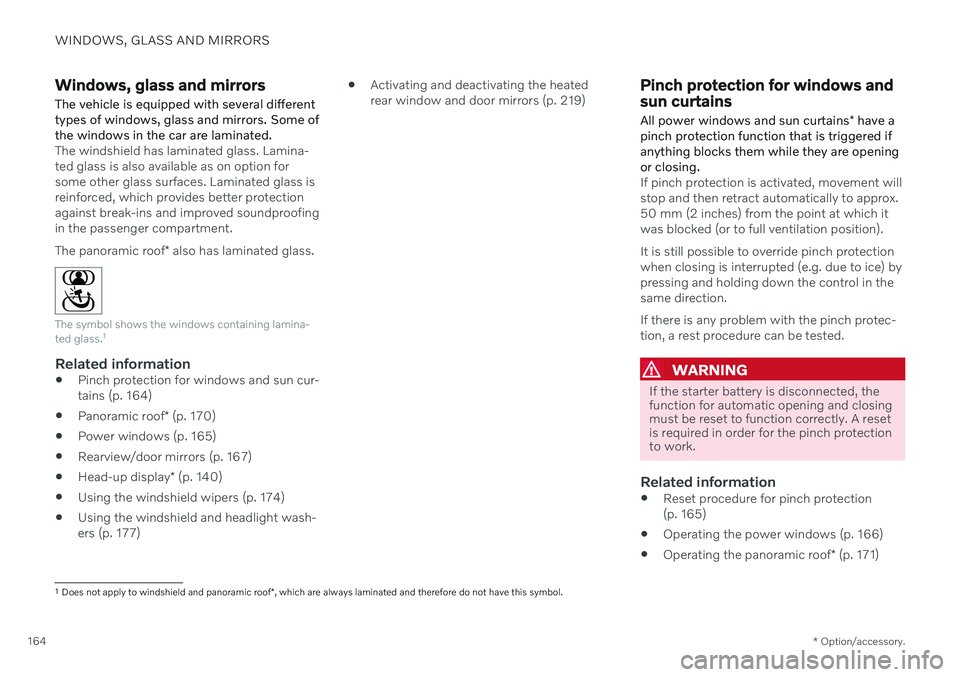
The windshield has laminated glass. Lamina- ted glass is also available as on option forsome other glass surfaces. Laminated glass isreinforced, which provides better protectionagainst break-ins and improved soundproofingin the passenger compartment. The panoramic roof * also has laminated glass.
The symbol shows the windows containing lamina- ted glass. 1
Related information
Pinch protection for windows and sun cur- tains (p. 164)
Panoramic roof
* (p. 170)
Power windows (p. 165)
Rearview/door mirrors (p. 167)
Head-up display
* (p. 140)
Using the windshield wipers (p. 174)
Using the windshield and headlight wash-ers (p. 177)
Activating and deactivating the heatedrear window and door mirrors (p. 219)
Pinch protection for windows and sun curtains All power windows and sun curtains
* have a
pinch protection function that is triggered if anything blocks them while they are openingor closing.
If pinch protection is activated, movement will stop and then retract automatically to approx.50 mm (2 inches) from the point at which itwas blocked (or to full ventilation position). It is still possible to override pinch protection when closing is interrupted (e.g. due to ice) bypressing and holding down the control in thesame direction. If there is any problem with the pinch protec- tion, a rest procedure can be tested.
WARNING
If the starter battery is disconnected, the function for automatic opening and closingmust be reset to function correctly. A resetis required in order for the pinch protectionto work.
Related information
Reset procedure for pinch protection (p. 165)
Operating the power windows (p. 166)
Operating the panoramic roof
* (p. 171)
1
Does not apply to windshield and panoramic roof *, which are always laminated and therefore do not have this symbol.
Page 167 of 661
WINDOWS, GLASS AND MIRRORS
* Option/accessory.165
Reset procedure for pinch protection
If you experience any problems with the elec- trical functions for the power windows, youcan try to perform a reset.
WARNING
If the starter battery is disconnected, the function for automatic opening and closingmust be reset to function correctly. A resetis required in order for the pinch protectionto work.
Consult a workshop if you experience any problems with the panoramic roof. 2
Resetting a power window
1. Start with the window in the closed posi-
tion.
2. Then move the control in manual mode three times upward toward the closed position.
> The system will be automatically acti-vated.
If the problem persists, contact a workshop.
Related information
Pinch protection for windows and sun cur- tains (p. 164)
Operating the power windows (p. 166)
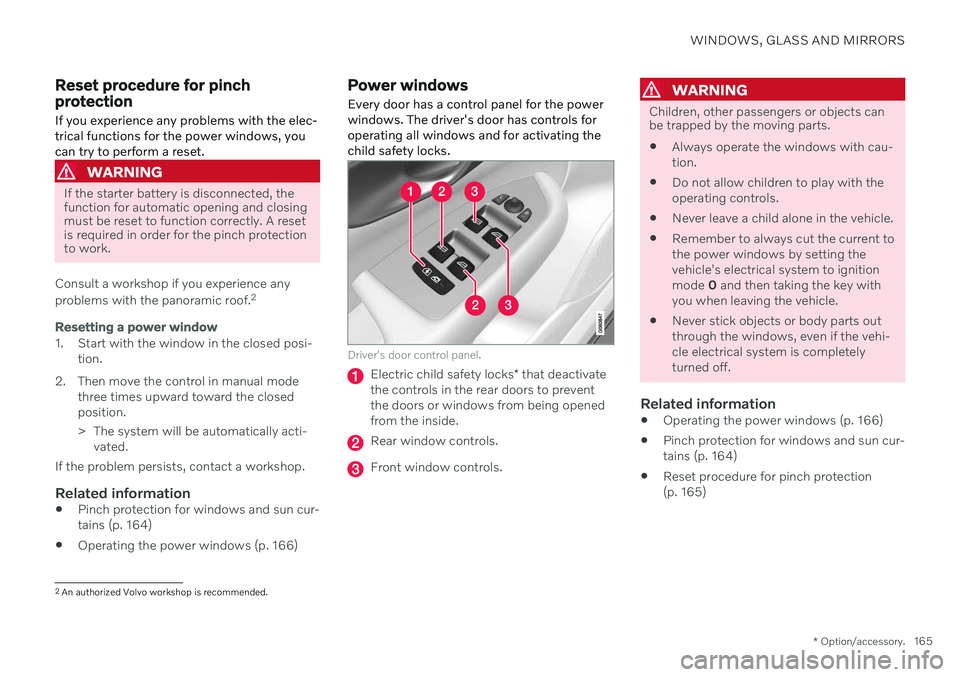
Power windows Every door has a control panel for the power windows. The driver's door has controls foroperating all windows and for activating thechild safety locks.
Driver's door control panel.
Electric child safety locks
* that deactivate
the controls in the rear doors to prevent the doors or windows from being openedfrom the inside.
Rear window controls.
Front window controls.
WARNING
Children, other passengers or objects can be trapped by the moving parts.
Always operate the windows with cau- tion.
Do not allow children to play with theoperating controls.
Never leave a child alone in the vehicle.
Remember to always cut the current tothe power windows by setting thevehicle's electrical system to ignitionmode
0 and then taking the key with
you when leaving the vehicle.
Never stick objects or body parts outthrough the windows, even if the vehi-cle electrical system is completelyturned off.
Related information
Operating the power windows (p. 166)
Pinch protection for windows and sun cur-tains (p. 164)
Reset procedure for pinch protection(p. 165)
2
An authorized Volvo workshop is recommended.
Page 242 of 661
||
KEY, LOCKS AND ALARM
* Option/accessory.
240
NOTE
Be aware of the risk of locking the remote key in the vehicle. If the remote key or key tag is left in the vehicle, it will be deactivated whenthe vehicle is locked and the alarm setusing another valid key. The key will bereactivated when the vehicle isunlocked.
If the remote key or Care Key is left inthe vehicle, it will be deactivated evenif the vehicle is locked using Volvo OnCall, and will be reactivated when thevehicle is unlocked using Volvo On Callor another valid key.
Button-less key (Key Tag)
*
The button-less key4
provided with the keyless
locking and unlocking function works in the same way as the regular remote key for key-less start, locking and unlocking. The key iswaterproof up to a depth of approx. 10 meters(30 feet) for up to 60 minutes. It does nothave a detachable key blade and its batterycannot be replaced.
Care Key - restricted remote keyA Care Key enables the vehicle owner to set amaximum speed limit for the vehicle. This limit is intended to promote safe use of the vehicle,e.g. when it is loaned out.
InterferenceElectromagnetic fields or obstructing objectsmay interfere with the remote key's functionsfor keyless start and keyless locking and unlocking
*.
NOTE
Avoid storing the remote key near metal objects or electronic devices, e.g. cellphones, tablets, laptops or chargers – pref-erably no closer than 10-15 cm (4-6 in.).
If you experience interference, use the remote key's detachable blade to unlock the vehicleand then place the remote key in the backupreader in the tunnel console cup holder to dis-arm the alarm and start the vehicle.
NOTE
When the remote control key is placed in the cup holder, make sure that no othervehicle keys, metal objects or electronicdevices (e.g. cell phones, tablets, laptopsor chargers) are found in the cup holder.Multiple vehicle keys close to each other inthe cup holder can disrupt their functional-ity.
WARNING
California Proposition 65 Operating, servicing and maintaining a pas- senger vehicle can expose you to chemi-cals including engine exhaust, carbon mon-oxide, phthalates, and lead, which areknown to the State of California to causecancer and birth defects or other reproduc-tive harm. To minimize exposure, avoidbreathing exhaust, do not idle the engineexcept as necessary, service your vehicle ina well ventilated area and wear gloves orwash your hands frequently when servicingyour vehicle. For more information go towww.P65Warnings.ca.gov/passenger-vehicle.
4
Also called sport key.
Page 243 of 661
KEY, LOCKS AND ALARM
}}
* Option/accessory.241
Related information
Starting the vehicle (p. 392)
Locking and unlocking using the remote key (p. 241)
Remote key range (p. 243)
Replacing the remote key's battery(p. 244)
Detachable key blade (p. 249)
Care Key – restricted remote key (p. 248)
Electronic immobilizer (p. 252)
Linking a remote key to a driver profile(p. 136)
Locking and unlocking using the remote key
All doors, tailgate and fuel filler door can be locked and unlocked simultaneously usingthe buttons on the remote key.
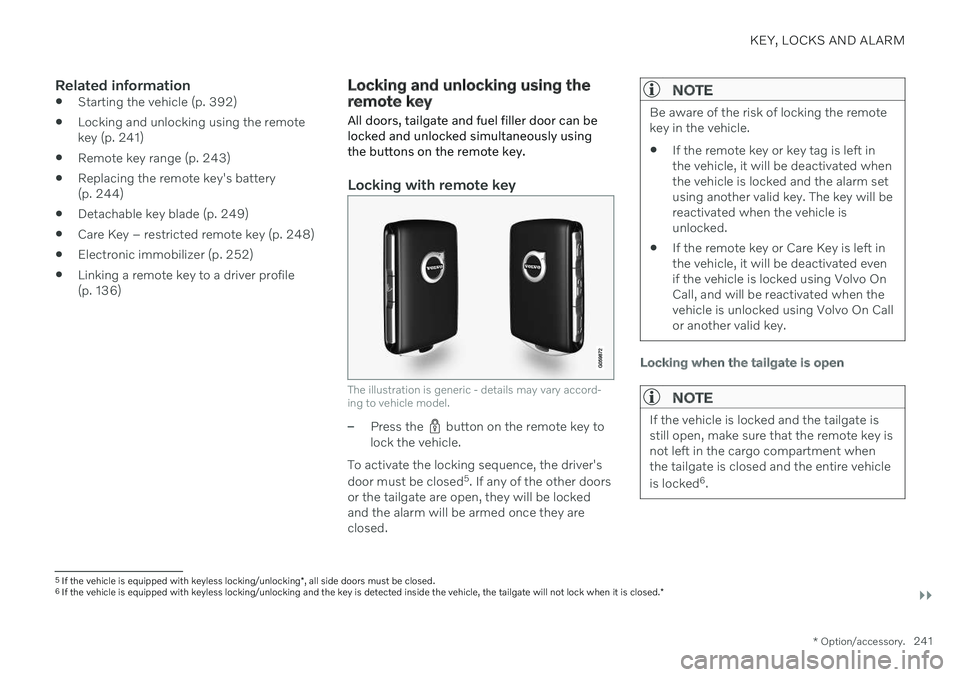
Locking with remote key
The illustration is generic - details may vary accord- ing to vehicle model.
–Press the button on the remote key to
lock the vehicle.
To activate the locking sequence, the driver's door must be closed 5
. If any of the other doors
or the tailgate are open, they will be locked and the alarm will be armed once they areclosed.
NOTE
Be aware of the risk of locking the remote key in the vehicle. If the remote key or key tag is left in the vehicle, it will be deactivated whenthe vehicle is locked and the alarm setusing another valid key. The key will bereactivated when the vehicle isunlocked.
If the remote key or Care Key is left inthe vehicle, it will be deactivated evenif the vehicle is locked using Volvo OnCall, and will be reactivated when thevehicle is unlocked using Volvo On Callor another valid key.
Locking when the tailgate is open
NOTE
If the vehicle is locked and the tailgate is still open, make sure that the remote key isnot left in the cargo compartment whenthe tailgate is closed and the entire vehicle is locked 6
.
5 If the vehicle is equipped with keyless locking/unlocking *, all side doors must be closed.
6 If the vehicle is equipped with keyless locking/unlocking and the key is detected inside the vehicle, the tailgate will not lock when it is closed. *
Page 244 of 661
||
KEY, LOCKS AND ALARM
242
Unlocking with remote key
–Press the button on the remote key to
unlock the vehicle.
Automatic relockingIf none of the doors or tailgate are opened within two minutes after being unlocked, theywill automatically relock. This function reducesthe risk of inadvertently leaving the vehicleunlocked.
Remote key not working
NOTE
Move closer to the vehicle and try to unlock it again.
If the remote key is not working to lock or unlock the vehicle, its battery may be dis-charged. Use the detachable key blade tolock/unlock the driver's door instead.
Related information
Settings for remote and inside door unlock(p. 242)
Unlocking the tailgate using the remotekey (p. 243)
Remote key (p. 238)
Replacing the remote key's battery(p. 244)
Locking and unlocking with detachablekey blade (p. 250)
Settings for remote and inside door unlock Several different sequences are available for remote unlocking.
To change this setting: 1.
Tap
Settings in the center display's Top
view.
2. Tap
My CarLockingRemote and
Interior Unlock.
3. Select alternative:
All Doors – unlocks all doors at the
same time.
Single Door – unlocks the driver's
door. Press the remote key unlock but- ton twice to unlock all doors.
The settings made here also affect centrallocking using the inside door handle.
Related information
Locking and unlocking using the remotekey (p. 241)
Locking and unlocking from inside thevehicle (p. 258)
Page 246 of 661
||
KEY, LOCKS AND ALARM
* Option/accessory.
244 approx. 1.5 meter (5 feet) along the sides of the vehicle or approx. 1 meter (3 feet) from thetailgate.
NOTE
The functions of the remote control key can be disrupted by ambient radio waves,buildings, topographical conditions, etc.The vehicle can always be locked/unlockedusing the key blade.
If the remote key is removed from the vehicle
If the remote key is removed from the vehicle while the engine is run- ning, the warning message
Vehicle
key not found Removed from
vehicle will be displayed in the instrument
panel and an audible signal will sound when the last door is closed.
The message will disappear when the key is returned to the vehicle and the O button on
the right-side steering wheel keypad ispressed or when the last door is closed again.
Related information
Remote key (p. 238)
Antenna locations for the start and locksystem (p. 257)
Keyless and touch-sensitive surfaces
*
(p. 254)
Replacing the remote key's battery
The battery in the remote key must be replaced when it is discharged.
NOTE
All batteries have a limited service life and must eventually be replaced (does notapply for Key Tag). The battery's service lifevaries depending on how often thevehicle/key is used.
The remote key battery should be replaced if
the information symbol illuminates and the message
Vehicle key bat. low is dis-
played in the instrument panel
the locks do not react after several attempts to lock or unlock the vehicleusing the remote key within approx.20 meter (65 feet) from the vehicle.
NOTE
Move closer to the vehicle and try to unlock it again.
The battery in the smaller key without but- tons 7
(the Key Tag) cannot be replaced. A new key can be ordered from an authorized Volvo workshop.
CAUTION
An end-of-life Key Tag must be turned in to an authorized Volvo workshop. The keymust be deleted from the vehicle becauseit can still be used to start the vehicle viabackup start.
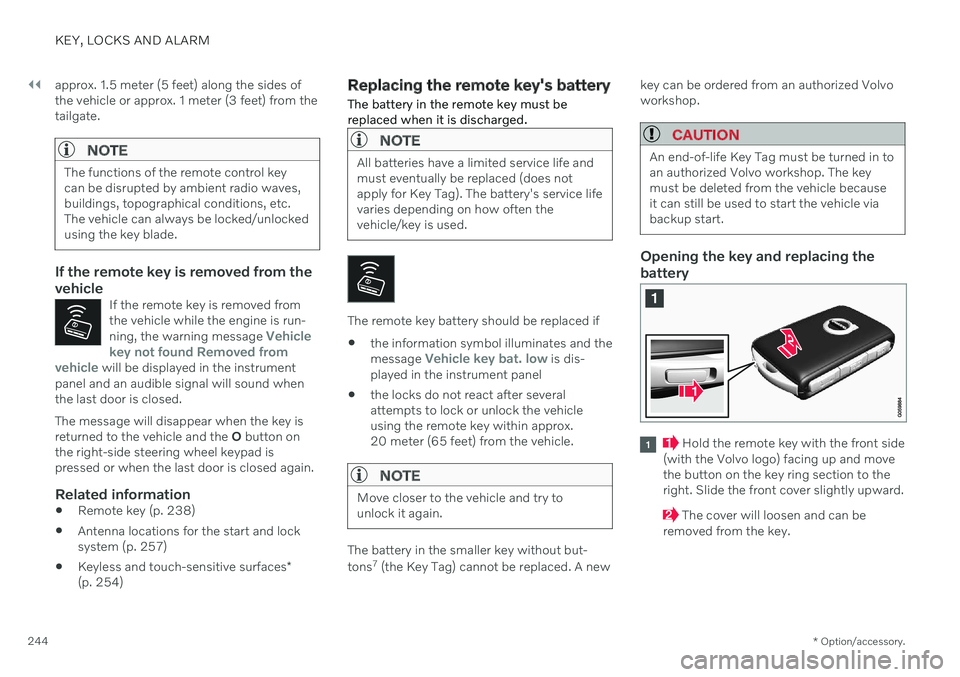
Opening the key and replacing the battery
Hold the remote key with the front side
(with the Volvo logo) facing up and move the button on the key ring section to theright. Slide the front cover slightly upward.
The cover will loosen and can be
removed from the key.