set clock VOLVO V60 2021 Owners Manual
[x] Cancel search | Manufacturer: VOLVO, Model Year: 2021, Model line: V60, Model: VOLVO V60 2021Pages: 661, PDF Size: 12.68 MB
Page 84 of 661
DISPLAYS AND VOICE CONTROL
* Option/accessory.
82
Instrument panel The instrument panel displays information related to the vehicle and driving.
The instrument panel contains gauges, indica- tors and monitoring and warning symbols.What is shown in the instrument panel variesdepending on the equipment, settings andfunctions currently active. The instrument panel is activated as soon as a door is opened, i.e. in ignition mode 0. The
panel will power down after a short period oftime if it is not used. To reactivate it, do one ofthe following:
Depress the brake pedal.
Activate ignition mode
I.
Open one of the doors. The instrument panel is available in two ver- sions: 8" and 12"
*.WARNING
If the instrument panel turns off, does not activate when the ignition is switched on,or part/all of the panel cannot be read, donot drive the vehicle. Consult a workshopimmediately. Volvo recommends anauthorized Volvo workshop.
WARNING
If the instrument panel is not functioning properly, information about brakes, airbagsor other safety-related systems may not bedisplayed. The driver will then not be ableto check the status of the vehicle systemsor receive relevant warnings and informa-tion.
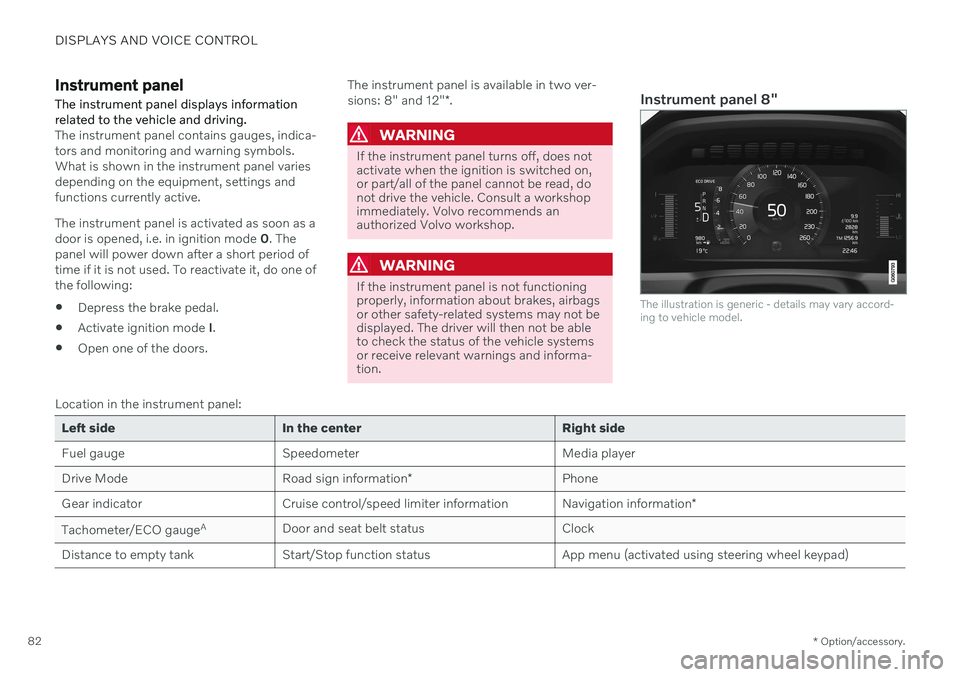
Instrument panel 8"
The illustration is generic - details may vary accord- ing to vehicle model.
Location in the instrument panel:
Left side In the center Right side
Fuel gauge Speedometer Media player Drive Mode
Road sign information* Phone
Gear indicator Cruise control/speed limiter information Navigation information*
Tachometer/ECO gauge A
Door and seat belt status Clock
Distance to empty tank Start/Stop function status App menu (activated using steering wheel keypad)
Page 94 of 661
DISPLAYS AND VOICE CONTROL
* Option/accessory.
92
Date and time The clock is displayed in both the instrument panel and the center display.
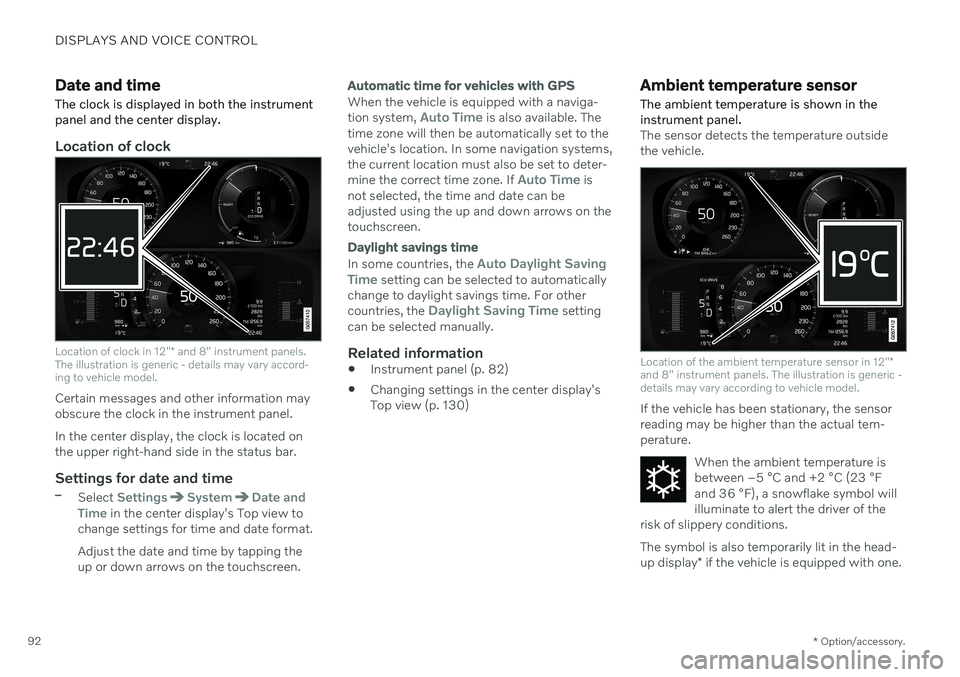
Location of clock
Location of clock in 12" * and 8" instrument panels.
The illustration is generic - details may vary accord- ing to vehicle model.
Certain messages and other information may obscure the clock in the instrument panel. In the center display, the clock is located on the upper right-hand side in the status bar.
Settings for date and time–Select SettingsSystemDate and
Time in the center display's Top view to
change settings for time and date format. Adjust the date and time by tapping the up or down arrows on the touchscreen.
Automatic time for vehicles with GPS
When the vehicle is equipped with a naviga- tion system, Auto Time is also available. The
time zone will then be automatically set to the vehicle's location. In some navigation systems,the current location must also be set to deter- mine the correct time zone. If
Auto Time is
not selected, the time and date can be adjusted using the up and down arrows on thetouchscreen.
Daylight savings time
In some countries, the Auto Daylight Saving
Time setting can be selected to automatically
change to daylight savings time. For other countries, the
Daylight Saving Time setting
can be selected manually.
Related information
Instrument panel (p. 82)
Changing settings in the center display's Top view (p. 130)
Ambient temperature sensor
The ambient temperature is shown in the instrument panel.
The sensor detects the temperature outside the vehicle.
Location of the ambient temperature sensor in 12" *
and 8" instrument panels. The illustration is generic - details may vary according to vehicle model.
If the vehicle has been stationary, the sensor reading may be higher than the actual tem-perature.
When the ambient temperature isbetween –5 °C and +2 °C (23 °F
and 36 °F), a snowflake symbol will
illuminate to alert the driver of the
risk of slippery conditions. The symbol is also temporarily lit in the head- up display * if the vehicle is equipped with one.
Page 111 of 661
DISPLAYS AND VOICE CONTROL
* Option/accessory.109
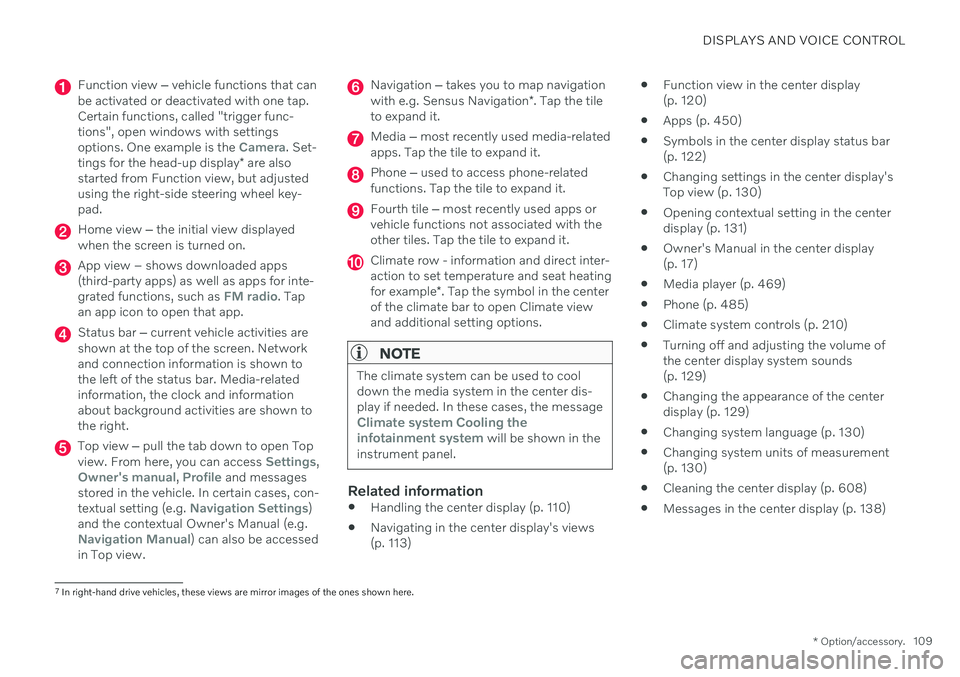
Function view ‒ vehicle functions that can
be activated or deactivated with one tap. Certain functions, called "trigger func-tions", open windows with settingsoptions. One example is the
Camera. Set-
tings for the head-up display * are also
started from Function view, but adjusted using the right-side steering wheel key-pad.
Home view ‒ the initial view displayed
when the screen is turned on.
App view – shows downloaded apps (third-party apps) as well as apps for inte-grated functions, such as
FM radio. Tap
an app icon to open that app.
Status bar ‒ current vehicle activities are
shown at the top of the screen. Network and connection information is shown tothe left of the status bar. Media-relatedinformation, the clock and informationabout background activities are shown tothe right.
Top view ‒ pull the tab down to open Top
view. From here, you can access Settings,Owner's manual, Profile and messages
stored in the vehicle. In certain cases, con- textual setting (e.g.
Navigation Settings)
and the contextual Owner's Manual (e.g.
Navigation Manual) can also be accessed
in Top view.
Navigation ‒ takes you to map navigation
with e.g. Sensus Navigation *. Tap the tile
to expand it.
Media ‒ most recently used media-related
apps. Tap the tile to expand it.
Phone ‒ used to access phone-related
functions. Tap the tile to expand it.
Fourth tile ‒ most recently used apps or
vehicle functions not associated with the other tiles. Tap the tile to expand it.
Climate row - information and direct inter- action to set temperature and seat heating for example *. Tap the symbol in the center
of the climate bar to open Climate view and additional setting options.
NOTE
The climate system can be used to cool down the media system in the center dis-play if needed. In these cases, the message
Climate system Cooling the
infotainment system will be shown in the
instrument panel.
Related information
Handling the center display (p. 110)
Navigating in the center display's views (p. 113)
Function view in the center display(p. 120)
Apps (p. 450)
Symbols in the center display status bar(p. 122)
Changing settings in the center display'sTop view (p. 130)
Opening contextual setting in the centerdisplay (p. 131)
Owner's Manual in the center display(p. 17)
Media player (p. 469)
Phone (p. 485)
Climate system controls (p. 210)
Turning off and adjusting the volume ofthe center display system sounds(p. 129)
Changing the appearance of the centerdisplay (p. 129)
Changing system language (p. 130)
Changing system units of measurement(p. 130)
Cleaning the center display (p. 608)
Messages in the center display (p. 138)
7
In right-hand drive vehicles, these views are mirror images of the ones shown here.
Page 116 of 661
||
DISPLAYS AND VOICE CONTROL
* Option/accessory.
114
NOTE
In Home view's standard mode – short press on the Home button. An animationdescribing access to the various views isshown on the screen.
NOTE
When the vehicle is moving:
Certain functions (e.g. using the center display's keyboard) may be deacti-vated.
Certain texts (e.g. those generated byapps) will be shortened to three rows. Tap the
Read out button to have the
entire message read aloud.
Text messages will be shortened to one row. Tap the
Read out button to
have the entire message read aloud.
Status barCurrent vehicle activities are shown at the top of the screen in the status bar. Network andconnection information is shown to the left ofthe status bar. Media-related information, theclock and information about background activ-ities are shown to the right.
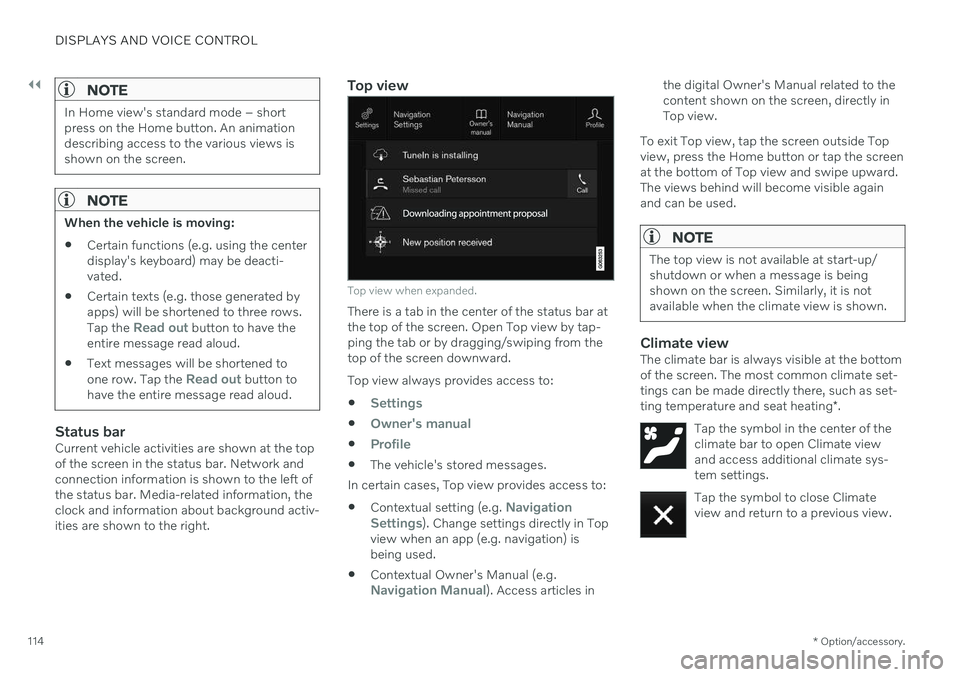
Top view
Top view when expanded.
There is a tab in the center of the status bar at the top of the screen. Open Top view by tap-ping the tab or by dragging/swiping from thetop of the screen downward. Top view always provides access to:
Settings
Owner's manual
Profile
The vehicle's stored messages.
In certain cases, Top view provides access to: Contextual setting (e.g.
Navigation
Settings). Change settings directly in Top
view when an app (e.g. navigation) is being used.
Contextual Owner's Manual (e.g.
Navigation Manual). Access articles in the digital Owner's Manual related to the content shown on the screen, directly inTop view.
To exit Top view, tap the screen outside Topview, press the Home button or tap the screenat the bottom of Top view and swipe upward.The views behind will become visible againand can be used.
NOTE
The top view is not available at start-up/ shutdown or when a message is beingshown on the screen. Similarly, it is notavailable when the climate view is shown.
Climate viewThe climate bar is always visible at the bottom of the screen. The most common climate set-tings can be made directly there, such as set- ting temperature and seat heating *.
Tap the symbol in the center of the climate bar to open Climate viewand access additional climate sys-tem settings.
Tap the symbol to close Climate view and return to a previous view.
Page 145 of 661
DISPLAYS AND VOICE CONTROL
}}
* Option/accessory.143
Calibrating the horizontal positionIf the windshield or display unit has been replaced, the head-up display's horizontalposition may need to be calibrated. Calibrationmeans that the projected image is rotatedclockwise or counterclockwise. 1.
Tap
Settings in the center display's Top
view.
2. Select
My CarDisplaysHead-Up
Display Options
Head-Up Display
Calibration.
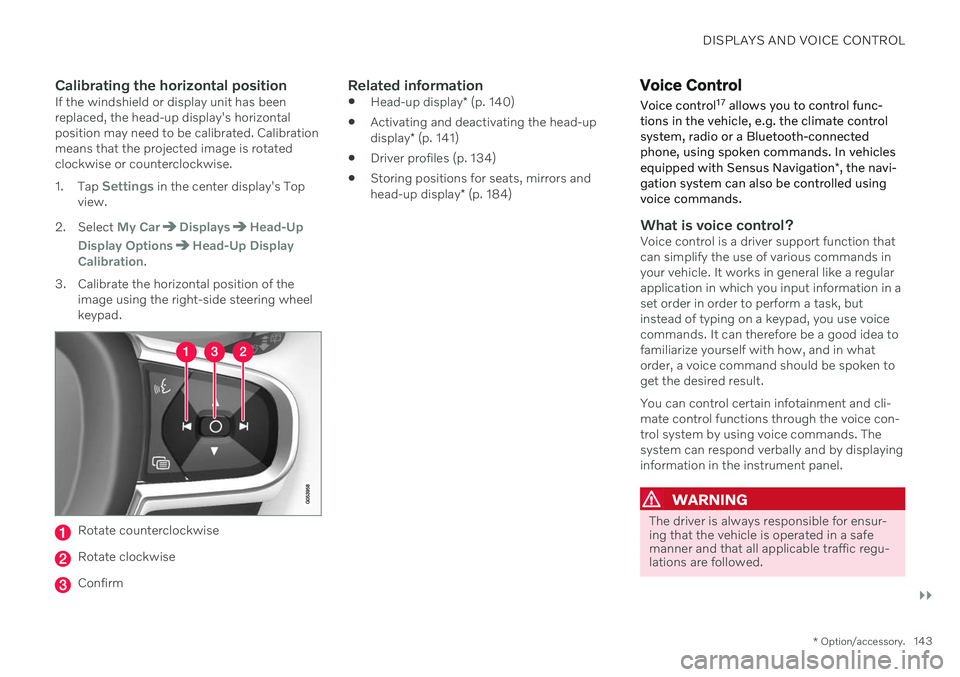
3. Calibrate the horizontal position of the image using the right-side steering wheel keypad.
Rotate counterclockwise
Rotate clockwise
Confirm
Related information
Head-up display
* (p. 140)
Activating and deactivating the head-up display
* (p. 141)
Driver profiles (p. 134)
Storing positions for seats, mirrors andhead-up display
* (p. 184)
Voice Control
Voice control 17
allows you to control func-
tions in the vehicle, e.g. the climate control system, radio or a Bluetooth-connectedphone, using spoken commands. In vehicles equipped with Sensus Navigation *, the navi-
gation system can also be controlled using voice commands.
What is voice control?Voice control is a driver support function that can simplify the use of various commands inyour vehicle. It works in general like a regularapplication in which you input information in aset order in order to perform a task, butinstead of typing on a keypad, you use voicecommands. It can therefore be a good idea tofamiliarize yourself with how, and in whatorder, a voice command should be spoken toget the desired result. You can control certain infotainment and cli- mate control functions through the voice con-trol system by using voice commands. Thesystem can respond verbally and by displayinginformation in the instrument panel.
WARNING
The driver is always responsible for ensur- ing that the vehicle is operated in a safemanner and that all applicable traffic regu-lations are followed.
Page 230 of 661
||
CLIMATE CONTROL
* Option/accessory.
228 3.
Tap
Add timer.
> A pop-up window will appear.
NOTE
It is not possible to add a time setting if there are already 8 settings for the timer.Delete a time setting to be able to add anew one.
4. Tap Date to set a time for a specific date.
Tap
Days to set a time for one or more
days of the week. With
Days: Activate/deactivate the repeat
function by selecting/deselecting the
Repeat weekly checkbox.
5. With
Date: Select a date for precondition-
ing by scrolling in the date list using the arrows. With
Days: Select days of the week for
preconditioning by tapping the buttons for the days.
6. Set the time at which preconditioning should be completed by scrolling usingthe arrows in the clock.
7. Tap
Confirm to add a timer setting.
> The timer setting will be added to the list and activated.
Editing the timer setting1. Open Climate view in the center display. 2. Select the
Parking climate tab.
3. Tap the timer setting you would like to change.
> A pop-up window will appear.
4. To edit a timer setting, follow the proce- dures described under the heading "Add- ing a timer setting" above.
Related information
Preconditioning
* (p. 226)
Preconditioning timer
* (p. 227)
Activating and deactivating precondition- ing timer
* (p. 228)
Deleting preconditioning timer settings
*
(p. 229)
Activating and deactivating preconditioning timer *
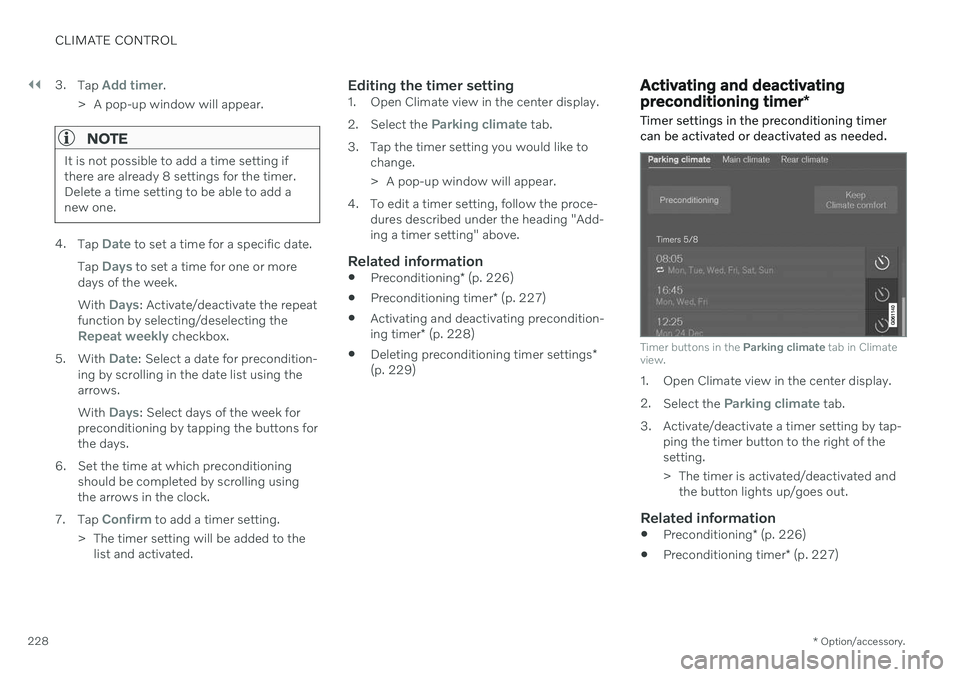
Timer settings in the preconditioning timer can be activated or deactivated as needed.
Timer buttons in the Parking climate tab in Climate
view.
1. Open Climate view in the center display. 2. Select the
Parking climate tab.
3. Activate/deactivate a timer setting by tap- ping the timer button to the right of the setting.
> The timer is activated/deactivated andthe button lights up/goes out.
Related information
Preconditioning
* (p. 226)
Preconditioning timer
* (p. 227)
Page 398 of 661
||
STARTING AND DRIVING
396
Related information
Starting the vehicle (p. 392)
Adjusting the steering wheel (p. 195)
Jump starting using another battery (p. 431)
Selecting ignition mode (p. 396)
Selecting ignition mode
The vehicle's ignition can be put in various modes (levels) to make different functionsavailable.
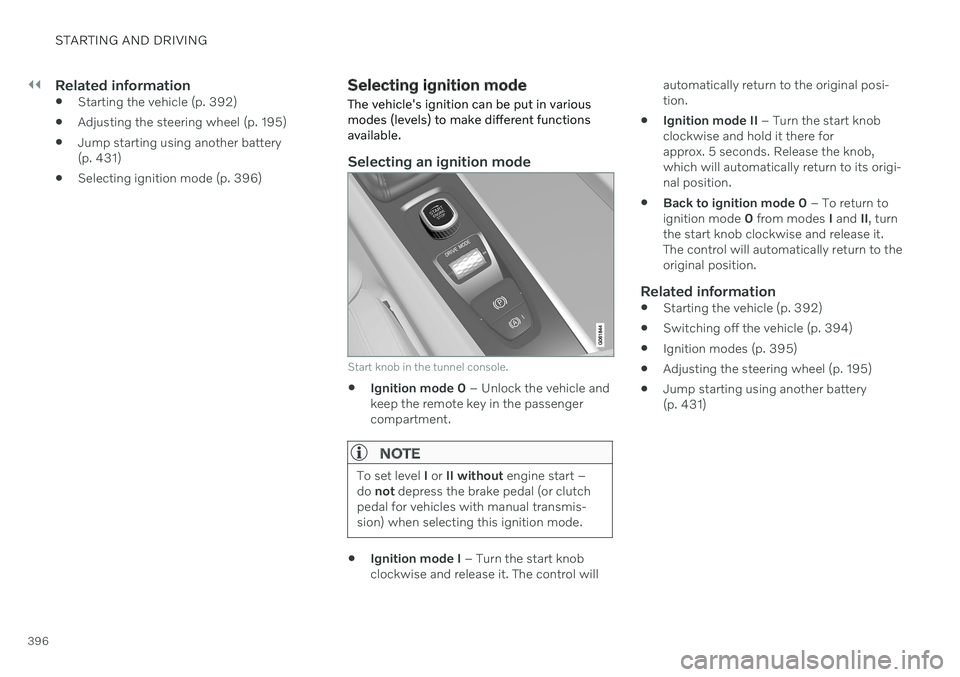
Selecting an ignition mode
Start knob in the tunnel console.
Ignition mode 0
– Unlock the vehicle and
keep the remote key in the passenger compartment.
NOTE
To set level I or II without engine start –
do not depress the brake pedal (or clutch
pedal for vehicles with manual transmis- sion) when selecting this ignition mode.
Ignition mode I
– Turn the start knob
clockwise and release it. The control will automatically return to the original posi- tion.
Ignition mode II
– Turn the start knob
clockwise and hold it there forapprox. 5 seconds. Release the knob,which will automatically return to its origi-nal position.
Back to ignition mode 0
– To return to
ignition mode 0 from modes I and II, turn
the start knob clockwise and release it.The control will automatically return to theoriginal position.
Related information
Starting the vehicle (p. 392)
Switching off the vehicle (p. 394)
Ignition modes (p. 395)
Adjusting the steering wheel (p. 195)
Jump starting using another battery(p. 431)
Page 618 of 661
||
MAINTENANCE AND SERVICE
616
CAUTION
Remember to remove dirt from the drain holes in the doors and sills after washingthe vehicle.
Related information
Cleaning the exterior (p. 613)
Polishing and waxing (p. 614)
Automatic car washes (p. 616)
High-pressure washing (p. 617)
Cleaning the wiper blades (p. 618)
Cleaning exterior plastic, rubber and trim components (p. 618)
Cleaning rims (p. 619)
Corrosion protection (p. 620)
Settings for automatically activating theparking brake (p. 402)
Automatic car washes
The vehicle should be washed as soon as it becomes dirty. The longer the dirt remains,the more difficult it will be to keep the vehicleclean. It could also lead to paint damage.
Washing your vehicle in an automatic car wash is a fast and easy way to keep your vehi-cle clean, but it does not reach all areas of thevehicle. Volvo recommends washing yourvehicle by hand or supplementing automaticcar washes with a hand wash.
NOTE
Volvo recommends not washing the vehi- cle in an automatic car wash during thefirst few months; the paintwork on newvehicles takes some time to fully harden.
CAUTION
Before driving the vehicle into a car wash, deactivate the Automatic Braking whenStationary and Automatic Parking BrakeApplication functions. If the functions arenot deactivated, the brake system willseize when the vehicle is stationary and thevehicle will not be able to roll.
CAUTION
For automatic car washes in which the vehicle is pulled forward on rolling wheels:
1. Before washing the vehicle, make sure that the automatic rain sensor is deac- tivated. If it is not deactivated andinadvertently starts, the wiper armscould be damaged.
2. To help prevent damage from the auto- matic car wash machinery, make surethat the door mirrors are folded in,antennas retracted or removed, andany auxiliary lights secured.
3. Drive into the automatic car wash.
4. Turn off the "Automatic Braking when Stationary" function using the
but-
ton in the tunnel console.
5. Turn off the "Automatic Parking Brake Application" function in the center dis- play's Top view.
6. Turn off the engine by turning the start knob in the tunnel console clockwise.Hold the knob in position for at least2 seconds.
The vehicle is now ready for the automaticcar wash.
Page 645 of 661
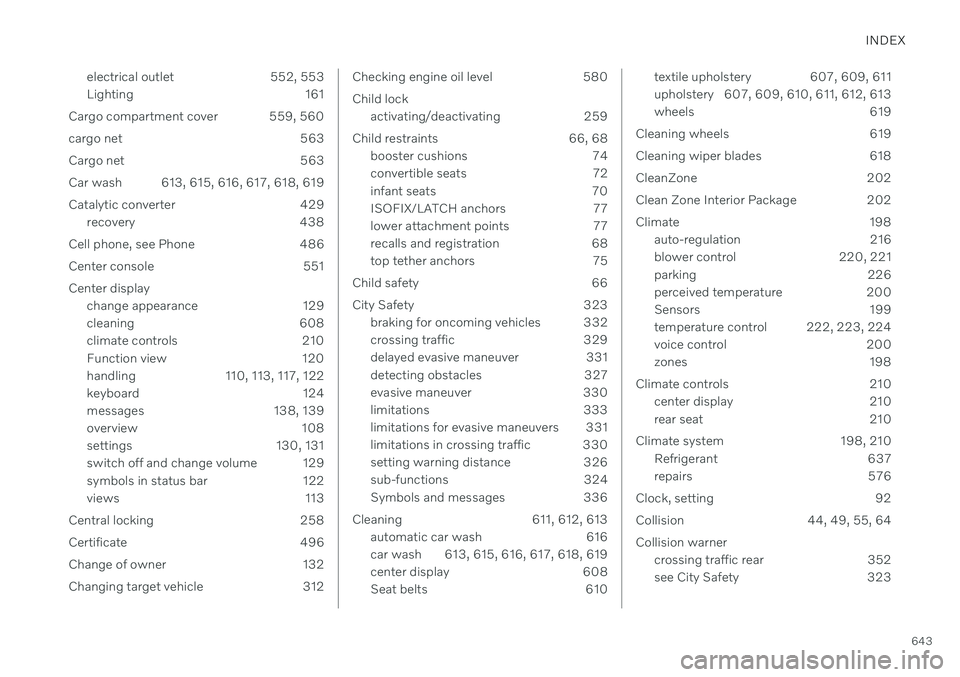
INDEX
643
electrical outlet 552, 553
Lighting 161
Cargo compartment cover 559, 560
cargo net 563
Cargo net 563
Car wash 613, 615, 616, 617, 618, 619
Catalytic converter 429 recovery 438
Cell phone, see Phone 486
Center console 551
Center display change appearance 129
cleaning 608
climate controls 210
Function view 120
handling 110, 113, 117, 122
keyboard 124
messages 138, 139
overview 108
settings 130, 131
switch off and change volume 129
symbols in status bar 122
views 113
Central locking 258
Certificate 496
Change of owner 132
Changing target vehicle 312
Checking engine oil level 580 Child lock activating/deactivating 259
Child restraints 66, 68 booster cushions 74
convertible seats 72
infant seats 70
ISOFIX/LATCH anchors 77
lower attachment points 77
recalls and registration 68
top tether anchors 75
Child safety 66
City Safety 323 braking for oncoming vehicles 332
crossing traffic 329
delayed evasive maneuver 331
detecting obstacles 327
evasive maneuver 330
limitations 333
limitations for evasive maneuvers 331
limitations in crossing traffic 330
setting warning distance 326
sub-functions 324
Symbols and messages 336
Cleaning 611, 612, 613 automatic car wash 616
car wash 613, 615, 616, 617, 618, 619
center display 608
Seat belts 610textile upholstery 607, 609, 611
upholstery 607, 609, 610, 611, 612, 613
wheels 619
Cleaning wheels 619
Cleaning wiper blades 618
CleanZone 202
Clean Zone Interior Package 202
Climate 198 auto-regulation 216
blower control 220, 221
parking 226
perceived temperature 200
Sensors 199
temperature control 222, 223, 224
voice control 200
zones 198
Climate controls 210 center display 210
rear seat 210
Climate system 198, 210 Refrigerant 637
repairs 576
Clock, setting 92
Collision 44, 49, 55, 64Collision warner crossing traffic rear 352
see City Safety 323