trunk VOLVO V60 2021 Owners Manual
[x] Cancel search | Manufacturer: VOLVO, Model Year: 2021, Model line: V60, Model: VOLVO V60 2021Pages: 661, PDF Size: 12.68 MB
Page 56 of 661
SAFETY
54
Door and seat belt reminders
This system is intended to remind occupants to buckle their seat belts and to alert thedriver if a door, hood or other opening (trunk,sunroof, etc.) is open.
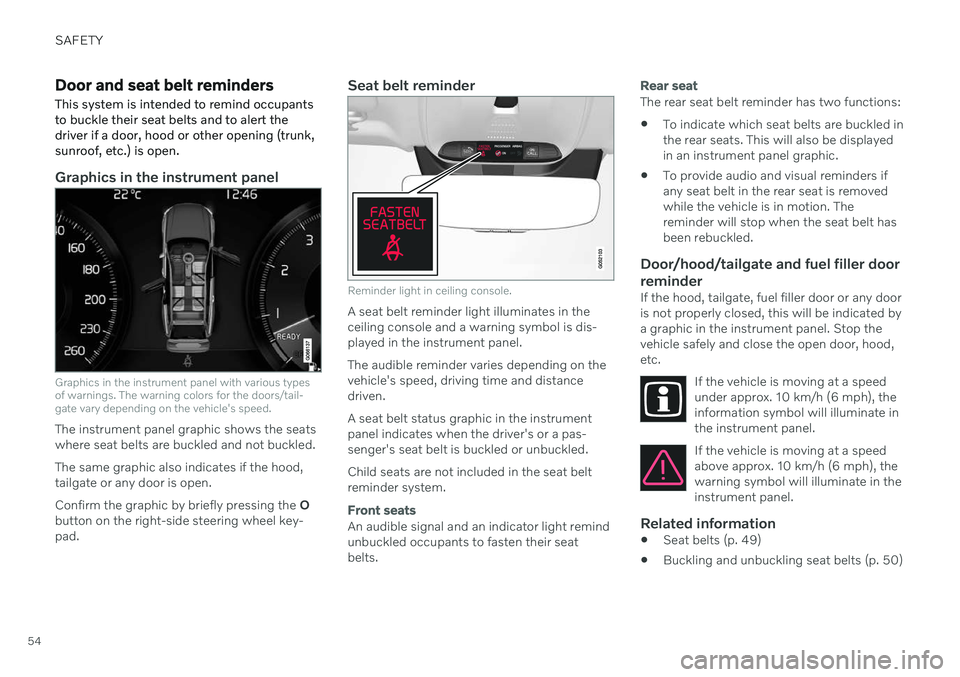
Graphics in the instrument panel
Graphics in the instrument panel with various types of warnings. The warning colors for the doors/tail-gate vary depending on the vehicle's speed.
The instrument panel graphic shows the seats where seat belts are buckled and not buckled. The same graphic also indicates if the hood, tailgate or any door is open. Confirm the graphic by briefly pressing the O
button on the right-side steering wheel key- pad.
Seat belt reminder
Reminder light in ceiling console.
A seat belt reminder light illuminates in the ceiling console and a warning symbol is dis-played in the instrument panel. The audible reminder varies depending on the vehicle's speed, driving time and distancedriven. A seat belt status graphic in the instrument panel indicates when the driver's or a pas-senger's seat belt is buckled or unbuckled. Child seats are not included in the seat belt reminder system.
Front seats
An audible signal and an indicator light remind unbuckled occupants to fasten their seatbelts.
Rear seat
The rear seat belt reminder has two functions:
To indicate which seat belts are buckled in the rear seats. This will also be displayedin an instrument panel graphic.
To provide audio and visual reminders ifany seat belt in the rear seat is removedwhile the vehicle is in motion. Thereminder will stop when the seat belt hasbeen rebuckled.
Door/hood/tailgate and fuel filler door
reminder
If the hood, tailgate, fuel filler door or any dooris not properly closed, this will be indicated bya graphic in the instrument panel. Stop thevehicle safely and close the open door, hood,etc.
If the vehicle is moving at a speedunder approx. 10 km/h (6 mph), theinformation symbol will illuminate inthe instrument panel.
If the vehicle is moving at a speed above approx. 10 km/h (6 mph), thewarning symbol will illuminate in theinstrument panel.
Related information
Seat belts (p. 49)
Buckling and unbuckling seat belts (p. 50)
Page 162 of 661
LIGHTING
* Option/accessory.
160
Using home safe lighting
Some of the exterior lights remain on to illu- minate the area around the vehicle. This iscalled home safe lighting.
To activate home safe lighting:
1. Switch off the ignition.
2. Push the left-side steering wheel lever toward the dashboard and release.
3. Exit the vehicle and lock the doors. > A symbol in the instrument panel illumi-nates to indicate that the function is activated and exterior lighting switcheson: Parking lights, headlights, licenseplate lighting and outer door handle lighting *.
The length of time home safe lighting remains illuminated can be set in the center display.
Related information
Adjusting light functions via the centerdisplay (p. 151)
Welcome Light (p. 160)
Welcome Light
Approach lighting is activated when the vehi- cle is unlocked and can be used to providelight as you walk toward the vehicle.
The function is activated when the remote key is used for unlocking. The parking lights, ceil-ing lights, footwell lights and trunk/cargocompartment lights are activated in daylightconditions. In weak daylight or dark condi-tions, the license plate lighting and outer door handle lighting * will also be activated, with the
light directed toward the ground. If no door is opened, the lights will remain illu- minated for approx. 2 minutes. If a door isopened while the function is activated, the interior lighting and outer door handle lighting *
will remain on for a longer period of time. This function can be activated and deactivated in the center display.
Related information
Adjusting light functions via the centerdisplay (p. 151)
Using home safe lighting (p. 160)
Remote key (p. 238)
Interior Lighting
The passenger compartment is equipped with several different types of lighting, e.g.general lighting, adjustable ambient lightingand reading lights.
All lighting in the passenger compartment can be turned on and off manually within5 minutes after:
the engine has been switched off and theignition is in mode
0.
the vehicle is unlocked but has not beenstarted.
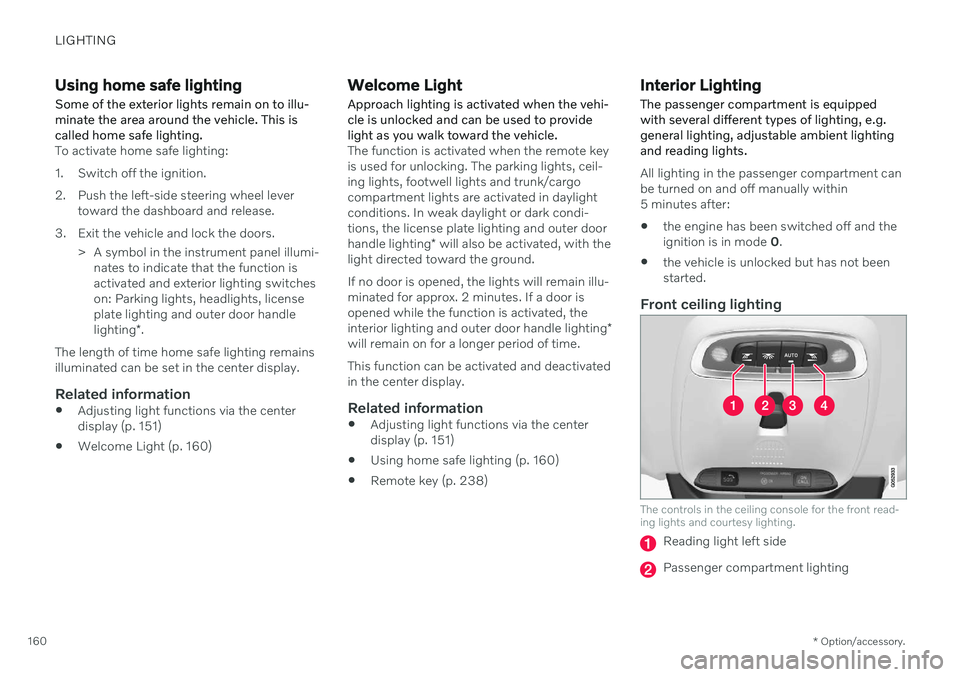
Front ceiling lighting
The controls in the ceiling console for the front read- ing lights and courtesy lighting.
Reading light left side
Passenger compartment lighting
Page 263 of 661
KEY, LOCKS AND ALARM
}}
* Option/accessory.261
Closing and locking the tailgate using the buttons *
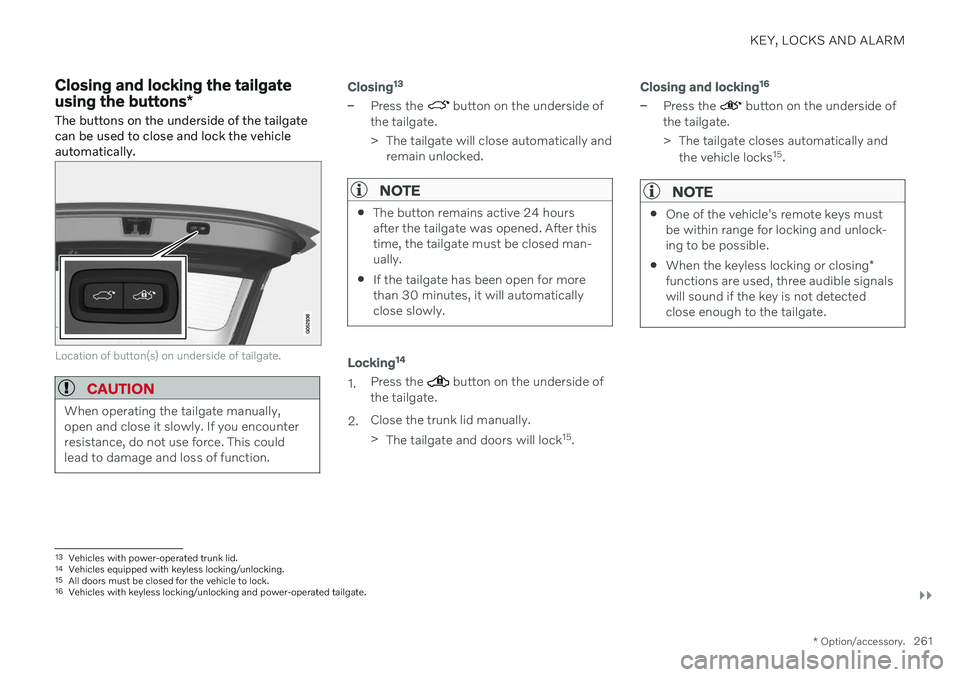
The buttons on the underside of the tailgate can be used to close and lock the vehicleautomatically.
Location of button(s) on underside of tailgate.
CAUTION
When operating the tailgate manually, open and close it slowly. If you encounterresistance, do not use force. This couldlead to damage and loss of function.
Closing 13
–Press the button on the underside of
the tailgate.
> The tailgate will close automatically and remain unlocked.
NOTE
The button remains active 24 hours after the tailgate was opened. After thistime, the tailgate must be closed man-ually.
If the tailgate has been open for morethan 30 minutes, it will automaticallyclose slowly.
Locking 14
1.
Press the button on the underside of
the tailgate.
2. Close the trunk lid manually. >
The tailgate and doors will lock 15
.
Closing and locking 16
–Press the button on the underside of
the tailgate.
> The tailgate closes automatically and
the vehicle locks 15
.
NOTE
One of the vehicle's remote keys must be within range for locking and unlock-ing to be possible.
When the keyless locking or closing
*
functions are used, three audible signalswill sound if the key is not detectedclose enough to the tailgate.
13 Vehicles with power-operated trunk lid.
14 Vehicles equipped with keyless locking/unlocking.
15 All doors must be closed for the vehicle to lock.16Vehicles with keyless locking/unlocking and power-operated tailgate.
Page 264 of 661
||
KEY, LOCKS AND ALARM
* Option/accessory.
262
Interrupting closing
Press the button on the dashboard.
Press the button on the remote key.
Press the close button on the underside of the tailgate 13
.
Press the rubberized pressure plate on the underside of the tailgate's outer handle.
Using a foot movement
*.
Tailgate movement is interrupted and stops.The tailgate can then be opened or closedmanually. If the tailgate stops near the closed position, it will open the next time it is activated.
Pinch protectionIf anything obstructs the tailgate with enoughforce to prevent it from opening or closing,pinch protection will be activated.
When opening - the tailgate will stopmoving and an audible signal will sound.
When closing - the tailgate will stop, along audible signal will sound and the tail-gate will return to the programmed maxi-mum opening position.
WARNING
Be aware of the risk of injury when opening and closing. Before opening or closing, make sure that no one is near the tailgate's range ofmotion. Serious injury could occur. Always operate the tailgate with caution.
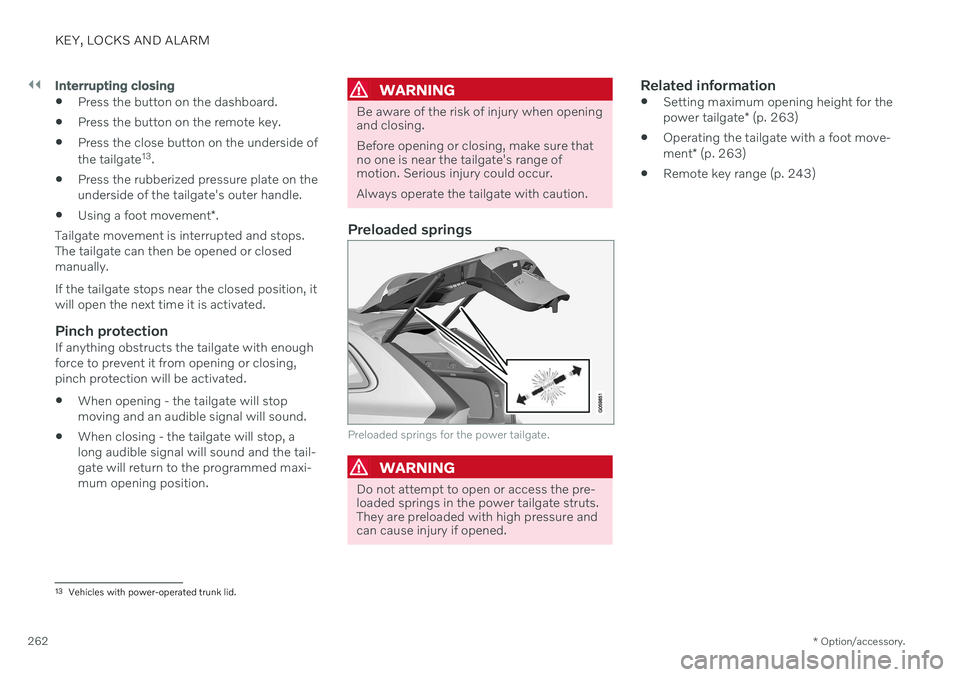
Preloaded springs
Preloaded springs for the power tailgate.
WARNING
Do not attempt to open or access the pre- loaded springs in the power tailgate struts.They are preloaded with high pressure andcan cause injury if opened.
Related information
Setting maximum opening height for the power tailgate
* (p. 263)
Operating the tailgate with a foot move-ment
* (p. 263)
Remote key range (p. 243)
13
Vehicles with power-operated trunk lid.
Page 265 of 661
KEY, LOCKS AND ALARM
}}
* Option/accessory.263
Setting maximum opening height for the power tailgate *
The tailgate can be set to stop opening at a certain height, for example if the tailgateneeds to be opened in a garage with a lowceiling.
Setting maximum opening height1. Open the tailgate manually to the desired opening height.
2. Press the
button on the lower edge of
the tailgate and hold it for about 3 seconds.
> Two audio signals will sound to indicate that the position has been stored.
NOTE
It is not possible to program an opening position lower than half-open tailgate.
Resetting maximum opening position1. Open the tailgate manually to the fully open position.
2. Press the
button on the lower edge of
the tailgate and hold it for about 3 seconds.
> Two audio signals will sound to indicate that the stored position has been erased.
NOTE
If the system has been working contin- uously for a prolonged period of time, itwill be switched off to avoid overload.It can be used again after approxi-mately 2 minutes.
Operating the tailgate with a foot movement
*
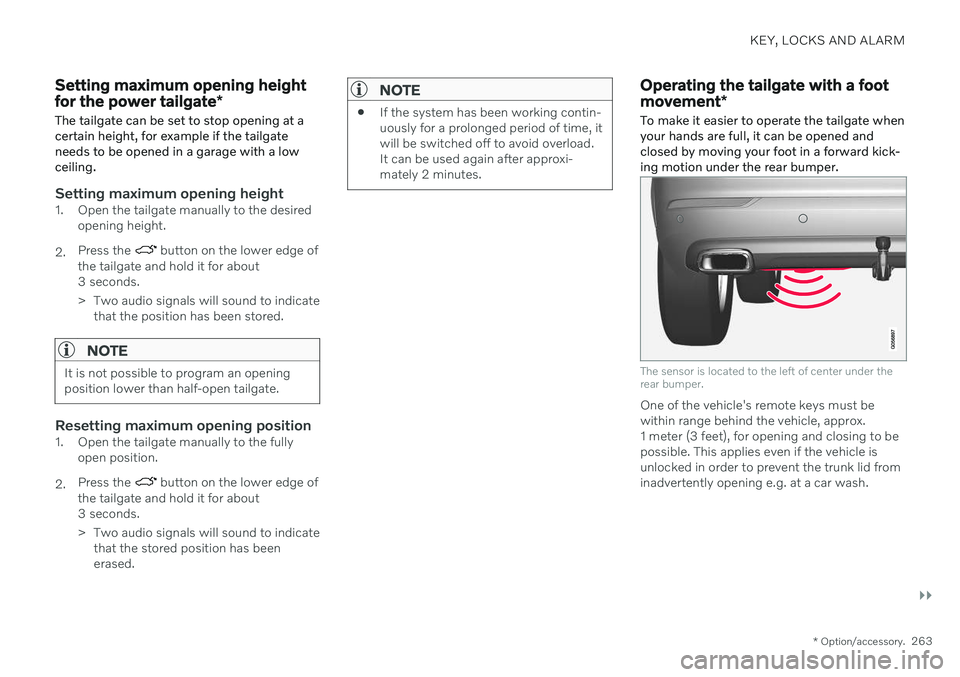
To make it easier to operate the tailgate when your hands are full, it can be opened andclosed by moving your foot in a forward kick-ing motion under the rear bumper.
The sensor is located to the left of center under the rear bumper.
One of the vehicle's remote keys must be within range behind the vehicle, approx.1 meter (3 feet), for opening and closing to bepossible. This applies even if the vehicle isunlocked in order to prevent the trunk lid frominadvertently opening e.g. at a car wash.
Page 541 of 661
WHEELS AND TIRES
}}
539
CAUTION
The vehicle must not be driven with tires of different dimensions or with a spare wheelother than the one that came with the vehi-cle. The use of different size wheels canseriously damage your vehicle's transmis-sion.
Related information
Changing a wheel (p. 534)
Recommended tire pressure (p. 529)
Handling the spare wheel 15
Follow these instructions regarding handling the spare wheel.
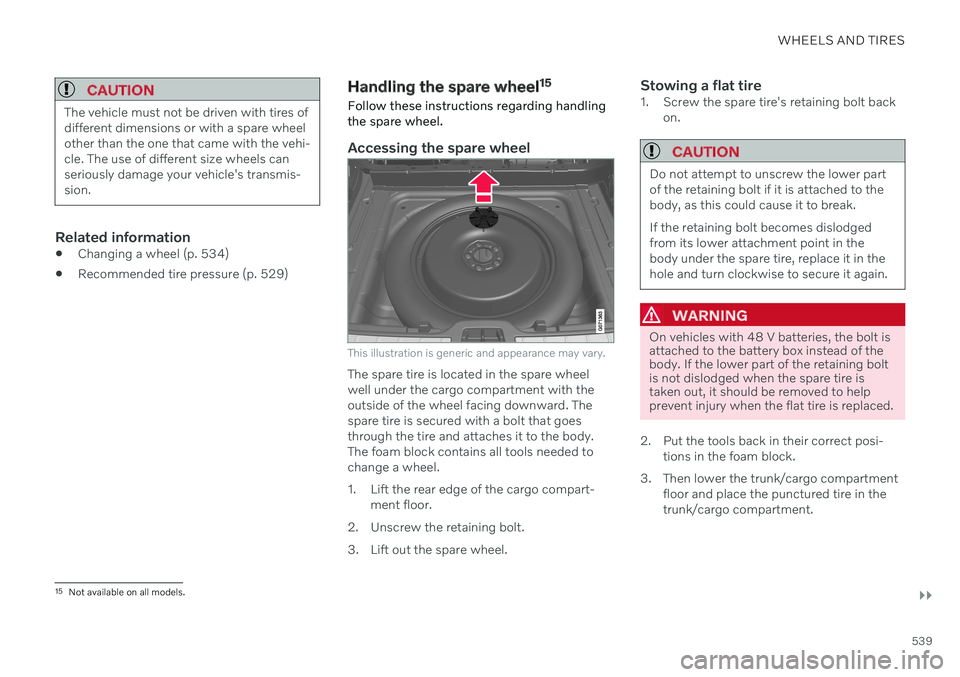
Accessing the spare wheel
This illustration is generic and appearance may vary.
The spare tire is located in the spare wheel well under the cargo compartment with theoutside of the wheel facing downward. Thespare tire is secured with a bolt that goesthrough the tire and attaches it to the body.The foam block contains all tools needed tochange a wheel.
1. Lift the rear edge of the cargo compart- ment floor.
2. Unscrew the retaining bolt.
3. Lift out the spare wheel.
Stowing a flat tire1. Screw the spare tire's retaining bolt back on.
CAUTION
Do not attempt to unscrew the lower part of the retaining bolt if it is attached to thebody, as this could cause it to break. If the retaining bolt becomes dislodged from its lower attachment point in thebody under the spare tire, replace it in thehole and turn clockwise to secure it again.
WARNING
On vehicles with 48 V batteries, the bolt is attached to the battery box instead of thebody. If the lower part of the retaining boltis not dislodged when the spare tire istaken out, it should be removed to helpprevent injury when the flat tire is replaced.
2. Put the tools back in their correct posi- tions in the foam block.
3. Then lower the trunk/cargo compartment floor and place the punctured tire in the trunk/cargo compartment.
15Not available on all models.
Page 554 of 661
LOADING, STORAGE AND PASSENGER COMPARTMENT
* Option/accessory.
552
Electrical outlets
There is a 12 V electrical outlet in the tunnel console and a 12 V electrical outlet * in the
trunk/cargo compartment. If a problem occurs with an electrical socket, contact a workshop - an authorized Volvoworkshop is recommended.
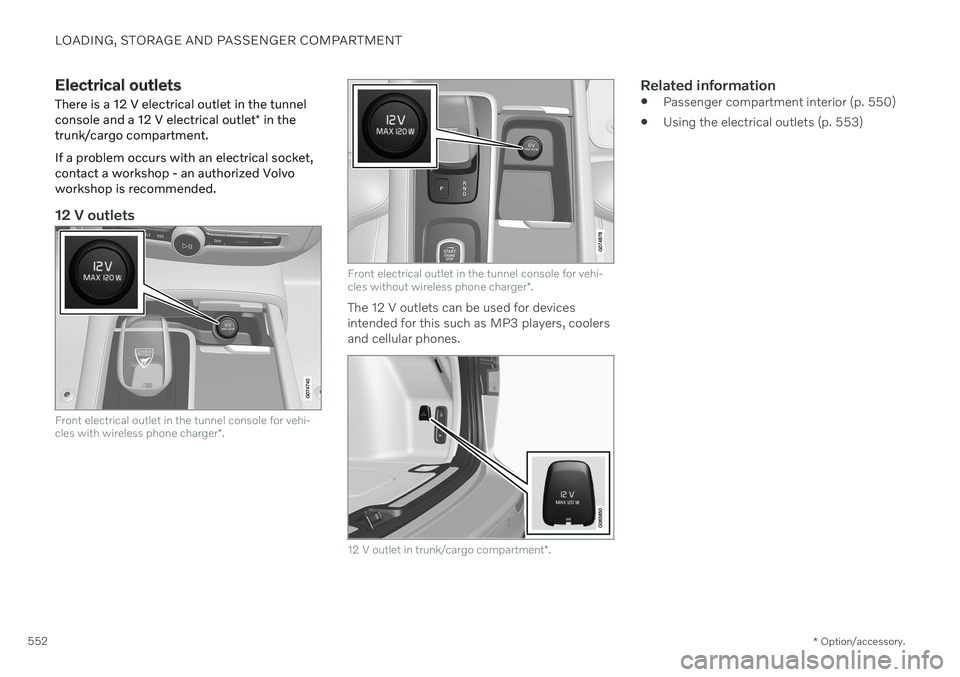
12 V outlets
Front electrical outlet in the tunnel console for vehi- cles with wireless phone charger *.
Front electrical outlet in the tunnel console for vehi- cles without wireless phone charger *.
The 12 V outlets can be used for devices intended for this such as MP3 players, coolersand cellular phones.
12 V outlet in trunk/cargo compartment *.
Related information
Passenger compartment interior (p. 550)
Using the electrical outlets (p. 553)
Page 555 of 661
LOADING, STORAGE AND PASSENGER COMPARTMENT
553
Using the electrical outlets
The 12 V outlet can be used for devices intended for this such as MP3 players, cool-ers and cellular phones.
The ignition must be in at least mode I for the
outlets to supply current. The outlets will then be active as long as there is sufficient chargein the start battery. If the engine is turned off and the vehicle is locked, the outlets will be deactivated. If theengine is turned off and the vehicle remainsunlocked, the sockets will remain active for upto 7 minutes.
NOTE
Bear in mind that using the electrical out- lets when the engine is off could cause thestarter battery to have too low of a chargelevel, which could limit other functionality. Accessories connected to the electrical outlets can be activated even when thevehicle electrical system is off or if precon-ditioning is used. For this reason, discon-nect plugs when they are not in use to pre-vent the starter battery from becoming dis-charged.
WARNING
Do not use accessories with large or heavy plugs – they could damage theoutlet or come loose while you are driv-ing.
Do not use accessories that couldcause disruptions to e.g. the vehicle'sradio receiver or electrical system.
Position the accessory so that there isno risk of it injuring the driver or pas-sengers in the event of heavy brakingor a collision.
Pay attention to connected accessoriesas they can generate heat that couldburn passengers or the interior.
Using 12 V outlets1. Remove the stopper (tunnel console) or
fold down the cover (trunk/cargo com-partment) over the socket and plug in thedevice.
2. Unplug the device and put the stopper back in (tunnel console) or fold up thecover (trunk/cargo compartment) whenthe socket is not in use or left unattended.
CAUTION
The maximum power is 120 W (10 A) per outlet.
Related information
Electrical outlets (p. 552)
Passenger compartment interior (p. 550)
Page 558 of 661
LOADING, STORAGE AND PASSENGER COMPARTMENT
* Option/accessory.
556
Loading recommendations
There are a number of things that are impor- tant to consider when carrying loads in or onthe vehicle.
Load-carrying capacity is determined by the vehicle's curb weight. The total weight of allpassengers and any installed accessoriesreduces the vehicle's load-carrying capacity bythe corresponding amount.
WARNING
The vehicle's driving characteristics change depending on the weight and position ofthe load.
Loading the cargo compartment/trunkKeep the following in mind when loading:
Position objects so they are pressing against the rear seat backrests.
Heavy objects should be positioned as lowas possible. Avoid placing heavy objectson folded-down seat backrests.
Cover sharp corners with a soft cloth orsimilar to help prevent damage to theupholstery.
Use the load anchoring eyelets and ten-sioning straps or similar to secure allobjects.
WARNING
In a head-on collision at a speed of 50 km/h (30 mph), an unsecured objectweighing 20 kg (44 pounds) can reach aprojectile weight equivalent to 1000 kg(2200 pounds).
WARNING
If objects are loaded higher than the upper edge of the side windows, leave a 10 cm(4 in.) space between the objects and thewindow. Objects placed closer to thiscould impede the function of the inflatablecurtain concealed inside the headlining.
WARNING
Always secure the load. Otherwise, it may shift during heavy braking and injure peo-ple in the vehicle. Cover sharp edges and sharp corners with something soft. Turn off the engine and apply the parking brake when loading/unloading longobjects. Otherwise, it is possible for theload to reach the gear lever or gear selectorand move it to a drive position – whichcould cause the vehicle to begin rolling.
Extra cargo space
The rear seat backrests can be folded down to increase cargo space in the cargo compart- ment/trunk and simplify loading. If the rearseat backrests are folded down, make surethat no objects loaded into the vehicle preventthe WHIPS system for the front seats fromfunctioning correctly. A ski hatch in the rear seat can be folded down to carry skis or other long, thin objects.
Related information
Load anchoring eyelets (p. 558)
Folding down the rear seat backrests(p. 192)
Rear seat ski hatch (p. 559)
Roof loads and load carriers (p. 557)
Leveling control
* and suspension (p. 422)
Weights (p. 633)
Page 591 of 661

MAINTENANCE AND SERVICE
}}
589
Fuses and fuseboxes All electrical functions and components are protected by a number of fuses in order toprotect the vehicle's electrical system fromdamage by short circuiting or overloading.
WARNING
Never use a foreign object or a fuse with a higher amperage than that specified toreplace a fuse. This could cause significantdamage to the electrical system and possi-bly lead to a fire.
If any electrical component or function is not responding, the component may have blown afuse due to temporary overload. If the samefuse blows repeatedly, there may be a prob-lem with the component. Volvo recommendscontacting an authorized Volvo workshop tohave the component checked.
Location of fuseboxes
The illustration is generic - appearance may vary according to vehicle model.
Engine compartment
Under the glove compartment
Trunk/cargo compartment
Related information
Replacing fuses (p. 589)
Fuses in the cargo compartment (p. 602)
Fuses in the engine compartment(p. 591)
Fuses under the glove compartment(p. 596)
Replacing fuses
All electrical functions and components are protected by a number of fuses in order toprotect the vehicle's electrical system fromdamage by short circuiting or overloading.
1. Refer to the fuse diagram to locate the fuse.
2. Pull out the fuse and examine it from the side to determine if the curved metal wire in the fuse is intact.
3. If the wire is broken, replace the fuse with a new fuse of the same color and amper-age.
WARNING
Never use a foreign object or a fuse with a higher amperage than that specified toreplace a fuse. This could cause significantdamage to the electrical system and possi-bly lead to a fire.
WARNING
Contact an authorized Volvo workshop for assistance replacing fuses not listed in theOwner's Manual. If fuse replacement isperformed incorrectly, significant damagecan be caused to the electrical system.