ECU VOLVO V60 TWIN ENGINE 2020 Service Manual
[x] Cancel search | Manufacturer: VOLVO, Model Year: 2020, Model line: V60 TWIN ENGINE, Model: VOLVO V60 TWIN ENGINE 2020Pages: 673, PDF Size: 14.2 MB
Page 569 of 673
LOADING, STORAGE AND PASSENGER COMPARTMENT
}}
* Option/accessory.567
WARNING
The vehicle's center of gravity and driving characteristics are altered by roof loads. Follow the vehicle's specifications regar- ding weights and maximum permittedload.
Related information
Loading recommendations (p. 565)
Weights (p. 645)
Grocery bag holders Grocery bag holders (hooks) help keep shop- ping bags in place and prevent them fromfalling over and spilling their contents in thecargo compartment.
On the sides of the cargo compartment
There are two grocery bag holders in the side panel on each side of the cargo compartment.
CAUTION
The grocery bag holders are only intended to hold weights up to 5 kg (11 lbs).
Under the floor hatch
*
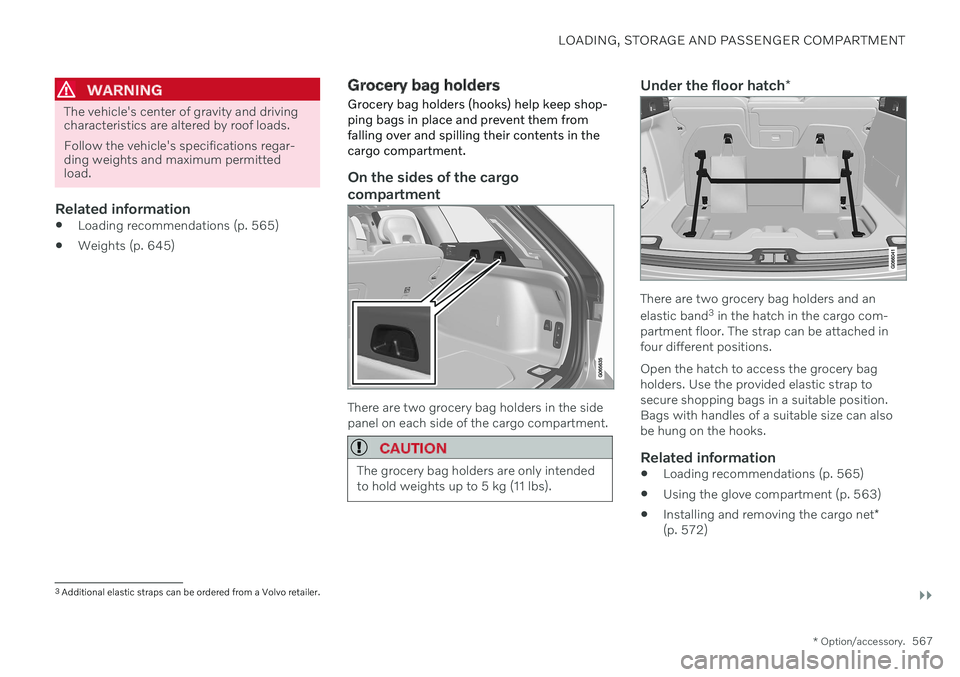
There are two grocery bag holders and an elastic band3
in the hatch in the cargo com-
partment floor. The strap can be attached in four different positions. Open the hatch to access the grocery bag holders. Use the provided elastic strap tosecure shopping bags in a suitable position.Bags with handles of a suitable size can alsobe hung on the hooks.
Related information
Loading recommendations (p. 565)
Using the glove compartment (p. 563)
Installing and removing the cargo net
*
(p. 572)
3 Additional elastic straps can be ordered from a Volvo retailer.
Page 570 of 673
LOADING, STORAGE AND PASSENGER COMPARTMENT
* Option/accessory.
568
Installing and removing the cargo com- partment cover
* (p. 569)
Installing and removing the steel cargogrid
* (p. 571)
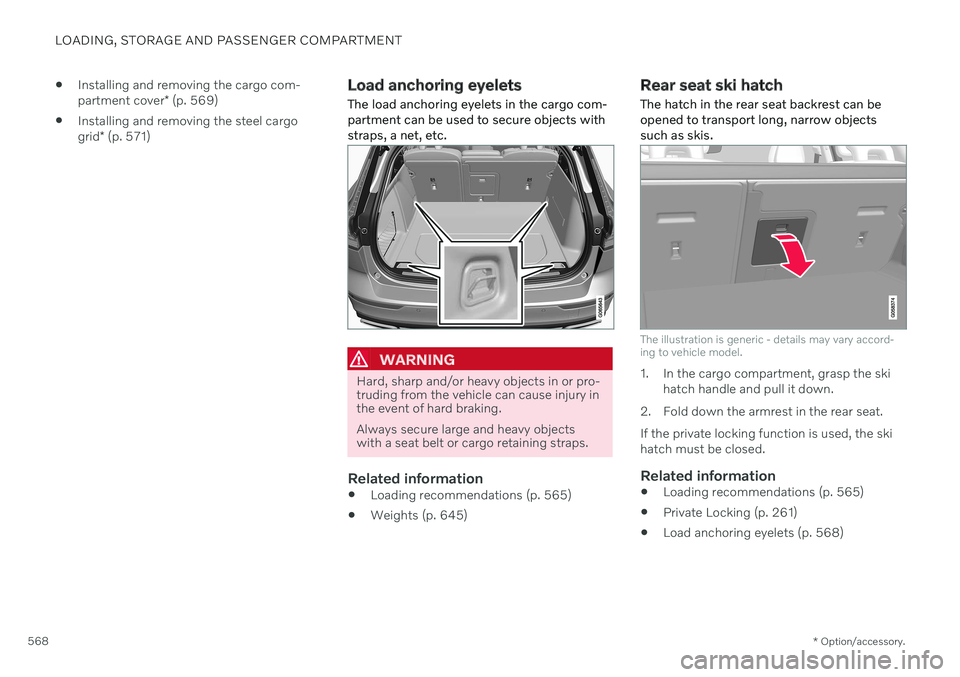
Load anchoring eyelets The load anchoring eyelets in the cargo com- partment can be used to secure objects withstraps, a net, etc.
WARNING
Hard, sharp and/or heavy objects in or pro- truding from the vehicle can cause injury inthe event of hard braking. Always secure large and heavy objects with a seat belt or cargo retaining straps.
Related information
Loading recommendations (p. 565)
Weights (p. 645)
Rear seat ski hatch
The hatch in the rear seat backrest can be opened to transport long, narrow objectssuch as skis.
The illustration is generic - details may vary accord- ing to vehicle model.
1. In the cargo compartment, grasp the ski hatch handle and pull it down.
2. Fold down the armrest in the rear seat. If the private locking function is used, the ski hatch must be closed.
Related information
Loading recommendations (p. 565)
Private Locking (p. 261)
Load anchoring eyelets (p. 568)
Page 571 of 673
LOADING, STORAGE AND PASSENGER COMPARTMENT
}}
* Option/accessory.569
Installing and removing the cargo compartment cover *
The cover can be rolled out to conceal objects in the cargo compartment.
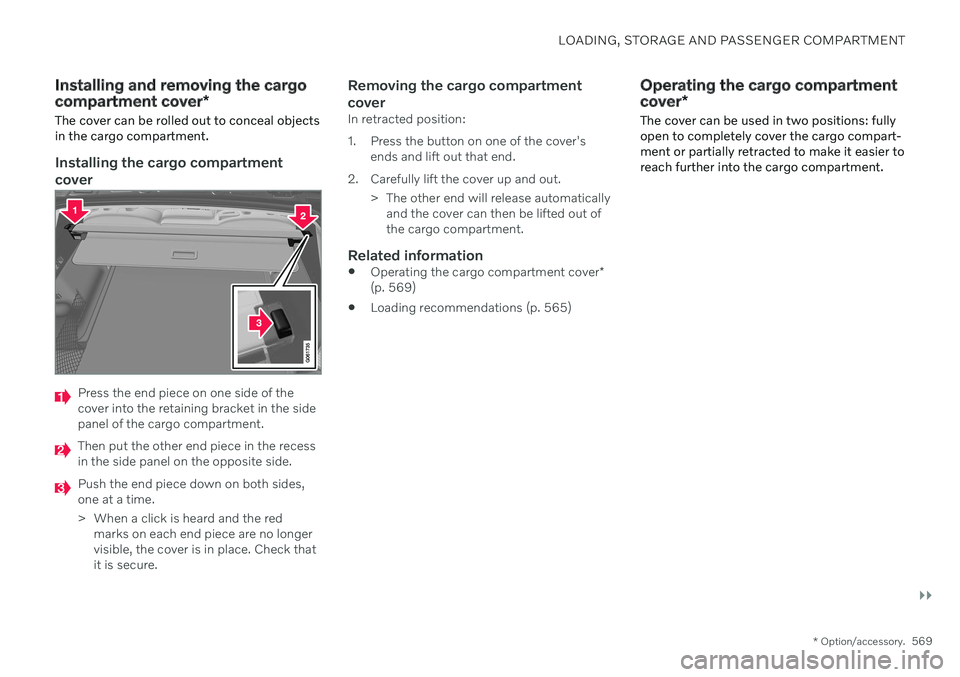
Installing the cargo compartment cover
Press the end piece on one side of the cover into the retaining bracket in the sidepanel of the cargo compartment.
Then put the other end piece in the recess in the side panel on the opposite side.
Push the end piece down on both sides, one at a time.
> When a click is heard and the red marks on each end piece are no longer visible, the cover is in place. Check thatit is secure.
Removing the cargo compartment cover
In retracted position:
1. Press the button on one of the cover's ends and lift out that end.
2. Carefully lift the cover up and out. > The other end will release automaticallyand the cover can then be lifted out of the cargo compartment.
Related information
Operating the cargo compartment cover
*
(p. 569)
Loading recommendations (p. 565)
Operating the cargo compartment cover
*
The cover can be used in two positions: fully open to completely cover the cargo compart-ment or partially retracted to make it easier toreach further into the cargo compartment.
Page 572 of 673
||
LOADING, STORAGE AND PASSENGER COMPARTMENT
* Option/accessory.
570
Fully open
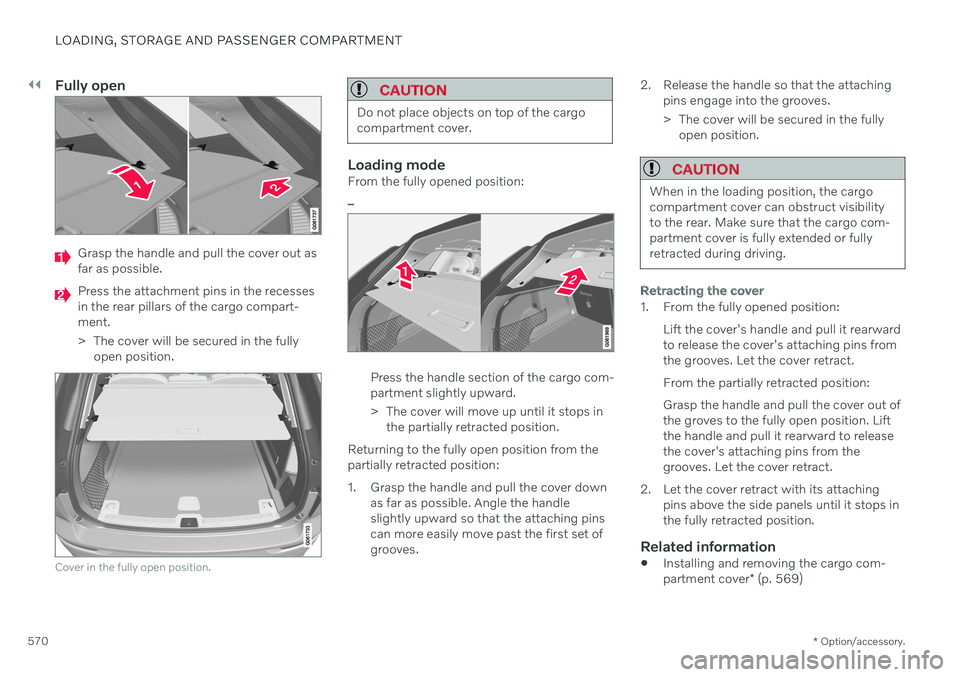
Grasp the handle and pull the cover out as far as possible.
Press the attachment pins in the recesses in the rear pillars of the cargo compart-ment.
> The cover will be secured in the fully
open position.
Cover in the fully open position.
CAUTION
Do not place objects on top of the cargo compartment cover.
Loading modeFrom the fully opened position:
–
Press the handle section of the cargo com- partment slightly upward.
> The cover will move up until it stops in the partially retracted position.
Returning to the fully open position from the partially retracted position:
1. Grasp the handle and pull the cover down as far as possible. Angle the handle slightly upward so that the attaching pinscan more easily move past the first set ofgrooves. 2. Release the handle so that the attaching
pins engage into the grooves.
> The cover will be secured in the fullyopen position.
CAUTION
When in the loading position, the cargo compartment cover can obstruct visibilityto the rear. Make sure that the cargo com-partment cover is fully extended or fullyretracted during driving.
Retracting the cover
1. From the fully opened position:
Lift the cover's handle and pull it rearward to release the cover's attaching pins fromthe grooves. Let the cover retract. From the partially retracted position:Grasp the handle and pull the cover out of the groves to the fully open position. Liftthe handle and pull it rearward to releasethe cover's attaching pins from thegrooves. Let the cover retract.
2. Let the cover retract with its attaching pins above the side panels until it stops inthe fully retracted position.
Related information
Installing and removing the cargo com- partment cover
* (p. 569)
Page 573 of 673
LOADING, STORAGE AND PASSENGER COMPARTMENT
}}
* Option/accessory.571
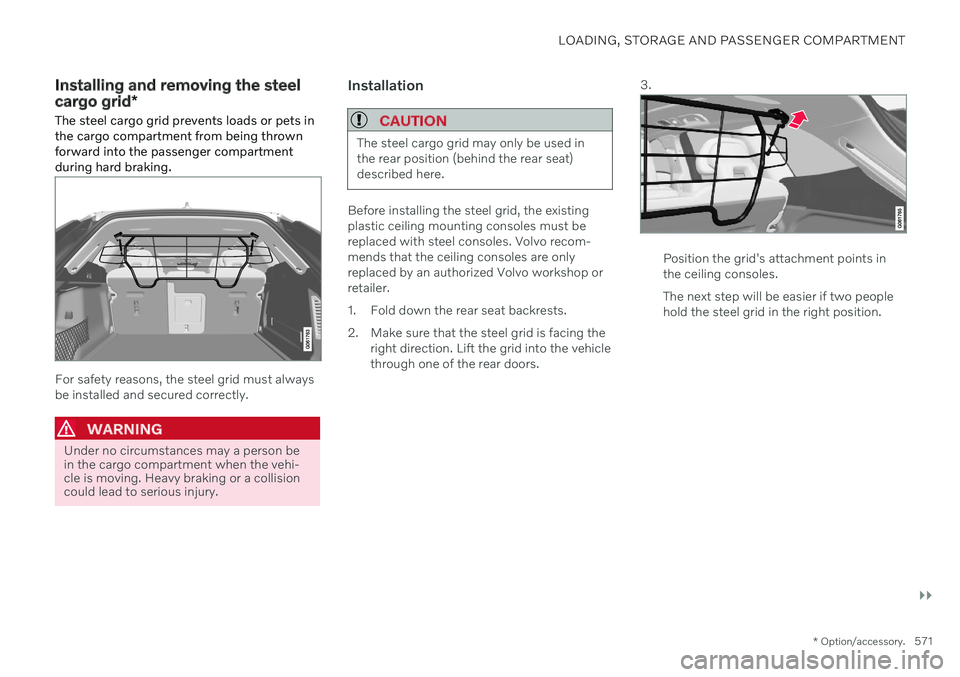
Installing and removing the steel cargo grid*
The steel cargo grid prevents loads or pets in the cargo compartment from being thrownforward into the passenger compartmentduring hard braking.
For safety reasons, the steel grid must always be installed and secured correctly.
WARNING
Under no circumstances may a person be in the cargo compartment when the vehi-cle is moving. Heavy braking or a collisioncould lead to serious injury.
Installation
CAUTION
The steel cargo grid may only be used in the rear position (behind the rear seat)described here.
Before installing the steel grid, the existing plastic ceiling mounting consoles must bereplaced with steel consoles. Volvo recom-mends that the ceiling consoles are onlyreplaced by an authorized Volvo workshop orretailer.
1. Fold down the rear seat backrests.
2. Make sure that the steel grid is facing the right direction. Lift the grid into the vehicle through one of the rear doors. 3.
Position the grid's attachment points in the ceiling consoles. The next step will be easier if two people hold the steel grid in the right position.
Page 574 of 673
||
LOADING, STORAGE AND PASSENGER COMPARTMENT
* Option/accessory.
572 4.
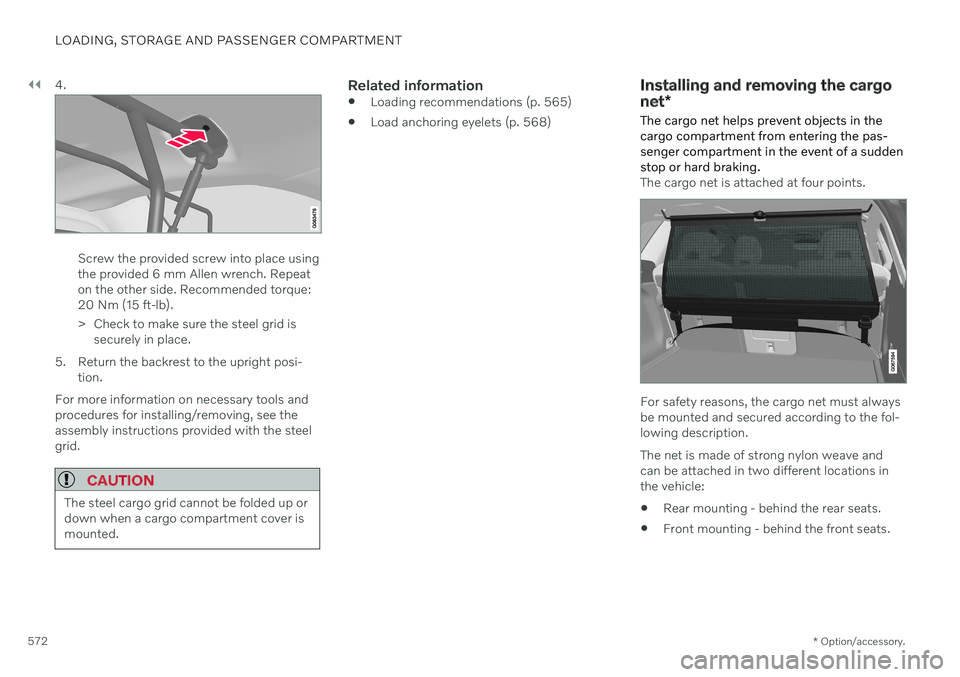
Screw the provided screw into place using the provided 6 mm Allen wrench. Repeaton the other side. Recommended torque:20 Nm (15 ft-lb).
> Check to make sure the steel grid is
securely in place.
5. Return the backrest to the upright posi- tion.
For more information on necessary tools and procedures for installing/removing, see theassembly instructions provided with the steelgrid.
CAUTION
The steel cargo grid cannot be folded up or down when a cargo compartment cover ismounted.
Related information
Loading recommendations (p. 565)
Load anchoring eyelets (p. 568)
Installing and removing the cargo net
*
The cargo net helps prevent objects in the cargo compartment from entering the pas-senger compartment in the event of a suddenstop or hard braking.
The cargo net is attached at four points.
For safety reasons, the cargo net must always be mounted and secured according to the fol-lowing description. The net is made of strong nylon weave and can be attached in two different locations inthe vehicle:
Rear mounting - behind the rear seats.
Front mounting - behind the front seats.
Page 575 of 673
LOADING, STORAGE AND PASSENGER COMPARTMENT
}}
573
WARNING
Objects in the cargo compartment must always be securely anchored, even with acorrectly installed cargo net.
Installing the cargo net
WARNING
All of the cargo net's upper consoles, hooks and straps must be securely moun-ted and attached before the net is used. Never use the net if it is damaged.
NOTE
With front mounting, the cargo net is most easily installed via a rear door.
1. Fold out the cargo net and make sure thatthe upper rod folds out and locks into position.
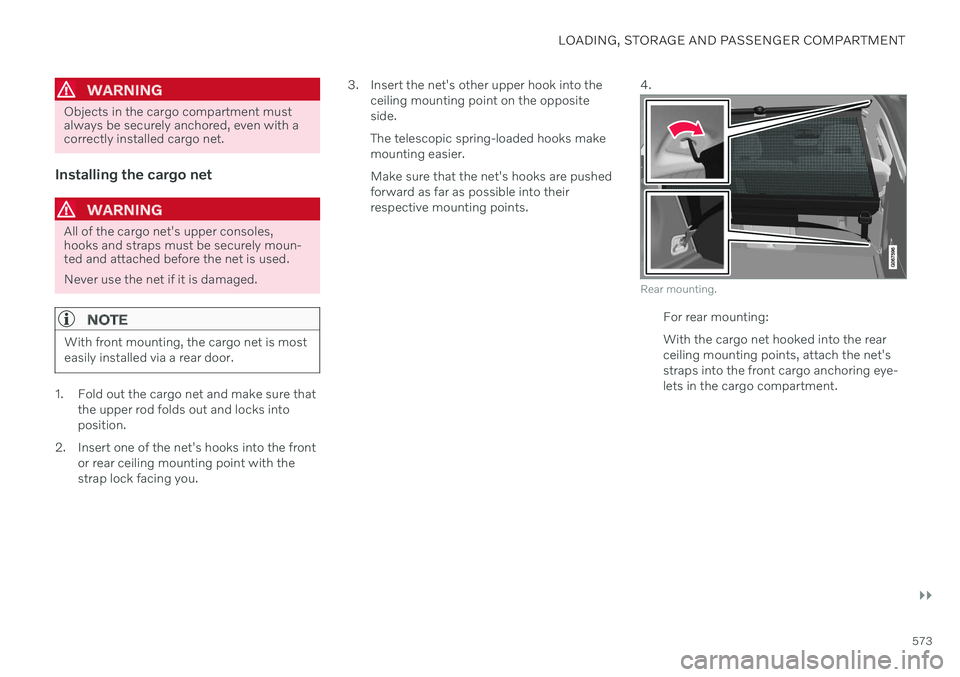
2. Insert one of the net's hooks into the front or rear ceiling mounting point with thestrap lock facing you. 3. Insert the net's other upper hook into the
ceiling mounting point on the oppositeside. The telescopic spring-loaded hooks make mounting easier. Make sure that the net's hooks are pushed forward as far as possible into theirrespective mounting points. 4.
Rear mounting.
For rear mounting: With the cargo net hooked into the rear ceiling mounting points, attach the net'sstraps into the front cargo anchoring eye-lets in the cargo compartment.
Page 588 of 673

||
MAINTENANCE AND SERVICE
586
Swipe your hand from left to right under the hood, grasp the handle and move it upand to the side to release the catch and liftthe hood.
Warning - hood not closedWhen the hood is released, a warn-ing symbol and graphic will be dis-played in the instrument panel andan audible signal will sound. If the
vehicle begins to roll, the audible signal will berepeated several times.
NOTE
If the warning symbol is illuminated or an audible warning signal sounds even thoughthe hood is securely closed, consult aworkshop - an authorized Volvo workshopis recommended.
Closing the hood1. Press down the hood until it begins to close under its own weight.
2. When the hood reaches the catch at the handle in the front edge of the vehicle, press down on the hood to close it com-pletely.
WARNING
Risk of injury! When closing, make sure that the hood is completely unobstructedand that no one can be injured.
WARNING
Make sure the hood locks securely after closing. It must audibly lock on both sides.
Hood not completely closed.
Hood completely closed.
WARNING
Never drive with the hood open! If this symbol appears, or anything else indicatesthat the hood is not com-pletely closed while driv-ing, stop immediately and
close it properly.
Related information
Engine compartment overview (p. 587)
Door and seat belt reminders (p. 51)
Page 595 of 673

MAINTENANCE AND SERVICE
}}
593
Start battery
The vehicle has a single-pole electrical sys- tem that uses the chassis and engine mountas conductors. The start battery is used to start the electrical system and power electrical equipment in thevehicle. The hybrid battery is used to start thecombustion engine. The start battery should only be replaced by a workshop 17
.
The start battery is a 12 V AGM (Absorbed Glass Mat) battery, dimensioned for regenera-tive charging and to support the function ofthe vehicle's various systems. The service life and performance of the start battery are affected by factors such as drivingstyle, driving conditions, climate, battery dis-charges, number of starts, etc. Never disconnect the start battery while the engine is running.
Make sure the cables to the start batteryare correctly connected and the clampsare securely tightened.
WARNING
Batteries generate hydrogen gas, which is flammable and explosive.
Do not connect the jumper cable toany part of the fuel system or to anymoving parts. Avoid touching hotmanifolds.
Battery fluid contains sulfuric acid. Donot allow battery fluid to contact eyes,skin, fabrics or painted surfaces.
If contact occurs, flush the affectedarea immediately with water. Obtainmedical help immediately if eyes areaffected.
Never expose the battery to open flameor electric spark. Do not smoke nearthe battery. Failure to follow theinstructions for jump starting can leadto injury.
Connection points
WARNING
California Proposition 65 Operating, servicing and maintaining a pas- senger vehicle can expose you to chemi-cals including engine exhaust, carbon mon-oxide, phthalates, and lead, which areknown to the State of California to causecancer and birth defects or other reproduc-tive harm. To minimize exposure, avoidbreathing exhaust, do not idle the engineexcept as necessary, service your vehicle ina well ventilated area and wear gloves orwash your hands frequently when servicingyour vehicle. For more information go towww.P65Warnings.ca.gov/passenger-vehicle.
Use the vehicle's connection points in the engine compartment to connect an externalstart battery or battery charger. The battery terminals on the car's start battery in the luggage/cargo area must not be used.
17
An authorized Volvo workshop is recommended.
Page 597 of 673
MAINTENANCE AND SERVICE
}}
595
NOTE
If the starter battery becomes discharged too many times, it will shorten its servicelife. The service life of the starter battery is affected by several factors, such as drivingconditions and climate. The startingcapacity of the battery reduces graduallyover time. The battery must therefore berecharged if the vehicle is not used or along period of time or if it is only drivenshort distances. Severe cold further limitsthe starting capacity. To keep the starter battery in a good condi- tion, the vehicle should be driven at least15 minutes per week or the battery shouldbe connected to a battery charger withautomatic trickle charging. A starter battery that is always kept fully charged has the maximum service life.Location
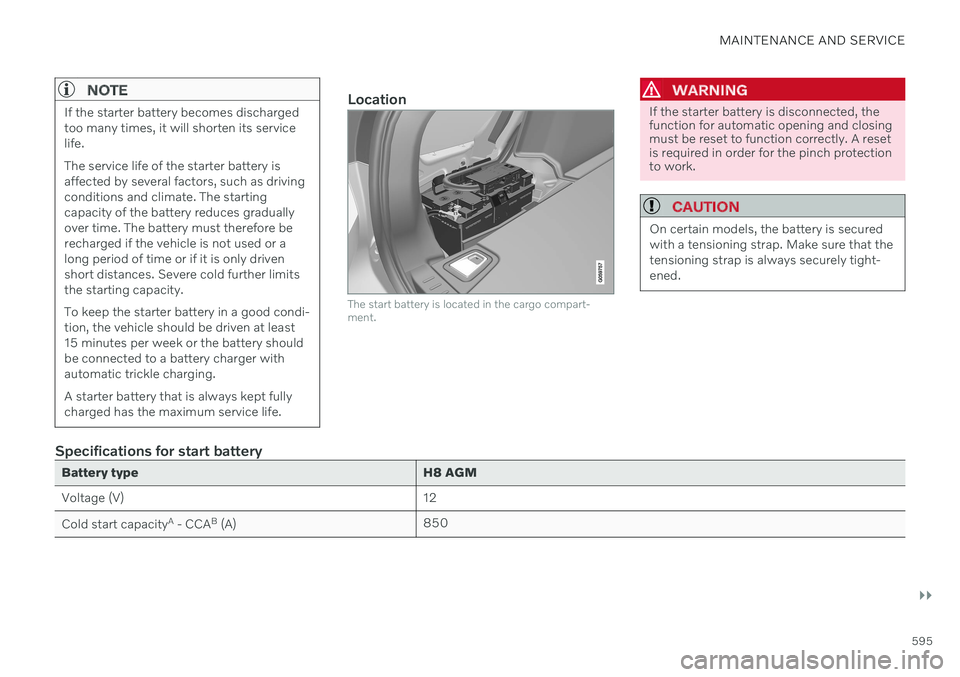
The start battery is located in the cargo compart- ment.
WARNING
If the starter battery is disconnected, the function for automatic opening and closingmust be reset to function correctly. A resetis required in order for the pinch protectionto work.
CAUTION
On certain models, the battery is secured with a tensioning strap. Make sure that thetensioning strap is always securely tight-ened.
Specifications for start battery
Battery typeH8 AGM
Voltage (V) 12
Cold start capacity A
- CCA B
(A) 850