lock VOLVO V70 1999 Owners Manual
[x] Cancel search | Manufacturer: VOLVO, Model Year: 1999, Model line: V70, Model: VOLVO V70 1999Pages: 61, PDF Size: 0.88 MB
Page 5 of 61
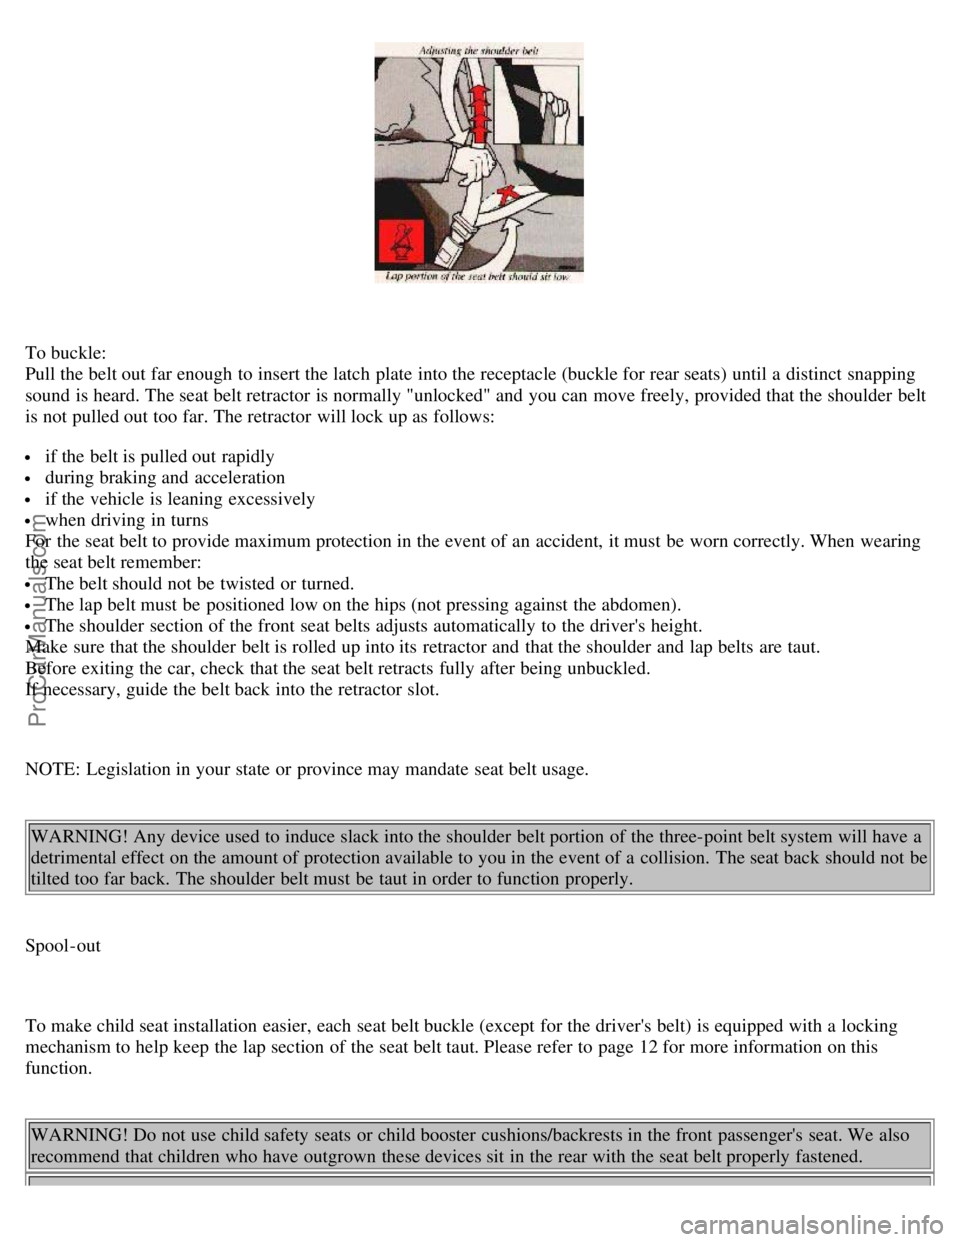
To buckle:
Pull the belt out far enough to insert the latch plate into the receptacle (buckle for rear seats) until a distinct snapping
sound is heard. The seat belt retractor is normally "unlocked" and you can move freely, provided that the shoulder belt
is not pulled out too far. The retractor will lock up as follows:
if the belt is pulled out rapidly
during braking and acceleration
if the vehicle is leaning excessively
when driving in turns
For the seat belt to provide maximum protection in the event of an accident, it must be worn correctly. When wearing
the seat belt remember:
The belt should not be twisted or turned.
The lap belt must be positioned low on the hips (not pressing against the abdomen).
The shoulder section of the front seat belts adjusts automatically to the driver's height.
Make sure that the shoulder belt is rolled up into its retractor and that the shoulder and lap belts are taut.
Before exiting the car, check that the seat belt retracts fully after being unbuckled.
If necessary, guide the belt back into the retractor slot.
NOTE: Legislation in your state or province may mandate seat belt usage.
WARNING! Any device used to induce slack into the shoulder belt portion of the three-point belt system will have a
detrimental effect on the amount of protection available to you in the event of a collision. The seat back should not be
tilted too far back. The shoulder belt must be taut in order to function properly.
Spool-out
To make child seat installation easier, each seat belt buckle (except for the driver's belt) is equipped with a locking
mechanism to help keep the lap section of the seat belt taut. Please refer to page 12 for more information on this
function. WARNING! Do not use child safety seats or child booster cushions/backrests in the front passenger's seat. We also
recommend that children who have outgrown these devices sit in the rear with the seat belt properly fastened.
ProCarManuals.com
Page 9 of 61
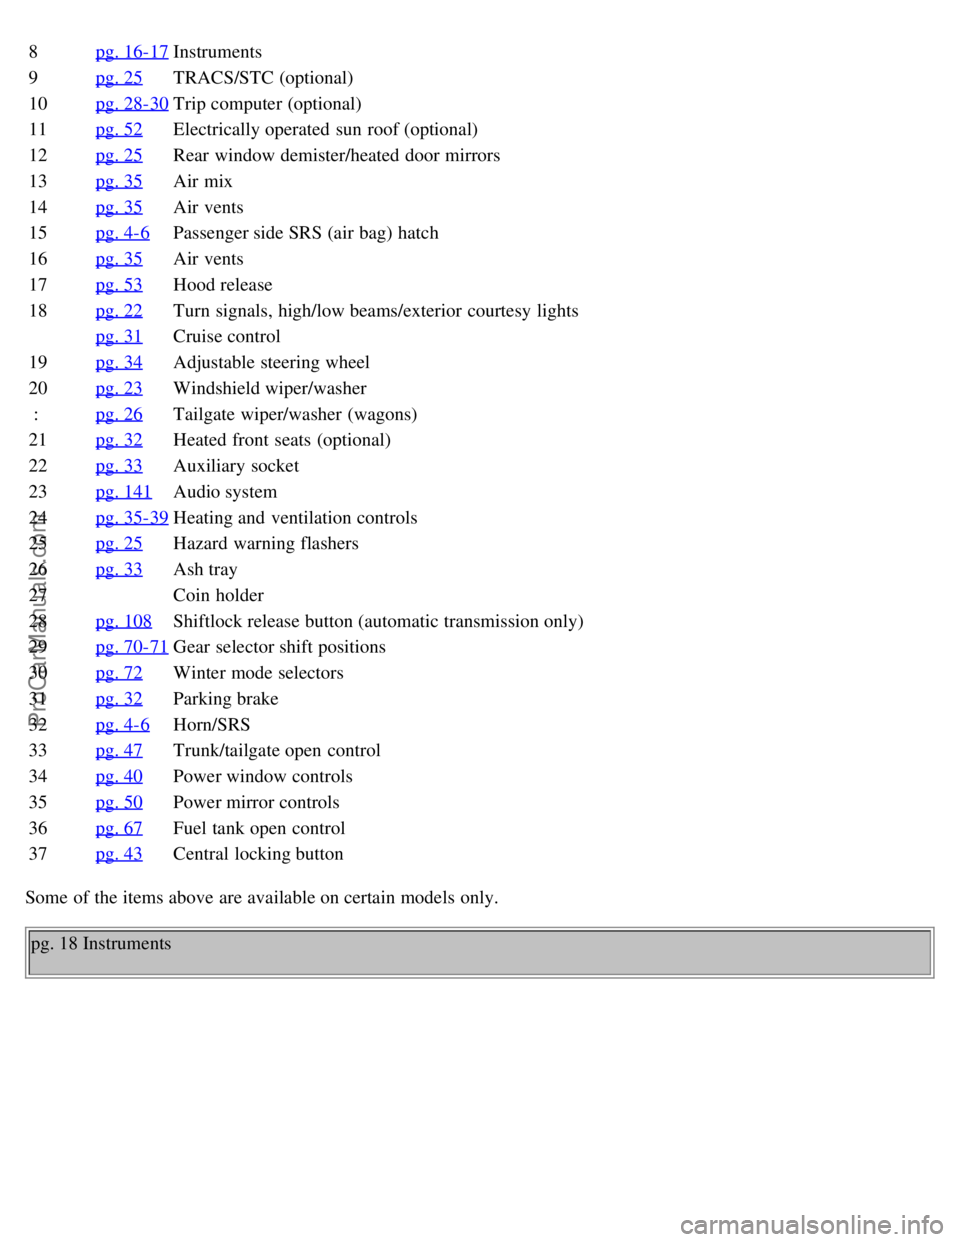
8pg. 16-17Instruments
9pg. 25TRACS/STC (optional)
10 pg. 28-30
Trip computer (optional)
11 pg. 52
Electrically operated sun roof (optional)
12 pg. 25
Rear window demister/heated door mirrors
13 pg. 35
Air mix
14 pg. 35
Air vents
15 pg. 4-6
Passenger side SRS (air bag) hatch
16 pg. 35
Air vents
17 pg. 53
Hood release
18 pg. 22
Turn signals, high/low beams/exterior courtesy lights
pg. 31
Cruise control
19 pg. 34
Adjustable steering wheel
20 pg. 23
Windshield wiper/washer
: pg. 26
Tailgate wiper/washer (wagons)
21 pg. 32
Heated front seats (optional)
22 pg. 33
Auxiliary socket
23 pg. 141
Audio system
24 pg. 35-39
Heating and ventilation controls
25 pg. 25
Hazard warning flashers
26 pg. 33
Ash tray
27 Coin holder
28 pg. 108
Shiftlock release button (automatic transmission only)
29 pg. 70-71
Gear selector shift positions
30 pg. 72
Winter mode selectors
31 pg. 32
Parking brake
32 pg. 4-6
Horn/SRS
33 pg. 47
Trunk/tailgate open control
34 pg. 40
Power window controls
35 pg. 50
Power mirror controls
36 pg. 67
Fuel tank open control
37 pg. 43
Central locking button
Some of the items above are available on certain models only.
pg. 18 Instruments
ProCarManuals.com
Page 10 of 61
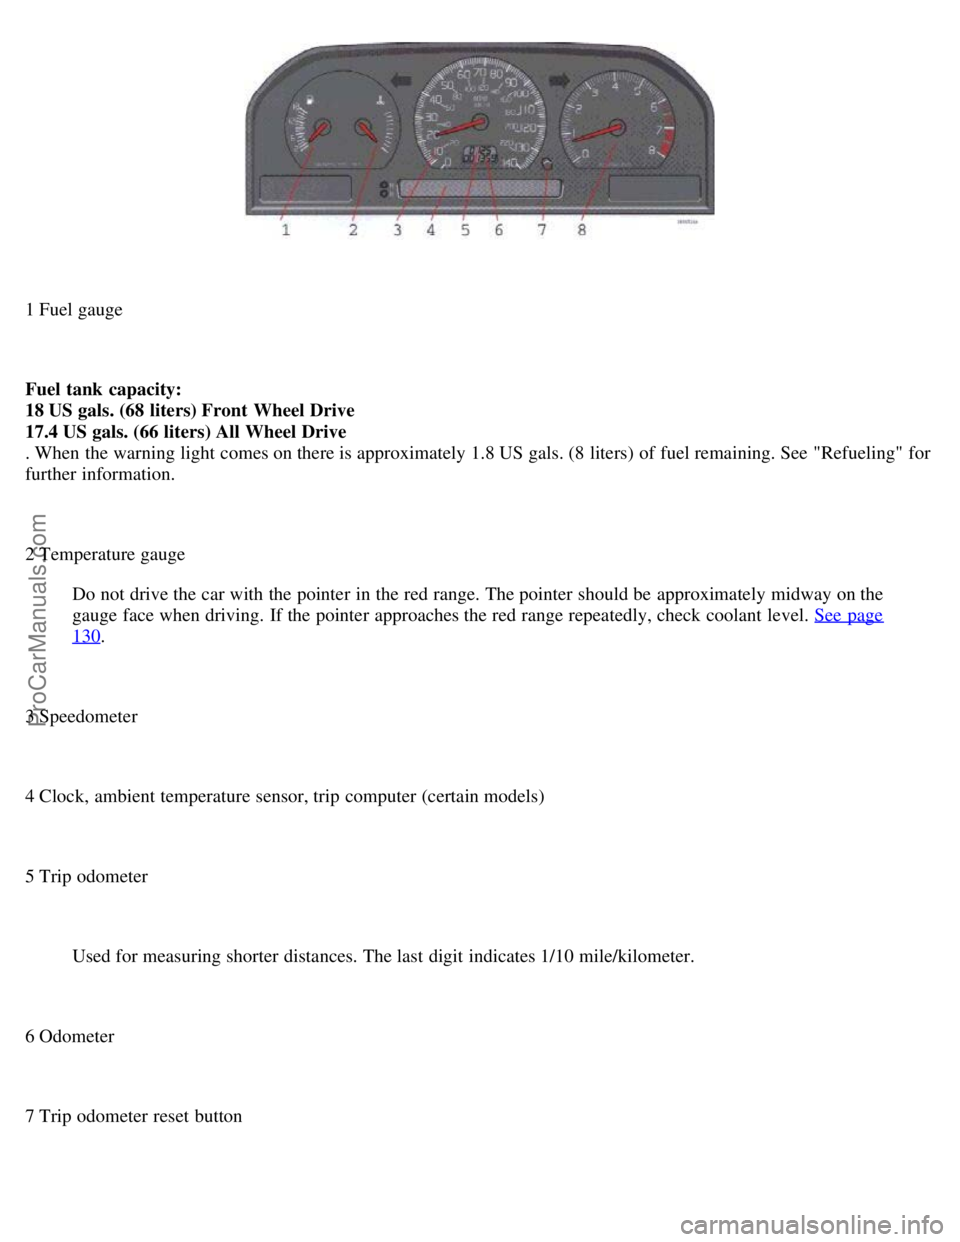
1 Fuel gauge
Fuel tank capacity:
18 US gals. (68 liters) Front Wheel Drive
17.4 US gals. (66 liters) All Wheel Drive
. When the warning light comes on there is approximately 1.8 US gals. (8 liters) of fuel remaining. See "Refueling" for
further information.
2 Temperature gauge Do not drive the car with the pointer in the red range. The pointer should be approximately midway on the
gauge face when driving. If the pointer approaches the red range repeatedly, check coolant level. See page
130.
3 Speedometer
4 Clock, ambient temperature sensor, trip computer (certain models)
5 Trip odometer Used for measuring shorter distances. The last digit indicates 1/10 mile/kilometer.
6 Odometer
7 Trip odometer reset button
ProCarManuals.com
Page 12 of 61
Chapter 3 - Body and interior
pg. 41 Body and interior
Body and interior
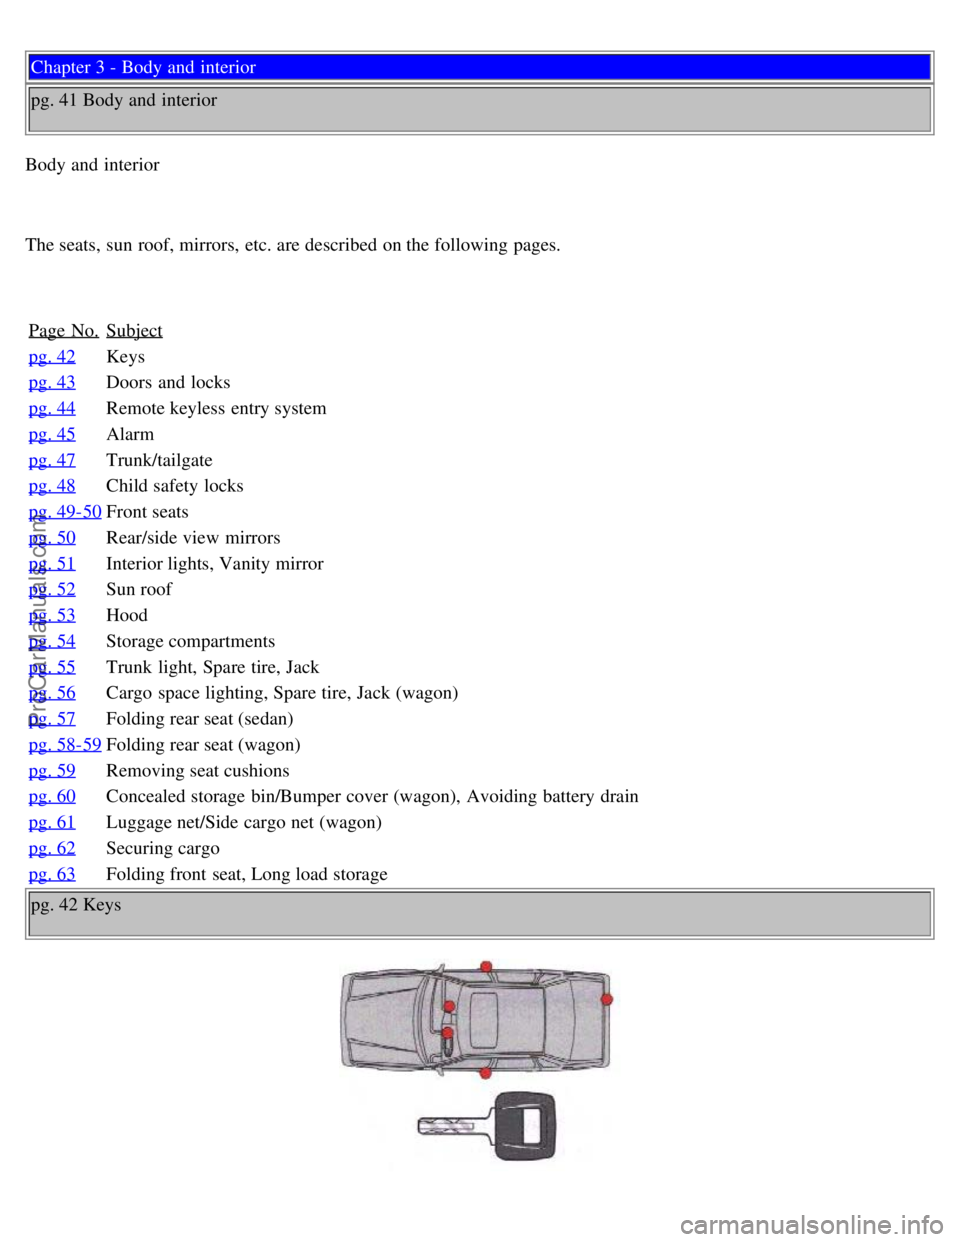
The seats, sun roof, mirrors, etc. are described on the following pages.
Page No.
Subject
pg. 42Keys
pg. 43
Doors and locks
pg. 44
Remote keyless entry system
pg. 45
Alarm
pg. 47
Trunk/tailgate
pg. 48
Child safety locks
pg. 49-50
Front seats
pg. 50
Rear/side view mirrors
pg. 51
Interior lights, Vanity mirror
pg. 52
Sun roof
pg. 53
Hood
pg. 54
Storage compartments
pg. 55
Trunk light, Spare tire, Jack
pg. 56
Cargo space lighting, Spare tire, Jack (wagon)
pg. 57
Folding rear seat (sedan)
pg. 58-59
Folding rear seat (wagon)
pg. 59
Removing seat cushions
pg. 60
Concealed storage bin/Bumper cover (wagon), Avoiding battery drain
pg. 61
Luggage net/Side cargo net (wagon)
pg. 62
Securing cargo
pg. 63
Folding front seat, Long load storage
pg. 42 Keys
ProCarManuals.com
Page 13 of 61
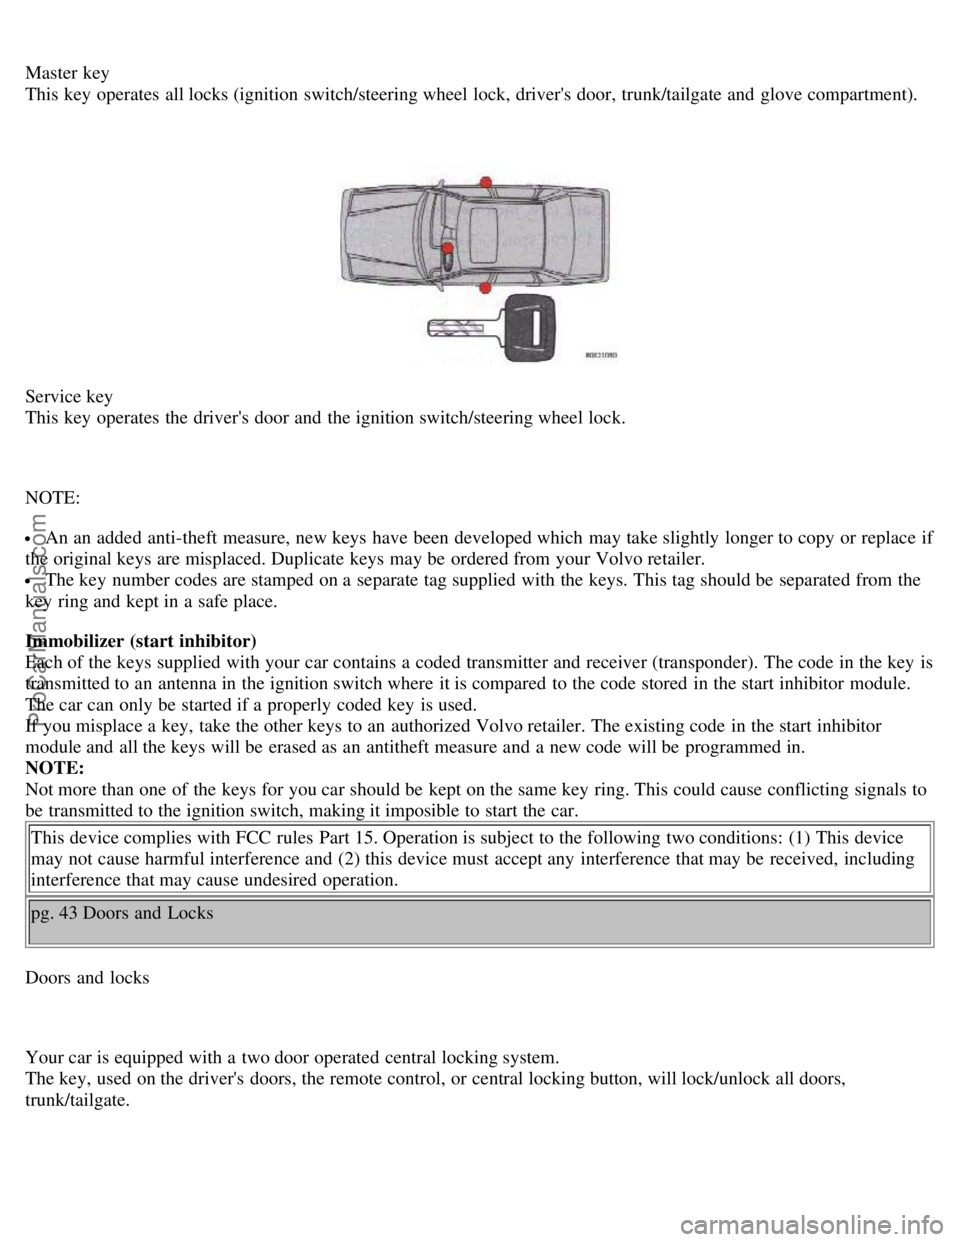
Master key
This key operates all locks (ignition switch/steering wheel lock, driver's door, trunk/tailgate and glove compartment).
Service key
This key operates the driver's door and the ignition switch/steering wheel lock.
NOTE:
An an added anti-theft measure, new keys have been developed which may take slightly longer to copy or replace if
the original keys are misplaced. Duplicate keys may be ordered from your Volvo retailer.
The key number codes are stamped on a separate tag supplied with the keys. This tag should be separated from the
key ring and kept in a safe place.
Immobilizer (start inhibitor)
Each of the keys supplied with your car contains a coded transmitter and receiver (transponder). The code in the key is
transmitted to an antenna in the ignition switch where it is compared to the code stored in the start inhibitor module.
The car can only be started if a properly coded key is used.
If you misplace a key, take the other keys to an authorized Volvo retailer. The existing code in the start inhibitor
module and all the keys will be erased as an antitheft measure and a new code will be programmed in.
NOTE:
Not more than one of the keys for you car should be kept on the same key ring. This could cause conflicting signals to
be transmitted to the ignition switch, making it imposible to start the car.
This device complies with FCC rules Part 15. Operation is subject to the following two conditions: (1) This device
may not cause harmful interference and (2) this device must accept any interference that may be received, including
interference that may cause undesired operation.
pg. 43 Doors and Locks
Doors and locks
Your car is equipped with a two door operated central locking system.
The key, used on the driver's doors, the remote control, or central locking button, will lock/unlock all doors,
trunk/tailgate.
ProCarManuals.com
Page 14 of 61

Turn the key once to unlock the driver's door only.
Turn the key again (within 10 seconds) to unlock all doors, trunk/tailgate.
One turn with the key towards lock in the drivers door locks all doors, trunk/tailgate.
Use the switch on the front door armrests to lock/unlock the car from the inside.
Check the action of the buttons on the other doors to verify their correct function (lock/unlock).WARNING! The doors should not be locked while driving. In case of an accident, this may hinder rapid access to
the occupants of the vehicle. (Also see information on "Child safety locks".)
Central locking button (on both front doors)
Central locking button
The central locking buttons on both front door armrests can be used to lock or unlock all doors and trunk/tailgate and
set the alram if your car is so equipped. This switch functions even if a door/trunk/tailgate is open.
Lock: Press the left side of the button
Unlock: Press the right side of the button
NOTE: To help prevent accidentally locking the keys in the car, the central locking system is designed to unlock the
driver's door immediately if the key is left in the ignition switch and the car is locked using the lock button on the
door. A sound from the lock will be audible at this time.
Please note that this function will not unlock the doors if the engine is running. pg. 44 Remote keyless entry system
ProCarManuals.com
Page 15 of 61

Remote keyless entry system
Your car is equipped with a remote control transmitter. This transmitter uses a readio frequency which will allow
“keyless” entry into the passenger compartment or the trunk. You will be supplied with two coded key ring
transmitters, which willenable you to lock/unlock all doors and the trunk/tailgate from a distance of 10-15 feet (3-5
meters).
The car can also be locked/unlocked with the key.
As an extra security precaution in certain situations (valet parking,etc.), Volvo recommends that the transmitter not be
included when the keys are given to anyone. The service key can be used instead. If one of transmitters is misplaced ,
contact the nearest authorized Volvo retailer for assistance.
Using the remote control
* Press the LOCK button once to lock all doors and trunk/tailgate.
ProCarManuals.com
Page 16 of 61
* Press the UNLOCK button once to unlock the driver’s door only. Press this button again (within 10 seconds) to
unlock all doors, trunk/tailgate.
* Press the OPEN TRUNK/TAILGATE button twice within 3 seconds to pop open the trunk or unlock the tailgateThis device complies with FCC rules Part 15. Operation is subject to the following two conditions: (1) This device
may not cause harmful interference and (2) this device must accept any interference that may be received, including
interferencethat may cause undesired operation.
NOTE: If only the driver’s door is unlocked, the lock will automatically reengage (re-lock) and the alarm will reset
after 2 minutes unless the door has been opened.
The lock/unlock and alarm features can also be utilized by using the keys. See section: Doors and Locks on page 43
.
If the alarm LED glows coninuously for 5 seconds, this indicates a fault in the system or that a door is not properly
closed.
WARNING! Volvo does not recommend using the transmitter to lock the doors from inside the car. On cars
equipped with an alarm, the alarm would be activated and would sound when one of the doors is opened. The doors
must not be locked using the remote transmitter while the vehicle is occupied. In case of an accident, this may hinder
rapid access to the occupants of the vehicle. The alarm will also sound on models equipped with this feature.
NOTE : To avoid leaving your keys in the car, make a habit of always locking the car with the remote control.
Contents | Top of Page
ProCarManuals.com
Page 19 of 61
Octane Rating
Volvo engines are designed for optimum performance on unleaded premium gasoline with an octane rating. AKI of 91,
or above. AKI (ANTI KNOCK INDEX) is an average of the Research Octane Number, RON, and the Motor Octane
Number, MON, (RON + MON/ 2).
The minimum octane requirement is AKI 87 (RON 91).
Gasoline containing alcohol and ethers
"Oxygenated fuels"
Some fuel suppliers sell gasoline containing "oxygenates" which are usually alcohols or ethers. In some areas, state or
local laws require that the service pump be marked indicating use of alcohol or ethers. However, there are areas in
which the pumps are unmarked. If you are not sure whether there is alcohol or ethers in the gasoline you buy, check
with the service station operator.
To meet seasonal air quality restrictions, some states require the use of "oxygenated" fuel in certain areas.
Volvo allows the use of the following "oxygenated fuels; however, the octane ratings listed on this page must still be
met.
Alcohol — Ethanol
Fuels containing up to 10% ethanol by volume may be used.
Ethanol may also be referred to as Ethyl alcohol, or "Gasohol".
Ethers — MTBE
Fuels containing up to 15% MTBE may be used.
Refueling
The fuel tank is designed to hold approximately:
18.4 US gal. (68 liters) - Front Wheel Drive
17.4 US gal. (66 liters) - All Wheel Drive
with sufficient volume left over to accommodate possible expansion of the fuel in hot weather. Be aware that the
"usable" tank will be somewhat less than the specified maximum. When the fuel level is low, such factors as ambient
temperature, the fuel's "Reid vapor pressure" characteristics, and terrain can affect the fuel pumps' ability to supply the
engine with an adequate supply of fuel. Therefore, it is advisable to refuel as soon as possible when the needle nears
the red zone, or when the fuel warning light comes on.
Fuel tank cover
The fuel tank cover (on the fight rear fender) is locked and must be popped open using the control on the driver's door.
ProCarManuals.com
Page 24 of 61
Snow chains should be installed on front wheels only (this applies to cars with front wheel drive and to cars
equipped with All Wheel Drive) . Use only Volvo approved snow chains.
Snow chains may be mounted on tire dimension
Front wheel drive: 185/65R15 and 195/60R15. Tire dimension 205/55R15 and 205/50R16 require a special type of
snow chain.
Chains cannot be used on front wheel drive models equipped with 205/55R16 tires.
All Wheel Drive: Special snow chains are available for AWD models equipped with 195/65R15 and 205/55R16 tires.
Chains cannot be used on V70 XC AWD models equipped with 205/65R15 tires. Consult your Volvo retailer.
If accessory, aftermarket or "custom" tires and wheels are installed and are of a size different than the original
tires and wheels, chains in some cases CANNOT be used. Snow chains cannot be used on those turbo-charged
models fitted with all-season tires 205/55 R16. Models equipped with 205/55 R15 or 205/50 R16 need specially
designed snow chains. Sufficient clearances between chains and brakes, suspension and body components must
be maintained.
Some strap-on type chains will interfere with brake components and therefore CANNOT be used.
Consult your Volvo retailer for additional snow chain information. CAUTION:
Check local regulations regarding the use of snow chains before installing.
Always follow the chains manufacturer's installation instructions carefully. Install chains as tightly as possible and
re-tighten periodically.
Never exceed the chain manufacture's specified maximum speed limit. (Under no circumstances should that limit
be higher than 30 mph (45 km/h).
Avoid bumps, holes or sharp turns when driving with snow chains.
The handling of the vehicle can be adversely affected when driving with chains. Avoid fast or sharp turns as well
as locked wheel braking.
Snow tires, studded tires *
Tires for winter use:
Owners who live in or regularly commute through areas with sustained periods of snow or icy driving
conditions are strongly advised to fit suitable winter tires to help retain the highest degree of traction.
It is important to install winter tires on all four wheels to help retain traction during cornering, braking and
accelerating. Failure to do so could reduce traction to an unsafe level or adversely affect handling. Do not mix tires of
different design as this could also negatively affect overall tire road grip. Volvo recommends 185/65 R15 winter tires
on 15" wheels on all front wheel drive S/V 70 models** including models equipped with 16" or 17" wheels.
Winter tires wear more quickly on dry roads in warm weather. They should be removed when the winter driving
season has ended.
Studded tires should be run-in 300-600 miles (500-1000 km) during which the car should be driven as smoothly as
possible to give the studs the opportunity to seat properly in the tires. The car tires should have the same rotational
ProCarManuals.com