key VOLVO V70 2005 User Guide
[x] Cancel search | Manufacturer: VOLVO, Model Year: 2005, Model line: V70, Model: VOLVO V70 2005Pages: 139, PDF Size: 3.84 MB
Page 48 of 139
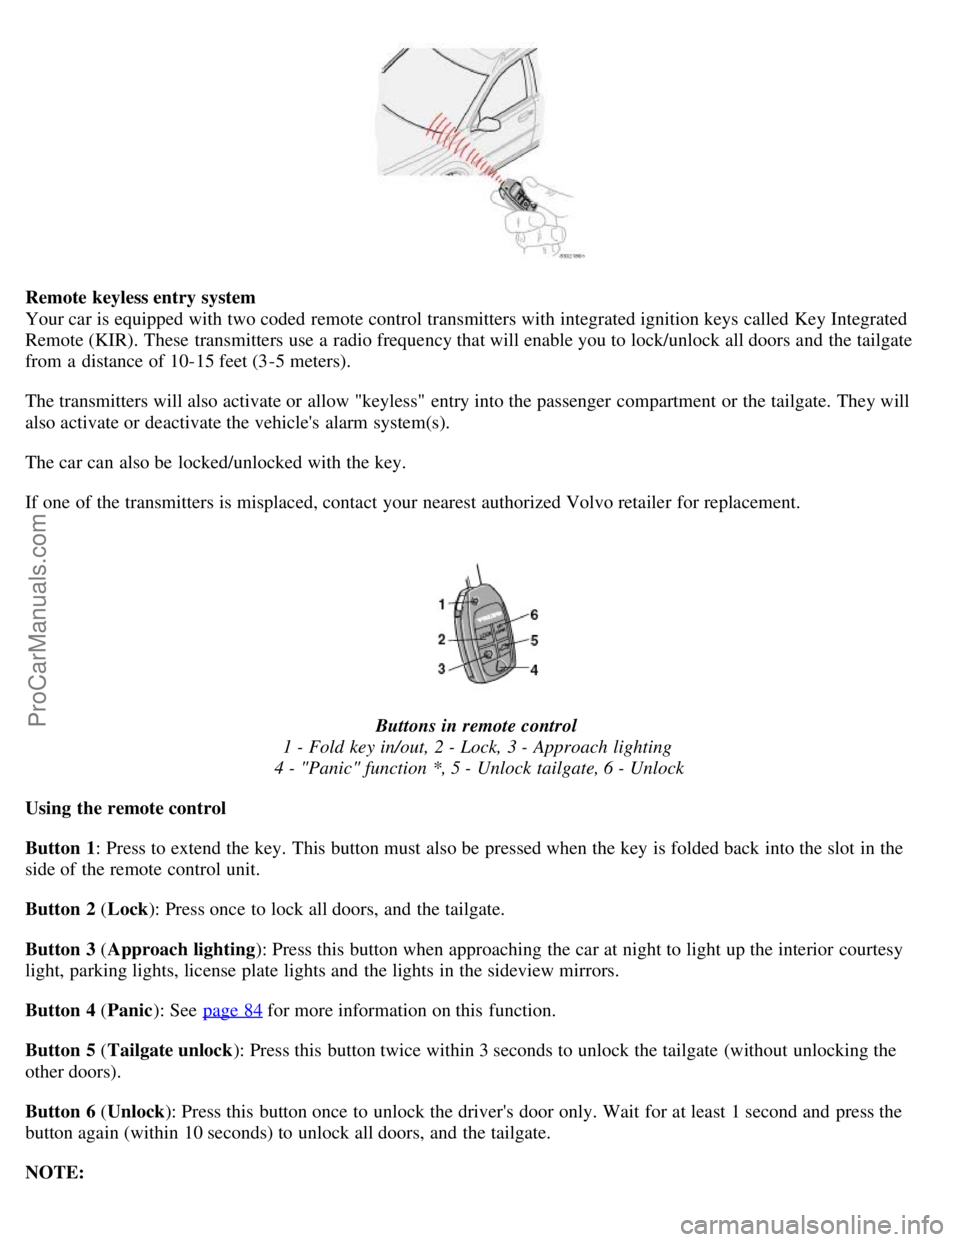
Remote keyless entry system
Your car is equipped with two coded remote control transmitters with integrated ignition keys called Key Integrated
Remote (KIR). These transmitters use a radio frequency that will enable you to lock/unlock all doors and the tailgate
from a distance of 10-15 feet (3-5 meters).
The transmitters will also activate or allow "keyless" entry into the passenger compartment or the tailgate. They will
also activate or deactivate the vehicle's alarm system(s).
The car can also be locked/unlocked with the key.
If one of the transmitters is misplaced, contact your nearest authorized Volvo retailer for replacement.
Buttons in remote control
1 - Fold key in/out, 2 - Lock, 3 - Approach lighting
4 - "Panic" function *, 5 - Unlock tailgate, 6 - Unlock
Using the remote control
Button 1: Press to extend the key. This button must also be pressed when the key is folded back into the slot in the
side of the remote control unit.
Button 2 ( Lock): Press once to lock all doors, and the tailgate.
Button 3 ( Approach lighting ): Press this button when approaching the car at night to light up the interior courtesy
light, parking lights, license plate lights and the lights in the sideview mirrors.
Button 4 ( Panic): See page 84
for more information on this function.
Button 5 ( Tailgate unlock ): Press this button twice within 3 seconds to unlock the tailgate (without unlocking the
other doors).
Button 6 ( Unlock): Press this button once to unlock the driver's door only. Wait for at least 1 second and press the
button again (within 10 seconds) to unlock all doors, and the tailgate.
NOTE:
ProCarManuals.com
Page 49 of 139

If the doors are unlocked with the remote, the locks will automatically reengage (re-lock) and the alarm will reset
after 2 minutes unless a door has been opened.
The lock/unlock and alarm features can also be utilized by using the keys.
FCC ID:LQNP2T-APU
This device complies with part 15 of the FCC rules. Operation is subject to the following conditions: (1) This device
may not cause harmful interference, and (2) this device must accept any interference received, including interference
that may cause undesired operation.
Canadian 2306104388
Model 504 2927 by Donnelly
Operation is subject to the following conditions: (1) this device may not cause interference, and (2) this device must
accept any interference, including interference that may cause undesired operation of the device.
Canadian 2306104388A
Model 509 977 by Connaught Electronics
Operation is subject to the following conditions: (1) this device may not cause interference, and (2) this device must
accept any interference, including interference that may cause undesired operation of the device.
pg. 82 Remote keyless entry system
Remote keyless entry system - replacing batteries
If the range of the transmitter is noticeably reduced, this indicates that the battery is weak and should be replaced.
To replace the battery
Remove the cover by carefully prying up its rear edge with a small screwdriver
Replace the battery with a new 3-volt, CR 2032 battery. The battery should be inserted with the plus side upward.
Avoid touching the contact surfaces of the battery with your fingers.
Press the cover back into place. Ensure that the rubber seal seats correctly to help prevent moisture from entering the
unit.
NOTE: The old battery should be disposed of properly at a recycling center or at your Volvo retailer.
WARNING!
Volvo does not recommend using the transmitter to lock the doors from inside the car. The alarm would be activated
ProCarManuals.com
Page 51 of 139
A door is forced open.
The ignition switch is tampered with.
If there is movement in the passenger compartment (if the car is equipped with the optional movement sensor).
The car is lifted or towed (if the car is equipped with the optional inclination sensor).
The battery is disconnected (while the alarm is armed).
Arming the alarm
Press the LOCK button on the remote control, lock the car using the key in the driver's door or press the central lock
button on one of the front doors with the door open. One long flash of the turn signals will confirm that the alarm is
armed.
Disarming the alarm
Press the UNLOCK button on the remote control or unlock the doors with the key.
Turning off (stopping) the alarm
If the alarm is sounding, it can be stopped by pressing the UNLOCK button on the remote control or by unlocking the
driver's door with the key.
Visual alarm signal
The visual alarm signal is given by flashing all turn signals and turning on the interior lighting for approximately 5
minutes.
Audible alarm signal
An audible alarm signal is given by a battery powered siren. One alarm cycle lasts for 25 seconds.
"Panic" button
In an emergency situation, this feature can be used to attract attention. Activate the "panic" function by pressing the
red button on the remote control (see illustration on page 81
) for at least 3 seconds or by pressing this button twice
within 3 seconds. The turn signals will flash, the interior lights will go on and the car's horn will sound.
The function can be turned off by pressing any of the buttons on the remote control or will stop automatically
after 25 seconds. When a button is pressed, there is a 5 second delay before the panic alarm is deactivated.
NOTE: This function will NOT unlock the car.
pg. 85 Alarm
Temporarily turning off the inclination and movement alarm sensor(s) - accessory
This button will only be found in cars equipped with the accessory inclination and/or movement sensors.
FCC ID: MAYDA5823
ProCarManuals.com
Page 52 of 139

This device complies with part 15 of the FCC rules. Operation is subject to the following conditions: (1) This device
may not cause harmful interference, and (2) this device must accept any interference received, including interference
that may cause undesired operation.
Canadian IC: 4405A-DA5823
Movement sensor DA5823 by Dynex
Operation is subject to the following conditions: (1) this device may not cause interference, and (2) this device must
accept any interference, including interference that may cause undesired operation of the device.
In certain situations it may be desirable to turn off the inclination and movement alarm sensors if, for example, you
drive your car onto a ferry where the rocking of the boat could trigger the alarm or if a pet is left in the car with the
doors locked.
To temporarily turn off the inclination and movement alarm sensors from the alarm system:
From the time the ignition key is turned from the Drive position (position II) until you lock the car, you can press the
button in the center console. The LED in the switch will light up and a message will be displayed in the text window
to indicate that the sensors are disconnected.
The car can then be locked in the usual way to set the alarm.
NOTE:
This function will not turn off the vehicle's standard alarm.
The optional sensors are automatically reconnected to the alarm system the next time the car is unlocked and then
locked again.
LED alarm status signals
The status of the alarm system is indicated by the red LED at the top of the dash:
LED off - the alarm is not armed
LED flashes once per second - the alarm is armed
LED flashes rapidly before the ignition is switched on - the alarm has been triggered
Fault in the alarm system: If a fault has been detected in the alarm system, a message will be displayed in the text
window. Contact a Volvo retailer.
Automatic re-lock/re -arm system
If the car is unlocked with the remote, the car will re-lock and the alarm will re-arm after 2 minutes unless a door or
the tailgate has been opened.
pg. 86 Child safety locks - rear doors
ProCarManuals.com
Page 53 of 139
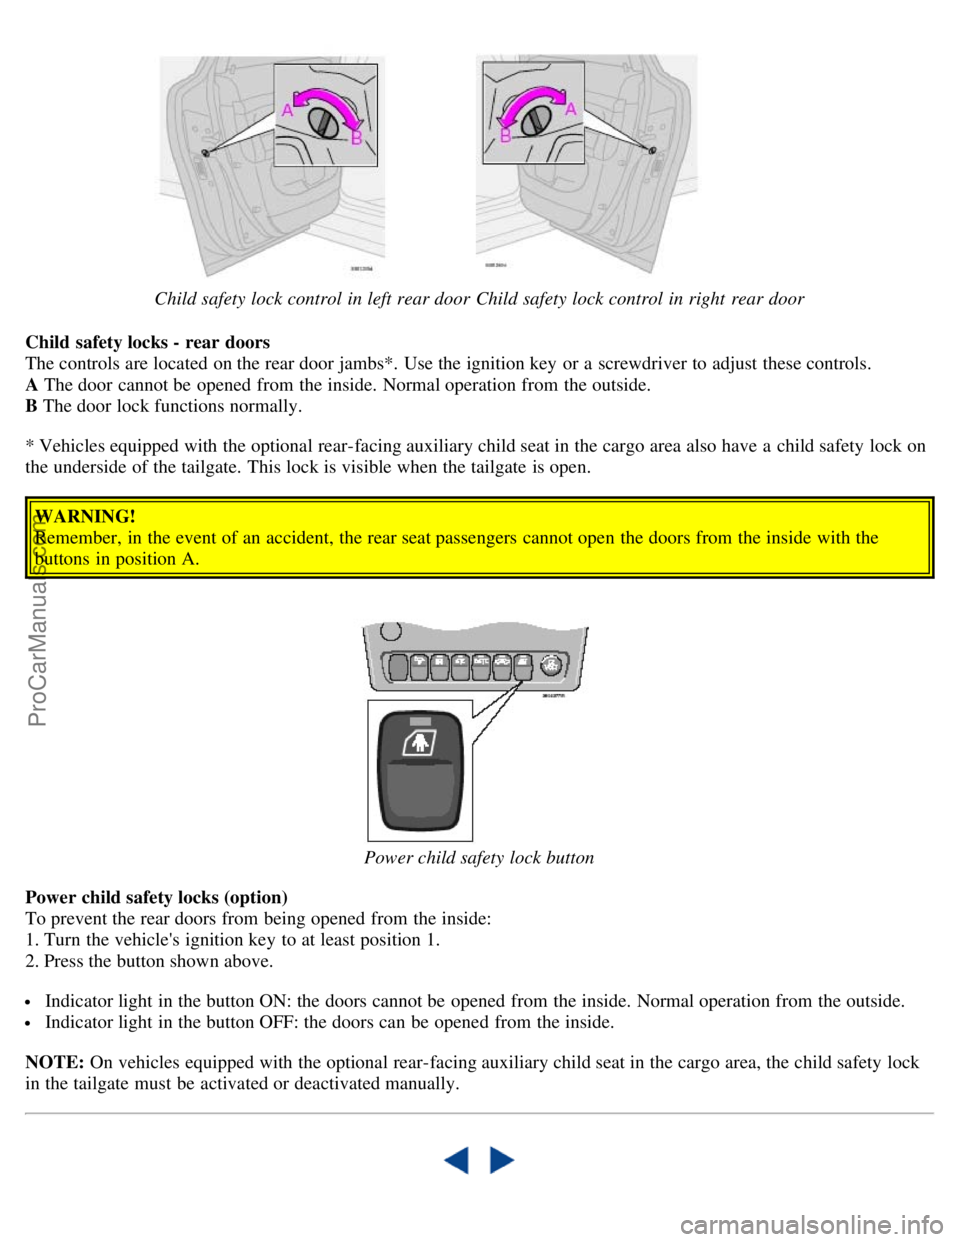
Child safety lock control in left rear doorChild safety lock control in right rear door
Child safety locks - rear doors
The controls are located on the rear door jambs*. Use the ignition key or a screwdriver to adjust these controls.
A The door cannot be opened from the inside. Normal operation from the outside.
B The door lock functions normally.
* Vehicles equipped with the optional rear-facing auxiliary child seat in the cargo area also have a child safety lock on
the underside of the tailgate. This lock is visible when the tailgate is open.
WARNING!
Remember, in the event of an accident, the rear seat passengers cannot open the doors from the inside with the
buttons in position A.
Power child safety lock button
Power child safety locks (option)
To prevent the rear doors from being opened from the inside:
1. Turn the vehicle's ignition key to at least position 1.
2. Press the button shown above.
Indicator light in the button ON: the doors cannot be opened from the inside. Normal operation from the outside.
Indicator light in the button OFF: the doors can be opened from the inside.
NOTE: On vehicles equipped with the optional rear-facing auxiliary child seat in the cargo area, the child safety lock
in the tailgate must be activated or deactivated manually.
ProCarManuals.com
Page 58 of 139

additional information.
WARNING!
Never carry a cell phone that is switched on while refueling your vehicle. If the phone rings, this may cause a spark
that could ignite gasoline fumes, resulting in fire and injury.
CAUTION:
Do not refuel with the engine running *. Turn the ignition off or to position I. If the ignition is on, an incorrect
reading could occur in the fuel gauge.
After refueling, close the fuel filler cap by turning it clockwise until it clicks into place *.
Allow for fuel expansion by not overfilling the tank. Overfilling could also cause damage to the emission control
systems.
Avoid spilling gasoline when refueling. In addition to causing damage to the environment, gasolines containing
alcohol can cause damage to painted surfaces, which may not be covered under the New Vehicle Limited Warranty.
Do not use gasolines containing methanol (methyl alcohol, wood alcohol). This practice can result in vehicle
performance deterioration and can damage critical parts in the fuel system. Such damage may not be covered under the
New Vehicle Limited Warranty.
* If the fuel filler cap is not closed tightly or if the engine is running when the car is refueled, the Check Engine light
(malfunction indicator lamp) may indicate a fault. However, your vehicle's performance will not be affected. Use only
Volvo original or approved fuel filler caps.
pg. 91 Starting the engine
Starting the engine
1. Fasten the seat belt.
WARNING!
Before starting, check that the seat, steering wheel and mirrors adjusted properly.
Make sure the brake pedal can be depressed completely. Adjust the seat if necessary. See page 60.
2. Apply the parking brake, if not already set. The gear selector ( automatic transmission) is locked in the (P)ark
position ( SHIFT -LOCK ).
Manual transmission: the clutch must be fully depressed.
3. Without touching the accelerator pedal, turn the ignition key* to the starting position. Allow the starter to operate
for up to 10 seconds. Release the key as soon as the engine starts. If the engine fails to start, repeat this step.
For cold starts at altitudes above 6000 ft (1800 meters), depress the accelerator pedal halfway and turn the key to the
starting position. Release the pedal slowly when the engine starts.
NOTE:
On certain models, when the car is started, idle speed may be noticeably higher than normal for a short period,
depending on the temperature of the engine.
This has been done to help bring components in the emission control system to their normal operating temperature as
quickly as possible, which enables them to function normally.
For cold starts at altitudes above 6000 ft (1800 meters), depress the accelerator pedal halfway and turn the key to the
starting position. Release the pedal slowly when the engine starts.
4. To release the gear selector from the (P)ark position, the engine must be running (or the ignition key must be in
position II) and the brake pedal must be depressed. While keeping firm pressure on the brake pedal, release the parking
brake.
ProCarManuals.com
Page 59 of 139
5. Select the desired gear. The gear engages after a very slight delay which is especially noticeable when selecting R.
NOTE:
Your car is equipped with a KEYLOCK system. When the engine is switched off, the gear selector must be in the
( P )ark position before the key can be removed from the ignition switch.
When starting in cold weather, the transmission may shift up at slightly higher engine speeds than normal until the
automatic transmission fluid reaches normal operating temperature.
* Your car is equipped with an electronic start inhibitor (immobilizer). The keys you received with your car are
specially coded. The code in the key is transmitted to an antenna in the ignition switch where it is compared to the
code stored in the start inhibitor module. The car can only be started if a properly coded key is used.
If two of the keys to your car are close together, e.g., on the same key ring, when you try to start the car, this could
cause interference in the immobilizer system and result in the car not starting. If this should occur, remove one of the
keys from the key ring before trying to start the car again.
pg. 92 Starting the engine
CAUTION:
The engine should be idling when you move the gear selector. Never accelerate until after you feel the transmission
engage! Accelerating immediately after selecting a gear will cause harsh engagement and premature transmission wear.
Selecting P or N when idling at a standstill for prolonged periods time will help prevent overheating of the automatic
transmission fluid.
Do not race a cold engine immediately after starting. Oil flow may not reach some lubrication points fast enough to
prevent engine damage.
WARNING!
Always place the gear selector in Park or in reverse on models with a manual transmission, and apply the parking
brake before leaving the vehicle. Never leave the car unattended with the engine running.
Always open garage doors fully before starting the engine inside a garage to ensure adequate ventilation. The
exhaust gases contain carbon monoxide, which is invisible and odorless but very poisonous.
An extra mat on the driver's floor can cause the accelerator pedal and the clutch to catch. Check that the movement
of the accelerator pedal and clutch is not impeded. Not more than one protective floor covering may be used at one
time.
pg. 93 Manual transmission
ProCarManuals.com
Page 61 of 139
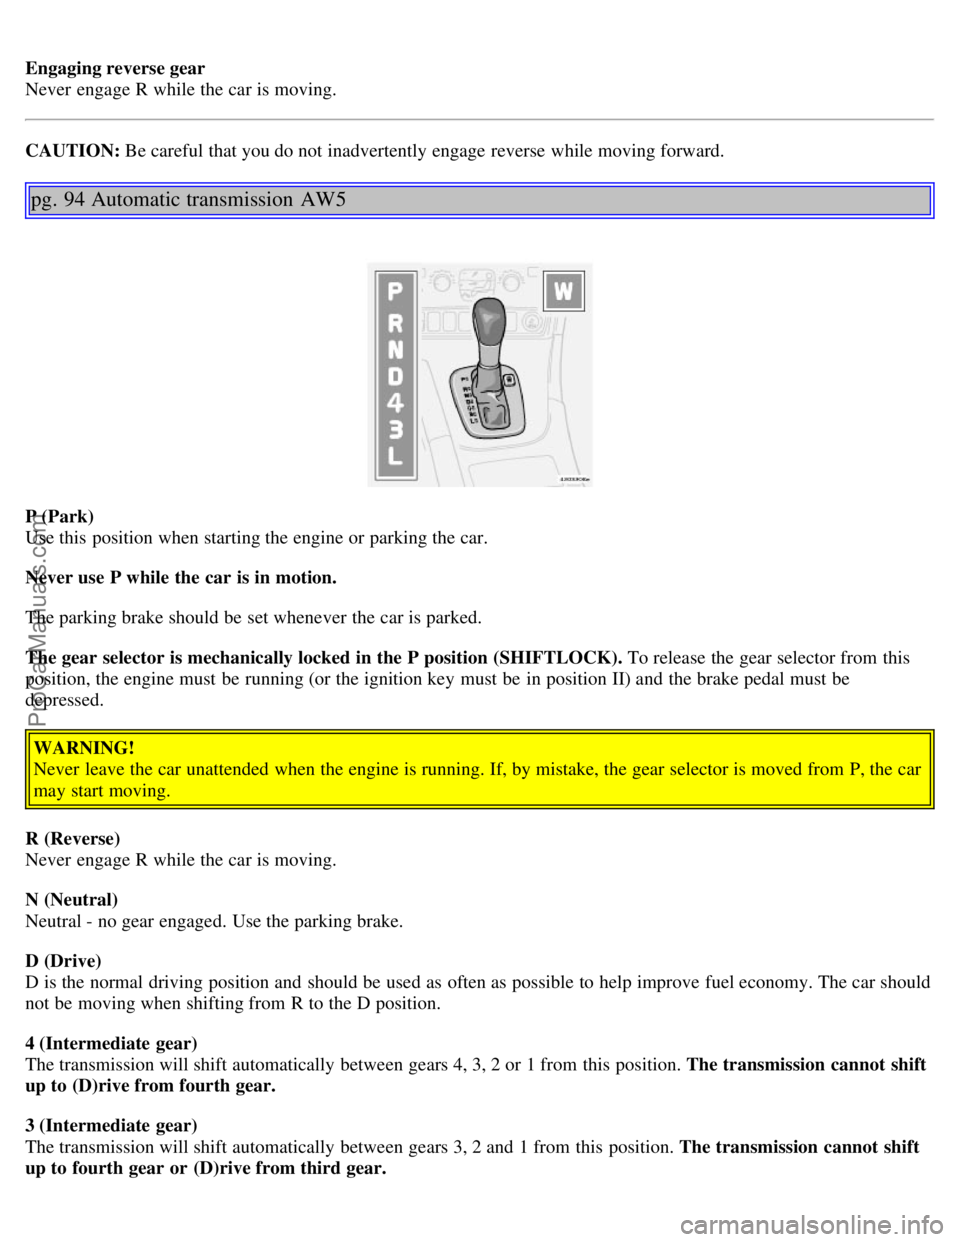
Engaging reverse gear
Never engage R while the car is moving.
CAUTION: Be careful that you do not inadvertently engage reverse while moving forward.
pg. 94 Automatic transmission AW5
P (Park)
Use this position when starting the engine or parking the car.
Never use P while the car is in motion.
The parking brake should be set whenever the car is parked.
The gear selector is mechanically locked in the P position (SHIFTLOCK). To release the gear selector from this
position, the engine must be running (or the ignition key must be in position II) and the brake pedal must be
depressed.
WARNING!
Never leave the car unattended when the engine is running. If, by mistake, the gear selector is moved from P, the car
may start moving.
R (Reverse)
Never engage R while the car is moving.
N (Neutral)
Neutral - no gear engaged. Use the parking brake.
D (Drive)
D is the normal driving position and should be used as often as possible to help improve fuel economy. The car should
not be moving when shifting from R to the D position.
4 (Intermediate gear)
The transmission will shift automatically between gears 4, 3, 2 or 1 from this position. The transmission cannot shift
up to (D)rive from fourth gear.
3 (Intermediate gear)
The transmission will shift automatically between gears 3, 2 and 1 from this position. The transmission cannot shift
up to fourth gear or (D)rive from third gear.
ProCarManuals.com
Page 63 of 139

This mode may be selected for starting/moving off on slippery roads.
NOTE: R-models are not equipped with this button.
Kickdown
Automatic shift to a lower gear (kickdown) is achieved by depressing the accelerator pedal fully and briskly. An
upshift will occur when approaching the top speed for a particular gear or by releasing the accelerator pedal slightly.
Kickdown can be used for maximum acceleration or when passing at highway speeds.
Cold starts
When driving before the engine has reached its normal operating temperature, the transmission will shift up at slightly
higher engine speeds to heat the three-way catalytic converter as quickly as possible.
pg. 96 Automatic transmission (Geartronic)
P (Park)
Use this position when starting the engine or parking the car.
Never use P while the car is in motion. The parking brake should be set whenever the car is parked.
The gear selector is mechanically locked in the P position (SHIFTLOCK). To release the gear selector from this
position, the engine must be running (or the ignition key must be in position II) and the brake pedal must be
depressed.
WARNING!
Never leave the car unattended when the engine is running. If, by mistake, the gear selector is moved from P, the car
may start moving.
R (Reverse)
Never engage R while the car is moving forward.
N (Neutral)
Neutral - no gear engaged. Use the parking brake.
D (Drive)
D is the normal driving position and should be used as often as possible to help improve fuel economy. The car should
not be moving when shifting from R to the D position.
Kickdown
Automatic shift to a lower gear (kickdown) is achieved by depressing the accelerator pedal fully and briskly. An
ProCarManuals.com
Page 72 of 139
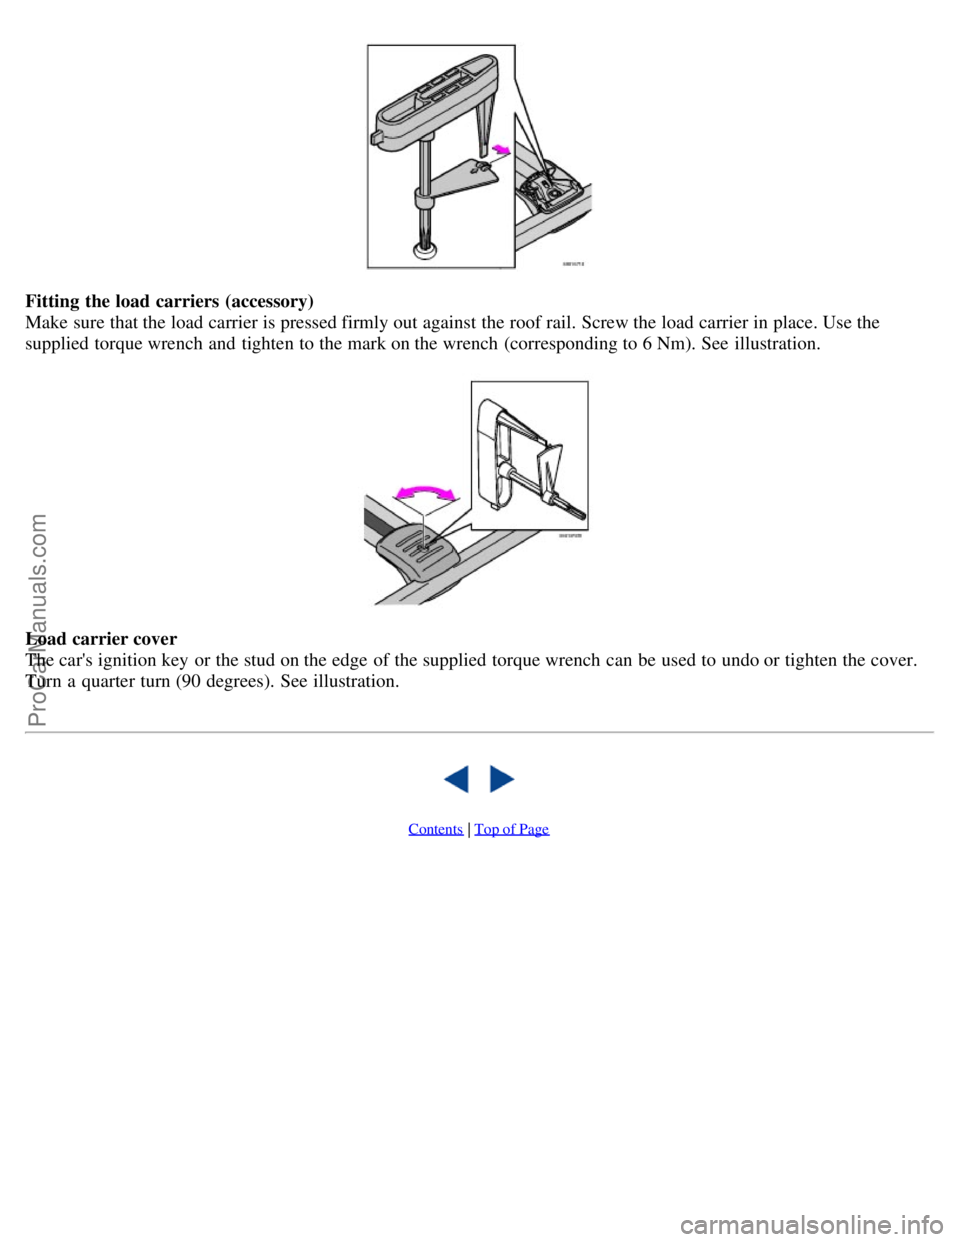
Fitting the load carriers (accessory)
Make sure that the load carrier is pressed firmly out against the roof rail. Screw the load carrier in place. Use the
supplied torque wrench and tighten to the mark on the wrench (corresponding to 6 Nm). See illustration.
Load carrier cover
The car's ignition key or the stud on the edge of the supplied torque wrench can be used to undo or tighten the cover.
Turn a quarter turn (90 degrees). See illustration.
Contents | Top of Page
ProCarManuals.com