stop start VOLVO V90 2017 Workshop Manual
[x] Cancel search | Manufacturer: VOLVO, Model Year: 2017, Model line: V90, Model: VOLVO V90 2017Pages: 594, PDF Size: 15.07 MB
Page 432 of 594
STARTING AND DRIVING
* Option/accessory.
430
Towing eye
Use the towing eye for towing. The towing eye is screwed into a threaded socket behind a coveron the right-hand side of the bumper, front orrear.
NOTE
If the car is equipped with a towing bracket, there is no rear mounting for a towing eye.
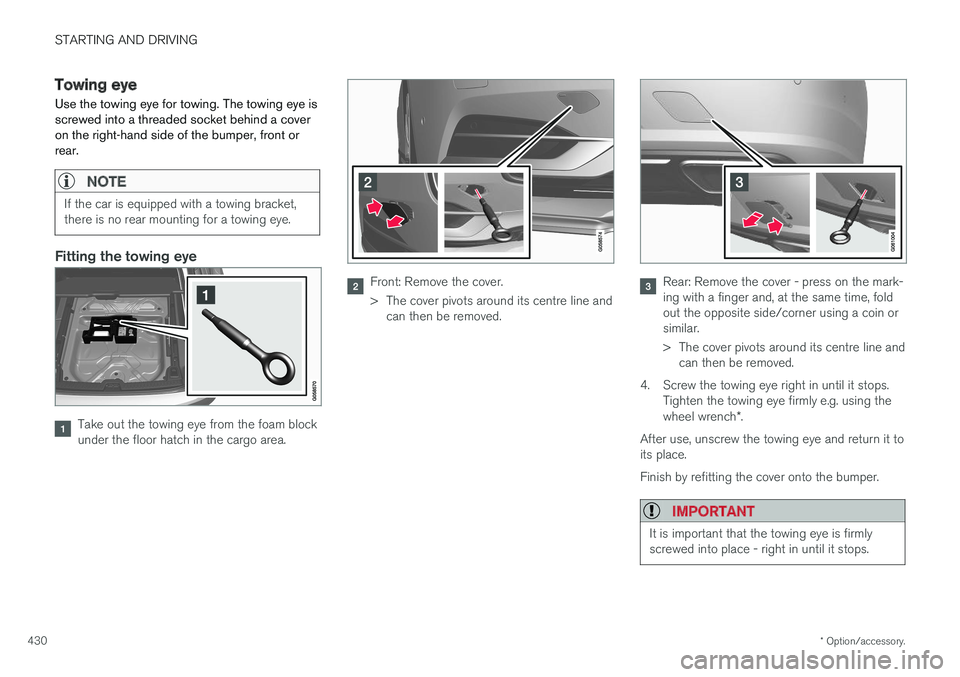
Fitting the towing eye
Take out the towing eye from the foam block under the floor hatch in the cargo area.
Front: Remove the cover.
> The cover pivots around its centre line and can then be removed.Rear: Remove the cover - press on the mark- ing with a finger and, at the same time, foldout the opposite side/corner using a coin orsimilar.
> The cover pivots around its centre line andcan then be removed.
4. Screw the towing eye right in until it stops. Tighten the towing eye firmly e.g. using the wheel wrench *.
After use, unscrew the towing eye and return it to its place. Finish by refitting the cover onto the bumper.
IMPORTANT
It is important that the towing eye is firmly screwed into place - right in until it stops.
Page 433 of 594
STARTING AND DRIVING
}}
431
The towing eye may be used to pull the car up onto a recovery vehicle with a flatbed platform.The car's position and ground clearance deter-mine whether it is possible. If the slope of the recovery vehicle's ramp is too steep, or if the ground clearance under the car isinadequate, then the car may be damaged if youtry to pull it up using the towing eye. If necessary, raise the car by using the recovery vehicle's lifting device. Do not use the towing eye.
WARNING
No one/nothing is allowed to remain behind the recovery vehicle while the car pulled uponto the flatbed platform.
IMPORTANT
The towing eye is only designed for towing on roads -
not for pulling the car unstuck or out
of a ditch. Call a recovery service for recovery assistance.
Related information
• Towing (p. 431)
• Recovering the car (p. 432)
Towing
During towing, one vehicle pulls another vehicle along behind it by means of a towline.
Find out the statutory maximum speed limit for towing before the towing begins.
Preparations and towing1. Activate the car's hazard warning flashers.
2. Secure the towline in the towing eye.
3. Deactivate the steering lock by unlocking the car.
NOTE
In ignition position II the steering lock is
deactivated if the car has been unlocked. See section “Ignition position” for more informa-tion.
4. Set the car in ignition position II by turning
the ignition dial to START and holding the
ignition dial in the START position for
approx. 4 seconds. Then release the knob, which automatically returns to its startingposition.
5. Move the gear selector to neutral position N
and release the parking brake.
> The towing vehicle can now start towing. 6. Keep the towline taut when the towing vehi-
cle reduces speed by holding your foot gen- tly pressed on the brake pedal - therebyavoiding unnecessary jerking.
7. Be prepared to brake to stop.
IMPORTANT
Note that the car must always be towed with the wheels rolling forward. • Do not tow cars with automatic transmis- sion at speeds higher than 80 km/h(50 mph) or for distances in excess of 80km.
WARNING
•Check that the steering lock is unlocked before towing.
• Ignition position
II must be active - in
ignition position I all airbags are deacti-
vated.
• Always keep the remote control key in thecar when it is being towed.
WARNING
The brake servo and power steering do not work when the engine is switched off - thebrake pedal needs to be depressedabout 5 times more heavily and the steering isconsiderably heavier than normal.
Page 443 of 594
AUDIO AND MEDIA
441
Settings for radioSettings for the different radio bands.
The broadcast of traffic messages etc. can be temporarily interrupted by tapping on
in the
right-hand steering wheel keypad or by tapping on
Cancel in the centre display.
Drag down the top view and select
SettingsMedia and the desired radio band. Activating/
deactivating functions.
AM/FM
•Show Broadcast Information — shows
information on programme content, artists, etc.
•
Freeze Program Name — select to stop
the programme service name from scrolling continuously. Instead it freezes after 20 sec-onds.
•
News - interrupts the current media play-
back and broadcasts news. Playback of pre- vious media source is resumed when thenews broadcast is finished.
•
Traffic Announcements - interrupts the
current media playback and broadcasts infor- mation about traffic disruptions. Playback ofprevious media source is resumed when themessage is finished.
•
Local Interruptions — interrupts the cur-
rent media playback and broadcasts informa- tion about traffic disruptions in the neigh- bourhood. Playback of previous media sourceis resumed when the message is finished. The
Local Interruptions function is a geo-
graphically restricted version of the Traffic
Announcements function. The Traffic
Announcements function must be acti-
vated at the same time.
•
Alarm - interrupts the current media play-
back and sends alerts about major accidents and disasters. Playback of previous mediasource is resumed when the message is fin-ished.
DAB
•Sort Services - selection for how channels
will be sorted. Either alphabetically or by service number.
•
DAB To DAB Handover - starts the func-
tion for linking within DAB. If reception of a radio channel is lost, another channel isfound automatically in another channel group(ensemble).
•
DAB To FM Handover - starts the function
for linking between DAB and FM. If reception of a radio channel is lost, an alternative fre-quency is searched for automatically.
•
Select Announcements — select the
types of messages to be received while DAB is playing. Selected messages will interruptthe current media playback to play back themessage. Playback of previous media sourceis resumed when the message is finished.
Alarm - interrupts the current media play-
back and sends alerts about major accidents and disasters. Playback of previous mediasource is resumed when the message is fin-ished.
Traffic Flash — receives information about
traffic disruptions.
News Flash — receives news.
Transport Flash — receives information
about public transport, e.g. ferry and train timetables.
Warning/Services — receives information
about incidents of lower significance than the Alarm function, e.g. power failures.
•
Show Broadcast Information — select to
show radio text or selected types of radio text, e.g. artist.
•
Show Program Related Images — select
whether or not to show images for pro- grammes on the screen.
Related information
• Radio (p. 436)
• Digital radio (p. 440)
• Symbols in the centre display's status bar(p. 45)
Page 488 of 594
||
WHEELS AND TYRES
* Option/accessory.
486
General information on the tyre monitoring system
In the information below, the tyre monitoring sys- tem is referred to generically as TPMS. Each tyre, including the spare tyre *, should be
checked once a month. When checking, the tyre should be cold and have the air pressure recom-mended by the car manufacturer specified on thetyre pressure label or in the tyre pressure table. Ifthe car has tyres of a different size than that rec-ommended by the manufacturer, find out whatthe correct air pressure level is for these. As an extra safety feature, the car is equipped with a tyre pressure monitoring system (TPMS),which shows when the air pressure in one ormore tyres is too low. When the indicator symbolfor low air pressure is lit, stop and check the tyresas soon as possible and inflate to the correct airpressure. Driving with tyres that have tyre pressure that is too low may cause the tyre to overheat, whichcan cause a puncture. Low tyre pressure alsoreduces fuel efficiency as well as tyre service life,and can affect car handling and stopping ability.Note that TPMS does not replace regular tyremaintenance. It is the driver's responsibility tomaintain correct tyre pressure, even if the limit forlow tyre pressure has not been reached so thatthe indicator symbol illuminates. The car is also equipped with a TPMS system fault indicator, which indicates when the system is not functioning correctly. The TPMS systemfault indicator is combined with the indicator sym-bol for low tyre pressure. When the systemdetects a fault, the symbol in the driver displaywill flash for about one minute and then remainilluminated. This procedure will be repeated whenthe car is started until the fault has been rectified.When the symbol is illuminated, the system's abil-ity to detect or warn of low tyre pressure may beaffected. A TPMS system fault can occur for several rea- sons, such as after changing to a spare tyre, orchanging tyres or wheels that prevent TPMS fromfunctioning correctly. Always check the indicator symbol for TPMS after changing one or more tyres in order toensure the new tyre or wheel is working correctlywith TPMS.
Messages in the driver displayThe following messages may be shown when theindicator symbol is illuminated:
•
Tyre pressure low Check tyres, calibrate
after fill
•Tyre pressure system Temporarily
unavailable
•Tyre pressure system Service required.
If the system cannot determine which tyre has low pressure, all four tyres will be indicated in thecentre display.
To bear in mind
• Always calibrate the system after a wheelchange or tyre pressure adjustment. See thetyre pressure label on the driver's side doorpillar for Volvo's recommended tyre pres-sures.
• The system does not replace normal tyremaintenance.
• There is no option to deactivate ITPMS.
Related information
•Tyres (p. 482)
• Checking tyre pressure with the tyre monitor- ing system
* (p. 487)
• Calibrating tyre monitoring
* (p. 489)
• Rectifying low tyre pressure with tyre moni-toring
* (p. 488)
Page 491 of 594
WHEELS AND TYRES
* Option/accessory.489
Calibrating tyre monitoring *
In order for the Indirect Tyre Pressure Monitoring System (ITPMS) to work correctly, a referencevalue for the tyre pressure must be determined.This must be performed each time the tyres arechanged or the tyre pressure is changed.
For example, when driving with a heavy load or at high speed above 160 km/h (100 mph), the tyrepressure should be adjusted in accordance withVolvo's recommended tyre pressure values. Fol-lowing which, the system must be recalibrated.
1. Stop the engine.
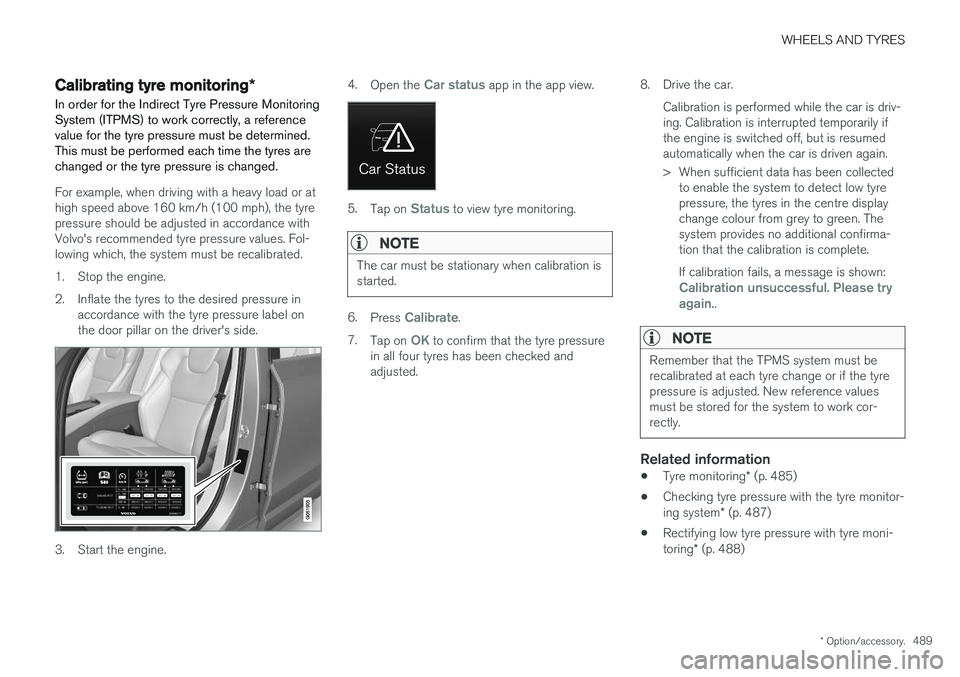
2. Inflate the tyres to the desired pressure in accordance with the tyre pressure label on the door pillar on the driver's side.
3. Start the engine. 4.
Open the
Car status app in the app view.
5.Tap on Status to view tyre monitoring.
NOTE
The car must be stationary when calibration is started.
6.Press Calibrate.
7. Tap on
OK to confirm that the tyre pressure
in all four tyres has been checked and adjusted. 8. Drive the car.
Calibration is performed while the car is driv-ing. Calibration is interrupted temporarily ifthe engine is switched off, but is resumedautomatically when the car is driven again.
> When sufficient data has been collectedto enable the system to detect low tyre pressure, the tyres in the centre displaychange colour from grey to green. Thesystem provides no additional confirma-tion that the calibration is complete. If calibration fails, a message is shown:
Calibration unsuccessful. Please try again..
NOTE
Remember that the TPMS system must be recalibrated at each tyre change or if the tyrepressure is adjusted. New reference valuesmust be stored for the system to work cor-rectly.
Related information
• Tyre monitoring
* (p. 485)
• Checking tyre pressure with the tyre monitor- ing system
* (p. 487)
• Rectifying low tyre pressure with tyre moni-toring
* (p. 488)
Page 513 of 594

MAINTENANCE AND SERVICE
* Option/accessory.511
Data transmission between car and workshop6
The time required for a booked visit to a Volvo workshop can be shortened by transmitting trou-bleshooting data as soon as the car stops at theworkshop. The data can be transmitted most conveniently by selecting the option
Automatically connect
when I arrive in settings view in the centre dis-
play.
Each time the car slows to a slow enough speed it starts searching for a Wi-Fi network. If anauthorised Volvo network (at a workshop) isfound, a message is displayed or a pop-up win-dow opens in the centre display. (This does notapply when you connect manually, see the sec-tion "Connecting to a workshop manually"below).
Connecting to a workshop automatically
NOTE
To avoid the driver being disturbed by unwan- ted connection inquiries (for example, if thecar is often parked in the neighbourhood of aworkshop with an authorised Volvo network),the connection mode will change to manual ifthe driver declines connection twice within aperiod of 5 days.
Without driver confirmation
This option provides the most convenient way of transmitting troubleshooting data. The car con-nects without the need for the driver to confirm. If the car stops at the workshop and is switched off with the start knob, a message is shown atthe top in the centre display. The car will connectautomatically when the driver
Page 516 of 594
MAINTENANCE AND SERVICE
514
Opening and closing the bonnet
The bonnet can be opened using the handle in the passenger compartment and a handle underthe bonnet.
Open the bonnet
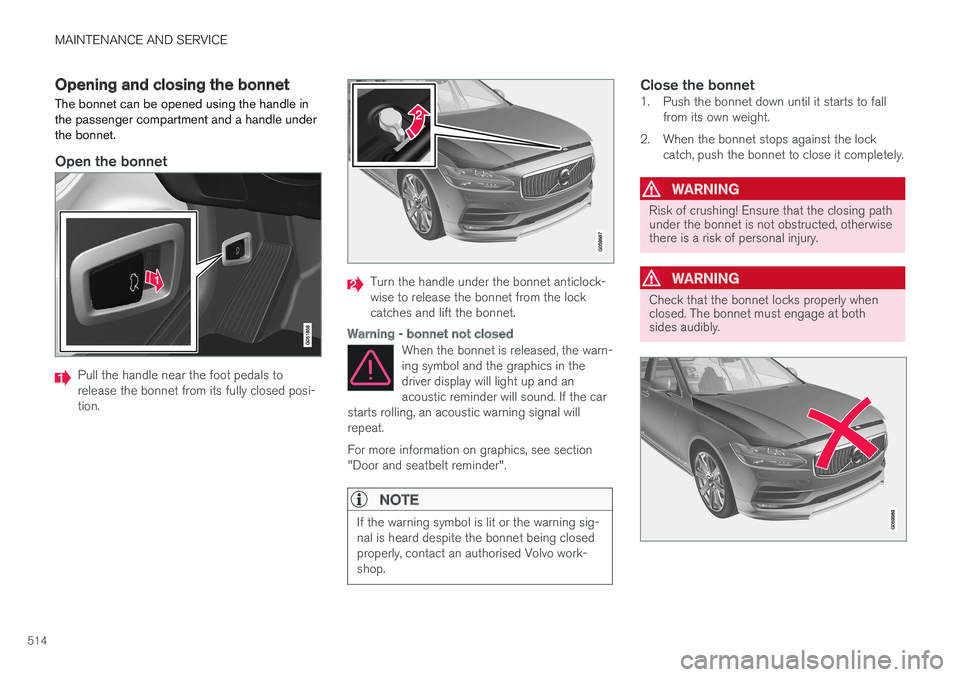
Pull the handle near the foot pedals to release the bonnet from its fully closed posi-tion.
Turn the handle under the bonnet anticlock- wise to release the bonnet from the lockcatches and lift the bonnet.
Warning - bonnet not closed
When the bonnet is released, the warn- ing symbol and the graphics in thedriver display will light up and anacoustic reminder will sound. If the car
starts rolling, an acoustic warning signal willrepeat. For more information on graphics, see section "Door and seatbelt reminder".
NOTE
If the warning symbol is lit or the warning sig- nal is heard despite the bonnet being closedproperly, contact an authorised Volvo work-shop.
Close the bonnet1. Push the bonnet down until it starts to fall from its own weight.
2. When the bonnet stops against the lock catch, push the bonnet to close it completely.
WARNING
Risk of crushing! Ensure that the closing path under the bonnet is not obstructed, otherwisethere is a risk of personal injury.
WARNING
Check that the bonnet locks properly when closed. The bonnet must engage at bothsides audibly.
Page 517 of 594
MAINTENANCE AND SERVICE
515
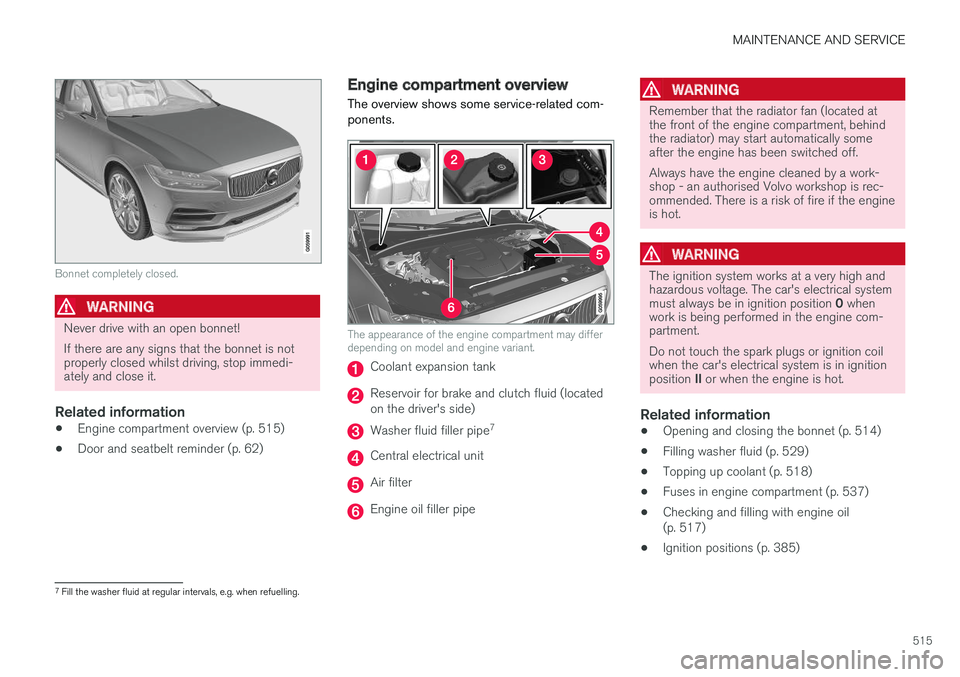
Bonnet completely closed.
WARNING
Never drive with an open bonnet! If there are any signs that the bonnet is not properly closed whilst driving, stop immedi-ately and close it.
Related information
•Engine compartment overview (p. 515)
• Door and seatbelt reminder (p. 62)
Engine compartment overview
The overview shows some service-related com- ponents.
The appearance of the engine compartment may differ depending on model and engine variant.
Coolant expansion tank
Reservoir for brake and clutch fluid (located on the driver's side)
Washer fluid filler pipe 7
Central electrical unit
Air filter
Engine oil filler pipe
WARNING
Remember that the radiator fan (located at the front of the engine compartment, behindthe radiator) may start automatically someafter the engine has been switched off. Always have the engine cleaned by a work- shop - an authorised Volvo workshop is rec-ommended. There is a risk of fire if the engineis hot.
WARNING
The ignition system works at a very high and hazardous voltage. The car's electrical system must always be in ignition position
0 when
work is being performed in the engine com- partment. Do not touch the spark plugs or ignition coil when the car's electrical system is in ignition position II or when the engine is hot.
Related information
• Opening and closing the bonnet (p. 514)
• Filling washer fluid (p. 529)
• Topping up coolant (p. 518)
• Fuses in engine compartment (p. 537)
• Checking and filling with engine oil (p. 517)
• Ignition positions (p. 385)
7
Fill the washer fluid at regular intervals, e.g. when refuelling.
Page 532 of 594
||
MAINTENANCE AND SERVICE
530
IMPORTANT
Use Volvo genuine washer fluid or equivalent with a recommended pH of between 6 and 8,in working dilution (e.g. 1:1 with neutralwater).
IMPORTANT
Use washer fluid with antifreeze when the temperature is below freezing to avoid freez-ing in the pump, reservoir and hoses.
Volume:• Cars
with headlamp washing: 5.5 litres.
• Cars
without headlamp washing: 3.5 litres.
Related information
•Windscreen and headlamp washers (p. 150)
• Opening and closing the bonnet (p. 514)
Starter battery
The electrical system is single-pole and uses the chassis and engine casing as a conductor. The starter battery is used to start up the electri- cal system and drive the starter motor as well asother electrical equipment in the car. The starter battery should be replaced by a workshop 13
.
The car has a voltage-regulated AC alternator. The starter battery is a 12 V AGM battery, designed for the carbon dioxide reducing func-tions, Start/Stop and regenerative charging, andto support the functionality of the car's differentsystems. The service life and function of the starter battery is influenced by factors such as the number ofstarts, discharging, driving style, driving condi-tions, climatic conditions etc. • Never disconnect the starter battery when the engine is running.
• Check that the cables to the starter batteryare correctly connected and properly tight-ened.
WARNING
•
The battery can generate oxyhydrogen gas, which is highly explosive. A spark canbe formed if a jump lead is connectedincorrectly, and this can be enough forthe battery to explode.
• The battery contains sulphuric acid, whichcan cause serious burns.
• If sulphuric acid comes into contact witheyes, skin or clothing, flush with largequantities of water. If acid splashes intothe eyes - seek medical attention imme-diately.
When connecting an external starter battery orbattery charger, use the car's charging points inthe engine compartment. The battery terminalson the car's starter battery in the cargo area must not be used.
During charging, both the starter battery and the support battery are charged.
13 An authorised Volvo workshop is recommended.
Page 535 of 594
MAINTENANCE AND SERVICE
}}
533
Symbols on the batteries
There are information and warning symbols on the batteries.
Use protective goggles.
Further information in the
owner's manual for the car.
Store the battery out of the reach of children.
The battery contains corro- sive acid.
Avoid sparks and nakedflames.
Risk of explosion.
Must be taken for recycling.
NOTE
An expended starter battery or support bat- tery must be recycled in an environmentallysafe manner since it contains lead.
Related information
•Starter battery (p. 530)
• Support battery (p. 533)
Support battery Cars with Start/Stop function, in addition to the starter battery, are equipped with a support bat-tery.
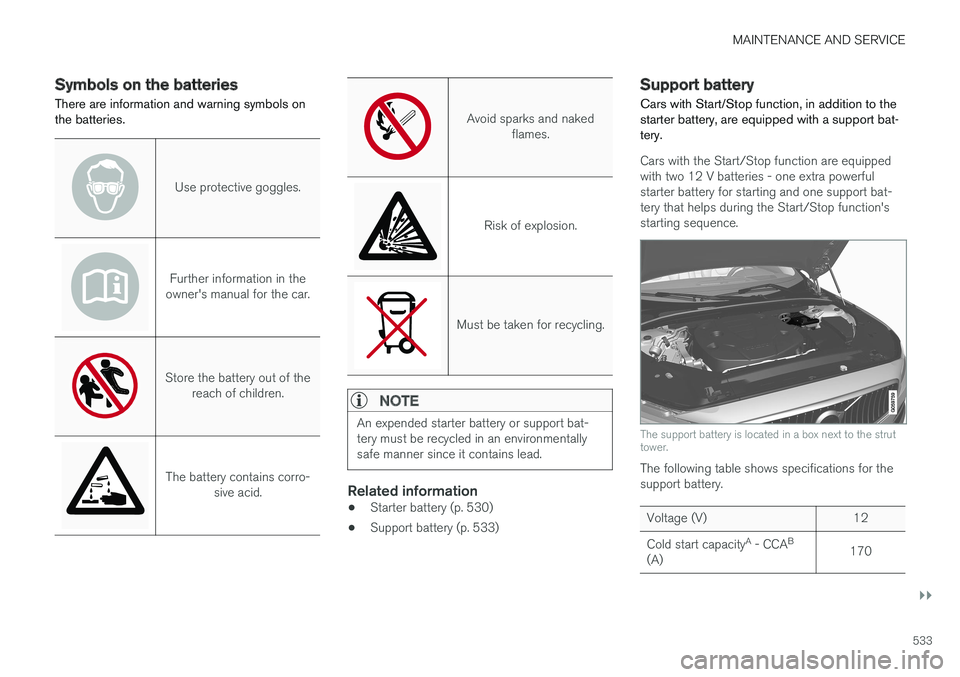
Cars with the Start/Stop function are equipped with two 12 V batteries - one extra powerfulstarter battery for starting and one support bat-tery that helps during the Start/Stop function'sstarting sequence.
The support battery is located in a box next to the strut tower.
The following table shows specifications for the support battery.
Voltage (V) 12 Cold start capacity A
- CCA B
(A) 170