start stop button VOLVO V90 2017 Owners Manual
[x] Cancel search | Manufacturer: VOLVO, Model Year: 2017, Model line: V90, Model: VOLVO V90 2017Pages: 594, PDF Size: 15.07 MB
Page 53 of 594
INTRODUCTION
}}
51
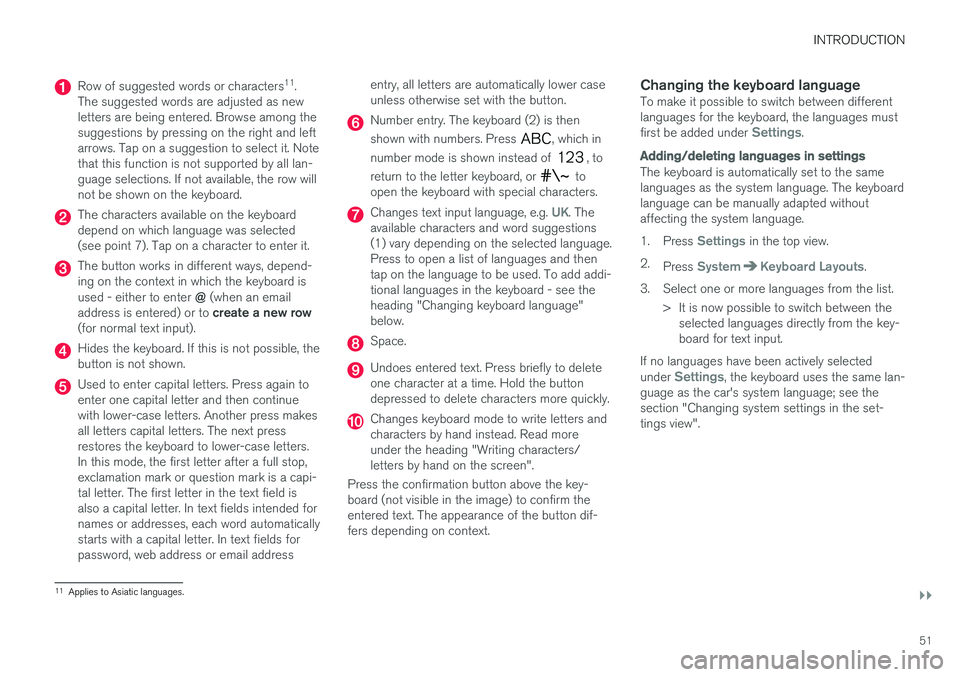
Row of suggested words or characters11
.
The suggested words are adjusted as new letters are being entered. Browse among thesuggestions by pressing on the right and leftarrows. Tap on a suggestion to select it. Notethat this function is not supported by all lan-guage selections. If not available, the row willnot be shown on the keyboard.
The characters available on the keyboard depend on which language was selected(see point 7). Tap on a character to enter it.
The button works in different ways, depend- ing on the context in which the keyboard is used - either to enter @ (when an email
address is entered) or to create a new row
(for normal text input).
Hides the keyboard. If this is not possible, the button is not shown.
Used to enter capital letters. Press again to enter one capital letter and then continuewith lower-case letters. Another press makesall letters capital letters. The next pressrestores the keyboard to lower-case letters.In this mode, the first letter after a full stop,exclamation mark or question mark is a capi-tal letter. The first letter in the text field isalso a capital letter. In text fields intended fornames or addresses, each word automaticallystarts with a capital letter. In text fields forpassword, web address or email address entry, all letters are automatically lower caseunless otherwise set with the button.
Number entry. The keyboard (2) is then shown with numbers. Press
, which in
number mode is shown instead of
, to
return to the letter keyboard, or
to
open the keyboard with special characters.
Changes text input language, e.g. UK. The
available characters and word suggestions (1) vary depending on the selected language.Press to open a list of languages and thentap on the language to be used. To add addi-tional languages in the keyboard - see theheading "Changing keyboard language"below.
Space.
Undoes entered text. Press briefly to delete one character at a time. Hold the buttondepressed to delete characters more quickly.
Changes keyboard mode to write letters and characters by hand instead. Read moreunder the heading "Writing characters/letters by hand on the screen".
Press the confirmation button above the key-board (not visible in the image) to confirm theentered text. The appearance of the button dif-fers depending on context.
Changing the keyboard languageTo make it possible to switch between differentlanguages for the keyboard, the languages must first be added under
Settings.
Adding/deleting languages in settings
The keyboard is automatically set to the same languages as the system language. The keyboardlanguage can be manually adapted withoutaffecting the system language. 1. Press
Settings in the top view.
2. Press
SystemKeyboard Layouts.
3. Select one or more languages from the list. > It is now possible to switch between theselected languages directly from the key- board for text input.
If no languages have been actively selected under
Settings, the keyboard uses the same lan-
guage as the car's system language; see the section "Changing system settings in the set-tings view".
11 Applies to Asiatic languages.
Page 109 of 594
INSTRUMENTS AND CONTROLS
}}
107
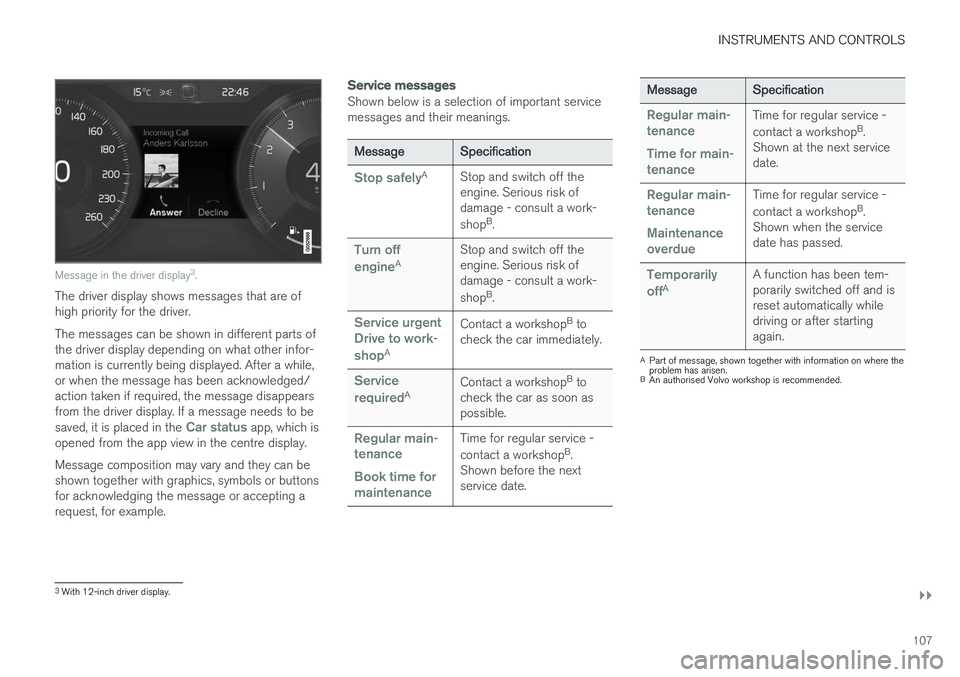
Message in the driver display3
.
The driver display shows messages that are of high priority for the driver. The messages can be shown in different parts of the driver display depending on what other infor-mation is currently being displayed. After a while,or when the message has been acknowledged/action taken if required, the message disappearsfrom the driver display. If a message needs to be saved, it is placed in the
Car status app, which is
opened from the app view in the centre display. Message composition may vary and they can be shown together with graphics, symbols or buttonsfor acknowledging the message or accepting arequest, for example.
Service messages
Shown below is a selection of important service messages and their meanings.
Message Specification
Stop safelyA
Stop and switch off the engine. Serious risk ofdamage - consult a work- shopB
.
Turn off engineA Stop and switch off the engine. Serious risk ofdamage - consult a work- shop
B
.
Service urgent Drive to work- shop
A Contact a workshop
B
to
check the car immediately.
Service requiredA Contact a workshop
B
to
check the car as soon as possible.
Regular main- tenance Book time for maintenanceTime for regular service - contact a workshop B
.
Shown before the next service date.
Message Specification
Regular main- tenance Time for main- tenanceTime for regular service - contact a workshopB
.
Shown at the next service date.
Regular main- tenance Maintenance overdueTime for regular service - contact a workshop B
.
Shown when the service date has passed.
Temporarily offA A function has been tem- porarily switched off and isreset automatically whiledriving or after startingagain.
A
Part of message, shown together with information on where the problem has arisen.
B An authorised Volvo workshop is recommended.
3With 12-inch driver display.
Page 145 of 594
INSTRUMENTS AND CONTROLS
}}
* Option/accessory.143
Press the on/off button. The
symbol in the
driver display illuminates when the rear fog lamp is switched on. The rear fog lamp is switched off automatically when:
• the ignition knob is turned to
STOP or when
the stalk switch's rotating ring is set in posi- tion
• the stalk switch's rotating ring is in position
and the front fog lamps are switched
off.
NOTE
Regulations on the use of rear fog lamps vary from country to country.
Related information
• Headlamp control (p. 134)
• Front fog lamps/cornering lights
* (p. 142)
• Ignition positions (p. 385)
Brake lights The brake light automatically comes on during braking.
The brake light is switched on when the brake pedal is depressed. In addition, it is switched onwhen one of driver support systems Adaptive cruise control
*, City Safety or Rear Collision
Warning brakes the car.
Related information
• Emergency brake lights (p. 408)
• Adaptive cruise control
* (p. 290)
• City Safety (p. 330)
• Rear Collision Warning (p. 340)
Hazard warning flashers
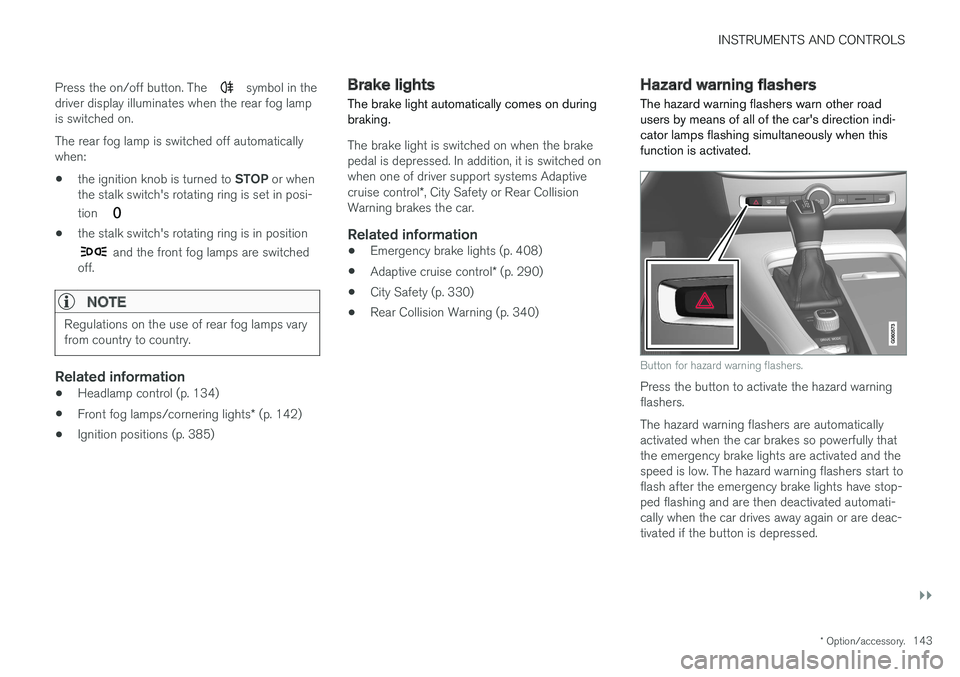
The hazard warning flashers warn other road users by means of all of the car's direction indi-cator lamps flashing simultaneously when thisfunction is activated.
Button for hazard warning flashers.
Press the button to activate the hazard warning flashers. The hazard warning flashers are automatically activated when the car brakes so powerfully thatthe emergency brake lights are activated and thespeed is low. The hazard warning flashers start toflash after the emergency brake lights have stop-ped flashing and are then deactivated automati-cally when the car drives away again or are deac-tivated if the button is depressed.
Page 159 of 594
INSTRUMENTS AND CONTROLS
* Option/accessory.157
Calibrating the compass *
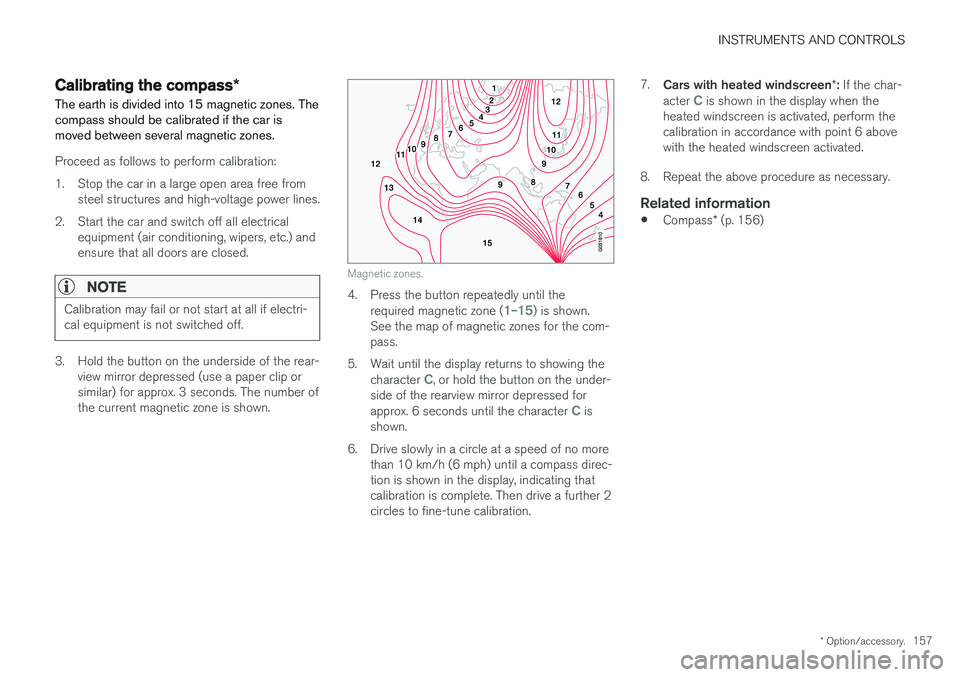
The earth is divided into 15 magnetic zones. The compass should be calibrated if the car ismoved between several magnetic zones.
Proceed as follows to perform calibration:
1. Stop the car in a large open area free from steel structures and high-voltage power lines.
2. Start the car and switch off all electrical equipment (air conditioning, wipers, etc.) and ensure that all doors are closed.
NOTE
Calibration may fail or not start at all if electri- cal equipment is not switched off.
3. Hold the button on the underside of the rear-view mirror depressed (use a paper clip or similar) for approx. 3 seconds. The number ofthe current magnetic zone is shown.
Magnetic zones.
4. Press the button repeatedly until the
required magnetic zone (1–15) is shown.
See the map of magnetic zones for the com- pass.
5. Wait until the display returns to showing the character
C, or hold the button on the under-
side of the rearview mirror depressed for approx. 6 seconds until the character
C is
shown.
6. Drive slowly in a circle at a speed of no more than 10 km/h (6 mph) until a compass direc- tion is shown in the display, indicating thatcalibration is complete. Then drive a further 2circles to fine-tune calibration. 7.
Cars with heated windscreen *: If the char-
acter
C is shown in the display when the
heated windscreen is activated, perform the calibration in accordance with point 6 abovewith the heated windscreen activated.
8. Repeat the above procedure as necessary.
Related information
• Compass
* (p. 156)
Page 163 of 594
INSTRUMENTS AND CONTROLS
}}
* Option/accessory.161
The function is deactivated when the car is sup- plied from the factory and can be activated/deac-tivated: 1.
Press
Settings in the top view in the centre
display.
2. Press
My CarLocking.
Select
Auto Close Sunroof Curtain to
activate/deactivate.
Closing using the remote control key, central locking button or door handles
Remote control key
–Give a long press on the remote control key's lock button
until the panorama roof and
sun blind start moving towards the closed position. Then release the lock button.
Movement stops if the remote control key's lockbutton is pressed again or when the roof/blindhas reached the closed position.
Central locking button
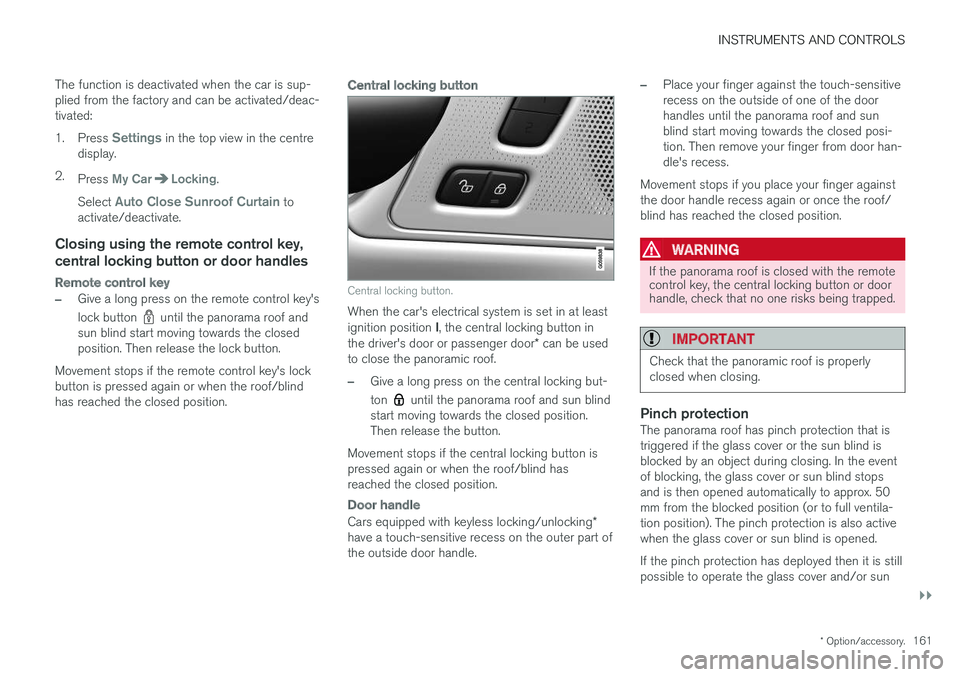
Central locking button.
When the car's electrical system is set in at least ignition position I, the central locking button in
the driver's door or passenger door * can be used
to close the panoramic roof.
–Give a long press on the central locking but- ton
until the panorama roof and sun blind
start moving towards the closed position. Then release the button.
Movement stops if the central locking button ispressed again or when the roof/blind hasreached the closed position.
Door handle
Cars equipped with keyless locking/unlocking *
have a touch-sensitive recess on the outer part of the outside door handle.
–Place your finger against the touch-sensitive recess on the outside of one of the doorhandles until the panorama roof and sunblind start moving towards the closed posi-tion. Then remove your finger from door han-dle's recess.
Movement stops if you place your finger againstthe door handle recess again or once the roof/blind has reached the closed position.
WARNING
If the panorama roof is closed with the remote control key, the central locking button or doorhandle, check that no one risks being trapped.
IMPORTANT
Check that the panoramic roof is properly closed when closing.
Pinch protectionThe panorama roof has pinch protection that is triggered if the glass cover or the sun blind isblocked by an object during closing. In the eventof blocking, the glass cover or sun blind stopsand is then opened automatically to approx. 50mm from the blocked position (or to full ventila-tion position). The pinch protection is also activewhen the glass cover or sun blind is opened. If the pinch protection has deployed then it is still possible to operate the glass cover and/or sun
Page 197 of 594
CLIMATE CONTROL
}}
* Option/accessory.195
From the climate view in the centre display
Activating/deactivating max defroster
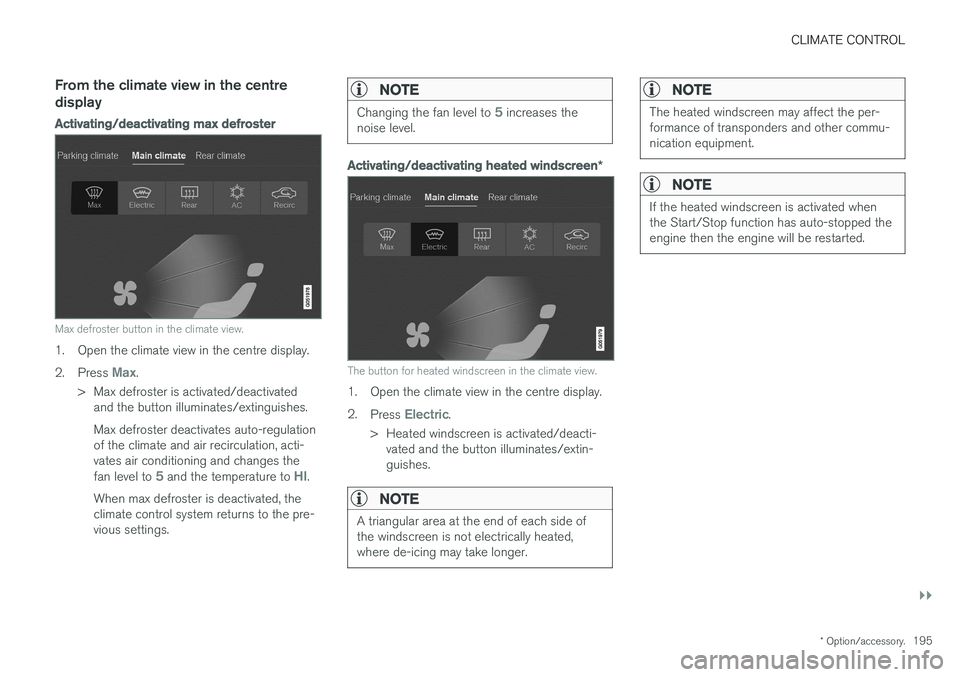
Max defroster button in the climate view.
1. Open the climate view in the centre display. 2.
Press
Max.
> Max defroster is activated/deactivated and the button illuminates/extinguishes. Max defroster deactivates auto-regulation of the climate and air recirculation, acti-vates air conditioning and changes the fan level to
5 and the temperature to HI.
When max defroster is deactivated, the climate control system returns to the pre-vious settings.
NOTE
Changing the fan level to 5 increases the
noise level.
Activating/deactivating heated windscreen *
The button for heated windscreen in the climate view.
1. Open the climate view in the centre display. 2.
Press
Electric.
> Heated windscreen is activated/deacti- vated and the button illuminates/extin- guishes.
NOTE
A triangular area at the end of each side of the windscreen is not electrically heated,where de-icing may take longer.
NOTE
The heated windscreen may affect the per- formance of transponders and other commu-nication equipment.
NOTE
If the heated windscreen is activated when the Start/Stop function has auto-stopped theengine then the engine will be restarted.
Page 209 of 594
CLIMATE CONTROL
}}
* Option/accessory.207
The function utilises several systems in different cases: •
Residual heat from the engine, in a cold cli- mate, heats the passenger compartment tocomfort temperature.
• The ventilation, in a hot climate, cools thepassenger compartment to the current outertemperature.
NOTE
Climate comfort retention is switched off when the car is locked from the outside toavoid using residual heat unnecessarily. Useof the function is intended to maintain climatecomfort when driver or passengers remaininside the car.
Related information
• Climate control (p. 182)
• Starting/stopping preconditioning
* (p. 207)
• Timer for preconditioning
* (p. 208)
• Starting/switching off climate comfort reten- tion
* (p. 210)
• Symbols and messages for parking climatecontrol
* (p. 212)
• Heater
* (p. 213)
• Parking heater
* (p. 214)
Starting/stopping preconditioning *
Preconditioning warms the passenger compart- ment and engine or airs the passenger compart-ment before driving. The function can use directstart from the centre display or a mobile phone.
Starting/stopping from the centre
display
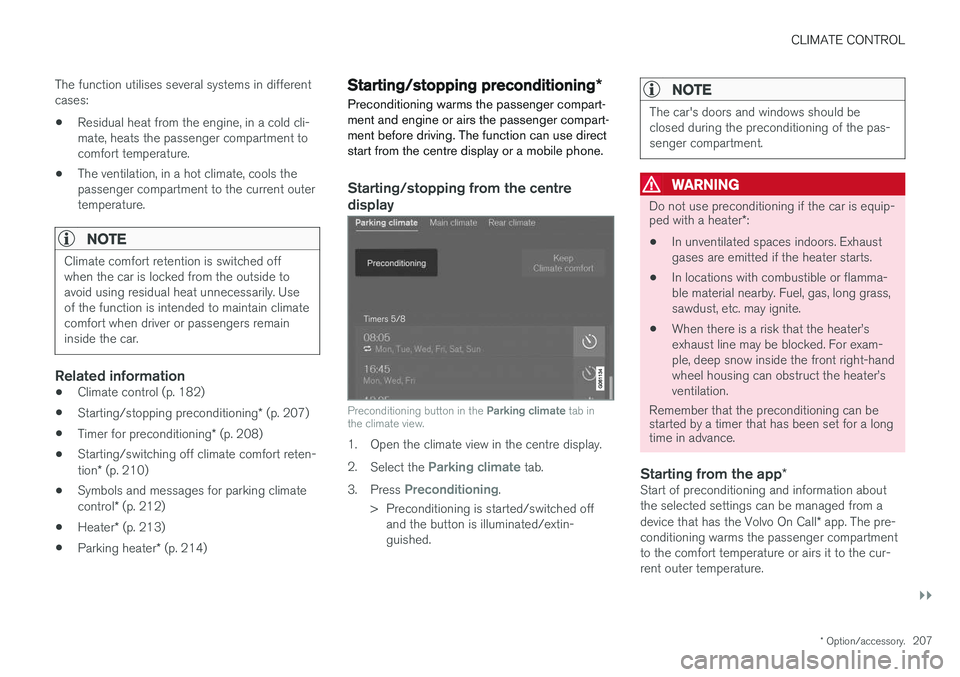
Preconditioning button in the Parking climate tab in
the climate view.
1. Open the climate view in the centre display. 2. Select the
Parking climate tab.
3. Press
Preconditioning.
> Preconditioning is started/switched off and the button is illuminated/extin- guished.
NOTE
The car's doors and windows should be closed during the preconditioning of the pas-senger compartment.
WARNING
Do not use preconditioning if the car is equip- ped with a heater *:
• In unventilated spaces indoors. Exhaust gases are emitted if the heater starts.
• In locations with combustible or flamma-ble material nearby. Fuel, gas, long grass,sawdust, etc. may ignite.
• When there is a risk that the heater
Page 210 of 594
||
CLIMATE CONTROL
* Option/accessory.
208 To be able to also cool the passenger compart- ment to the comfort temperature (with the car'sair conditioning) the engine remote start function Engine Remote Start - ERS
5
via the Volvo On
Call * app. can be used.
Related information
• Parking climate
* (p. 206)
• Timer for preconditioning
* (p. 208)
• Starting/switching off climate comfort reten- tion
* (p. 210)
• Symbols and messages for parking climatecontrol
* (p. 212)
• Heater
* (p. 213)
Timer for preconditioning *
The timer can be set so that the preconditioning is finished at a predetermined time.
The timer can handle up to 8 different settings for:
• A time on a single date
• A time on one or more days of the week, withor without repetition.
Related information
•
Parking climate
* (p. 206)
• Setting the timer for preconditioning
*
(p. 208)
• Activating/deactivating the timer for precon- ditioning
* (p. 210)
• Starting/stopping preconditioning
* (p. 207)
• Symbols and messages for parking climatecontrol
* (p. 212)
Setting the timer for preconditioning *
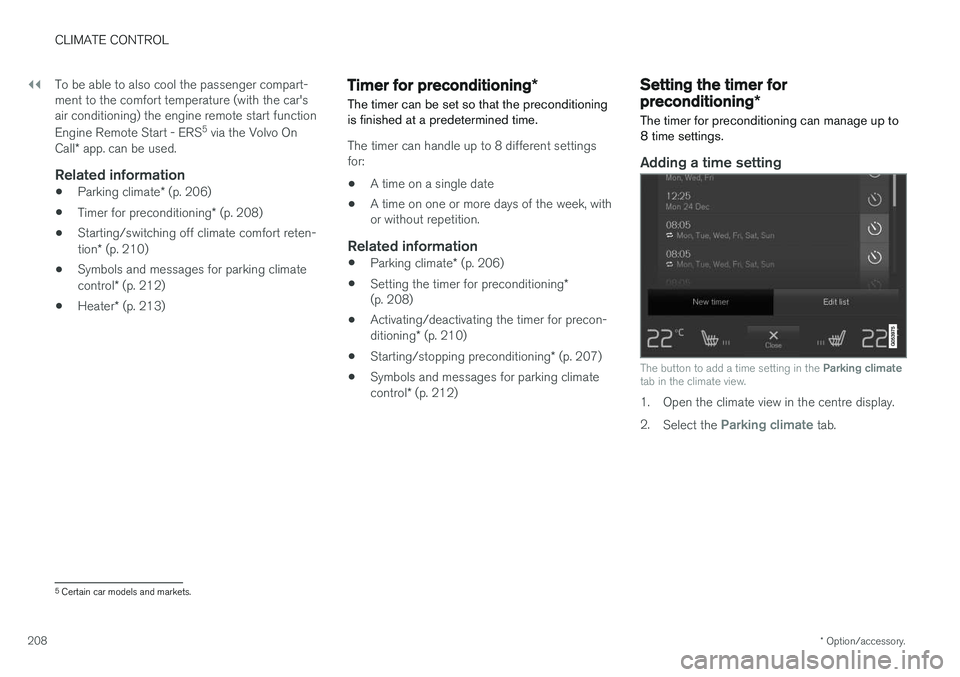
The timer for preconditioning can manage up to 8 time settings.
Adding a time setting
The button to add a time setting in the Parking climate
tab in the climate view.
1. Open the climate view in the centre display. 2. Select the
Parking climate tab.
5
Certain car models and markets.
Page 254 of 594
||
LOCKS AND ALARM
* Option/accessory.
252 5. Pull out the handle.
> The door opens.
Locking will be performed in the same way, but with an anticlockwise turn 45 degrees instead ofclockwise in step (3).
Switching off the alarm *
NOTE
When the door is unlocked using the key blade and is then opened, the alarm is trig-gered.
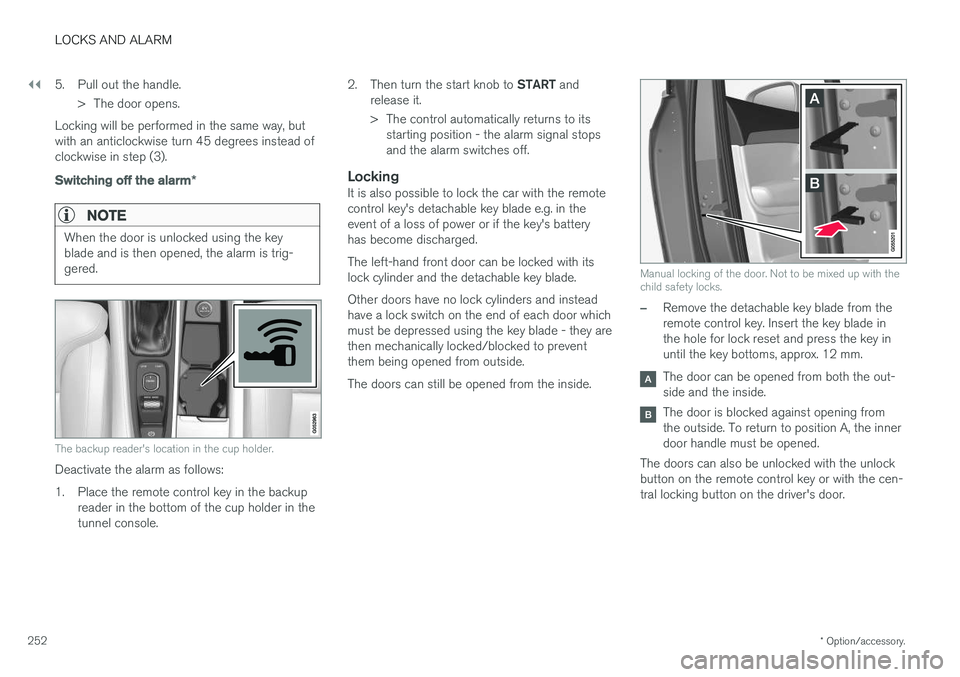
The backup reader's location in the cup holder.
Deactivate the alarm as follows:
1. Place the remote control key in the backup
reader in the bottom of the cup holder in the tunnel console. 2.
Then turn the start knob to START and
release it.
> The control automatically returns to its starting position - the alarm signal stops and the alarm switches off.
LockingIt is also possible to lock the car with the remotecontrol key's detachable key blade e.g. in theevent of a loss of power or if the key's batteryhas become discharged. The left-hand front door can be locked with its lock cylinder and the detachable key blade. Other doors have no lock cylinders and instead have a lock switch on the end of each door whichmust be depressed using the key blade - they arethen mechanically locked/blocked to preventthem being opened from outside. The doors can still be opened from the inside.
Manual locking of the door. Not to be mixed up with the child safety locks.
–Remove the detachable key blade from the remote control key. Insert the key blade inthe hole for lock reset and press the key inuntil the key bottoms, approx. 12 mm.
The door can be opened from both the out- side and the inside.
The door is blocked against opening from the outside. To return to position A, the innerdoor handle must be opened.
The doors can also be unlocked with the unlockbutton on the remote control key or with the cen-tral locking button on the driver's door.
Page 257 of 594
LOCKS AND ALARM
* Option/accessory.255
2.
Press the
button on the underside of
the tailgate for at least 3 seconds.
> Two short acoustic signals sound to indi- cate that the set position has been saved.
To reset max. opening:
–Manually move the tailgate to its highest possible position - press the
button on
the tailgate for at least 3 seconds.
> Two acoustic signals sound to indicate that the set position has been cleared. The tailgate will then assume its max.position when opened.
NOTE
• If the system has been operating continu- ously for a long time, it is switched off toavoid overload. It can be used again afterabout 2 minutes.
Pinch protectionIf something with sufficient resistance prevents the tailgate from opening/closing then the pinchprotection is activated.
• During opening - movement is interrupted,the tailgate stops and a long acoustic signalsounds.
• During closing - movement is interrupted, thetailgate stops, a long acoustic signal soundsand the tailgate returns to the programmedmax. position.
WARNING
Observe the risk of trapping when opening/ closing. Before starting opening/closing,check that there is nobody near to the tailgateas trapping may have serious consequences. Always operate the tailgate with caution.
Pre-tensioned springs
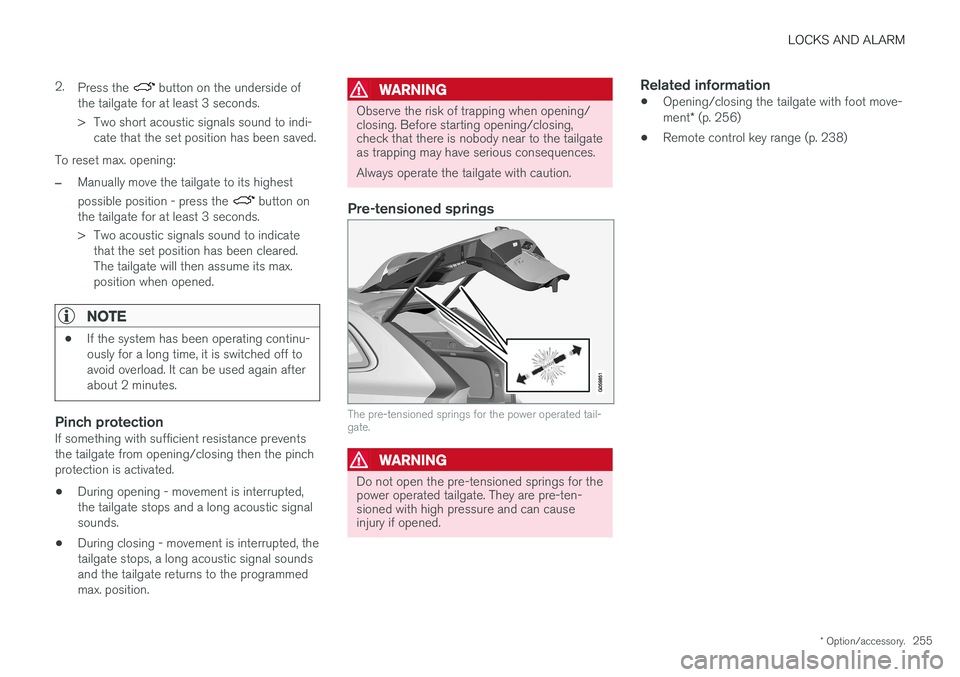
The pre-tensioned springs for the power operated tail- gate.
WARNING
Do not open the pre-tensioned springs for the power operated tailgate. They are pre-ten-sioned with high pressure and can causeinjury if opened.
Related information
• Opening/closing the tailgate with foot move- ment
* (p. 256)
• Remote control key range (p. 238)