brake light VOLVO V90 2018 Owner´s Manual
[x] Cancel search | Manufacturer: VOLVO, Model Year: 2018, Model line: V90, Model: VOLVO V90 2018Pages: 656, PDF Size: 11.78 MB
Page 443 of 656
STARTING AND DRIVING
* Option/accessory.441
CAUTION
•Bumper-attached trailer hitches must not be used on Volvos, nor should safetychains be attached to the bumper.
• Trailer hitches attaching to the vehiclerear axle must not be used.
• Never connect a trailer's hydraulic brakesystem directly to the vehicle brake sys-tem, nor a trailer's lighting system directlyto the vehicle lighting system. Consultyour nearest authorized Volvo retailer forcorrect installation.
• When towing a trailer, the trailer's safetychains or wire must be correctly fastenedto the attachment points provided in thetrailer hitch on the vehicle. The safetychain or wire must never be fastened toor wound around the towing ball.
NOTE
The optional detachable trailer hitch may not be available in all markets or on all models.Consult your Volvo retailer.
NOTE
Extreme weather conditions, towing a trailer, driving at high altitudes and fuel quality arefactors that significantly increase a vehicle'sfuel consumption.
Trailer weights
WARNING
Please adhere to the recommendations provi- ded for trailer weight. If the recommendationsare not followed, the vehicle and trailer maybe difficult to control during evasive maneu-vers and braking.
NOTE
The specified maximum trailer weights are those permitted by Volvo. National vehicleregulations may set additional restrictions ontrailer weight and speed. The trailer hitchesmay be certified for higher towing weightsthan the vehicle is permitted to tow.
Self-leveling suspension
*The vehicle's self-leveling system attempts to keep the vehicle at a constant level, regardless ofload (up to the maximum permitted weight).When the vehicle is stationary, the rear end of thevehicle will be slightly lowered, which is normal.
Driving in hilly terrain or hot weatherIn certain conditions, there is a risk of overheat-ing when driving with a trailer. If overheating ofthe engine and drive system is detected, a warn-ing symbol will illuminate in the instrument panelalong with a message. The automatic transmission selects the optimalgear for the current load and engine speed.
Steep inclines
Do not lock the automatic transmission into a higher gear than what the engine can handle
‒ it
is not always preferable to drive in high gears at low rpm.
Parking on a hill
1. Depress the brake pedal.
2. Apply the parking brake.3. Put the gear selector in P.
4. Release the brake pedal.Put chocks behind the wheels when the vehicle is parked on a hill with a trailer attached.
Starting on a hill
1. Depress the brake pedal. 2. Put the gear selector in D.
3. Release the parking brake.
4. Release the brake pedal and start driving.
Related information
• Trailer Stability Assist
* (p. 442)
• Checking trailer lights (p. 443)
• Towing capacity and tongue weight (p. 632)
• Overheating of engine and transmission (p. 437)
Page 445 of 656
STARTING AND DRIVING
* Option/accessory.443
Checking trailer lights
When connecting a trailer, make sure that all of the lights on the trailer are functioning beforestarting to drive.
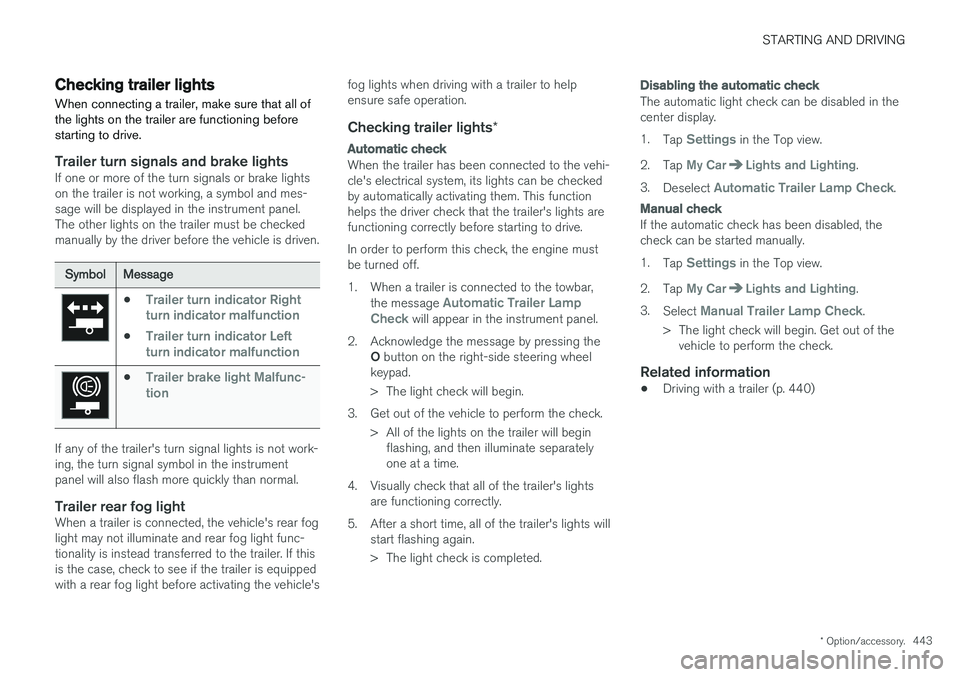
Trailer turn signals and brake lightsIf one or more of the turn signals or brake lights on the trailer is not working, a symbol and mes-sage will be displayed in the instrument panel.The other lights on the trailer must be checkedmanually by the driver before the vehicle is driven.
SymbolMessage
•Trailer turn indicator Right
turn indicator malfunction
•Trailer turn indicator Left
turn indicator malfunction
•Trailer brake light Malfunc-
tion
If any of the trailer's turn signal lights is not work- ing, the turn signal symbol in the instrumentpanel will also flash more quickly than normal.
Trailer rear fog lightWhen a trailer is connected, the vehicle's rear foglight may not illuminate and rear fog light func-tionality is instead transferred to the trailer. If thisis the case, check to see if the trailer is equippedwith a rear fog light before activating the vehicle's fog lights when driving with a trailer to helpensure safe operation.
Checking trailer lights
*
Automatic check
When the trailer has been connected to the vehi- cle's electrical system, its lights can be checkedby automatically activating them. This functionhelps the driver check that the trailer's lights arefunctioning correctly before starting to drive. In order to perform this check, the engine must be turned off.
1. When a trailer is connected to the towbar,
the message
Automatic Trailer Lamp
Check will appear in the instrument panel.
2. Acknowledge the message by pressing the O button on the right-side steering wheel
keypad.
> The light check will begin.
3. Get out of the vehicle to perform the check. > All of the lights on the trailer will beginflashing, and then illuminate separately one at a time.
4. Visually check that all of the trailer's lights are functioning correctly.
5. After a short time, all of the trailer's lights will start flashing again.
> The light check is completed.
Disabling the automatic check
The automatic light check can be disabled in the center display. 1.Tap
Settings in the Top view.
2. Tap
My CarLights and Lighting.
3. Deselect
Automatic Trailer Lamp Check.
Manual check
If the automatic check has been disabled, the check can be started manually. 1.Tap
Settings in the Top view.
2. Tap
My CarLights and Lighting.
3. Select
Manual Trailer Lamp Check.
> The light check will begin. Get out of the vehicle to perform the check.
Related information
• Driving with a trailer (p. 440)
Page 446 of 656
STARTING AND DRIVING
444
Towing using a towlineThis section refers to one vehicle being towed behind another using a towline.
Before towing another vehicle, check applicable speed limit regulations.
Preparations and towing
CAUTION
Note that the vehicle must always be towed with the wheels rolling forward.
• Do not tow a vehicle with automatictransmission at a speed greater than80 km/h (50 mph) or for a distancegreater than 80 km (50 miles).
WARNING
•
Ignition mode
II must be active – all air-
bags are deactivated in ignition mode I.
• Always have the remote key in the vehicle when it is towed.
WARNING
The brake and steering servos do not work when the engine is off – it takesabout 5 times more pressure on the brakepedal and steering requires much more effortthan normal. 1. Turn on the hazard warning flashers.
2. Attach the towline to the towing eyelet.3.
Put the vehicle in ignition mode II – without
pressing the brake pedal, turn the start knob clockwise and hold it there for about4 seconds. Release the knob, which willautomatically return to its original position.
4. Move the gear selector to neutral ( N) and
release the parking brake. If the battery charge level is too low, it may not be possible to release the parking brake.Connect an auxiliary battery to the vehicle ifthe battery is discharged.
> The towing vehicle can now start driving.
5. Keep the towline taut when the towing vehi- cle slows down by applying light pressure to the brake pedal. This will help avoid jarringmovements.
6. Be prepared to apply the brakes to stop the vehicle.
Jump startingDo not tow the vehicle to start the engine. Use anauxiliary battery if the start battery's charge levelis so low that the engine cannot be started.
CAUTION
Attempting to tow with the engine running could result in damage to the three-way cata-lytic converter.
Related information
• Attaching and removing the towing eyelet (p. 445)
• Hazard warning flashers (p. 164)
• Recovery (p. 446)
• Jump starting using another battery (p. 439)
• Selecting ignition mode (p. 404)
Page 585 of 656
MAINTENANCE AND SERVICE
* Option/accessory.583
NOTE
To bear in mind when refitting the covering:
• The pin in the clip must be pressed back completely before the clip is reinstalled inthe covering.
• When the covering is reinstalled, the pinmust be pressed in until the end surfaceis level with the surface of the clip.
Related information
• Replacing bulbs (p. 581)
• Replacing the low beam headlight bulbs (p. 584)
• Replacing the high beam headlight bulbs(p. 584)
• Replacing daytime running lights/front park-ing light bulbs (p. 585)
• Replacing front turn signal bulbs (p. 586)
• Bulb specifications (p. 588)
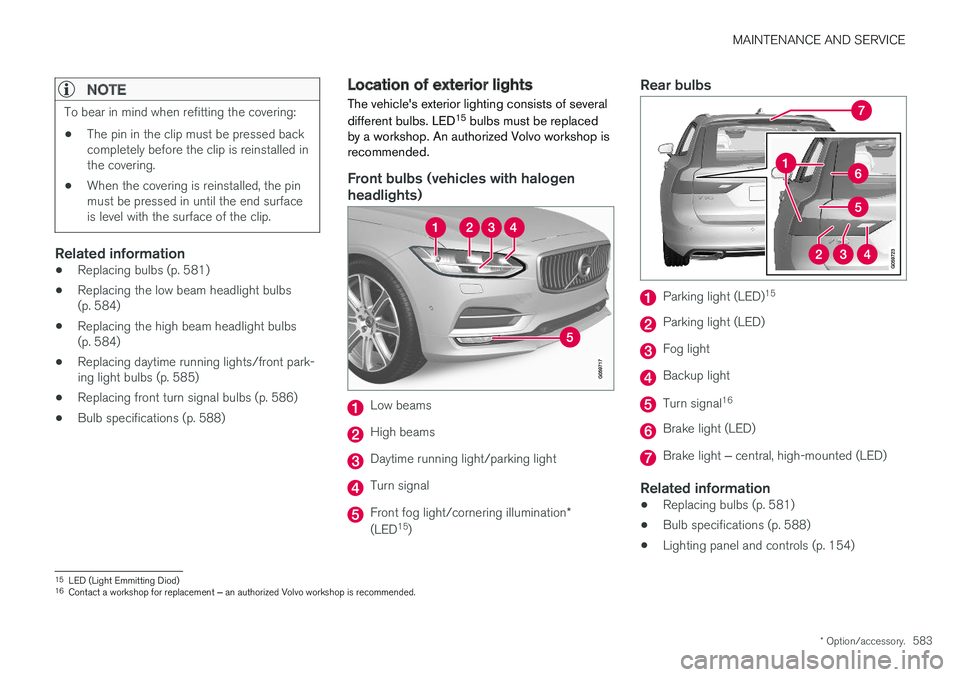
Location of exterior lights
The vehicle's exterior lighting consists of several different bulbs. LED 15
bulbs must be replaced
by a workshop. An authorized Volvo workshop is recommended.
Front bulbs (vehicles with halogen headlights)
Low beams
High beams
Daytime running light/parking light
Turn signal
Front fog light/cornering illumination *
(LED 15
)
Rear bulbs
Parking light (LED) 15
Parking light (LED)
Fog light
Backup light
Turn signal
16
Brake light (LED)
Brake light
‒ central, high-mounted (LED)
Related information
• Replacing bulbs (p. 581)
• Bulb specifications (p. 588)
• Lighting panel and controls (p. 154)
15
LED (Light Emmitting Diod)
16 Contact a workshop for replacement ‒ an authorized Volvo workshop is recommended.
Page 600 of 656
||
MAINTENANCE AND SERVICE
* Option/accessory.
598
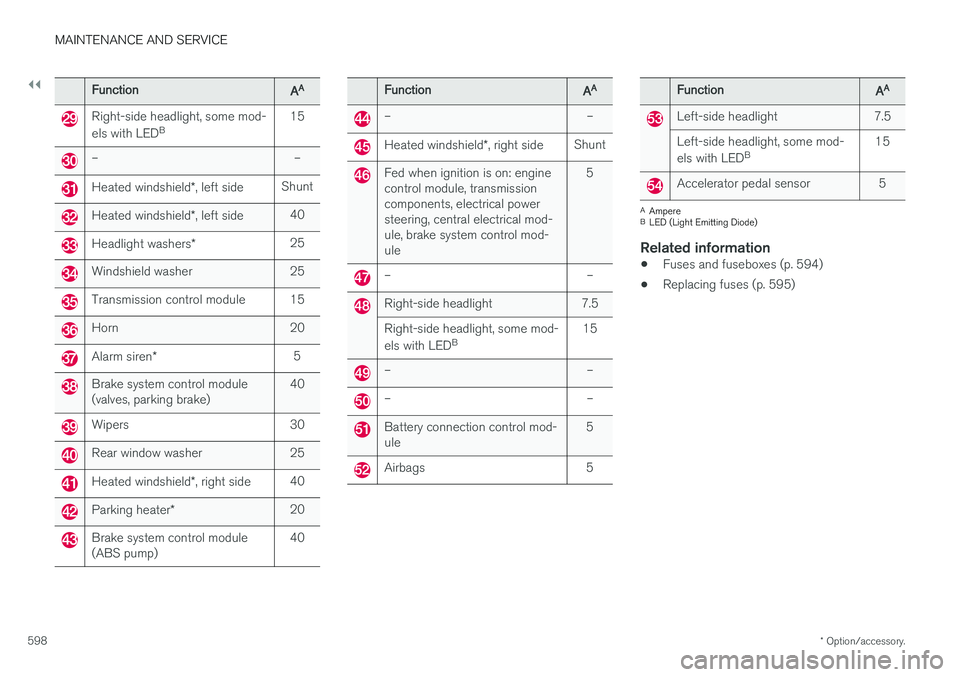
FunctionAA
Right-side headlight, some mod- els with LED B 15
– –
Heated windshield
*, left side Shunt
Heated windshield
*, left side 40
Headlight washers
*25
Windshield washer 25
Transmission control module 15
Horn 20
Alarm siren
* 5
Brake system control module (valves, parking brake) 40
Wipers 30
Rear window washer 25
Heated windshield
*, right side 40
Parking heater
* 20
Brake system control module (ABS pump) 40
FunctionAA
– –
Heated windshield
*, right side Shunt
Fed when ignition is on: engine control module, transmissioncomponents, electrical powersteering, central electrical mod-ule, brake system control mod-ule 5
– –
Right-side headlight 7.5 Right-side headlight, some mod- els with LED
B 15
– –
– –
Battery connection control mod- ule 5
Airbags 5
FunctionAA
Left-side headlight 7.5 Left-side headlight, some mod- els with LED
B 15
Accelerator pedal sensor 5
A
Ampere
B LED (Light Emitting Diode)
Related information
• Fuses and fuseboxes (p. 594)
• Replacing fuses (p. 595)
Page 602 of 656
||
MAINTENANCE AND SERVICE
* Option/accessory.
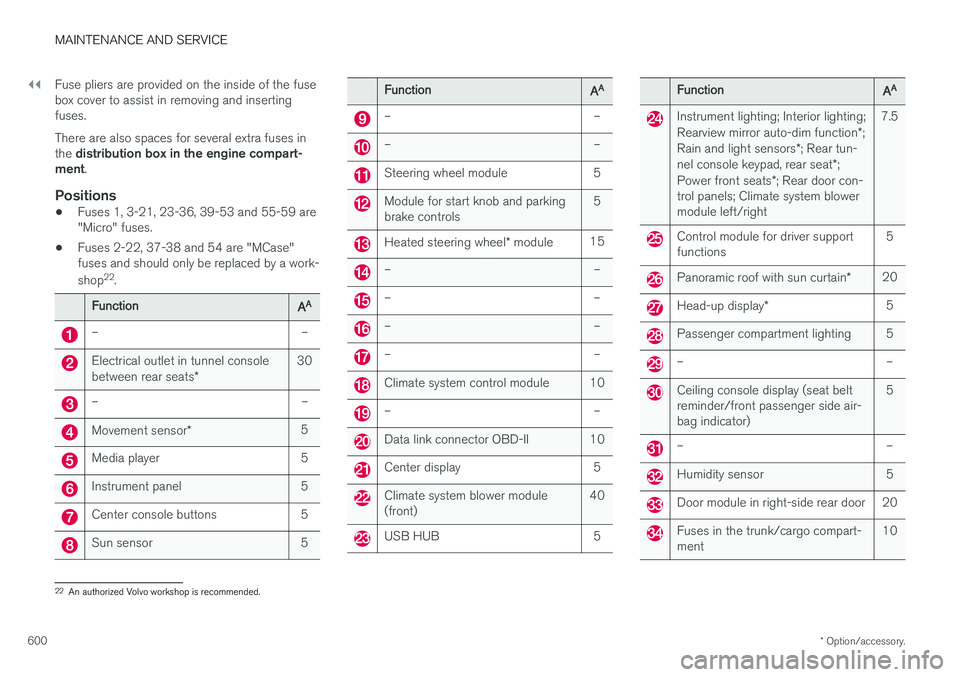
600 Fuse pliers are provided on the inside of the fuse box cover to assist in removing and insertingfuses. There are also spaces for several extra fuses in the
distribution box in the engine compart-
ment .
Positions
•Fuses 1, 3-21, 23-36, 39-53 and 55-59 are "Micro" fuses.
• Fuses 2-22, 37-38 and 54 are "MCase"fuses and should only be replaced by a work- shop 22
.
FunctionAA
– –
Electrical outlet in tunnel console between rear seats * 30
– –
Movement sensor
* 5
Media player 5
Instrument panel 5
Center console buttons 5
Sun sensor 5
FunctionAA
– –
– –
Steering wheel module 5
Module for start knob and parking brake controls 5
Heated steering wheel
* module 15
– –
– –
– –
– –
Climate system control module 10
– –
Data link connector OBD-II 10
Center display 5
Climate system blower module (front) 40
USB HUB 5
FunctionAA
Instrument lighting; Interior lighting; Rearview mirror auto-dim function
*;
Rain and light sensors *; Rear tun-
nel console keypad, rear seat *;
Power front seats *; Rear door con-
trol panels; Climate system blower module left/right 7.5
Control module for driver support functions
5
Panoramic roof with sun curtain
*20
Head-up display
* 5
Passenger compartment lighting 5
– –
Ceiling console display (seat belt reminder/front passenger side air-bag indicator) 5
– –
Humidity sensor 5
Door module in right-side rear door 20
Fuses in the trunk/cargo compart- ment
10
22
An authorized Volvo workshop is recommended.
Page 611 of 656
MAINTENANCE AND SERVICE
}}
* Option/accessory.609
WARNING
•Never use more than one inlay mat at a time on the driver's floor. If any other typeof floor mat is used, remove the originalmat from the driver's seat floor beforedriving. All types of mats must be securelyanchored in the attachment points in thefloor. Make sure the floor mat does notimpede the movement of the brake pedalor accelerator pedal in any way, as thiscould be a serious safety hazard.
• Volvo's floor mats are specially manufac-tured for your vehicle. They must be prop-erly secured in the attachment points inthe floor to help ensure they cannot slideand become trapped under the pedals.
After vacuuming, a specially designed textilecleaning agent should be used to remove stainson floor mats. Floor mats should be cleaned withproducts recommended by Volvo retailers.
Related information
• Cleaning the interior (p. 606)
• Cleaning the center display (p. 606)
• Cleaning fabric upholstery and ceiling liner(p. 608)
• Cleaning the seat belt (p. 608)
• Cleaning leather upholstery (p. 609) •
Cleaning the leather steering wheel(p. 610)
• Cleaning interior plastic, metal and wood sur-faces (p. 611)
Cleaning leather upholstery
Only use cleaning agents and car care products recommended by Volvo. Clean regularly andtreat stains immediately for best results. It isimportant to vacuum before using a cleaningagent.
Leather upholstery *Volvo's leather upholstery is treated to protect its original appearance. Over time, sunlight, grease,dirt, etc. could break down the protective layer.This could result in scratches and cracking. Leather upholstery is a natural product that changes and acquires a beautiful patina overtime. Regular cleaning and treatments arerequired to preserve the qualities and color of theleather. Volvo offers a comprehensive product,Volvo Leather Care Kit/Wipes, for cleaning andtreating leather upholstery that, when used asdirected, preserves the leather's protective coa-ting. For best results, Volvo recommends cleaning and applying protective cream one to four times ayear (or more as needed). Volvo Leather Care Kit951 0251 and Volvo Leather Softener 9437429 are available for purchase at Volvo retailers.
Page 616 of 656
MAINTENANCE AND SERVICE
614
Automatic car washes The vehicle should be washed as soon as it becomes dirty. This makes the vehicle easier toclean because dirt does not attach as strongly. Italso reduces the risk of scratches and keeps thevehicle looking new.
Automatic car washesAn automatic car wash is a fast and easy way to keep your vehicle clean, but it does not reach allareas of the vehicle. For best results, Volvo rec-ommends hand washing your vehicle or supple-menting automatic car washes with a hand wash.
NOTE
Volvo recommends not washing the vehicle in an automatic car wash during the first fewmonths; the paintwork on new vehicles takessome time to fully harden.
CAUTION
Before driving the vehicle into a car wash, deactivate the Automatic Braking when Sta-tionary and Automatic Parking Brake Applica-tion functions. If the functions are not deacti-vated, the brake system will seize when thevehicle is stationary and the vehicle will not beable to roll.
CAUTION
For automatic car washes in which the vehicle is pulled forward on rolling wheels:
1. Before washing the vehicle, make surethat the automatic rain sensor is deacti- vated. If it is not deactivated and inadver-tently starts, the wiper arms could bedamaged.
2. To help prevent damage from the auto- matic car wash machinery, make surethat the door mirrors are folded in, anten-nas retracted or removed, and any auxili-ary lights secured.
3. Drive into the automatic car wash.
4. Turn off the "Automatic Braking when Stationary" function using the switch in the tunnel console.
5. Turn off the "Automatic Parking Brake Application" function in the center dis-play's Top view.
6. Turn off the engine by turning the start knob in the tunnel console clockwise.Hold the knob in position for at least2 seconds.
The vehicle is now ready for the automatic carwash.
Related information
• Cleaning the exterior (p. 611)
• Polishing and waxing (p. 612)
• Hand washing (p. 612)
• High-pressure washing (p. 615)
• Cleaning the wiper blades (p. 615)
• Cleaning exterior plastic, rubber and trim components (p. 616)
• Cleaning rims (p. 617)
• Corrosion protection (p. 617)
Page 641 of 656
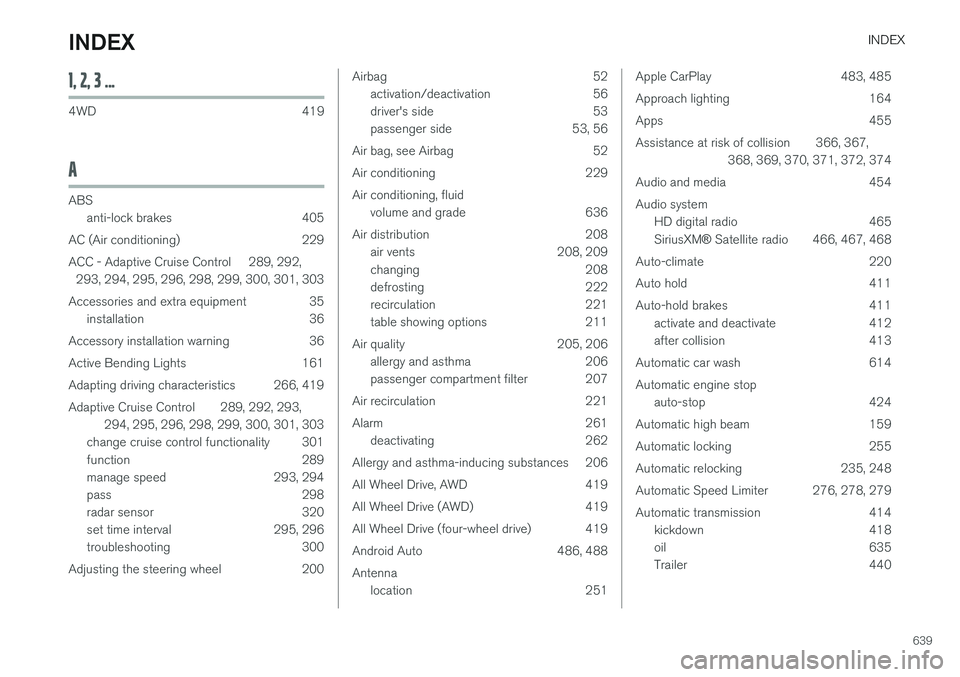
INDEX
639
1, 2, 3 ...
4WD 419
A
ABSanti-lock brakes 405
AC (Air conditioning) 229
ACC - Adaptive Cruise Control 289, 292, 293, 294, 295, 296, 298, 299, 300, 301, 303
Accessories and extra equipment 35 installation 36
Accessory installation warning 36
Active Bending Lights 161
Adapting driving characteristics 266, 419
Adaptive Cruise Control 289, 292, 293, 294, 295, 296, 298, 299, 300, 301, 303
change cruise control functionality 301
function 289
manage speed 293, 294
pass 298
radar sensor 320
set time interval 295, 296
troubleshooting 300
Adjusting the steering wheel 200
Airbag 52 activation/deactivation 56
driver's side 53
passenger side 53, 56
Air bag, see Airbag 52
Air conditioning 229Air conditioning, fluid volume and grade 636
Air distribution 208 air vents 208, 209
changing 208
defrosting 222
recirculation 221
table showing options 211
Air quality 205, 206 allergy and asthma 206
passenger compartment filter 207
Air recirculation 221
Alarm 261 deactivating 262
Allergy and asthma-inducing substances 206
All Wheel Drive, AWD 419
All Wheel Drive (AWD) 419
All Wheel Drive (four-wheel drive) 419
Android Auto 486, 488 Antenna location 251Apple CarPlay 483, 485
Approach lighting 164
Apps 455
Assistance at risk of collision 366, 367, 368, 369, 370, 371, 372, 374
Audio and media 454Audio system HD digital radio 465 SiriusXM ® Satellite radio 466, 467, 468
Auto-climate 220
Auto hold 411
Auto-hold brakes 411 activate and deactivate 412
after collision 413
Automatic car wash 614 Automatic engine stop auto-stop 424
Automatic high beam 159
Automatic locking 255
Automatic relocking 235, 248
Automatic Speed Limiter 276, 278, 279
Automatic transmission 414 kickdown 418
oil 635
Trailer 440
INDEX
Page 642 of 656
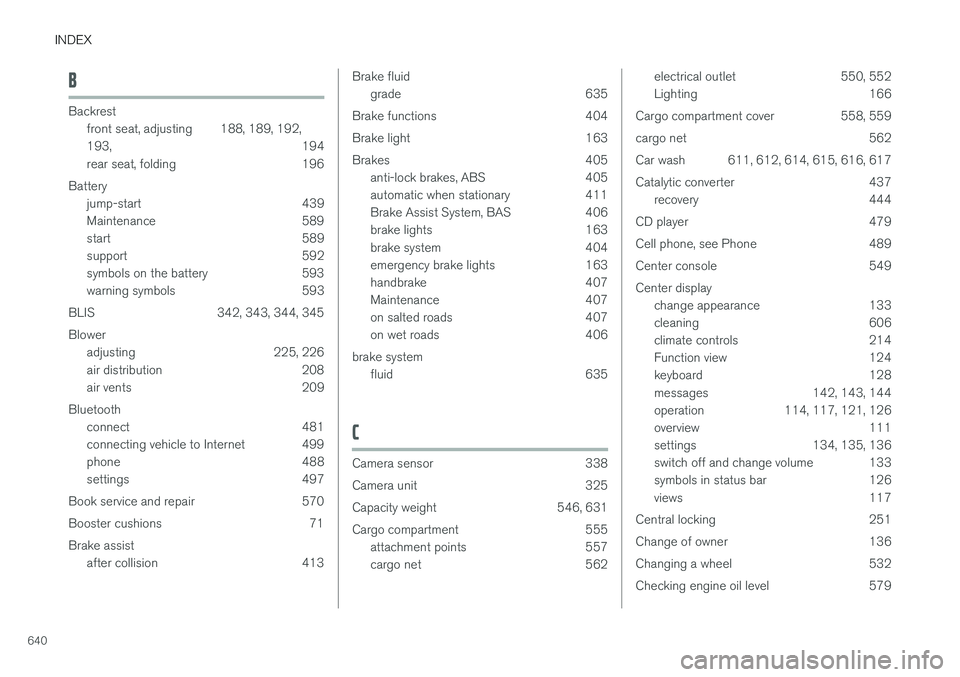
INDEX
640
B
Backrestfront seat, adjusting 188, 189, 192, 193 , 194
rear seat, folding 196
Battery jump-start 439
Maintenance 589
start 589
support 592
symbols on the battery 593
warning symbols 593
BLIS 342, 343, 344, 345 Blower adjusting 225, 226
air distribution 208
air vents 209
Bluetooth connect 481
connecting vehicle to Internet 499
phone 488
settings 497
Book service and repair 570
Booster cushions 71Brake assist after collision 413
Brake fluidgrade 635
Brake functions 404
Brake light 163
Brakes 405 anti-lock brakes, ABS 405
automatic when stationary 411
Brake Assist System, BAS 406
brake lights 163
brake system 404
emergency brake lights 163
handbrake 407
Maintenance 407
on salted roads 407
on wet roads 406
brake system fluid 635
C
Camera sensor 338
Camera unit 325
Capacity weight 546, 631
Cargo compartment 555
attachment points 557
cargo net 562
electrical outlet 550, 552
Lighting 166
Cargo compartment cover 558, 559
cargo net 562
Car wash 611, 612, 614, 615, 616, 617
Catalytic converter 437 recovery 444
CD player 479
Cell phone, see Phone 489
Center console 549Center display change appearance 133
cleaning 606
climate controls 214
Function view 124
keyboard 128
messages 142, 143, 144
operation 114, 117, 121, 126
overview 111
settings 134, 135, 136
switch off and change volume 133
symbols in status bar 126
views 117
Central locking 251
Change of owner 136
Changing a wheel 532
Checking engine oil level 579