buttons VOLVO V90 CROSS COUNTRY 2017 Quick Guide
[x] Cancel search | Manufacturer: VOLVO, Model Year: 2017, Model line: V90 CROSS COUNTRY, Model: VOLVO V90 CROSS COUNTRY 2017Pages: 184, PDF Size: 5.75 MB
Page 4 of 184
2
INTRODUCTION
Contacting Volvo8
Volvo On Call Roadside Assistance 8
Additional information about your vehicle 8
Volvo and the environment 9
Owner's manual and the environment 10
IntelliSafe —driver support
10
Sensus 11
Owner's manual in mobile devices 14
Options, accessories and the On- board Diagnostic (OBDII) socket 14
Finding owner's information 16
Driver distraction 18
Volvo Structural Parts Statement 19
Crash event data 20
Volvo ID 21
Center display overview 22
Changing center display settings 24
Using the center display keyboard 25
Function view buttons 30
Navigating in the center display's views 32
Symbols in the center display status bar 37
Changing settings in different typesof apps 37
Using the center display 38
Using the owner's manual 42
On-board digital owner's manual44
Navigating in the digital owner's manual 45
Glass 47
Technician certification 47
IMPORTANT INFORMATION
General safety information50
Occupant safety 50
Reporting safety defects 51
Recall information 52
Safety during pregnancy 52
Whiplash protection system 53
Seat belts 54
Seat belt pretensioners 55
Buckling and unbuckling seat belts 56
Door and seat belt reminders 58
Airbag system 59
Driver/passenger side airbags 59
Occupant weight sensor 62
Side impact airbags 66
Inflatable curtains 67
Safety mode 67
Starting or moving a vehicle in safety mode 68
Child safety 69
Child restraints 71
Infant seats 72
Convertible seats 74
Booster cushions 77
ISOFIX/LATCH lower anchors 78
Lower child seat attachment points 79
TABLE OF CONTENTS
Page 15 of 184
INTRODUCTION
* Option/accessory.13
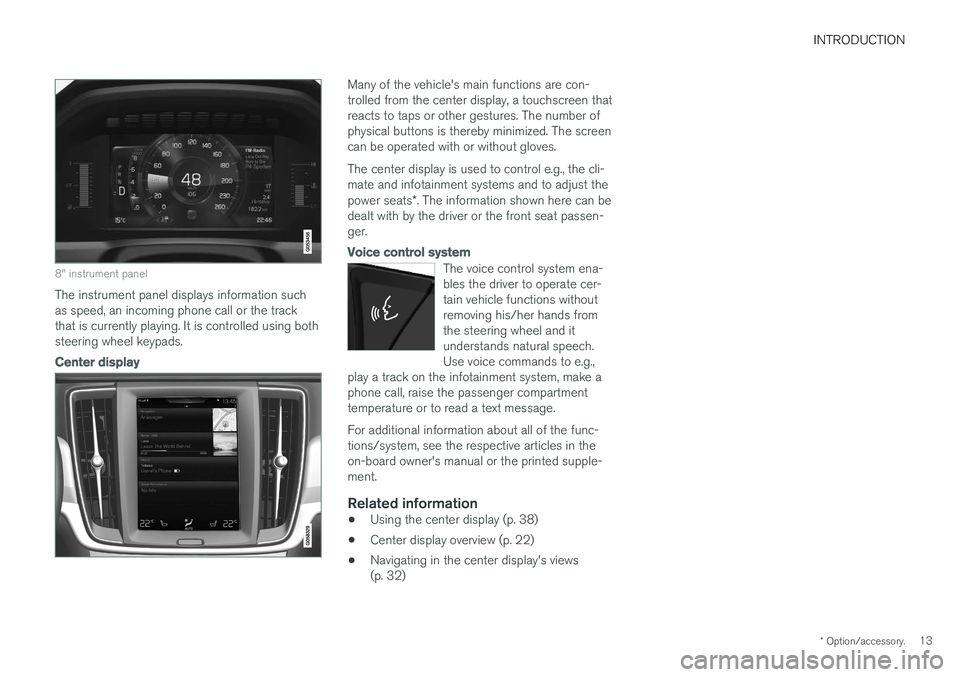
8" instrument panel
The instrument panel displays information such as speed, an incoming phone call or the trackthat is currently playing. It is controlled using bothsteering wheel keypads.
Center display
Many of the vehicle's main functions are con- trolled from the center display, a touchscreen thatreacts to taps or other gestures. The number ofphysical buttons is thereby minimized. The screencan be operated with or without gloves. The center display is used to control e.g., the cli- mate and infotainment systems and to adjust the power seats*. The information shown here can be
dealt with by the driver or the front seat passen- ger.
Voice control system
The voice control system ena- bles the driver to operate cer-tain vehicle functions withoutremoving his/her hands fromthe steering wheel and itunderstands natural speech.Use voice commands to e.g.,
play a track on the infotainment system, make aphone call, raise the passenger compartmenttemperature or to read a text message.
For additional information about all of the func- tions/system, see the respective articles in theon-board owner's manual or the printed supple-ment.
Related information
• Using the center display (p. 38)
• Center display overview (p. 22)
• Navigating in the center display's views(p. 32)
Page 25 of 184
INTRODUCTION
* Option/accessory.23
Function view: vehicle functions can be acti- vated/deactivated by tapping. Certain func-tions are called "trigger functions", which open settings windows, e.g.,
Camera and
parking functions. Settings for the head-up display * are also started from Function view
but the actual interaction is controlled from the steering wheel keypad buttons and theinstrument panel.
Home view: the initial view shown when the center display is started.
App (Application) view: shows apps that have been downloaded (third-party apps) as well as ones for integrated functions such as
FM
radio. Tap an icon to open the app.
Status bar: vehicle activities are shown at the top of the screen. Network/connection infor-mation is shown on the left side of the bar.Media-related information, the clock andinformation about background activities areshown to the right.
Top view: pull down the tab to open Top view. From here, you can access Settings,Owner's manual and stored messages.
Navigation: leads to map navigation. Tap the sub-view to expand it.
Media: the most recently used media-related apps. Tap the sub-view to expand it.
Phone: used to access phone-related func- tions. Tap the sub-view to expand it.
The extra sub-view: the most recently used apps/vehicle functions that do not belong inany of the other sub-views are listed here.Tap the sub-view to expand it.
Climate bar: information and direct access to settings such as temperature, seat heating *
and blower speed. Tap the symbol at the center of the Climate bar to open Climateview for additional settings.
Related information
• Using the center display (p. 38)
Page 28 of 184
||
INTRODUCTION
26
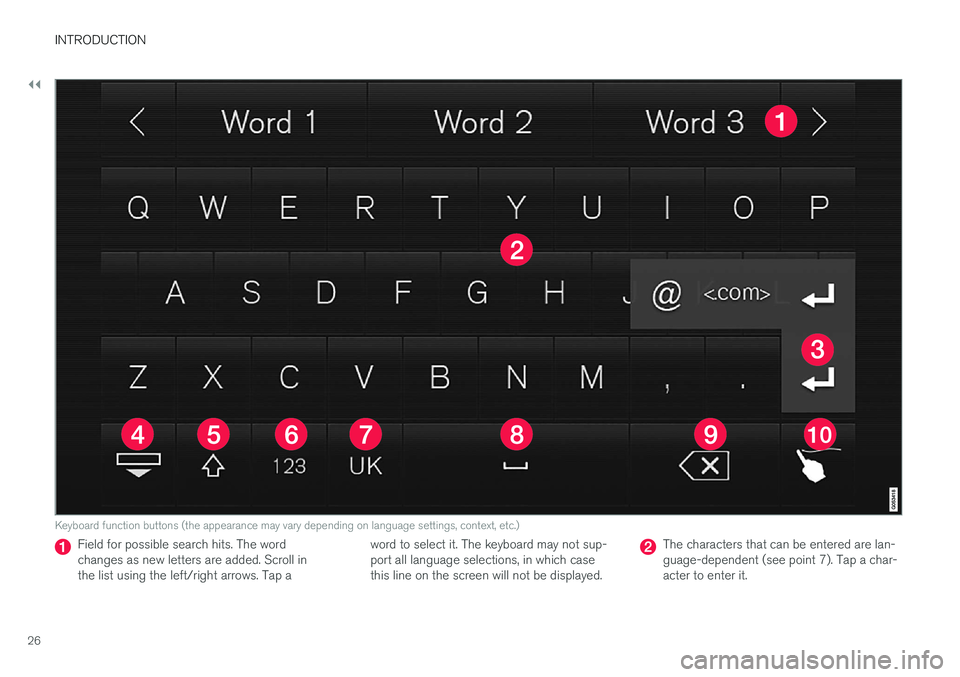
Keyboard function buttons (the appearance may vary depending on language settings, context, etc.)
Field for possible search hits. The word changes as new letters are added. Scroll inthe list using the left/right arrows. Tap aword to select it. The keyboard may not sup-port all language selections, in which casethis line on the screen will not be displayed.The characters that can be entered are lan- guage-dependent (see point 7). Tap a char-acter to enter it.
Page 29 of 184
INTRODUCTION
}}
27
Several buttons (depending on the context for which the keyboard is being used) will bedisplayed here. In certain cases, it can be used to enter @, .com or to start a new line.
Press to hide the keyboard. In cases where this is not possible, the button will not be dis-played.
Tap once to enter one uppercase letter.
Double-tap for Caps lock (tap again to
return to lowercase letters). Letters entered after the !, . and ? characters will automati-cally be uppercase. The first letter in the textfield or in text fields intended for names,addresses or company names will also auto-matically be uppercase. The first letter in textfields intended for passwords, webaddresses or email addresses will automati-cally be lowercase unless upper case ischosen.
Press to display the numbers that can be entered. When numbers are displayed, tap
to resume entering text or to
enter special characters.
Tap to change the keyboard language (in this example, UK English is the selected lan-guage). The characters available will changeaccording to the selected language (2). Thisbutton will only be displayed if several key-board languages have been selected (seethe section "Changing keyboard languages" below). Tap to display a list of possible lan-guages and tap a language to use it.
Tap to enter blank spaces.
Tap to erase one character at a time.
Tap to enable handwriting. See the section "Handwritten text" below.
Entering text and performing searches using thekeyboard are done somewhat differently in thenavigation system. See the section "Filtering des-tination search results" below. Tap the button above the keyboard to confirm the text that has been entered (not shown in theillustration). This button's appearance differsdepending on the context.
Changing keyboard languagesIn order to change keyboard languages, they must first be selected under Settings.
The keyboard language can be changed without changing the language used for the other sys-tems/menus in the vehicle.
1. Pull down the center display's Top view and tap
Settings.
2. Tap
SystemKeyboard Layouts. 3. Select and one or more of the languages in
the list.
> The makes it possible to change the key-board layout and characters available depending on the language(s) selected.
When more than one languagehas been selected, this button (7)3
will appear on the key-
board.
To shift between keyboard languages:
1. Press and hold the button (7).
> A list will be displayed.
2. Tap the desired language. If more than four languages have been selected in
Settings,
scroll in the list.
> The keyboard layout and characters avail- able will change to the selected language.
3In the example illustration, the button shows "UK".
Page 32 of 184
INTRODUCTION
30
Function view buttons
The Function view, which is one of the center display's basic views, contains all of the vehicle's on-screen function buttons. From the Homeview, swipe from left to right on the screen tocome to the Function view.Different types of buttonsThere are three different types of vehicle function buttons as listed in the following table.
Type of button
Functions Vehicle function affected
Function buttons Have On/Off modes. An LED indicator light to the left of the button's icon will illuminate when a function is active. Press the button to turn the function on or off. Most of the buttons in the function view arefunction buttons.
Start buttons Do not have On/Off modes. Pressing a start button opens a function's window, e.g., a window for adjusting thedriver's seat. •
Camera.
•
Headrest fold.
• Functions for folding down a seat.
•
Head-up display adjustments.
Parking buttons Have On/Off and scanning modes. Similar to function buttons but have an additional parking scanning mode. •
Park In.
•
Park Out.
Button modes
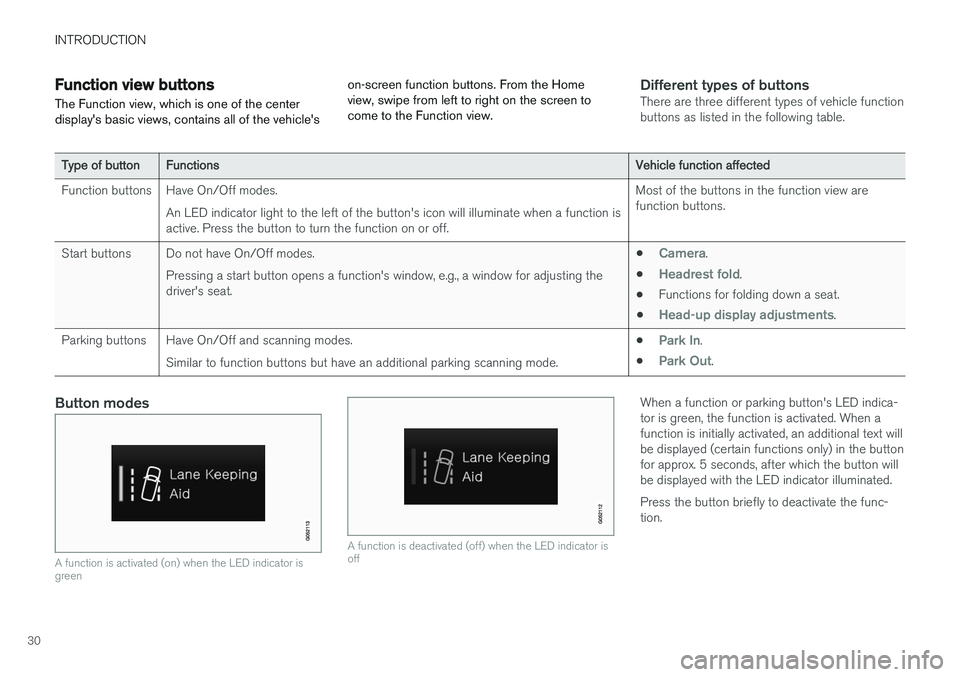
A function is activated (on) when the LED indicator is green
A function is deactivated (off) when the LED indicator is off
When a function or parking button's LED indica- tor is green, the function is activated. When afunction is initially activated, an additional text willbe displayed (certain functions only) in the buttonfor approx. 5 seconds, after which the button willbe displayed with the LED indicator illuminated. Press the button briefly to deactivate the func- tion.
Page 42 of 184
||
INTRODUCTION
40
Turning off and reactivating the center display
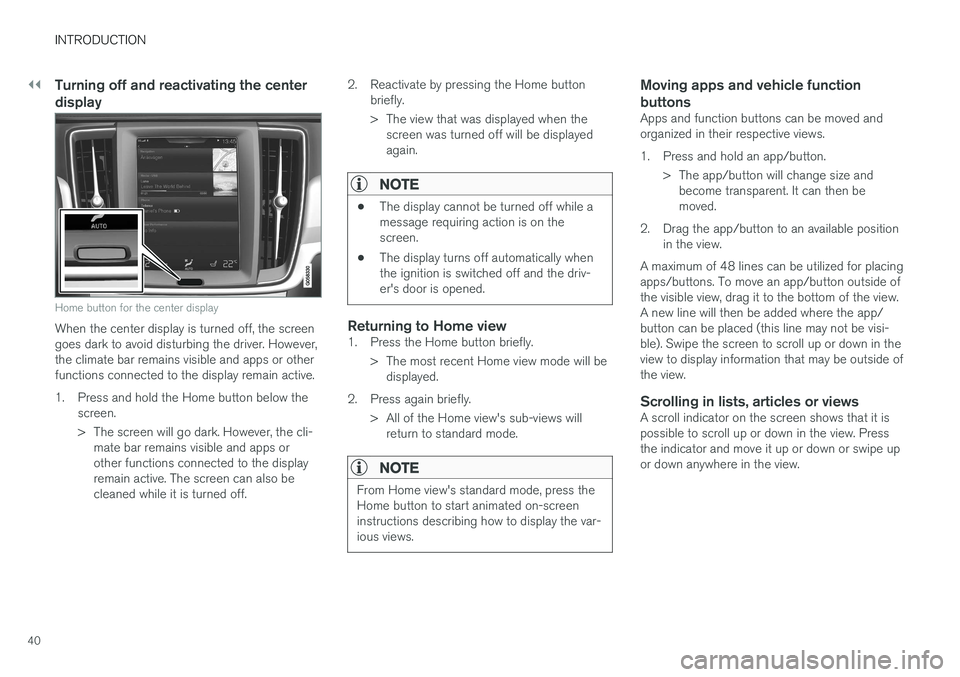
Home button for the center display
When the center display is turned off, the screen goes dark to avoid disturbing the driver. However,the climate bar remains visible and apps or otherfunctions connected to the display remain active.
1. Press and hold the Home button below thescreen.
> The screen will go dark. However, the cli-mate bar remains visible and apps or other functions connected to the displayremain active. The screen can also becleaned while it is turned off. 2. Reactivate by pressing the Home button
briefly.
> The view that was displayed when thescreen was turned off will be displayed again.
NOTE
• The display cannot be turned off while a message requiring action is on thescreen.
• The display turns off automatically whenthe ignition is switched off and the driv-er's door is opened.
Returning to Home view1. Press the Home button briefly.
> The most recent Home view mode will bedisplayed.
2. Press again briefly. > All of the Home view's sub-views willreturn to standard mode.
NOTE
From Home view's standard mode, press the Home button to start animated on-screeninstructions describing how to display the var-ious views.
Moving apps and vehicle function buttons
Apps and function buttons can be moved and organized in their respective views.
1. Press and hold an app/button.
> The app/button will change size andbecome transparent. It can then be moved.
2. Drag the app/button to an available position in the view.
A maximum of 48 lines can be utilized for placingapps/buttons. To move an app/button outside ofthe visible view, drag it to the bottom of the view.A new line will then be added where the app/button can be placed (this line may not be visi-ble). Swipe the screen to scroll up or down in theview to display information that may be outside ofthe view.
Scrolling in lists, articles or viewsA scroll indicator on the screen shows that it ispossible to scroll up or down in the view. Pressthe indicator and move it up or down or swipe upor down anywhere in the view.
Page 98 of 184
||
PRACTICAL INFORMATION
* Option/accessory.
96 2.
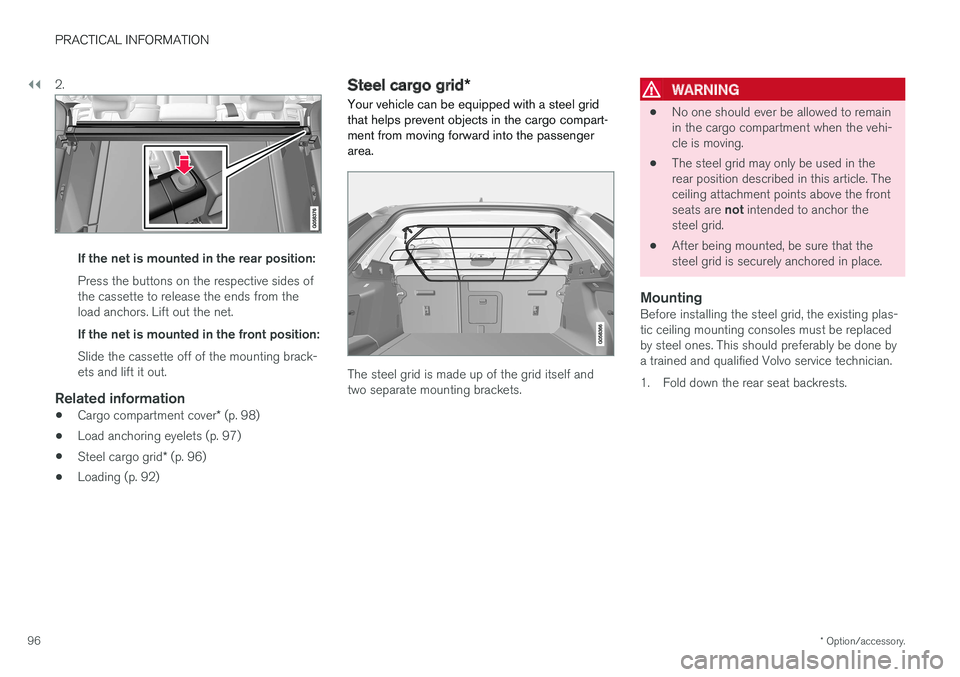
If the net is mounted in the rear position: Press the buttons on the respective sides of the cassette to release the ends from theload anchors. Lift out the net. If the net is mounted in the front position: Slide the cassette off of the mounting brack- ets and lift it out.
Related information
•
Cargo compartment cover
* (p. 98)
• Load anchoring eyelets (p. 97)
• Steel cargo grid
* (p. 96)
• Loading (p. 92)
Steel cargo grid
*
Your vehicle can be equipped with a steel grid that helps prevent objects in the cargo compart-ment from moving forward into the passengerarea.
The steel grid is made up of the grid itself and two separate mounting brackets.
WARNING
• No one should ever be allowed to remain in the cargo compartment when the vehi-cle is moving.
• The steel grid may only be used in therear position described in this article. Theceiling attachment points above the front seats are
not intended to anchor the
steel grid.
• After being mounted, be sure that the steel grid is securely anchored in place.
MountingBefore installing the steel grid, the existing plas-tic ceiling mounting consoles must be replacedby steel ones. This should preferably be done bya trained and qualified Volvo service technician.
1. Fold down the rear seat backrests.
Page 157 of 184
FUSES
}}
* Option/accessory.155
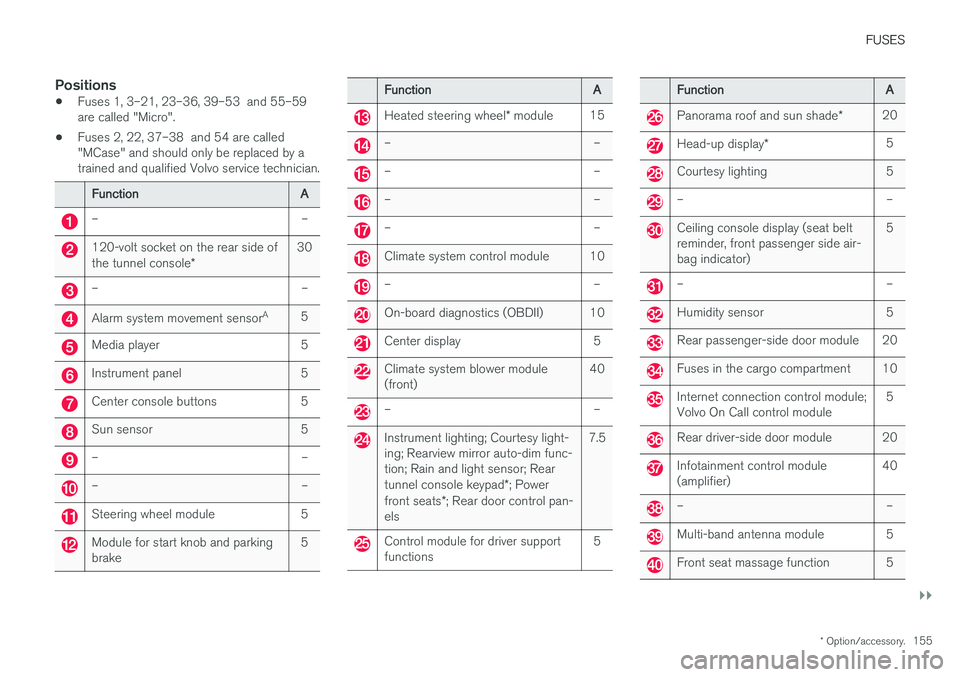
Positions
•Fuses 1, 3–21, 23–36, 39–53 and 55–59 are called "Micro".
• Fuses 2, 22, 37–38 and 54 are called"MCase" and should only be replaced by atrained and qualified Volvo service technician.
Function
A
– –
120-volt socket on the rear side of the tunnel console* 30
– –
Alarm system movement sensor
A
5
Media player 5
Instrument panel 5
Center console buttons 5
Sun sensor 5
– –
– –
Steering wheel module 5
Module for start knob and parking brake 5
Function
A
Heated steering wheel* module 15
– –
– –
– –
– –
Climate system control module 10
– –
On-board diagnostics (OBDII) 10
Center display 5
Climate system blower module (front) 40
– –
Instrument lighting; Courtesy light- ing; Rearview mirror auto-dim func-tion; Rain and light sensor; Rear tunnel console keypad
*; Power
front seats *; Rear door control pan-
els 7.5
Control module for driver support functions
5
Function
A
Panorama roof and sun shade*20
Head-up display
* 5
Courtesy lighting 5
– –
Ceiling console display (seat belt reminder, front passenger side air-bag indicator) 5
– –
Humidity sensor 5
Rear passenger-side door module 20
Fuses in the cargo compartment 10
Internet connection control module; Volvo On Call control module
5
Rear driver-side door module 20
Infotainment control module (amplifier)40
– –
Multi-band antenna module 5
Front seat massage function 5