low beam VOLVO V90 CROSS COUNTRY 2021 User Guide
[x] Cancel search | Manufacturer: VOLVO, Model Year: 2021, Model line: V90 CROSS COUNTRY, Model: VOLVO V90 CROSS COUNTRY 2021Pages: 683, PDF Size: 14.19 MB
Page 163 of 683
LIGHTING
161
Active high beam
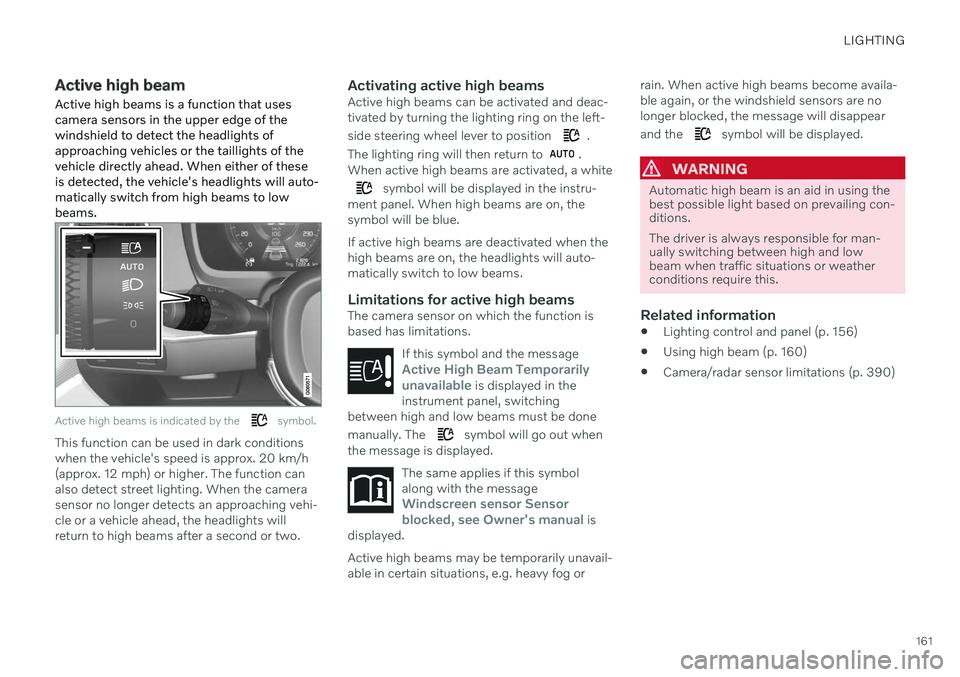
Active high beams is a function that uses camera sensors in the upper edge of thewindshield to detect the headlights ofapproaching vehicles or the taillights of thevehicle directly ahead. When either of theseis detected, the vehicle's headlights will auto-matically switch from high beams to lowbeams.
Active high beams is indicated by the symbol.
This function can be used in dark conditions when the vehicle's speed is approx. 20 km/h(approx. 12 mph) or higher. The function canalso detect street lighting. When the camerasensor no longer detects an approaching vehi-cle or a vehicle ahead, the headlights willreturn to high beams after a second or two.
Activating active high beamsActive high beams can be activated and deac-tivated by turning the lighting ring on the left- side steering wheel lever to position
.
The lighting ring will then return to
.
When active high beams are activated, a white
symbol will be displayed in the instru-
ment panel. When high beams are on, the symbol will be blue. If active high beams are deactivated when the high beams are on, the headlights will auto-matically switch to low beams.
Limitations for active high beamsThe camera sensor on which the function isbased has limitations.
If this symbol and the message
Active High Beam Temporarily
unavailable is displayed in the
instrument panel, switching
between high and low beams must be done manually. The
symbol will go out when
the message is displayed.
The same applies if this symbol along with the message
Windscreen sensor Sensor
blocked, see Owner's manual is
displayed.
Active high beams may be temporarily unavail- able in certain situations, e.g. heavy fog or rain. When active high beams become availa-ble again, or the windshield sensors are nolonger blocked, the message will disappear and the
symbol will be displayed.
WARNING
Automatic high beam is an aid in using the best possible light based on prevailing con-ditions. The driver is always responsible for man- ually switching between high and lowbeam when traffic situations or weatherconditions require this.
Related information
Lighting control and panel (p. 156)
Using high beam (p. 160)
Camera/radar sensor limitations (p. 390)
Page 165 of 683
LIGHTING
}}
* Option/accessory.163
The function is only active in weak daylight or dark conditions and only when the vehicle ismoving and the low beams are on.
Deactivating/activating the functionThe function is activated as the default factorysetting and can be activated and deactivatedin the center display's Function view:
Tap the
Active Bending
Lights button.
Related information
Adjusting light functions via the center display (p. 157)
Front fog lights/corner illumination
*
(p. 163)
Front fog lights/corner illumination *
The fog lights can be activated manually when driving in fog and are activated auto-matically when backing up to help augmentthe backup light. If the vehicle is equipped with corner illumi- nation *, the fog lights are activated automati-
cally in weak daylight or dark conditions to illuminate the area diagonally in front of thevehicle.
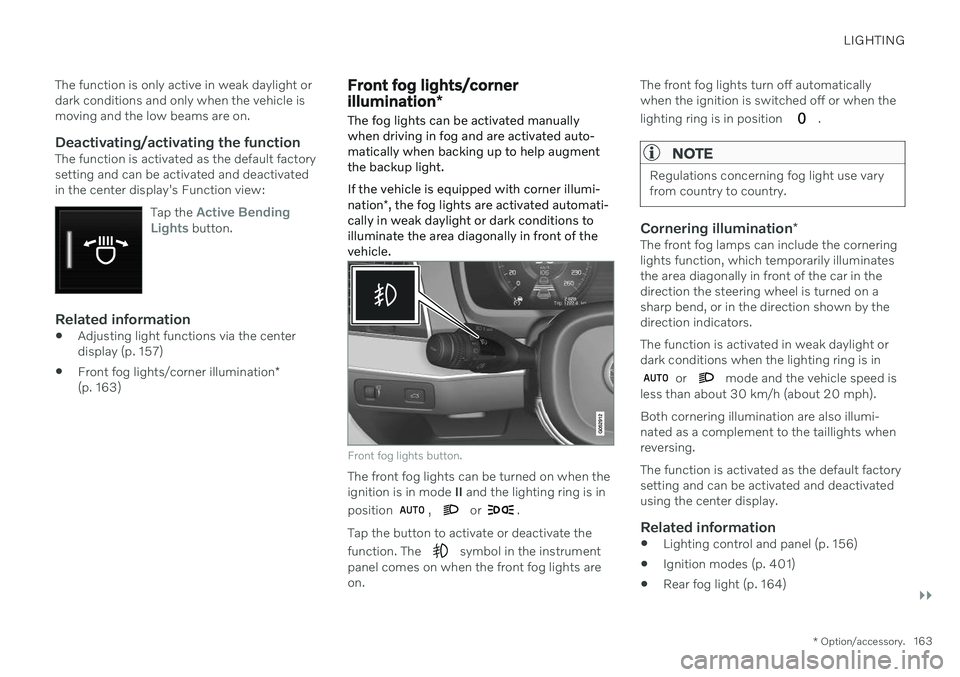
Front fog lights button.
The front fog lights can be turned on when the ignition is in mode II and the lighting ring is in
position
, or .
Tap the button to activate or deactivate the function. The
symbol in the instrument
panel comes on when the front fog lights are on. The front fog lights turn off automaticallywhen the ignition is switched off or when the lighting ring is in position
.
NOTE
Regulations concerning fog light use vary from country to country.
Cornering illumination
*The front fog lamps can include the cornering lights function, which temporarily illuminates the area diagonally in front of the car in thedirection the steering wheel is turned on asharp bend, or in the direction shown by thedirection indicators. The function is activated in weak daylight or dark conditions when the lighting ring is in
or mode and the vehicle speed is
less than about 30 km/h (about 20 mph). Both cornering illumination are also illumi- nated as a complement to the taillights whenreversing. The function is activated as the default factory setting and can be activated and deactivated using the center display.
Related information
Lighting control and panel (p. 156)
Ignition modes (p. 401)
Rear fog light (p. 164)
Page 188 of 683
WINDOWS, GLASS AND MIRRORS
* Option/accessory.
186
Changing rear window wipers (p. 643)
Using the windshield wipers (p. 183)
Using the windshield and headlight washers The windshield and headlight washers are designed to clean the windshield and head-lights. Use the right-side steering wheel leverto start the windshield and headlight wash-ers.
Starting the windshield and headlight washers
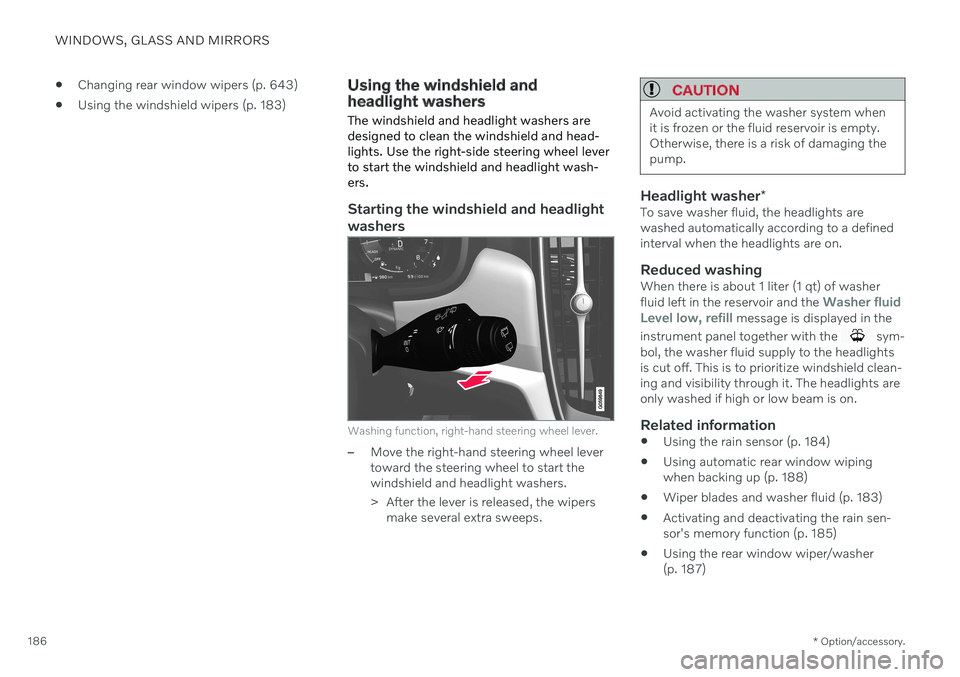
Washing function, right-hand steering wheel lever.
–Move the right-hand steering wheel lever toward the steering wheel to start thewindshield and headlight washers.
> After the lever is released, the wipers
make several extra sweeps.
CAUTION
Avoid activating the washer system when it is frozen or the fluid reservoir is empty.Otherwise, there is a risk of damaging thepump.
Headlight washer *To save washer fluid, the headlights are washed automatically according to a definedinterval when the headlights are on.
Reduced washingWhen there is about 1 liter (1 qt) of washer fluid left in the reservoir and the Washer fluid
Level low, refill message is displayed in the
instrument panel together with the
sym-
bol, the washer fluid supply to the headlights is cut off. This is to prioritize windshield clean-ing and visibility through it. The headlights areonly washed if high or low beam is on.
Related information
Using the rain sensor (p. 184)
Using automatic rear window wipingwhen backing up (p. 188)
Wiper blades and washer fluid (p. 183)
Activating and deactivating the rain sen-sor's memory function (p. 185)
Using the rear window wiper/washer(p. 187)
Page 392 of 683
DRIVER SUPPORT
* Option/accessory.
390
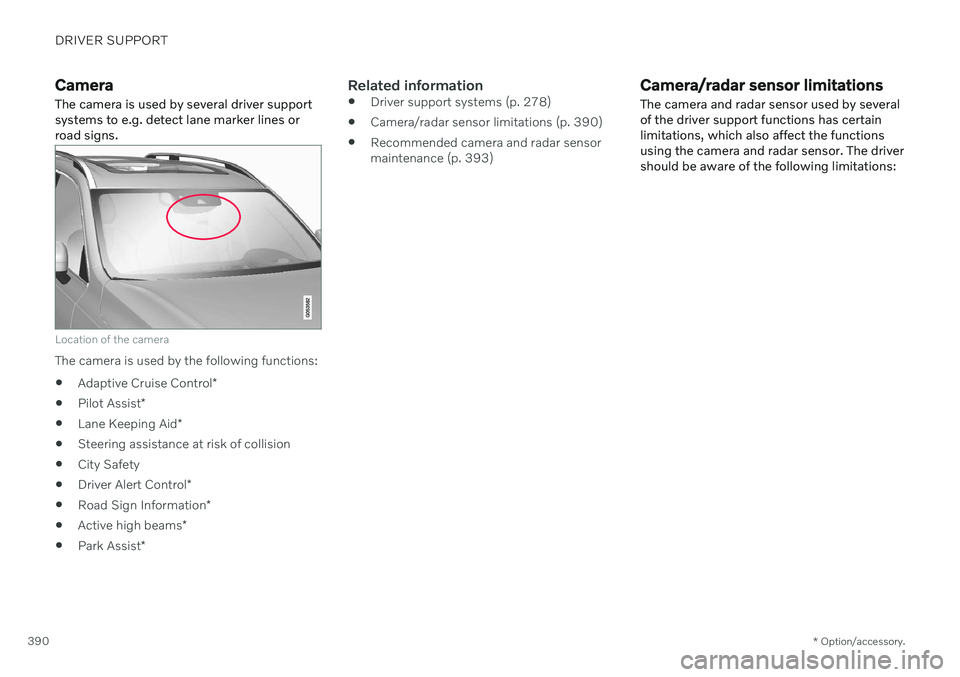
Camera The camera is used by several driver support systems to e.g. detect lane marker lines orroad signs.
Location of the camera
The camera is used by the following functions:
Adaptive Cruise Control
*
Pilot Assist
*
Lane Keeping Aid
*
Steering assistance at risk of collision
City Safety
Driver Alert Control
*
Road Sign Information
*
Active high beams
*
Park Assist
*
Related information
Driver support systems (p. 278)
Camera/radar sensor limitations (p. 390)
Recommended camera and radar sensor maintenance (p. 393)
Camera/radar sensor limitations The camera and radar sensor used by several of the driver support functions has certainlimitations, which also affect the functionsusing the camera and radar sensor. The drivershould be aware of the following limitations:
Page 625 of 683
MAINTENANCE AND SERVICE
* Option/accessory.623
Replacing bulbs
Bulb types vary depending on model and equipment level. If a light bulb 14
breaks, it can
be replaced by following the procedure shown in the Owner's Manual. If you are experiencing problems with any lights other than light bulbs, contact a work- shop 15
.
If there is a problem with an LED 16
light, the
entire lamp unit will normally need to be replaced.
NOTE
For information on lights not mentioned in the Owner's Manual, contact a Volvoretailer or an authorized Volvo workshop.
WARNING
The vehicle electrical system must be in ignition mode 0 when bulbs are replaced.
CAUTION
Never touch the bulb glass with your bare fingers. Grease and oils from your fingersvaporize in the heat and will leave adeposit on the reflector, which may dam-age it.
NOTE
If the error message persists after the defective bulb has been replaced, we rec-ommend a visit to an authorized Volvoworkshop.
NOTE
Exterior lighting such as headlights and taillights may develop temporary conden-sation on the inside of the lens. This is nor-mal. All exterior lighting is designed toresist this. Condensation is normally ven-ted out of the lamp housing once the lighthas been lit for some period of time.
NOTE
Bulbs for Active Bending Lights * contain
traces of mercury and should therefore always be deposited at an authorized Volvoworkshop.
Related information
Location of exterior lights (p. 624)
Removing the plastic cover to replace bulbs (p. 624)
Replacing the low beam headlight bulbs(p. 625)
Replacing the high beam headlight bulbs(p. 626)
Replacing daytime running lights/frontparking light bulbs (p. 626)
Replacing front turn signal bulbs (p. 627)
Bulb specifications (p. 628)
14
Some vehicles do not have any light bulbs.
15 An authorized Volvo workshop is recommended.
16 LED (Light Emitting Diode)
Page 626 of 683
MAINTENANCE AND SERVICE
* Option/accessory.
624
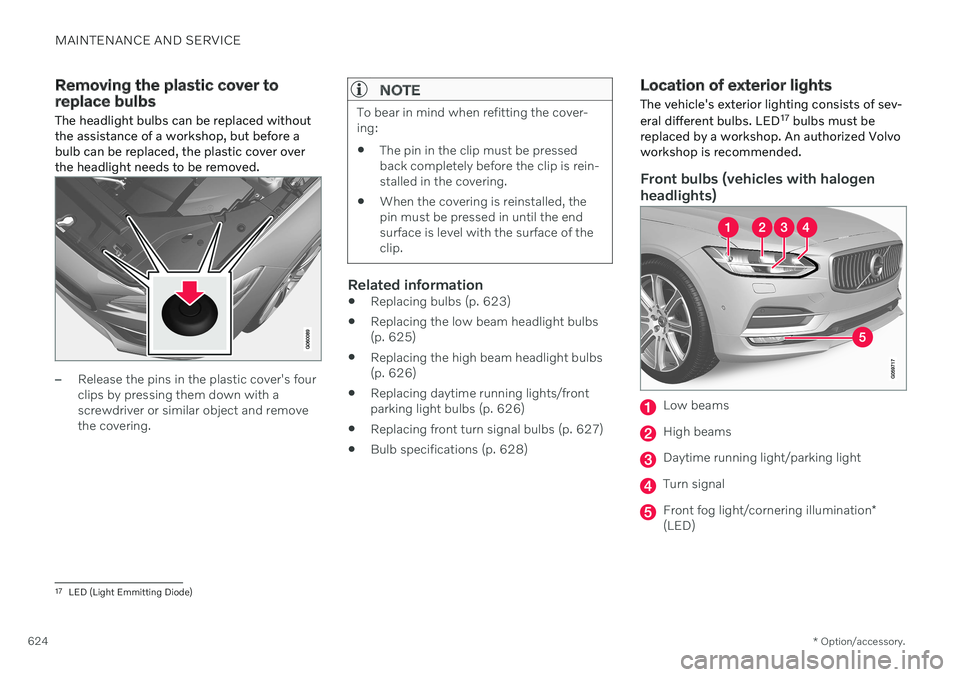
Removing the plastic cover to replace bulbs The headlight bulbs can be replaced without the assistance of a workshop, but before abulb can be replaced, the plastic cover overthe headlight needs to be removed.
–Release the pins in the plastic cover's four clips by pressing them down with ascrewdriver or similar object and removethe covering.
NOTE
To bear in mind when refitting the cover- ing:
The pin in the clip must be pressedback completely before the clip is rein-stalled in the covering.
When the covering is reinstalled, thepin must be pressed in until the endsurface is level with the surface of theclip.
Related information
Replacing bulbs (p. 623)
Replacing the low beam headlight bulbs (p. 625)
Replacing the high beam headlight bulbs(p. 626)
Replacing daytime running lights/frontparking light bulbs (p. 626)
Replacing front turn signal bulbs (p. 627)
Bulb specifications (p. 628)
Location of exterior lights The vehicle's exterior lighting consists of sev- eral different bulbs. LED 17
bulbs must be
replaced by a workshop. An authorized Volvo workshop is recommended.
Front bulbs (vehicles with halogen headlights)
Low beams
High beams
Daytime running light/parking light
Turn signal
Front fog light/cornering illumination *
(LED)
17 LED (Light Emmitting Diode)
Page 627 of 683
MAINTENANCE AND SERVICE
625
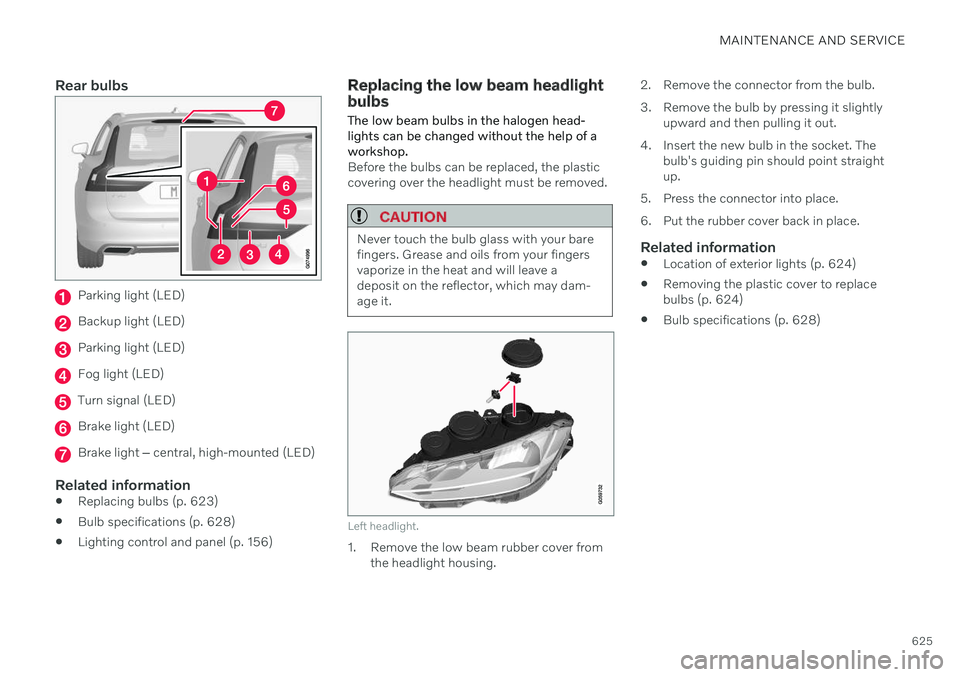
Rear bulbs
Parking light (LED)
Backup light (LED)
Parking light (LED)
Fog light (LED)
Turn signal (LED)
Brake light (LED)
Brake light ‒ central, high-mounted (LED)
Related information
Replacing bulbs (p. 623)
Bulb specifications (p. 628)
Lighting control and panel (p. 156)
Replacing the low beam headlight bulbs The low beam bulbs in the halogen head- lights can be changed without the help of aworkshop.
Before the bulbs can be replaced, the plastic covering over the headlight must be removed.
CAUTION
Never touch the bulb glass with your bare fingers. Grease and oils from your fingersvaporize in the heat and will leave adeposit on the reflector, which may dam-age it.
Left headlight.
1. Remove the low beam rubber cover from
the headlight housing. 2. Remove the connector from the bulb.
3. Remove the bulb by pressing it slightly
upward and then pulling it out.
4. Insert the new bulb in the socket. The bulb's guiding pin should point straight up.
5. Press the connector into place.
6. Put the rubber cover back in place.
Related information
Location of exterior lights (p. 624)
Removing the plastic cover to replace bulbs (p. 624)
Bulb specifications (p. 628)
Page 630 of 683
||
MAINTENANCE AND SERVICE
628
Related information
Location of exterior lights (p. 624)
Removing the plastic cover to replace bulbs (p. 624)
Bulb specifications (p. 628)
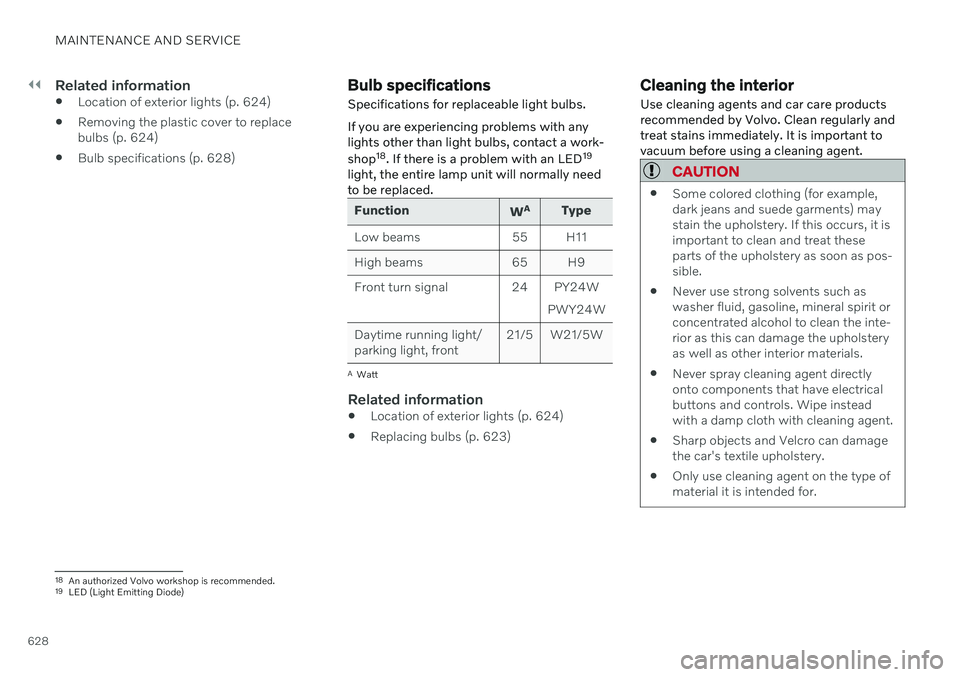
Bulb specifications
Specifications for replaceable light bulbs. If you are experiencing problems with any lights other than light bulbs, contact a work- shop 18
. If there is a problem with an LED 19
light, the entire lamp unit will normally need to be replaced.
Function WA
Type
Low beams 55 H11
High beams 65 H9
Front turn signal 24 PY24W PWY24W
Daytime running light/ parking light, front 21/5 W21/5W
A
Watt
Related information
Location of exterior lights (p. 624)
Replacing bulbs (p. 623)
Cleaning the interior
Use cleaning agents and car care products recommended by Volvo. Clean regularly andtreat stains immediately. It is important tovacuum before using a cleaning agent.
CAUTION
Some colored clothing (for example, dark jeans and suede garments) maystain the upholstery. If this occurs, it isimportant to clean and treat theseparts of the upholstery as soon as pos-sible.
Never use strong solvents such aswasher fluid, gasoline, mineral spirit orconcentrated alcohol to clean the inte-rior as this can damage the upholsteryas well as other interior materials.
Never spray cleaning agent directlyonto components that have electricalbuttons and controls. Wipe insteadwith a damp cloth with cleaning agent.
Sharp objects and Velcro can damagethe car's textile upholstery.
Only use cleaning agent on the type ofmaterial it is intended for.
18
An authorized Volvo workshop is recommended.
19 LED (Light Emitting Diode)
Page 666 of 683
INDEX
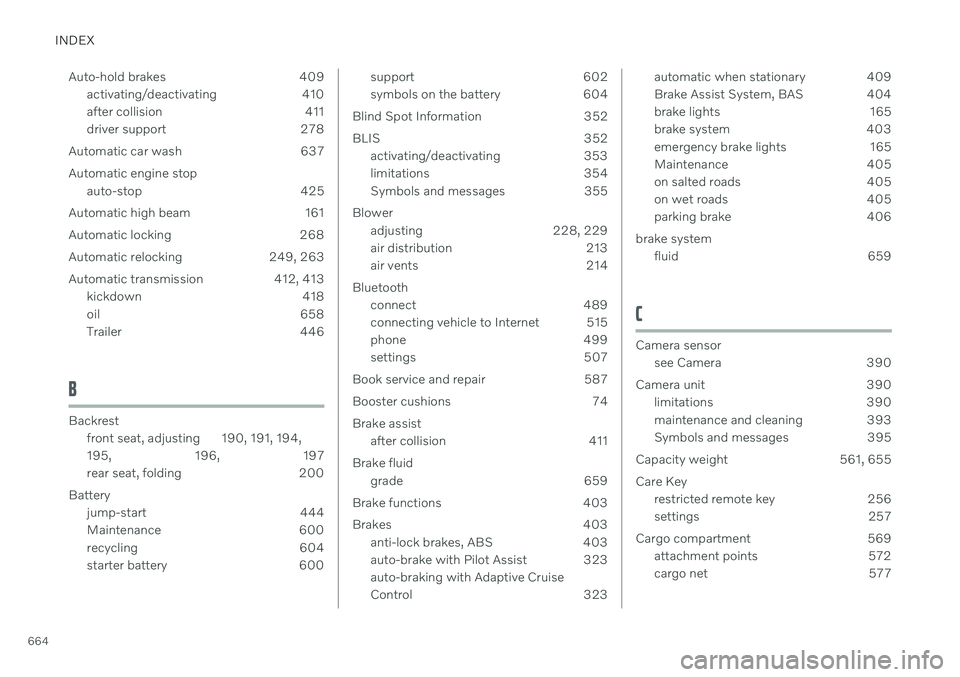
664Auto-hold brakes 409
activating/deactivating 410
after collision 411
driver support 278
Automatic car wash 637 Automatic engine stop auto-stop 425
Automatic high beam 161
Automatic locking 268
Automatic relocking 249, 263
Automatic transmission 412, 413 kickdown 418
oil 658
Trailer 446
B
Backrestfront seat, adjusting 190, 191, 194, 195 , 196, 197
rear seat, folding 200
Battery jump-start 444
Maintenance 600
recycling 604
starter battery 600
support 602
symbols on the battery 604
Blind Spot Information 352
BLIS 352 activating/deactivating 353
limitations 354
Symbols and messages 355
Blower adjusting 228, 229
air distribution 213
air vents 214
Bluetooth connect 489
connecting vehicle to Internet 515
phone 499
settings 507
Book service and repair 587
Booster cushions 74 Brake assist after collision 411
Brake fluid grade 659
Brake functions 403
Brakes 403 anti-lock brakes, ABS 403
auto-brake with Pilot Assist 323auto-braking with Adaptive Cruise
Control 323automatic when stationary 409
Brake Assist System, BAS 404
brake lights 165
brake system 403
emergency brake lights 165
Maintenance 405
on salted roads 405
on wet roads 405
parking brake 406
brake system fluid 659
C
Camera sensorsee Camera 390
Camera unit 390 limitations 390
maintenance and cleaning 393
Symbols and messages 395
Capacity weight 561, 655 Care Key restricted remote key 256
settings 257
Cargo compartment 569 attachment points 572
cargo net 577
Page 670 of 683
INDEX
668Fluids and oils 597, 658, 659 Fog lights
front 163
rear 164
Four-C 429 Front seat blower 228
climate 218
heating 220, 221
temperature 230
ventilation 223
Front seat manual 190
Front seats, power 191 adjusting passenger seat from driv-
er's seat 199
adjusting seat 191
lumbar support 197
massage 194, 195, 196
multifunction control 194, 195, 196, 197
side bolsters 197
store position 192, 193
FSC, environmental labeling 23
Fuel 439 Travel Link service 481
Fuel filling 438
Fuel gauge 93
Fuel requirements 439, 440
Fuel tank volume 659
Fuse box 605
Fuses 605 below the glove compartment 612
in engine compartment 607
in the cargo compartment 618
replacing 605
G
Gasoline grade 439 Gaugefuel gauge 93
Gear selector positions automatic transmission 413
Glass, laminated/reinforced 172
Glove compartment 568 Gracenote ® 487
Grocery bag holders 571
Gross vehicle weight 655
H
Handbrake 406
Hand wash 636
Hard disk space 522
Hazard warning flashers 165
HDC 433
HD radio 471
Head restraint 201
Head-up display 146 activating/deactivating 147
cleaning 630
Distance Alert 358
replacing windshield 592
settings 148
store position 148, 192, 193
Heated washer nozzles 183 Heating Seats 220, 221
steering wheel 223, 224
windows 227
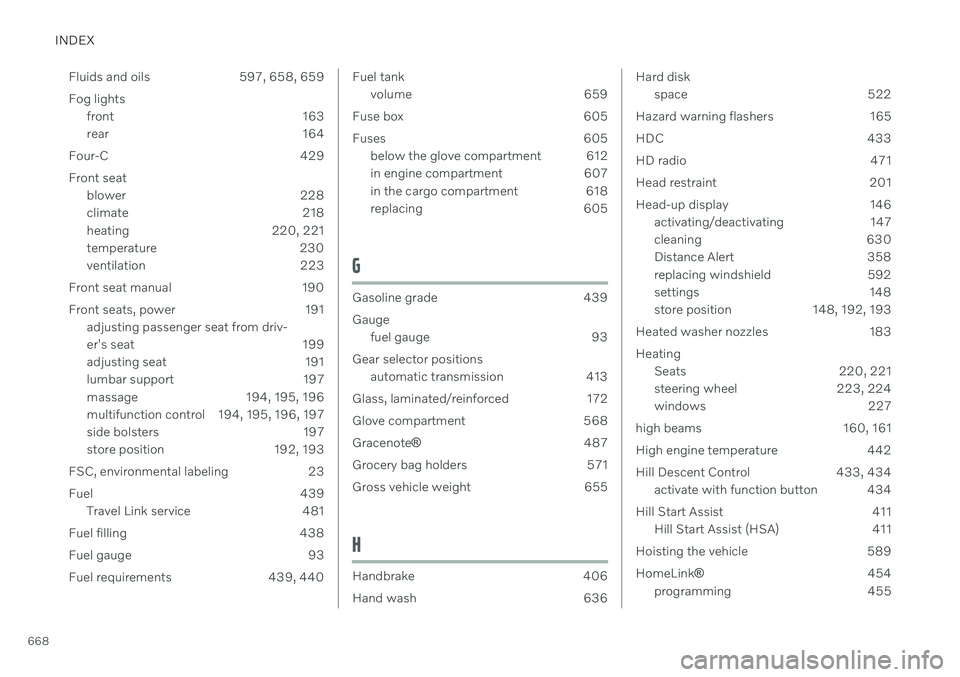
high beams 160, 161
High engine temperature 442
Hill Descent Control 433, 434 activate with function button 434
Hill Start Assist 411 Hill Start Assist (HSA) 411
Hoisting the vehicle 589 HomeLink ® 454
programming 455