door lock VOLVO V90 CROSS COUNTRY 2021 Owners Manual
[x] Cancel search | Manufacturer: VOLVO, Model Year: 2021, Model line: V90 CROSS COUNTRY, Model: VOLVO V90 CROSS COUNTRY 2021Pages: 683, PDF Size: 14.19 MB
Page 8 of 683
6
Parking climate*
234
Preconditioning *
234
Starting and stopping precondi- tioning * 234
Preconditioning timer *
235
Adding and editing timer settingsfor preconditioning * 235
Activating and deactivating pre-conditioning timer * 236
Deleting preconditioning timersettings * 237
Pre-cleaning *
238
Starting and stopping pre-cleaning *
238
Climate comfort retaining function *
239
Starting and switching off the cli-mate retaining function when parking *239
Parking climate symbols and mes-sages * 241
KEY, LOCKS AND ALARM
Locking and unlocking
244
Lock indication 244
Lock confirmation settings 246
Remote key 246
Locking and unlocking using the remote key 249
Settings for remote and insidedoor unlock 250
Unlocking the tailgate using theremote key 251
Remote key range 251
Replacing the remote key's battery 252
Ordering additional remote keys 256
Care Key – restricted remote key 256
Care Key settings 257
Detachable key blade 257
Locking and unlocking withdetachable key blade 258
Electronic immobilizer 260
Start and lock system type desig-nations 260
Keyless and touch-sensitive surfaces *
262
Keyless locking and unlocking *
263
Keyless unlock settings *
264
Keyless tailgate unlock *
264
Antenna locations for the start and lock system 265
Locking and unlocking from insidethe vehicle 266
Unlocking the tailgate from insidethe vehicle 267
Activating and deactivating child locks 267
Automatic locking when driving 268
Closing and locking the tailgate using the buttons * 269
Setting maximum opening heightfor the power tailgate *271
Operating the tailgate with a footmovement * 271
Private Locking 272
Activating and deactivating pri- vate locking 273
Alarm 274
Arming and disarming the alarm 275
Page 11 of 683
9
STARTING AND DRIVING
Starting the vehicle398
Switching off the vehicle 400
Ignition modes 401
Selecting ignition mode 402
Brake functions 403
Brakes 403
Brake Assist System 404
Braking on wet roads 405
Braking on salted roads 405
Maintenance of the brake system 405
Parking brake 406
Activating and deactivating the parking brake 406
Settings for automatically activat-ing the parking brake 408
Parking on a hill 408
Parking brake malfunction 408
Auto-hold brakes 409
Activating and deactivating Auto-hold at a standstill 410
Hill Start Assist 411
Braking assist after a collision 411
Regenerative braking *
411
Transmission 412
Automatic transmission 412
Shifting gears with automatic transmission413
Using the steering wheel paddles *
to shift 415
Shiftlock 417
Deactivating the automatic shiftlock 417
The kickdown function 418
The Launch function *
418
Automatic transmission symbolsand messages 419
All Wheel Drive (AWD) 419
Drive modes *
419
Changing drive mode *
421
Eco drive mode 422
Activating and deactivating Ecodrive mode using the function button 424
Start/Stop function 425
Driving with the Start/Stop function 425
Deactivating the Start/Stop function 426
Conditions for the Start/Stop function 427
Leveling control * and suspension
429
Leveling control settings *
432
Low Speed Control 432
Activating and deactivating LowSpeed Control using the functionbutton 433
Hill Descent Control
433
Activating and deactivating Hill Descent Control using the func-tion button 434
Economical driving 435
Preparing for a long trip 436
Winter driving 436
Driving through standing water 437
Opening/closing the fuel filler door 438
Refueling 438
Fuel 439
Octane rating 440
Emission controls 442
Overheating of engine and trans-mission 442
Battery drain 443
Jump starting using another battery 444
Driving with a trailer 446
Trailer Stability Assist *
448
Checking trailer lights 449
Towing using a towline 450
Attaching and removing the tow-ing eyelet 451
Recovery 453
HomeLink ®
* 454
Programming HomeLink ®
* 455
Page 52 of 683
||
SAFETY
50
WARNING
Never repair the belt yourself. Repairs should only be performed by a trainedand qualified Volvo service technician.
Any device used to induce slack intothe shoulder belt portion of the three-point belt system will have a detrimen-tal effect on the amount of protectionavailable in the event of a collision.
The seat back should not be tilted toofar back. The shoulder belt must betaut in order to function properly.
Do not use any type of child restraint inthe front passenger seat. We recom-mend that children who have outgrownthese devices sit in the rear seat withthe seat belt properly fastened.
Related information
Safety (p. 44)
Seat belt tensioners (p. 52)
Buckling and unbuckling seat belts(p. 50)
Door and seat belt reminders (p. 54)
Buckling and unbuckling seat belts Make sure that all passengers have buckled their seat belts before starting to drive.Buckling seat belts1. Pull out the belt slowly and make sure it is
not twisted or damaged.
NOTE
The seat belt is equipped with a seat belt retractor that will lock up in the followingsituations: if the belt is pulled out too quickly.
during braking and acceleration.
if the vehicle is leaning excessively.
when driving in turns.
if the automatic locking retractor/emer- gency locking retractor (ALR/ELR) isactivated. Each seat belt (except for thedriver's) is equipped with an ALR func-tion, which is designed to keep the seatbelt taut when installing a childrestraint. ALR is activated when the seatbelt is pulled out as far as possible. Ifthis is done, a sound from the seat beltretractor will be audible, which is nor-mal. The seat belt can now only be fedinto the retractor, not pulled out. Thisfunction is automatically disabled whenthe seat belt is unbuckled and fullyretracted.
Page 64 of 683
||
SAFETY
62
WARNING
Keep the following points in mind with respect to the OWS system. Failure tofollow these instructions couldadversely affect the system's functionand result in serious injury to the occu-pant of the front passenger's seat.
The full weight of the front seat pas-senger should always be on the seatcushion. The passenger should neverlift him/herself off the seat cushionusing the armrest in the door or thecenter console, by pressing the feet onthe floor, by sitting on the edge of theseat cushion, or by pressing againstthe backrest in a way that reducespressure on the seat cushion. Thiscould cause OWS to disable the front,passenger's side airbag.
WARNING
Do not place any type of object on the front passenger's seat in such a waythat jamming, pressing, or squeezingoccurs between the object and thefront seat, other than as a direct resultof the correct use of the AutomaticLocking Retractor/Emergency LockingRetractor (ALR/ELR) seat belt.
No objects should be placed under thefront passenger's seat. This could inter-fere with the OWS system's function.
Related information
Driver/passenger side front airbags (p. 56)
Side airbags
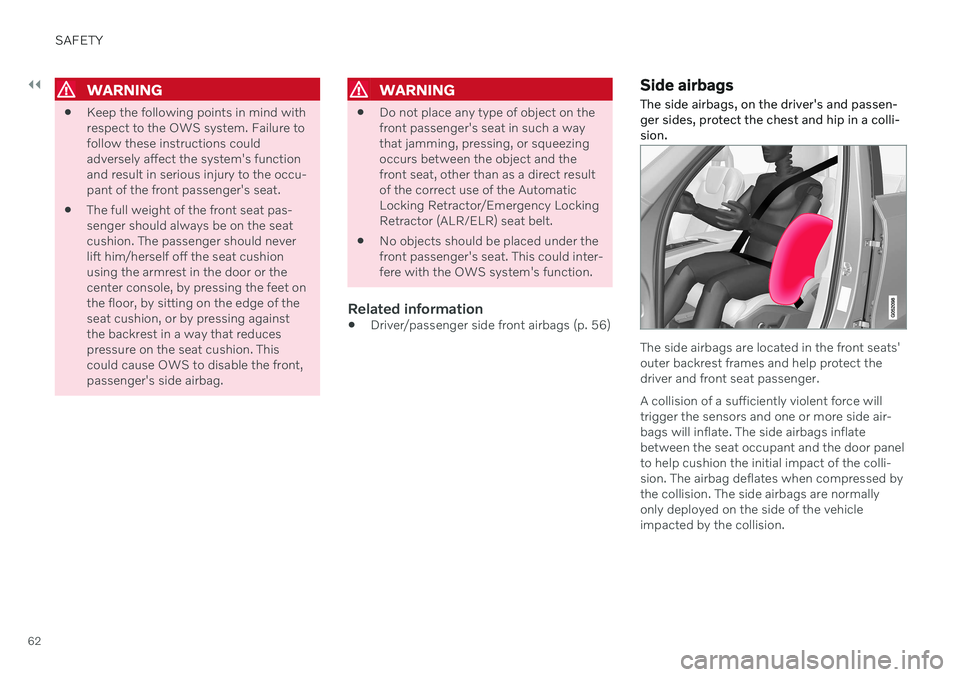
The side airbags, on the driver's and passen- ger sides, protect the chest and hip in a colli-sion.
The side airbags are located in the front seats' outer backrest frames and help protect thedriver and front seat passenger. A collision of a sufficiently violent force will trigger the sensors and one or more side air-bags will inflate. The side airbags inflate between the seat occupant and the door panel to help cushion the initial impact of the colli- sion. The airbag deflates when compressed by the collision. The side airbags are normally only deployed on the side of the vehicle impacted by the collision.
Page 89 of 683
DISPLAYS AND VOICE CONTROL
* Option/accessory.87
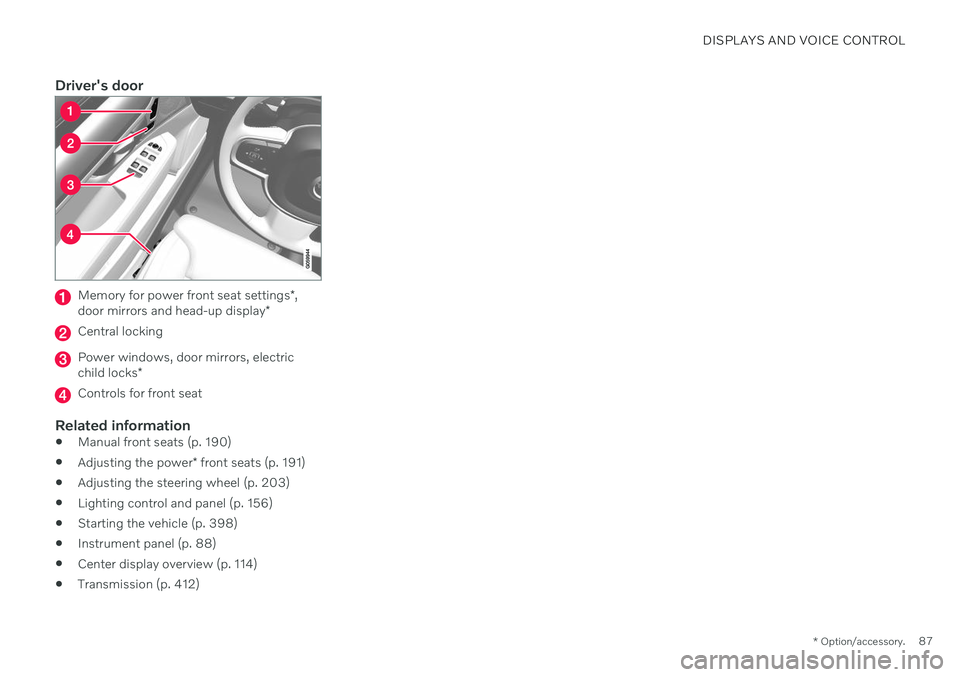
Driver's door
Memory for power front seat settings *,
door mirrors and head-up display *
Central locking
Power windows, door mirrors, electric child locks*
Controls for front seat
Related information
Manual front seats (p. 190)
Adjusting the power
* front seats (p. 191)
Adjusting the steering wheel (p. 203)
Lighting control and panel (p. 156)
Starting the vehicle (p. 398)
Instrument panel (p. 88)
Center display overview (p. 114)
Transmission (p. 412)
Page 90 of 683
DISPLAYS AND VOICE CONTROL
* Option/accessory.
88
Instrument panel The instrument panel displays information related to the vehicle and driving.
The instrument panel contains gauges, indica- tors and monitoring and warning symbols.What is shown in the instrument panel variesdepending on the equipment, settings andfunctions currently active. The instrument panel is activated as soon as a door is opened, i.e. in ignition mode 0. The
panel will power down after a short period oftime if it is not used. To reactivate it, do one ofthe following:
Depress the brake pedal.
Activate ignition mode
I.
Open one of the doors. The instrument panel is available in two ver- sions: 8" and 12"
*.WARNING
If the instrument panel turns off, does not activate when the ignition is switched on,or part/all of the panel cannot be read, donot drive the vehicle. Consult a workshopimmediately. Volvo recommends anauthorized Volvo workshop.
WARNING
If the instrument panel is not functioning properly, information about brakes, airbagsor other safety-related systems may not bedisplayed. The driver will then not be ableto check the status of the vehicle systemsor receive relevant warnings and informa-tion.
Instrument panel 8"
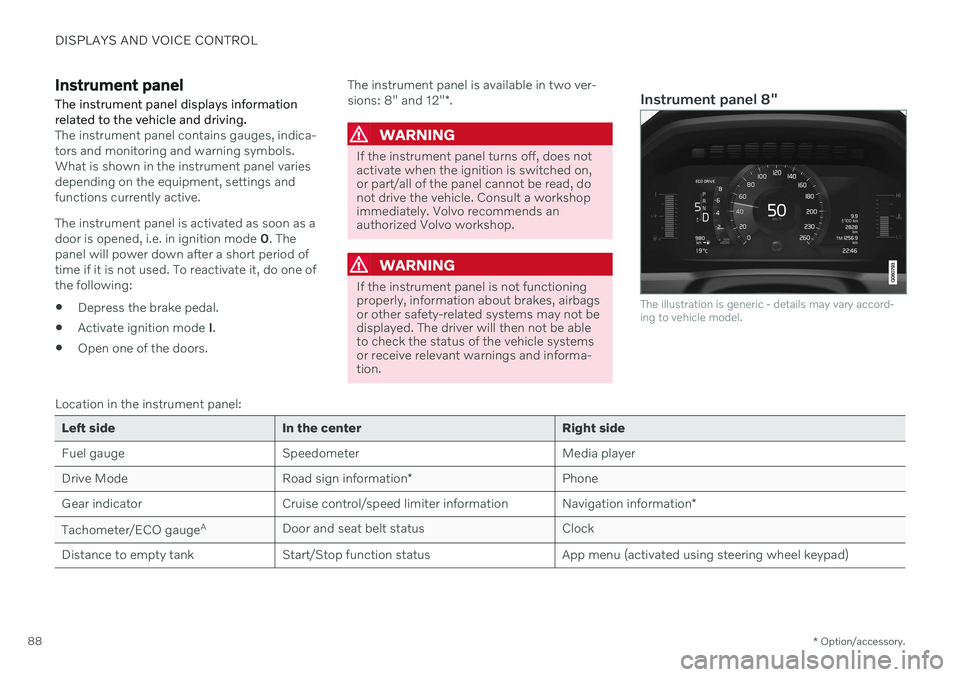
The illustration is generic - details may vary accord- ing to vehicle model.
Location in the instrument panel:
Left side In the center Right side
Fuel gauge Speedometer Media player Drive Mode
Road sign information* Phone
Gear indicator Cruise control/speed limiter information Navigation information*
Tachometer/ECO gauge A
Door and seat belt status Clock
Distance to empty tank Start/Stop function status App menu (activated using steering wheel keypad)
Page 92 of 683
||
DISPLAYS AND VOICE CONTROL
* Option/accessory.
90
Instrument panel 12" *
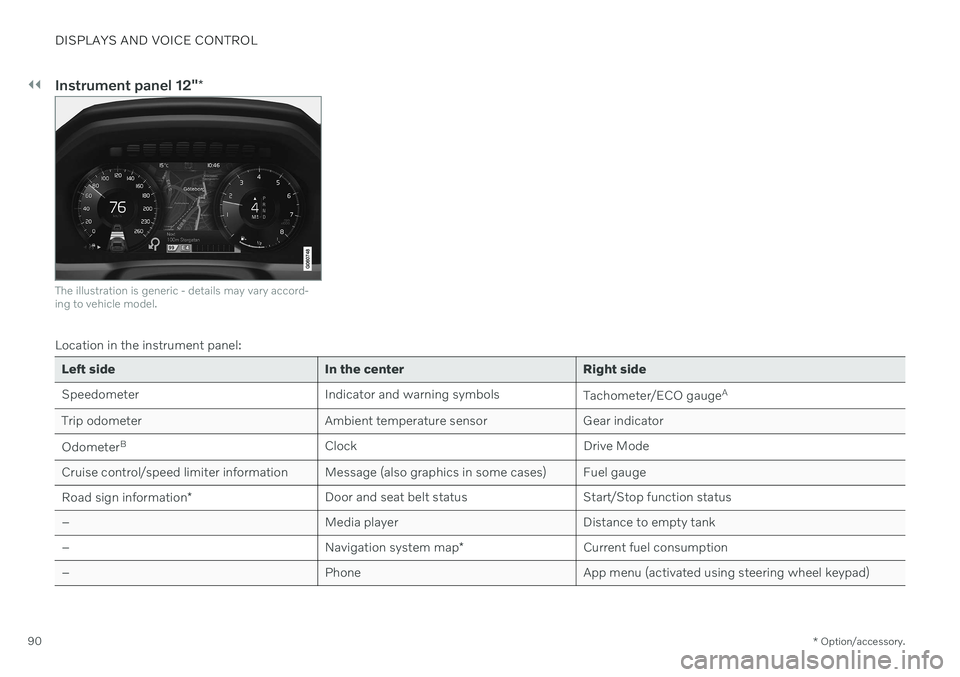
The illustration is generic - details may vary accord- ing to vehicle model.
Location in the instrument panel:
Left side In the center Right side
Speedometer Indicator and warning symbols
Tachometer/ECO gaugeA
Trip odometer Ambient temperature sensor Gear indicator Odometer B
Clock Drive Mode
Cruise control/speed limiter information Message (also graphics in some cases) Fuel gauge Road sign information * Door and seat belt status Start/Stop function status
– Media player Distance to empty tank
– Navigation system map*Current fuel consumption
– PhoneApp menu (activated using steering wheel keypad)
Page 168 of 683
LIGHTING
* Option/accessory.
166
Using home safe lighting
Some of the exterior lights remain on to illu- minate the area around the vehicle. This iscalled home safe lighting.
To activate home safe lighting:
1. Switch off the ignition.
2. Push the left-side steering wheel lever toward the dashboard and release.
3. Exit the vehicle and lock the doors. > A symbol in the instrument panel illumi-nates to indicate that the function is activated and exterior lighting switcheson: Parking lights, headlights, licenseplate lighting and outer door handle lighting *.
The length of time home safe lighting remains illuminated can be set in the center display.
Related information
Adjusting light functions via the centerdisplay (p. 157)
Welcome Light (p. 166)
Welcome Light
Approach lighting is activated when the vehi- cle is unlocked and can be used to providelight as you walk toward the vehicle.
The function is activated when the remote key is used for unlocking. The parking lights, ceil-ing lights, footwell lights and trunk/cargocompartment lights are activated in daylightconditions. In weak daylight or dark condi-tions, the license plate lighting and outer door handle lighting * will also be activated, with the
light directed toward the ground. If no door is opened, the lights will remain illu- minated for approx. 2 minutes. If a door isopened while the function is activated, the interior lighting and outer door handle lighting *
will remain on for a longer period of time. This function can be activated and deactivated in the center display.
Related information
Adjusting light functions via the centerdisplay (p. 157)
Using home safe lighting (p. 166)
Remote key (p. 246)
Interior Lighting
The passenger compartment is equipped with several different types of lighting, e.g.general lighting, adjustable ambient lightingand reading lights.
All lighting in the passenger compartment can be turned on and off manually within5 minutes after:
the engine has been switched off and theignition is in mode
0.
the vehicle is unlocked but has not beenstarted.
Front ceiling lighting
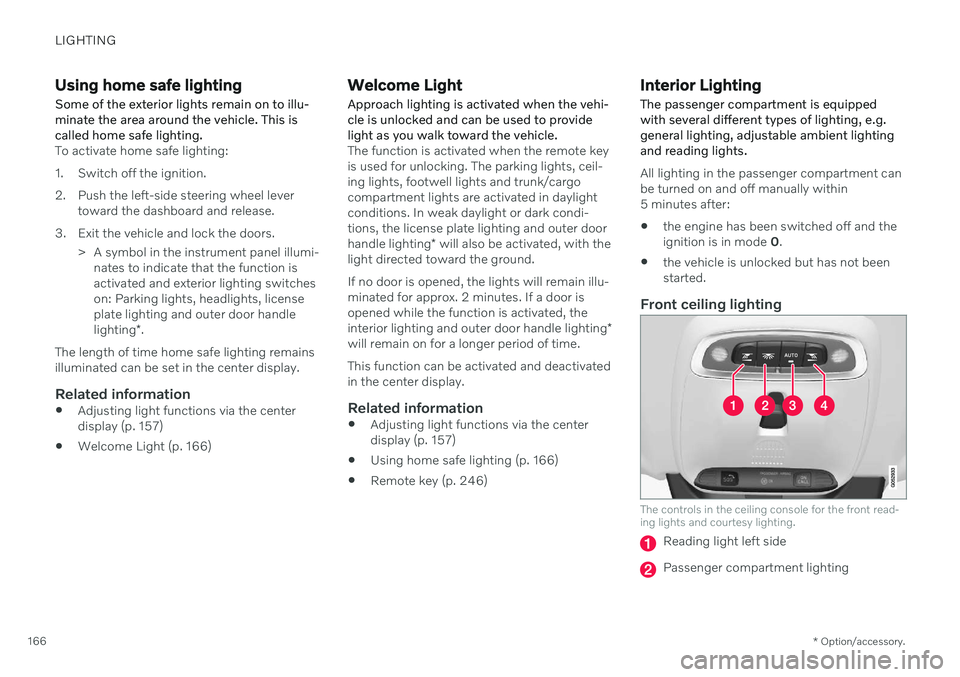
The controls in the ceiling console for the front read- ing lights and courtesy lighting.
Reading light left side
Passenger compartment lighting
Page 169 of 683
LIGHTING
}}
* Option/accessory.167
Courtesy lighting auto switch
Reading light right side
Reading lights
The reading lights on the right and left sides are switched on and off by briefly pressing thebuttons in the ceiling console. To adjust thebrightness, press and hold the button.
Passenger compartment lighting
Briefly press the button in the ceiling console to switch on or off the footwell lighting andceiling lighting.
Courtesy lighting auto switch
Activate the auto switch by briefly pressing the AUTO button in the ceiling console. With
Auto activated, the indicator light in the buttonand the courtesy lighting come on and areturned off as follows. Courtesy lighting is switched on when:
The vehicle is unlocked
The vehicle is switched off
A side door is opened.
Courtesy lighting is switched off when: The vehicle is locked
The engine is started
A side door is closed
A side door has been open for approx. 2 minutes.
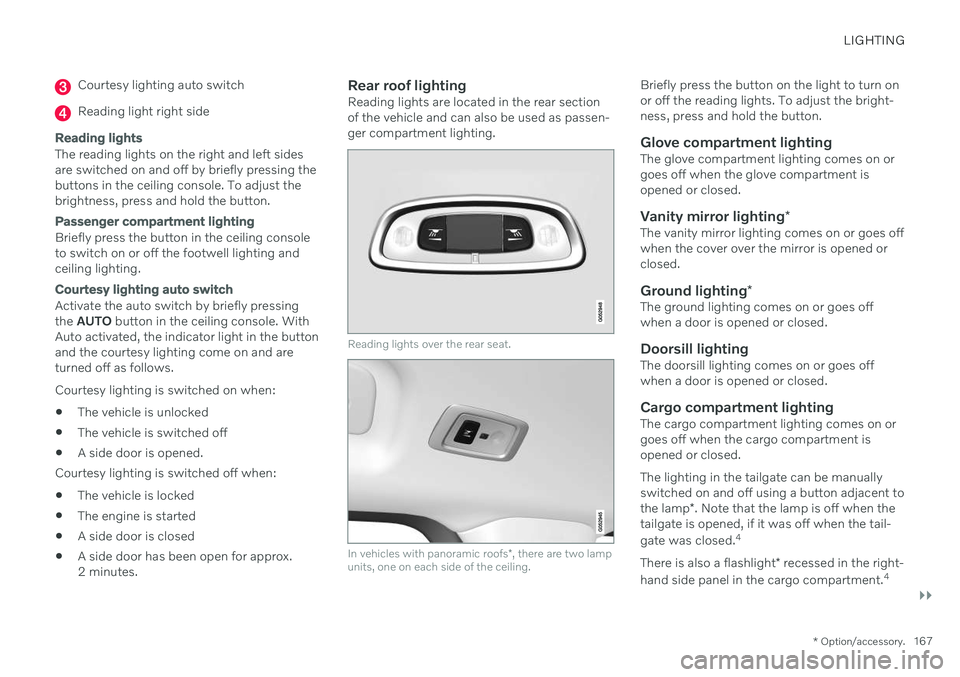
Rear roof lightingReading lights are located in the rear sectionof the vehicle and can also be used as passen-ger compartment lighting.
Reading lights over the rear seat.
In vehicles with panoramic roofs
*, there are two lamp
units, one on each side of the ceiling.
Briefly press the button on the light to turn on or off the reading lights. To adjust the bright-ness, press and hold the button.
Glove compartment lightingThe glove compartment lighting comes on orgoes off when the glove compartment isopened or closed.
Vanity mirror lighting *The vanity mirror lighting comes on or goes offwhen the cover over the mirror is opened orclosed.
Ground lighting*The ground lighting comes on or goes offwhen a door is opened or closed.
Doorsill lightingThe doorsill lighting comes on or goes offwhen a door is opened or closed.
Cargo compartment lightingThe cargo compartment lighting comes on orgoes off when the cargo compartment isopened or closed. The lighting in the tailgate can be manually switched on and off using a button adjacent to the lamp*. Note that the lamp is off when the
tailgate is opened, if it was off when the tail- gate was closed. 4
There is also a flashlight * recessed in the right-
hand side panel in the cargo compartment. 4
Page 170 of 683
||
LIGHTING
* Option/accessory.
168
Ambient LightingThe ambient lighting comes on when the doors are opened and goes out when the vehi-cle is locked. Ambient lighting brightness canbe adjusted in the center display and also fine-tuned using the thumb wheel in the dash-board.
Mood lighting *The vehicle is equipped with LEDs that pro-vide faint lighting in various colors. This light-ing is on when the engine is running. Moodlighting can be adjusted in the center displayand also fine-tuned using the thumb wheel inthe dashboard.
Lighting in the door storage compartments
Lighting in the door storage compartments comes on when the doors are opened andgoes out when the vehicle is locked. Thebrightness can be adjusted using the thumbwheel in the dashboard.
Lighting in the tunnel console's front
cup holder
The lighting in front console cup holdersswitches on when the vehicle is unlocked andoff when the vehicle is locked. The brightnesscan be adjusted using the thumb wheel in thedashboard.
Related information
Adjusting interior lighting (p. 168)
Lighting control and panel (p. 156)
Ignition modes (p. 401)
Passenger compartment interior (p. 564)
Adjusting interior lighting
Illumination in the vehicle varies depending on ignition mode. The interior lighting can beadjusted with a thumb wheel in the dash-board and certain light functions can also beadjusted via the center display.
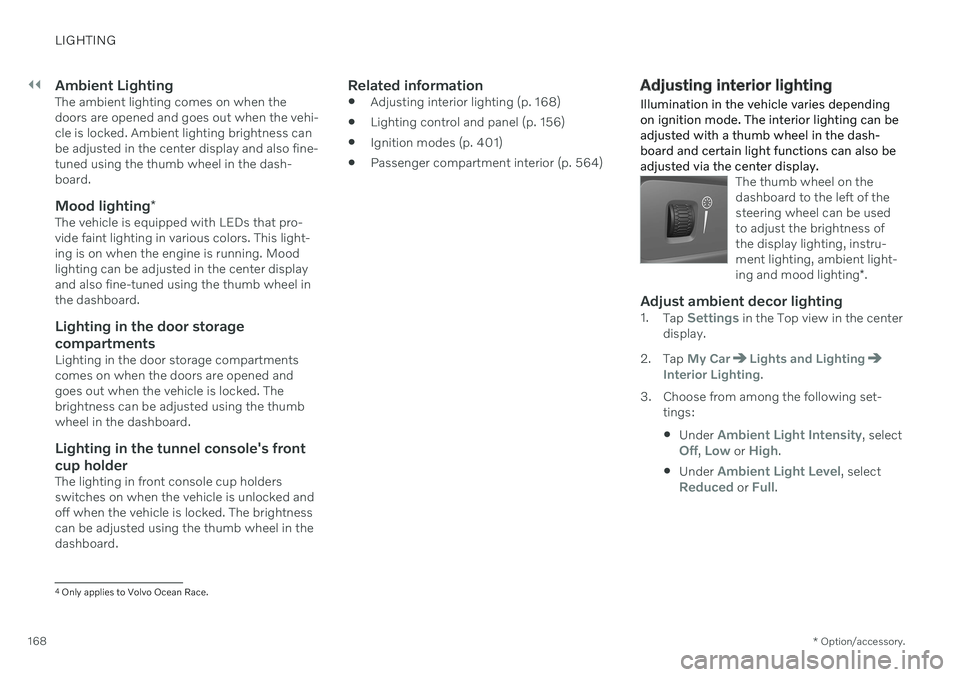
The thumb wheel on the dashboard to the left of thesteering wheel can be usedto adjust the brightness ofthe display lighting, instru-ment lighting, ambient light- ing and mood lighting *.
Adjust ambient decor lighting1.
Tap Settings in the Top view in the center
display.
2. Tap
My CarLights and LightingInterior Lighting.
3. Choose from among the following set- tings:
Under
Ambient Light Intensity, selectOff, Low or High.
Under
Ambient Light Level, selectReduced or Full.
4
Only applies to Volvo Ocean Race.