brake light VOLVO XC60 2016 Owner´s Manual
[x] Cancel search | Manufacturer: VOLVO, Model Year: 2016, Model line: XC60, Model: VOLVO XC60 2016Pages: 398, PDF Size: 9.98 MB
Page 9 of 398
Contents
7
08
Brakes – general..................................... 266
Brakes – symbols ................................... 268
Anti-lock braking system (ABS).............. 268
Brake lights............................................. 268
Emergency Brake Assistance (EBA)....... 269
Parking brake – general information....... 269
Parking brake – applying........................ 270
Parking brake – releasing........................ 271
Parking brake – symbols and messages 272
Driving through water.............................. 273
Engine and cooling system..................... 274
Conserving electrical current.................. 274
Before a long distance trip...................... 274
Driving in cold weather........................... 275
Refueling – fuel requirements................. 276
Refueling – octane rating........................ 277Refueling – opening/closing fuel filler
door......................................................... 278
Refueling – opening/closing fuel cap...... 279
Emission controls.................................... 280
Economical driving.................................. 280
Towing a trailer....................................... 282
Detachable trailer hitch........................... 283
Trailer Stability Assist (TSA).................... 284
08
Towing the vehicle.................................. 285
Towing eyelet.......................................... 285
Towing by tow truck............................... 286
09
09 Wheels and tires
Tires – general information...................... 289
Tires – storage and age.......................... 290
Tires – tread wear indicator.................... 291
Tires – tire economy................................ 291
Changing a wheel – direction of rotation 292
Changing a wheel – removing wheel...... 292
Changing a wheel – spare wheel............ 295Changing a wheel – accessing the spare
wheel....................................................... 296
Changing a wheel – installing a wheel.... 296
Tire inflation – general information.......... 297
Tire inflation – checking pressure........... 298
Tire specifications................................... 299
Tire inflation – pressure table.................. 301
Loading specifications............................ 302
Loading specifications – load limit.......... 302
Tire specifications – terminology............ 303Tire specifications – Uniform Tire Quality
Grading................................................... 304
Snow chains............................................ 305
Snow tires/studded tires......................... 306
Tire pressure monitoring - introduction.. 306Tire Pressure Monitoring System (TPMS)
– general information.............................. 307
Page 10 of 398
Contents
8* Option/accessory, for more information, see Introduction.
09
Tire Pressure Monitoring System (TPMS)
– changing wheels.................................. 308 Tire Pressure Monitoring System (TPMS)
– recalibrating......................................... 309 Tire Pressure Monitoring System (TPMS)
– activating/deactivating......................... 309 Tire Pressure Monitoring System (TPMS)
– messages............................................. 310
Tire Monitor - introduction...................... 311
Calibrating Tire Monitor.......................... 311
Tire Monitor status information............... 312
Tire Monitor – messages......................... 313
Self-supporting run flat tires (SST).......... 314Tire sealing system* – general informa-
tion.......................................................... 314
Tire sealing system* – overview.............. 316
Tire sealing system* – sealing hole......... 317Tire sealing system – checking inflation
pressure.................................................. 319
Tire sealing system* – inflating tires........ 320Tire sealing system* – sealing compound
container................................................. 321
10
10 Maintenance and servicing
Maintenance – introduction.................... 323
Maintenance – owner maintenance........ 324
Maintenance – hoisting........................... 325
Onboard Diagnostic System................... 326
Booking service and repairs .................. 326
Maintenance – opening/closing hood..... 328
Engine compartment – overview............ 329
Engine compartment – engine oil........... 330
Engine compartment – coolant............... 332
Engine compartment – brake fluid.......... 333Engine compartment – power steering
fluid......................................................... 334
Bulbs – introduction................................ 335
Bulbs – headlight housing....................... 336
Bulbs – cover.......................................... 337
Bulbs – low beam, Halogen.................... 338
Bulbs – high beam, Halogen................... 338
Bulbs – extra high beam......................... 339
Bulbs – front turn signals........................ 339
Bulbs – rear fog lights............................. 340
Bulbs – location of taillight bulbs............ 340
Bulbs – brake lights and taillights........... 341
Bulbs – license plate lighting.................. 341
Bulbs – cargo area lighting..................... 341
10
Bulbs – vanity mirror lighting.................. 342
Bulbs – specifications............................. 342
Wiper blades – service position.............. 343
Wiper blades – windshield...................... 344
Wiper blades – tailgate........................... 345
Engine compartment – washer fluid....... 345
Battery – symbols................................... 346
Battery – handling................................... 346
Battery – maintenance............................ 347
Battery – changing.................................. 348
Fuses – introduction............................... 349
Fuses – engine compartment................. 351
Fuses – glove compartment................... 355
Fuses – cargo area/trunk........................ 358Fuses – engine compartment cold zone
(Start/Stop only)...................................... 359
Washing the car...................................... 361
Automatic car wash................................ 362
Polishing and waxing.............................. 362
Cleaning the interior................................ 363
Touching up paintwork........................... 365
Page 19 of 398
01 Introduction
01
17
WARNING
If your vehicle is involved in an accident, unseen damage may affect its drivabilityand safety.
WARNING
CALIFORNIA proposition 65 Engine exhaust, some of its constituents, and certain vehicle components contain oremit chemicals known to the state of Cali-fornia to cause cancer, and birth defectsor other reproductive harm. In addition,certain fluids contained in vehicles andcertain products of component wear con-tain or emit chemicals known to the Stateof California to cause cancer, and birthdefects or other reproductive harm.
WARNING
Certain components of this vehicle such as air bag modules, seat belt pretensioners,adaptive steering columns, and button cellbatteries may contain Perchlorate material.Special handling may apply for service orvehicle end of life disposal. See www.dtsc.ca.gov/hazardouswaste/ perchlorate.
ShiftlockWhen your vehicle is parked, the gear selec- tor is locked in the P (Park) position. To
release the selector from this position, the ignition must be in mode
II (p. 79) or the
engine must be running. Depress the brakepedal, press the button on the front side ofthe gear selector and move the selector fromP (Park).
Anti-lock Brake System (ABS)The ABS system performs a brief self-diag-nostic test when the engine has been startedand driver releases the brake pedal. Anotherautomatic test may be performed when thevehicle first reaches a speed of approximately6 mph (10 km/h). The brake pedal will pulsateseveral times and a sound may be audiblefrom the ABS control module. This is normal.
Fuel filler doorPress the button on the light switch panel(see the illustration in Refueling – opening/closing fuel filler door (p. 278)) when the vehi-cle is at a standstill to unlock the fuel fillerdoor. It will relock when closed and there willbe an audible click.
Points to keep in mind
• Do not export your Volvo to another country before investigating that coun-try's applicable safety and exhaust emis-sion requirements. In some cases it maybe difficult or impossible to comply withthese requirements. Modifications to theemission control system(s) may renderyour Volvo not certifiable for legal opera- tion in the U.S., Canada and other coun-tries.
• All information, illustrations and specifica-tions contained in this manual are basedon the latest product information availa-ble at the time of publication. Please notethat some vehicles may be equipped dif-ferently, depending on special legalrequirements. Optional equipment descri-bed in this manual may not be available inall markets.
• Some of the illustrations shown aregeneric and may not depict the exactmodel for which this manual is intended.
• Volvo reserves the right to make modelchanges at any time, or to change speci-fications or design without notice andwithout incurring obligation.
Related information
• Information on the Internet (p. 20)
• Volvo and the environment (p. 22)
• Important warnings (p. 23)
Page 24 of 398
01 Introduction
01
22
Volvo and the environment
Volvo is committed to the well being of its customers. As a natural part of this commit-ment, we care about the environment inwhich we all live. Concern for the environmentmeans an everyday involvement in reducingour environmental impact. Volvo's environmental activities are based on a holistic view, which means we consider theoverall environmental impact of a productthroughout its complete life cycle. In this con-text, design, production, product use, andrecycling are all important considerations. Inproduction, Volvo has partly or completelyphased out several chemicals includingCFCs, lead chromates, asbestos, and cad-mium; and reduced the number of chemicalsused in our plants 50% since 1991. Volvo was the first in the world to introduce into production a three-way catalytic con-verter with a Lambda sond, now called theheated oxygen sensor, in 1976. The currentversion of this highly efficient system reducesemissions of harmful substances (CO, HC,NOx) from the exhaust pipe by approximately95 – 99% and the search to eliminate theremaining emissions continues. Volvo is theonly automobile manufacturer to offer CFC-free retrofit kits for the air conditioning systemof all models as far back as the 1975model 240. Advanced electronic engine con-trols and cleaner fuels are bringing us closerto our goal. In addition to continuous environ-mental refinement of conventional gasoline-powered internal combustion engines, Volvois actively looking at advanced technologyalternative-fuel vehicles. When you drive a Volvo, you become our partner in the work to lessen the car's impacton the environment. To reduce your vehicle'senvironmental impact, you can: •
Maintain proper air pressure in your tires. Tests have shown decreased fuel econ-omy with improperly inflated tires.
• Follow the recommended maintenanceschedule in your Warranty and ServiceRecords Information booklet.
• Drive at a constant speed whenever pos-sible.
• See a trained and qualified Volvo servicetechnician as soon as possible forinspection if the check engine (malfunc-tion indicator) light illuminates, or stayson after the vehicle has started.
• Properly dispose of any vehicle-relatedwaste such as used motor oil, used bat-teries, brake pads, etc.
• When cleaning your vehicle, please usegenuine Volvo car care products. AllVolvo car care products are formulated tobe environmentally friendly.
FSC®
The FSC ®
(Forest Stewardship Council ®
)
symbol indicates that the wood pulp used in this publication comes from FSC ®
certified
forests and other responsible sources.
Related information
• Economical driving (p. 280)
• Tires – tire economy (p. 291)
Page 69 of 398
03 Instruments and controls
03
* Option/accessory, for more information, see Introduction.67
FunctionSee
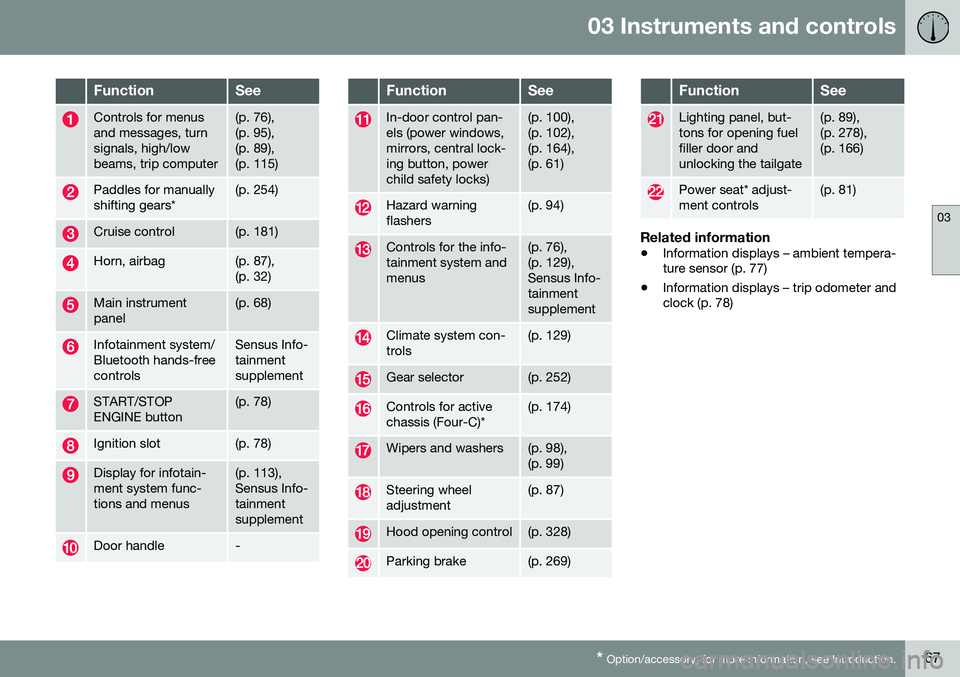
Controls for menus and messages, turnsignals, high/lowbeams, trip computer(p. 76), (p. 95),(p. 89),(p. 115)
Paddles for manually shifting gears*(p. 254)
Cruise control(p. 181)
Horn, airbag(p. 87), (p. 32)
Main instrument panel(p. 68)
Infotainment system/ Bluetooth hands-freecontrolsSensus Info- tainmentsupplement
START/STOP ENGINE button(p. 78)
Ignition slot(p. 78)
Display for infotain- ment system func-tions and menus(p. 113), Sensus Info-tainmentsupplement
Door handle-
FunctionSee
In-door control pan- els (power windows,mirrors, central lock-ing button, powerchild safety locks)(p. 100), (p. 102),(p. 164),(p. 61)
Hazard warning flashers(p. 94)
Controls for the info- tainment system andmenus(p. 76), (p. 129),Sensus Info-tainmentsupplement
Climate system con- trols(p. 129)
Gear selector(p. 252)
Controls for active chassis (Four-C)*(p. 174)
Wipers and washers(p. 98), (p. 99)
Steering wheel adjustment(p. 87)
Hood opening control(p. 328)
Parking brake(p. 269)
FunctionSee
Lighting panel, but- tons for opening fuelfiller door andunlocking the tailgate(p. 89), (p. 278),(p. 166)
Power seat* adjust- ment controls(p. 81)
Related information
• Information displays – ambient tempera- ture sensor (p. 77)
• Information displays – trip odometer andclock (p. 78)
Page 72 of 398
||
03 Instruments and controls
03
70
Indicator and warning symbols
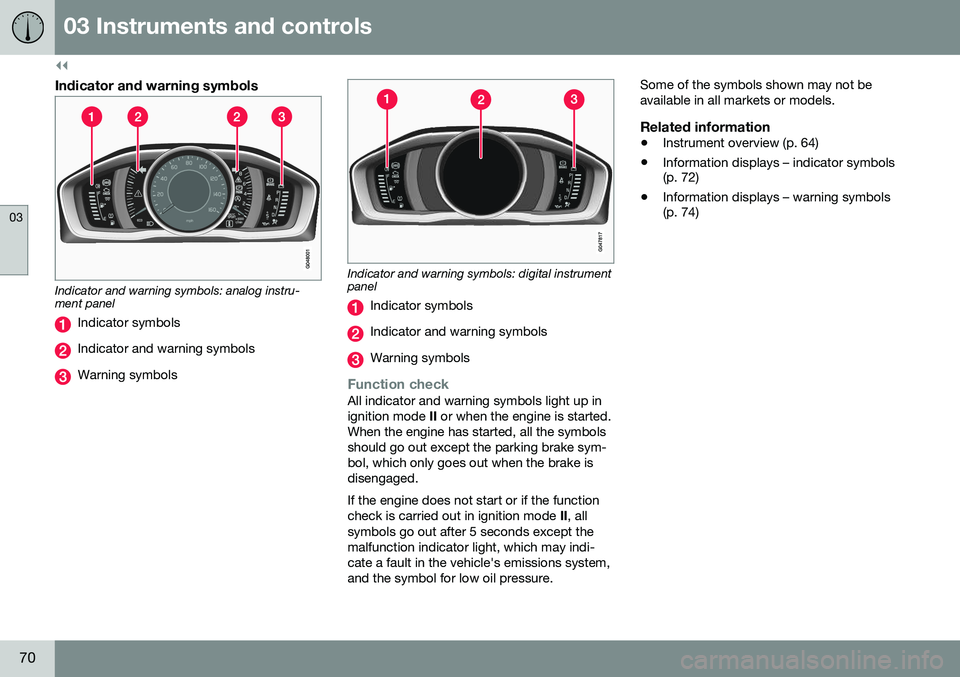
Indicator and warning symbols: analog instru- ment panel
Indicator symbols
Indicator and warning symbols
Warning symbols
Indicator and warning symbols: digital instrument panel
Indicator symbols
Indicator and warning symbols
Warning symbols
Function checkAll indicator and warning symbols light up in ignition mode II or when the engine is started.
When the engine has started, all the symbolsshould go out except the parking brake sym-bol, which only goes out when the brake isdisengaged. If the engine does not start or if the function check is carried out in ignition mode II, all
symbols go out after 5 seconds except themalfunction indicator light, which may indi-cate a fault in the vehicle's emissions system,and the symbol for low oil pressure. Some of the symbols shown may not beavailable in all markets or models.
Related information
•
Instrument overview (p. 64)
• Information displays – indicator symbols (p. 72)
• Information displays – warning symbols(p. 74)
Page 73 of 398
03 Instruments and controls
03
}}
* Option/accessory, for more information, see Introduction.71
Eco Guide* and Power Meter*
Eco guide and Power guide are two gauges in the instrument panel that help improve drivingeconomy. The vehicle also stores driving-related statis- tics in the form of a bar graph, see Trip com-puter – Trip statistics (p. 123).
Introduction
To display or remove these functions from theinstrument panel, select the "Eco" theme (seeInformation displays – introduction (p. 68)). Driving statistics are also stored and can be displayed in the form of a bar chart (see Tripcomputer – Trip statistics (p. 123)).
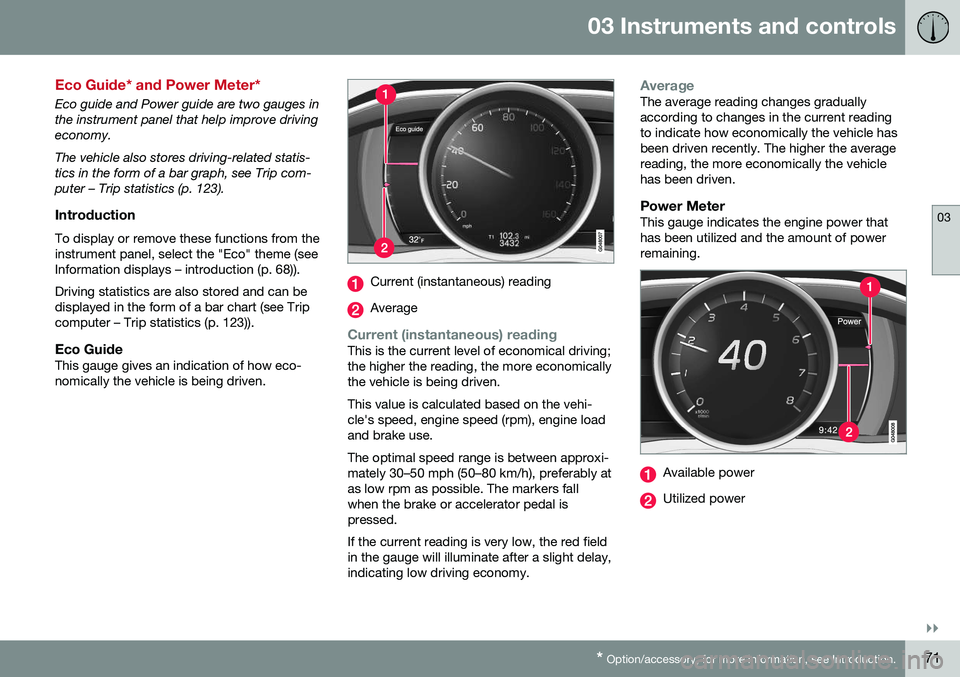
Eco GuideThis gauge gives an indication of how eco-nomically the vehicle is being driven.
Current (instantaneous) reading
Average
Current (instantaneous) readingThis is the current level of economical driving; the higher the reading, the more economicallythe vehicle is being driven. This value is calculated based on the vehi- cle's speed, engine speed (rpm), engine loadand brake use. The optimal speed range is between approxi- mately 30–50 mph (50–80 km/h), preferably atas low rpm as possible. The markers fallwhen the brake or accelerator pedal ispressed. If the current reading is very low, the red field in the gauge will illuminate after a slight delay,indicating low driving economy.
AverageThe average reading changes gradually according to changes in the current readingto indicate how economically the vehicle hasbeen driven recently. The higher the averagereading, the more economically the vehiclehas been driven.
Power MeterThis gauge indicates the engine power thathas been utilized and the amount of powerremaining.
Available power
Utilized power
Page 74 of 398
||
03 Instruments and controls
03
72* Option/accessory, for more information, see Introduction.
Available powerThe smaller, upper indicator shows the engine's available power 2
. The higher the
reading on the scale, the greater the amount of power remaining in the current gear.
Utilized powerThe larger, lower indicator shows the amount of engine power that has been utilized 2
. The
higher the reading on the scale, the greater the amount of power that is being utilized. The larger the gap between the two indica- tors, the greater the amount of power remain-ing.
Information displays – indicator symbols
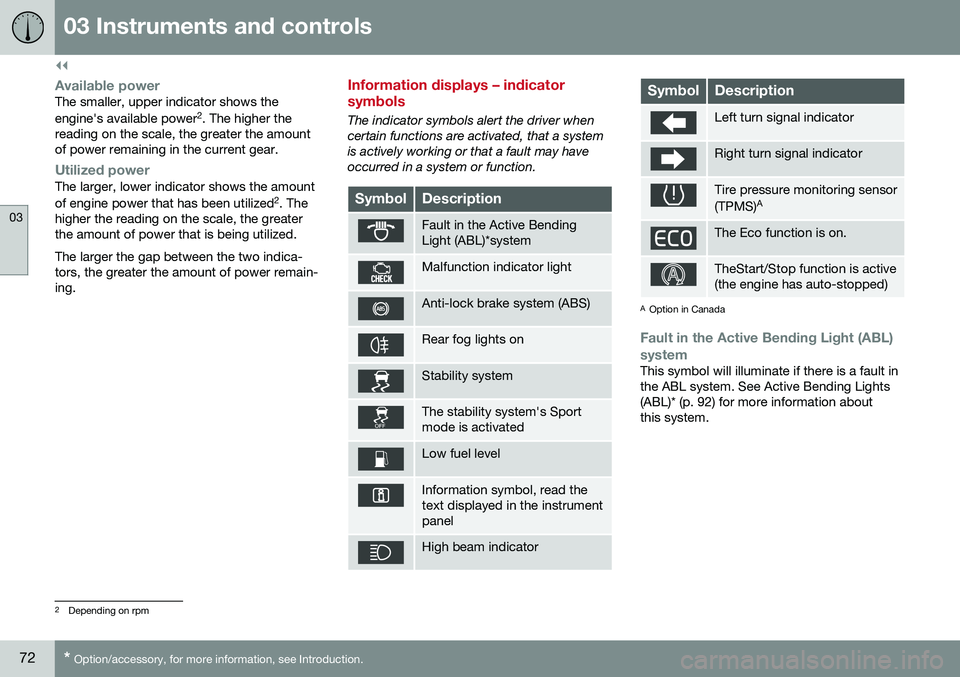
The indicator symbols alert the driver when certain functions are activated, that a systemis actively working or that a fault may haveoccurred in a system or function.
SymbolDescription
Fault in the Active Bending Light (ABL)*system
Malfunction indicator light
Anti-lock brake system (ABS)
Rear fog lights on
Stability system
The stability system's Sport mode is activated
Low fuel level
Information symbol, read the text displayed in the instrumentpanel
High beam indicator
SymbolDescription
Left turn signal indicator
Right turn signal indicator
Tire pressure monitoring sensor (TPMS) A
The Eco function is on.
TheStart/Stop function is active (the engine has auto-stopped)
A
Option in Canada
Fault in the Active Bending Light (ABL)
system
This symbol will illuminate if there is a fault in the ABL system. See Active Bending Lights(ABL)* (p. 92) for more information aboutthis system.
2 Depending on rpm
Page 75 of 398
03 Instruments and controls
03
}}
* Option/accessory, for more information, see Introduction.73
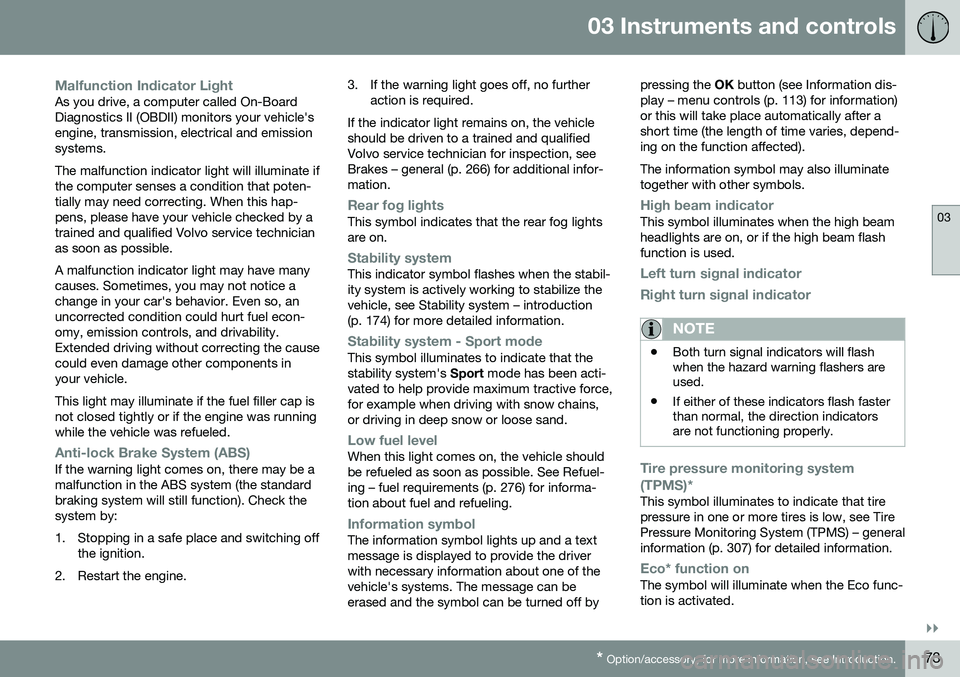
Malfunction Indicator LightAs you drive, a computer called On-Board Diagnostics II (OBDII) monitors your vehicle'sengine, transmission, electrical and emissionsystems. The malfunction indicator light will illuminate if the computer senses a condition that poten-tially may need correcting. When this hap-pens, please have your vehicle checked by atrained and qualified Volvo service technicianas soon as possible. A malfunction indicator light may have many causes. Sometimes, you may not notice achange in your car's behavior. Even so, anuncorrected condition could hurt fuel econ-omy, emission controls, and drivability.Extended driving without correcting the causecould even damage other components inyour vehicle. This light may illuminate if the fuel filler cap is not closed tightly or if the engine was runningwhile the vehicle was refueled.
Anti-lock Brake System (ABS)If the warning light comes on, there may be a malfunction in the ABS system (the standardbraking system will still function). Check thesystem by:
1. Stopping in a safe place and switching off
the ignition.
2. Restart the engine. 3. If the warning light goes off, no further
action is required.
If the indicator light remains on, the vehicle should be driven to a trained and qualifiedVolvo service technician for inspection, seeBrakes – general (p. 266) for additional infor-mation.
Rear fog lightsThis symbol indicates that the rear fog lights are on.
Stability systemThis indicator symbol flashes when the stabil- ity system is actively working to stabilize thevehicle, see Stability system – introduction(p. 174) for more detailed information.
Stability system - Sport modeThis symbol illuminates to indicate that the stability system's Sport mode has been acti-
vated to help provide maximum tractive force,for example when driving with snow chains,or driving in deep snow or loose sand.
Low fuel levelWhen this light comes on, the vehicle should be refueled as soon as possible. See Refuel-ing – fuel requirements (p. 276) for informa-tion about fuel and refueling.
Information symbolThe information symbol lights up and a text message is displayed to provide the driverwith necessary information about one of thevehicle's systems. The message can beerased and the symbol can be turned off by pressing the
OK button (see Information dis-
play – menu controls (p. 113) for information)or this will take place automatically after ashort time (the length of time varies, depend-ing on the function affected). The information symbol may also illuminate together with other symbols.
High beam indicatorThis symbol illuminates when the high beam headlights are on, or if the high beam flashfunction is used.
Left turn signal indicator
Right turn signal indicator
NOTE
• Both turn signal indicators will flash when the hazard warning flashers areused.
• If either of these indicators flash fasterthan normal, the direction indicatorsare not functioning properly.
Tire pressure monitoring system (TPMS)*
This symbol illuminates to indicate that tire pressure in one or more tires is low, see TirePressure Monitoring System (TPMS) – generalinformation (p. 307) for detailed information.
Eco* function onThe symbol will illuminate when the Eco func- tion is activated.
Page 76 of 398
||
03 Instruments and controls
03
74* Option/accessory, for more information, see Introduction.
Start/stop*The symbol illuminates when the engine has auto-stopped.
Related information
• Information displays – introduction (p. 68)
• Information displays – warning symbols (p. 74)
Information displays – warning symbols
The warning lights alert the driver that an important function is activated or that a seri-ous fault has occurred.
SymbolDescription
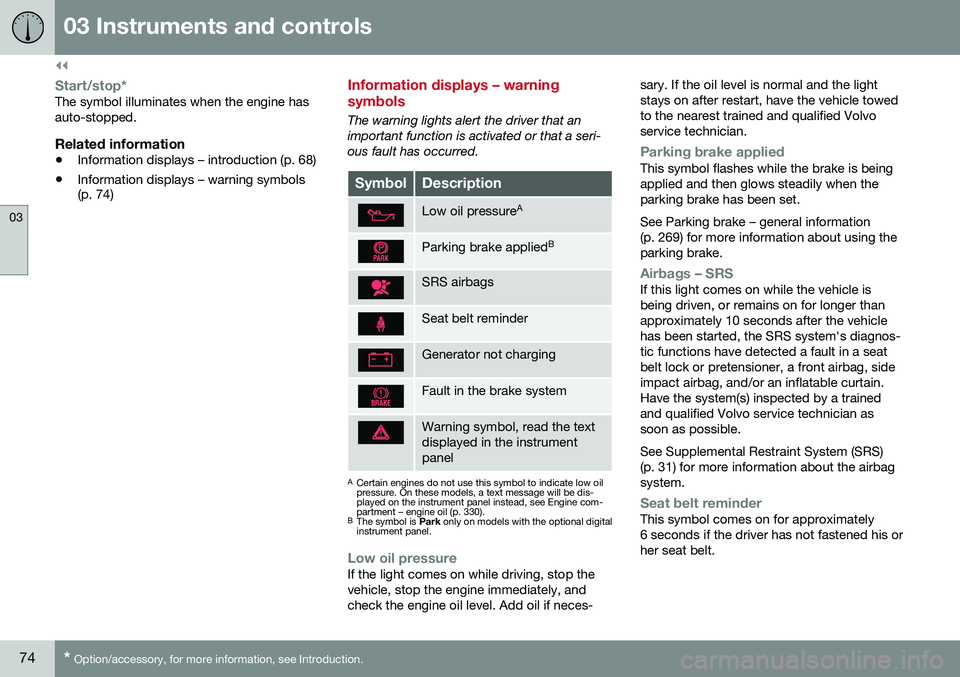
Low oil pressure A
Parking brake applied B
SRS airbags
Seat belt reminder
Generator not charging
Fault in the brake system
Warning symbol, read the text displayed in the instrumentpanel
A
Certain engines do not use this symbol to indicate low oil pressure. On these models, a text message will be dis-played on the instrument panel instead, see Engine com-partment – engine oil (p. 330).
B The symbol is Park only on models with the optional digital
instrument panel.
Low oil pressureIf the light comes on while driving, stop the vehicle, stop the engine immediately, andcheck the engine oil level. Add oil if neces- sary. If the oil level is normal and the lightstays on after restart, have the vehicle towedto the nearest trained and qualified Volvoservice technician.
Parking brake appliedThis symbol flashes while the brake is being applied and then glows steadily when theparking brake has been set. See Parking brake – general information (p. 269) for more information about using theparking brake.
Airbags – SRSIf this light comes on while the vehicle is being driven, or remains on for longer thanapproximately 10 seconds after the vehiclehas been started, the SRS system's diagnos-tic functions have detected a fault in a seatbelt lock or pretensioner, a front airbag, sideimpact airbag, and/or an inflatable curtain.Have the system(s) inspected by a trainedand qualified Volvo service technician assoon as possible. See Supplemental Restraint System (SRS) (p. 31) for more information about the airbagsystem.
Seat belt reminderThis symbol comes on for approximately 6 seconds if the driver has not fastened his orher seat belt.