interior lights VOLVO XC60 2018 Owner´s Manual
[x] Cancel search | Manufacturer: VOLVO, Model Year: 2018, Model line: XC60, Model: VOLVO XC60 2018Pages: 660, PDF Size: 11.77 MB
Page 6 of 660
4
Setting types in the center display133
Table of settings in the center display 134
Driver profiles 135
Selecting a driver profile 136
Changing a driver profile's name 137
Resetting driver profile settings 137
Linking a remote key to a driver profile 137
Messages in the center display 138
Handling messages in the center display 139
Handling messages saved from the center display 140
Head-up display *
140
Activating and deactivating the head- up display * 142
Head-up display settings *
142
Voice control 143
Using voice commands 144
Voice control for cellular phones 145
Voice control for radio and media 146
Voice control settings 146
LIGHTING
Lighting panel and controls150
Adjusting light functions via the cen- ter display 151
Parking lights 152
Daytime running lights 152
Low beams 153
Using high beam 154
Active high beam 155
Using turn signals 156
Active Bending Lights *
157
Front fog lights/cornering illumination *
157
Rear fog light 158
Brake lights 159
Emergency brake lights 159
Hazard warning flashers 160
Using home safe lighting 160
Welcome Light 160
Interior Lighting 161
Adjusting interior lighting 162
WINDOWS, GLASS AND MIRRORS
Windows, glass and mirrors166
Pinch protection for windows and sun curtains 166
Reset procedure for pinch protection 167
Power windows 167
Operating the power windows 168
Rearview/door mirrors 169
Adjusting the rearview mirror dim-ming function 170
Adjusting the door mirrors 170
Panoramic roof *
172
Operating the panoramic roof *
173
Auto closing the panoramic roof * sun
curtain 175
Using the windshield wipers 176
Heated windshield washer nozzles *
177
Using the rain sensor 177
Using the rain sensor's memory function 178
Using the windshield and headlightwashers 179
Using the rear window wiper/washer 180
Using automatic rear window wipingwhen backing up 180
Page 15 of 660
13
MAINTENANCE AND SERVICE
Volvo's service program572
Data transfer between vehicle and workshop over Wi-Fi 574
Download Center 575
Handling system updates via Down-load Center 575
Vehicle status 576
Scheduling service and repairs 576
Sending vehicle information to theworkshop 578
Hoisting the vehicle 579
Opening and closing the hood 581
Climate control system service 582
Replacing a windshield with head-up display * 582
Engine compartment overview 583
Engine oil 583
Checking and filling engine oil 584
Refilling coolant 586
Replacing bulbs 587
Location of exterior lights 588
Replacing the low beam headlight bulbs 589
Replacing the high beam headlight bulbs 590
Replacing daytime running lights/ front parking light bulbs 590
Replacing front turn signal bulbs 591
Bulb specifications591
Start battery 592
Support battery 595
Battery symbols 596
Fuses and fuseboxes 597
Replacing fuses 598
Fuses in the engine compartment 599
Fuses under the glove compartment 602
Fuses in the cargo compartment 605
Cleaning the interior 609
Cleaning the center display 609
Cleaning the head-up display *
610
Cleaning fabric upholstery and ceil- ing liner 611
Cleaning the seat belt 611
Cleaning floor mats and inlay mats 611
Cleaning leather upholstery 612
Cleaning the leather steering wheel 613
Cleaning interior plastic, metal andwood surfaces 614
Cleaning the exterior 614
Polishing and waxing 615
Hand washing 615
Automatic car washes 617
High-pressure washing 618
Cleaning the wiper blades618
Cleaning exterior plastic, rubber and trim components 619
Cleaning rims 620
Corrosion protection 620
Paintwork 621
Touching up minor paint damage 621
Color codes 622
Changing rear window wipers 623
Replacing windshield wiper blades 624
Windshield wipers in the service position 625
Filling washer fluid 626
Page 152 of 660
LIGHTING
* Option/accessory.
150
Lighting panel and controls
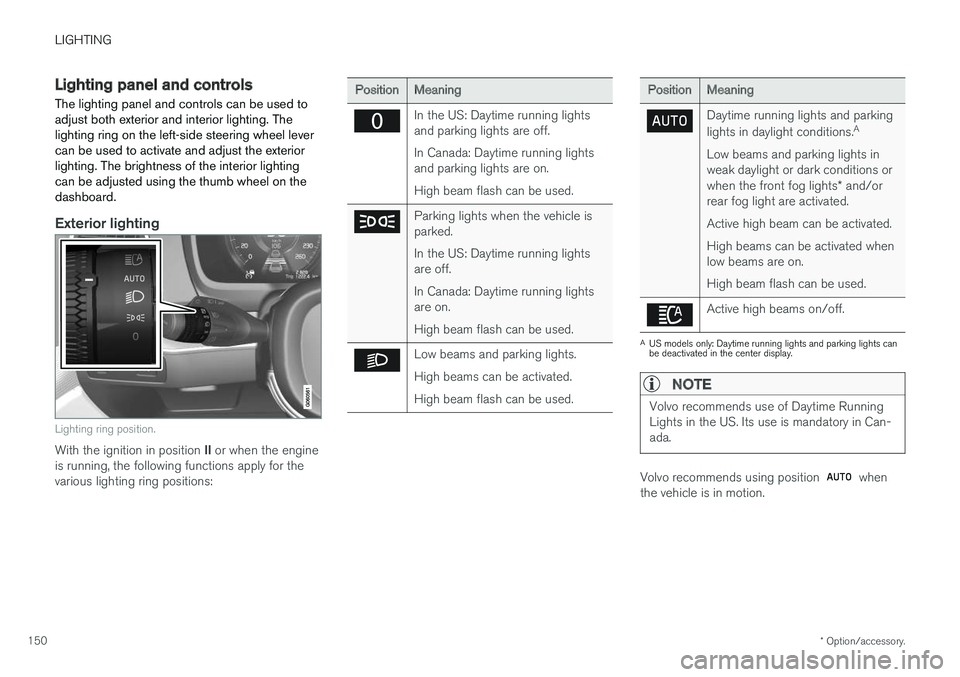
The lighting panel and controls can be used to adjust both exterior and interior lighting. Thelighting ring on the left-side steering wheel levercan be used to activate and adjust the exteriorlighting. The brightness of the interior lightingcan be adjusted using the thumb wheel on thedashboard.
Exterior lighting
Lighting ring position.
With the ignition in position II or when the engine
is running, the following functions apply for the various lighting ring positions:
PositionMeaning
In the US: Daytime running lights and parking lights are off. In Canada: Daytime running lights and parking lights are on. High beam flash can be used.
Parking lights when the vehicle is parked. In the US: Daytime running lights are off. In Canada: Daytime running lights are on. High beam flash can be used.
Low beams and parking lights. High beams can be activated.High beam flash can be used.
PositionMeaning
Daytime running lights and parking lights in daylight conditions. A
Low beams and parking lights in weak daylight or dark conditions or when the front fog lights * and/or
rear fog light are activated. Active high beam can be activated.High beams can be activated when low beams are on. High beam flash can be used.
Active high beams on/off.
A US models only: Daytime running lights and parking lights can be deactivated in the center display.
NOTE
Volvo recommends use of Daytime Running Lights in the US. Its use is mandatory in Can-ada.
Volvo recommends using position when
the vehicle is in motion.
Page 153 of 660
LIGHTING
* Option/accessory.151
WARNING
The vehicle lighting system cannot in all situa- tions determine when the daylight is too weakor not strong enough, e.g. when there is fogor rain. The driver is always responsible for driving the vehicle with lighting that is safe for the trafficconditions and as specified by applicable traf-fic regulations.
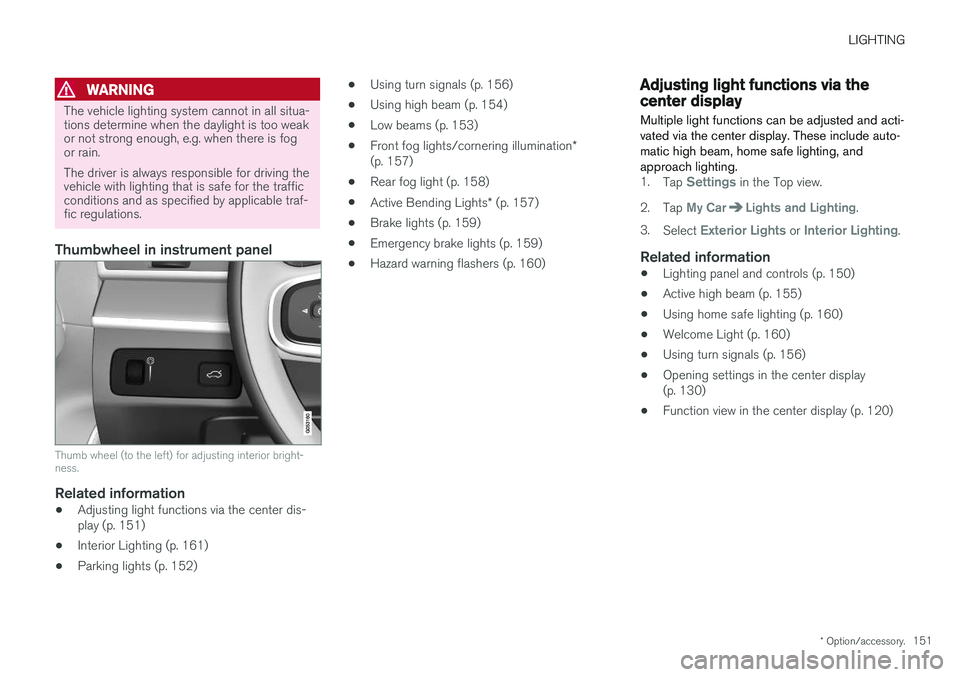
Thumbwheel in instrument panel
Thumb wheel (to the left) for adjusting interior bright- ness.
Related information
•Adjusting light functions via the center dis- play (p. 151)
• Interior Lighting (p. 161)
• Parking lights (p. 152) •
Using turn signals (p. 156)
• Using high beam (p. 154)
• Low beams (p. 153)
• Front fog lights/cornering illumination
*
(p. 157)
• Rear fog light (p. 158)
• Active Bending Lights
* (p. 157)
• Brake lights (p. 159)
• Emergency brake lights (p. 159)
• Hazard warning flashers (p. 160)
Adjusting light functions via thecenter display
Multiple light functions can be adjusted and acti- vated via the center display. These include auto-matic high beam, home safe lighting, andapproach lighting.
1. Tap Settings in the Top view.
2. Tap
My CarLights and Lighting.
3. Select
Exterior Lights or Interior Lighting.
Related information
• Lighting panel and controls (p. 150)
• Active high beam (p. 155)
• Using home safe lighting (p. 160)
• Welcome Light (p. 160)
• Using turn signals (p. 156)
• Opening settings in the center display (p. 130)
• Function view in the center display (p. 120)
Page 162 of 660
LIGHTING
* Option/accessory.
160
Hazard warning flashers
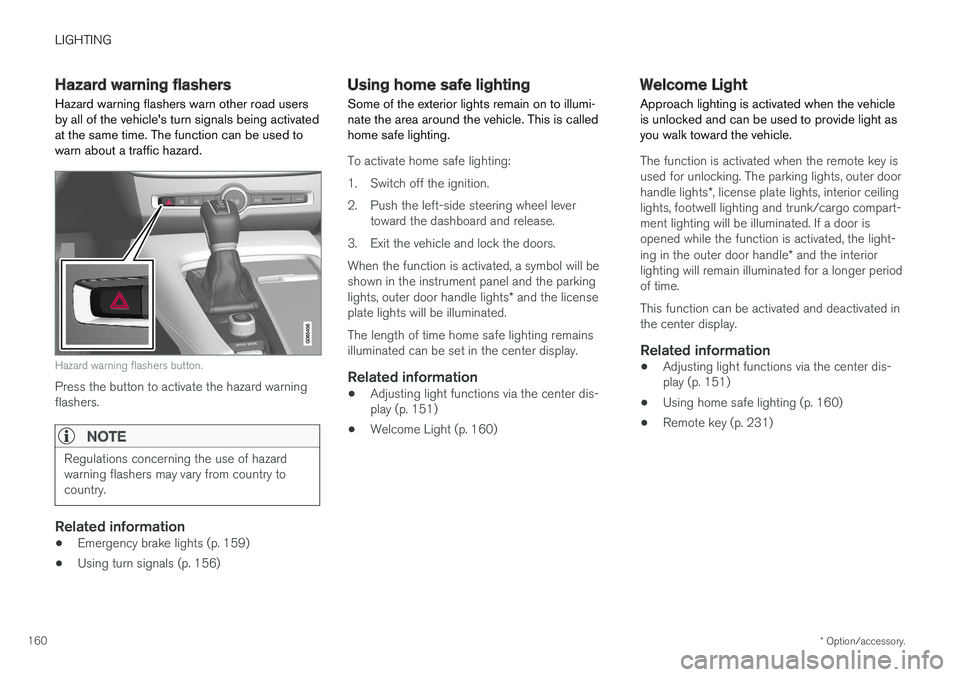
Hazard warning flashers warn other road users by all of the vehicle's turn signals being activatedat the same time. The function can be used towarn about a traffic hazard.
Hazard warning flashers button.
Press the button to activate the hazard warning flashers.
NOTE
Regulations concerning the use of hazard warning flashers may vary from country tocountry.
Related information
• Emergency brake lights (p. 159)
• Using turn signals (p. 156)
Using home safe lighting
Some of the exterior lights remain on to illumi- nate the area around the vehicle. This is calledhome safe lighting.
To activate home safe lighting:
1. Switch off the ignition.
2. Push the left-side steering wheel lever toward the dashboard and release.
3. Exit the vehicle and lock the doors.When the function is activated, a symbol will be shown in the instrument panel and the parking lights, outer door handle lights * and the license
plate lights will be illuminated. The length of time home safe lighting remains illuminated can be set in the center display.
Related information
• Adjusting light functions via the center dis-play (p. 151)
• Welcome Light (p. 160)
Welcome Light Approach lighting is activated when the vehicle is unlocked and can be used to provide light asyou walk toward the vehicle.
The function is activated when the remote key is used for unlocking. The parking lights, outer door handle lights
*, license plate lights, interior ceiling
lights, footwell lighting and trunk/cargo compart- ment lighting will be illuminated. If a door isopened while the function is activated, the light- ing in the outer door handle * and the interior
lighting will remain illuminated for a longer period of time. This function can be activated and deactivated in the center display.
Related information
• Adjusting light functions via the center dis-play (p. 151)
• Using home safe lighting (p. 160)
• Remote key (p. 231)
Page 163 of 660

LIGHTING
}}
* Option/accessory.161
Interior Lighting
The interior is equipped with several different types of lighting to improve the experience. Thisincludes reading lamps, glove box lighting andground lighting.
All lighting in the passenger compartment can be turned on and off manually within 5 minutesafter:
• the engine has been switched off and the ignition is in mode
0.
• the vehicle is unlocked but the engine has not been started.
Front ceiling lighting
The controls in the ceiling console for the front reading lights and courtesy lighting.
Reading light left side
Passenger compartment lighting
Courtesy lighting auto switch
Reading light right side
Reading lights
The reading lights on the right and left sides are switched on and off by briefly pressing the but-tons in the ceiling console. To adjust the bright-ness, press and hold the button.
Passenger compartment lighting
Briefly press the button in the ceiling console to switch on or off the footwell lighting and ceilinglighting.
Courtesy lighting auto switch
Activate the auto switch by briefly pressing the AUTO
button in the ceiling console. With Auto
activated, the indicator light in the button and the courtesy lighting come on and are turned off asfollows. The courtesy lighting: • comes on when the vehicle is unlocked and when the ignition is switched off
• goes off when the engine is started andwhen the vehicle is locked
• comes on or goes off when a side door isopened or closed
• remains on for 2 minutes if any of the sidedoors are open.
Rear roof lighting
*Reading lights are located in the rear section ofthe vehicle and can also be used as passengercompartment lighting.
Reading lights over the rear seat.
In vehicles with panoramic roofs *, there are two lamp
units, one on each side of the ceiling.
Page 164 of 660
||
LIGHTING
* Option/accessory.
162 Briefly press the button on the light to turn on or off the reading lights. To adjust the brightness,press and hold the button.
Glove compartment lightingThe glove compartment lighting comes on orgoes off when the glove compartment is openedor closed.
Vanity mirror lighting
*The vanity mirror lighting comes on or goes offwhen the cover over the mirror is opened orclosed.
Ground lighting*The ground lighting comes on or goes off when adoor is opened or closed.
Cargo compartment lightingThe cargo compartment lighting comes on orgoes off when the tailgate is opened or closed.
Ambient LightingThe ambient lighting comes on when the doorsare opened and goes out when the vehicle islocked. Ambient lighting brightness can beadjusted in the center display and also fine-tuned using the thumb wheel in the dashboard.
Mood lighting*The vehicle is equipped with several LEDs that provide faint lighting in various colors. This light-ing is on when the engine is running. Mood light-ing can be adjusted in the center display and also fine-tuned using the thumb wheel in the dash-board.
Lighting in the door storage compartments
Lighting in the door storage compartments comes on when the doors are opened and goesout when the vehicle is locked. The brightnesscan be adjusted using the thumb wheel in thedashboard.
Lighting in the front tunnel console
cupholders
The lighting in front console cupholders switcheson when the vehicle is unlocked and off when thevehicle is locked. The brightness can be adjustedusing the thumb wheel in the dashboard.
Related information
• Adjusting interior lighting (p. 162)
• Lighting panel and controls (p. 150)
• Ignition modes (p. 401)
• Passenger compartment interior (p. 554)
Adjusting interior lighting
Illumination in the vehicle varies depending on ignition mode. The interior lighting can beadjusted with a thumb wheel in the dashboardand certain light functions can also be adjustedvia the center display.
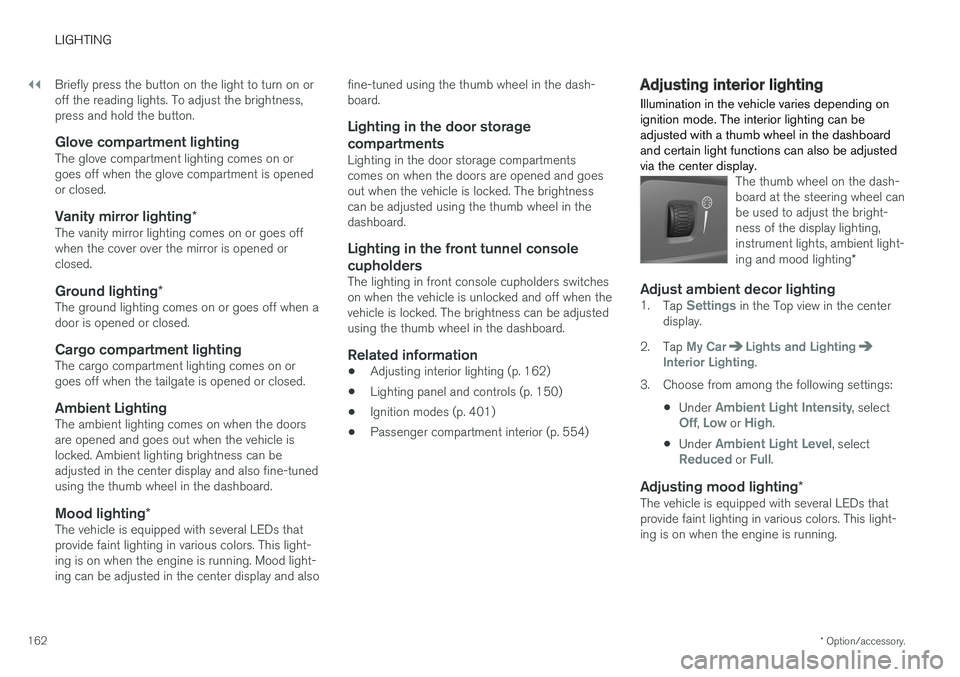
The thumb wheel on the dash- board at the steering wheel canbe used to adjust the bright-ness of the display lighting,instrument lights, ambient light- ing and mood lighting *
Adjust ambient decor lighting1.
Tap Settings in the Top view in the center
display.
2. Tap
My CarLights and LightingInterior Lighting.
3. Choose from among the following settings:
•Under
Ambient Light Intensity, selectOff, Low or High.
• Under
Ambient Light Level, selectReduced or Full.
Adjusting mood lighting
*The vehicle is equipped with several LEDs that provide faint lighting in various colors. This light-ing is on when the engine is running.
Page 165 of 660
LIGHTING
163
Changing the brightness
1.Tap Settings in the Top view in the center
display.
2. Tap
My CarLights and Lighting
Interior LightingInterior Mood Lighting.
3. Under
Interior Mood Light Intensity, selectOff, Low or High.
Changing the color of the light
1.Tap Settings in the Top view in the center
display.
2. Tap
My CarLights and Lighting
Interior LightingInterior Mood Lighting.
3. Choose
By Temperature or By Color to
change the color of the light. If
By Temperature is selected, the light will
change according to the temperature set for the passenger compartment. If
By Color is selected, the subcategoryTheme Colors can be used to make further
adjustments.
Related information
• Interior Lighting (p. 161)
• Adjusting light functions via the center dis- play (p. 151)
• Ignition modes (p. 401)
Page 575 of 660
MAINTENANCE AND SERVICE
}}
573
Emission inspection readiness
How do states use OBD II for emission
inspections?
Many states connect a computer directly to a vehicle's OBD II system. The inspector can thenread "faults." In some states, this type of inspec-tion has replaced the tailpipe emission test.
How can my vehicle fail OBD II emission
inspection?
Your vehicle can fail OBD II emission inspection for any of the following reasons:
• If your Check Engine (MIL) light is lit, yourvehicle may fail inspection.
• If your vehicle's Check Engine light was lit,but went out without any action on your part,OBD II will still have a recorded fault. Yourvehicle may pass or fail, depending on theinspection practices in your area.
• If you had recent service that required dis-connecting the battery, OBD II diagnosticinformation may be incomplete and "notready" for inspection. A vehicle that is notready may fail inspection.
How can I prepare for my next OBD II
emission inspection?
• If your Check Engine (MIL) light is lit - or was lit but went out without service, have your vehicle diagnosed and, if necessary, servicedby a qualified Volvo technician.
• If you recently had service for a lit CheckEngine light, or if you had service thatrequired disconnecting the battery, a periodof driving is necessary to bring the OBD IIsystem to "ready" for inspection. Two half-hour trips of mixed stop-and-go/highwaydriving are typically needed to allow OBD II toreach readiness. Your Volvo retailer can pro-vide you with more information on planning atrip.
• Maintain your vehicle in accordance with yourvehicle's maintenance schedule.
Owner maintenancePeriodic maintenance requirements and intervalsare described in your vehicle's Warranty andService Records Information booklet. The following points can be carried out between the normally scheduled maintenance services.
Each time the car is refueled:
•Check the engine oil level.
• Clean the windshield, windshield wipers, headlights, and taillights.
Monthly:
• Check cold tire pressure in all tires. Inspect the tires for wear.
• Check that engine coolant and other fluidlevels are between the indicated "min" and"max" markings.
• Clean interior glass surfaces with a glasscleaner and soft paper towels.
• Wipe driver information displays with a softcloth.
• Visually inspect battery terminals for corro-sion. Corrosion may indicate a loose terminalconnector, or a battery near the end of itsuseful service life. Consult your Volvo retailerfor additional information.
As needed:
Wash the car, including the undercarriage, to reduce wear that can be caused by a buildup ofdirt, and corrosion that can be caused by salt res-idues. Clean leaves and twigs from air intake vents at the base of the windshield, and from other placeswhere they may collect.
NOTE
Complete service information for qualified technicians is available online for purchase orsubscription at www.volvotechinfo.com.
Page 647 of 660

INDEX
645
Child restraints 63, 65
booster cushions 71
convertible seats 69
infant seats 67
ISOFIX/LATCH anchors 74
lower attachment points 73
recalls and registration 65
top tether anchors 72
Child safety 63
Child safety locks 251
City Safety 327, 328, 330, 331, 337, 339
City Safety during evasive maneuver 335
City Safety in crossing traffic 333, 334 City Safety when evasive maneuver preven- ted 336
Cleaning 611, 613, 614 automatic car wash 617
car wash 614, 615, 617, 618, 619, 620
center display 609
Seat belts 611
textile upholstery 609, 611, 612
upholstery 609, 611, 612, 613, 614
wheels 620
Cleaning wheels 620
Cleaning wiper blades 618
Clean Zone 203
Clean Zone Interior Package 204
Climate 200 auto-regulation 218
blower control 223, 224
perceived temperature 201
Sensors 201
temperature control 225, 226, 227
voice control 202
zones 200
Climate controls 212 center display 212
rear seat 212
Climate system 200, 212 Refrigerant 640
repairs 582
Clock, setting 90
Collision 42, 47, 52, 61 Collision warner detection of pedestrians 331
radar sensor 318
Collision warning 327, 340
Color code, paintwork 622
Color codes 622
Compass 454 calibration 454
Condensation in headlights 615, 617, 618, 619Connecting vehicle to InternetNo connection or poor connection 506
via a mobile device (WiFi) 503
via mobile device (Bluetooth) 503
via vehicle's modem 504
Connect phone 493
Contact information 26
Convertible seats 69
coolant 639
Coolant, filling 586 Cooling system overheating 440
Cornering illumination 158
Corner Traction Control 266
Corrosion protection 620Covering cargo compartment 566
Crash, see Collision 42
Crash event data 33
Cross Traffic Alert – CTA 346, 347, 348, 349
Cruise control 278, 279 manage speed 279, 280
temporary deactivation 281, 282
turn off 282
CTA – Cross Traffic Alert 346, 347, 348, 349
Curb weight 635