display VOLVO XC60 2019 Sensus Navigation Manual
[x] Cancel search | Manufacturer: VOLVO, Model Year: 2019, Model line: XC60, Model: VOLVO XC60 2019Pages: 43, PDF Size: 0.53 MB
Page 15 of 43
NAVIGATION
}}
* Option/accessory.13
Entering a destination with Send to Car (p. 14)
Map settings (p. 21)
Entering a destination usingRecent/Favorites/Library
A destination can be specified in different ways in the navigation system * - selecting from a list is
one of them.
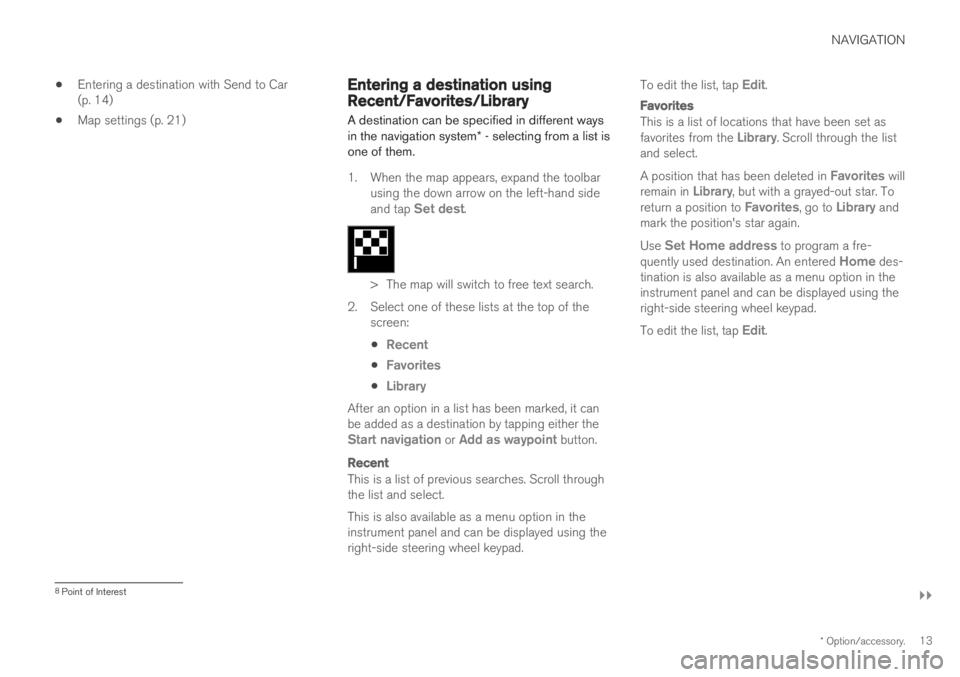
1. When the map appears, expand the toolbar using the down arrow on the left-hand side and tap
Set dest.
> The map will switch to free text search.
2. Select one of these lists at the top of the screen:
Recent
Favorites
Library
After an option in a list has been marked, it can be added as a destination by tapping either the
Start navigation or Add as waypoint button.
Recent
This is a list of previous searches. Scroll through the list and select. This is also available as a menu option in the instrument panel and can be displayed using theright-side steering wheel keypad. To edit the list, tap
Edit.
Favorites
This is a list of locations that have been set as favorites from the Library. Scroll through the list
and select. A position that has been deleted in
Favorites will
remain in Library, but with a grayed-out star. To
return a position to Favorites, go to Library and
mark the position's star again. Use
Set Home address to program a fre-
quently used destination. An entered Home des-
tination is also available as a menu option in the instrument panel and can be displayed using theright-side steering wheel keypad. To edit the list, tap
Edit.
8 Point of Interest
Page 16 of 43
||
NAVIGATION
* Option/accessory.
14
Library
This is a list of saved locations and itineraries. The most recently saved will be shown at the topof the list. Tap the location's star to select/deselect it as a favorite. A location with a selected (filled in) star will also be displayed under the
Favorites head-
ing. If a location is deleted in
Library, it will also be
deleted in Favorites.
The Library can be sorted in various ways:
Added - sort in chronological order.
Name - sort in alphabetical order.
Distance - sort according to distance from
the vehicle's current location.
Received - locations sent to the vehicle
using the Send to Car function will be filtered out. New unread locations have a BLUEmarker that is grayed out once the positionshave been read.
Use
Edit to delete one or more items in the list.
Related information
Itinerary (p. 15)
Entering a destination directly on the map (p. 10)
Entering a destination using an address (p. 10)
Entering a destination with a free text search(p. 11)
Entering a POI as a destination (p. 12)
Entering a destination with Send to Car(p. 14)
Route settings and guidance (p. 22)
Entering a destination with Send toCar
A destination can be specified in different ways in the navigation system * – using the Send to
Car function is one of them.
Sending a location to the vehicleSend to Car is a function that makes it possible to add a destination/location to the vehicle's nav-igation system from a computer. Send to Car can also be performed using the Volvo On Call app. Volvo On Call can also beused to send a destination/location to the vehiclefrom a Volvo On Call customer service center. Please note that the procedure shown here is only one example from one of several map serv-ice providers.
1. Go to wego.here.com on the computer.
> A map service will open.
2. Search for the desired location.
3. Right-click the location and then click the address.
> A side menu/information card will open.
4. Click Share in the side menu.
5. Click Send to car in the side menu.
6. Select the vehicle and enter the vehicle's VIN number or the email address registered to your Volvo ID. Then click Send.
Page 17 of 43
NAVIGATION
* Option/accessory.15
7.
Click Finish .
> The location will be sent to the vehicle.
For more information about other service provid- ers and the Send to Car function, please visit theVolvo Cars support site (support.volvocars.com).
Receiving and using a location in the vehicle
In order for the vehicle to receive data, it must beconnected to the Internet. If the location was sentto the vehicle using Volvo On Call, the vehicle'sintegrated modem will be used to receive thedata, i.e. no other Internet connection is required.
1. When the vehicle has received a location, a notification will appear in the center display. Tap the notification/symbol.
> An information card will open.
2. Select how you would like to use the loca- tion.
Using a stored location
Received locations are saved in the navigation system's library for later use.
Related information
Itinerary (p. 15)
Entering a destination directly on the map(p. 10)
Entering a destination using an address(p. 10)
Entering a destination with a free text search(p. 11)
Entering a POI as a destination (p. 12)
Entering a destination using Recent/Favor-ites/Library (p. 13)
Route settings and guidance (p. 22)
Itinerary
The itinerary is the route that the navigation sys- tem * suggests when the user enters a destina-
tion.
The first location set will be the itinerary's desti-
nation (final destination).
The next locations set will be the itinerary's way-
points (intermediate stops along the route).
An itinerary and its destination and waypoints can be easily edited at any time.
Related information
Viewing an itinerary (p. 16)
Editing or clearing an itinerary (p. 16)
Viewing alternative routes (p. 17)
Show guidance in the itinerary (p. 18)
Page 19 of 43
NAVIGATION
* Option/accessory.17
Viewing alternative routes
It is possible to search for alternate routes in the navigation system * while guidance is being pro-
vided.
1. Expand the toolbar using the down arrow first and then the three dots.
2.
Tap the Itinerary symbol to open the itiner-
ary.
3. Tap
Alternative routes.
4. Select an alternative route:
Eco
Fast
Scenic
5. Tap the map. > The updated route will be displayed onthe map and guidance will resume.
Related information
Editing or clearing an itinerary (p. 16)
Show traffic disruptions along the route (p. 19)
Selecting a detour in the navigation system
*
(p. 19)
Route settings and guidance (p. 22)
Viewing points of interest along theroute A list of points of interest (POI 9
) along your
route can be displayed in the navigation system *.
1.
Tap Ahead.
2. Tap
POI.
> POIs along the route are displayed according to their distance from the vehi- cle.
3. If there are multiple POIs in the same loca- tion, they will be displayed as a group. Tapthe group for a list of the POIs.
4. Select a POI.
5. Select one of the information card's options and follow the instructions.
Related information
Information cards in the navigation system
*
(p. 6)
Map settings (p. 21)
Page 20 of 43
NAVIGATION
* Option/accessory.
18
Show guidance in the itinerary
A list of coming guidance points helps the driver prepare in advance for upcoming maneuvers,e.g. moving into the correct lane before making aturn.
To display a list of upcoming turns in the itinerary in the navigation system *:
1. Expand the toolbar using the down arrow on the left-hand side.
2. Expand the toolbar further using the three dots.
3. Tap the
Turn-by-Turn symbol (see image).
A list of guidance points on the itinerary will be displayed instead of the toolbar (you can scroll through the list). Tap the arrow pointing to the left to minimize the list. The next guidance point is always shown at the top of the list.
Tap one of the guidance points in thelist to show the location on the map.Tap the map's crosshairs (see image)to return to the map guidance view,
where the map shows the vehicle's current loca-tion.
Traffic disruptions on map10
The navigation system * receives information on
traffic events and traffic disruptions and displays these on the map.
NOTE
Traffic information is not available in all areas/countries. Coverage areas for traffic information is con- tinuously extended.
It is possible to make settings to determine which traffic-related information is shown on the map. Traffic disruptions, such as congested and slow- moving traffic, road work and accidents, areshown with different symbols when the map iszoomed in.
Road construction, for example, is indi-cated by this symbol. Sections of roadwith major traffic disruptions are alsoshown with a red line on the side of the
road affected. The line also indicates which direc-tion of traffic is affected. If the disruption affectsboth directions of traffic, the section of road ismarked with red lines on both sides of the road.
Information on traffic disruptions
–Tap the traffic disruption symbol.
> An information card will be displayed. Information may include e.g. the location of the traffic disruption with the streetname/road number and its type/extent/duration.
Avoiding traffic disruptions
If there are traffic disruptions along the route, theAvoid option can be selected. The system will
then calculate an alternate route.
Real Time Traffic Information (RTTI)11
If the vehicle is connected to the Internet, enhanced traffic information can be retrieved using RTTI 12
.
Related information
Traffic information settings (p. 23)
Map settings (p. 21)
Show traffic disruptions along the route (p. 19)
Real Time Traffic Information (RTTI) (p. 20)
Information cards in the navigation system
*
(p. 6)
9 Point of Interest
Page 21 of 43
NAVIGATION
}}
* Option/accessory.19
Show traffic disruptions along theroute A list of traffic disruptions along the route can be shown when a destination has been entered in the navigation system *.
1. When the map appears, expand the left-side
toolbar using the down arrow and then the three dots.
2.
Tap Ahead.
3. Tap
Traffic. If there are no traffic problems
along your route, the traffic button will be grayed out.
> Any traffic problems along the route will be displayed according to their distance from the vehicle.
4. For additional information about a traffic dis- ruption, tap the row to open an informationcard. Select one of the information card'soptions and follow the instructions. 5.
Tap
Avoid to avoid the traffic disruption.
> The route will be recalculated and guid- ance will begin for the new route.
Related information
Traffic disruptions on map (p. 18)
Traffic information settings (p. 23)
Information cards in the navigation system
*
(p. 6)
Real Time Traffic Information (RTTI) (p. 20)
Selecting a detour in the navigation
system
*
Select a detour to avoid the next section of the route, e.g. if the road is closed.
1. Expand the left-side toolbar using the down arrow and then the three dots.
2.
Tap the Detour symbol to display an alter-
nate route with information on the new dis- tance and estimated travel time. Normally,only short detours are suggested to take youquickly back to your original itinerary.
3. To accept the suggested detour: Tap the
sign with the detour information. The route isalso accepted if you begin driving the sug-gested route. Once the suggestion has beenaccepted, guidance will resume using the detour as the new route. If you do not
accept the suggestion, continue driving the
original route.
Instead of choosing
Detour, you can instead
select another route and leave your itinerary's current route. The system will update the route
10 Only available in certain markets.11
Only available in certain markets.12 Real Time Traffic Information
Page 22 of 43
||
NAVIGATION
* Option/accessory.
20 automatically and continue guidance to your des- tination along the most suitable route. It is also possible to display an alternative route while driving.
Related information
Viewing alternative routes (p. 17)
Real Time Traffic Information
(RTTI)13
When the vehicle is connected to the Internet, the driver can access enhanced traffic informa- tion (RTTI 14
).
Information on traffic events and traffic flow is continuously retrieved from an Internet service.When a vehicle requests traffic flow information,anonymous data about traffic flow in the vehicle'slocation is also provided, which helps enable theservice to function. Anonymous data is only sentwhen RTTI is activated. Current traffic information is shown in the naviga- tion system * for highways/freeways, major roads,
secondary roads and in some cases urban routes. The amount of traffic information shown on the map depends on the distance to the vehicle andis only shown within approximately 120 km(75 miles) from the vehicle's location. Text and symbols on the map are displayed in the usual way and the traffic flow shows how fast thetraffic is moving on a road in comparison with theroad's speed limit. The traffic flow is shown onthe map on each side of the road with a coloredline in each direction.
Green - no disturbances.
Orange - slow-moving traffic.
Red - congestion/traffic jam/accident.
Black - road closed.
NOTE
Traffic information is not available in all areas/countries. Coverage areas for traffic information is con- tinuously extended.
Related information
Activating and deactivating enhanced traffic information (p. 21)
13
Certain markets only.
14 Real Time Traffic Information
Page 23 of 43
NAVIGATION
}}
* Option/accessory.21
Activating and deactivating
enhanced traffic information15
When the vehicle is connected to the Internet, the driver can access enhanced traffic informa- tion (RTTI 16
) in the navigation system *.
To activate or deactivate RTTI: 1.
Tap
Settings in the center display's Top
view.
2. Tap
NavigationTraffic.
3. Select
Real Time Traffic Information to
activate (replace regular traffic information with RTTI) or deactivate RTTI.
4. One pop-up window with the heading
Terms
and conditions and one with the headingData sharing will appear if RTTI is being
used for the first time.
If the vehicle's Internet connection is lost when RTTI is activated, regular traffic information willbe automatically activated. RTTI will be reactiva-ted when the vehicle is once again connected tothe Internet.
Related information
Real Time Traffic Information (RTTI) (p. 20)
Traffic information settings (p. 23)
Navigation system
* settings
Select settings for how the route and other infor- mation should be presented in the navigationsystem.
SettingsNavigation
Settings can be personalized in the following areas:
Map - manages the content and appearance
of the map.
Route and Guidance - handles guidance
and how routes are calculated and displayed.
Traffic - manages traffic information.
Related information
Map settings (p. 21)
Route settings and guidance (p. 22)
Traffic information settings (p. 23)
Map settings
The following settings determine how the map is displayed in the navigation system *.
SettingsNavigationMap
Settings can be personalized in the following areas:
Position Format
Map Display Format
Show Speed Cameras
Show Favorites
Point of Interest (POI)
Position FormatSelect Position Format to designate/display
the current location on the map using its address or its coordinates:
Address
Coordinates and Altitude
15 Certain markets only.
16 Real Time Traffic Information
Page 24 of 43
||
NAVIGATION
* Option/accessory.
22
Map Display FormatSelect Map Display Format to choose back-
ground lighting for the map:
Day - bright colors.
Night - dark colors for better night vision.
Auto - the system will switch between Dayand Night depending on the ambient light in
the passenger compartment.
Speed cameras 17Select Show Speed Cameras to display speed
cameras on the map.
FavoritesTo display Favorites on the map, select.
Point of Interest (POI 18
)Select POIs to be displayed on the map underPoint of Interest (POI). Tap on the desired cat-
egory, e.g. "Transportation", and then select show all or specific sub categories. Tap
Back or Closeto exit the menu.
Related information
Navigation system
* settings (p. 21)
Route settings and guidance (p. 22)
Traffic information settings (p. 23)
Viewing points of interest along the route (p. 17)
Entering a POI as a destination (p. 12)
Entering a destination using Recent/Favor-ites/Library (p. 13)
Route settings and guidance Settings for how the route is calculated and how guidance is presented in the navigation system
*
are selected here.
SettingsNavigationRoute and
Guidance
Settings can be personalized in the following areas:
Arrival Time Format
Voice Guidance Level
Choose Default Route Type
Route Learning
Avoidance Settings
Propose Gas Station
17 This function is not available on all markets.
18 Point of Interest
Page 25 of 43
NAVIGATION
}}
* Option/accessory.23
Arrival Time FormatChoose how arrival time will be displayed:
ETA19 (estimated time of arrival at the desti-
nation)
RTA20 (remaining time to arrival at destina-
tion)
Times are displayed according to the time zone of the destination.
Voice Guidance Level1. Tap Voice Guidance Level.
2. Tap desired voice guidance:
None (no automatic voice guidance, but
guidance can be manually requested once)
Low (only one message per guidance
point)
Medium (up to 3 messages per guidance
point, with limited information provided)
Full (up to 4 messages per guidance
point and all available information provi- ded)
Choose Default Route TypeSelect the default type of route to be used:
Fast
Eco
Scenic (highways/freeways are avoided
whenever possible; note that this could lead to longer travel times)
It is also possible to display an alternative routewhile driving.
Route LearningSelect Route Learning to allow data to be col-
lected to optimize route calculations.
AvoidTap Avoidance Settings to open a menu of
options to automatically avoid (if possible) when calculating a route. Possible selections includetunnels, ferries, congestion charge zones, etc.
Suggest service stationTap Propose Gas Station to activate or deacti-
vate the display of suggestions for nearby service stations in the instrument panel when fuel level islow.
Related information
Navigation system
* settings (p. 21)
Map settings (p. 21)
Traffic information settings (p. 23)
Viewing alternative routes (p. 17)
Traffic information settings The following settings determine how traffic information 21
is presented in the navigation sys-
tem *.
SettingsNavigationTraffic
Settings can be personalized in the following areas:
Show and Handle Traffic Events
Avoid Traffic Events
Show Free Flowing Traffic
Real Time Traffic Information
Show & Handle Traffic EventsSelect to display traffic events on the map and use this information to calculate routes:
None
Major
All types
19 Estimated Time of Arrival
20 Remaining Time to Arrival