warning light VOLVO XC60 TWIN ENGINE 2019 Owner's Manual
[x] Cancel search | Manufacturer: VOLVO, Model Year: 2019, Model line: XC60 TWIN ENGINE, Model: VOLVO XC60 TWIN ENGINE 2019Pages: 695, PDF Size: 14.96 MB
Page 171 of 695
WINDOWS, GLASS AND MIRRORS
* Option/accessory.169
WARNING
Make sure that no child or other passengercomes into contact with the windows as theyare closing with keyless closing*.
NOTE
One way to reduce the pulsating wind noiseheard when the rear windows are open is toalso open the front windows slightly.
NOTE
The windows cannot be opened at speedsover approx. 180 km/h (ca112 mph), but theycan be closed.
The driver is always responsible for followingapplicable traffic regulations.
Related information
Power windows (p. 167)
Pinch protection for windows and sun cur-tains (p. 166)
Reset procedure for pinch protection(p. 167)
Keyless locking and unlocking* (p. 253)
Locking and unlocking using the remote key(p. 240)
Rearview/door mirrors
The rearview mirror and door mirrors can beused to improve the driver's visibility behind thevehicle.
Rearview mirror
The rearview mirror can be easily adjusted man-ually. The rearview mirror can be equipped withHomeLink*, auto-dim* and compass*.
Door mirrors
WARNING
The door mirror on the passenger side iscurved to improve visibility. Objects in the mir-ror may appear farther away than they actuallyare.
The joystick in the drivers' door control panel isused to adjust the position of the door mirrors.There are also several automatic settings thatcan also be connected to the memory functionbuttons for the power seat*.
Related information
HomeLink®* (p. 485)
Compass* (p. 489)
Adjusting the rearview mirror dimming func-tion (p. 170)
Adjusting the door mirrors (p. 170)
Storing positions for seats, mirrors and head-up display* (p. 186)
Activating and deactivating the heated rearwindow and door mirrors (p. 221)
Page 174 of 695
WINDOWS, GLASS AND MIRRORS
* Option/accessory.172
Panoramic roof*
The panoramic roof is divided into two glasssections. The front section can be opened verti-cally at the rear edge (ventilation position) or hor-izontally (open position). The rear section cannotbe moved.
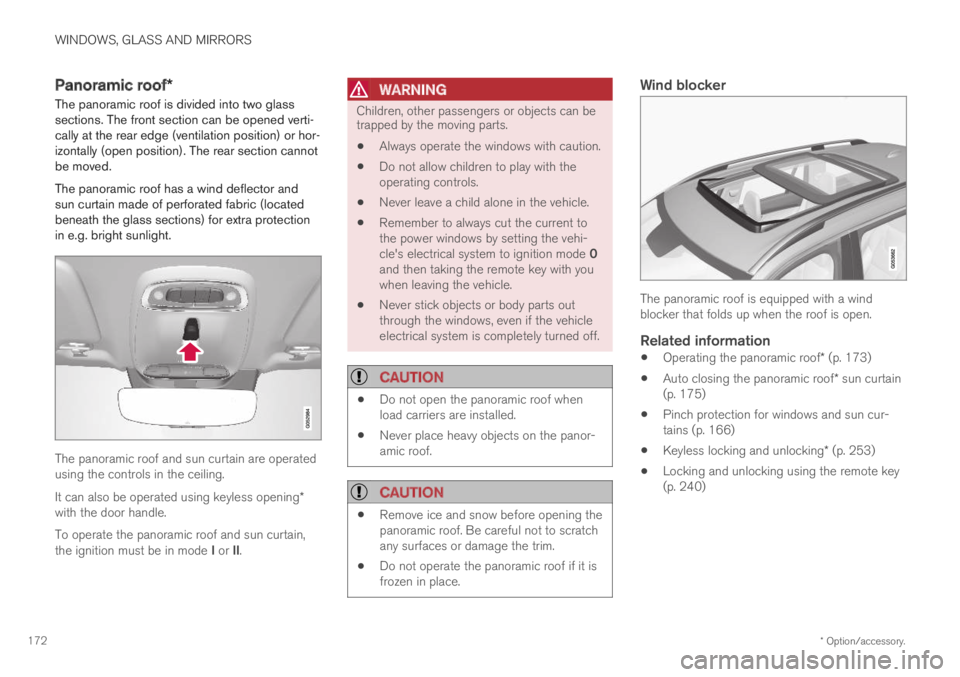
The panoramic roof has a wind deflector andsun curtain made of perforated fabric (locatedbeneath the glass sections) for extra protectionin e.g. bright sunlight.
The panoramic roof and sun curtain are operatedusing the controls in the ceiling.
It can also be operated using keyless opening*with the door handle.
To operate the panoramic roof and sun curtain,the ignition must be in mode I or II.
WARNING
Children, other passengers or objects can betrapped by the moving parts.
Always operate the windows with caution.
Do not allow children to play with theoperating controls.
Never leave a child alone in the vehicle.
Remember to always cut the current tothe power windows by setting the vehi-cle's electrical system to ignition mode 0and then taking the remote key with youwhen leaving the vehicle.
Never stick objects or body parts outthrough the windows, even if the vehicleelectrical system is completely turned off.
CAUTION
Do not open the panoramic roof whenload carriers are installed.
Never place heavy objects on the panor-amic roof.
CAUTION
Remove ice and snow before opening thepanoramic roof. Be careful not to scratchany surfaces or damage the trim.
Do not operate the panoramic roof if it isfrozen in place.
Wind blocker
The panoramic roof is equipped with a windblocker that folds up when the roof is open.
Related information
Operating the panoramic roof* (p. 173)
Auto closing the panoramic roof* sun curtain(p. 175)
Pinch protection for windows and sun cur-tains (p. 166)
Keyless locking and unlocking* (p. 253)
Locking and unlocking using the remote key(p. 240)
Page 197 of 695
SEATS AND STEERING WHEEL
195
Folding the backrests manually
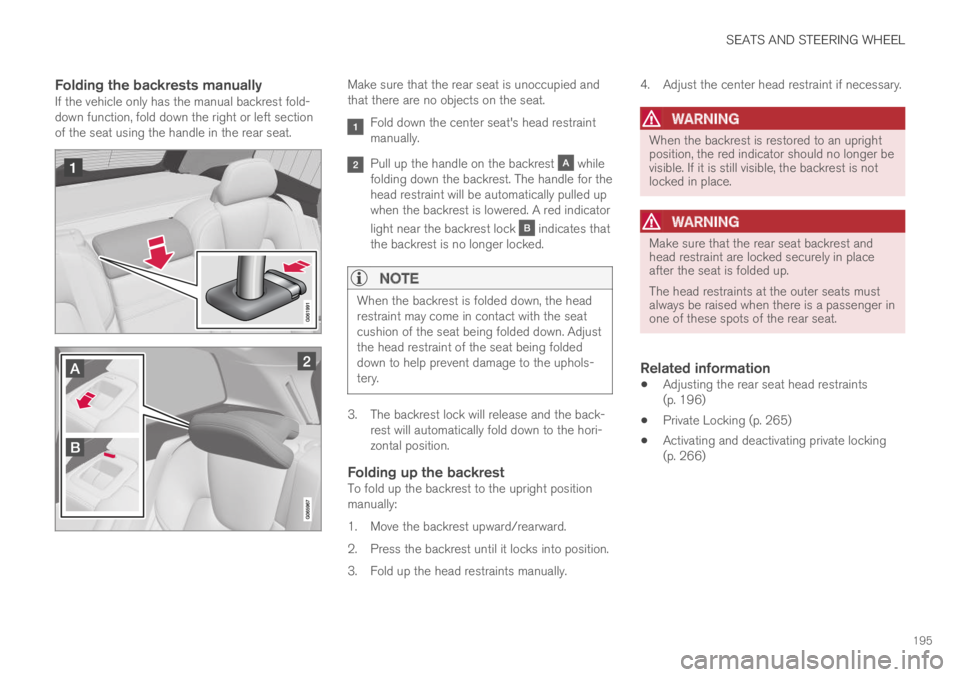
If the vehicle only has the manual backrest fold-down function, fold down the right or left sectionof the seat using the handle in the rear seat.
Make sure that the rear seat is unoccupied andthat there are no objects on the seat.
Fold down the center seat's head restraintmanually.
Pull up the handle on the backrest whilefolding down the backrest. The handle for thehead restraint will be automatically pulled upwhen the backrest is lowered. A red indicator
light near the backrest lock indicates thatthe backrest is no longer locked.
NOTE
When the backrest is folded down, the headrestraint may come in contact with the seatcushion of the seat being folded down. Adjustthe head restraint of the seat being foldeddown to help prevent damage to the uphols-tery.
3. The backrest lock will release and the back-rest will automatically fold down to the hori-zontal position.
Folding up the backrest
To fold up the backrest to the upright positionmanually:
1. Move the backrest upward/rearward.
2. Press the backrest until it locks into position.
3. Fold up the head restraints manually.
4. Adjust the center head restraint if necessary.
WARNING
When the backrest is restored to an uprightposition, the red indicator should no longer bevisible. If it is still visible, the backrest is notlocked in place.
WARNING
Make sure that the rear seat backrest andhead restraint are locked securely in placeafter the seat is folded up.
The head restraints at the outer seats mustalways be raised when there is a passenger inone of these spots of the rear seat.
Related information
Adjusting the rear seat head restraints(p. 196)
Private Locking (p. 265)
Activating and deactivating private locking(p. 266)
Page 200 of 695
||
SEATS AND STEERING WHEEL
* Option/accessory.198
Horn
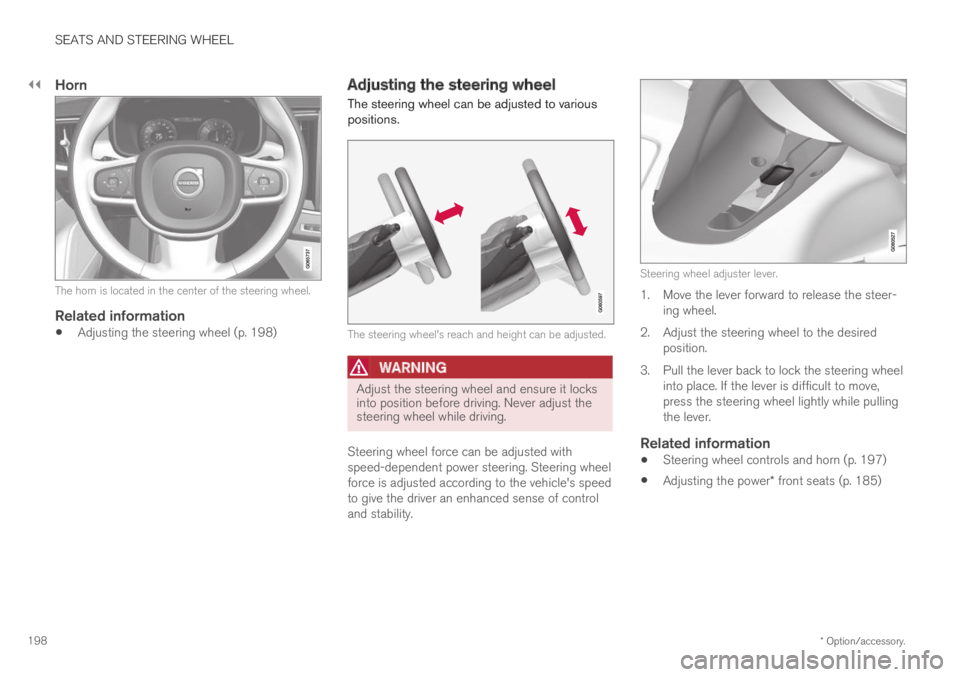
The horn is located in the center of the steering wheel.
Related information
Adjusting the steering wheel (p. 198)
Adjusting the steering wheel
The steering wheel can be adjusted to variouspositions.
The steering wheel's reach and height can be adjusted.
WARNING
Adjust the steering wheel and ensure it locksinto position before driving. Never adjust thesteering wheel while driving.
Steering wheel force can be adjusted withspeed-dependent power steering. Steering wheelforce is adjusted according to the vehicle's speedto give the driver an enhanced sense of controland stability.
Steering wheel adjuster lever.
1. Move the lever forward to release the steer-ing wheel.
2.Adjust the steering wheel to the desiredposition.
3. Pull the lever back to lock the steering wheelinto place. If the lever is difficult to move,press the steering wheel lightly while pullingthe lever.
Related information
Steering wheel controls and horn (p. 197)
Adjusting the power* front seats (p. 185)
Page 240 of 695
||
KEY, LOCKS AND ALARM
* Option/accessory.238
The keyless system for locking/unlocking thedoors and tailgate (Passive Entry*) is available asan option. This system has a range in a semicirclewith a radius of approximately 1.5 meter (5 feet)out from the driver's door and approx. 1 meter(3 feet) out from the tailgate.
With keyless start in combination with keylesslocking and unlocking, the remote key can belocated anywhere in the passenger compartmentor cargo compartment in order to start theengine.
Each remote key supplied with the vehicle can belinked to a driver profile with unique settings forthe vehicle. When a key with a specific profile isused, the vehicle settings are adjusted accordingto that profile.
Buttonless key, Key Tag
For vehicles equipped with keyless locking andunlocking*, a smaller, lighter and button-less key
(Key Tag4) is also provided. It works the sameway as the regular remote key as regard keylessstart and keyless locking and unlocking. The keyis waterproof up to a depth of approx. 10 meters(30 feet) for up to 60 minutes. It does not have adetachable key blade and its battery cannot bereplaced.
Remote key buttons
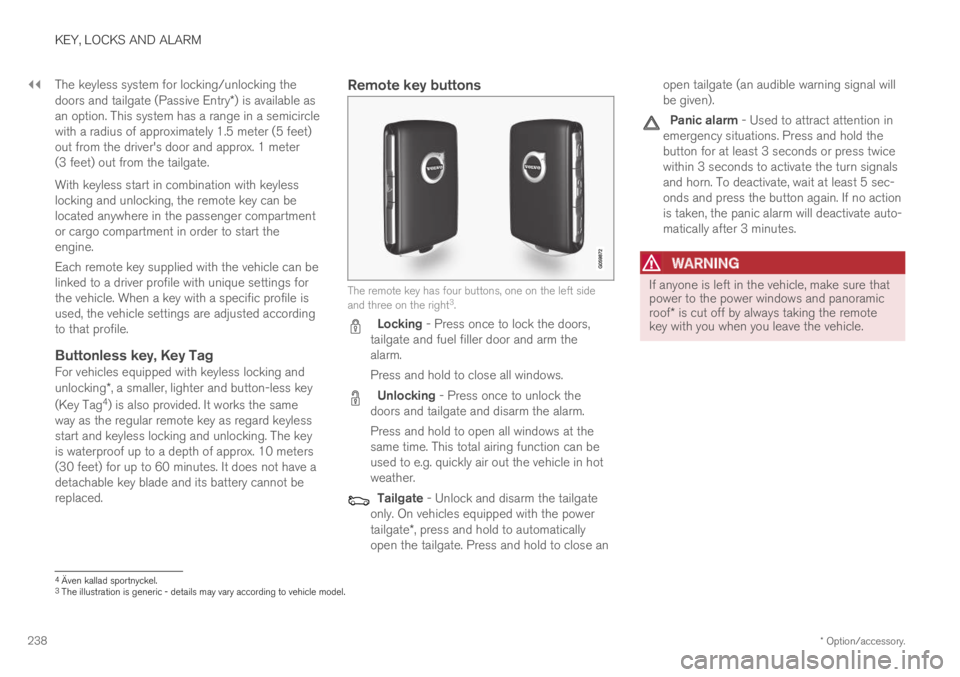
The remote key has four buttons, one on the left sideand three on the right3.
Locking - Press once to lock the doors,tailgate and fuel filler door and arm thealarm.
Press and hold to close all windows.
Unlocking - Press once to unlock thedoors and tailgate and disarm the alarm.
Press and hold to open all windows at thesame time. This total airing function can beused to e.g. quickly air out the vehicle in hotweather.
Tailgate - Unlock and disarm the tailgateonly. On vehicles equipped with the powertailgate*, press and hold to automaticallyopen the tailgate. Press and hold to close an
open tailgate (an audible warning signal willbe given).
Panic alarm - Used to attract attention inemergency situations. Press and hold thebutton for at least 3 seconds or press twicewithin 3 seconds to activate the turn signalsand horn. To deactivate, wait at least 5 sec-onds and press the button again. If no actionis taken, the panic alarm will deactivate auto-matically after 3 minutes.
WARNING
If anyone is left in the vehicle, make sure thatpower to the power windows and panoramicroof* is cut off by always taking the remotekey with you when you leave the vehicle.
4Även kallad sportnyckel.3The illustration is generic - details may vary according to vehicle model.
Page 244 of 695
||
KEY, LOCKS AND ALARM
* Option/accessory.242
1.Press the button on the remote key.
>The lock and alarm indicator on the dash-board will go out to indicate that the vehi-cle is no longer fully armed.
The tailgate will be unlocked but remainclosed. However, the side doors willremain locked and armed.
Press lightly on the rubberized pressureplate under the tailgate handle to openthe tailgate.
If the tailgate is not opened within2 minutes, it will be relocked and thealarm armed.
2.With the optional power tailgate* -
Hold and press (about 1.5 seconds) the button on the remote key
>The tailgate will unlock and open. How-ever, the side doors will remain locked andarmed.
Related information
Locking and unlocking using the remote key(p. 240)
Opening and closing the power tailgate*(p. 260)
Remote key range
In order to function correctly, the remote keymust be within a certain distance from the vehi-cle.
Manual use
The remote key's functions for e.g. locking and
unlocking, which are activated by pressing or
, have a range of approx. 20 meters (65 feet)from the vehicle.
If the vehicle's locks do not react, move closerand try again.
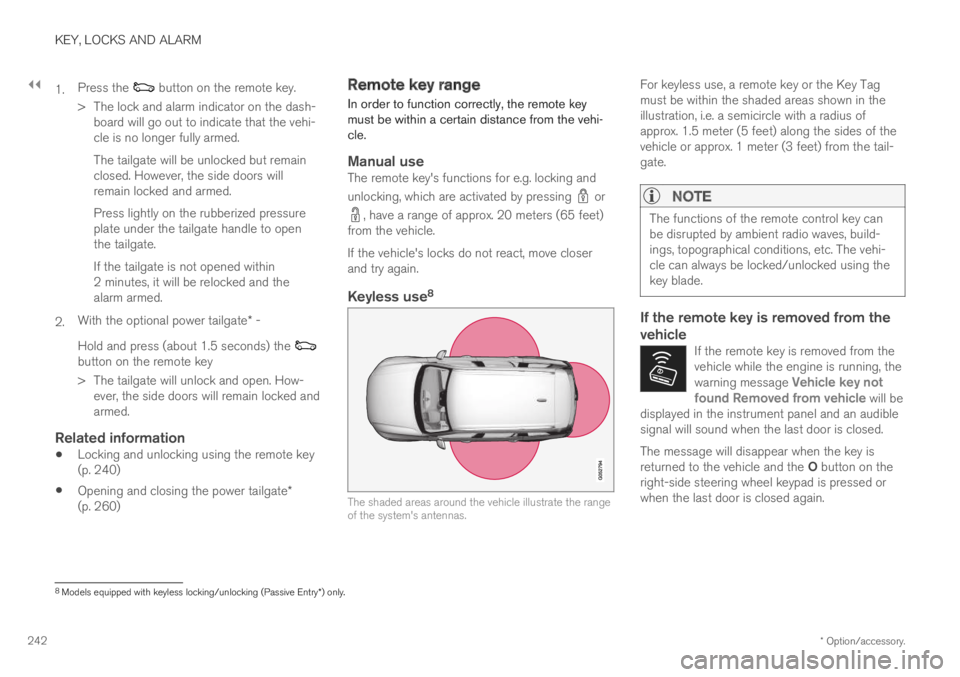
Keyless use 8
The shaded areas around the vehicle illustrate the rangeof the system's antennas.
For keyless use, a remote key or the Key Tagmust be within the shaded areas shown in theillustration, i.e. a semicircle with a radius ofapprox. 1.5 meter (5 feet) along the sides of thevehicle or approx. 1 meter (3 feet) from the tail-gate.
NOTE
The functions of the remote control key canbe disrupted by ambient radio waves, build-ings, topographical conditions, etc. The vehi-cle can always be locked/unlocked using thekey blade.
If the remote key is removed from the
vehicle
If the remote key is removed from thevehicle while the engine is running, thewarning message Vehicle key notfound Removed from vehicle will bedisplayed in the instrument panel and an audiblesignal will sound when the last door is closed.
The message will disappear when the key isreturned to the vehicle and the O button on theright-side steering wheel keypad is pressed orwhen the last door is closed again.
8
Models equipped with keyless locking/unlocking (Passive Entry * ) only.
Page 257 of 695
KEY, LOCKS AND ALARM
* Option/accessory.255
Keyless unlock settings*
Several different sequences are available forkeyless unlocking.
1.Tap Settings in the center display's Topview.
2.Tap My CarLockingKeyless Unlock
3. Select alternative:
All Doors
- unlocks all doors at the same time.
Single Door
- unlocks the selected door.
Related information
Keyless locking and unlocking* (p. 253)
Keyless and touch-sensitive surfaces*(p. 252)
Keyless tailgate unlock*
The tailgate can be opened using the remotekey. The key only needs to be within range, e.g.in a pocket or bag.
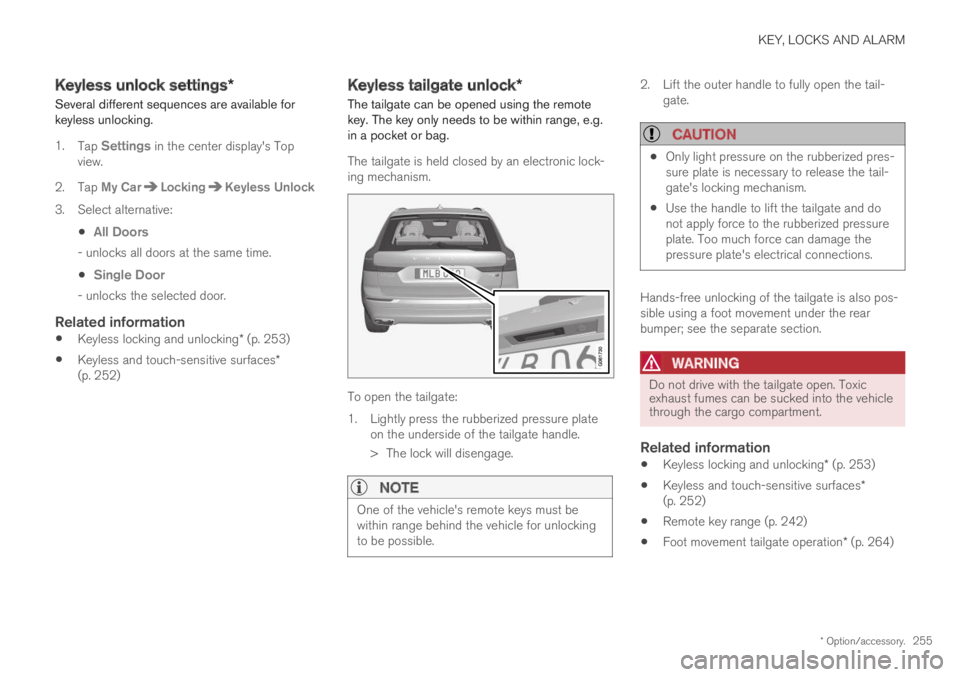
The tailgate is held closed by an electronic lock-ing mechanism.
To open the tailgate:
1.Lightly press the rubberized pressure plateon the underside of the tailgate handle.
> The lock will disengage.
NOTE
One of the vehicle's remote keys must bewithin range behind the vehicle for unlockingto be possible.
2. Lift the outer handle to fully open the tail-gate.
CAUTION
Only light pressure on the rubberized pres-sure plate is necessary to release the tail-gate's locking mechanism.
Use the handle to lift the tailgate and donot apply force to the rubberized pressureplate. Too much force can damage thepressure plate's electrical connections.
Hands-free unlocking of the tailgate is also pos-sible using a foot movement under the rearbumper; see the separate section.
WARNING
Do not drive with the tailgate open. Toxicexhaust fumes can be sucked into the vehiclethrough the cargo compartment.
Related information
Keyless locking and unlocking* (p. 253)
Keyless and touch-sensitive surfaces*(p. 252)
Remote key range (p. 242)
Foot movement tailgate operation* (p. 264)
Page 258 of 695
KEY, LOCKS AND ALARM
* Option/accessory.256
Antenna locations for the start andlock system
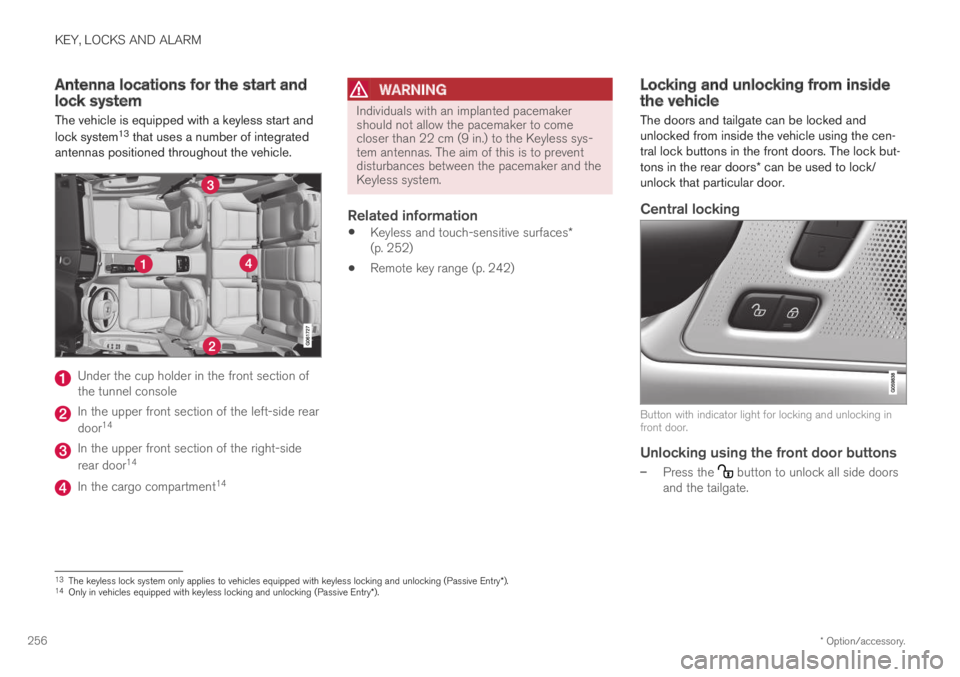
The vehicle is equipped with a keyless start and
lock system13 that uses a number of integratedantennas positioned throughout the vehicle.
Under the cup holder in the front section ofthe tunnel console
In the upper front section of the left-side rear
door14
In the upper front section of the right-side
rear door14
In the cargo compartment14
WARNING
Individuals with an implanted pacemakershould not allow the pacemaker to comecloser than 22 cm (9 in.) to the Keyless sys-tem antennas. The aim of this is to preventdisturbances between the pacemaker and theKeyless system.
Related information
Keyless and touch-sensitive surfaces*(p. 252)
Remote key range (p. 242)
Locking and unlocking from insidethe vehicle
The doors and tailgate can be locked andunlocked from inside the vehicle using the cen-tral lock buttons in the front doors. The lock but-tons in the rear doors* can be used to lock/unlock that particular door.
Central locking
Button with indicator light for locking and unlocking infront door.
Unlocking using the front door buttons
–Press the button to unlock all side doorsand the tailgate.
13The keyless lock system only applies to vehicles equipped with keyless locking and unlocking (Passive Entry*).14Only in vehicles equipped with keyless locking and unlocking (Passive Entry*).
Page 285 of 695
DRIVER SUPPORT
283
Activating/deactivating AutomaticSpeed Limiter
The Automatic Speed Limiter (ASL) is a supple-ment to the Speed Limiter (SL) and can be acti-vated/deactivated.
Activating ASL
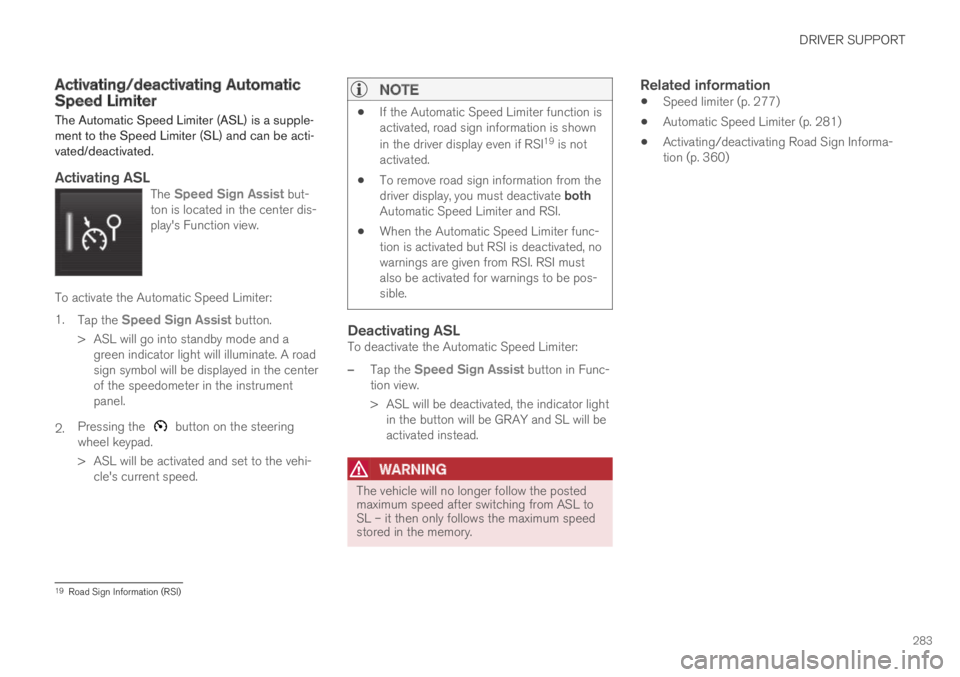
The Speed Sign Assist but-ton is located in the center dis-play's Function view.
To activate the Automatic Speed Limiter:
1.Tap the Speed Sign Assist button.
>ASL will go into standby mode and agreen indicator light will illuminate. A roadsign symbol will be displayed in the centerof the speedometer in the instrumentpanel.
2.Pressing the button on the steeringwheel keypad.
>ASL will be activated and set to the vehi-cle's current speed.
NOTE
If the Automatic Speed Limiter function isactivated, road sign information is shown
in the driver display even if RSI19 is notactivated.
To remove road sign information from thedriver display, you must deactivate bothAutomatic Speed Limiter and RSI.
When the Automatic Speed Limiter func-tion is activated but RSI is deactivated, nowarnings are given from RSI. RSI mustalso be activated for warnings to be pos-sible.
Deactivating ASL
To deactivate the Automatic Speed Limiter:
–Tap the Speed Sign Assist button in Func-tion view.
>ASL will be deactivated, the indicator lightin the button will be GRAY and SL will beactivated instead.
WARNING
The vehicle will no longer follow the postedmaximum speed after switching from ASL toSL – it then only follows the maximum speedstored in the memory.
Related information
Speed limiter (p. 277)
Automatic Speed Limiter (p. 281)
Activating/deactivating Road Sign Informa-tion (p. 360)
19Road Sign Information (RSI)
Page 293 of 695
DRIVER SUPPORT
* Option/accessory.291
WARNING
Distance Alert only reacts of the time intervalto the vehicle ahead is shorter than the presetvalue – vehicle speed is not affected.
Related information
Head-up display for Distance Alert (p. 291)
Activating/deactivating Distance Alert(p. 292)
Setting a time interval for Distance Alert(p. 292)
Distance Alert limitations (p. 293)
Head-up display for Distance Alert32
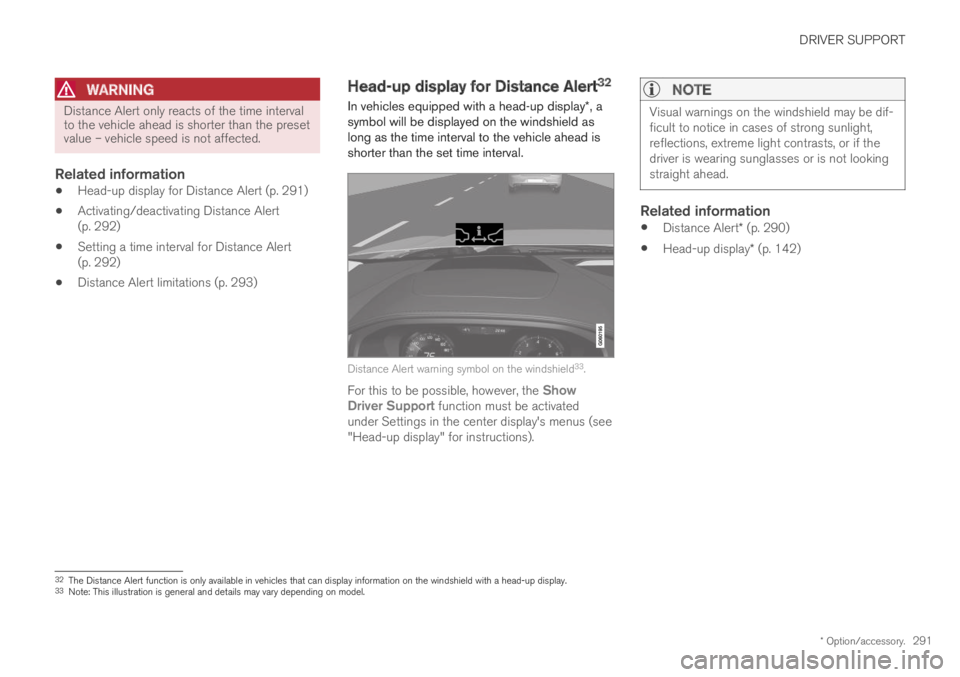
In vehicles equipped with a head-up display*, asymbol will be displayed on the windshield aslong as the time interval to the vehicle ahead isshorter than the set time interval.
Distance Alert warning symbol on the windshield33.
For this to be possible, however, the ShowDriver Support function must be activatedunder Settings in the center display's menus (see"Head-up display" for instructions).
NOTE
Visual warnings on the windshield may be dif-ficult to notice in cases of strong sunlight,reflections, extreme light contrasts, or if thedriver is wearing sunglasses or is not lookingstraight ahead.
Related information
Distance Alert* (p. 290)
Head-up display* (p. 142)
32The Distance Alert function is only available in vehicles that can display information on the windshield with a head-up display.33Note: This illustration is general and details may vary depending on model.