battery VOLVO XC60 TWIN ENGINE 2019 Owners Manual
[x] Cancel search | Manufacturer: VOLVO, Model Year: 2019, Model line: XC60 TWIN ENGINE, Model: VOLVO XC60 TWIN ENGINE 2019Pages: 695, PDF Size: 14.96 MB
Page 8 of 695
6
Preconditioning timer227
Adding and editing timer settings forpreconditioning227
Activating and deactivating precondi-tioning timer228
Deleting preconditioning timer settings229
Climate comfort retaining function230
Starting and switching off the cli-mate retaining function when parking230
Parking climate symbols and messages231
Heater232
Parking heater232
Additional heater232
Activating and deactivating the auxili-ary heater233
KEY, LOCKS AND ALARM
Lock indication236
Lock confirmation settings237
Remote key237
Locking and unlocking using theremote key240
Settings for remote and inside doorunlock241
Unlocking the tailgate using theremote key241
Remote key range242
Replacing the remote key's battery243
Ordering additional remote keys246
Red Key - restricted remote key*247
Red Key* settings247
Detachable key blade248
Locking and unlocking with detacha-ble key blade249
Electronic immobilizer251
Start and lock system type designations251
Keyless and touch-sensitive surfaces*252
Keyless locking and unlocking*253
Keyless unlock settings*255
Keyless tailgate unlock*255
Antenna locations for the start andlock system256
Locking and unlocking from insidethe vehicle256
Unlocking the tailgate from insidethe vehicle258
Activating and deactivating childsafety locks258
Automatic locking when driving260
Opening and closing the power tailgate*260
Setting a maximum height for thepower tailgate*263
Foot movement tailgate operation*264
Private Locking265
Activating and deactivating privatelocking266
Alarm267
Arming and disarming the alarm268
Page 11 of 695
9
Limitations of Run-Off Mitigationwith steering assistance378
Steering assistance during collisionrisks from oncoming traffic378
Activating/deactivating Steeringassistance during collision risks withoncoming vehicles
379
Limitations of steering assistanceduring collision risks from oncomingtraffic
380
Steering assistance during collisionrisks from behind*381
Activating/deactivating Steeringassistance during collision risks frombehind*
382
Limitations of steering assistanceduring collision risks from behind382
Symbols and messages for steeringassistance during collision risks384
Park Assist*385
Park Assist front, rear and sides386
Activating/deactivating Park Assist387
Park Assist limitations388
Recommended maintenance forPark Assist389
Park Assist symbols and messages390
Park Assist Camera*391
Park Assist Camera views392
Park Assist Camera trajectory lines394
Sensor field from Park Assist forPark Assist Camera396
Starting the Park Assist Camera397
Park Assist Camera limitations398
Recommended maintenance of thePark Assist Camera399
Park Assist Camera symbols andmessages400
Park Assist Pilot* 401
Types of parking with Park Assist Pilot401
Parking with Park Assist Pilot403
Leaving a parking space with ParkAssist Pilot405
Park Assist Pilot* limitations 406
Recommended maintenance forPark Assist Pilot408
Park Assist Pilot* messages409
HYBRID INFORMATION
General information about Twin Engine412
Charging the hybrid battery413
Charging current415
Charge cable415
Charging cable residual current device417
Charging cable temperature monitoring418
Opening and closing the chargingsocket cover418
Initiating hybrid battery charging419
Charging status in the vehicle'scharging socket421
Charging status in the chargingcable's charging module421
Charging status in the instrument panel423
Stopping hybrid battery charging425
Twin Engine symbols and messagesin the instrument panel426
Long-term storage of vehicles withhybrid batteries428
Page 12 of 695
10
STARTING AND DRIVING
Starting the vehicle430
Switching off the vehicle432
Ignition modes433
Selecting ignition mode434
Brake functions434
Brakes435
Brake Assist System437
Braking on wet roads437
Braking on salted roads437
Maintenance of the brake system438
Parking brake438
Activating and deactivating the park-ing brake439
Settings for automatically activatingthe parking brake440
Parking on a hill440
Parking brake malfunction441
Auto-hold brakes442
Activating and deactivating Auto-hold at a standstill442
Hill Start Assist443
Braking assist after a collision443
Transmission444
Gear selector positions for automatictransmissions445
Using the steering wheel paddles* toshift447
Shiftlock448
The kickdown function448
All Wheel Drive (AWD)448
Drive systems449
Starting and stopping the combus-tion engine in Twin Engine vehicles450
Drive modes450
Changing drive mode455
Energy distribution in hybrid modeusing map data*456
Leveling control* and suspension457
Leveling control settings*460
Low Speed Control460
Activating and deactivating LowSpeed Control using the function button461
Hill Descent Control462
Activating and deactivating HillDescent Control using the functionbutton
463
Economical driving463
Using the electric motor only465
Factors affecting electric motor range465
"Hold" and "Charge" functions467
Preparing for a long trip468
Winter driving468
Driving through standing water469
Opening/closing the fuel filler door470
Refueling471
Fuel472
Octane rating473
Emission controls475
Overheating of engine and transmission475
Battery drain476
Jump starting using another battery477
Detachable towbar*478
Driving with a trailer479
Trailer Stability Assist*481
Checking trailer lights482
Towing using a towline483
Attaching and removing the towing eyelet484
Recovery485
HomeLink®*485
Programming HomeLink®*486
Using HomeLink®*487
Type approval for HomeLink®*488
Compass*489
Activating and deactivating the compass*489
Calibrating the compass*489
Page 15 of 695
13
LOADING, STORAGE AND
PASSENGER COMPARTMENT
Passenger compartment interior588
Tunnel console589
Electrical outlets590
Using the electrical outlets592
Using the glove compartment593
Sun visors594
Cargo compartment595
Loading recommendations595
Roof loads and load carriers596
Grocery bag holders597
Load anchoring eyelets598
Rear seat ski hatch598
Installing and removing the cargocompartment cover*598
Operating the cargo compartment cover*600
Installing and removing the steelcargo grid*602
Installing and removing the cargo net*603
MAINTENANCE AND SERVICE
Volvo's service program608
Data transfer between vehicle andworkshop over Wi-Fi610
Download Center611
Handling system updates via Down-load Center611
Vehicle status612
Scheduling service and repairs613
Sending vehicle information to theworkshop614
Hoisting the vehicle616
Opening and closing the hood618
Climate control system service619
Replacing a windshield with head-updisplay*619
Engine compartment overview620
Engine oil621
Checking and filling engine oil622
Refilling coolant623
Replacing bulbs624
Start battery625
Hybrid battery629
Battery symbols630
Fuses and fuseboxes630
Replacing fuses631
Fuses in the engine compartment632
Fuses under the glove compartment636
Fuses in the cargo compartment639
Cleaning the interior643
Cleaning the center display643
Cleaning the head-up display*644
Cleaning fabric upholstery and ceil-ing liner645
Cleaning the seat belt645
Cleaning floor mats and inlay mats645
Cleaning leather upholstery646
Cleaning the leather steering wheel647
Cleaning interior plastic, metal andwood surfaces648
Cleaning the exterior648
Polishing and waxing649
Hand washing649
Automatic car washes651
High-pressure washing652
Cleaning the wiper blades652
Cleaning exterior plastic, rubber andtrim components653
Cleaning rims654
Corrosion protection654
Paintwork655
Touching up minor paint damage655
Page 30 of 695
||
YOUR VOLVO
* Option/accessory.28
goal. In addition to continuous environmentalrefinement of conventional gasoline-poweredinternal combustion engines, Volvo is activelylooking at advanced technology alternative-fuelvehicles.
When you drive a Volvo, you become our partnerin the work to lessen the vehicle's impact on theenvironment. To reduce your vehicle's environ-mental impact, you can:
Maintain proper air pressure in your tires.Tests have shown decreased fuel economywith improperly inflated tires.
Follow the recommended maintenanceschedule in your Warranty and ServiceRecords Information booklet.
Drive at a constant speed whenever possible.
See a trained and qualified Volvo servicetechnician as soon as possible for inspectionif the check engine (malfunction indicator)light illuminates, or stays on after the vehiclehas started.
Properly dispose of any vehicle-related wastesuch as used motor oil, used batteries, brakepads, etc.
When cleaning your vehicle, please use gen-uine Volvo car care products. All Volvo carcare products are formulated to be environ-mentally friendly.
Twin Engine vehicles
If possible, precondition the vehicle with thecharging cable before driving.
If preconditioning is not possible in coldweather, use the seat and steering wheelheating primarily. Avoid heating the entirepassenger compartment, which reduces thehybrid battery's charge level.
Choose the Pure drive mode to help mini-mize electric power consumption.
In hilly terrain, put the gear selector in modeB to utilize the electric motor's braking func-tion when the accelerator pedal is released.This helps charge the hybrid battery.
Related information
Economical driving (p. 463)
Starting and stopping preconditioning(p. 226)
The Owner's Manual and the environment(p. 24)
Air quality (p. 202)
IntelliSafe - driver support
IntelliSafe is Volvo Cars' philosophy regardingvehicle safety. IntelliSafe consists of a number ofsystems, both standard and optional, that aredesigned to help make driving safer, preventaccidents and protect passengers and otherroad users.
Support
IntelliSafe includes driver support functions suchas Adaptive cruise control* which helps the driverto maintain an even speed combined with a pre-selected time interval to the vehicle ahead.
Pilot Assist2 helps the driver keep the vehicle inthe current traffic lane by providing steeringassistance and maintaining an even speed and aset time interval to the vehicle ahead.
Park Assist Pilot* helps the driver pull into andout of parking spaces.
Other examples of systems that can help thedriver are the Active main beam, Cross TrafficAlert (CTA)* and Blind Spot Information (BLIS)*systems.
Prevention
City Safety is a function intended to help preventaccidents. The function can help prevent or miti-gate a collision with pedestrians, cyclists, largeanimals or other vehicles. Light, sound and pulsa-tions in the brake pedal are provided to alert of a
2Depending on market, this function can be either standard or optional.
Page 54 of 695
||
SAFETY
52
Rear seat
The rear seat belt reminder has two functions:
To indicate which seat belts are buckled inthe rear seats. This will also be displayed inan instrument panel graphic.
To provide audio and visual reminders if anyseat belt in the rear seat is removed whilethe vehicle is in motion. The reminder willstop when the seat belt has been rebuckled.
Door/hood/tailgate and fuel filler door
reminder
If the hood, tailgate, fuel filler door or any door isnot properly closed, this will be indicated by agraphic in the instrument panel. Stop the vehiclesafely and close the open door, hood, etc.
If the vehicle is moving at a speedunder approx. 10 km/h (6 mph), theinformation symbol will illuminate in theinstrument panel.
If the vehicle is moving at a speedabove approx. 10 km/h (6 mph), thewarning symbol will illuminate in theinstrument panel.
Related information
Seat belts (p. 47)
Buckling and unbuckling seat belts (p. 48)
Airbags
The vehicle is equipped with airbags and inflat-able curtains for the driver and passengers.
WARNING
If the airbag warning light stays on afterthe engine has started or if it illuminateswhile you are driving, have the vehicleinspected by a trained and qualified Volvoservice technician as soon as possible.
Never attempt to alter or repair any of thevehicle's safety systems yourself. Incor-rectly performed repairs to any systemcould impair function and lead to seriousinjury. All work on these systems shouldbe performed by a trained and qualifiedVolvo service technician.
WARNING
If your vehicle has become water-damaged inany way (e.g., soaked floor mats/standingwater on the floor of the vehicle), do notattempt to start the engine. This may causeairbag deployment, which could result in seri-ous injury. Volvo recommends towing thevehicle directly to an authorized Volvo work-shop.
Before attempting to tow the vehicle:
1.Switch off the ignition for at least 10minutes and disconnect the battery.
2. Follow the instructions for manually over-riding the shiftlock system.
Deployed airbags
WARNING
If any of the airbags have deployed:
Do not attempt to drive the vehicle. Haveit towed to an authorized workshop.
If necessary, seek medical attention.
Related information
Safety (p. 42)
Driver/passenger-side airbags (p. 53)
Side airbags (p. 59)
Inflatable curtain (p. 60)
Page 86 of 695
DISPLAYS AND VOICE CONTROL
* Option/accessory.84
Instrument panel
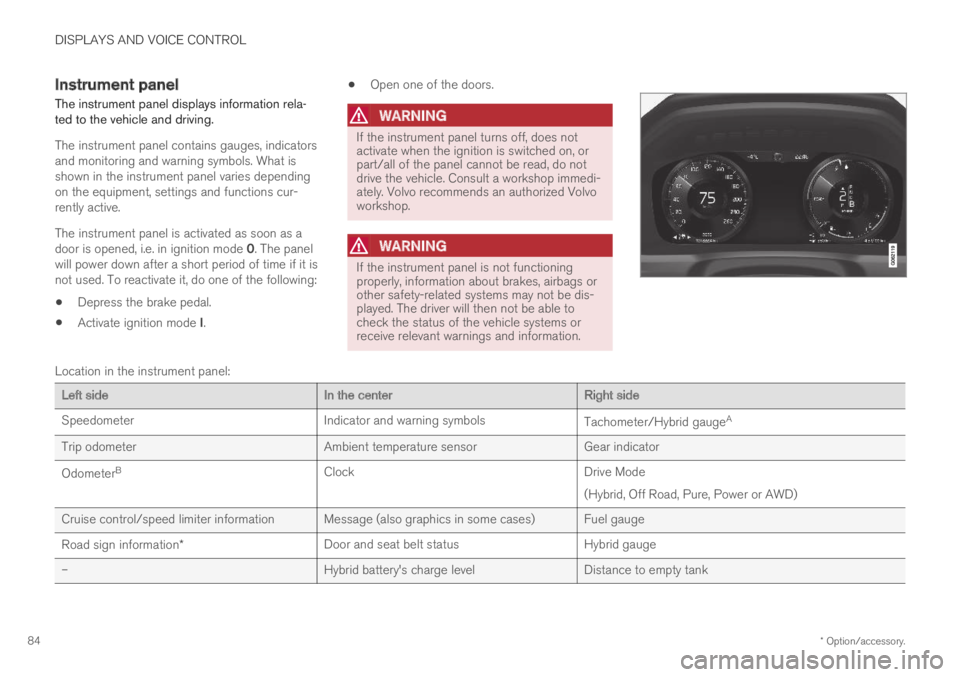
The instrument panel displays information rela-ted to the vehicle and driving.
The instrument panel contains gauges, indicatorsand monitoring and warning symbols. What isshown in the instrument panel varies dependingon the equipment, settings and functions cur-rently active.
The instrument panel is activated as soon as adoor is opened, i.e. in ignition mode 0. The panelwill power down after a short period of time if it isnot used. To reactivate it, do one of the following:
Depress the brake pedal.
Activate ignition mode I.
Open one of the doors.
WARNING
If the instrument panel turns off, does notactivate when the ignition is switched on, orpart/all of the panel cannot be read, do notdrive the vehicle. Consult a workshop immedi-ately. Volvo recommends an authorized Volvoworkshop.
WARNING
If the instrument panel is not functioningproperly, information about brakes, airbags orother safety-related systems may not be dis-played. The driver will then not be able tocheck the status of the vehicle systems orreceive relevant warnings and information.
Location in the instrument panel:
Left sideIn the centerRight side
SpeedometerIndicator and warning symbolsTachometer/Hybrid gaugeA
Trip odometerAmbient temperature sensorGear indicator
OdometerBClockDrive Mode
(Hybrid, Off Road, Pure, Power or AWD)
Cruise control/speed limiter information Message (also graphics in some cases) Fuel gauge
Road sign information*Door and seat belt statusHybrid gauge
–Hybrid battery's charge levelDistance to empty tank
Page 87 of 695
DISPLAYS AND VOICE CONTROL
85
Left sideIn the centerRight side
–Media playerDistance to discharged battery
–Navigation system mapCurrent fuel consumption
–PhoneApp menu (activated using steering wheel keypad)
–Voice Control–
–CompassA–
ADepends on selected drive mode.BTotal distance.
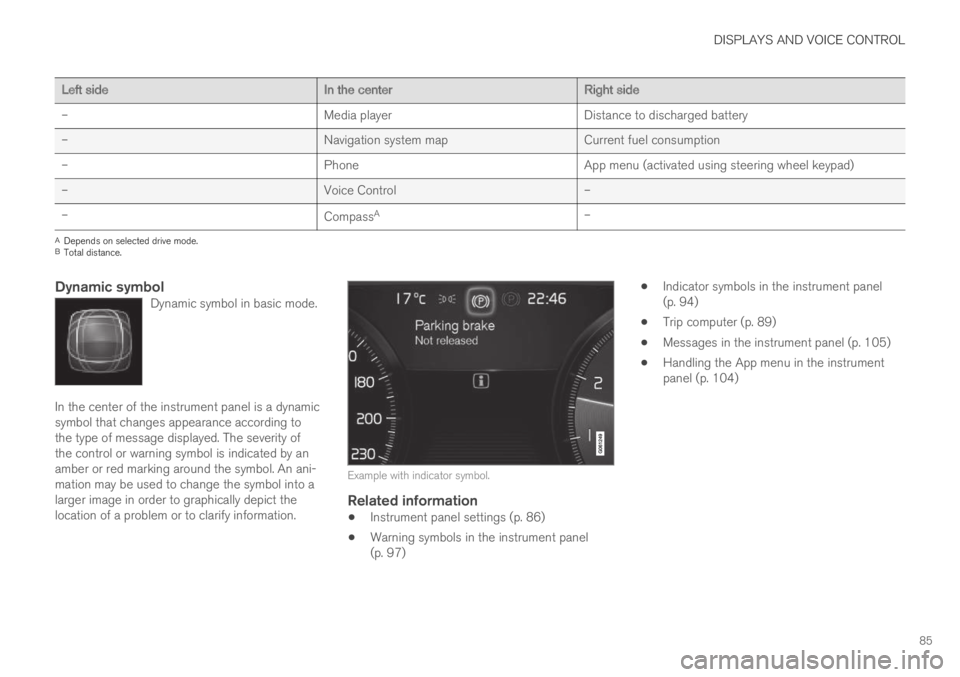
Dynamic symbol
Dynamic symbol in basic mode.
In the center of the instrument panel is a dynamicsymbol that changes appearance according tothe type of message displayed. The severity ofthe control or warning symbol is indicated by anamber or red marking around the symbol. An ani-mation may be used to change the symbol into alarger image in order to graphically depict thelocation of a problem or to clarify information.
Example with indicator symbol.
Related information
Instrument panel settings (p. 86)
Warning symbols in the instrument panel(p. 97)
Indicator symbols in the instrument panel(p. 94)
Trip computer (p. 89)
Messages in the instrument panel (p. 105)
Handling the App menu in the instrumentpanel (p. 104)
Page 89 of 695
DISPLAYS AND VOICE CONTROL
}}
87
Fuel gauge
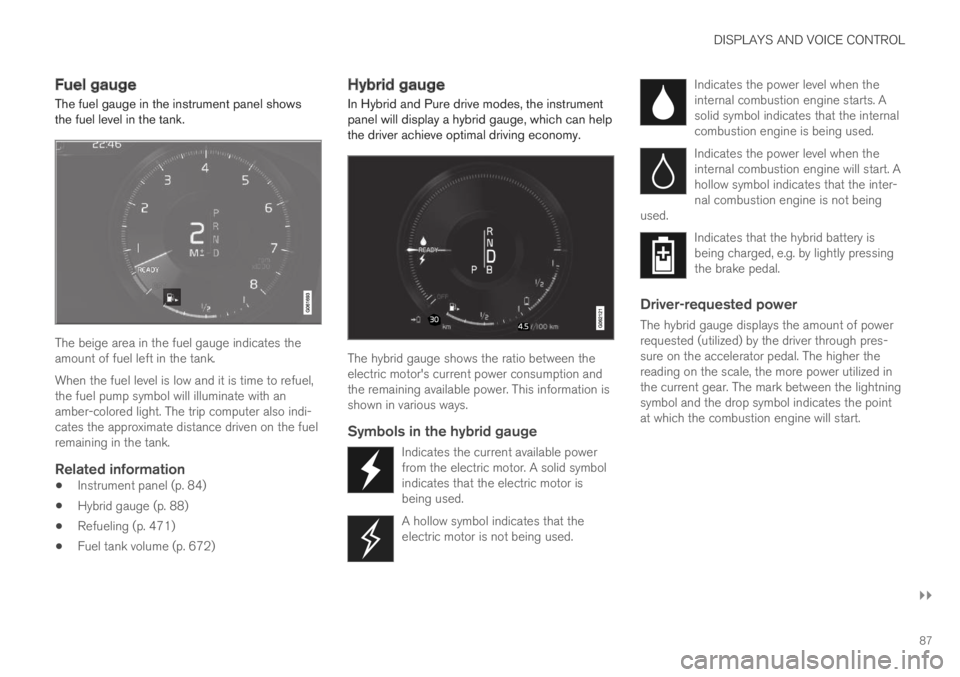
The fuel gauge in the instrument panel showsthe fuel level in the tank.
The beige area in the fuel gauge indicates theamount of fuel left in the tank.
When the fuel level is low and it is time to refuel,the fuel pump symbol will illuminate with anamber-colored light. The trip computer also indi-cates the approximate distance driven on the fuelremaining in the tank.
Related information
Instrument panel (p. 84)
Hybrid gauge (p. 88)
Refueling (p. 471)
Fuel tank volume (p. 672)
Hybrid gauge
In Hybrid and Pure drive modes, the instrumentpanel will display a hybrid gauge, which can helpthe driver achieve optimal driving economy.
The hybrid gauge shows the ratio between theelectric motor's current power consumption andthe remaining available power. This information isshown in various ways.
Symbols in the hybrid gauge
Indicates the current available powerfrom the electric motor. A solid symbolindicates that the electric motor isbeing used.
A hollow symbol indicates that theelectric motor is not being used.
Indicates the power level when theinternal combustion engine starts. Asolid symbol indicates that the internalcombustion engine is being used.
Indicates the power level when theinternal combustion engine will start. Ahollow symbol indicates that the inter-nal combustion engine is not beingused.
Indicates that the hybrid battery isbeing charged, e.g. by lightly pressingthe brake pedal.
Driver-requested power
The hybrid gauge displays the amount of powerrequested (utilized) by the driver through pres-sure on the accelerator pedal. The higher thereading on the scale, the more power utilized inthe current gear. The mark between the lightningsymbol and the drop symbol indicates the pointat which the combustion engine will start.
Page 90 of 695

||
DISPLAYS AND VOICE CONTROL
88
For example:
The vehicle has been started, but is stationary and nopower is being requested.
The electric motor cannot supply the requested powerand the internal combustion engine will start.
The vehicle is generating current to recharge the battery,e.g. during light braking or engine braking on a down-slope.
Related information
Drive modes (p. 450)
Instrument panel (p. 84)
Brakes (p. 435)
Using the electric motor only (p. 465)
Starting and stopping the combustion enginein Twin Engine vehicles (p. 450)
Hybrid gauge
The hybrid battery gauge shows how much cur-rent is left in the hybrid battery.
The current in the hybrid battery is used to powerthe electric motor, but can also be used to heator cool the vehicle. The trip computer calculatesan approximate driving distance with the remain-ing current in the hybrid battery.