four wheel drive VOLVO XC60 TWIN ENGINE 2019 Owners Manual
[x] Cancel search | Manufacturer: VOLVO, Model Year: 2019, Model line: XC60 TWIN ENGINE, Model: VOLVO XC60 TWIN ENGINE 2019Pages: 695, PDF Size: 14.96 MB
Page 94 of 695
DISPLAYS AND VOICE CONTROL
92
Resetting the trip odometer
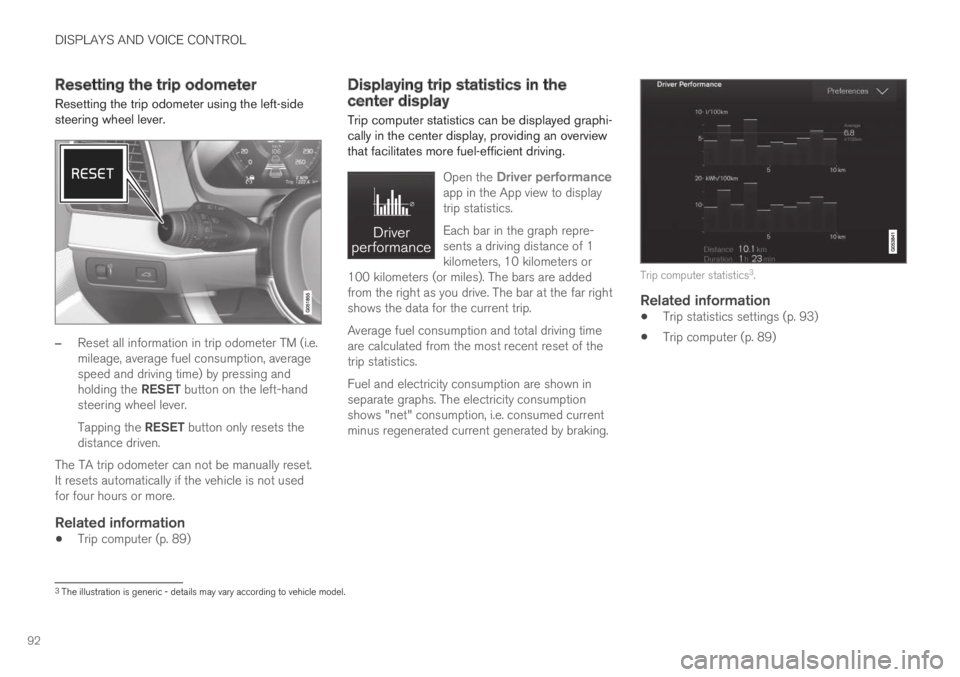
Resetting the trip odometer using the left-sidesteering wheel lever.
–Reset all information in trip odometer TM (i.e.mileage, average fuel consumption, averagespeed and driving time) by pressing andholding the RESET button on the left-handsteering wheel lever.
Tapping the RESET button only resets thedistance driven.
The TA trip odometer can not be manually reset.It resets automatically if the vehicle is not usedfor four hours or more.
Related information
Trip computer (p. 89)
Displaying trip statistics in thecenter display
Trip computer statistics can be displayed graphi-cally in the center display, providing an overviewthat facilitates more fuel-efficient driving.
Open the Driver performanceapp in the App view to displaytrip statistics.
Each bar in the graph repre-sents a driving distance of 1kilometers, 10 kilometers or100 kilometers (or miles). The bars are addedfrom the right as you drive. The bar at the far rightshows the data for the current trip.
Average fuel consumption and total driving timeare calculated from the most recent reset of thetrip statistics.
Fuel and electricity consumption are shown inseparate graphs. The electricity consumptionshows "net" consumption, i.e. consumed currentminus regenerated current generated by braking.
Trip computer statistics3.
Related information
Trip statistics settings (p. 93)
Trip computer (p. 89)
3The illustration is generic - details may vary according to vehicle model.
Page 186 of 695
SEATS AND STEERING WHEEL
* Option/accessory.184
Manual front seats
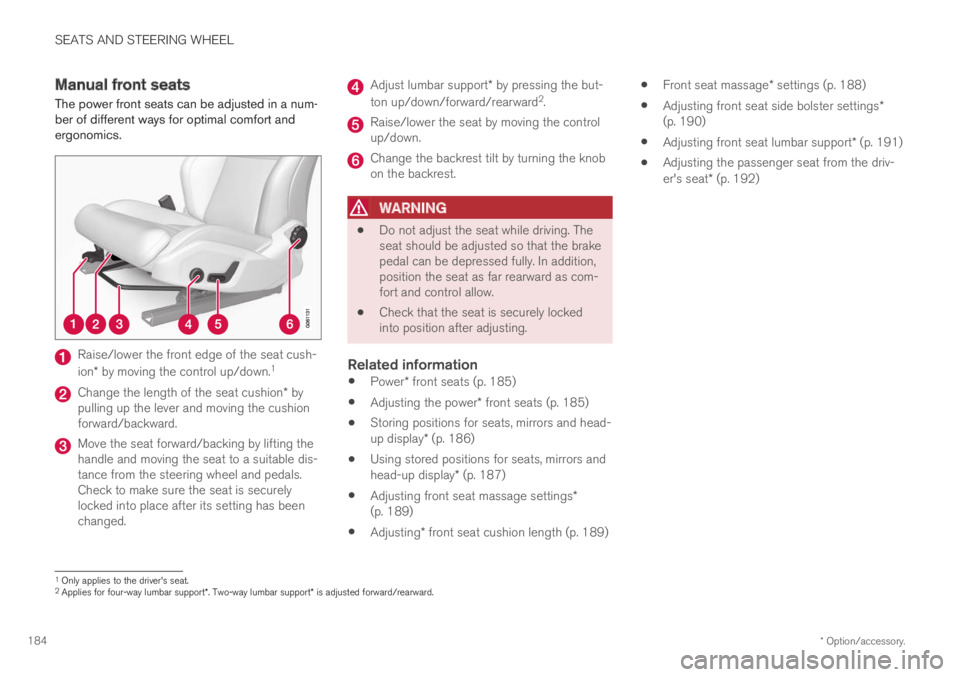
The power front seats can be adjusted in a num-ber of different ways for optimal comfort andergonomics.
Raise/lower the front edge of the seat cush-
ion* by moving the control up/down.1
Change the length of the seat cushion* bypulling up the lever and moving the cushionforward/backward.
Move the seat forward/backing by lifting thehandle and moving the seat to a suitable dis-tance from the steering wheel and pedals.Check to make sure the seat is securelylocked into place after its setting has beenchanged.
Adjust lumbar support* by pressing the but-
ton up/down/forward/rearward2.
Raise/lower the seat by moving the controlup/down.
Change the backrest tilt by turning the knobon the backrest.
WARNING
Do not adjust the seat while driving. Theseat should be adjusted so that the brakepedal can be depressed fully. In addition,position the seat as far rearward as com-fort and control allow.
Check that the seat is securely lockedinto position after adjusting.
Related information
Power* front seats (p. 185)
Adjusting the power* front seats (p. 185)
Storing positions for seats, mirrors and head-up display* (p. 186)
Using stored positions for seats, mirrors andhead-up display* (p. 187)
Adjusting front seat massage settings*(p. 189)
Adjusting* front seat cushion length (p. 189)
Front seat massage* settings (p. 188)
Adjusting front seat side bolster settings*(p. 190)
Adjusting front seat lumbar support* (p. 191)
Adjusting the passenger seat from the driv-er's seat* (p. 192)
1Only applies to the driver's seat.2Applies for four-way lumbar support*. Two-way lumbar support* is adjusted forward/rearward.
Page 215 of 695
CLIMATE CONTROL
}}
* Option/accessory.213
Blower control.
AUTO - Automatic climate control.
Parking climate
Parking climate functions can be controlled fromthe Parking climate tab.
Climate controls on the rear side of the
tunnel console *
If the vehicle is equipped with heated rear seats*,there are physical buttons on the rear side of thetunnel console to control this.
Related information
Climate (p. 200)
Activating and deactivating power frontseats* (p. 213)
Activating and deactivating the heated rearseats* (p. 214)
Activating and deactivating front seat ventila-tion* (p. 215)
Activating and deactivating the heated steer-ing wheel* (p. 215)
Activating auto climate control (p. 216)
Activating and deactivating recirculation(p. 217)
Activating and deactivating max defroster(p. 218)
Activating and deactivating the heated wind-shield* (p. 219)
Activating and deactivating the heated rearwindow and door mirrors (p. 221)
Setting the blower speed for the front seats(p. 222)
Synchronize temperature (p. 223)
Activating and deactivating air conditioning(p. 224)
Activating and deactivating power
front seats*
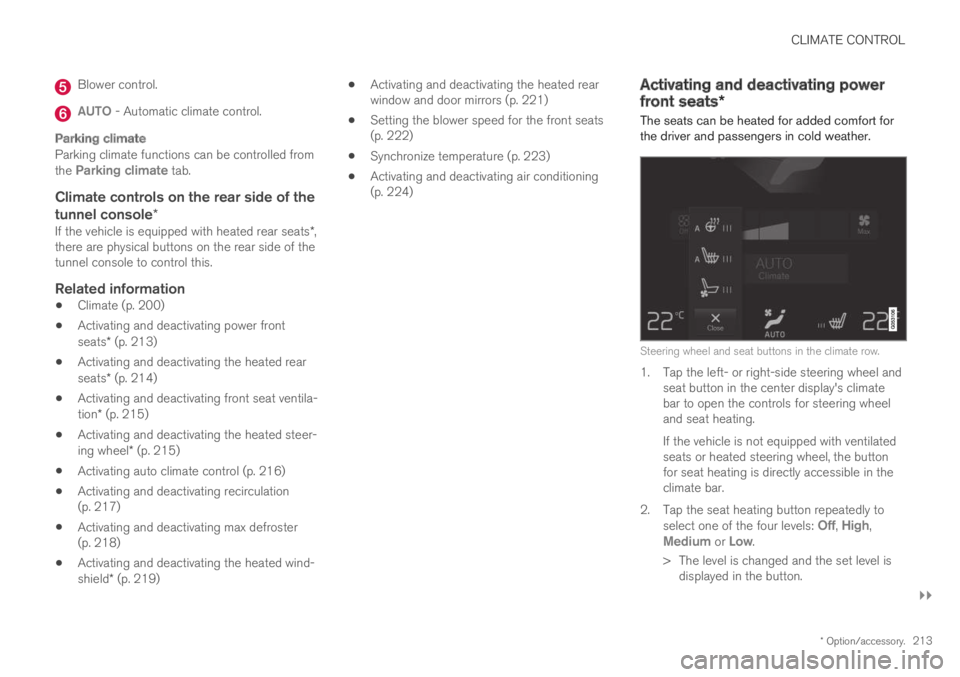
The seats can be heated for added comfort forthe driver and passengers in cold weather.
Steering wheel and seat buttons in the climate row.
1. Tap the left- or right-side steering wheel andseat button in the center display's climatebar to open the controls for steering wheeland seat heating.
If the vehicle is not equipped with ventilatedseats or heated steering wheel, the buttonfor seat heating is directly accessible in theclimate bar.
2.Tap the seat heating button repeatedly toselect one of the four levels: Off, High,Medium or Low.
>The level is changed and the set level isdisplayed in the button.
Page 217 of 695
CLIMATE CONTROL
}}
* Option/accessory.215
Activating and deactivating front
seat ventilation*
The seats can be ventilated to provide increasedcomfort in warm weather.
The ventilation system consists of fans in theseats and backrest that draw air through the seatupholstery. The cooler the passenger compart-ment is, the greater the cooling effect of the ven-tilation. The system can be activated when theengine is running.
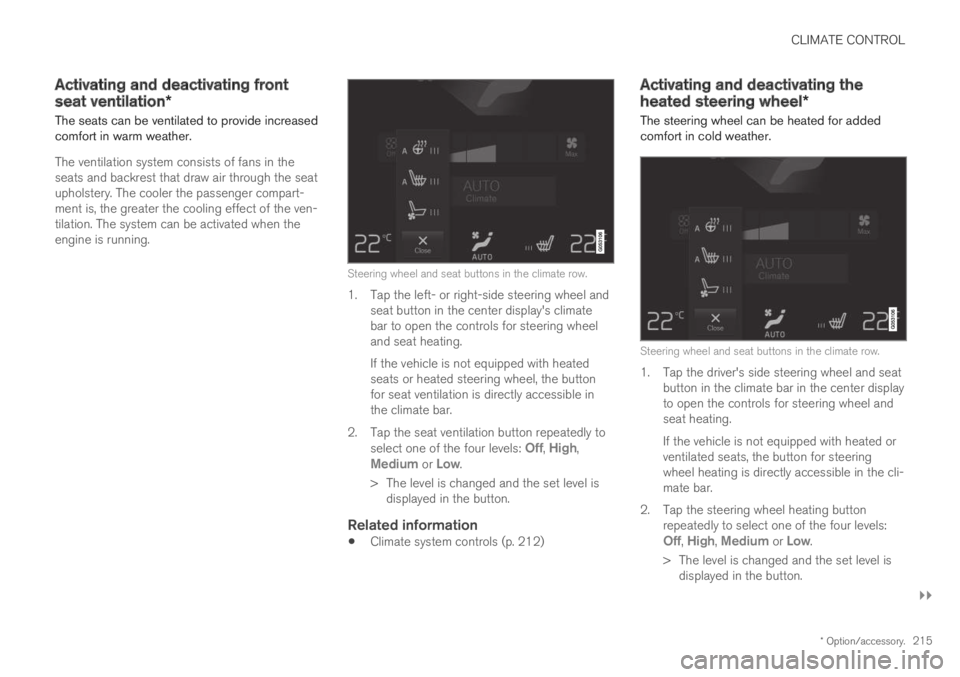
Steering wheel and seat buttons in the climate row.
1. Tap the left- or right-side steering wheel andseat button in the center display's climatebar to open the controls for steering wheeland seat heating.
If the vehicle is not equipped with heatedseats or heated steering wheel, the buttonfor seat ventilation is directly accessible inthe climate bar.
2.Tap the seat ventilation button repeatedly toselect one of the four levels: Off, High,Medium or Low.
>The level is changed and the set level isdisplayed in the button.
Related information
Climate system controls (p. 212)
Activating and deactivating the
heated steering wheel*
The steering wheel can be heated for addedcomfort in cold weather.
Steering wheel and seat buttons in the climate row.
1. Tap the driver's side steering wheel and seatbutton in the climate bar in the center displayto open the controls for steering wheel andseat heating.
If the vehicle is not equipped with heated orventilated seats, the button for steeringwheel heating is directly accessible in the cli-mate bar.
2.Tap the steering wheel heating buttonrepeatedly to select one of the four levels:Off, High, Medium or Low.
>The level is changed and the set level isdisplayed in the button.
Page 347 of 695
DRIVER SUPPORT
* Option/accessory.345
City Safety braking for oncoming
vehicles*
City Safety can help you apply the brakes for anoncoming vehicle in your lane.
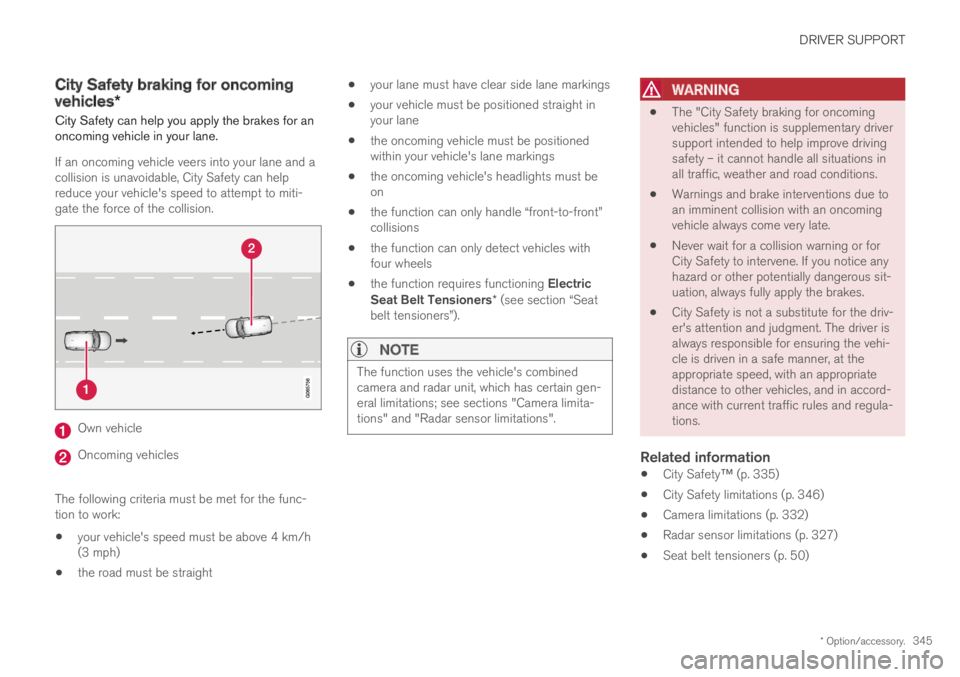
If an oncoming vehicle veers into your lane and acollision is unavoidable, City Safety can helpreduce your vehicle's speed to attempt to miti-gate the force of the collision.
Own vehicle
Oncoming vehicles
The following criteria must be met for the func-tion to work:
your vehicle's speed must be above 4 km/h(3 mph)
the road must be straight
your lane must have clear side lane markings
your vehicle must be positioned straight inyour lane
the oncoming vehicle must be positionedwithin your vehicle's lane markings
the oncoming vehicle's headlights must beon
the function can only handle “front-to-front”collisions
the function can only detect vehicles withfour wheels
the function requires functioning ElectricSeat Belt Tensioners* (see section “Seatbelt tensioners”).
NOTE
The function uses the vehicle's combinedcamera and radar unit, which has certain gen-eral limitations; see sections "Camera limita-tions" and "Radar sensor limitations".
WARNING
The "City Safety braking for oncomingvehicles" function is supplementary driversupport intended to help improve drivingsafety – it cannot handle all situations inall traffic, weather and road conditions.
Warnings and brake interventions due toan imminent collision with an oncomingvehicle always come very late.
Never wait for a collision warning or forCity Safety to intervene. If you notice anyhazard or other potentially dangerous sit-uation, always fully apply the brakes.
City Safety is not a substitute for the driv-er's attention and judgment. The driver isalways responsible for ensuring the vehi-cle is driven in a safe manner, at theappropriate speed, with an appropriatedistance to other vehicles, and in accord-ance with current traffic rules and regula-tions.
Related information
City Safety™ (p. 335)
City Safety limitations (p. 346)
Camera limitations (p. 332)
Radar sensor limitations (p. 327)
Seat belt tensioners (p. 50)
Page 450 of 695
STARTING AND DRIVING
448
Shiftlock
The automatic transmission's shiftlock functionhelps prevent inadvertently moving the gearselector between different positions.
Automatic shiftlock
The automatic shiftlock has a separate safetysystem.
From Park - P
To move to another gear from P (Park), the brakepedal must be depressed and the ignition inmode II.
From Neutral - N
If the gear selector is in N and the vehicle hasbeen stationary for at least 3 seconds (with orwithout the engine running), the gear selector willbe locked in that position.
To move the gear selector from N to anothergear, the brake pedal must be depressed and theignition in mode II.
Messages in the instrument panel
If the gear selector is locked in position, a mes-sage will appear in the instrument panel, e.g.Gear lever Press brake pedal to activategear lever.
There is no mechanical shiftlock function.
Related information
Gear selector positions for automatic trans-missions (p. 445)
The kickdown function
Kickdown is used when maximum acceleration isneeded, e.g. when passing.
When the accelerator pedal is depressed all theway to the floor (past the normal full acceleratorposition), the transmission will automaticallyengage kickdown, i.e. immediately shift down to alower gear.
If the accelerator pedal is released from the kick-down position, the transmission will automaticallyshift up again.
Safety function
The transmission control module is equipped witha downshift protection feature to help prevent theengine from overheating.
In some conditions, the transmission will preventdownshifting/kickdown if this would lead to suchhigh engine speed (rpm) that the engine couldbe damaged. If the driver still attempts downshift-ing or kickdown at a high rpm, nothing will hap-pen and the original gear will remain selected.
With kickdown, the vehicle can downshift one ormore steps at a time depending on the enginespeed. The vehicle upshifts when the engine rea-ches its maximum rpm to prevent engine dam-age.
Related information
Gear selector positions for automatic trans-missions (p. 445)
All Wheel Drive (AWD)
All-wheel drive, All Wheel Drive (AWD), alsocalled four-wheel drive, means that power is dis-tributed to all four wheels, which improves trac-tion.
The electric motor that powers the rear wheelsenables electronic all-wheel drive functionality.All-wheel drive reacts differently depending onwhich drive mode is selected.
Related information
Drive modes (p. 450)
Low Speed Control (p. 460)
Transmission (p. 444)
Page 485 of 695
STARTING AND DRIVING
483
Disabling the automatic check
The automatic light check can be disabled in thecenter display.
1.Tap Settings in the Top view.
2.Tap My CarLights and Lighting.
3.Deselect Automatic Trailer Lamp Check.
Manual check
If the automatic check has been disabled, thecheck can be started manually.
1.Tap Settings in the Top view.
2.Tap My CarLights and Lighting.
3.Select Manual Trailer Lamp Check.
>The light check will begin. Get out of thevehicle to perform the check.
Related information
Driving with a trailer (p. 479)
Towing using a towline
This section refers to one vehicle being towedbehind another using a towline.
Twin Engine vehicles may not be towed behindanother vehicle due to the risk of damage to theelectric motor. The vehicle must be lifted onto atow truck and transported with all four wheels onthe bed or lifting platform of the truck (no wheelsmay touch the road).
Towing another vehicle
Towing another vehicle requires a lot of power -use the AWD drive mode. This helps charge thehybrid battery and improve the vehicle's drivingand roadholding characteristics.
Before towing another vehicle, check applicablespeed limit regulations.
Jump starting
Do not tow the vehicle to start the engine. Use anauxiliary battery if the start battery's charge levelis so low that the engine cannot be started.
CAUTION
Attempts to tow-start the vehicle could causedamage to the electrical drive motor andthree-way catalytic converter.
Related information
Attaching and removing the towing eyelet(p. 484)
Hazard warning flashers (p. 161)
Recovery (p. 485)
Jump starting using another battery (p. 477)
Selecting ignition mode (p. 434)
Page 558 of 695
WHEELS AND TIRES
556
Tires
The function of the tires is to carry loads, providetraction on road surfaces, reduce vibrations andprotect the wheels from wear.
The tires significantly influence the vehicle's driv-ing characteristics. The type, dimensions, tirepressure and speed rating have a considerableimpact on how the vehicle performs.
Your vehicle is equipped with tires according tothe vehicle's tire information placard on the B-pil-lar (the structural member at the side of the vehi-cle, at the rear of the driver's door opening).
WARNING
A damaged tire could cause the driver to losecontrol of the vehicle.
CAUTION
Some Volvo models are equipped with anUltra High Performance tire and wheel com-bination designed to provide maximum drypavement performance with consideration forhydroplaning resistance. They may be moresusceptible to road hazard damage and,depending on driving conditions, may achievea tread life of less than 30,000 km (20,000miles). Even if this vehicle is equipped withVolvo's advanced AWD or stability system,these tires are not designed for winter driving,and should be replaced with winter tires whenweather conditions dictate.
The tires have good road holding characteristicsand offer good handling on dry and wet surfaces.It should be noted however that the tires havebeen developed to give these features on snow/ice-free surfaces.
Most models are equipped with "all-season" tires,which provide a somewhat higher degree of road-holding on slippery road surfaces than tires with-out the "all-season" rating. However, for optimalroadholding on icy or snow-covered roads, Volvorecommends snow tires on all four wheels.
When replacing tires, be sure that the new tiresare the same size designation, type (radial) andpreferably from the same manufacturer, on all
four wheels. Otherwise there is a risk of alteringthe vehicle's roadholding and handling characte-ristics.
Recommended tires
On delivery, the car is equipped with Volvo origi-
nal tires that have the VOL1 marking on the sideof the tires. These tires have been designed spe-cifically for your vehicle. It is therefore importantwhen replacing tires that the new tires have thissame marking to help maintain the vehicle's driv-ing characteristics, comfort and fuel consumption.
New tires
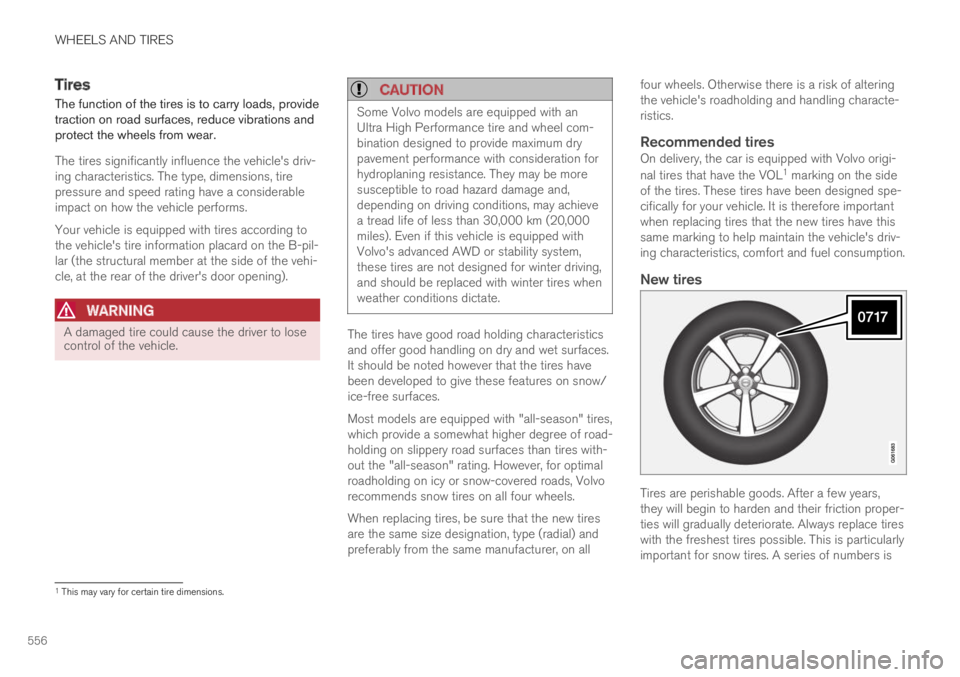
Tires are perishable goods. After a few years,they will begin to harden and their friction proper-ties will gradually deteriorate. Always replace tireswith the freshest tires possible. This is particularlyimportant for snow tires. A series of numbers is
1This may vary for certain tire dimensions.
Page 563 of 695
WHEELS AND TIRES
561
NOTE
The tire's load index and speed rating maynot appear on the sidewall because they arenot required by law.
7.M+S or M/S = Mud and Snow, AT = All Ter-rain, AS = All Season
8.U.S. DOT Tire Identification Number(TIN): This begins with the letters "DOT" andindicates that the tire meets all federalstandards. The next two numbers are thefactory code where the tire was manufac-tured, the next two are the tire size code andthe last four numbers represent the weekand year the tire was made. For example,0717 means that the tire was manufacturedduring week 7 of 2017. The numbers inbetween are marketing codes used at themanufacturer's discretion. This informationhelps a tire manufacturer identify a tire forsafety recall purposes.
9.Tire Ply Composition and Material Used:Indicates the number of plies indicates or thenumber of layers of rubber-coated fabric inthe tire tread and sidewall. Tire manufactur-ers also must indicate the ply materials in thetire and the sidewall, which include steel,nylon, polyester, and others.
10.Maximum Load: Indicates the maximumload in pounds and kilograms that can becarried by the tire. Refer to the vehicle's tire
information placard located on the B-Pillarfor the correct tire pressure for your vehicle.
11.Treadwear, Traction, and Temperaturegrades.
12.Maximum permissible inflation pressure:the greatest amount of air pressure thatshould ever be put in the tire. This limit is setby the tire manufacturer.
Speed Symbol
A tire's Speed Symbol (SS) indicates the maxi-mum speed for which the tire has been certifiedand should be at least equivalent to the vehicle'stop speed.
Winter tires, with or without studs, are exceptionsand may use a lower SS. When winter tires areinstalled, the vehicle may not be driven fasterthan the tires' SS.
The vehicle's speed should always be determinedby the posted speed limit and traffic and roadconditions, not the tire's SS.
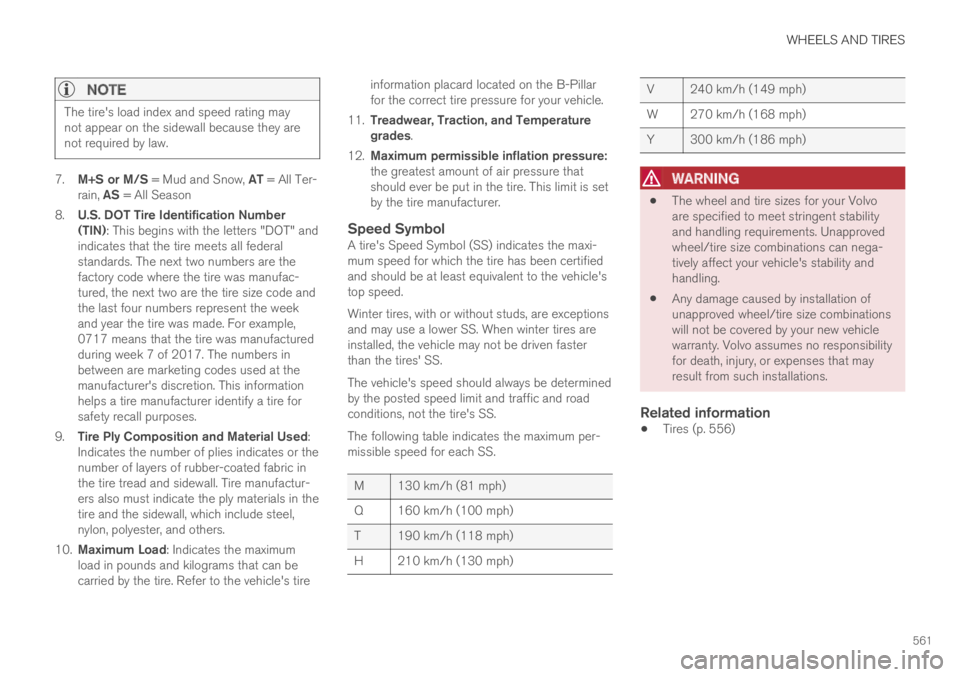
The following table indicates the maximum per-missible speed for each SS.
M 130 km/h (81 mph)
Q160 km/h (100 mph)
T 190 km/h (118 mph)
H 210 km/h (130 mph)
V 240 km/h (149 mph)
W270 km/h (168 mph)
Y 300 km/h (186 mph)
WARNING
The wheel and tire sizes for your Volvoare specified to meet stringent stabilityand handling requirements. Unapprovedwheel/tire size combinations can nega-tively affect your vehicle's stability andhandling.
Any damage caused by installation ofunapproved wheel/tire size combinationswill not be covered by your new vehiclewarranty. Volvo assumes no responsibilityfor death, injury, or expenses that mayresult from such installations.
Related information
Tires (p. 556)
Page 569 of 695
WHEELS AND TIRES
}}
* Option/accessory.567
Calibrating the tire pressure
monitoring system*
In order for the tire pressure monitoring system 9
to function correctly, tire pressure reference val-ues must be set correctly. This must be doneeach time the tires are changed or the tire pres-sure is adjusted.
For example, when driving with a heavy load or athigh speeds (over 160 km/h (100 mph)), tirepressure should be adjusted to the Volvo-recom-mended tire pressure values. The system shouldthen be recalibrated.
1.Switch off the ignition.
2. Inflate the tire to the correct inflation pres-sure; see the tire pressure placard on thedriver's side B pillar for recommended pres-sures for factory-mounted tires.
3. Start the vehicle.
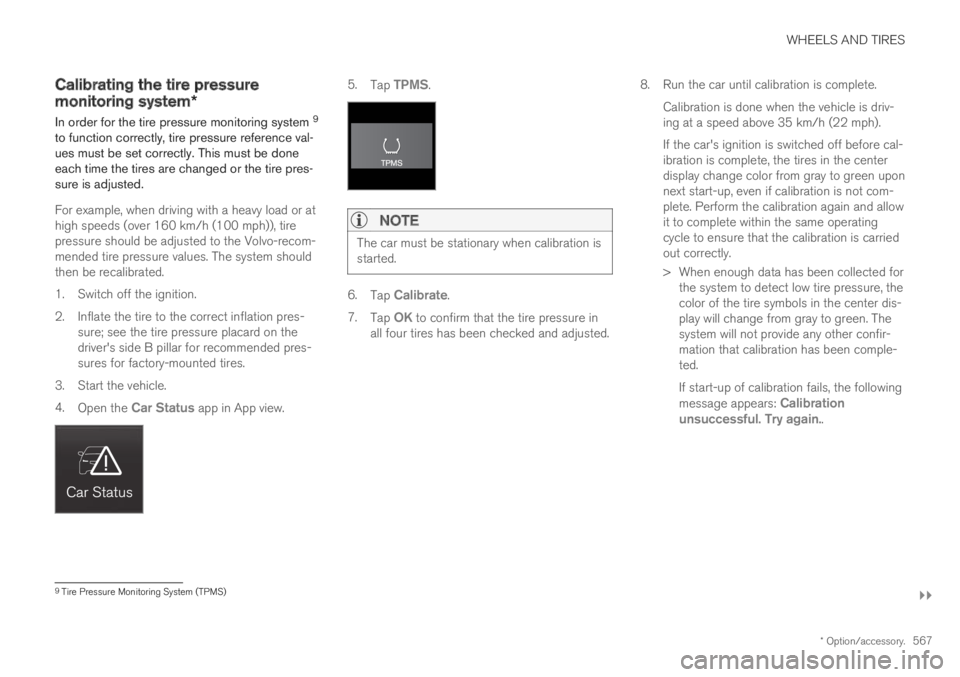
4.Open the Car Status app in App view.
5.Tap TPMS.
NOTE
The car must be stationary when calibration isstarted.
6.Tap Calibrate.
7.Tap OK to confirm that the tire pressure inall four tires has been checked and adjusted.
8.Run the car until calibration is complete.
Calibration is done when the vehicle is driv-ing at a speed above 35 km/h (22 mph).
If the car's ignition is switched off before cal-ibration is complete, the tires in the centerdisplay change color from gray to green uponnext start-up, even if calibration is not com-plete. Perform the calibration again and allowit to complete within the same operatingcycle to ensure that the calibration is carriedout correctly.
> When enough data has been collected forthe system to detect low tire pressure, thecolor of the tire symbols in the center dis-play will change from gray to green. Thesystem will not provide any other confir-mation that calibration has been comple-ted.
If start-up of calibration fails, the followingmessage appears: Calibrationunsuccessful. Try again..
9Tire Pressure Monitoring System (TPMS)