ESP VOLVO XC70 2004 Owners Manual
[x] Cancel search | Manufacturer: VOLVO, Model Year: 2004, Model line: XC70, Model: VOLVO XC70 2004Pages: 241, PDF Size: 5.78 MB
Page 53 of 241
2004 VOLVO XC70
pg. 33 Cruise control
Cruise control
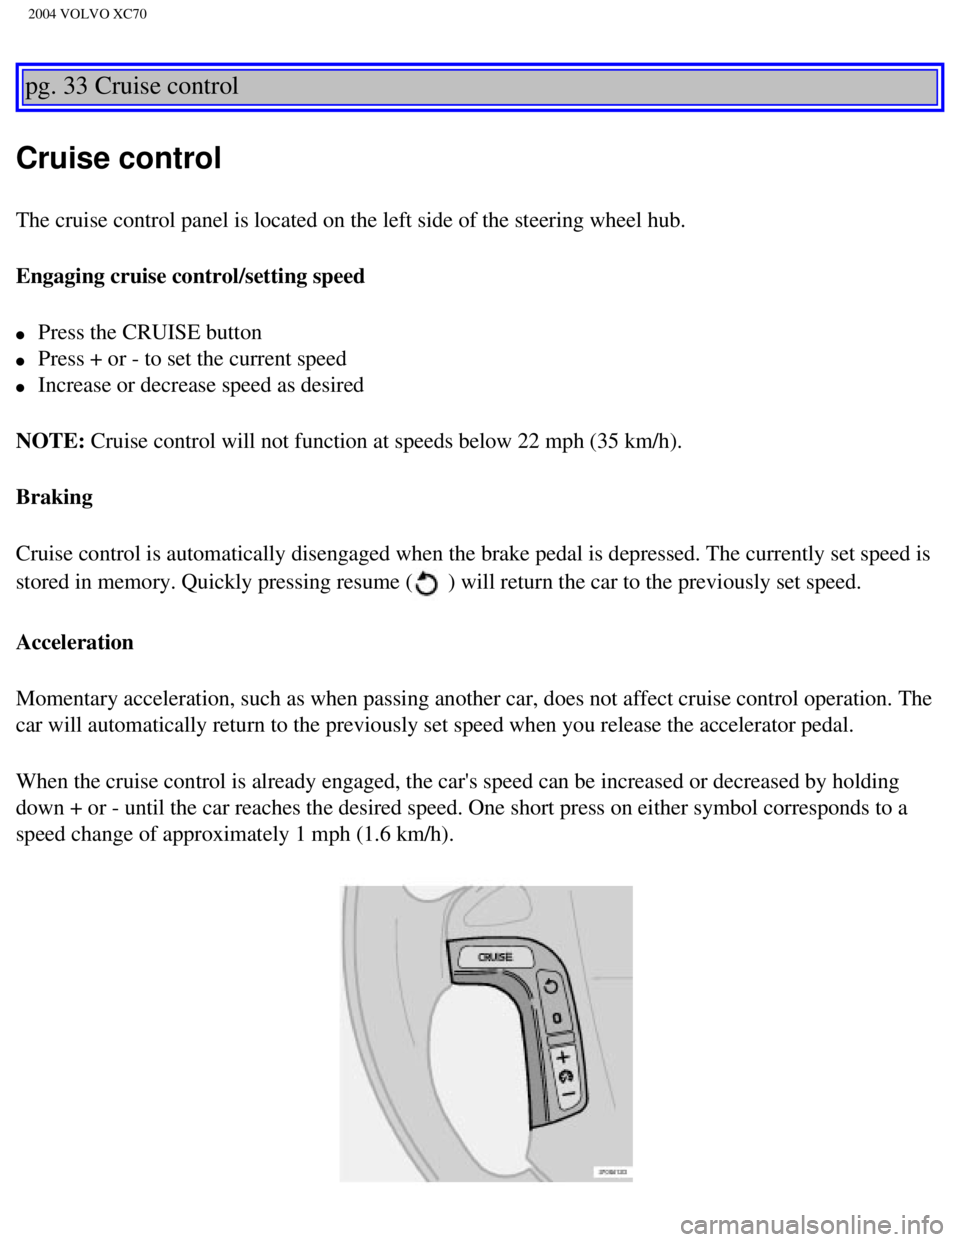
The cruise control panel is located on the left side of the steering whe\
el hub.
Engaging cruise control/setting speed
l Press the CRUISE button
l Press + or - to set the current speed
l Increase or decrease speed as desired
NOTE: Cruise control will not function at speeds below 22 mph (35 km/h).
Braking
Cruise control is automatically disengaged when the brake pedal is depre\
ssed. The currently set speed is
stored in memory. Quickly pressing resume (
) will return the car to the previously set speed.
Acceleration
Momentary acceleration, such as when passing another car, does not affec\
t cruise control operation. The
car will automatically return to the previously set speed when you relea\
se the accelerator pedal.
When the cruise control is already engaged, the car's speed can be incre\
ased or decreased by holding
down + or - until the car reaches the desired speed. One short press on \
either symbol corresponds to a
speed change of approximately 1 mph (1.6 km/h).
file:///K|/ownersdocs/2004/2004_XC70/04xc70_02b.htm (1 of 18)12/30/200\
6 4:32:58 PM
Page 61 of 241
2004 VOLVO XC70
Hazard warning flashers
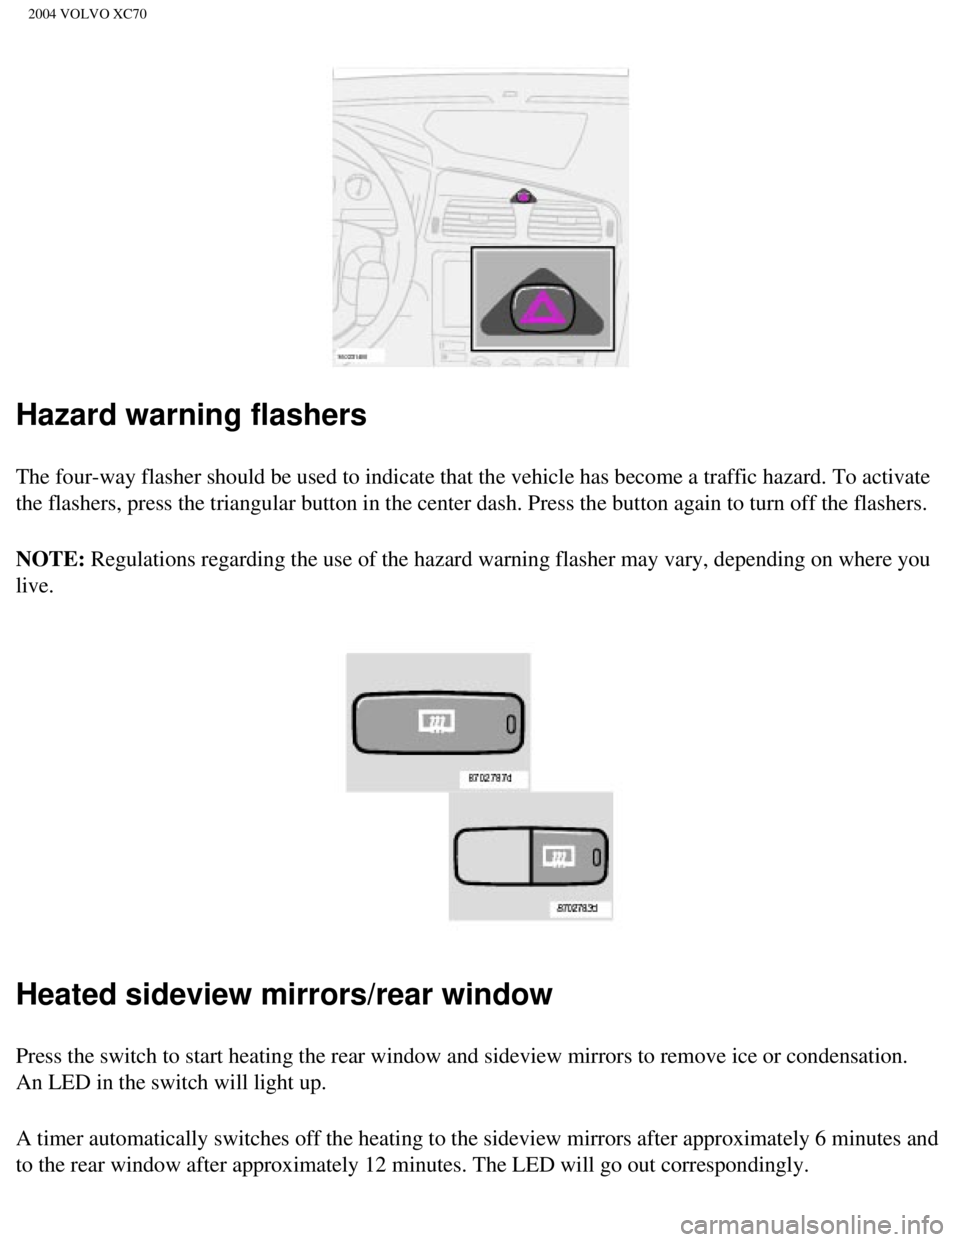
The four-way flasher should be used to indicate that the vehicle has bec\
ome a traffic hazard. To activate
the flashers, press the triangular button in the center dash. Press the \
button again to turn off the flashers.
NOTE: Regulations regarding the use of the hazard warning flasher may vary, de\
pending on where you
live.
Heated sideview mirrors/rear window
Press the switch to start heating the rear window and sideview mirrors t\
o remove ice or condensation.
An LED in the switch will light up.
A timer automatically switches off the heating to the sideview mirrors a\
fter approximately 6 minutes and
to the rear window after approximately 12 minutes. The LED will go out c\
orrespondingly.
file:///K|/ownersdocs/2004/2004_XC70/04xc70_02b.htm (9 of 18)12/30/200\
6 4:32:58 PM
Page 80 of 241
2004 VOLVO XC70
A/C - ON/OFF
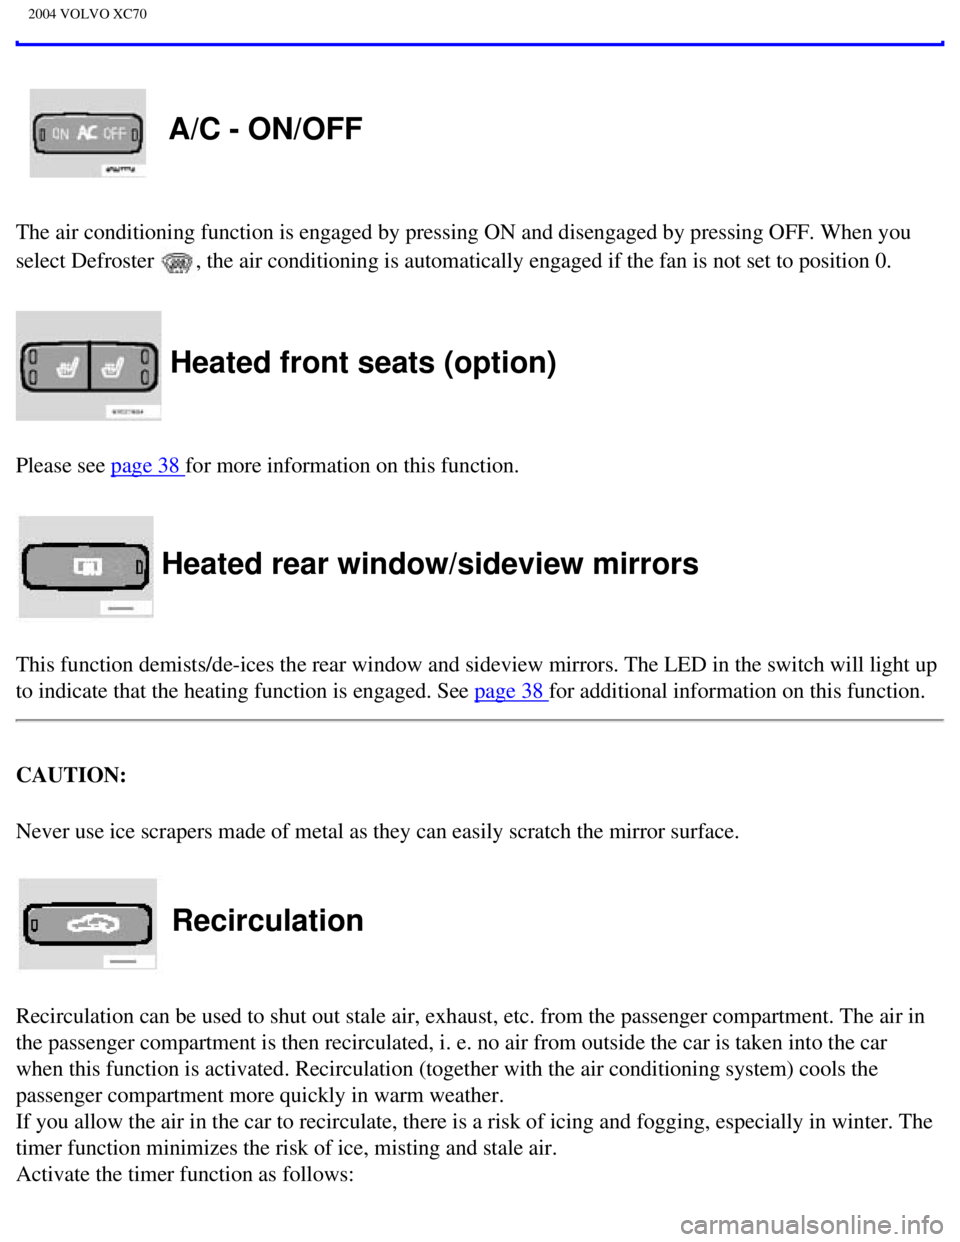
The air conditioning function is engaged by pressing ON and disengaged b\
y pressing OFF. When you
select Defroster
, the air conditioning is automatically engaged if the fan is not set to\
position 0.
Heated front seats (option)
Please see page 38 for more information on this function.
Heated rear window/sideview mirrors
This function demists/de-ices the rear window and sideview mirrors. The \
LED in the switch will light up
to indicate that the heating function is engaged. See
page 38 for additional information on this function.
CAUTION:
Never use ice scrapers made of metal as they can easily scratch the mirr\
or surface.
Recirculation
Recirculation can be used to shut out stale air, exhaust, etc. from the \
passenger compartment. The air in
the passenger compartment is then recirculated, i. e. no air from outsid\
e the car is taken into the car
when this function is activated. Recirculation (together with the air c\
onditioning system) cools the
passenger compartment more quickly in warm weather.
If you allow the air in the car to recirculate, there is a risk of icing\
and fogging, especially in winter. The
timer function minimizes the risk of ice, misting and stale air.
Activate the timer function as follows:
file:///K|/ownersdocs/2004/2004_XC70/04xc70_03.htm (10 of 12)12/30/200\
6 4:32:59 PM
Page 114 of 241

2004 VOLVO XC70
Rear reading lights
Reading lights - front/rear
The reading lights can be switched on or off by pressing the respective \
buttons. These lights switch off
automatically after 10 minutes if the engine is not running. If the engi\
ne is running, the lights stay on
indefinitely. The lights can be switched off at any time by pressing the\
button.
Contents | Top of Page
file:///K|/ownersdocs/2004/2004_XC70/04xc70_04b.htm (21 of 21)12/30/20\
06 4:33:01 PM
Page 143 of 241

2004 VOLVO XC70
TEMPERATURE
The temperature grades are AA (the highest), A, B, and C, representing\
the tire's resistance to the
generation of heat and its ability to dissipate heat when tested under c\
ontrolled conditions on a specified
indoor laboratory test wheel. Sustained high temperature can cause the m\
aterial of the tire to degenerate
and reduce tire life, and excessive temperature can lead to sudden tire \
failure. The grade C corresponds
to a minimum level of performance which all passenger car tires must mee\
t under the Federal Motor
Safety Standard No. 109. Grades B and A represent higher levels of perfo\
rmance on the laboratory test
wheel than the minimum required by law. WARNING!
The temperature grade for this tire is established for a tire that is pr\
operly inflated and not overloaded.
Excessive speed, under-inflation, or excessive loading, either separatel\
y or in combination, can cause
heat buildup and possible tire failure.
pg. 114 Changing wheels
Insert flat end of lug wrench and turn/pull straight out
Changing wheels
The spare wheel is located under the carpet on the cargo area floor. The\
optional subwoofer, located
under the cargo area floor, must be removed to allow access to the spare\
wheel. See
page 72 for
instructions. The jack and crank are secured in the wheel recess.
There are two jack attachment points on each side of the car.
file:///K|/ownersdocs/2004/2004_XC70/04xc70_07.htm (7 of 11)12/30/2006\
4:33:03 PM
Page 160 of 241
2004 VOLVO XC70
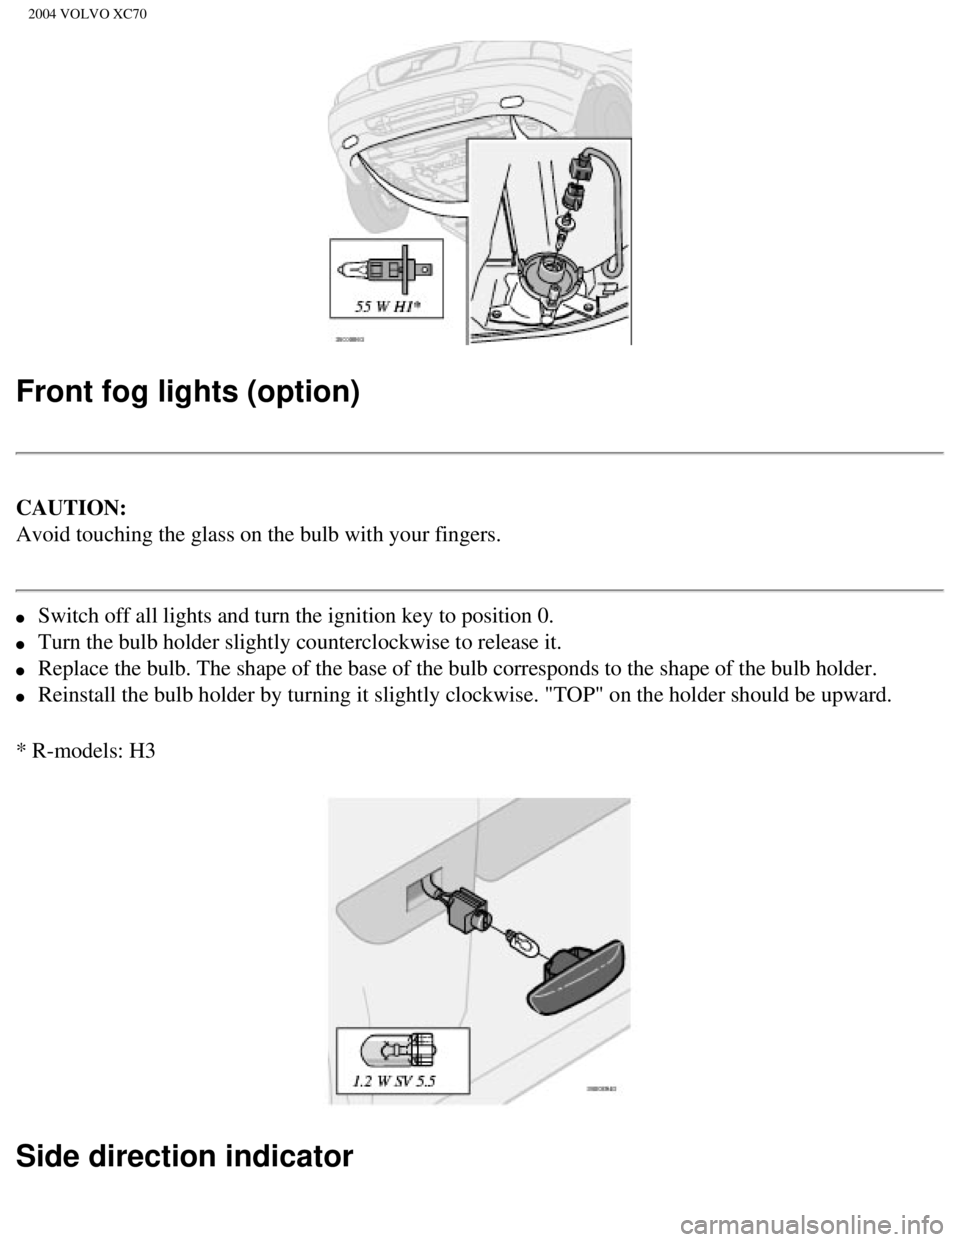
Front fog lights (option)
CAUTION:
Avoid touching the glass on the bulb with your fingers.
l Switch off all lights and turn the ignition key to position 0.
l Turn the bulb holder slightly counterclockwise to release it.
l Replace the bulb. The shape of the base of the bulb corresponds to the s\
hape of the bulb holder.
l Reinstall the bulb holder by turning it slightly clockwise. "TOP" on the\
holder should be upward.
* R-models: H3
Side direction indicator
file:///K|/ownersdocs/2004/2004_XC70/04xc70_08a.htm (13 of 22)12/30/20\
06 4:33:05 PM
Page 167 of 241

2004 VOLVO XC70
(because the paint will not have hardened sufficiently).
l An automatic wash is a simple and quick way to clean your car, but it is\
worth remembering that it
may not be as thorough as when you yourself go over the car with sponge \
and water. Keeping the
underbody clean is most important, especially in the winter. Some automa\
tic washers do not have
facilities for washing the underbody.
l Before driving into an automatic wash, make sure that side view mirrors,\
auxiliary lamps, etc, are
secure, otherwise there is risk of the machine dislodging them.
Polishing and waxing
l Normally, polishing is not required during the first year after delivery\
. However, waxing may be
beneficial.
l Before applying polish or wax the car must be washed and dried. Tar spot\
s can be removed with
kerosene or tar remover. Difficult spots may require a fine rubbing comp\
ound.
l After polishing, use liquid or paste wax.
l Several commercially available products contain both polish and wax.
l Waxing alone does not substitute for polishing of a dull surface.
l A wide range of polymer-based car waxes can be purchased today. These wa\
xes are easy to use and
produce a long-lasting, high-gloss finish that protects the bodywork aga\
inst oxidation, road dirt and
fading.
l Do not polish or wax your car in direct sunlight (the surface of the ca\
r should not be warmer than
113° F (45° C).
Cleaning the upholstery
l The fabric can be cleaned with soapy water or a detergent. For more difficult spot\
s caused by oil, ice
cream, shoe polish, grease, etc., use a clothing/fabric stain remover.
l The plastic in the upholstery can be cleaned with a soft cloth and mild soap soluti\
on.
l Leather upholstery/suede-like upholstery (alcanteraTM) can be cleaned with a soft cloth and mild
soap solution. For more difficult spots, Volvo offers a leather care kit\
.
l Under no circumstances should gasoline, naphtha or similar cleaning agen\
ts be used on the
plastic or the leather since these can cause damage.
Cleaning the seat belts
Clean only with lukewarm water and mild soap solution.
Cleaning floor mats
The floor mats should be vacuumed or brushed clean regularly, especially\
during winter, when they
file:///K|/ownersdocs/2004/2004_XC70/04xc70_08a.htm (20 of 22)12/30/20\
06 4:33:05 PM
Page 178 of 241
2004 VOLVO XC70
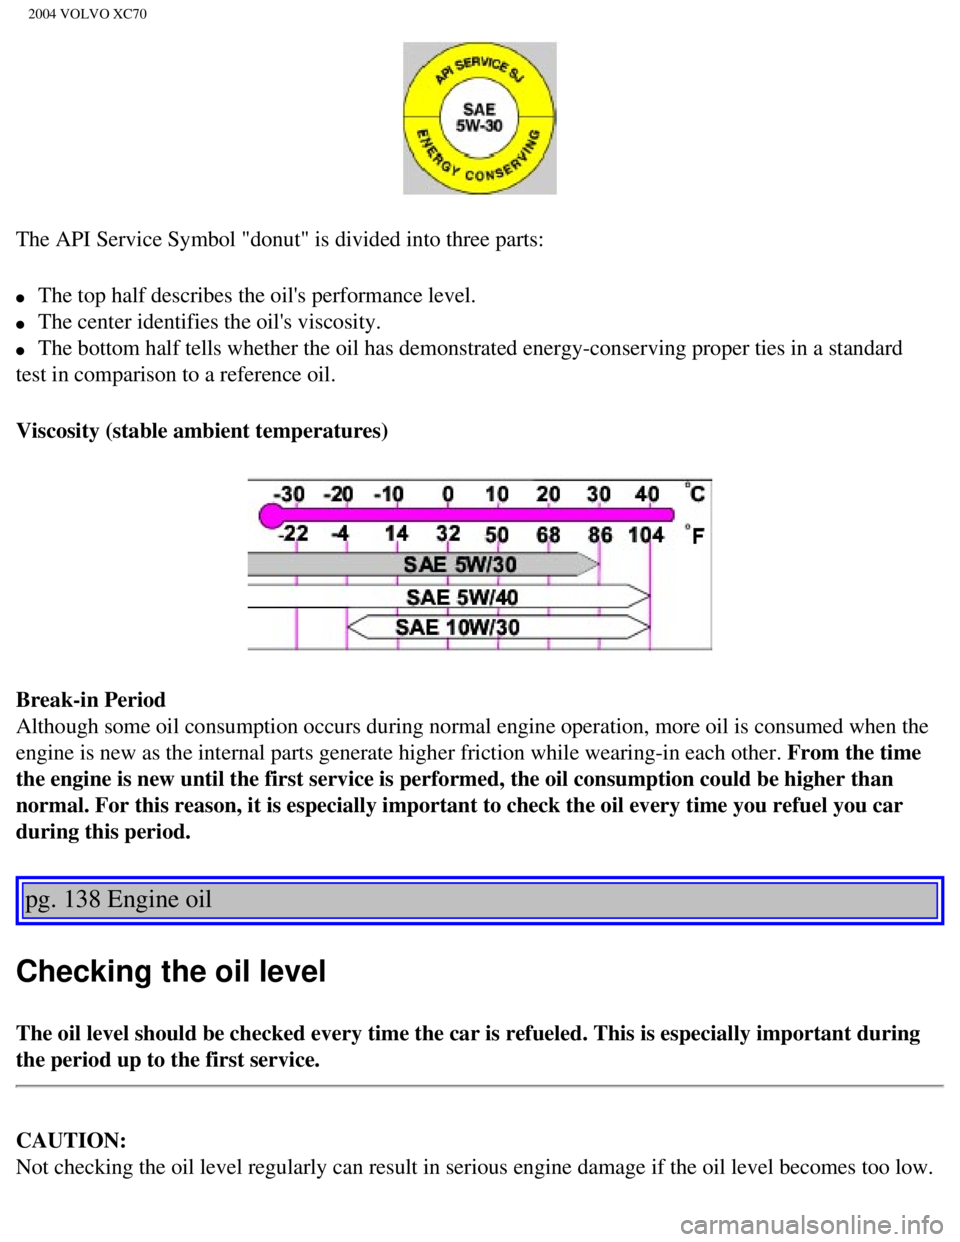
The API Service Symbol "donut" is divided into three parts:
l The top half describes the oil's performance level.
l The center identifies the oil's viscosity.
l The bottom half tells whether the oil has demonstrated energy-conserving\
proper ties in a standard
test in comparison to a reference oil.
Viscosity (stable ambient temperatures)
Break-in Period
Although some oil consumption occurs during normal engine operation, mor\
e oil is consumed when the
engine is new as the internal parts generate higher friction while weari\
ng-in each other. From the time
the engine is new until the first service is performed, the oil consumpt\
ion could be higher than
normal. For this reason, it is especially important to check the oil eve\
ry time you refuel you car
during this period.
pg. 138 Engine oil
Checking the oil level
The oil level should be checked every time the car is refueled. This is \
especially important during
the period up to the first service.
CAUTION:
Not checking the oil level regularly can result in serious engine damage\
if the oil level becomes too low.
file:///K|/ownersdocs/2004/2004_XC70/04xc70_08b.htm (9 of 16)12/30/200\
6 4:33:06 PM
Page 187 of 241
2004 VOLVO XC70
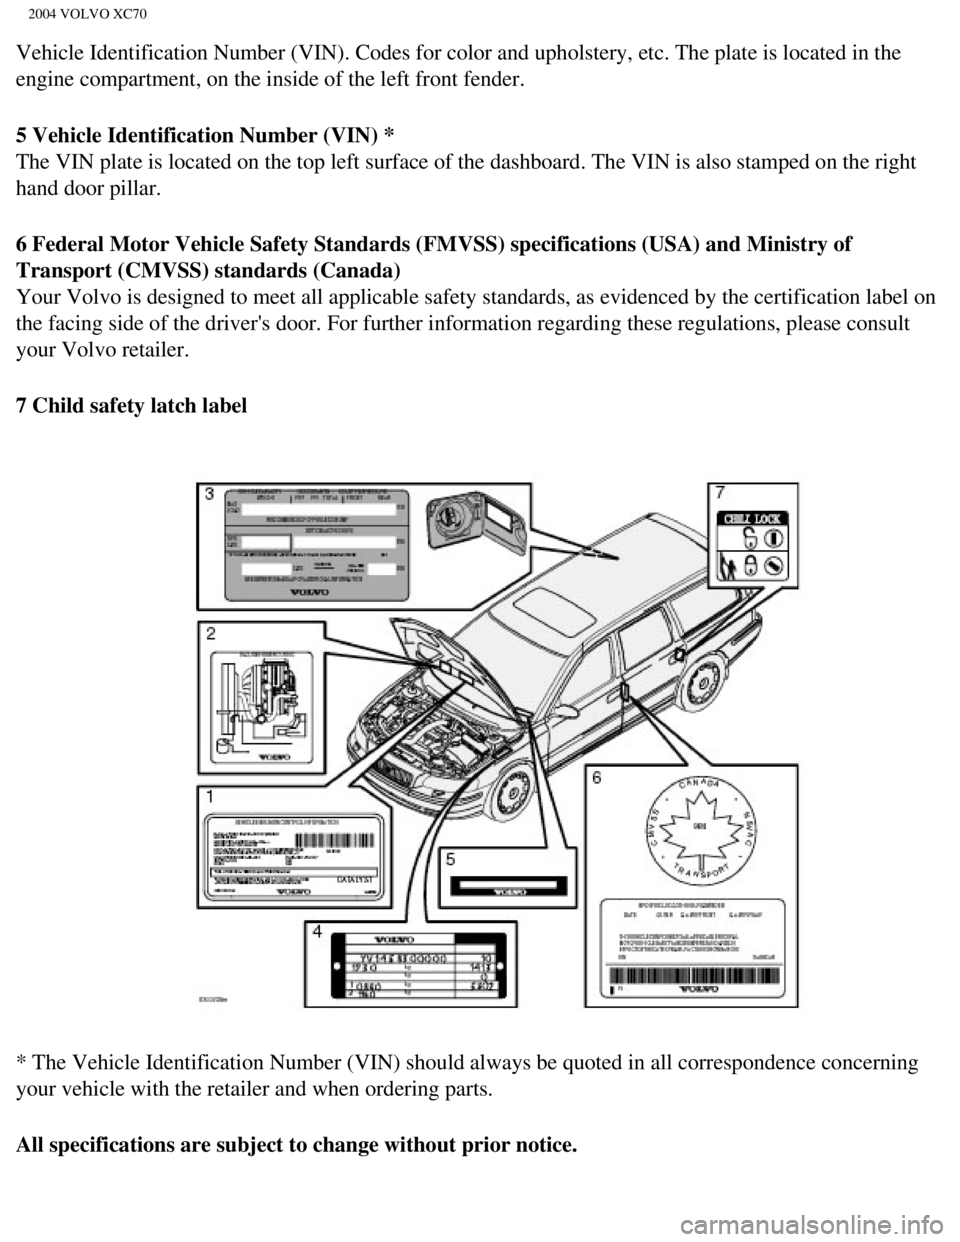
Vehicle Identification Number (VIN). Codes for color and upholstery, e\
tc. The plate is located in the
engine compartment, on the inside of the left front fender.
5 Vehicle Identification Number (VIN) *
The VIN plate is located on the top left surface of the dashboard. The V\
IN is also stamped on the right
hand door pillar.
6 Federal Motor Vehicle Safety Standards (FMVSS) specifications (USA)\
and Ministry of
Transport (CMVSS) standards (Canada)
Your Volvo is designed to meet all applicable safety standards, as evide\
nced by the certification label on
the facing side of the driver's door. For further information regarding \
these regulations, please consult
your Volvo retailer.
7 Child safety latch label
* The Vehicle Identification Number (VIN) should always be quoted in a\
ll correspondence concerning
your vehicle with the retailer and when ordering parts.
All specifications are subject to change without prior notice.
file:///K|/ownersdocs/2004/2004_XC70/04xc70_09.htm (2 of 12)12/30/2006\
4:33:07 PM
Page 204 of 241
2004 VOLVO XC70
If you have a key pad in the steering wheel press the right or left arro\
w to switch between preset stations.
Scan function
Press the SCAN button (HU-613) or the SOURCE button (HU-803) to star\
t the station scan function.
When a station is found, scanning stops for several seconds, after which\
scanning will continue.
Press the SCAN or SOURCE button when a station has been found if you wou\
ld like to listen to that
station and to discontinue the scan function.
pg. 158 Audio systems HU-613/HU-803 - radio
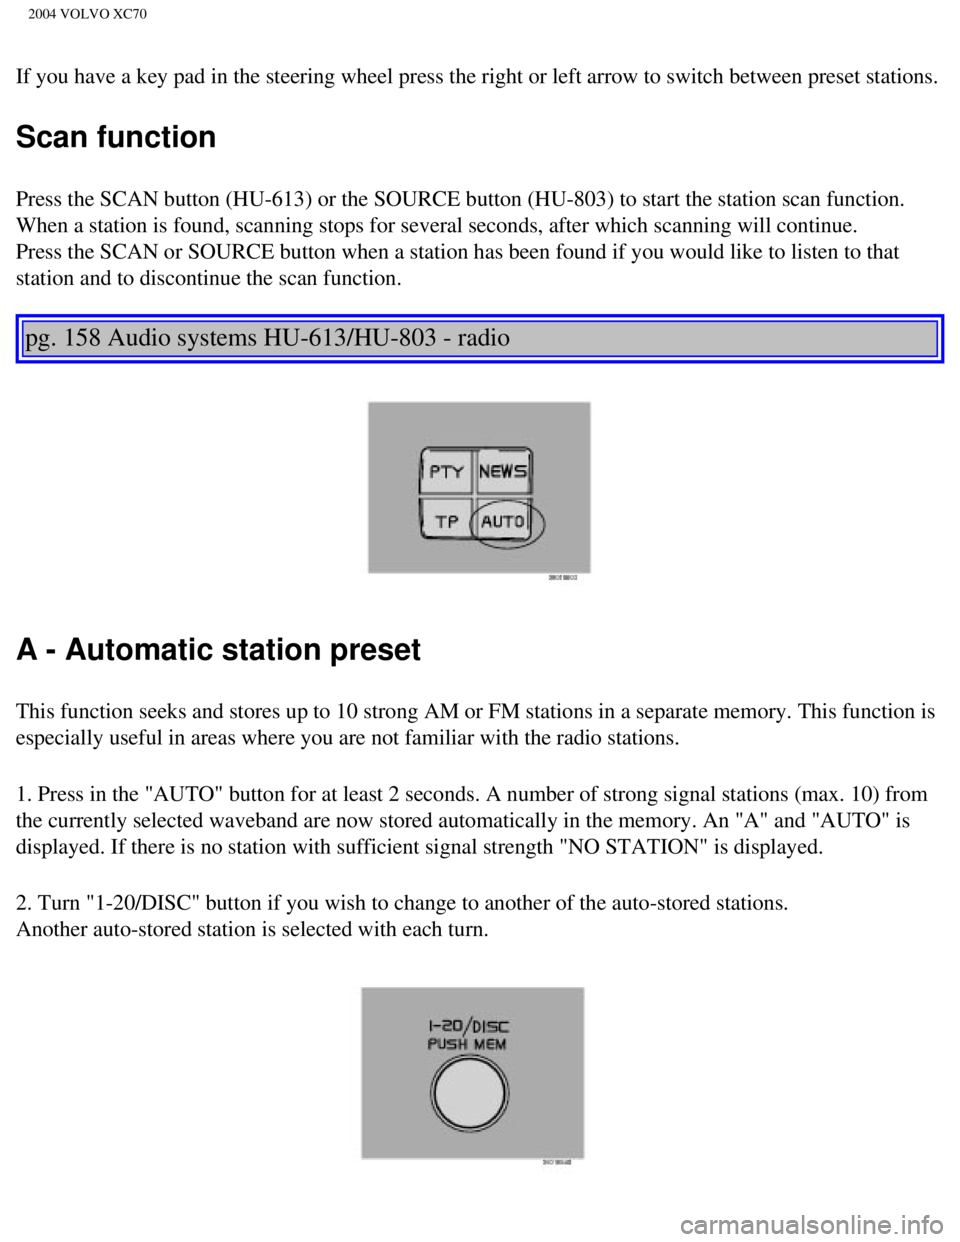
A - Automatic station preset
This function seeks and stores up to 10 strong AM or FM stations in a se\
parate memory. This function is
especially useful in areas where you are not familiar with the radio sta\
tions.
1. Press in the "AUTO" button for at least 2 seconds. A number of strong\
signal stations (max. 10) from
the currently selected waveband are now stored automatically in the memo\
ry. An "A" and "AUTO" is
displayed. If there is no station with sufficient signal strength "NO ST\
ATION" is displayed.
2. Turn "1-20/DISC" button if you wish to change to another of the auto-\
stored stations.
Another auto-stored station is selected with each turn.
file:///K|/ownersdocs/2004/2004_XC70/04xc70_10a.htm (7 of 10)12/30/200\
6 4:33:08 PM