information code VOLVO XC70 2013 Owner´s Manual
[x] Cancel search | Manufacturer: VOLVO, Model Year: 2013, Model line: XC70, Model: VOLVO XC70 2013Pages: 382, PDF Size: 6.78 MB
Page 13 of 382
Introduction
Important information
11
sion. The quality of these used parts may also
have been affected due to environmental
exposure.
Information on the Internet
Additional information about your vehicle is
available at www.volvocars.com.
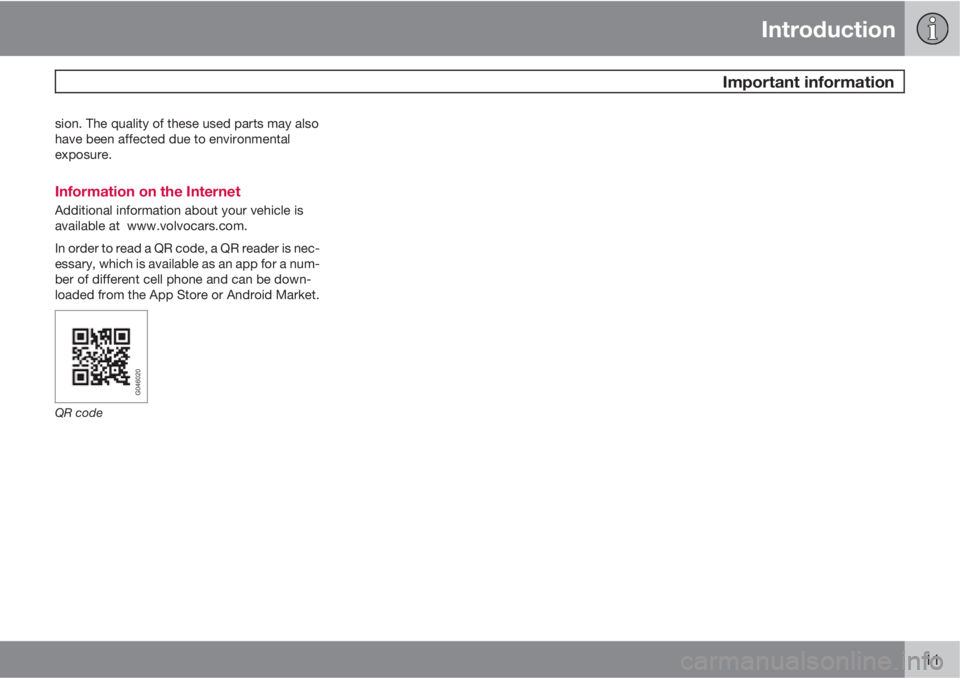
In order to read a QR code, a QR reader is nec-
essary, which is available as an app for a num-
ber of different cell phone and can be down-
loaded from the App Store or Android Market.
QR code
Page 56 of 382
02 Locks and alarm
Remote key and key blade
02
54
Introduction
Two remote keys or optional Personal Car
Communicators (PCC) are provided with your
vehicle. They enable you to unlock the doors
and tailgate, and also function as ignition keys
to start the vehicle or operate electrical com-
ponents. The remote keys contain detachable
metal key blades for manually locking or
unlocking the driver's door and the glove com-
partment. The visible ends of these key blades
are unique to make it easier to identify "your"
remote key. Up to six remotes can be pro-
grammed for use on the same vehicle.
The PCCs have enhanced functionality com-
pared with the standard remote key.
NOTE
In the remainder of this chapter, all referen-
ces to the remote key also pertain to the
PCC unless otherwise stated.
WARNING
Never leave the remote key in the ignition
slot if children are to remain in the vehicle.
See page 82 for more information on the var-
ious ignition modes.
Detachable key bladeEach remote key or PCC contains a detachable
metal key blade for mechanically locking or
unlocking the driver's door and the glove com-
partment, and to enable the private locking
function. See page 59 for more information
on the key blade and page 62 for information
on the private locking function. The key blades
have a unique code, which is used if new ones
need to be produced. This code is available at
an authorized Volvo retailer.
The visible ends of these key blades are unique
to make it easier to identify "your" remote key.
Loss of a remote keyIf either of the remote keys is lost, the other
should be taken with the car to a Volvo retailer.
As an anti-theft measure, the code of the lost
remote key must be erased from the system.
NOTE
Additional or duplicate remote control keys
can be obtained from any Authorized Volvo
Retailer.
You can also obtain additional or duplicate
remote control keys from certain independ-
ent repair facilities and locksmiths that are
qualified to make remote control keys. Each
key must be programmed to work with your
vehicle.
California Only:
A list of independent repair facilities and/or
locksmiths known to Volvo that can cut and
code replacement keys can be found:
•on the Volvo website at
http://www.volvocars.com/us/keys
•by calling Volvo Customer Care at
1-800-458-1552
The number of registered keys for the vehicle
can be found by pressing MY CAR and going
into Information
Number of keys. See
page 189 for a description of the menu sys-
tem.
USA-5WK49264
FCC ID:KR55WK49264 + Siemens VDO
5WK49236
FCC ID:KR55WK49236, 5WK49266
Page 58 of 382
02 Locks and alarm
Remote key and key blade
02
56
Immobilizer (start inhibitor)Each of the keys supplied with your vehicle
contains a coded transponder. The code in the
key is transmitted to an antenna in the ignition
slot where it is compared to the code stored in
the start inhibitor module. The vehicle will start
only with a properly coded key. If you misplace
a key, take the other keys to a trained and
qualified Volvo service technician for reprog-
ramming as an anti-theft measure. The follow-
ing messages (which may appear in the instru-
ment panel display) are related to the immobil-
izer:MessageMeaning
Insert car keyRemote key not rec-
ognized during start.
Try to start the vehi-
cle again.
Car key not foundPCC with keyless
drive only. Remote
key not recognized
during start. Try to
start the vehicle
again.
If the problem con-
tinues, insert the
remote key into the
ignition slot and try
to start the vehicle
again.
Immobilizer Try
start againRemote key fault
during start. Contact
an authorized Volvo
workshop.
CAUTION
Never use force when inserting the remote
key in the ignition slot. The vehicle cannot
be started if the transponder is damaged.
USA–FCC ID: LTQWFS 125VOThis device complies with part 15 of the FCC
rules. Operation is subject to the following con-
dition: (1) This device may not cause harmful
interference, and (2) this device must accept
any interference received, including interfer-
ence that may cause undesired operation.
Canada–IC: 3659A-WFS125VO
Operation is subject to the following condi-
tions: (1) this device may not cause interfer-
ence, and (2) this device must accept any inter-
ference, including interference that may cause
undesired operation of the device.
See page 113 for information on starting the
vehicle.
Replacing the battery in the remote keyThe batteries should be replaced if:
•The information symbol illuminates andLow battery in remote control. Please
change batteries. is shown in the display
and/or
•if the locks do not react after several
attempts to unlock or lock the vehicle.
NOTE
The remote key's range is normally approx-
imately 60 ft (20 m) from the vehicle.
See page 60 for information about replacing
the battery.
Page 71 of 382
02 Locks and alarm
Alarm
02
69 The alarm system
The alarm is automatically armed whenever the
vehicle is locked with the remote key or
optional Personal Car Communicator.
When armed, the alarm continuously monitors
a number of points on the vehicle. The follow-
ing conditions will trigger the alarm:
•The hood is forced open.
•The tailgate is forced open.
•A door is forced open.
•The ignition slot is tampered with.
•An attempt is made to start the vehicle with
a non-approved key (a key not coded to
the car's ignition).
•If there is movement in the passenger com-
partment (if the vehicle is equipped with
the accessory movement sensor).
•The vehicle is lifted or towed (if the vehicle
is equipped with the accessory inclination
sensor).
•The battery is disconnected (while the
alarm is armed).
•The siren is disconnected when the alarm
is disarmed.
A message will appear in the information dis-
play if a fault should occur in the alarm system.
Contact a trained and qualified Volvo service
technician.
NOTE
Do not attempt to repair any of the compo-
nents in the alarm system yourself. This
could affect the insurance policy on the
vehicle.
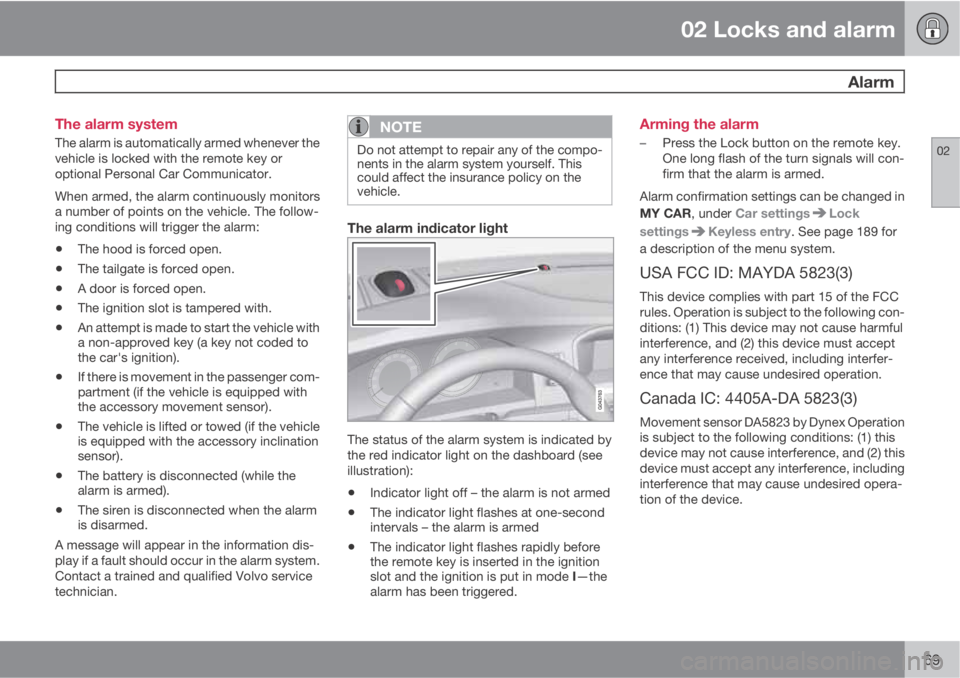
The alarm indicator light
The status of the alarm system is indicated by
the red indicator light on the dashboard (see
illustration):
•Indicator light off – the alarm is not armed
•The indicator light flashes at one-second
intervals – the alarm is armed
•The indicator light flashes rapidly before
the remote key is inserted in the ignition
slot and the ignition is put in mode I—the
alarm has been triggered.
Arming the alarm
–Press the Lock button on the remote key.
One long flash of the turn signals will con-
firm that the alarm is armed.
Alarm confirmation settings can be changed in
MY CAR, under Car settings
Lock
settings
Keyless entry. See page 189 for
a description of the menu system.
USA FCC ID: MAYDA 5823(3)
This device complies with part 15 of the FCC
rules. Operation is subject to the following con-
ditions: (1) This device may not cause harmful
interference, and (2) this device must accept
any interference received, including interfer-
ence that may cause undesired operation.
Canada IC: 4405A-DA 5823(3)
Movement sensor DA5823 by Dynex Operation
is subject to the following conditions: (1) this
device may not cause interference, and (2) this
device must accept any interference, including
interference that may cause undesired opera-
tion of the device.
Page 113 of 382
03 Your driving environment
HomeLink® Wireless Control System*
03
* Option/accessory, for more information, see Introduction.111
NOTE
Some devices may require you to replace
this Programming Step 2 with procedures
noted in the “Gate Operator / Canadian Pro-
gramming” section. If the HomeLink indica-
tor light does not change to a rapidly blink-
ing light after performing these steps, con-
tact HomeLink at www.homelink.com or by
phoning the hotline at 1–800–355–3515.
3.
Firmly press, hold for five seconds and
release the programmed HomeLink but-
ton up to two separate times to activate the
door. If the door does not activate, press
and hold the just-trained HomeLink button
and observe the indicator light.
•If the indicator light stays on con-
stantly, programming is complete
and your device should activate when
the HomeLink button is pressed and
released.
•If the indicator light blinks rapidly for
two seconds and then turns to a con-
stant light continue with “Program-
ming” steps 4-6 to complete the pro-
gramming of a rolling code equipped
device (most commonly a garage door
opener).
4. At the garage door opener receiver (motor-
head unit) in the garage, locate the “learn”or “smart” button. This can usually be
found where the hanging antenna wire is
attached to the motor-head unit.
5. Firmly press and release the “learn” or
“smart” button. (The name and color of the
button may vary by manufacturer.) There
are 30 seconds to initiate step 6.
6. Return to the vehicle and firmly press, hold
for two seconds and release the pro-
grammed HomeLink button. Repeat the
“press/hold/release” sequence a second
time, and, depending on the brand of the
garage door opener (or other rolling code
equipped device), repeat this sequence a
third time to complete the programming
process.
HomeLink should now activate your rolling
code equipped device.
Gate Operator/Canadian ProgrammingCanadian radio-frequency laws require trans-
mitter signals to “time-out” (or quit) after sev-
eral seconds of transmission – which may not
be long enough for HomeLink to pick up the
signal during programming. Similar to this
Canadian law, some U.S. gate operators are
designed to “time-out” in the same manner.
If you live in Canada or you are having difficul-
ties programming a gate operator or garage
door opener by using the “Programming” pro-cedures, replace “Programming HomeLink”
step 2 with the following:
•Continue to press and hold the HomeLink
button while you press and release -
every two seconds (“cycle”) your hand-
held transmitter until the HomeLink indica-
tor light changes from a slow to a rapidly
blinking light. Now you may release both
the HomeLink and hand-held transmitter
buttons.
Proceed with “Programming” step 3 to com-
plete.
Using HomeLink
To operate, simply press and hold the pro-
grammed HomeLink button until the trained
device begins to operate (this may take several
seconds). Activation will now occur for the
trained device (i.e., garage door opener, gate
operator, security system, entry door lock,
home/office lighting, etc.). For convenience,
the hand-held transmitter of the device may
also be used at any time. In the event that there
are still programming difficulties or questions,
contact HomeLink at: www.homelink.com or
by phoning the hotline at 1–800–355–3515.
Page 196 of 382
05 Comfort and driving pleasure
The MY CAR menus
05
194
Voice POI list
Edit list
The navigation system has a large number of
points of interest (POIs). A maximum of 30 POIs
can be stored in this list.
The menu alternative
Voice POI list is only
displayed if the vehicle is equipped with the
optional Volvo Navigation System. Refer to the
navigation system's manual for detailed infor-
mation.
MY CARSettingsAudio settings
See page 214 for more information about the
infotainment system.
MY CARSettingsClimate settings
Automatic blower adjustment
Normal
High
Low
Recirculation timer
Automatic rear defroster
Interior air quality system
Reset climate settingsThis feature returns the "Climate settings"
menu to the original factory settings.
For more information about the climate sys-
tem, see page 195.
MY CARSettingsFavourites (FAV)
See page 220 for more information about this
feature.
MY CARSettingsInformation
Number of keys
See page 54 for more information.
VIN number
See page 359 for more information.
DivX® VOD code
See page 236 for more information.
Bluetooth software version in car
See page 224 for more information.
Map and software version
Refer to the optional Volvo Navigation System
manual for more information.
Page 224 of 382
06 Infotainment
Introduction
06
222* Option/accessory, for more information, see Introduction.
There is also a dynamic calibration that takes
into consideration the volume level, radio
reception, and the speed of the vehicle.
The settings that are described in this manual,
(
Bass, Treble, Equalizer etc.) are only
intended to enable the user to adapt sound
reproduction to his/her personal tastes.
Infotainment system menus
RADIO menus
Main AM menuAM menu
Show presets7
Scan
Audio settings8
Sound stage9
Equalizer10
Volume compensation
Reset all audio settings
Main FM1/FM2 menuFM menu
Show radio text
Show presets
Scan
Advanced settings
Reset all FM settings
Audio settings8
Main SAT1*/SAT2* menu (SiriusXM
E
E
satellite radio)SAT1
SIRIUS radio off. Press RADIO button
to activate SIRIUS.
SAT2
SIRIUS radio off. Press RADIO button
to activate SIRIUS.
Song memory
Add song
Song Seek
Delete songView song memory
Channel list information
Station name
Artist
Title
Information
Show presets
Category list
Advanced SIRIUS settings
Skip options
Channel skip list
Lock options
Channel lock list
Unlock all channels
Temporarily unlock all chan-
nels
Change code
Audio settings8
7High Performance Multimedia and Premium Sound Multimedia only.8The audio settings are the same for all infotainment system modes9Premium Sound Multimedia only.10To reach sub menus, see "Main menu AM.
Page 229 of 382
06 Infotainment
Radio
06
227
Activate/deactivate in FM mode under Show
radio text.
HD Radio
E
Ereception (U.S. models
only)
Introduction
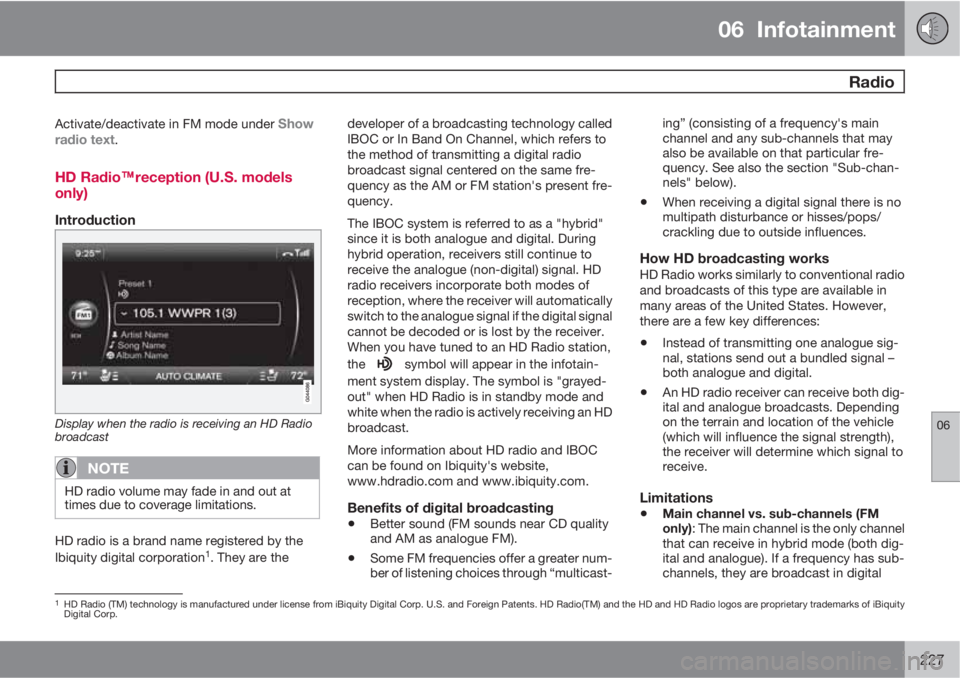
Display when the radio is receiving an HD Radio
broadcast
NOTE
HD radio volume may fade in and out at
times due to coverage limitations.
HD radio is a brand name registered by the
Ibiquity digital corporation1. They are thedeveloper of a broadcasting technology called
IBOC or In Band On Channel, which refers to
the method of transmitting a digital radio
broadcast signal centered on the same fre-
quency as the AM or FM station's present fre-
quency.
The IBOC system is referred to as a "hybrid"
since it is both analogue and digital. During
hybrid operation, receivers still continue to
receive the analogue (non-digital) signal. HD
radio receivers incorporate both modes of
reception, where the receiver will automatically
switch to the analogue signal if the digital signal
cannot be decoded or is lost by the receiver.
When you have tuned to an HD Radio station,
the
symbol will appear in the infotain-
ment system display. The symbol is "grayed-
out" when HD Radio is in standby mode and
white when the radio is actively receiving an HD
broadcast.
More information about HD radio and IBOC
can be found on Ibiquity's website,
www.hdradio.com and www.ibiquity.com.
Benefits of digital broadcasting
•Better sound (FM sounds near CD quality
and AM as analogue FM).
•Some FM frequencies offer a greater num-
ber of listening choices through “multicast-ing” (consisting of a frequency's main
channel and any sub-channels that may
also be available on that particular fre-
quency. See also the section "Sub-chan-
nels" below).
•When receiving a digital signal there is no
multipath disturbance or hisses/pops/
crackling due to outside influences.
How HD broadcasting worksHD Radio works similarly to conventional radio
and broadcasts of this type are available in
many areas of the United States. However,
there are a few key differences:
•Instead of transmitting one analogue sig-
nal, stations send out a bundled signal –
both analogue and digital.
•An HD radio receiver can receive both dig-
ital and analogue broadcasts. Depending
on the terrain and location of the vehicle
(which will influence the signal strength),
the receiver will determine which signal to
receive.
Limitations
•Main channel vs. sub-channels (FM
only): The main channel is the only channel
that can receive in hybrid mode (both dig-
ital and analogue). If a frequency has sub-
channels, they are broadcast in digital
1HD Radio (TM) technology is manufactured under license from iBiquity Digital Corp. U.S. and Foreign Patents. HD Radio(TM) and the HD and HD Radio logos are proprietary trademarks of iBiquity
Digital Corp.
Page 232 of 382
06 Infotainment
Radio
06
230
unsubscribed and the text Subscription
update needed is displayed (see also
"Selecting a channel").
2.
Call SiriusXM
E at 1-888-539-SIRIUS
(7474).
3. If you tune to an unsubscribed channel, the
SiriusXM
E ID will be displayed. The Sir-
iusXM
E ID can also be accessed from the
menu (press OK/MENU, turn TUNE to
scroll to the
Advanced settings menu,
press OK/MENU, scroll to SIRIUS ID and
press OK/MENU to display the number).
4.
Updating subscription will be displayed
while the subscription is being updated,
after which the display will return to the
normal view.
SiriusXM
E
E ID
The SiriusXM
E ID (sometimes referred to as
the Electronic Serial Number or ESN) is
required when contacting the SiriusXM
E Call
Center. It is used to activate your account and
when making any account transactions.
Selecting a channel category1.
Turn TUNE to display a list of channels.
2.
Press EXIT.3.
Turn TUNE to scroll through the list of cat-
egories and press OK/MENU to make a
selection.
> The channels in the selected category
are displayed.
NOTE
•The category All is default, which ena-
bles you to scroll through the entire list
of available satellite channels.
•The channel categories are automati-
cally updated several times a year. This
takes approximately two minutes and
will interrupt normal broadcasting. A
message will be displayed while updat-
ing is in progress. Information on chan-
nel or feature updates is available at
www.siriusxm.com.
Selecting a channelThere are three ways of tuning in a channel:
•Using the left and right arrow keys to go to
the next channel. Skipped channels (see
page 232) will be excluded.
•By turning the TUNE control and selecting
a channel from the list
•Through direct channel entry.
NOTE
•The numbers of skipped or locked
channels will not be displayed.
•If a channel is locked, the access code
must be entered before the channel can
be selected. See "Unlocking a channel"
on page 232.
Direct channel entry
The SiriusXM
E satellite channels are in numer-
ical order throughout all of the categories. To
access a channel directly:
1.
Turn TUNE to access the channel list.
2. Use the keypad buttons to enter the chan-
nel's number.
3.
Press OK/MENU. The radio will tune to this
channel, even if it belongs to a category
other than the currently selected one.
Scanning
Scan automatically searches through the list of
satellite channels. The search will only be car-
ried out in the selected category, see
page 226 for more detailed information on the
scan function.
Storing a channelA total of 20 satellite channels can be stored;
10 channels each for SAT1 and SAT2, see
Page 233 of 382
06 Infotainment
Radio
06
231
page 226 for detailed information on storing
channels.
•A long press on one of the number keys
stores the currently tuned channel on that
key.
•A short press on a number key while the
radio is in SAT1 or SAT2 mode will tune to
the preset satellite channel stored on that
button, regardless of the currently selected
channel category.
Searching for and storing songs
The Song Seek function provides notification
when SiriusXM
E is broadcasting the songs
selected in song memory.
Song memory ena-
bles you to store the name of the song for
future advance notification when that song is
being played.
Song seekWhen a satellite radio channel plays one of the
songs stored in the song memory while the
Song seek feature is activated, the listener will
be alerted by a text message and an audible
signal.
Press OK/MENU to listen to the song or EXIT
to cancel.
To activate/deactivate the song seek function:
1.
Press OK/MENU.2.
Turn TUNE to scroll to
Song memory and
press OK/MENU.
3.
Turn TUNE to scroll to
Song Seek and
press OK/MENU to activate or deactivate
the function.
NOTE
When the song has ended, the radio will
remain tuned to the channel on which the
song was played.
Song memoryUp to ten songs can be saved in the system's
memory.
To add the currently playing song to the list:
1.
Press OK/MENU.
2.
Scroll to
Song memory and press OK/
MENU.
3.
Scroll to
Add current song to song
memory and press OK/MENU.
If a new song is selected when the memory is
full, you will be prompted to delete a song from
the list. To do so:
1.
Press OK/MENU.
2.
Turn TUNE to scroll through the list of
songs. Select a song and press OK/
MENU to delete it from the list.
Radio textThis text provides information about the song
that is currently playing. To turn this feature on
or off, press OK/MENU and scroll to
Show
radio text and press OK/MENU to toggle
between on or off.
Advanced SiriusXM
E settings
This menu function enables you to make set-
tings on certain SiriusXM
E satellite radio func-
tions. To access this menu:
1.
Press OK/MENU.
2.
Scroll to the
Advanced settings menu
and press OK/MENU.
WARNING
Settings should be made when the vehicle
is at a standstill.
The following settings can be made in the sat-
ellite menus:
•Channel skip settings can be made
•Channel lock settings can be made
•The channel access code can be displayed
or changed (see also "Locking a channel"
on page 232)
•Your SiriusXM
E ID can be displayed
•Reset SiriusXM
E settings