parking brake VOLVO XC70 2015 Owner´s Manual
[x] Cancel search | Manufacturer: VOLVO, Model Year: 2015, Model line: XC70, Model: VOLVO XC70 2015Pages: 408, PDF Size: 11.26 MB
Page 130 of 408
03 Your driving environment
Transmission
03
128* Option/accessory, for more information, see Introduction.
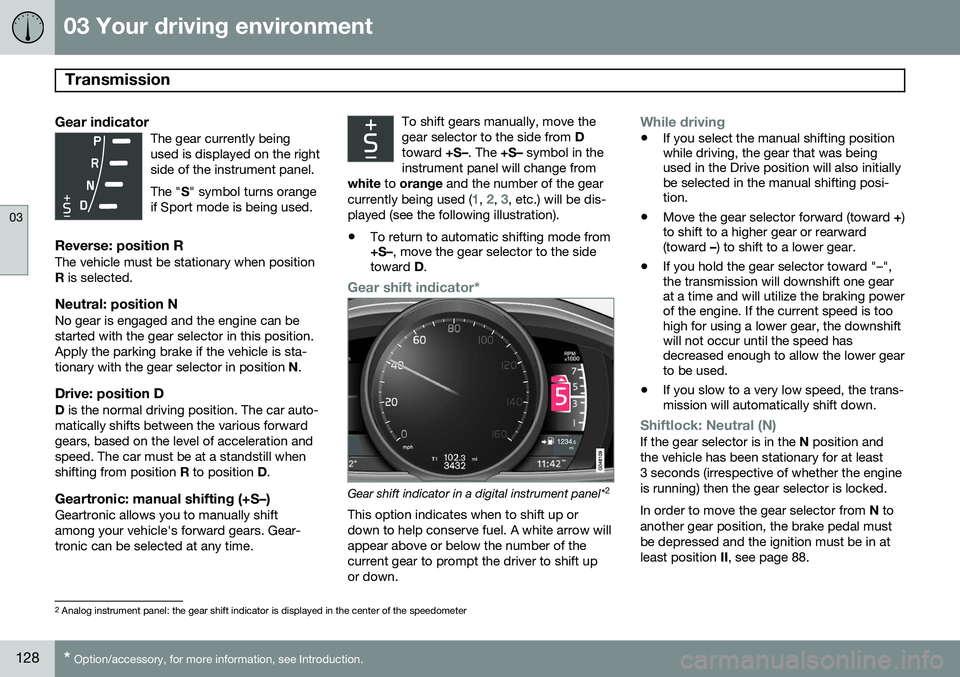
Gear indicatorThe gear currently being used is displayed on the rightside of the instrument panel. The " S" symbol turns orange
if Sport mode is being used.
Reverse: position RThe vehicle must be stationary when position R is selected.
Neutral: position NNo gear is engaged and the engine can bestarted with the gear selector in this position.Apply the parking brake if the vehicle is sta-tionary with the gear selector in position N.
Drive: position DD is the normal driving position. The car auto-
matically shifts between the various forwardgears, based on the level of acceleration andspeed. The car must be at a standstill whenshifting from position R to position D.
Geartronic: manual shifting (+S–)Geartronic allows you to manually shiftamong your vehicle's forward gears. Gear-tronic can be selected at any time. To shift gears manually, move thegear selector to the side from
D
toward +S–. The +S– symbol in the
instrument panel will change from
white to orange and the number of the gear
currently being used (
1, 2, 3, etc.) will be dis-
played (see the following illustration).
• To return to automatic shifting mode from +S–
, move the gear selector to the side
toward D.
Gear shift indicator*
Gear shift indicator in a digital instrument panel* 2
This option indicates when to shift up or down to help conserve fuel. A white arrow willappear above or below the number of thecurrent gear to prompt the driver to shift upor down.
While driving
• If you select the manual shifting position while driving, the gear that was beingused in the Drive position will also initiallybe selected in the manual shifting posi-tion.
• Move the gear selector forward (toward
+)
to shift to a higher gear or rearward(toward –) to shift to a lower gear.
• If you hold the gear selector toward "–",the transmission will downshift one gearat a time and will utilize the braking powerof the engine. If the current speed is toohigh for using a lower gear, the downshiftwill not occur until the speed hasdecreased enough to allow the lower gearto be used.
• If you slow to a very low speed, the trans-mission will automatically shift down.
Shiftlock: Neutral (N)If the gear selector is in the
N position and
the vehicle has been stationary for at least 3 seconds (irrespective of whether the engineis running) then the gear selector is locked. In order to move the gear selector from N to
another gear position, the brake pedal must be depressed and the ignition must be in atleast position II, see page 88.
2
Analog instrument panel: the gear shift indicator is displayed in the center of the speedometer
Page 132 of 408
03 Your driving environment
Transmission
03
130
Geartronic: starting on slippery
surfaces
Selecting 3rd gear in Geartronic’s manual shifting mode can help provide better tractionwhen starting off on slippery surfaces. To doso:
1. Depress the brake pedal and move the gear selector to the side from D toward
+S– .
2. Press the gear selector forward and release it (this selects 2nd gear). Press the selector forward again and release itto select 3rd gear. The optional steeringwheel paddles can also be used; see theprevious section "Geartronic: steeringwheel paddles."
3. Release the brake pedal and press gently on the accelerator pedal.
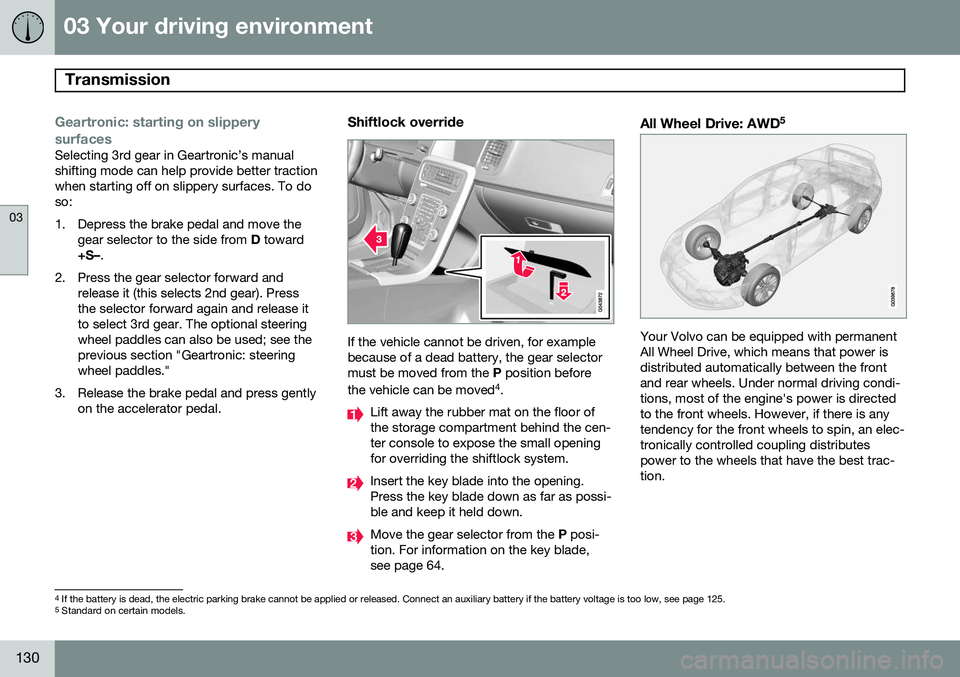
Shiftlock override
If the vehicle cannot be driven, for example because of a dead battery, the gear selectormust be moved from the P position before
the vehicle can be moved 4
.
Lift away the rubber mat on the floor of the storage compartment behind the cen-ter console to expose the small openingfor overriding the shiftlock system.
Insert the key blade into the opening. Press the key blade down as far as possi-ble and keep it held down.
Move the gear selector from the P posi-
tion. For information on the key blade, see page 64.
All Wheel Drive: AWD 5
Your Volvo can be equipped with permanent All Wheel Drive, which means that power isdistributed automatically between the frontand rear wheels. Under normal driving condi-tions, most of the engine's power is directedto the front wheels. However, if there is anytendency for the front wheels to spin, an elec-tronically controlled coupling distributespower to the wheels that have the best trac-tion.
4
If the battery is dead, the electric parking brake cannot be applied or released. Connect an auxiliary battery if the battery voltage is too low, see page 125.5
Standard on certain models.
Page 143 of 408
03 Your driving environment
Brakes
03
}}
* Option/accessory, for more information, see Introduction.141
Brake system
The brake system is a hydraulic system con- sisting of two separate brake circuits. If aproblem should occur in one of these circuits,it is still possible to stop the vehicle with theother brake circuit. If the brake pedal must be depressed farther than normal and requires greater foot pres-sure, the stopping distance will be longer. A warning light in the instrument panel will light up to warn the driver that a fault hasoccurred. If this light comes on while driving or braking, stop immediately and check the brake fluidlevel in the reservoir.
NOTE
Press the brake pedal hard and maintain pressure on the pedal – do not pump thebrakes.
WARNING
If the fluid level is below the MIN mark in
the reservoir or if a brake system message is shown in the information display: DO
NOT DRIVE . Have the vehicle towed to a
trained and qualified Volvo service techni-cian and have the brake system inspected.
Brake pad inspectionOn vehicles equipped with a jack*, the condi- tion of the brake pads can be checked byraising the vehicle (see page 331 for informa-tion about using the jack and removing awheel) and performing a visual inspection ofthe brake pads.
WARNING
• If the vehicle has been driven immedi- ately prior to a brake pad inspection,the wheel hub, brake components,etc., will be very hot. Allow time forthese components to cool before car-rying out the inspection.
• Apply the parking brake and put thegear selector in the Park (
P) position.
• Block the wheels standing on theground, use rigid wooden blocks orlarge stones.
WARNING
•Use the jack intended for the vehicle when changing a tire. For any otherjob, use stands to support the vehicle.
• The jack should be kept well-greasedand clean, and should not be dam-aged.
• Be sure the jack is on a firm, level,non-slippery surface.
• No objects should be placed betweenthe base of jack and the ground, orbetween the jack and the attachmentbar on the vehicle.
• The jack must correctly engage thejack attachment.
• Never allow any part of your body tobe extended under a vehicle suppor-ted by a jack.
Brake lightsThe brake lights come on automatically when the brakes are applied.
Adaptive brake lightsThe adaptive brake lights activate in the event of sudden braking or if the ABS system isactivated. This function causes an additionaltaillight on each side of the vehicle to illumi-nate to help alert vehicles traveling behind.
Page 144 of 408
03 Your driving environment
Brakes
03
142
The adaptive brake lights activate if: •The ABS system activates for more than approximately a half second
• In the event of sudden braking while thevehicle is moving at speeds aboveapproximately 6 mph (10 km/h)
When the vehicle has come to a stop, the brake lights and additional taillights remain onfor as long as the brake pedal is depressed oruntil braking force on the vehicle is reduced.
Power brakes function only when the engine is running
The power brakes utilize vacuum pressure which is only created when the engine is run-ning. Never let the vehicle roll to a stop withthe engine switched off. If the power brakes are not working, consid- erably higher pressure will be required on thebrake pedal to compensate for the lack ofpower assistance. This can happen for exam-ple when towing your vehicle or if the engineis switched off when the vehicle is rolling. Thebrake pedal feels harder than usual.
Water on brake discs and brake pads affects braking
Driving in rain and slush or passing throughan automatic car wash can cause water tocollect on the brake discs and pads. This willcause a delay in braking effect when the pedal is depressed. To avoid such a delaywhen the brakes are needed, depress thepedal occasionally when driving through rain,slush, etc. This will remove the water from thebrakes. Check that brake application feelsnormal. This should also be done after wash-ing or starting in very damp or cold weather.
Severe strain on the brake systemThe brakes will be subject to severe strainwhen driving in mountains or hilly areas, orwhen towing a trailer. Vehicle speed is usuallyslower, which means that the cooling of thebrakes is less efficient than when driving onlevel roads. To reduce the strain on thebrakes, shift into a lower gear and let theengine help with the braking. Do not forgetthat if you are towing a trailer, the brakes willbe subjected to a greater than normal load.
Anti-lock braking system (ABS)The Anti-lock Braking System (ABS) helps toimprove vehicle control (stopping and steer-ing) during severe braking conditions by limit-ing brake lockup. When the system "senses"impending lockup, braking pressure is auto-matically modulated in order to help preventlockup that could lead to a skid. The system performs a brief self-diagnostic test when the engine has been started anddriver releases the brake pedal. Another auto-matic test may be performed when the vehi-
cle first reaches a speed of approximately6 mph (10 km/h). The brake pedal will pulsateseveral times and a sound may be audiblefrom the ABS control module, which is nor-mal.
Cleaning the brake discsCoatings of dirt and water on the brake discsmay result in delayed brake function. Thisdelay is minimized by cleaning the brake lin-ings. Cleaning the brake pads is advisable in wet weather, prior to long-term parking, and afterthe vehicle has been washed. Do this bybraking gently for a short period while thevehicle is moving.
Emergency Brake AssistanceEBA is designed to provide full brake effectimmediately in the event of sudden, hardbraking. The system is activated by the speedwith which the brake pedal is depressed. When the EBA system is activated, the brake pedal will go down and pressure in the brakesystem immediately increases to the maxi-mum level. Maintain full pressure on thebrake pedal in order to utilize the systemcompletely. EBA is automatically deactivatedwhen the brake pedal is released.
Page 146 of 408
03 Your driving environment
Parking brake
03
144
Electric parking brake
An electric parking brake has the same func- tion as a manual parking brake.
NOTE
•A faint sound from the parking brake's electric motor can be heard when theparking brake is being applied. Thissound can also be heard during theautomatic function check of the park-ing brake.
• The brake pedal will move slightlywhen the electric parking brake isapplied or released.
Low battery voltageIf the battery voltage is too low, the park- ing brake cannot be applied or released. Connect an auxiliary battery if the battery voltage is too low, see page 125.
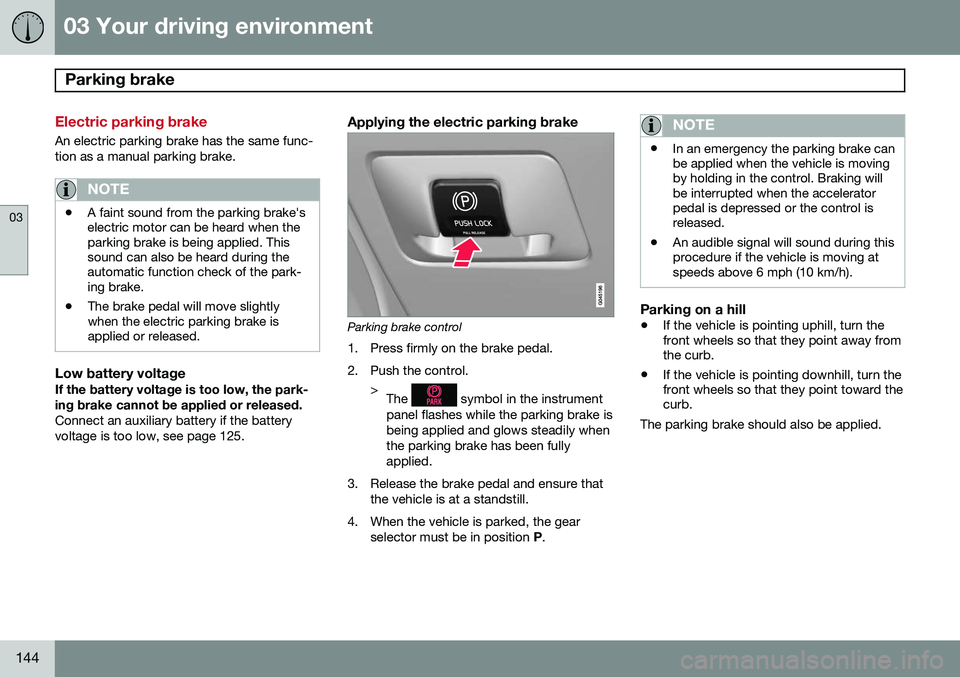
Applying the electric parking brake
Parking brake control
1. Press firmly on the brake pedal.
2. Push the control. >The
symbol in the instrument
panel flashes while the parking brake is being applied and glows steadily whenthe parking brake has been fullyapplied.
3. Release the brake pedal and ensure that the vehicle is at a standstill.
4. When the vehicle is parked, the gear selector must be in position P.
NOTE
• In an emergency the parking brake can be applied when the vehicle is movingby holding in the control. Braking willbe interrupted when the acceleratorpedal is depressed or the control isreleased.
• An audible signal will sound during thisprocedure if the vehicle is moving atspeeds above 6 mph (10 km/h).
Parking on a hill
•
If the vehicle is pointing uphill, turn the front wheels so that they point away fromthe curb.
• If the vehicle is pointing downhill, turn thefront wheels so that they point toward thecurb.
The parking brake should also be applied.
Page 147 of 408
03 Your driving environment
Parking brake
03
}}
145
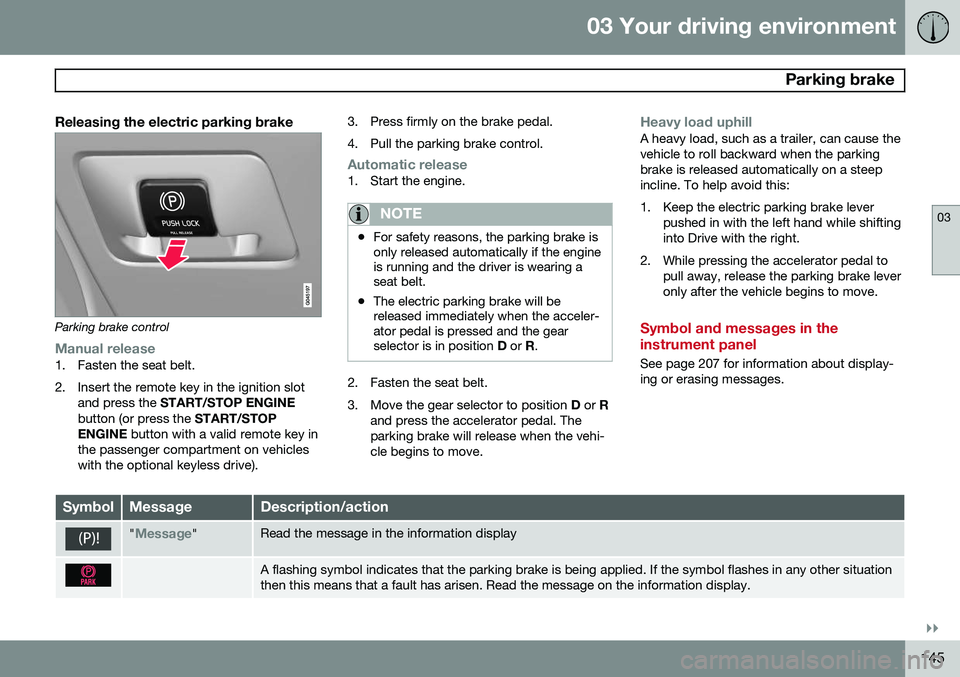
Releasing the electric parking brake
Parking brake control
Manual release1. Fasten the seat belt.
2. Insert the remote key in the ignition slotand press the START/STOP ENGINE
button (or press the START/STOP
ENGINE button with a valid remote key in
the passenger compartment on vehicles with the optional keyless drive). 3. Press firmly on the brake pedal.
4. Pull the parking brake control.
Automatic release1. Start the engine.
NOTE
•
For safety reasons, the parking brake is only released automatically if the engineis running and the driver is wearing aseat belt.
• The electric parking brake will bereleased immediately when the acceler-ator pedal is pressed and the gearselector is in position
D or R.
2. Fasten the seat belt.
3. Move the gear selector to position D or R
and press the accelerator pedal. The parking brake will release when the vehi-cle begins to move.
Heavy load uphillA heavy load, such as a trailer, can cause the vehicle to roll backward when the parkingbrake is released automatically on a steepincline. To help avoid this:
1. Keep the electric parking brake lever pushed in with the left hand while shifting into Drive with the right.
2. While pressing the accelerator pedal to pull away, release the parking brake leveronly after the vehicle begins to move.
Symbol and messages in the instrument panel
See page 207 for information about display- ing or erasing messages.
SymbolMessageDescription/action
"Message"Read the message in the information display
A flashing symbol indicates that the parking brake is being applied. If the symbol flashes in any other situation then this means that a fault has arisen. Read the message on the information display.
Page 148 of 408
03 Your driving environment
Parking brake
03
146
SymbolMessageDescription/action
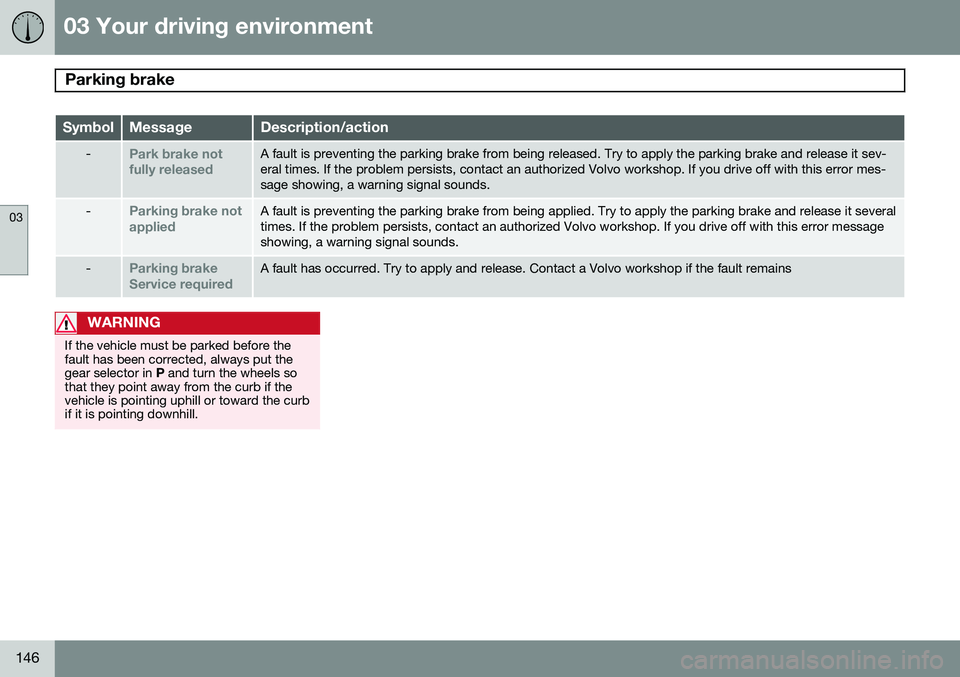
-Park brake not fully releasedA fault is preventing the parking brake from being released. Try to apply the parking brake and release it sev- eral times. If the problem persists, contact an authorized Volvo workshop. If you drive off with this error mes-sage showing, a warning signal sounds.
-Parking brake not appliedA fault is preventing the parking brake from being applied. Try to apply the parking brake and release it several times. If the problem persists, contact an authorized Volvo workshop. If you drive off with this error messageshowing, a warning signal sounds.
-Parking brake Service requiredA fault has occurred. Try to apply and release. Contact a Volvo workshop if the fault remains
WARNING
If the vehicle must be parked before the fault has been corrected, always put thegear selector in P and turn the wheels so
that they point away from the curb if thevehicle is pointing uphill or toward the curbif it is pointing downhill.
Page 165 of 408
04 Driver support
Adaptive Cruise Control (ACC)*
04
}}
* Option/accessory, for more information, see Introduction.163
WARNING
Please be aware that this function will also cause the vehicle to accelerate briefly incertain situations other than passinganother vehicle, for example using the leftturn signal to indicate a lane change or aturn toward a highway exit at speedsabove approximately 45 mph (70 km/h).
Turning ACC off completely
•
From standby mode, press once.
• From active mode, press
twice.
The set speed and time interval are then cleared from the system's memory and can- not be resumed by pressing
.
Toggling between ACC and CC (standard Cruise Control)
Switching from ACC to CCThis may be useful if, for example, the radar sensor is obstructed in some way. See thesection "The radar sensor and its limitations"on page 165 for additional information.
• Press and hold the
button; the symbol
in the instrument panel will switch from
to .
> This activates the standard cruise control function (see page 156).
WARNING
Switching from ACC to CC means that:
• Your vehicle will
no longer automati-
cally maintain a set distance to a vehi- cle ahead.
• Only the set speed will be maintainedand the driver will have to apply thebrakes when needed.
Switching from CC to ACC
Switch off cruise control by pressing once
or twice as needed according to the instruc- tions in the previous section "Turning ACC offcompletely." The next time the system isswitched on, ACC will be reactivated.
Queue Assist
IntroductionQueue Assist is an added ACC feature that is linked to your vehicle's automatic transmis-sion. Queue Assist consists of the following func- tions: • Enhanced speed interval (including when the vehicle is at a complete stop or is moving at speed below 18 mph(30 km/h))
• Automatic standby mode when ACCchanges target vehicles
• No automatic braking when at a standstill
• The parking brake is applied automati-cally
Please note that the lowest speed that can be set is 18 mph (30 km/h), although ACC canmaintain a set speed/distance to a vehicleahead down to a standstill. Queue Assistconsists of the following features:
Enhanced speed interval
NOTE
The driver's door must be closed and the driver's seat belt must be fastened beforeACC can be put in active mode. If the driv-er's seat belt is taken off or if the driver'sdoor is opened, ACC will return to standbymode.
Your vehicle can maintain the set time interval to the vehicle ahead at any permissiblespeed, including a complete stop. In order to activate ACC at speeds below 18 mph (30 km/h):
Page 166 of 408
04 Driver support
Adaptive Cruise Control (ACC)*
04
164* Option/accessory, for more information, see Introduction.
• The vehicle ahead must be within a rea- sonable distance (not farther away thanapprox. 100 ft/30 meters)
• The lowest speed that can be selected is18 mph (30 km/h), although ACC will alsohelp maintain the set time interval to thevehicle ahead at lower speeds, includinga complete stop.
During short stops (less than approximately 3 seconds) in slow-moving traffic, your vehi-cle will begin moving again automatically assoon as the vehicle ahead begins to move. If it takes more than 3 seconds for the vehicle ahead to begin moving, ACC will be automat-ically go into standby mode. The driver will then have to reactivate ACC in one of the following ways:
• By pressing
• By accelerating up to at least 3 mph (4 km/h). ACC will then resume followingthe vehicle ahead.
Your vehicle will then resume following the vehicle ahead at the set time interval.
NOTE
ACC can remain active and keep your vehicle at a standstill for up to 4 minutes.After 4 minutes have elapsed, the parkingbrake will be engaged and ACC will go intostandby mode. To reactivate ACC, the driver must release the parking brake (see page 145).
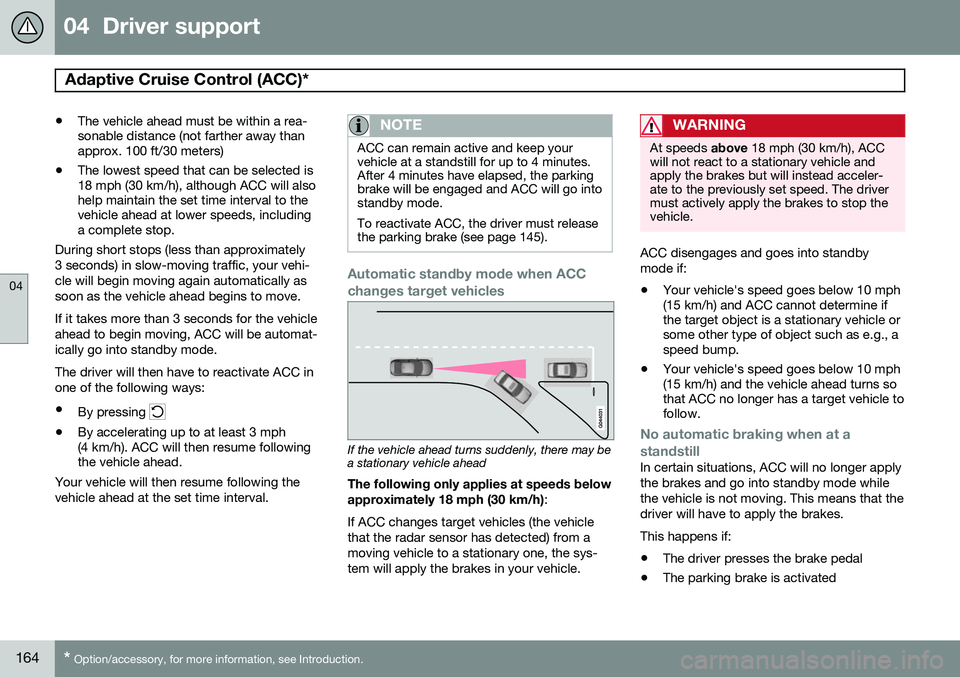
Automatic standby mode when ACC changes target vehicles
If the vehicle ahead turns suddenly, there may be a stationary vehicle ahead
The following only applies at speeds below approximately 18 mph (30 km/h) :
If ACC changes target vehicles (the vehicle that the radar sensor has detected) from amoving vehicle to a stationary one, the sys-tem will apply the brakes in your vehicle.
WARNING
At speeds above 18 mph (30 km/h), ACC
will not react to a stationary vehicle and apply the brakes but will instead acceler-ate to the previously set speed. The drivermust actively apply the brakes to stop thevehicle.
ACC disengages and goes into standby mode if:
• Your vehicle's speed goes below 10 mph (15 km/h) and ACC cannot determine ifthe target object is a stationary vehicle orsome other type of object such as e.g., aspeed bump.
• Your vehicle's speed goes below 10 mph(15 km/h) and the vehicle ahead turns sothat ACC no longer has a target vehicle tofollow.
No automatic braking when at a standstill
In certain situations, ACC will no longer apply the brakes and go into standby mode whilethe vehicle is not moving. This means that thedriver will have to apply the brakes. This happens if:
• The driver presses the brake pedal
• The parking brake is activated
Page 167 of 408
04 Driver support
Adaptive Cruise Control (ACC)*
04
}}
* Option/accessory, for more information, see Introduction.165
•
The gear selected is moved to
P,N or R
• The driver presses the
button to put
ACC in standby mode
The parking brake is applied
automatically
In certain situations, ACC will apply the park- ing brake in order to continue keeping thevehicle at a standstill. This happens if:
• The driver opens the door or takes off his/her seat belt
• DSTC is put in Sport mode (seepage 152)
• ACC has kept the vehicle at a standstillfor more than 2 minutes
• The engine has been switched off
• The brakes have overheated
The radar sensor and its limitations
In addition to being used by ACC, the radar sensor is also used by Distance Alert (seepage 169) and Collision Warning with FullAuto-brake and Pedestrian Detection (seepage 178). This sensor is designed to detectcars or larger vehicles driving in the samedirection as your vehicle, in the same lane.
WARNING
• If there is visible damage to the front grille or you suspect that the radarsensor may be damaged in any way,contact a trained and qualified Volvoservice technician as soon as possible.The radar sensor may only functionpartially (or not at all) if it is damagedor is not securely fastened in place.
• Accessories or other objects, such asextra headlights, must not be installedin front of the grille.
• Modification of the radar sensor couldmake its use illegal.
The radar sensor's capacity to detect vehi- cles ahead is impeded:
• if the radar sensor is obstructed and can- not detect other vehicles, for example inheavy rain, or if snow or other objects areobscuring the radar sensor.
NOTE
Keep the area in front of the radar sensor clean.
• if the speed of vehicles ahead is signifi- cantly different from your own speed.
Situations where ACC may not function optimally
WARNING
•The radar sensor has a limited field of vision. In some situations it may detecta vehicle later than expected or notdetect other vehicles at all.
• If ACC is not functioning properly,cruise control will also be disabled.