Back seat VOLVO XC90 T8 2016 Owner´s Manual
[x] Cancel search | Manufacturer: VOLVO, Model Year: 2016, Model line: XC90 T8, Model: VOLVO XC90 T8 2016Pages: 546, PDF Size: 10.26 MB
Page 175 of 546
INSTRUMENTS AND CONTROLS
173
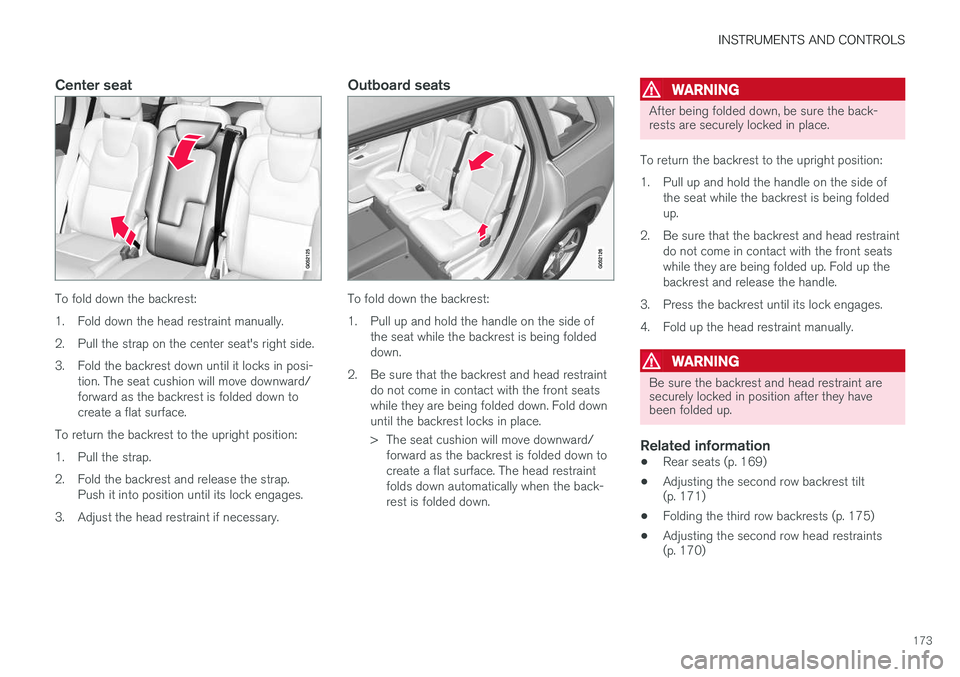
Center seat
To fold down the backrest:
1. Fold down the head restraint manually.
2. Pull the strap on the center seat's right side.
3. Fold the backrest down until it locks in posi-tion. The seat cushion will move downward/ forward as the backrest is folded down tocreate a flat surface.
To return the backrest to the upright position:
1. Pull the strap.
2. Fold the backrest and release the strap. Push it into position until its lock engages.
3. Adjust the head restraint if necessary.
Outboard seats
To fold down the backrest:
1. Pull up and hold the handle on the side of the seat while the backrest is being folded down.
2. Be sure that the backrest and head restraint do not come in contact with the front seatswhile they are being folded down. Fold downuntil the backrest locks in place.
> The seat cushion will move downward/forward as the backrest is folded down to create a flat surface. The head restraintfolds down automatically when the back-rest is folded down.
WARNING
After being folded down, be sure the back- rests are securely locked in place.
To return the backrest to the upright position:
1. Pull up and hold the handle on the side of the seat while the backrest is being folded up.
2. Be sure that the backrest and head restraint do not come in contact with the front seatswhile they are being folded up. Fold up thebackrest and release the handle.
3. Press the backrest until its lock engages.
4. Fold up the head restraint manually.
WARNING
Be sure the backrest and head restraint are securely locked in position after they havebeen folded up.
Related information
• Rear seats (p. 169)
• Adjusting the second row backrest tilt (p. 171)
• Folding the third row backrests (p. 175)
• Adjusting the second row head restraints(p. 170)
Page 176 of 546
INSTRUMENTS AND CONTROLS
* Option/accessory, for more information, see Introduction.
174
Moving the second row seats forward/rearward
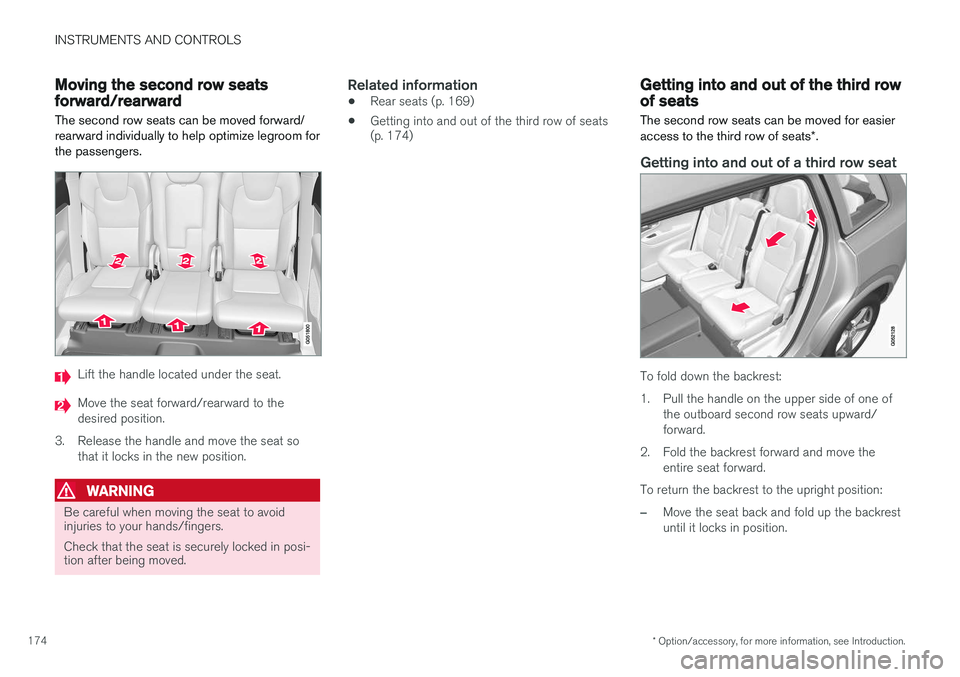
The second row seats can be moved forward/ rearward individually to help optimize legroom forthe passengers.
Lift the handle located under the seat.
Move the seat forward/rearward to the desired position.
3. Release the handle and move the seat so that it locks in the new position.
WARNING
Be careful when moving the seat to avoid injuries to your hands/fingers. Check that the seat is securely locked in posi- tion after being moved.
Related information
• Rear seats (p. 169)
• Getting into and out of the third row of seats (p. 174)
Getting into and out of the third row of seats
The second row seats can be moved for easier access to the third row of seats *.
Getting into and out of a third row seat
To fold down the backrest:
1. Pull the handle on the upper side of one of
the outboard second row seats upward/ forward.
2. Fold the backrest forward and move the entire seat forward.
To return the backrest to the upright position:
–Move the seat back and fold up the backrest until it locks in position.
Page 177 of 546
INSTRUMENTS AND CONTROLS
* Option/accessory, for more information, see Introduction.175
WARNING
Be sure the backrest and head restraint are securely locked in position after they havebeen folded up.
Related information
•Moving the second row seats forward/rear- ward (p. 174)
• Adjusting the second row backrest tilt(p. 171)
• Folding the second row backrests (p. 172)
Folding the third row backrests
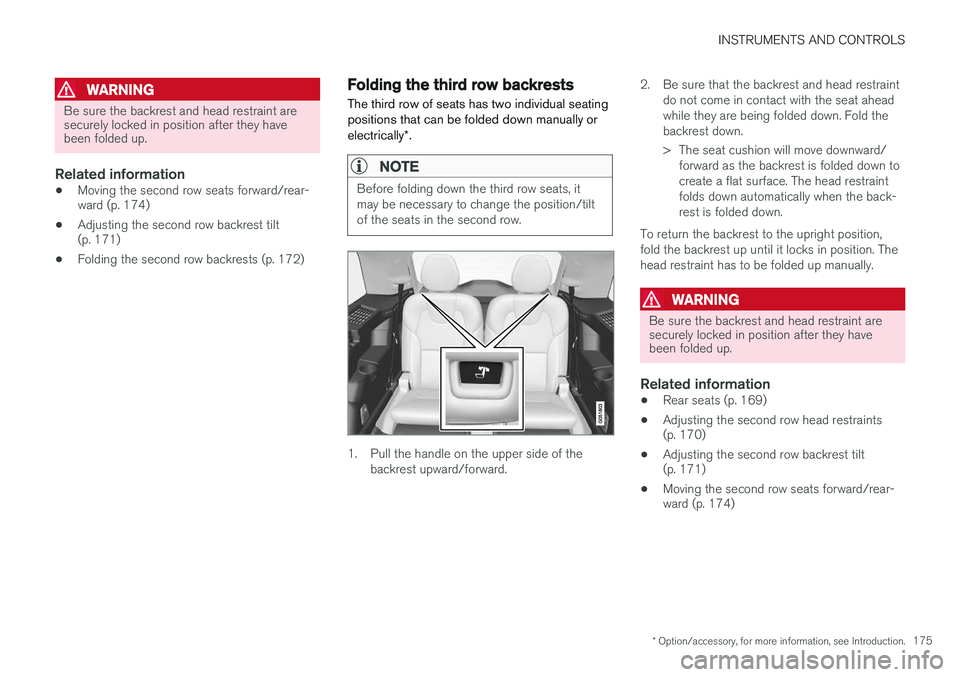
The third row of seats has two individual seating positions that can be folded down manually or electrically *.
NOTE
Before folding down the third row seats, it may be necessary to change the position/tiltof the seats in the second row.
1. Pull the handle on the upper side of the
backrest upward/forward. 2. Be sure that the backrest and head restraint
do not come in contact with the seat ahead while they are being folded down. Fold thebackrest down.
> The seat cushion will move downward/forward as the backrest is folded down to create a flat surface. The head restraintfolds down automatically when the back-rest is folded down.
To return the backrest to the upright position,fold the backrest up until it locks in position. Thehead restraint has to be folded up manually.
WARNING
Be sure the backrest and head restraint are securely locked in position after they havebeen folded up.
Related information
• Rear seats (p. 169)
• Adjusting the second row head restraints (p. 170)
• Adjusting the second row backrest tilt(p. 171)
• Moving the second row seats forward/rear-ward (p. 174)
Page 202 of 546
||
CLIMATE
* Option/accessory, for more information, see Introduction.
200
Automatically activating/deactivating the seat heating function when theengine is started
The seat heating * can be set to start automati-
cally when the engine is started. The automatic function starts heating the seats when the ambient temperature is sufficiently cold. 1. Tap
Settings in the center display's Top
view.
2. Tap
Climate.
3. Under
Auto Driver Seat Heating Level andAuto Passenger Seat Heating Level,
select Off, Low, Middle or High to activate/
deactivate the automatic function and select a level for the driver's and passenger's seats.
Related information
• Climate system controls (p. 188)
• Climate system controls in the center display (p. 189)
• Rear climate system controls on the tunnelconsole (p. 190)
Turning front seat ventilation
* on
and off
Seat ventilation can be used e.g., to help remove dampness from the seat occupant's clothing.
The ventilation system consists of fans in the seats and backrests that draw air through theseat upholstery. The cooling effect increases asthe air in the passenger compartment becomescooler. This feature can be activated when theengine is running and it monitors the seat's tem-perature, sunlight in the passenger compartmentand the ambient temperature.
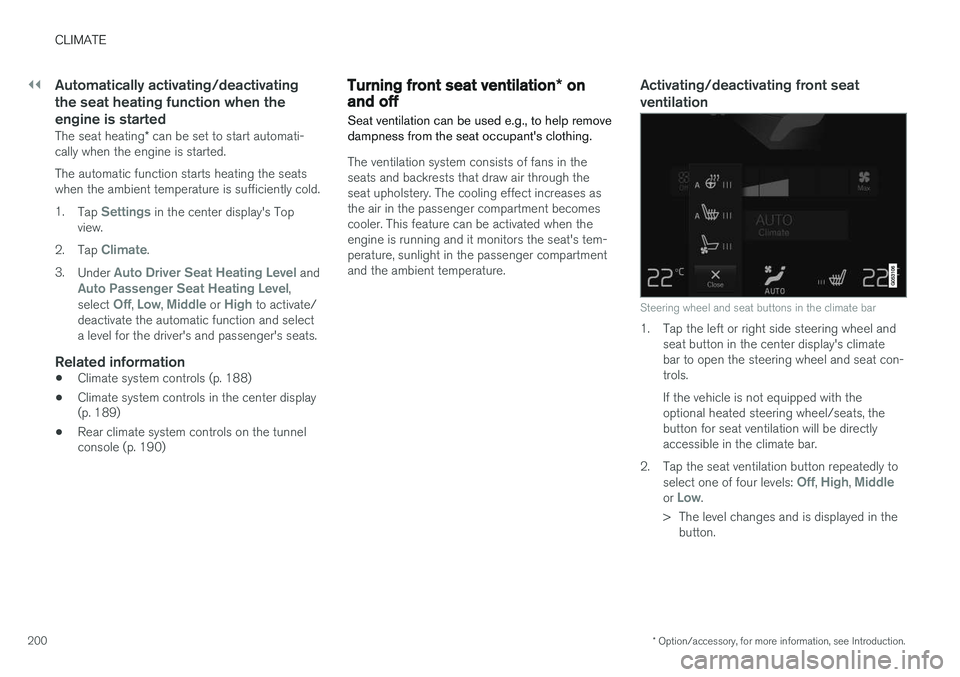
Activating/deactivating front seat ventilation
Steering wheel and seat buttons in the climate bar
1. Tap the left or right side steering wheel and seat button in the center display's climate bar to open the steering wheel and seat con-trols. If the vehicle is not equipped with the optional heated steering wheel/seats, thebutton for seat ventilation will be directlyaccessible in the climate bar.
2. Tap the seat ventilation button repeatedly to select one of four levels:
Off, High, Middleor Low.
> The level changes and is displayed in the button.
Page 210 of 546
LOADING AND STORAGE
* Option/accessory, for more information, see Introduction.
208
Cargo space
The vehicle has flexible cargo capacity that makes it possible to load and secure largeobjects.
By folding down the backrests in the second and third rows * of seats, the cargo capacity of the
vehicle increases considerably. To make loading easier, the rear section of the vehicle can beraised and lowered using the pneumatic suspen- sion *. Use the load anchoring eyelets or the gro-
cery bag holder to secure objects and the cargo compartment cover helps conceal the load. The jack * and tools can be found under the cargo
compartment's floor.
Related information
• Loading (p. 215)
• Cargo compartment cover
* (p. 221)
• Cargo net (p. 217)
• Grocery bag holder (p. 217)
• Load anchoring eyelets (p. 220)
• Steel cargo grid
* (p. 219)
Passenger compartment storage spaces
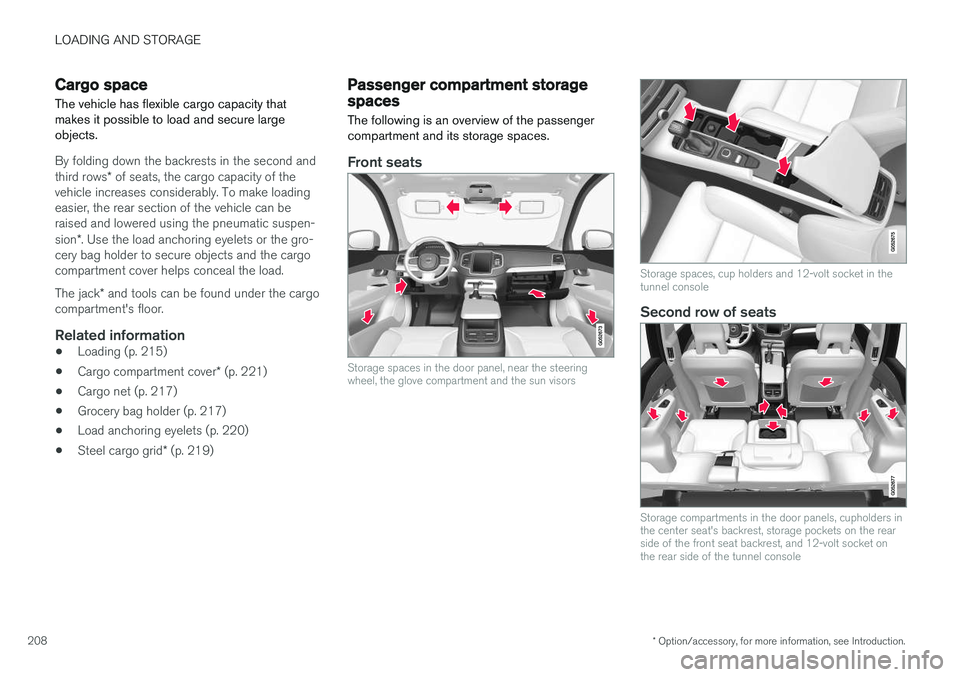
The following is an overview of the passenger compartment and its storage spaces.
Front seats
Storage spaces in the door panel, near the steering wheel, the glove compartment and the sun visors
Storage spaces, cup holders and 12-volt socket in the tunnel console
Second row of seats
Storage compartments in the door panels, cupholders in the center seat's backrest, storage pockets on the rearside of the front seat backrest, and 12-volt socket onthe rear side of the tunnel console
Page 211 of 546
LOADING AND STORAGE
}}
209
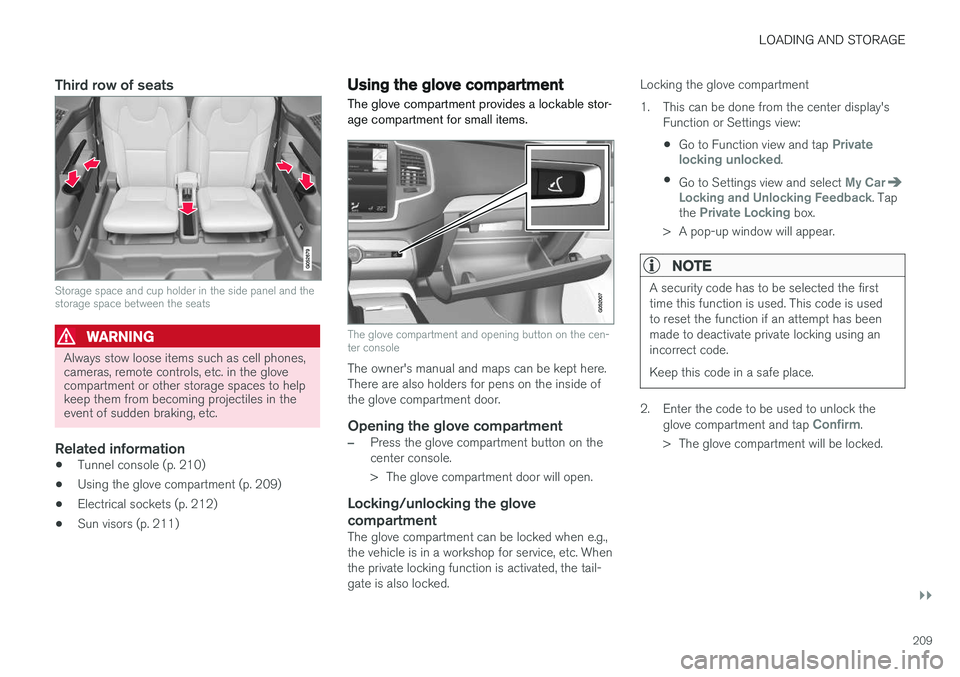
Third row of seats
Storage space and cup holder in the side panel and the storage space between the seats
WARNING
Always stow loose items such as cell phones, cameras, remote controls, etc. in the glovecompartment or other storage spaces to helpkeep them from becoming projectiles in theevent of sudden braking, etc.
Related information
•Tunnel console (p. 210)
• Using the glove compartment (p. 209)
• Electrical sockets (p. 212)
• Sun visors (p. 211)
Using the glove compartment
The glove compartment provides a lockable stor- age compartment for small items.
The glove compartment and opening button on the cen- ter console
The owner's manual and maps can be kept here. There are also holders for pens on the inside ofthe glove compartment door.
Opening the glove compartment
–Press the glove compartment button on the center console.
> The glove compartment door will open.
Locking/unlocking the glove compartment
The glove compartment can be locked when e.g., the vehicle is in a workshop for service, etc. Whenthe private locking function is activated, the tail-gate is also locked. Locking the glove compartment
1. This can be done from the center display's
Function or Settings view:
• Go to Function view and tap
Private
locking unlocked.
• Go to Settings view and select
My CarLocking and Unlocking Feedback. Tap
the Private Locking box.
> A pop-up window will appear.
NOTE
A security code has to be selected the first time this function is used. This code is usedto reset the function if an attempt has beenmade to deactivate private locking using anincorrect code. Keep this code in a safe place.
2. Enter the code to be used to unlock the glove compartment and tap Confirm.
> The glove compartment will be locked.
Page 212 of 546
||
LOADING AND STORAGE
* Option/accessory, for more information, see Introduction.
210 Unlocking the glove compartment
1. This function can be deactivated from the
center display's Function or Settings view:
• Go to Function view and tap
Private
locking locked.
• Go to settings and select
My CarLocking and Unlocking Feedback.
Deselect the Private Locking box.
> A pop-up window will appear.
2. Specify the code to be used to lock the glove compartment and tap
Confirm.
> The glove compartment will be unlocked.
Using the glove compartment as a cooler *
The glove compartment can be used to cool drinks or food and the cooling feature functionswhen the climate system is active (i.e., when the ignition is in mode II or when the engine is run-
ning).
Cooling activated
Cooling deactivated
–Activate/deactivate cooling by moving the control as far as possible toward the passen-ger compartment/glove compartment.
Related information
• Passenger compartment storage spaces (p. 208)
• Locking/unlocking the tailgate (p. 244)
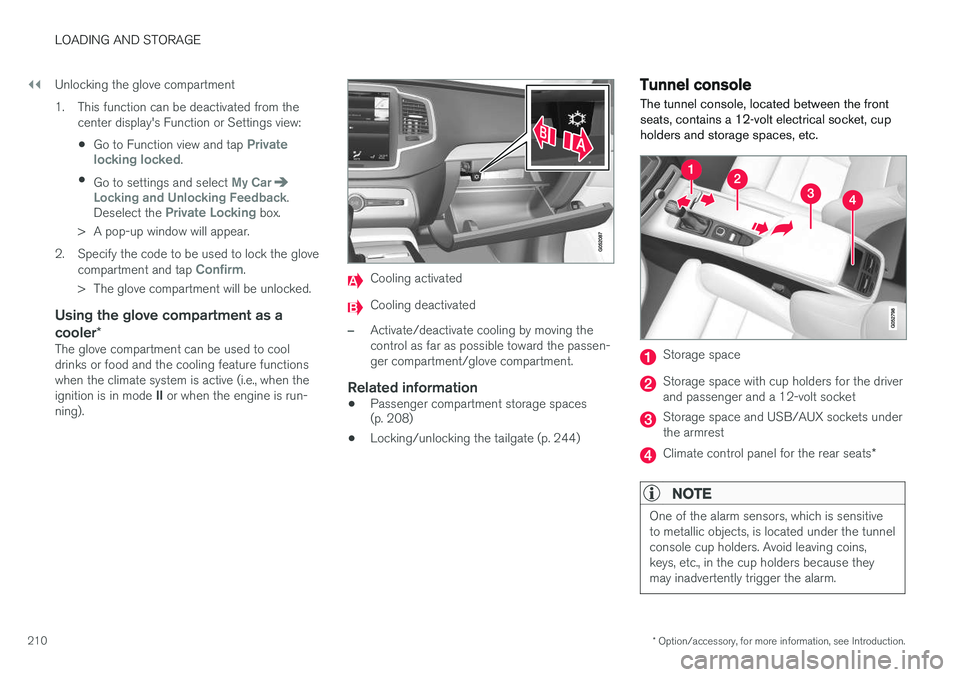
Tunnel console The tunnel console, located between the front seats, contains a 12-volt electrical socket, cupholders and storage spaces, etc.
Storage space
Storage space with cup holders for the driver and passenger and a 12-volt socket
Storage space and USB/AUX sockets under the armrest
Climate control panel for the rear seats
*
NOTE
One of the alarm sensors, which is sensitive to metallic objects, is located under the tunnelconsole cup holders. Avoid leaving coins,keys, etc., in the cup holders because theymay inadvertently trigger the alarm.
Page 217 of 546
LOADING AND STORAGE
}}
* Option/accessory, for more information, see Introduction.215
Loading
The load carrying capacity of your vehicle is determined by factors such as the number ofpassengers, the amount of cargo, the weight ofany accessories that may be installed, etc.
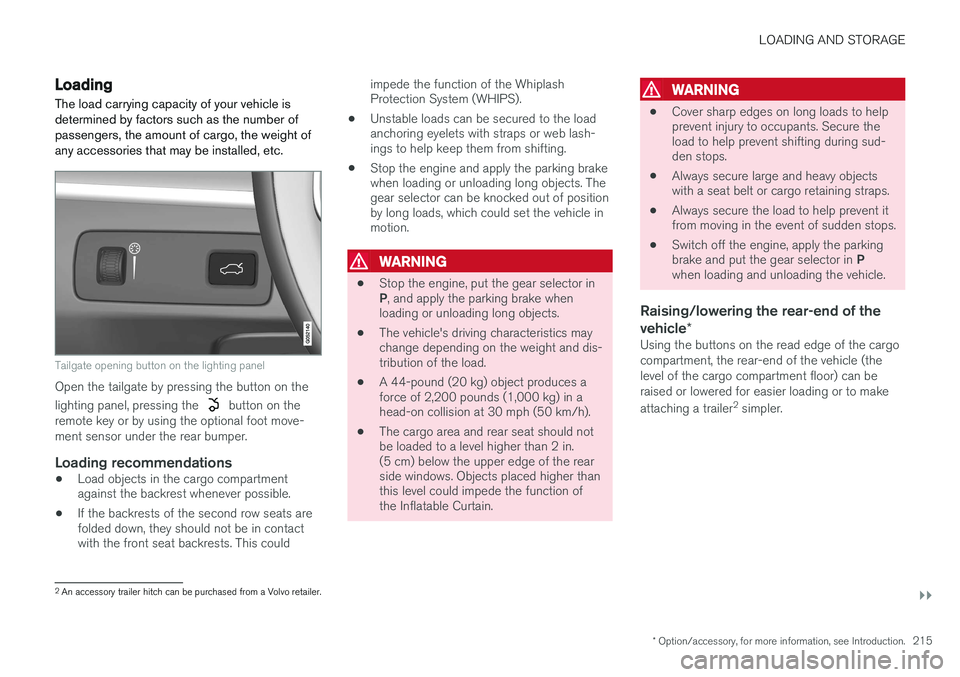
Tailgate opening button on the lighting panel
Open the tailgate by pressing the button on the lighting panel, pressing the
button on the
remote key or by using the optional foot move- ment sensor under the rear bumper.
Loading recommendations
• Load objects in the cargo compartment against the backrest whenever possible.
• If the backrests of the second row seats arefolded down, they should not be in contactwith the front seat backrests. This could impede the function of the WhiplashProtection System (WHIPS).
• Unstable loads can be secured to the loadanchoring eyelets with straps or web lash-ings to help keep them from shifting.
• Stop the engine and apply the parking brakewhen loading or unloading long objects. Thegear selector can be knocked out of positionby long loads, which could set the vehicle inmotion.
WARNING
•
Stop the engine, put the gear selector in P
, and apply the parking brake when
loading or unloading long objects.
• The vehicle's driving characteristics may change depending on the weight and dis-tribution of the load.
• A 44-pound (20 kg) object produces aforce of 2,200 pounds (1,000 kg) in ahead-on collision at 30 mph (50 km/h).
• The cargo area and rear seat should notbe loaded to a level higher than 2 in.(5 cm) below the upper edge of the rearside windows. Objects placed higher thanthis level could impede the function ofthe Inflatable Curtain.
WARNING
•
Cover sharp edges on long loads to help prevent injury to occupants. Secure theload to help prevent shifting during sud-den stops.
• Always secure large and heavy objectswith a seat belt or cargo retaining straps.
• Always secure the load to help prevent itfrom moving in the event of sudden stops.
• Switch off the engine, apply the parking brake and put the gear selector in
P
when loading and unloading the vehicle.
Raising/lowering the rear-end of the vehicle *
Using the buttons on the read edge of the cargo compartment, the rear-end of the vehicle (thelevel of the cargo compartment floor) can beraised or lowered for easier loading or to make attaching a trailer 2
simpler.
2 An accessory trailer hitch can be purchased from a Volvo retailer.
Page 218 of 546
||
LOADING AND STORAGE
* Option/accessory, for more information, see Introduction.
216
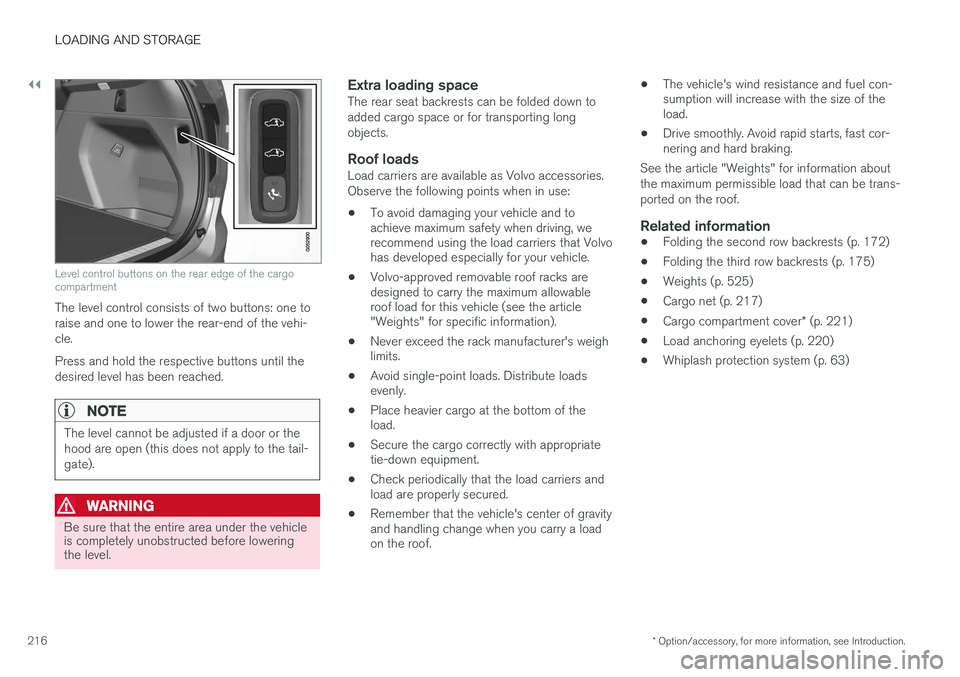
Level control buttons on the rear edge of the cargo compartment
The level control consists of two buttons: one to raise and one to lower the rear-end of the vehi-cle. Press and hold the respective buttons until the desired level has been reached.
NOTE
The level cannot be adjusted if a door or the hood are open (this does not apply to the tail-gate).
WARNING
Be sure that the entire area under the vehicle is completely unobstructed before loweringthe level.
Extra loading spaceThe rear seat backrests can be folded down to added cargo space or for transporting longobjects.
Roof loadsLoad carriers are available as Volvo accessories.Observe the following points when in use:
• To avoid damaging your vehicle and to achieve maximum safety when driving, werecommend using the load carriers that Volvohas developed especially for your vehicle.
• Volvo-approved removable roof racks aredesigned to carry the maximum allowableroof load for this vehicle (see the article"Weights" for specific information).
• Never exceed the rack manufacturer's weighlimits.
• Avoid single-point loads. Distribute loadsevenly.
• Place heavier cargo at the bottom of theload.
• Secure the cargo correctly with appropriatetie-down equipment.
• Check periodically that the load carriers andload are properly secured.
• Remember that the vehicle's center of gravityand handling change when you carry a loadon the roof. •
The vehicle's wind resistance and fuel con-sumption will increase with the size of theload.
• Drive smoothly. Avoid rapid starts, fast cor-nering and hard braking.
See the article "Weights" for information about the maximum permissible load that can be trans-ported on the roof.
Related information
• Folding the second row backrests (p. 172)
• Folding the third row backrests (p. 175)
• Weights (p. 525)
• Cargo net (p. 217)
• Cargo compartment cover
* (p. 221)
• Load anchoring eyelets (p. 220)
• Whiplash protection system (p. 63)
Page 219 of 546
LOADING AND STORAGE
}}
* Option/accessory, for more information, see Introduction.217
Grocery bag holder
The grocery bag holders (hooks) and elastic strap help keep shopping bags in place.
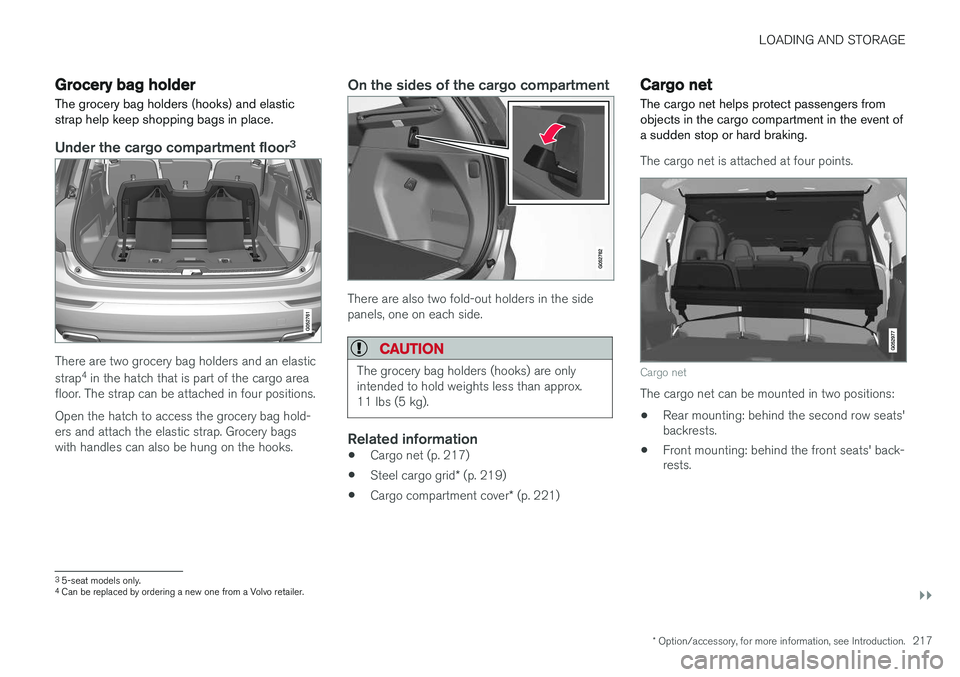
Under the cargo compartment floor 3
There are two grocery bag holders and an elastic strap
4
in the hatch that is part of the cargo area
floor. The strap can be attached in four positions. Open the hatch to access the grocery bag hold- ers and attach the elastic strap. Grocery bagswith handles can also be hung on the hooks.
On the sides of the cargo compartment
There are also two fold-out holders in the side panels, one on each side.
CAUTION
The grocery bag holders (hooks) are only intended to hold weights less than approx.11 lbs (5 kg).
Related information
• Cargo net (p. 217)
• Steel cargo grid
* (p. 219)
• Cargo compartment cover
* (p. 221)
Cargo net
The cargo net helps protect passengers from objects in the cargo compartment in the event ofa sudden stop or hard braking.
The cargo net is attached at four points.
Cargo net
The cargo net can be mounted in two positions: • Rear mounting: behind the second row seats' backrests.
• Front mounting: behind the front seats' back-rests.
3
5-seat models only.4
Can be replaced by ordering a new one from a Volvo retailer.