center console VOLVO XC90 T8 2017 Owner´s Manual
[x] Cancel search | Manufacturer: VOLVO, Model Year: 2017, Model line: XC90 T8, Model: VOLVO XC90 T8 2017Pages: 580, PDF Size: 10.37 MB
Page 183 of 580
INSTRUMENTS AND CONTROLS
}}
181
3.
Save the changes by tapping
Back/Close.
> The name has now been changed.
Resetting driver profile changesSettings that have been changed and saved in one or more driver profiles can be reset.
NOTE
Factory Reset is only possible when the
vehicle is stationary.
1. Tap Settings in the center display's Top
view.
2. Select
SystemFactory ResetReset
Personal Settings.
3. Select one of the following:
Reset for the
active profile, Reset for all profiles orCancel.
Related information
• Driver profiles (p. 179)
• Resetting the settings view (p. 117)
• Using the center display keyboard (p. 36)
• Using the center display (p. 49)
• Selecting a driver profile (p. 180)
Linking a remote key to a driver profile A remote key can be linked to a driver profile, which means that all of the settings stored in thedriver profile will apply each time that particularremote key is used with the vehicle.
A remote key is not initially linked to a specific driver profile. When the key is used to unlock thevehicle/start the engine for the first time, the
Guest profile will be used.
A driver profile can be selected manually each time the vehicle is unlocked/started without aremote key being linked to that profile. When thevehicle is started, the most recently selecteddriver profile will be activated. If the key has previ-ously been linked to a driver profile, it is not nec-essary to manually select a profile when that par-ticular key is used.
Linking a remote key to a driver profile for the first time
Select a profile to link to the remote key (if that profile is not already active).
1. Pull down the center display's Top view and tap
Settings.
2. Tap
SystemDriver Profiles.
3. Tap the profile to be linked to the remote key. The
Guest profile cannot be linked to a
remote key. 4. Open Top view in the center display and tap
SettingsSystemDriver ProfilesEdit Profile.
5. Select
Connect key to link the selected pro-
file to the remote key currently being used. A profile can only be linked to the remote keythat is currently being used. If there are sev-eral keys in the vehicle at the same time,
More than one key is found, put the key you want to connect on backup reader
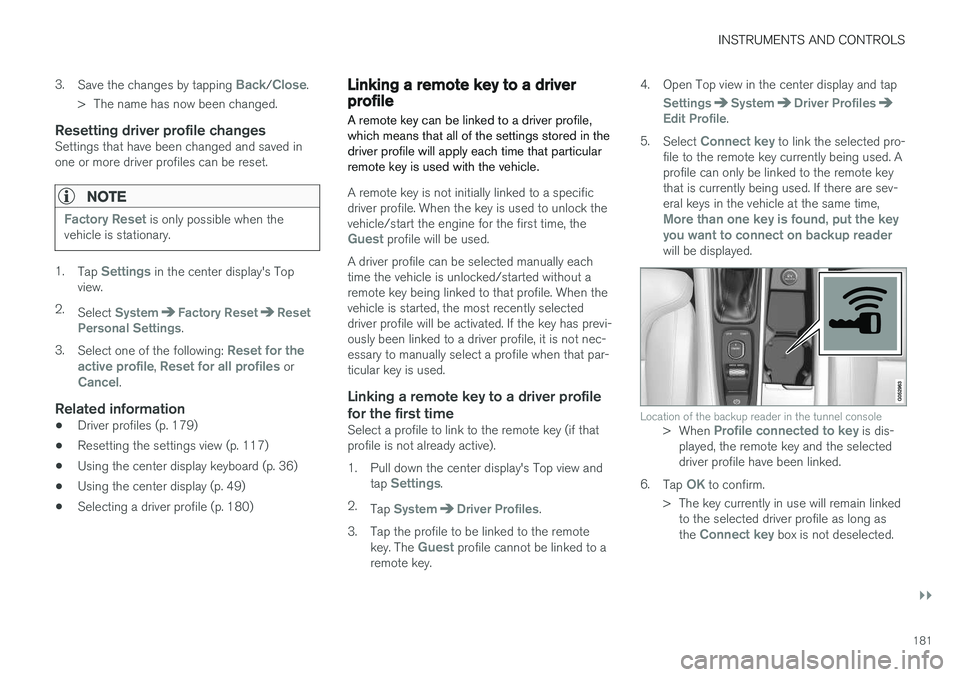
will be displayed.
Location of the backup reader in the tunnel console> When Profile connected to key is dis-
played, the remote key and the selected driver profile have been linked.
6. Tap
OK to confirm.
> The key currently in use will remain linked to the selected driver profile as long as the
Connect key box is not deselected.
Page 184 of 580
||
INSTRUMENTS AND CONTROLS
182
Related information
•Driver profiles (p. 179)
• Editing a driver profile (p. 180)
• Remote key (p. 235)
Importing/exporting a driver profile from/to a USB flash drive The personal settings stored in a driver profile can be imported or exported to another vehicleusing a USB flash drive.
The following steps describe the procedure for importing or exporting personal settings saved ina driver profile to a USB flash drive: 1.
Tap
Settings in the center display's Top
view.
2. Tap
SystemDriver Profiles.
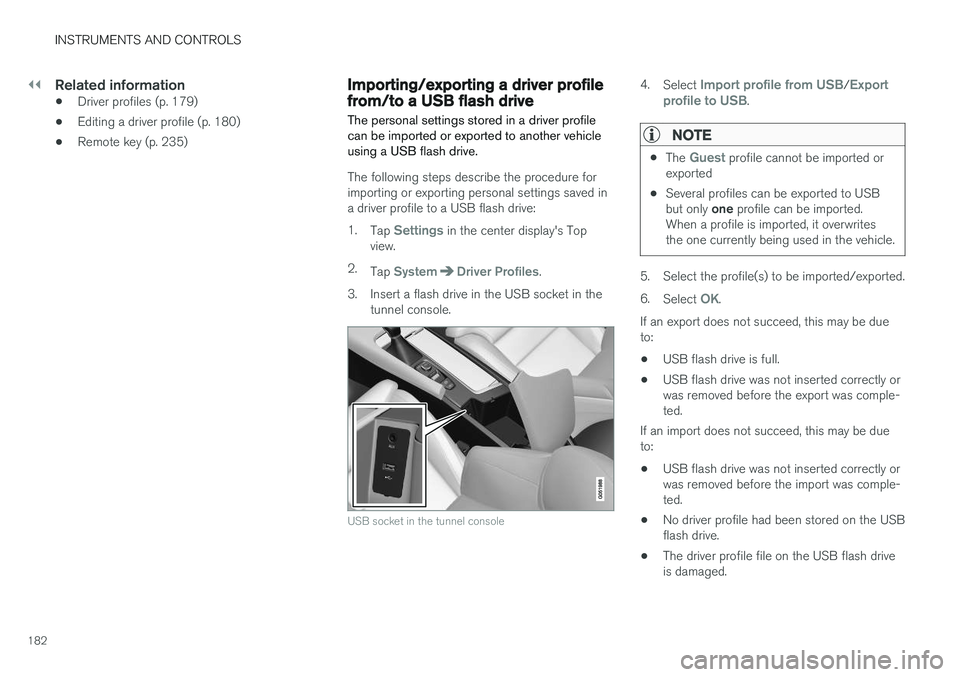
3. Insert a flash drive in the USB socket in the tunnel console.
USB socket in the tunnel console
4. Select Import profile from USB/Export
profile to USB.
NOTE
• The Guest profile cannot be imported or
exported
• Several profiles can be exported to USB but only
one profile can be imported.
When a profile is imported, it overwrites the one currently being used in the vehicle.
5. Select the profile(s) to be imported/exported. 6. Select
OK.
If an export does not succeed, this may be due to:
• USB flash drive is full.
• USB flash drive was not inserted correctly orwas removed before the export was comple-ted.
If an import does not succeed, this may be dueto:
• USB flash drive was not inserted correctly orwas removed before the import was comple-ted.
• No driver profile had been stored on the USBflash drive.
• The driver profile file on the USB flash driveis damaged.
Page 188 of 580
CLIMATE
186
Climate control systemThe vehicle is equipped with Electronic Climate Control (ECC) that cools, heats, dehumidifiesand filters the air in the passenger compartment.
4-zone climate system
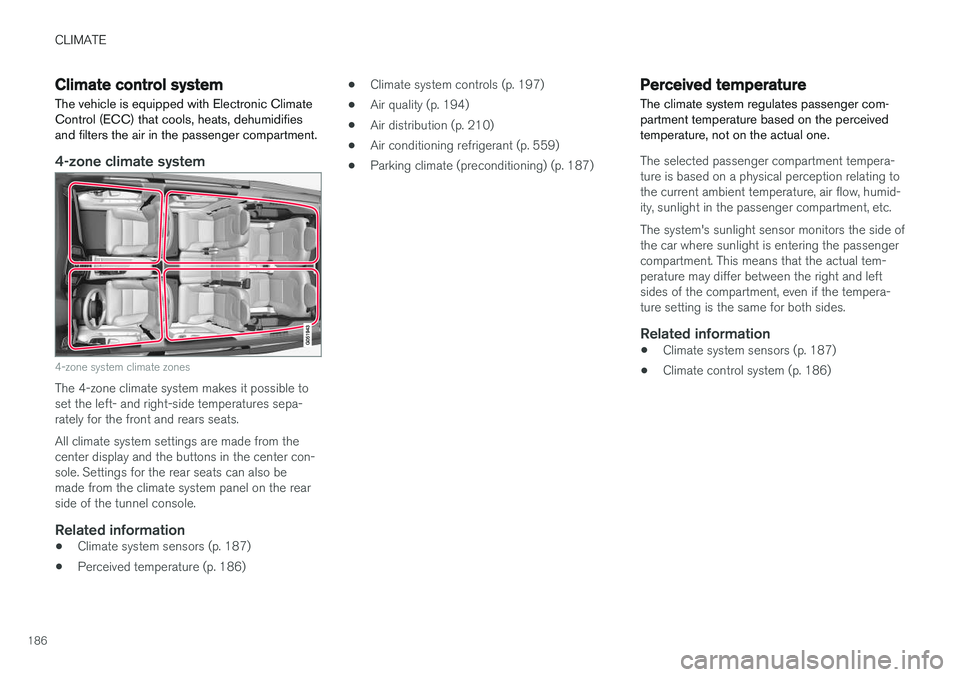
4-zone system climate zones
The 4-zone climate system makes it possible to set the left- and right-side temperatures sepa-rately for the front and rears seats. All climate system settings are made from the center display and the buttons in the center con-sole. Settings for the rear seats can also bemade from the climate system panel on the rearside of the tunnel console.
Related information
• Climate system sensors (p. 187)
• Perceived temperature (p. 186) •
Climate system controls (p. 197)
• Air quality (p. 194)
• Air distribution (p. 210)
• Air conditioning refrigerant (p. 559)
• Parking climate (preconditioning) (p. 187)
Perceived temperature
The climate system regulates passenger com- partment temperature based on the perceivedtemperature, not on the actual one.
The selected passenger compartment tempera- ture is based on a physical perception relating tothe current ambient temperature, air flow, humid-ity, sunlight in the passenger compartment, etc. The system's sunlight sensor monitors the side of the car where sunlight is entering the passengercompartment. This means that the actual tem-perature may differ between the right and leftsides of the compartment, even if the tempera-ture setting is the same for both sides.
Related information
• Climate system sensors (p. 187)
• Climate control system (p. 186)
Page 189 of 580
CLIMATE
}}
* Option/accessory.187
Climate system sensors The climate system's sensors help regulate the passenger compartment temperature, humiditylevel, etc.
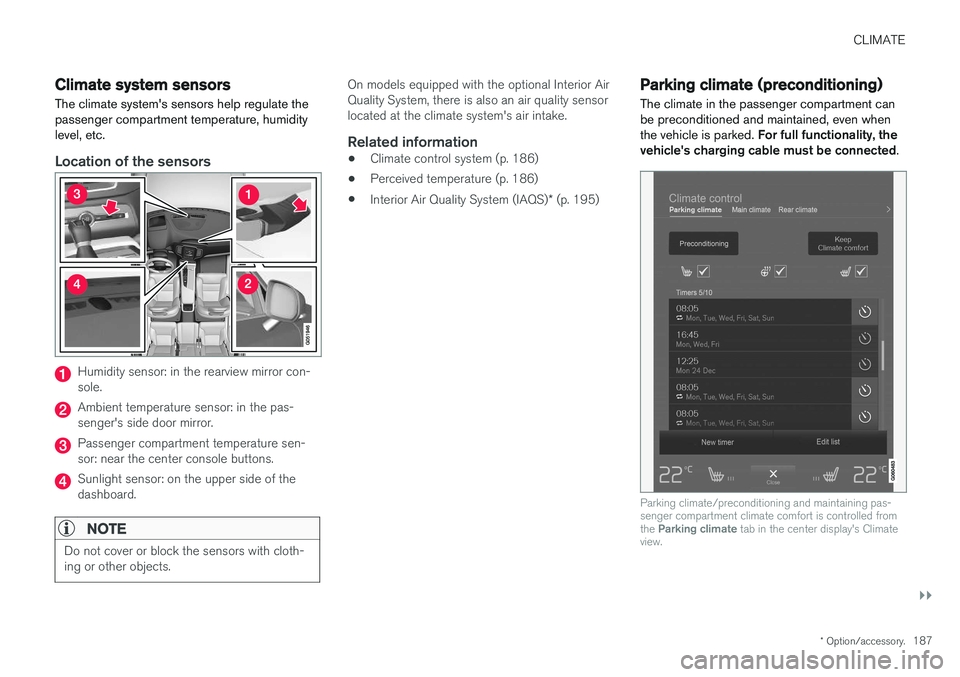
Location of the sensors
Humidity sensor: in the rearview mirror con- sole.
Ambient temperature sensor: in the pas- senger's side door mirror.
Passenger compartment temperature sen- sor: near the center console buttons.
Sunlight sensor: on the upper side of the dashboard.
NOTE
Do not cover or block the sensors with cloth- ing or other objects.
On models equipped with the optional Interior Air Quality System, there is also an air quality sensorlocated at the climate system's air intake.
Related information
•Climate control system (p. 186)
• Perceived temperature (p. 186)
• Interior Air Quality System (IAQS)
* (p. 195)
Parking climate (preconditioning)
The climate in the passenger compartment can be preconditioned and maintained, even whenthe vehicle is parked. For full functionality, the
vehicle's charging cable must be connected .
Parking climate/preconditioning and maintaining pas- senger compartment climate comfort is controlled from the Parking climate tab in the center display's Climate
view.
Page 199 of 580
CLIMATE
}}
* Option/accessory.197
Climate system controls
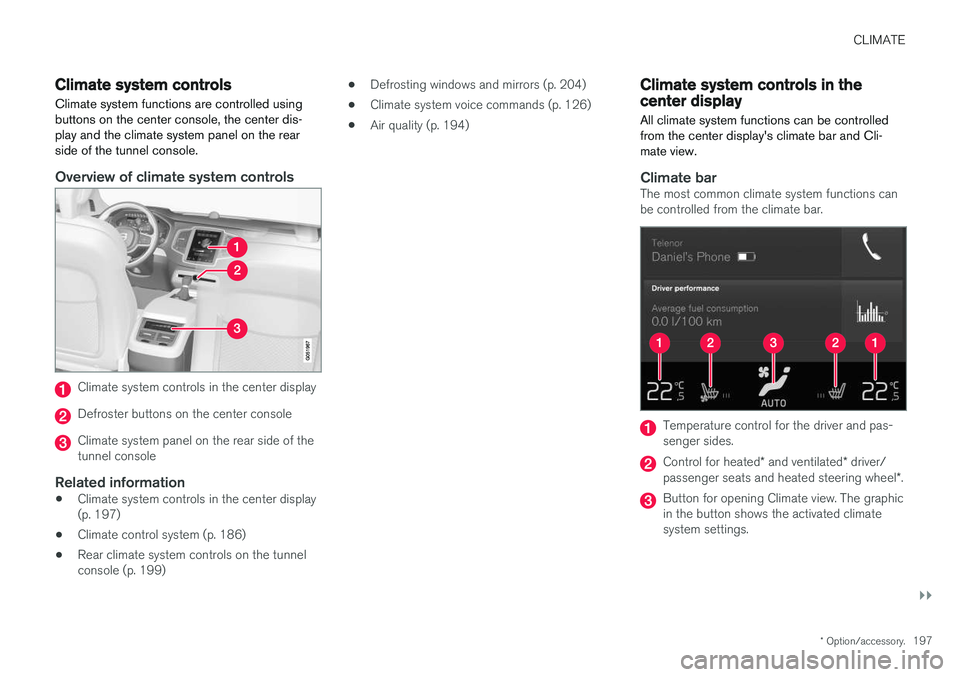
Climate system functions are controlled using buttons on the center console, the center dis-play and the climate system panel on the rearside of the tunnel console.
Overview of climate system controls
Climate system controls in the center display
Defroster buttons on the center console
Climate system panel on the rear side of the tunnel console
Related information
• Climate system controls in the center display(p. 197)
• Climate control system (p. 186)
• Rear climate system controls on the tunnelconsole (p. 199) •
Defrosting windows and mirrors (p. 204)
• Climate system voice commands (p. 126)
• Air quality (p. 194)
Climate system controls in the center display
All climate system functions can be controlled from the center display's climate bar and Cli-mate view.
Climate barThe most common climate system functions can be controlled from the climate bar.
Temperature control for the driver and pas- senger sides.
Control for heated * and ventilated * driver/
passenger seats and heated steering wheel *.
Button for opening Climate view. The graphic in the button shows the activated climatesystem settings.
Page 201 of 580
CLIMATE
}}
* Option/accessory.199
Rear seat temperature control.
Rear seat heating control *.
Parking climate 2
All of the parking climate functions can be con- trolled from the Parking climate tab.
Related information
•
Climate system controls (p. 197)
• Defrosting windows and mirrors (p. 204)
• Air conditioning (p. 207)
• Adjusting air distribution (p. 211)
• Setting the temperature (p. 201)
• Setting the blower speed (p. 199)
• Automatic climate control (p. 196)
• Turning steering wheel heating
* on and off
(p. 206)
• Turning seat heating
* on and off (p. 208)
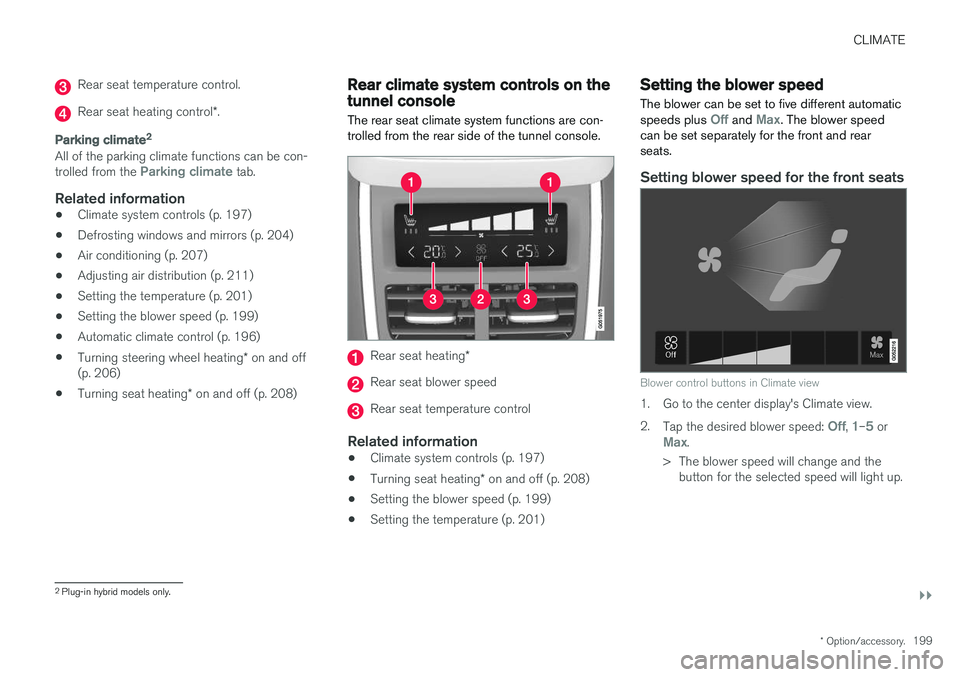
Rear climate system controls on the tunnel console
The rear seat climate system functions are con- trolled from the rear side of the tunnel console.
Rear seat heating *
Rear seat blower speed
Rear seat temperature control
Related information
•Climate system controls (p. 197)
• Turning seat heating
* on and off (p. 208)
• Setting the blower speed (p. 199)
• Setting the temperature (p. 201)
Setting the blower speed The blower can be set to five different automatic speeds plus
Off and Max. The blower speed
can be set separately for the front and rear seats.
Setting blower speed for the front seats
Blower control buttons in Climate view
1. Go to the center display's Climate view. 2. Tap the desired blower speed:
Off, 1–5 orMax.
> The blower speed will change and the button for the selected speed will light up.
2Plug-in hybrid models only.
Page 202 of 580
||
CLIMATE
200
NOTE
If the blower is turned off completely, the air conditioning is disengaged, which may resultin fogging on the windows.
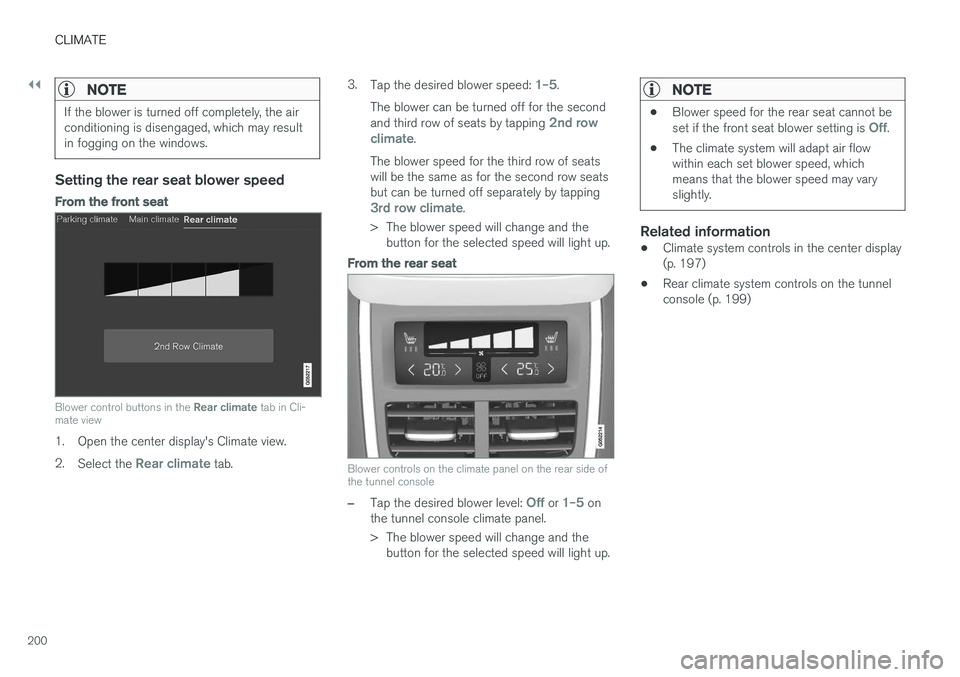
Setting the rear seat blower speed
From the front seat
Blower control buttons in the Rear climate tab in Cli-
mate view
1. Open the center display's Climate view. 2. Select the
Rear climate tab. 3.
Tap the desired blower speed:
1–5.
The blower can be turned off for the second and third row of seats by tapping
2nd row
climate.
The blower speed for the third row of seats will be the same as for the second row seatsbut can be turned off separately by tapping
3rd row climate.
> The blower speed will change and the button for the selected speed will light up.
From the rear seat
Blower controls on the climate panel on the rear side of the tunnel console
–Tap the desired blower level: Off or 1–5 on
the tunnel console climate panel.
> The blower speed will change and the button for the selected speed will light up.
NOTE
• Blower speed for the rear seat cannot be set if the front seat blower setting is Off.
• The climate system will adapt air flow within each set blower speed, whichmeans that the blower speed may varyslightly.
Related information
• Climate system controls in the center display (p. 197)
• Rear climate system controls on the tunnelconsole (p. 199)
Page 204 of 580
||
CLIMATE
202
Setting the rear seat temperature
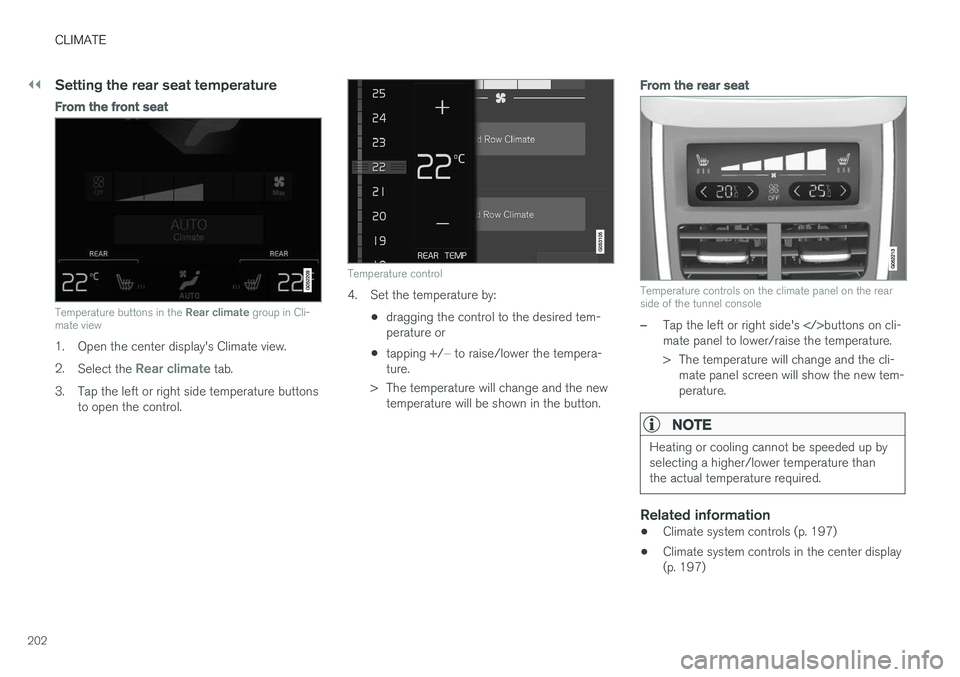
From the front seat
Temperature buttons in the Rear climate group in Cli-
mate view
1. Open the center display's Climate view. 2. Select the
Rear climate tab.
3. Tap the left or right side temperature buttons to open the control.
Temperature control
4. Set the temperature by:
•dragging the control to the desired tem- perature or
• tapping
+/− to raise/lower the tempera-
ture.
> The temperature will change and the new temperature will be shown in the button.
From the rear seat
Temperature controls on the climate panel on the rear side of the tunnel console
–Tap the left or right side's buttons on cli-
mate panel to lower/raise the temperature.
> The temperature will change and the cli- mate panel screen will show the new tem- perature.
NOTE
Heating or cooling cannot be speeded up by selecting a higher/lower temperature thanthe actual temperature required.
Related information
• Climate system controls (p. 197)
• Climate system controls in the center display (p. 197)
Page 205 of 580
CLIMATE
203
•
Rear climate system controls on the tunnel console (p. 199)
• Perceived temperature (p. 186)
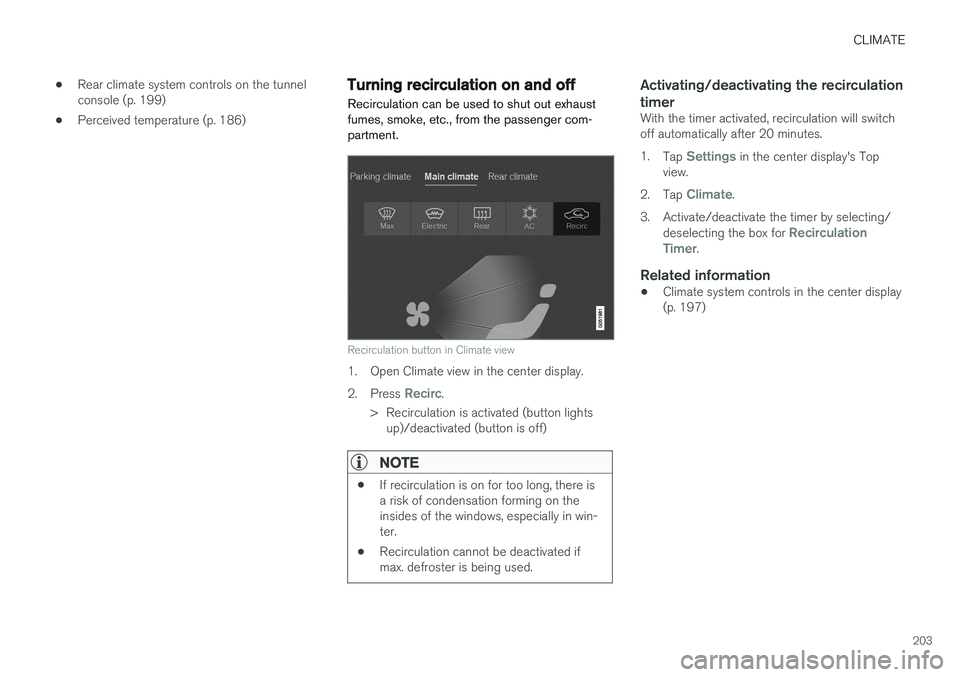
Turning recirculation on and off
Recirculation can be used to shut out exhaust fumes, smoke, etc., from the passenger com-partment.
Recirculation button in Climate view
1. Open Climate view in the center display. 2. Press
Recirc.
> Recirculation is activated (button lights up)/deactivated (button is off)
NOTE
• If recirculation is on for too long, there is a risk of condensation forming on theinsides of the windows, especially in win-ter.
• Recirculation cannot be deactivated ifmax. defroster is being used.
Activating/deactivating the recirculation timer
With the timer activated, recirculation will switch off automatically after 20 minutes. 1.
Tap
Settings in the center display's Top
view.
2. Tap
Climate.
3. Activate/deactivate the timer by selecting/ deselecting the box for
Recirculation
Timer.
Related information
• Climate system controls in the center display (p. 197)
Page 206 of 580
CLIMATE
* Option/accessory.
204
Defrosting windows and mirrors
The max. defroster, heated windshield * and
heated rear window/door mirror functions are used to remove ice or condensation.
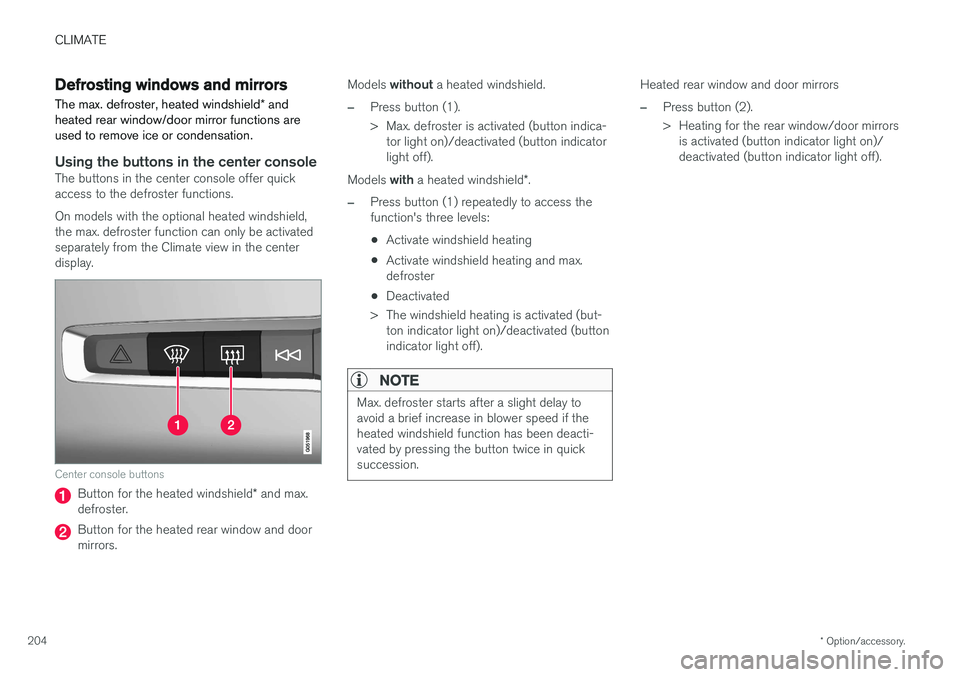
Using the buttons in the center consoleThe buttons in the center console offer quick access to the defroster functions. On models with the optional heated windshield, the max. defroster function can only be activatedseparately from the Climate view in the centerdisplay.
Center console buttons
Button for the heated windshield * and max.
defroster.
Button for the heated rear window and door mirrors. Models
without a heated windshield.
–Press button (1).
> Max. defroster is activated (button indica-
tor light on)/deactivated (button indicator light off).
Models with a heated windshield *.
–Press button (1) repeatedly to access the function's three levels:
• Activate windshield heating
• Activate windshield heating and max.defroster
• Deactivated
> The windshield heating is activated (but- ton indicator light on)/deactivated (buttonindicator light off).
NOTE
Max. defroster starts after a slight delay to avoid a brief increase in blower speed if theheated windshield function has been deacti-vated by pressing the button twice in quicksuccession.
Heated rear window and door mirrors
–Press button (2).
> Heating for the rear window/door mirrorsis activated (button indicator light on)/ deactivated (button indicator light off).