traction control VOLVO XC90 TWIN ENGINE 2018 Owners Manual
[x] Cancel search | Manufacturer: VOLVO, Model Year: 2018, Model line: XC90 TWIN ENGINE, Model: VOLVO XC90 TWIN ENGINE 2018Pages: 686, PDF Size: 17 MB
Page 41 of 686
YOUR VOLVO
39
Driver distraction
A driver has a responsibility to do everythingpossible to ensure his or her own safety and thesafety of passengers in the vehicle and otherssharing the roadway. Part of this responsibility isavoiding distractions, including performing activi-ties that are not directly related to controlling thevehicle in the driving environment.
Your new Volvo is, or can be, equipped with fea-ture-rich entertainment and communication sys-tems. These include hands-free cellular tele-phones, navigation systems, and multipurposeaudio systems. You may also own other portableelectronic devices for your own convenience.When used properly and safely, they enrich thedriving experience. Improperly used, any of thesecould cause a distraction.
For all of these systems, we want to provide thefollowing warning that reflects the strong Volvoconcern for your safety. Never use these devicesor any feature of your vehicle in a way that dis-tracts you from the task of driving safely. Distrac-tion can lead to a serious accident. In addition tothis general warning, we offer the following guid-ance regarding specific new features that may befound in your vehicle:
WARNING
•Never use a hand-held cellular telephonewhile driving. Some jurisdictions prohibitcellular telephone use by a driver whilethe vehicle is moving.
•If your vehicle is equipped with a naviga-tion system, set and make changes toyour travel itinerary only with the vehicleparked.
•Never program your audio system whilethe vehicle is moving. Program radio pre-sets with the vehicle parked, and use yourprogrammed presets to make radio usequicker and simpler.
•Never use portable computers or per-sonal digital assistants while the vehicleis moving.
Related information
•Audio, media and Internet (p. 486)
Page 117 of 686
DISPLAYS AND VOICE CONTROL
}}
* Option/accessory. 115
Activating and deactivating the
center display
The center display can be dimmed and reactiva-
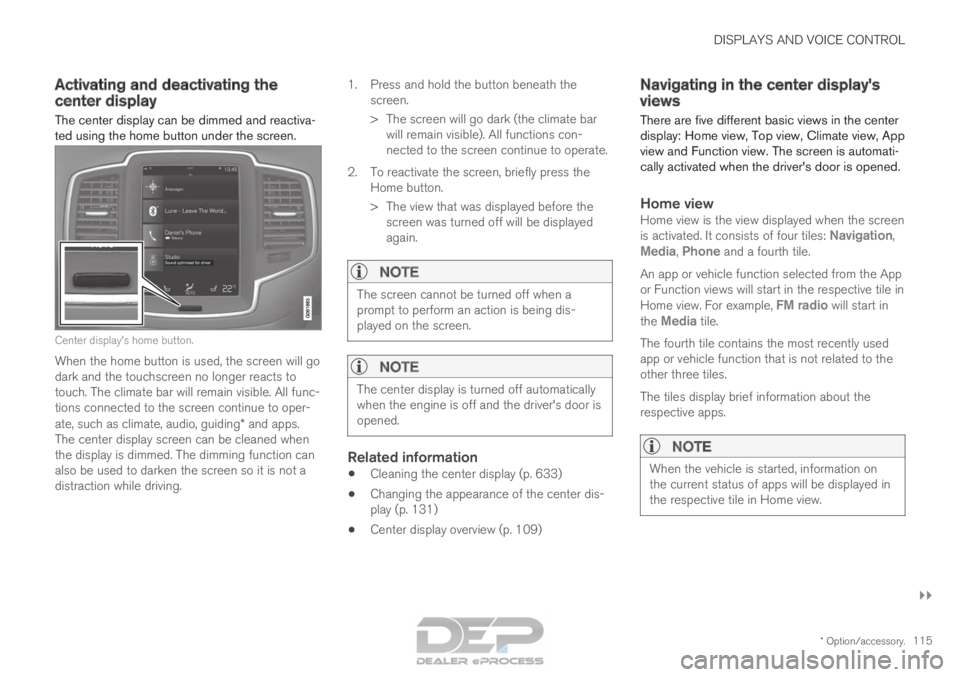
ted using the home button under the screen. Center display's home button.
When the home button is used, the screen will go
dark and the touchscreen no longer reacts to
touch. The climate bar will remain visible. All func-
tions connected to the screen continue to oper-
ate, such as climate, audio, guiding* and apps.
The center display screen can be cleaned when
the display is dimmed. The dimming function can
also be used to darken the screen so it is not a
distraction while driving. 1.
Press and hold the button beneath the
screen.
> The screen will go dark (the climate bar will remain visible). All functions con-
nected to the screen continue to operate.
2. To reactivate the screen, briefly press the Home button.
> The view that was displayed before thescreen was turned off will be displayed
again.
NOTE The screen cannot be turned off when a
prompt to perform an action is being dis-
played on the screen.
NOTE
The center display is turned off automatically
when the engine is off and the driver's door is
opened.
Related information
•
Cleaning the center display (p. 633)
• Changing the appearance of the center dis-
play (p. 131)
• Center display overview (p. 109) Navigating in the center display's
views
There are five different basic views in the center
display: Home view, Top view, Climate view, App
view and Function view. The screen is automati-
cally activated when the driver's door is opened.
Home viewHome view is the view displayed when the screen
is activated. It consists of four tiles: Navigation,
Media, Phone and a fourth tile.
An app or vehicle function selected from the App
or Function views will start in the respective tile in
Home view. For example, FM radio will start in
the
Media tile.
The fourth tile contains the most recently used
app or vehicle function that is not related to the
other three tiles.
The tiles display brief information about the
respective apps.
NOTE When the vehicle is started, information on
the current status of apps will be displayed in
the respective tile in Home view.
Page 147 of 686
DISPLAYS AND VOICE CONTROL
}}
* Option/accessory. 145Lowering position
Confirm
The brightness of the graphic is automatically
adapted to the light conditions in its background.
Brightness is also affected by adjustments to the
brightness of the other displays in the vehicle.
The height position can be stored in the front
power seat's* memory function.
Calibrating the horizontal positionIf the windshield or display unit has been
replaced, the head-up display's horizontal posi-
tion may need to be calibrated. Calibration means
that the projected image is rotated clockwise or
counterclockwise.
1. Tap Settings in the center display's Top
view.
2.
Select My Car Displays Head-Up
Display Options Head-Up Display
Calibration .
3.
Calibrate the horizontal position of the image
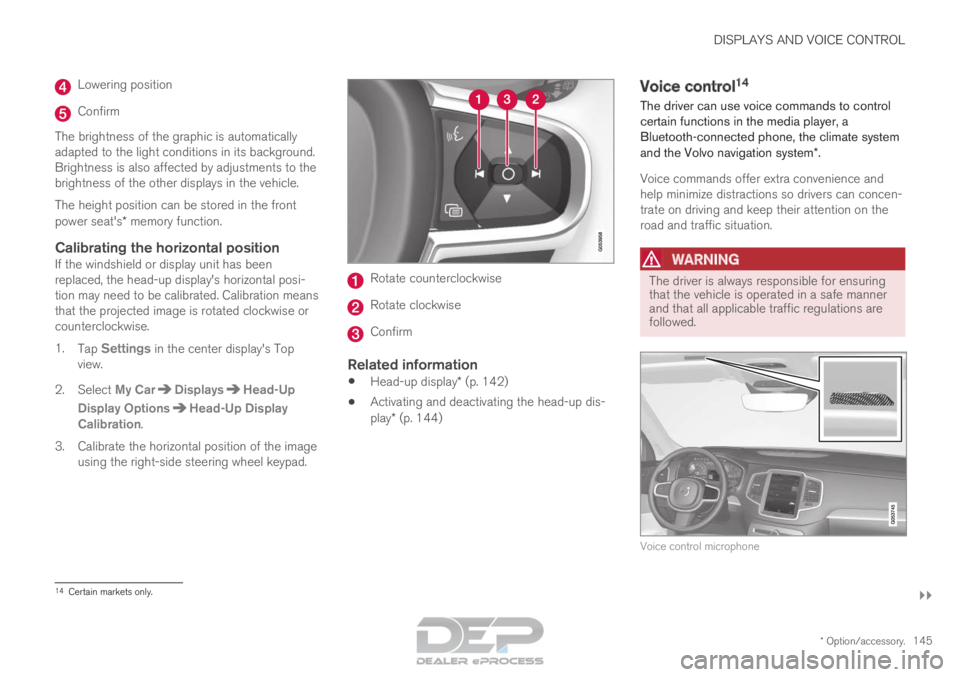
using the right-side steering wheel keypad. Rotate counterclockwise
Rotate clockwise
Confirm
Related information
•
Head-up display* (p. 142)
• Activating and deactivating the head-up dis-
play* (p. 144) Voice control
14
The driver can use voice commands to control
certain functions in the media player, a
Bluetooth-connected phone, the climate system
and the Volvo navigation system*.
Voice commands offer extra convenience and
help minimize distractions so drivers can concen-
trate on driving and keep their attention on the
road and traffic situation.
WARNING The driver is always responsible for ensuring
that the vehicle is operated in a safe manner
and that all applicable traffic regulations are
followed.
Voice control microphone
14
Certain markets only.
Page 276 of 686
DRIVER SUPPORT
* Option/accessory.
274 Electronic Stability Control
The Electronic Stability Control (ESC 2
) function
helps the driver avoid skidding and improves the
vehicle's directional stability.
This symbol will be displayed in
the instrument panel when the
ESC system is intervening.
When the ESC has intervened
to apply the brakes, a pulsing
sound may be heard and the
vehicle may accelerate more slowly than expec-
ted when the accelerator pedal is depressed. The ESC system consists of the following sub-
functions:
•
Stability control 3
• Spin control and active yaw control
• Engine drag control
• Trailer Stability Assist
WARNING •
The Electronic Stability Control system
ESC is supplementary driver support
intended to facilitate driving and make it
safer – it cannot handle all situations in
all traffic, weather and road conditions.
• ESC is not a substitute for the driver's
attention and judgment. The driver is
always responsible for ensuring the vehi-
cle is driven in a safe manner, at the
appropriate speed, with an appropriate
distance to other vehicles, and in accord-
ance with current traffic rules and regula-
tions.
Stability control 3This function helps control the driving and brak-
ing force of each individual wheel in an attempt
to stabilize the vehicle.
Spin control and active yaw controlThis function is active at low speeds and brakes
the wheels that are spinning to transfer additional
power from wheels that are not spinning.
This function also helps prevent the wheels from
spinning while the vehicle is accelerating.
Engine drag control
Engine drag control (EDC
4
) helps prevent inad-
vertent wheel lock, e.g. after downshifting or
using engine braking when driving at low speeds
on a slippery surface.
Inadvertent wheel lock while driving could impair
the driver's ability to steer the vehicle.
Trailer Stability Assist* 5
Trailer Stability Assist (TSA
6
) is designed to help
stabilize a vehicle that is towing a trailer if the
vehicle and trailer have begun to sway. For more
information, see "Trailer Stability Assist".
NOTE The TSA function is deactivated if
ESC Sport
Mode is activated.
Related information
• Electronic Stability Control Sport mode
(p. 275)
• Activating/deactivating Sport mode in Elec-
tronic Stability Control (p. 275) 1
Roll Stability Control
2 Electronic Stability Control
3 Also called traction control.
4 Engine Drag Control
5Trailer Stability Assist is included if the vehicle is equipped with a V\
olvo original towbar.6 Trailer Stability Assist
Page 277 of 686
DRIVER SUPPORT
275
•
Electronic Stability Control Sport mode limi-
tations (p. 276)
• Electronic Stability Control symbols and mes-
sages (p. 277) Electronic Stability Control Sport
mode
The ESC 7
system is always activated and can-
not be switched off. However, the driver can
select ESC Sport Mode, which offers more
active driving characteristics.
With the
ESC Sport Mode sub-function
selected, intervention from ESC is reduced and
more lateral movement is permitted, giving the
driver more control of the vehicle than usual.
When ESC Sport Mode is selected, ESC may
seem to be disabled even though it is often
assisting the driver.
NOTE When the
ESC Sport Mode function is
selected, the trailer stabilizer (TSA 8
) is
switched off. ESC Sport Mode also helps provide maximum
traction if the vehicle gets stuck or is driving on a
loose surface such as deep snow or loose sand.
Related information
• Electronic Stability Control (p. 274) Activating/deactivating Sport mode
in Electronic Stability Control
The ESC
9
system is always activated and can-
not be switched off. However, the driver can
select Sport mode, which offers more active
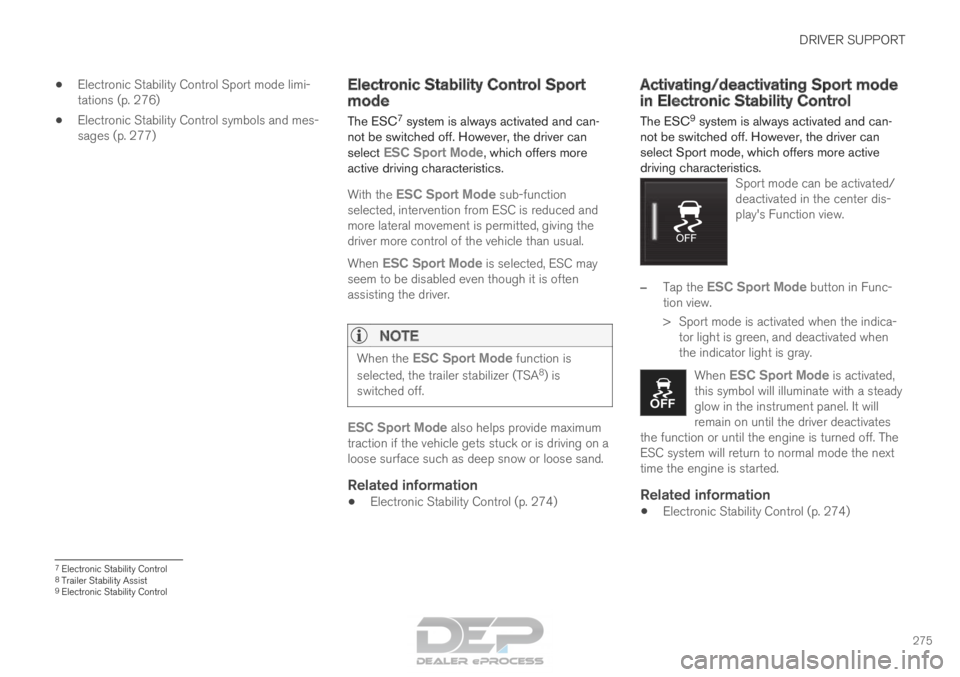
driving characteristics. Sport mode can be activated/
deactivated in the center dis-
play's Function view. –
Tap the
ESC Sport Mode button in Func-
tion view.
>
Sport mode is activated when the indica-
tor light is green, and deactivated when
the indicator light is gray.
When ESC Sport Mode is activated,
this symbol will illuminate with a steady
glow in the instrument panel. It will
remain on until the driver deactivates
the function or until the engine is turned off. The
ESC system will return to normal mode the next
time the engine is started.
Related information
• Electronic Stability Control (p. 274) 7
Electronic Stability Control
8 Trailer Stability Assist
9 Electronic Stability Control
Page 291 of 686

DRIVER SUPPORT
289
Cruise Control Eco Cruise
In the ECO drive mode, cruise control's accelera-
tion and deceleration will be smoother than in
other drive modes to help provide optimal fuel
efficiency and reduced environmental impact.
Because of this, the vehicle's actual speed may
be slightly above or below the set speed.
Cruise Control Dynamic Cruise
With the Dynamic drive mode, cruise control's
acceleration and deceleration will be faster and
more immediate than in other drive modes.
Related information
•Cruise control (p. 286) Deactivating and putting Cruise
Control in standby mode
Cruise Control (CC 31
) can be temporarily put
into standby mode and then reactivated.
Deactivating and putting Cruise Control
in standby mode Note: This illustration is general and details may vary
depending on model.
To put Cruise Control in standby mode:
–
Press the button on the steering wheel
(2).
>
The Cruise Control markings and symbols
will change from WHITE to GRAY, indicat-
ing that Cruise Control is temporarily
deactivated and the driver needs to con-
trol the vehicle's speed.
Standby mode due to action by the driver
Cruise Control will be temporarily deactivated and
put in standby mode if:
• the brakes are applied
• the gear selector is moved to N
• the vehicle is driven faster than the set
speed for more than 1 minute
The driver must then control the vehicle's speed.
Temporarily increasing speed using the accelera-
tor pedal, e.g. when passing another vehicle, will
not affect the setting. The vehicle will return to
the set speed when the accelerator pedal is
released.
Automatic standby mode
Cruise Control will be temporarily deactivated and
put in standby mode if:
• the wheels lose traction
• the engine speed (rpm) is too low/high
• the temperature in the brake system
becomes too high
• the vehicle's speed goes below 30 km/h
(20 mph).
The driver must then control the vehicle's speed.
Related information
• Cruise control (p. 286) 31
Cruise Control
Page 305 of 686
DRIVER SUPPORT
}}
303
To temporarily deactivate Adaptive Cruise Control
and put it in standby mode:
– Press the button on the steering wheel
(2).
> The symbol in the instrument panel
changes color from WHITE to GRAY and
the set speed in the center of the speed-
ometer will change from BEIGE to GRAY.
WARNING •
If Adaptive Cruise Control is in standby
mode, the driver must intervene and regu-
late both speed and distance to the vehicle
ahead.
• If the vehicle comes too close to a vehicle
ahead when Adaptive Cruise Control is in
standby mode, the driver is instead warned
of the short distance by the Distance Alert
function.
Standby mode due to action by the driver
Adaptive Cruise Control will be temporarily deac-
tivated and put in standby mode if:
• the brakes are applied.
• the gear selector is moved to N
• the vehicle is driven faster than the set
speed for more than 1 minute Temporarily increasing speed using the accelera-
tor pedal, e.g. when passing another vehicle, will
not affect the setting. The vehicle will return to
the set speed when the accelerator pedal is
released.
Automatic standby mode
Adaptive Cruise Control is dependent on other
systems, such as Electronic Stability Control
(ESC 50
). If any of these other systems stops
working, Adaptive Cruise Control will automati-
cally switch off.
WARNING With automatic standby mode, the driver is
warned by an acoustic signal and a message
on the instrument panel.
•
The driver must then regulate vehicle
speed, apply the brakes if necessary, and
maintain a safe distance to other vehicles.
Adaptive Cruise Control may go into standby
mode if: • your vehicle's speed goes below 5 km/h
(3 mph) and ACC cannot determine if the
vehicle ahead is stationary or if it is another
object, e.g. a speed bump.
• your vehicle's speed goes under 5 km/h
(3 mph) and the vehicle ahead turns so that
ACC no longer has a vehicle to follow. •
the driver opens the door.
• the driver unbuckles the seat belt.
• the engine speed (rpm) is too low/high.
• one or more of the wheels lose traction.
• the brake temperature is high.
• the parking brake is applied.
• the camera/radar sensor is covered by snow
or heavy rain (the camera lens/radar waves
are blocked)
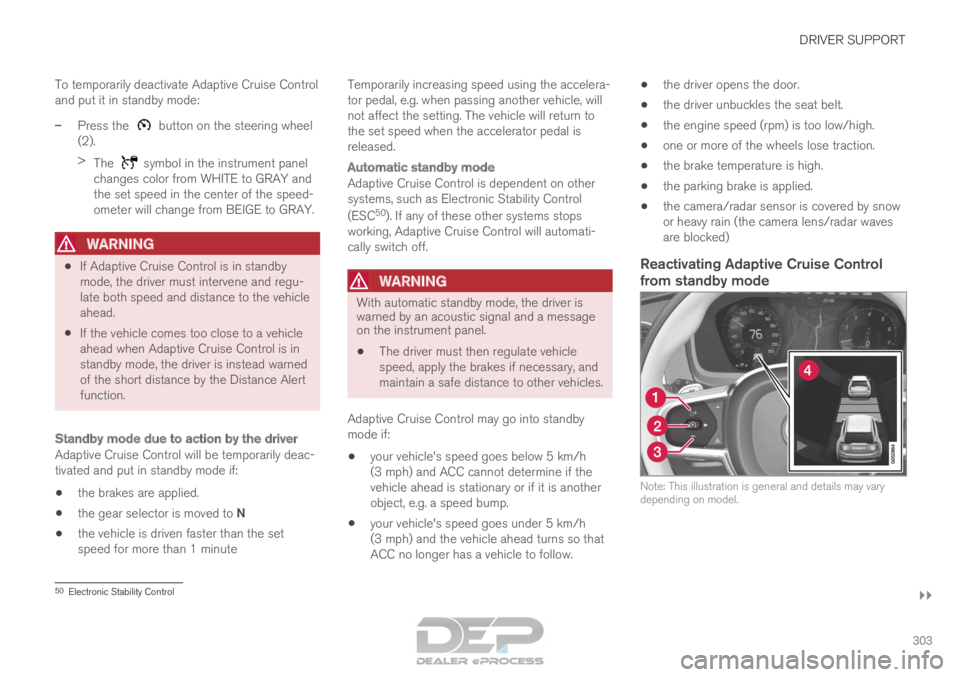
Reactivating Adaptive Cruise Control
from standby mode Note: This illustration is general and details may vary
depending on model.
50
Electronic Stability Control
Page 322 of 686
||DRIVER SUPPORT
320
Automatic standby mode
Pilot Assist is dependent on other systems, such
as Electronic Stability Control (ESC
66
). If any of
these other systems stops working, Pilot Assist
will automatically switch off.
WARNING With automatic standby mode, the driver is
warned by an acoustic signal and a message
on the instrument panel.
•
The driver must then regulate vehicle
speed, apply the brakes if necessary, and
maintain a safe distance to other vehicles.
Adaptive Cruise Control may go into standby
mode if, e.g.:
• the driver opens the door.
• the brake temperature is high.
• the driver's hands are not on the steering
wheel.
• the parking brake is applied.
• the engine speed (rpm) is too low/high.
• the driver unbuckles the seat belt.
• one or more of the wheels lose traction.
• the camera/radar sensor is covered by snow
or heavy rain (the camera lens/radar waves
are blocked) •
your vehicle's speed goes below 5 km/h
(3 mph) and Pilot Assist cannot determine if
the vehicle ahead is stationary or if it is
another object, e.g. a speed bump.
• your vehicle's speed goes under 5 km/h
(3 mph) and the vehicle ahead turns so that
Pilot Assist no longer has a vehicle to follow.
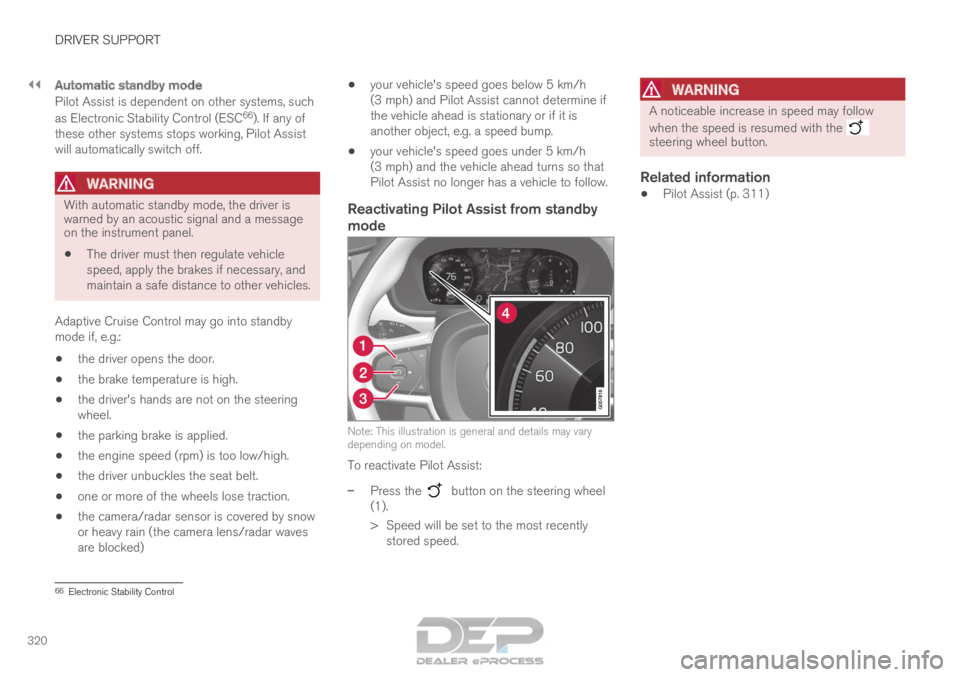
Reactivating Pilot Assist from standby
mode Note: This illustration is general and details may vary
depending on model.
To reactivate Pilot Assist:
–
Press the button on the steering wheel
(1).
>
Speed will be set to the most recently
stored speed.
WARNING A noticeable increase in speed may follow
when the speed is resumed with the
steering wheel button.
Related information
•
Pilot Assist (p. 311) 66
Electronic Stability Control
Page 436 of 686

||STARTING AND DRIVING
434
Deactivating automatically
1. Fasten your seat belt.
2. Depress the brake pedal firmly.
3. Start the vehicle.
4.
Move the gear selector to D or R and press
the accelerator pedal.
> The parking brake will release and the symbol in the instrument panel will go out.
NOTE When the vehicle is initially started, the park-
ing brake could disengage automatically even
if the driver's seat belt is not buckled.
Related information
•
Settings for automatically activating the park-
ing brake (p. 434)
• Parking brake malfunction (p. 435)
• Parking brake (p. 432)
• Parking on a hill (p. 434) Settings for automatically activating
the parking brake
Choose whether the parking brake should be
activated automatically when the vehicle is
switched off.
This selection is made in the Settings menu in
the center display.
1. Tap Settings in the Top view.
2.
Tap My Car Parking Brake and
Suspension and select or deselect the
Auto Activate Parking Brake function.
Related information
• Activating and deactivating the parking brake
(p. 433)
• Parking brake (p. 432) Parking on a hill
Always use the parking brake when parking on a
hill.
WARNING Always apply the parking brake when parking
on an incline. Selecting a gear or putting the
automatic transmission in P may not be suffi-
cient to keep the vehicle stationary in all sit-
uations.
If the vehicle is pointing uphill: • Turn the front wheels so they are pointing
away from the curb.
If the vehicle is pointing downhill:
• Turn the front wheels so they are pointing
toward the curb.
Heavy load uphill
Heavy loads, such as a trailer, could cause the
vehicle to roll backward when the parking brake
is released automatically on steep uphill gradi-
ents. To help avoid this, pull the control upward
while you are driving away. Release the control
when the vehicle gains traction.
Related information
• Activating and deactivating the parking brake
(p. 433)
Page 445 of 686
STARTING AND DRIVING
}}
443
All Wheel Drive (AWD)
All-wheel drive, All Wheel Drive (AWD), also
called four-wheel drive, means that power is dis-
tributed to all four wheels, which improves trac-
tion.
The electric motor that powers the rear wheels
enables electronic all-wheel drive functionality.
To achieve the best traction, power is automati-
cally directed to the wheels that have the best
grip. The system continuously calculates the
need for torque to the rear wheels, and can
immediately redistribute up to half of the engine's
torque to the rear wheels.
All-wheel drive also has a stabilizing effect at
higher speeds. In normal driving conditions, most
of the engine's power is directed to the front
wheels. When the vehicle is stationary, all-wheel
drive is always activated in preparation for maxi-
mum traction during acceleration.
All-wheel drive reacts differently depending on
which drive mode is selected.
Related information
• Drive modes (p. 445)
• Low Speed Control (p. 453)
• Transmission (p. 438) Drive systems
Volvo Twin Engine combines a combustion
engine for the front wheels and an electric motor
for the rear wheels.
Two drive systemsDepending on the selected drive mode and
power available in the electric motor, the drive
systems can either be used separately or in tan-
dem.
The electric motor gets its energy from a hybrid
battery located under the tunnel console. The
hybrid can be charged from a wall outlet or in a
special charging station. The combustion engine
can also charge the hybrid battery using a special
high-voltage generator.
Both the combustion engine and the electric
motor can generate power directly to the wheels.
An advanced control system coordinates both the
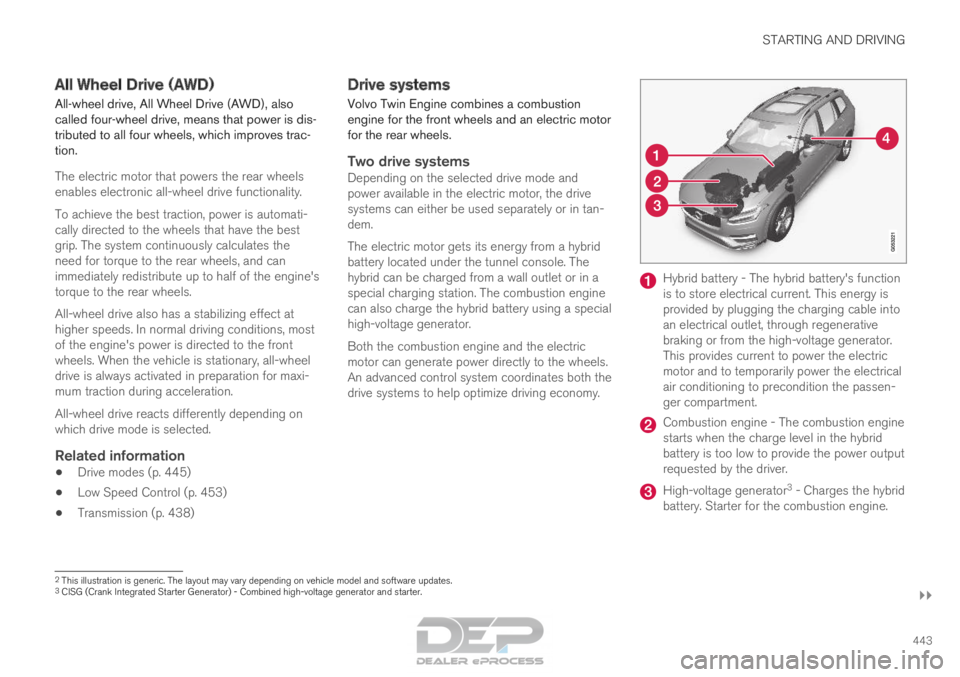
drive systems to help optimize driving economy. Hybrid battery - The hybrid battery's function
is to store electrical current. This energy is
provided by plugging the charging cable into
an electrical outlet, through regenerative
braking or from the high-voltage generator.
This provides current to power the electric
motor and to temporarily power the electrical
air conditioning to precondition the passen-
ger compartment.
Combustion engine - The combustion engine
starts when the charge level in the hybrid
battery is too low to provide the power output
requested by the driver.
High-voltage generator
3
- Charges the hybrid
battery. Starter for the combustion engine. 2
This illustration is generic. The layout may vary depending on vehicle m\
odel and software updates.
3 CISG (Crank Integrated Starter Generator) - Combined high-voltage gene\
rator and starter.