ECO mode VOLVO XC90 TWIN ENGINE 2020 Owners Manual
[x] Cancel search | Manufacturer: VOLVO, Model Year: 2020, Model line: XC90 TWIN ENGINE, Model: VOLVO XC90 TWIN ENGINE 2020Pages: 693, PDF Size: 13.34 MB
Page 590 of 693

LOADING, STORAGE AND PASSENGER COMPARTMENT
* Option/accessory.
588
Installing and removing the cargo compartment cover *
The cover can be rolled out to conceal objects in the cargo compartment.
Installing the cargo compartment cover 3
Press the end piece on one side of the cover into the retaining bracket in the sidepanel of the cargo compartment.
Then put the other end piece in the recess in the side panel on the opposite side.
Push the end piece down on both sides, one at a time.
> When a click is heard and the red
marks on each end piece are no longer visible, the cover is in place. Check thatit is secure.
Removing the cargo compartment cover
In retracted position:
1. Press the button on one of the cover's ends and lift out that end.For 7-seat models - remove the third row seat belt latches from the hooks above theside panels.
2. Carefully lift the cover up and out. > The other end will release automaticallyand the cover can then be lifted out ofthe cargo compartment.
Related information
Operating the cargo compartment cover
*
(p. 588)
Loading recommendations (p. 585)
Operating the cargo compartment cover
*
The cover can be used in two positions: fully open to completely cover the cargo compart-ment or partially retracted to make it easier toreach further into the cargo compartment.
3 In the XC90 Excellence, the cargo compartment cover is permanently fixed and cannot be taken out or put in.
Page 591 of 693
LOADING, STORAGE AND PASSENGER COMPARTMENT
}}
589
Fully open7-seat models 1.
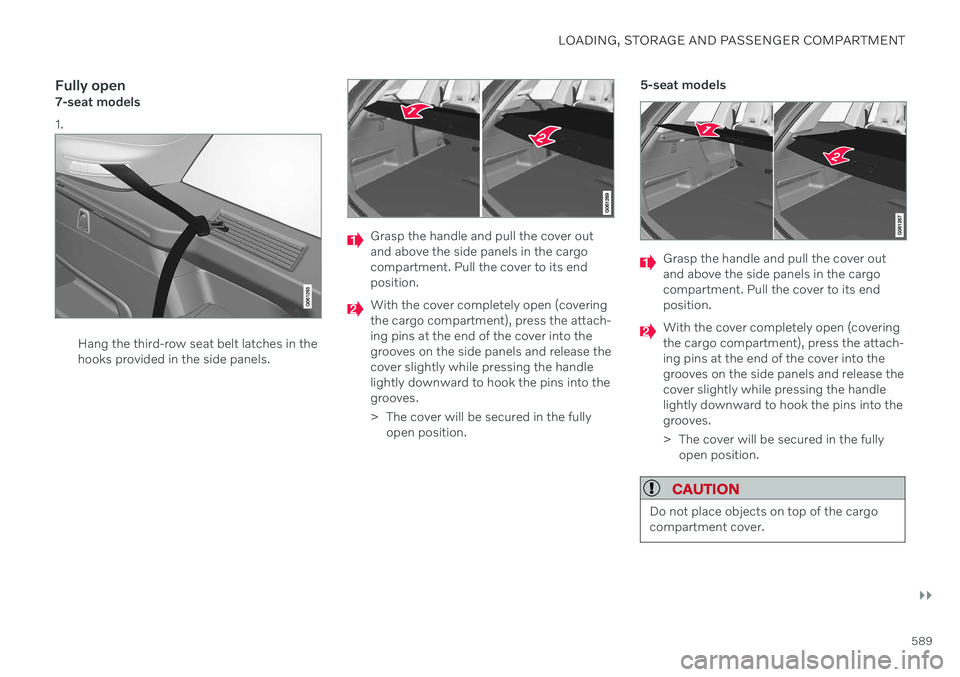
Hang the third-row seat belt latches in the hooks provided in the side panels.
Grasp the handle and pull the cover out and above the side panels in the cargocompartment. Pull the cover to its endposition.
With the cover completely open (covering the cargo compartment), press the attach-ing pins at the end of the cover into thegrooves on the side panels and release thecover slightly while pressing the handlelightly downward to hook the pins into thegrooves.
> The cover will be secured in the fullyopen position. 5-seat models
Grasp the handle and pull the cover out and above the side panels in the cargocompartment. Pull the cover to its endposition.
With the cover completely open (covering the cargo compartment), press the attach-ing pins at the end of the cover into thegrooves on the side panels and release thecover slightly while pressing the handlelightly downward to hook the pins into thegrooves.
> The cover will be secured in the fully
open position.
CAUTION
Do not place objects on top of the cargo compartment cover.
Page 605 of 693
MAINTENANCE AND SERVICE
}}
* Option/accessory.603
Hoisting the vehicle
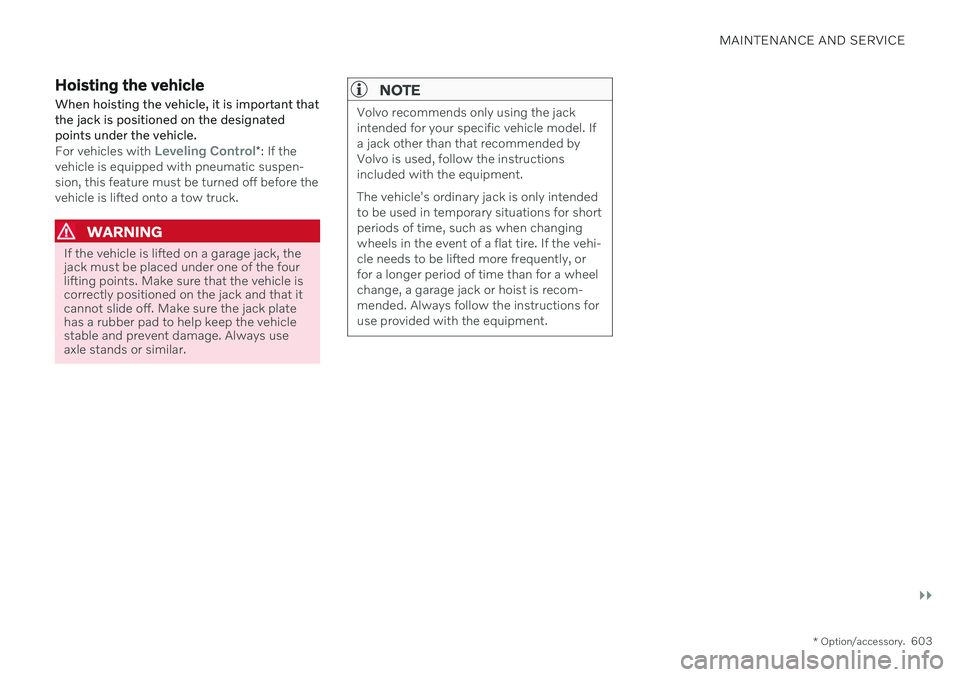
When hoisting the vehicle, it is important that the jack is positioned on the designatedpoints under the vehicle.
For vehicles with Leveling Control* : If the
vehicle is equipped with pneumatic suspen- sion, this feature must be turned off before thevehicle is lifted onto a tow truck.
WARNING
If the vehicle is lifted on a garage jack, the jack must be placed under one of the fourlifting points. Make sure that the vehicle iscorrectly positioned on the jack and that itcannot slide off. Make sure the jack platehas a rubber pad to help keep the vehiclestable and prevent damage. Always useaxle stands or similar.
NOTE
Volvo recommends only using the jack intended for your specific vehicle model. Ifa jack other than that recommended byVolvo is used, follow the instructionsincluded with the equipment. The vehicle's ordinary jack is only intended to be used in temporary situations for shortperiods of time, such as when changingwheels in the event of a flat tire. If the vehi-cle needs to be lifted more frequently, orfor a longer period of time than for a wheelchange, a garage jack or hoist is recom-mended. Always follow the instructions foruse provided with the equipment.
Page 609 of 693
MAINTENANCE AND SERVICE
}}
607
Engine compartment overview
This overview shows some service-related components.
Some of the components included in the vehi- cle's electric drive system are located in theengine compartment. Exercise caution whenaccessing the engine compartment and onlytouch what is required for normal mainte-nance.
WARNING
Orange wiring may only be handled by qualified personnel.
WARNING
A number of electrical components in Twin Engine Plug-in Hybrid vehicles use high-voltage current and can be extremely dan-gerous if handled incorrectly.
Do not touch anything that is not clearly described in this Owner's Man-ual.
Be careful when checking/filling fluidsin the engine compartment.
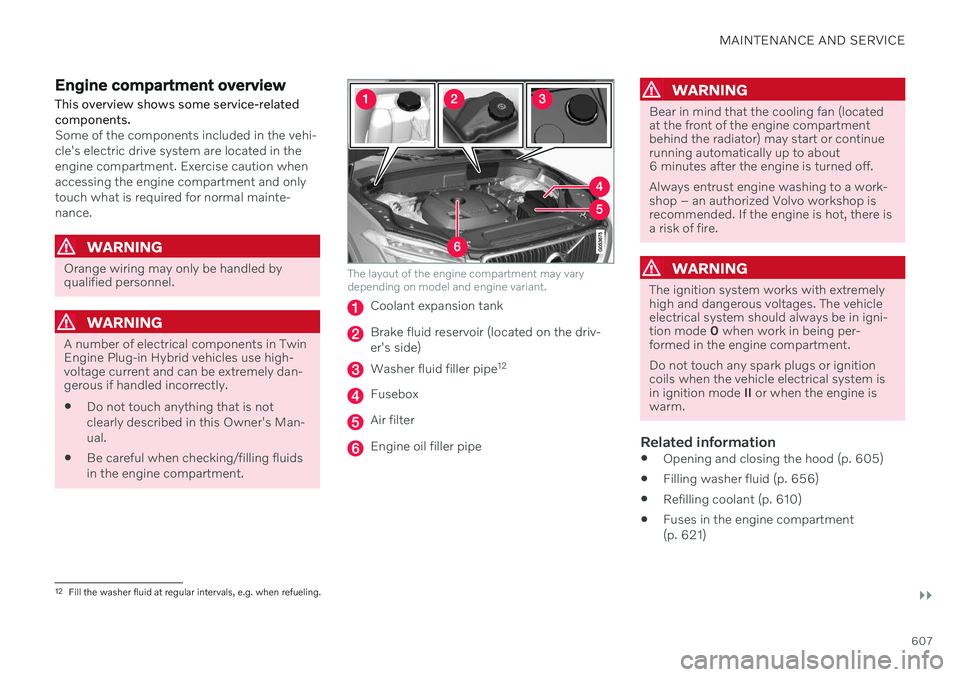
The layout of the engine compartment may vary depending on model and engine variant.
Coolant expansion tank
Brake fluid reservoir (located on the driv- er's side)
Washer fluid filler pipe 12
Fusebox
Air filter
Engine oil filler pipe
WARNING
Bear in mind that the cooling fan (located at the front of the engine compartmentbehind the radiator) may start or continuerunning automatically up to about6 minutes after the engine is turned off. Always entrust engine washing to a work- shop – an authorized Volvo workshop isrecommended. If the engine is hot, there isa risk of fire.
WARNING
The ignition system works with extremely high and dangerous voltages. The vehicleelectrical system should always be in igni-tion mode
0 when work in being per-
formed in the engine compartment. Do not touch any spark plugs or ignition coils when the vehicle electrical system isin ignition mode II or when the engine is
warm.
Related information
Opening and closing the hood (p. 605)
Filling washer fluid (p. 656)
Refilling coolant (p. 610)
Fuses in the engine compartment (p. 621)
12
Fill the washer fluid at regular intervals, e.g. when refueling.
Page 610 of 693
MAINTENANCE AND SERVICE
608
Checking and filling engine oil (p. 609)
Ignition modes (p. 415)
Engine oil For the recommended service intervals and warranties to be applied, an approved engineoil must be used.
Volvo recommends:
If the engine oil is not checked regularly and the level becomes low, this could cause seri-ous engine damage.
CAUTION
To satisfy the requirements for the engine's service intervals, all engines are factory-filled with a specially adapted syntheticengine oil. Great care has been put into thechoice of oil, with consideration given toservice life, startability, fuel consumptionand environmental impact. For the recommended service intervals to apply, an approved engine oil must beused. Only use the prescribed oil grade totop off or change the oil. Otherwise, thereis a risk of the vehicle's service life, starta-bility, fuel consumption and environmentalimpact being affected. Failure to use engine oil of the prescribed grade and viscosity could cause damage toengine-related components. Volvo Car Cor-poration disclaims warranty liability forsuch type of damage. Volvo recommends entrusting oil changes to an authorized Volvo workshop.
Volvo uses different systems to warn if the oil level is too low/high or the oil pressure is low.On engine variants with an oil pressure sensor,
Page 611 of 693
MAINTENANCE AND SERVICE
}}
609
a warning symbol is displayed in the instru- ment panel when oil pressure is low
. On
engine variants with an oil level sensor, the
warning symbol in the instrument panel
and display messages are used to alert the driver. Some engine variants have both sys-tems. Contact a Volvo retailer for more infor-mation. Change the engine oil and oil filter according to the schedule specified in the Warranty andMaintenance Records Information booklet.Oils of a higher grade than that specified maybe used. If the vehicle is driven in adverse con-ditions, Volvo recommends using an oil with ahigher grade than that specified.
Related information
Checking and filling engine oil (p. 609)
Engine oil specifications (p. 669)
Checking and filling engine oil
The engine oil level is monitored by an elec- tronic oil level sensor.
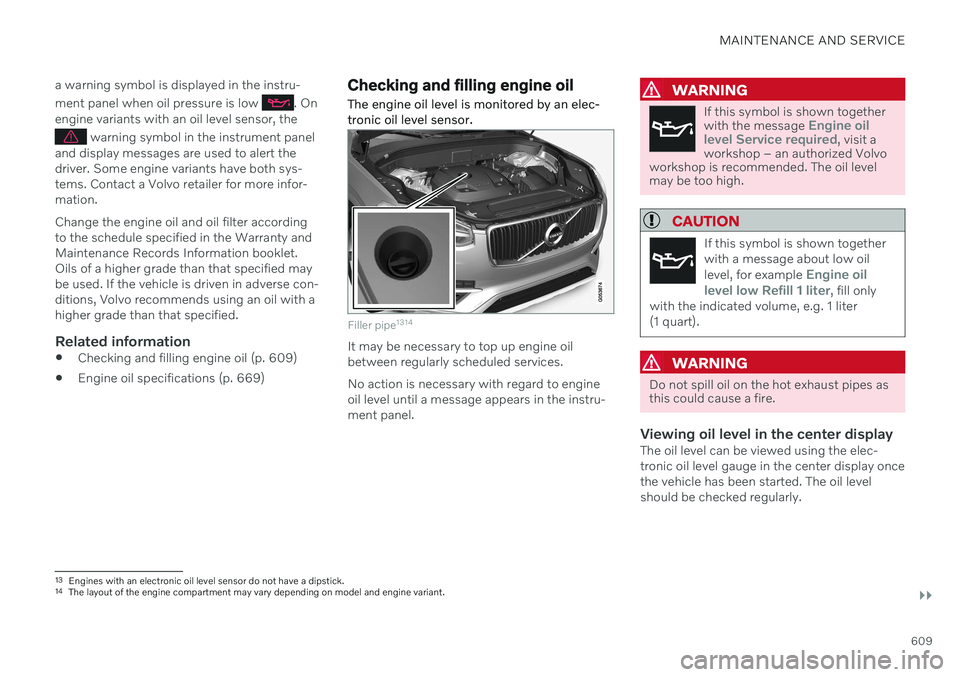
Filler pipe 1314
It may be necessary to top up engine oil between regularly scheduled services. No action is necessary with regard to engine oil level until a message appears in the instru-ment panel.
WARNING
If this symbol is shown together with the message Engine oil
level Service required, visit a
workshop – an authorized Volvo
workshop is recommended. The oil level may be too high.
CAUTION
If this symbol is shown together with a message about low oil level, for example
Engine oil
level low Refill 1 liter, fill only
with the indicated volume, e.g. 1 liter (1 quart).
WARNING
Do not spill oil on the hot exhaust pipes as this could cause a fire.
Viewing oil level in the center displayThe oil level can be viewed using the elec- tronic oil level gauge in the center display oncethe vehicle has been started. The oil levelshould be checked regularly.
13 Engines with an electronic oil level sensor do not have a dipstick.
14 The layout of the engine compartment may vary depending on model and engine variant.
Page 617 of 693
MAINTENANCE AND SERVICE
}}
615
NOTE
If the starter battery becomes discharged too many times, it will shorten its servicelife. The service life of the starter battery is affected by several factors, such as drivingconditions and climate. The startingcapacity of the battery reduces graduallyover time. The battery must therefore berecharged if the vehicle is not used or along period of time or if it is only drivenshort distances. Severe cold further limitsthe starting capacity. To keep the starter battery in a good condi- tion, the vehicle should be driven at least15 minutes per week or the battery shouldbe connected to a battery charger withautomatic trickle charging. A starter battery that is always kept fully charged has the maximum service life.Location
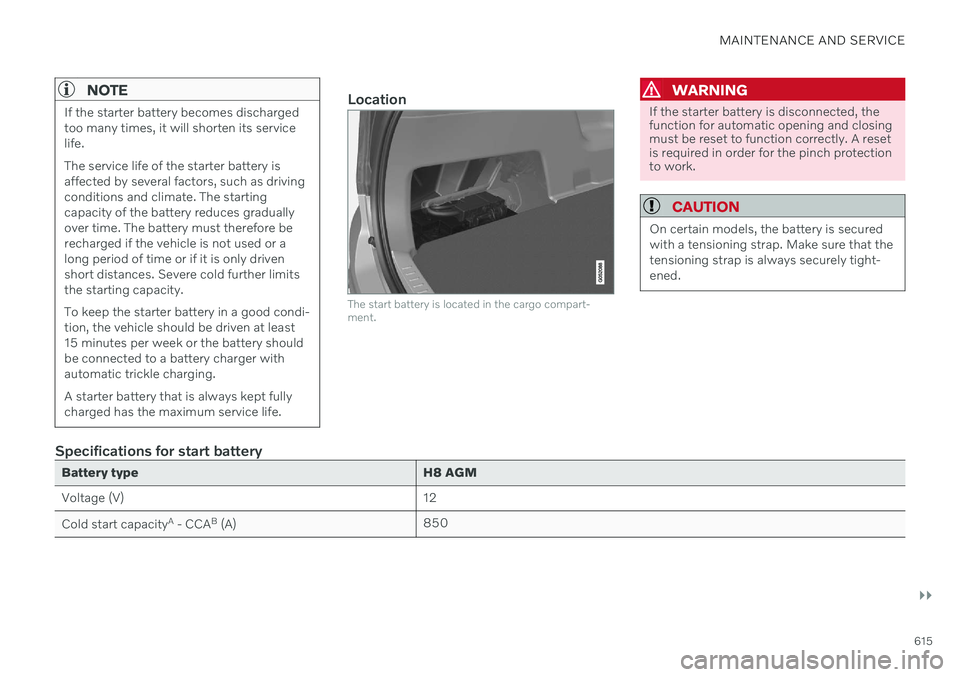
The start battery is located in the cargo compart- ment.
WARNING
If the starter battery is disconnected, the function for automatic opening and closingmust be reset to function correctly. A resetis required in order for the pinch protectionto work.
CAUTION
On certain models, the battery is secured with a tensioning strap. Make sure that thetensioning strap is always securely tight-ened.
Specifications for start battery
Battery typeH8 AGM
Voltage (V) 12
Cold start capacity A
- CCA B
(A) 850
Page 621 of 693
MAINTENANCE AND SERVICE
}}
619
Fuses and fuseboxes All electrical functions and components are protected by a number of fuses in order toprotect the vehicle's electrical system fromdamage by short circuiting or overloading.
WARNING
Never use a foreign object or a fuse with a higher amperage than that specified toreplace a fuse. This could cause significantdamage to the electrical system and possi-bly lead to a fire.
WARNING
Orange wiring may only be handled by qualified personnel.
WARNING
A number of electrical components in Twin Engine Plug-in Hybrid vehicles use high-voltage current and can be extremely dan-gerous if handled incorrectly. Do not touch anything that is not clearly described in the vehicle's Owner's Manual.
If any electrical component or function is not responding, the component may have blown a fuse due to temporary overload. If the same fuse blows repeatedly, there may be a prob-lem with the component. Volvo recommendscontacting an authorized Volvo workshop tohave the component checked.
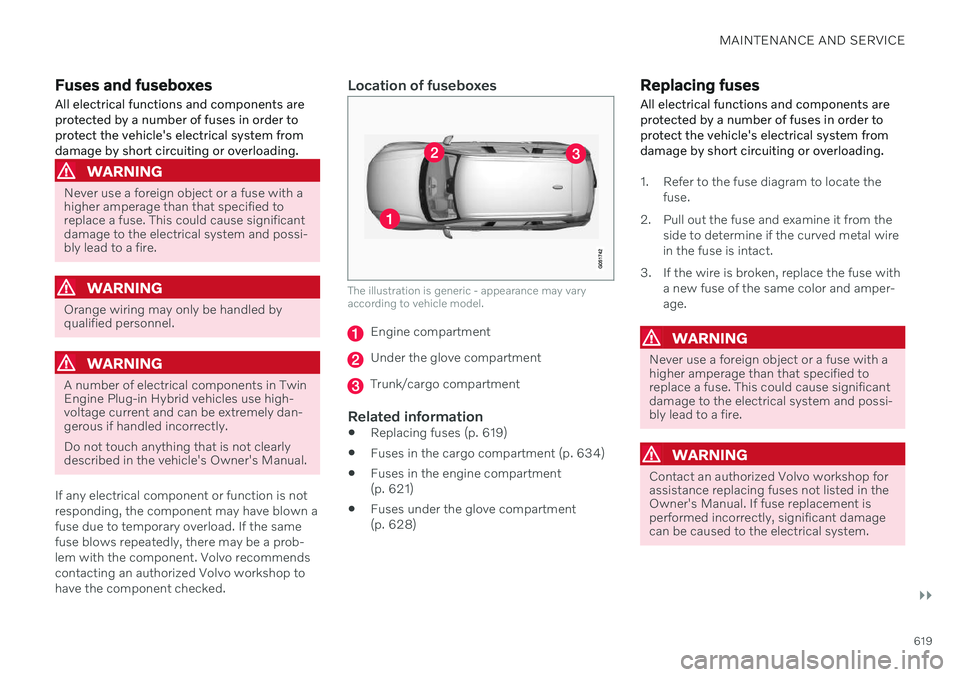
Location of fuseboxes
The illustration is generic - appearance may vary according to vehicle model.
Engine compartment
Under the glove compartment
Trunk/cargo compartment
Related information
Replacing fuses (p. 619)
Fuses in the cargo compartment (p. 634)
Fuses in the engine compartment (p. 621)
Fuses under the glove compartment(p. 628)
Replacing fuses
All electrical functions and components are protected by a number of fuses in order toprotect the vehicle's electrical system fromdamage by short circuiting or overloading.
1. Refer to the fuse diagram to locate the fuse.
2. Pull out the fuse and examine it from the side to determine if the curved metal wire in the fuse is intact.
3. If the wire is broken, replace the fuse with a new fuse of the same color and amper-age.
WARNING
Never use a foreign object or a fuse with a higher amperage than that specified toreplace a fuse. This could cause significantdamage to the electrical system and possi-bly lead to a fire.
WARNING
Contact an authorized Volvo workshop for assistance replacing fuses not listed in theOwner's Manual. If fuse replacement isperformed incorrectly, significant damagecan be caused to the electrical system.
Page 649 of 693
MAINTENANCE AND SERVICE
}}
* Option/accessory.647
Automatic car washes
The vehicle should be washed as soon as it becomes dirty. The longer the dirt remains,the more difficult it will be to keep the vehicleclean. It could also lead to paint damage.
Washing your vehicle in an automatic car wash is a fast and easy way to keep your vehi-cle clean, but it does not reach all areas of thevehicle. Volvo recommends washing yourvehicle by hand or supplementing automaticcar washes with a hand wash.
NOTE
Volvo recommends not washing the vehi- cle in an automatic car wash during thefirst few months; the paintwork on newvehicles takes some time to fully harden.
CAUTION
Before driving the vehicle into a car wash, deactivate the Automatic Braking whenStationary and Automatic Parking BrakeApplication functions. If the functions arenot deactivated, the brake system willseize when the vehicle is stationary and thevehicle will not be able to roll.
CAUTION
For automatic car washes in which the vehicle is pulled forward on rolling wheels:
1. Before washing the vehicle, make sure that the automatic rain sensor is deac- tivated. If it is not deactivated andinadvertently starts, the wiper armscould be damaged.
2. To help prevent damage from the auto- matic car wash machinery, make surethat the door mirrors are folded in,antennas retracted or removed, andany auxiliary lights secured.
3. Drive into the automatic car wash.
4. Turn off the "Automatic Braking when Stationary" function using the
but-
ton in the tunnel console.
5. Turn off the "Automatic Parking Brake Application" function in the center dis- play's Top view.
6. Turn off the engine by turning the start knob in the tunnel console clockwise.Hold the knob in position for at least2 seconds.
The vehicle is now ready for the automaticcar wash.
CAUTION
The system will automatically change to P
mode if the above steps are not followed. In P mode, the wheels are locked, which
they should not be when the vehicle isbeing washed in a car wash.
NOTE
Keep in mind that if the vehicle is equipped with the keyless locking and unlocking function *, the doors and tailgate/trunk lid
may open when washing the vehicle if the remote key is within range.
Related information
Cleaning the exterior (p. 644)
Polishing and waxing (p. 644)
Hand washing (p. 645)
High-pressure washing (p. 648)
Cleaning the wiper blades (p. 648)
Cleaning exterior plastic, rubber and trim components (p. 649)
Cleaning rims (p. 650)
Corrosion protection (p. 650)
Auto-hold brakes (p. 424)
Page 652 of 693
||
MAINTENANCE AND SERVICE
650
CAUTION
Avoid washing the vehicle with cleaner with a pH value below 3.5 or above 11.5.This could cause discoloration of anodizedaluminum components like the roof rail andaround the side windows. Never use metal polishing agent on ano- dized aluminum components. This couldcause discoloration and destroy the sur-face treatment.
Related information
Cleaning the exterior (p. 644)
Polishing and waxing (p. 644)
Hand washing (p. 645)
Automatic car washes (p. 647)
High-pressure washing (p. 648)
Cleaning the wiper blades (p. 648)
Cleaning rims (p. 650)
Corrosion protection (p. 650)
Cleaning rims
The vehicle should be washed as soon as it becomes dirty. The longer the dirt remains,the more difficult it will be to keep the vehicleclean. It could also lead to paint damage.Wash the vehicle in a car wash or garagewith an oil separator and use car washingdetergent.
Only use rim cleaning products recommended by Volvo. Strong rim cleaning agents could damage the surface and stain the chromed aluminum rims.
Related information
Cleaning the exterior (p. 644)
Polishing and waxing (p. 644)
Hand washing (p. 645)
Automatic car washes (p. 647)
High-pressure washing (p. 648)
Cleaning exterior plastic, rubber and trimcomponents (p. 649)
Cleaning rims (p. 650)
Corrosion protection (p. 650)
Corrosion protection Your vehicle is constructed with protection against corrosion.
Corrosion protection for the body consists of modern metallic protective coatings on thesheet metal, a high-quality painting process,corrosion-protected and minimized metaloverlap, and shielding plastic components,abrasion protection and supplemental rustinhibitor in exposed areas. In the chassis,exposed components of the wheel suspensionare made of corrosion-resistant cast alumi-num.
Inspection and maintenanceThe corrosion protection does not normallyrequire maintenance, but keeping the vehicleclean helps reduce the risk of corrosion. Theuse of strong alkaline or acidic cleaning fluidsshould be avoided on shiny body components.Any stone chips in the paint should betouched up as soon as they are discovered.
Related information
Cleaning the exterior (p. 644)
Polishing and waxing (p. 644)
Hand washing (p. 645)
Automatic car washes (p. 647)
High-pressure washing (p. 648)
Cleaning the wiper blades (p. 648)