dashboard VOLVO XC90 TWIN ENGINE HYBRID 2017 User Guide
[x] Cancel search | Manufacturer: VOLVO, Model Year: 2017, Model line: XC90 TWIN ENGINE HYBRID, Model: VOLVO XC90 TWIN ENGINE HYBRID 2017Pages: 584, PDF Size: 14.2 MB
Page 217 of 584

CLIMATE
}}
215
Air distribution table
Air distribution can be adjusted manually.
Air distributionUse
If all air distribution buttons are deselected in manual mode, the climate systemwill revert to automatic mode.
Main air flow from the defroster vents, some flow from the other vents.To remove ice and condensation (with moderateblower speed).
Main air flow from the dashboard vents, some flow from the other vents.For best comfort in hot weather.
Main air flow from the floor vents, some flow from the other vents.For heating/cooling near the floor.
Page 218 of 584

||
CLIMATE
216
Air distributionUse
Main air flow from the defroster and dashboard vents, some flow from the othervents.For best comfort in hot and dry weather.
Main air flow from the defroster and floor vents, some flow from the other vents.For best comfort and defrosting in cold or humid con-ditions.
Main air flow from the dashboard and floor vents, some flow from the othervents.For good comfort in sunny, cool weather.
For cooling or heat to the floor.
Main air flow from the defroster, dashboard and floor vents.For cooler air toward the floor in warm weather orwarmer air upward in cold weather.
Related information
•Air distribution (p. 212)
•Opening/closing/directing air vents (p. 213)
•Climate system controls in the center display(p. 199)
•Adjusting air distribution (p. 213)
Page 247 of 584
LOCKS AND ALARM
}}
* Option/accessory, for more information, see Introduction.245
door is opened from inside the vehicle using adoor handle. See also the article "Locking/unlocking from inside the vehicle" for additionalinformation.
If the locks repeatedly do not react when theunlock button is pressed, begin by moving closerto the vehicle. However, it may be necessary toreplace the battery in the remote. In this case, thedriver's door can be unlocked with the detacha-ble key blade. See also the article "Detachablekey blade" for additional information.
Keyless Passive Entry *
If the vehicle is equipped with this system, it isonly necessary to have a remote key in your pos-session to operate the central locking system.
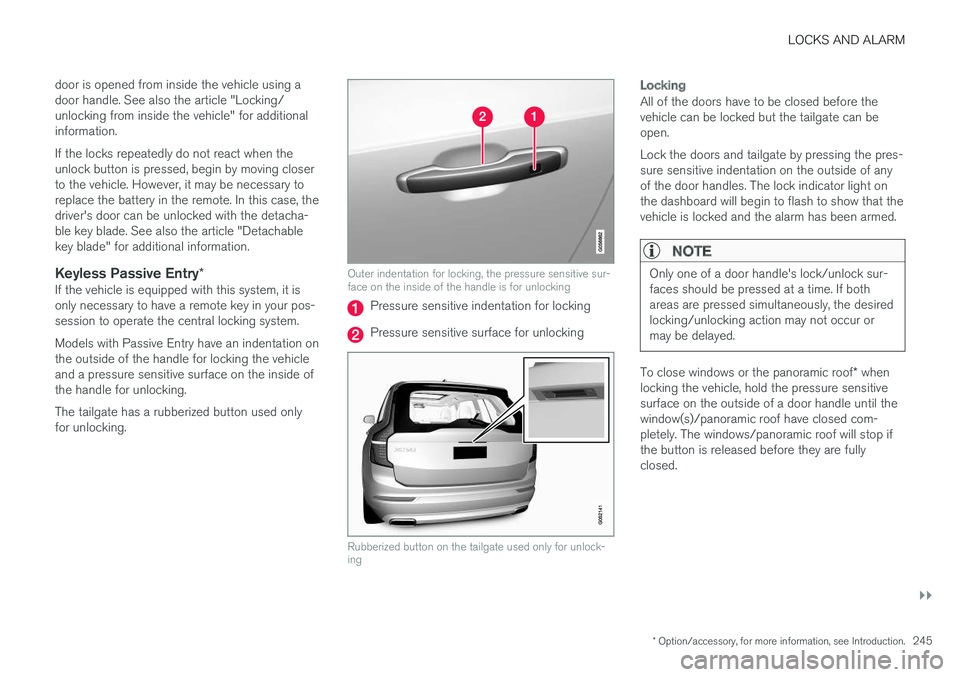
Models with Passive Entry have an indentation onthe outside of the handle for locking the vehicleand a pressure sensitive surface on the inside ofthe handle for unlocking.
The tailgate has a rubberized button used onlyfor unlocking.
Outer indentation for locking, the pressure sensitive sur-face on the inside of the handle is for unlocking
Pressure sensitive indentation for locking
Pressure sensitive surface for unlocking
Rubberized button on the tailgate used only for unlock-ing
Locking
All of the doors have to be closed before thevehicle can be locked but the tailgate can beopen.
Lock the doors and tailgate by pressing the pres-sure sensitive indentation on the outside of anyof the door handles. The lock indicator light onthe dashboard will begin to flash to show that thevehicle is locked and the alarm has been armed.
NOTE
Only one of a door handle's lock/unlock sur-faces should be pressed at a time. If bothareas are pressed simultaneously, the desiredlocking/unlocking action may not occur ormay be delayed.
To close windows or the panoramic roof* whenlocking the vehicle, hold the pressure sensitivesurface on the outside of a door handle until thewindow(s)/panoramic roof have closed com-pletely. The windows/panoramic roof will stop ifthe button is released before they are fullyclosed.
Page 248 of 584

||
LOCKS AND ALARM
* Option/accessory, for more information, see Introduction.246
Unlocking
Pull a door handle to unlock and open the dooror press the rubberized button under the tailgateopening control. The lock indicator light on thedashboard will go out to show that the vehicle isunlocked and the alarm has been disarmed.
The lock/unlock settings can be changed in thecenter display's Top view:
Go to: SettingsMy CarKeyless Unlockand select All Doors or Single Door.
Automatic relocking
If no door or the tailgate is opened within twominutes after being unlocked, the vehicle willautomatically relock.
Remote door unlock
The vehicle can be unlocked using the Volvo OnCall app.
Related information
•Remote key (p. 238)
•Remote key's range (p. 240)
•Detachable key blade (p. 242)
•Alarm (p. 256)
•Locking/unlocking from inside the vehicle(p. 246)
•Foot movement tailgate operation* (p. 243)
•Locking/unlocking the tailgate (p. 249)
Locking/unlocking from inside thevehicle
The lock buttons on either of the front doors canbe used to lock or unlock all doors and the tail-gate at the same time. The rear doors can belocked using their respective lock buttons*.
The central locking system
Central locking/unlocking buttons and indicator lightson the front doors
–Press the button to lock the vehicle.
Press to unlock.
Unlocking
•Press the button to unlock all doors andthe tailgate.
•Pull the door opening handle on either of thefront doors. This will unlock the vehicle com-
pletely8 and the door will open.
Locking
–Press the button on either of the frontdoors to lock the vehicle (both front doorsmust be closed).
Lock buttons on the rear doors *
Lock button and indicator light in a rear door
The lock buttons in the rear doors lock/unlockeach door respectively.
8The unlock setting "All Doors" must be selected. If the setting "Driver door, then all" has been selected, only that door will unlock and open.
Page 250 of 584
LOCKS AND ALARM
248
Locking and unlocking confirmation
The turn signals can be used to indicate that thevehicle has been locked/unlocked with theremote key. These settings can also be changedin the center display's Top view by going to:
SettingsMy CarLockingLocking andUnlocking Feedback.
Exterior confirmation
•Locking: the turn signals flash once and the
door mirrors will fold in (retract)12
•Unlocking: the turn signals flash twice and
the door mirrors will fold out12
When the vehicle is locked, confirmation will onlybe given if all doors/tailgate and the hood areclosed.
If the vehicle is locked while only the driver's door
is closed13, all doors/tailgate will lock but confir-mation will only be given when all doors/tailgate/hood are closed.
Interior confirmation
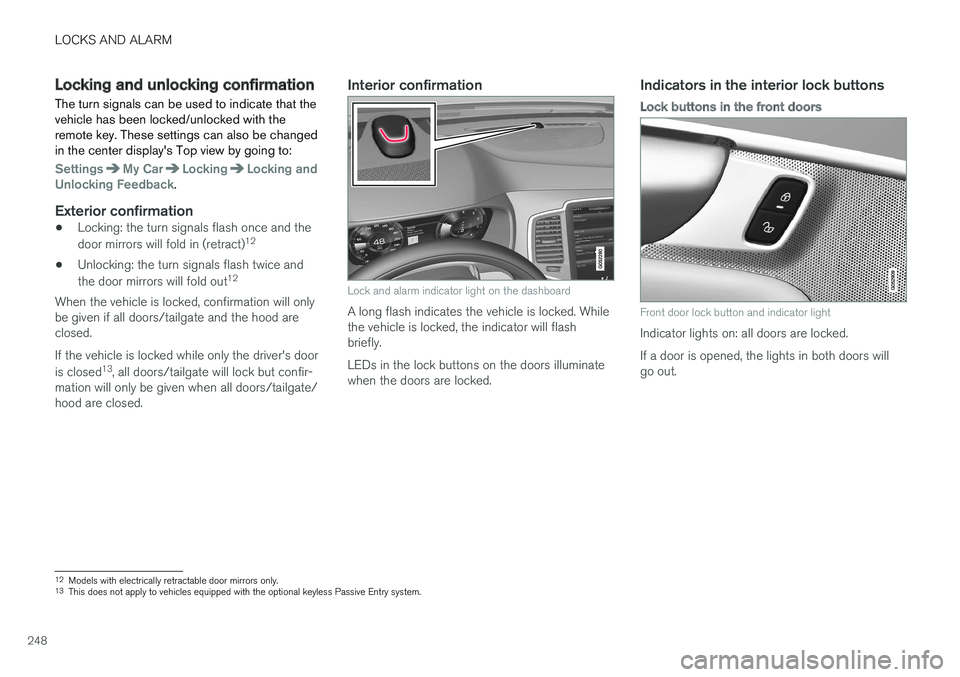
Lock and alarm indicator light on the dashboard
A long flash indicates the vehicle is locked. Whilethe vehicle is locked, the indicator will flashbriefly.
LEDs in the lock buttons on the doors illuminatewhen the doors are locked.
Indicators in the interior lock buttons
Lock buttons in the front doors
Front door lock button and indicator light
Indicator lights on: all doors are locked.
If a door is opened, the lights in both doors willgo out.
12Models with electrically retractable door mirrors only.13This does not apply to vehicles equipped with the optional keyless Passive Entry system.
Page 252 of 584

||
LOCKS AND ALARM
* Option/accessory, for more information, see Introduction.250
Keyless unlocking *
Rubberized pressure plate
Opening the tailgate:
1.With the remote key in your possession,unlock the tailgate by pressing lightly on therubberized pressure plate under the outertailgate handle. If the remote key is notdetected, the tailgate cannot be unlocked/opened. Three audible signals will sound.
2. Lift the handle to open the tailgate fully.
CAUTION
•When pressing the rubberized pressureplate, only light pressure is necessary torelease the tailgate's electronic lockingmechanism.
•When opening the tailgate, pull it upusing the handle. Too much pressure onthe rubberized pressure plate can dam-age its electrical connections.
WARNING
Avoid driving with the tailgate open if at allpossible. Doing so could allow exhaust gasesto enter the passenger compartment.
Unlocking the tailgate from inside the
vehicle
Tailgate unlock button
To unlock the tailgate:
–Press the button on the lighting panel.
>The tailgate will unlock and can beopened within two minutes (if the vehiclehas been locked from the inside).
Locking with the remote key
–Press the button on the remote key.
>The alarm indicator on the dashboard willbegin to flash to show that the alarm hasbeen armed.
Related information
•Remote key (p. 238)
•Power tailgate* (p. 251)
•Foot movement tailgate operation* (p. 243)
•Remote key's range (p. 240)
Page 258 of 584
LOCKS AND ALARM
* Option/accessory, for more information, see Introduction.256
Alarm
The alarm system provides a warning if anattempt is made to break into the vehicle.
The following conditions will trigger the alarm:
•a door/hood/tailgate are opened
•the battery is disconnected
•the alarm siren is disconnected
If a problem is detected in the alarmsystem, this symbol and Alarmsystem failure Service required willbe displayed in the instrument panel.Do not attempt to repair any of the componentsin the alarm system yourself; this could affect theinsurance policy on the vehicle. Contact a trainedand qualified Volvo service technician.
NOTE
One of the alarm sensors, which is sensitiveto metallic objects, is located under the tunnelconsole cup holders. Avoid leaving coins,keys, etc., in the cup holders because theymay inadvertently trigger the alarm.
Arming the alarm
–Lock the vehicle by pressing the remotekey's lock button. On models with theoptional Passive Entry system, the vehiclecan also be locked by pressing the outerindentation for locking on one of the doorhandles or by pressing the tailgate's rubber-ized pressure plate.
If the vehicle is equipped with a power tail-gate*, the button on the lower edge of thetailgate can also be used to lock the vehicleand arm the alarm.
Disarming the alarm
The alarm can be disarmed by:
•Unlock the vehicle by pressing the remotekey's unlock button
•Pressing the pressure-sensitive area on theinside of one of the door handles on modelswith the optional Passive Entry system.
•Pressing the tailgate's rubberized pressureplate on models with the optional PassiveEntry system.
Turning off a triggered (sounding)
alarm
–Press the remote key's unlock button or putthe ignition in mode I by turning the startknob to START and releasing it.
Alarm signals
The following occurs if the alarm has been trig-gered:
•A siren will sound for 30 seconds or until thealarm is turned off
•All turn signals flash for 5 minutes or untilthe alarm is turned off
If the door that triggered the alarm is left open,the alarm cycle will be repeated 10 times.
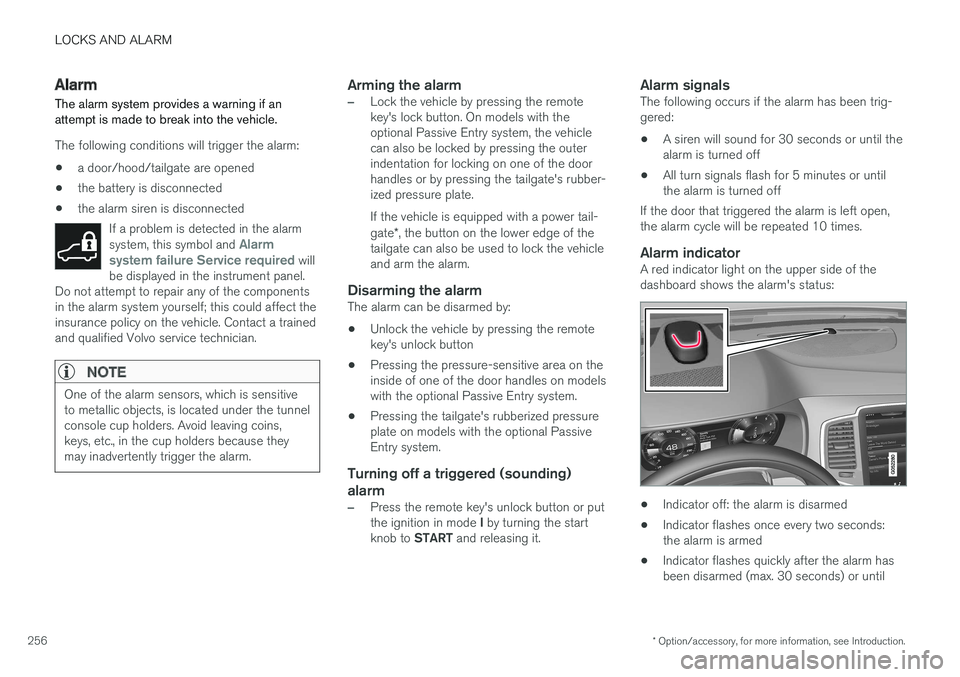
Alarm indicator
A red indicator light on the upper side of thedashboard shows the alarm's status:
•Indicator off: the alarm is disarmed
•Indicator flashes once every two seconds:the alarm is armed
•Indicator flashes quickly after the alarm hasbeen disarmed (max. 30 seconds) or until
Page 553 of 584
MAINTENANCE AND SERVICING
* Option/accessory, for more information, see Introduction.551
2. Finish by rubbing the wheel with absorbentpaper or a towel.
Type 3 (dry soil or dust)
1. Remove the soil/dust with a soft brush.
2. Same procedure as for type I stains.
CAUTION
Sharp objects, such as rings, could damagethe leather on the steering wheel.
Leather panels *
Leather should be allowed to breath. Never coverthe upper side of the dashboard or door panelswith a plastic protector. Ask your Volvo retailerabout Leather Care Kit 951 0251 and LeatherSoftener 943 7429.
Spots on interior plastic, metal, or wood
surfaces
Cleaning interior plastic components should bedone with a moist microfiber cloth. Consult yourVolvo retailer.
CAUTION
•Do not use cleaning agents with highalcohol content such as washer fluid toclean instrument panel glass.
•Never spray cleaning agents or waterdirectly onto components with electricalbuttons or controls. Clean components ofthis type by applying the cleaning agent/water sparingly to a cloth and wiping thecomponents so that no liquid penetratesinto these components.
Cleaning the seat belts
Clean only with lukewarm water and a mild soapsolution.
Cleaning floor mats
The floor mats should be vacuumed or brushedclean regularly, especially during winter whenthey should be taken out for drying. Spots on tex-tile mats can be removed with a mild detergent.For best protection in winter, Volvo recommendsthe use of Volvo rubber floor mats. Consult yourVolvo retailer.
WARNING
•Never use more than one floor mat at atime on the driver's floor. Before driving,remove the original mat from the driver'sseat floor before using any other type offloor mat. Any mat used in this positionshould be securely and properly anchoredin the attaching pins. An extra mat on thedriver's floor can cause the acceleratorand/or brake pedal to catch. Check thatthe movement of these pedals is notimpeded.
•Volvo's floor mats are specially manufac-tured for your car. They must be firmlysecured in the clips on the floor so thatthey cannot slide and become trappedunder the pedals on the driver's side.
Related information
•Cleaning the center display (p. 552)
Page 562 of 584
||
SPECIFICATIONS
560
List of labels
Vehicle Emission Control Information. (A)US models, (B) Canadian models. Your Volvois designed to meet all applicable emissionstandards, as evidenced by the certificationlabel on the underside of the hood. For fur-ther information regarding these regulations,please consult your Volvo retailer.
Engine oil. This label contains the recom-mended engine oil specifications.
Vehicle Identification Number (VIN). TheVIN plate is located on the top left surface ofthe dashboard. The Vehicle IdentificationNumber (VIN) should always be quoted in allcorrespondence concerning your vehicle withthe retailer and when ordering parts.
Tire inflation pressures. This label indicatesthe correct inflation pressures for the tiresthat were on the vehicle when it left the fac-tory.
Federal Motor Vehicle Safety Standards(FMVSS) specifications (USA) and Minis-try of Transport (CMVSS) standards(Canada). Your Volvo is designed to meet allapplicable safety standards, as evidenced bythe certification label on the driver's side B-pillar (the structural member at the side ofthe vehicle, at the rear of the driver's dooropening). This label also includes codes forpaint color, etc. For further information regar-ding these regulations, please consult yourVolvo retailer. U.S. models have the upperdecal; Canadian models have the lower one.