stop start VOLVO XC90 TWIN ENGINE HYBRID 2017 Owner's Guide
[x] Cancel search | Manufacturer: VOLVO, Model Year: 2017, Model line: XC90 TWIN ENGINE HYBRID, Model: VOLVO XC90 TWIN ENGINE HYBRID 2017Pages: 584, PDF Size: 14.2 MB
Page 410 of 584

STARTING AND DRIVING
408
Hybrid-related symbols andmessages
A number of symbols and messages relating tothe XC90 T8 Twin Engine Plug-in Hybrid may
appear in the instrument panel. They may alsobe displayed in combination with general indica-tor and warning symbols and will go out whenthe necessary action has been taken.
SymbolMessageExplanation
12 V Battery
Charging fault, service urgent. Driveto workshop
Battery fault. Contact a Volvo retailer or a trained and qualified Volvo service technician as soon aspossible.
12 V Battery
Charging fault Stop safely
Battery fault. Stop the vehicle as soon as possible and contact a Volvo retailer or a trained andqualified Volvo service technician.
12 V Battery
Low charge, temporarily reducedfunctionality
The hybrid battery's charge level is too low for optimal driving. Charge the battery as soon as possi-ble.
12 V Battery
Charging fault, low battery. Stopsafely
The hybrid battery is not sufficiently charged. Stop the vehicle as soon as possible and charge thebattery.
12 V Battery
Fuse failure Service required
Battery failure. Contact a Volvo retailer or a trained and qualified Volvo service technician as soon aspossible to have the system checked.
Hybrid battery
Overheated, stop safely
Battery temperature too high/too low. Stop the vehicle and turn off the engine. If the messageremains after the engine has been restarted, contact a Volvo retailer or a trained and qualified Volvoservice technician.
Page 412 of 584
STARTING AND DRIVING
410
Preparations for charging the hybridbattery
Several preparatory steps should be takenbefore starting to charge the hybrid battery.
WARNING
•The charging cable must be groundedwhen in use. It is equipped with a cordwith a grounding conductor and agrounding plug. The plug must beinserted into an appropriate outlet that isproperly installed and grounded inaccordance with all local codes and ordi-nances and is not damaged in any way
•Children should be supervised when inthe vicinity of the charging cable when itis plugged in
•High voltage is present in your electricmeter housing and power distributionservice panel. Contact with high voltagecan cause death or serious personalinjury
•Do not use the charging cable if it isdamaged in any way
•Always position the charging cable sothat it will not be driven over, stepped on,tripped over or otherwise damaged, orcause personal injury
•Disconnect the charger from the wall out-let before cleaning it
•Never connect the charging cable to anextension cord or a multiple plug socket
•If the hybrid battery needs to be replaced,this may only be done by Volvo retailer orauthorized Volvo workshop
Also, refer to the manufacturer's instructionsfor using the charging cable and its compo-nents.
Prior to charging
The charging cable and any of its componentsshould not be wet or submerged in any liquid.
The charge module or its plug should not beexposed to direct sunlight. This could cause theunit's overheating protector to reduce or stop thehybrid battery charging process.
Be sure the 120-/240-volt socket used has ade-quate current for charging electrically poweredvehicles. Have the socket checked by an licensedelectrician if you are uncertain.
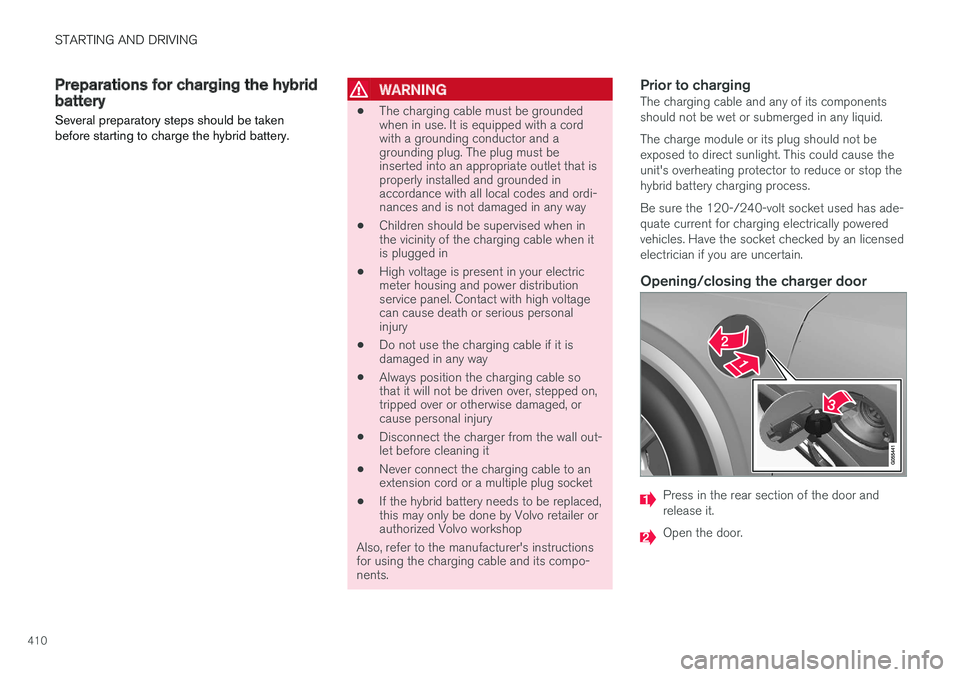
Opening/closing the charger door
Press in the rear section of the door andrelease it.
Open the door.
Page 413 of 584
STARTING AND DRIVING
}}
411
Pull off the charging socket's protectivecover and place it in the holder on the insideof the door. Be sure that the protective cov-er's rubber plug faces down to help keep thecover from falling out of the holder.
Put the cover back in position and close the doorin reverse order.
Stopping hybrid battery charging
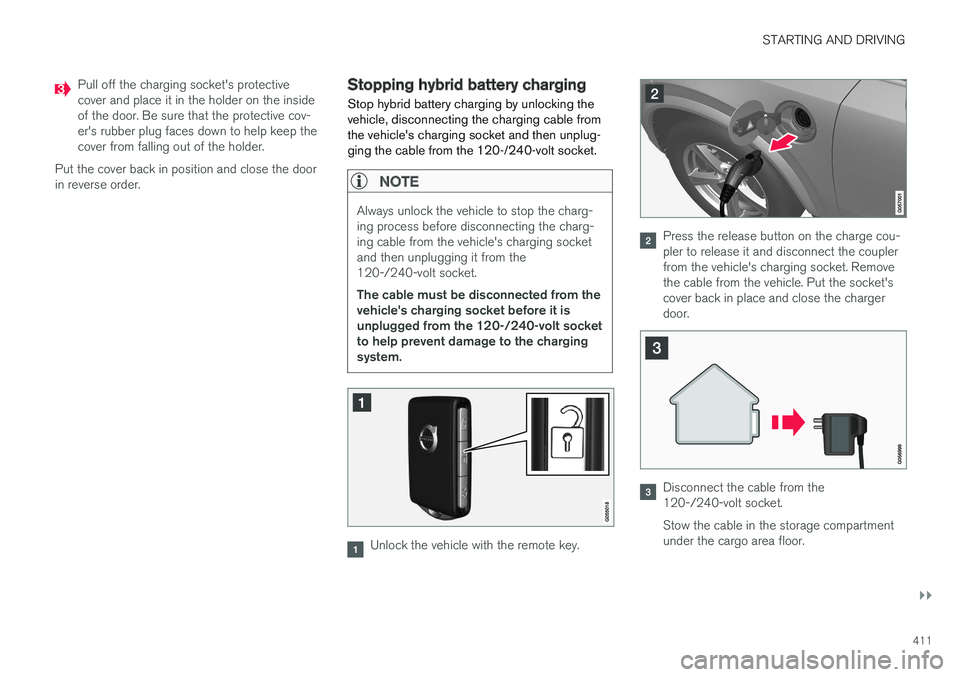
Stop hybrid battery charging by unlocking thevehicle, disconnecting the charging cable fromthe vehicle's charging socket and then unplug-ging the cable from the 120-/240-volt socket.
NOTE
Always unlock the vehicle to stop the charg-ing process before disconnecting the charg-ing cable from the vehicle's charging socketand then unplugging it from the120-/240-volt socket.
The cable must be disconnected from thevehicle's charging socket before it isunplugged from the 120-/240-volt socketto help prevent damage to the chargingsystem.
Unlock the vehicle with the remote key.
Press the release button on the charge cou-pler to release it and disconnect the couplerfrom the vehicle's charging socket. Removethe cable from the vehicle. Put the socket'scover back in place and close the chargerdoor.
Disconnect the cable from the120-/240-volt socket.
Stow the cable in the storage compartmentunder the cargo area floor.
Page 415 of 584
STARTING AND DRIVING
}}
413
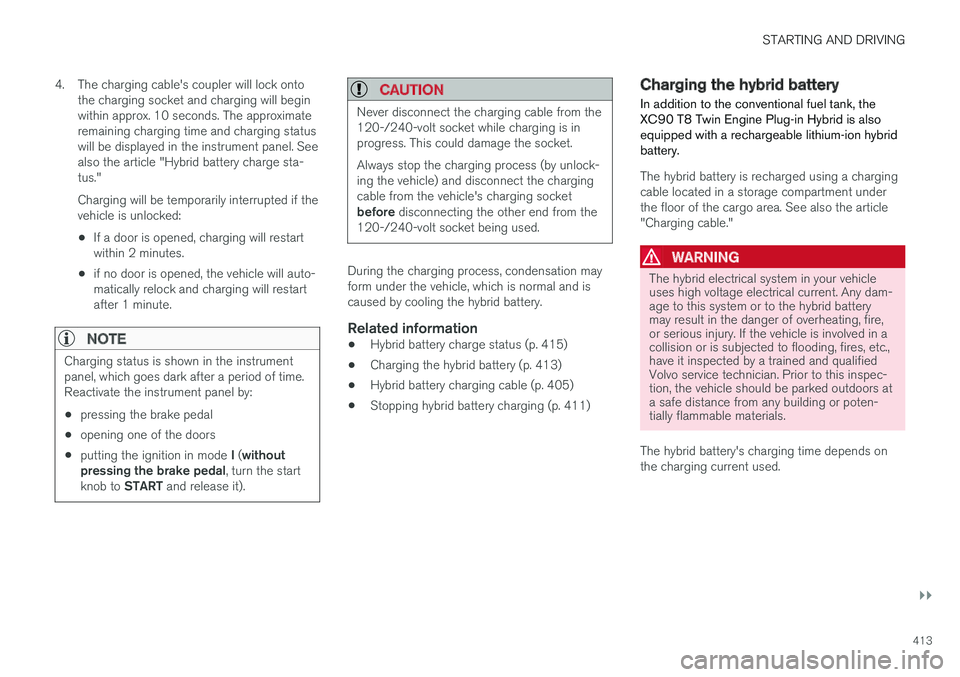
4.The charging cable's coupler will lock ontothe charging socket and charging will beginwithin approx. 10 seconds. The approximateremaining charging time and charging statuswill be displayed in the instrument panel. Seealso the article "Hybrid battery charge sta-tus."
Charging will be temporarily interrupted if thevehicle is unlocked:
•If a door is opened, charging will restartwithin 2 minutes.
•if no door is opened, the vehicle will auto-matically relock and charging will restartafter 1 minute.
NOTE
Charging status is shown in the instrumentpanel, which goes dark after a period of time.Reactivate the instrument panel by:
•pressing the brake pedal
•opening one of the doors
•putting the ignition in mode I (withoutpressing the brake pedal, turn the startknob to START and release it).
CAUTION
Never disconnect the charging cable from the120-/240-volt socket while charging is inprogress. This could damage the socket.
Always stop the charging process (by unlock-ing the vehicle) and disconnect the chargingcable from the vehicle's charging socketbefore disconnecting the other end from the120-/240-volt socket being used.
During the charging process, condensation mayform under the vehicle, which is normal and iscaused by cooling the hybrid battery.
Related information
•Hybrid battery charge status (p. 415)
•Charging the hybrid battery (p. 413)
•Hybrid battery charging cable (p. 405)
•Stopping hybrid battery charging (p. 411)
Charging the hybrid battery
In addition to the conventional fuel tank, theXC90 T8 Twin Engine Plug-in Hybrid is alsoequipped with a rechargeable lithium-ion hybridbattery.
The hybrid battery is recharged using a chargingcable located in a storage compartment underthe floor of the cargo area. See also the article"Charging cable."
WARNING
The hybrid electrical system in your vehicleuses high voltage electrical current. Any dam-age to this system or to the hybrid batterymay result in the danger of overheating, fire,or serious injury. If the vehicle is involved in acollision or is subjected to flooding, fires, etc.,have it inspected by a trained and qualifiedVolvo service technician. Prior to this inspec-tion, the vehicle should be parked outdoors ata safe distance from any building or poten-tially flammable materials.
The hybrid battery's charging time depends onthe charging current used.
Page 418 of 584
![VOLVO XC90 TWIN ENGINE HYBRID 2017 Owners Guide ||
STARTING AND DRIVING
416
GraphicMessageExplanation
Fullychargedat:[Time] isdisplayedwith ananimatedblue puls-ing lightthroughthechargingcable.
Charging is in pro-gress and the approx-imate time whe VOLVO XC90 TWIN ENGINE HYBRID 2017 Owners Guide ||
STARTING AND DRIVING
416
GraphicMessageExplanation
Fullychargedat:[Time] isdisplayedwith ananimatedblue puls-ing lightthroughthechargingcable.
Charging is in pro-gress and the approx-imate time whe](/img/45/59300/w960_59300-417.png)
||
STARTING AND DRIVING
416
GraphicMessageExplanation
Fullychargedat:[Time] isdisplayedwith ananimatedblue puls-ing lightthroughthechargingcable.
Charging is in pro-gress and the approx-imate time when thebattery will be fullycharged will be dis-played.
GraphicMessageExplanation
Charg-ing com-plete isdisplayed.An imagewill besuperim-posedover thegraphic ofthe vehi-cle with agreenLEDindicatorlight inthechargingsocket.
The battery is fullycharged.
Charg-ing errorwill bedisplayedand theLED indi-cator lightin thechargingsocketwill bered.
A fault has occurred.Check that the charg-ing cable is correctlyconnected to thevehicle's chargingsocket and the120-/240-volt socket.
Related information
•Hybrid battery charging cable (p. 405)
•Charging the hybrid battery (p. 413)
•Preparations for charging the hybrid battery(p. 410)
•Stopping hybrid battery charging (p. 411)
Page 419 of 584
STARTING AND DRIVING
}}
417
Charger status indicators
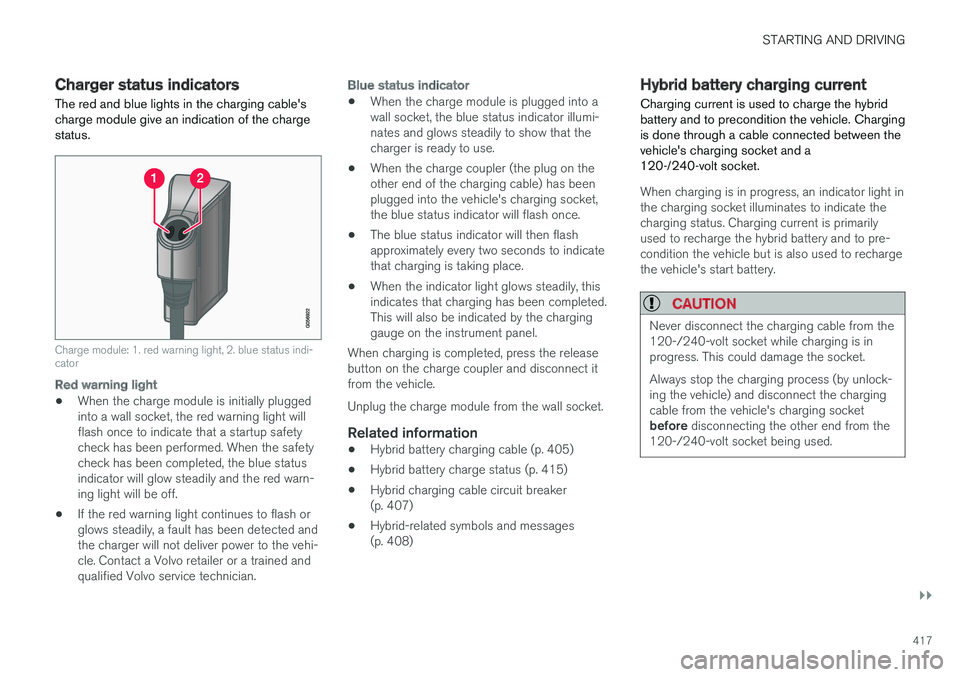
The red and blue lights in the charging cable'scharge module give an indication of the chargestatus.
Charge module: 1. red warning light, 2. blue status indi-cator
Red warning light
•When the charge module is initially pluggedinto a wall socket, the red warning light willflash once to indicate that a startup safetycheck has been performed. When the safetycheck has been completed, the blue statusindicator will glow steadily and the red warn-ing light will be off.
•If the red warning light continues to flash orglows steadily, a fault has been detected andthe charger will not deliver power to the vehi-cle. Contact a Volvo retailer or a trained andqualified Volvo service technician.
Blue status indicator
•When the charge module is plugged into awall socket, the blue status indicator illumi-nates and glows steadily to show that thecharger is ready to use.
•When the charge coupler (the plug on theother end of the charging cable) has beenplugged into the vehicle's charging socket,the blue status indicator will flash once.
•The blue status indicator will then flashapproximately every two seconds to indicatethat charging is taking place.
•When the indicator light glows steadily, thisindicates that charging has been completed.This will also be indicated by the charginggauge on the instrument panel.
When charging is completed, press the releasebutton on the charge coupler and disconnect itfrom the vehicle.
Unplug the charge module from the wall socket.
Related information
•Hybrid battery charging cable (p. 405)
•Hybrid battery charge status (p. 415)
•Hybrid charging cable circuit breaker(p. 407)
•Hybrid-related symbols and messages(p. 408)
Hybrid battery charging current
Charging current is used to charge the hybridbattery and to precondition the vehicle. Chargingis done through a cable connected between thevehicle's charging socket and a120-/240-volt socket.
When charging is in progress, an indicator light inthe charging socket illuminates to indicate thecharging status. Charging current is primarilyused to recharge the hybrid battery and to pre-condition the vehicle but is also used to rechargethe vehicle's start battery.
CAUTION
Never disconnect the charging cable from the120-/240-volt socket while charging is inprogress. This could damage the socket.
Always stop the charging process (by unlock-ing the vehicle) and disconnect the chargingcable from the vehicle's charging socketbefore disconnecting the other end from the120-/240-volt socket being used.
Page 432 of 584
||
STARTING AND DRIVING
430
Suspension leveling settings
Easy entry
The vehicle can be lowered to entering and exit-ing easier.
In the center display's Top view:
1.Tap Settings.
2.Tap My CarSuspension .
3.Select Easy Entry/Exit Control.
>When the vehicle is parked and theengine is turned off, the level is lowered.Level adjustment will stop if a side door isopened and will resume after a slightdelay when the door has been closed.When the engine is started and the vehi-cle begins to move, the level will be raisedto the height set by the selected drivemode.
If a door has been opened and closed, there maybe a slight delay before the leveling function willresume.
Turning off suspension and leveling control
In certain situations, this function has to beturned off, for example when lifting the vehicle ona jack to help avoid problems created by the dif-ference in levels in the pneumatic suspensionwhen the vehicle is raised.
1.Tap Settings in the center display's Topview.
2.Tap My CarSuspension .
3.Select Deactivate Suspension & LevelingControl.
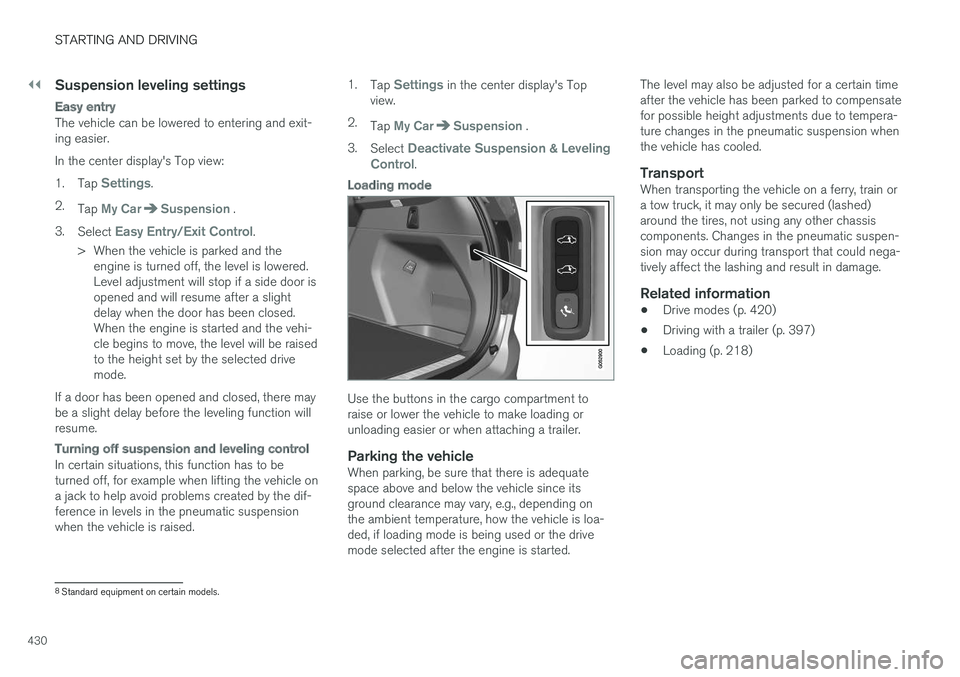
Loading mode
Use the buttons in the cargo compartment toraise or lower the vehicle to make loading orunloading easier or when attaching a trailer.
Parking the vehicle
When parking, be sure that there is adequatespace above and below the vehicle since itsground clearance may vary, e.g., depending onthe ambient temperature, how the vehicle is loa-ded, if loading mode is being used or the drivemode selected after the engine is started.
The level may also be adjusted for a certain timeafter the vehicle has been parked to compensatefor possible height adjustments due to tempera-ture changes in the pneumatic suspension whenthe vehicle has cooled.
Transport
When transporting the vehicle on a ferry, train ora tow truck, it may only be secured (lashed)around the tires, not using any other chassiscomponents. Changes in the pneumatic suspen-sion may occur during transport that could nega-tively affect the lashing and result in damage.
Related information
•Drive modes (p. 420)
•Driving with a trailer (p. 397)
•Loading (p. 218)
8Standard equipment on certain models.
Page 494 of 584
||
WHEELS AND TIRES
492
the inflation pressure recommended by the vehi-cle manufacturer on the vehicle placard or tireinflation pressure label. (If your vehicle has tiresof a different size than the size indicated on thevehicle placard or tire inflation pressure label, youshould determine the proper tire inflation pres-sure for those tires.)
As an added safety feature, your vehicle hasbeen equipped with a tire pressure monitoringsystem (TPMS) that illuminates a low tire pres-sure telltale when one or more of your tires issignificantly under-inflated. Accordingly, when thelow tire pressure telltale illuminates, you shouldstop and check your tires as soon as possible,and inflate them to the proper pressure.
Driving on a significantly under-inflated tire cau-ses the tire to overheat and can lead to tire fail-ure. Under-inflation also reduces fuel efficiencyand tire tread life, and may affect the vehicle'shandling and stopping ability. Please note thatthe TPMS is not a substitute for proper tire main-tenance, and it is the driver's responsibility tomaintain correct tire pressure, even if under-infla-tion has not reached the level to trigger illumina-tion of the TPMS low tire pressure telltale.
Your vehicle has also been equipped with aTPMS malfunction indicator to indicate when thesystem is not operating properly. The TPMS mal-function indicator is combined with the low tirepressure telltale.
When the system detects a malfunction, the tell-tale will flash for approximately one minute andthen remain continuously illuminated. Thissequence will continue upon subsequent vehiclestart-ups as long as the malfunction exists. Whenthe malfunction indicator is illuminated, the sys-tem may not be able to detect or signal low tirepressure as intended.
TPMS malfunctions may occur for a variety ofreasons, including the installation of replacementor alternate tires or wheels on the vehicle thatprevent the TPMS from functioning properly.Always check the TPMS malfunction telltale afterreplacing one or more tires or wheels on yourvehicle to ensure that the replacement or alter-nate tires and wheels allow the TPMS to con-tinue to function properly.
Messages in the instrument panel
When the TPMS symbol illuminates, the followingtext messages may also be displayed:
•Tire pressure low
•Tire pressure system Temporarilyunavailable
•Tire pressure system Service required
If TPMS cannot determine which tire(s) have lowinflation pressure:
•All four tires will be shown as affected in thecenter display
After changing wheels, always calibrate the sys-tem to avoid false warnings.
TPMS does not replace the need for regular tireinspection and maintenance.
NOTE
If you change to tires with a different dimen-sion than the factory-installed ones, theTPMS system must be calibrated for thesetires.
TPMS cannot be turned off.
WARNING
Incorrect inflation pressure could lead to tirefailure, resulting in a loss of control of thevehicle.
Related information
•Checking tire inflation pressure (p. 493)
•Reinflating tires equipped with the TirePressure Monitoring System (TPMS)(p. 494)
•Ignition modes (p. 400)
Page 513 of 584

MAINTENANCE AND SERVICING
511
Automatically connecting to a
workshop
Without driver confirmation
This is the most convenient way to transmit trou-ble-shooting data. The driver does not need toconfirm that the vehicle will establish a connec-tion.
If the vehicle stops at a workshop and the engineis switched off using the start knob, a messagewill appear above the status bar in the center dis-play. The vehicle will be automatically connectedwhen the driver's door is opened if the driverdoes not tap the Cancel button in the message.
To help prevent the driver from being disturbedby unwanted requests to connect (e.g., if thevehicle is often parked near a workshop with anauthorized Volvo network), the vehicle will switchto manual connection if the driver cancels a con-nection request twice within 5 days.
With driver confirmation
With this alternative, the driver must confirm aconnection.
If the vehicle stops at a workshop and the engineis switched off using the start knob, a pop-upwindow will open in the center display. The vehi-cle will be automatically connected when the driv-er's door is opened if the driver taps Connect inthe pop-up window. If the driver does nothing ortaps the pop-up window's Abort button, noattempt will be made to establish a connection.
NOTE
To help prevent the driver from being distur-bed by unwanted requests to connect (e.g., ifthe vehicle is often parked near a workshopwith an authorized Volvo network), the vehiclewill switch to manual connection if the drivercancels a connection request twice within5 days.
Manually connecting to a workshop
Manual connections are handled by the servicetechnician.
Changing the way a connection is made
The type of connection (manual or automatic)can be changed in the center display's Settingsmenu.
1. Pull down the center display's Top view andtap Settings.
2.Tap CommunicationVolvo ServiceNetworks.
3.Select Automatically connect when Iarrive, Ask before connecting or Neverconnect and never ask (manual connec-tions).
Related information
•Internet connected vehicle (p. 466)
•Settings view (p. 115)
Climate system service
Service and repairs on the air conditioning sys-tem should only be done by a trained and quali-fied Volvo service technician.
Troubleshooting and repairs
The air conditioning system contains a floures-cent tracer substance. Ultraviolet light is used tosearch for leaks in the system.
Refrigerant R134a
WARNING
The air conditioning system contains therefrigerant R134a under pressure. Serviceand repairs on the system should only bedone by a trained and qualified Volvo servicetechnician.
Related information
•Climate control system (p. 188)
Page 516 of 584
||
MAINTENANCE AND SERVICING
514
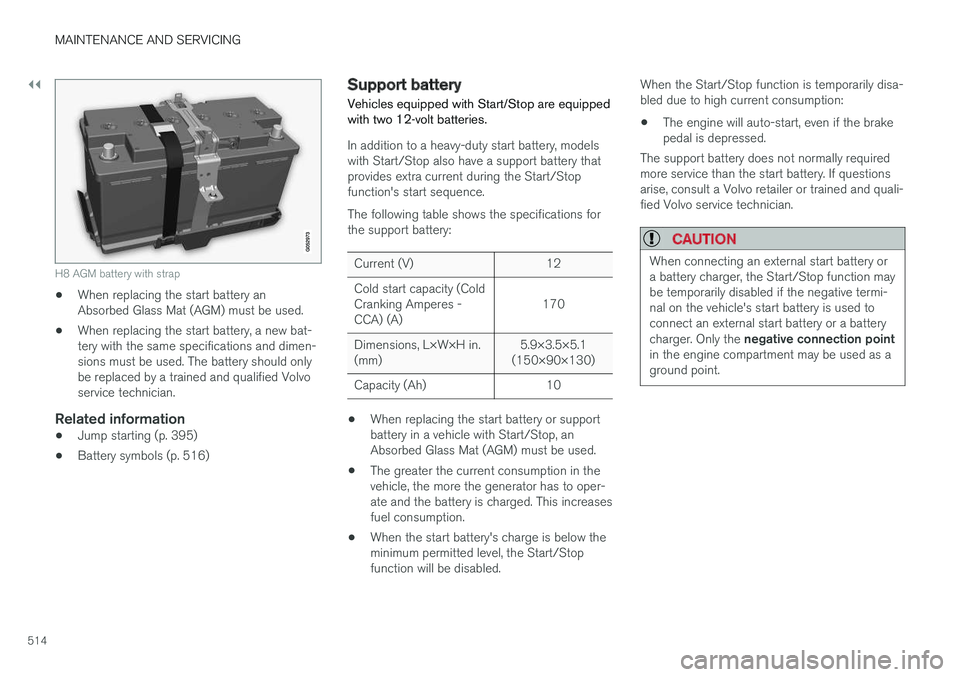
H8 AGM battery with strap
•When replacing the start battery anAbsorbed Glass Mat (AGM) must be used.
•When replacing the start battery, a new bat-tery with the same specifications and dimen-sions must be used. The battery should onlybe replaced by a trained and qualified Volvoservice technician.
Related information
•Jump starting (p. 395)
•Battery symbols (p. 516)
Support battery
Vehicles equipped with Start/Stop are equippedwith two 12-volt batteries.
In addition to a heavy-duty start battery, modelswith Start/Stop also have a support battery thatprovides extra current during the Start/Stopfunction's start sequence.
The following table shows the specifications forthe support battery:
Current (V)12
Cold start capacity (ColdCranking Amperes -CCA) (A)170
Dimensions, L×W×H in.(mm)5.9×3.5×5.1(150×90×130)
Capacity (Ah)10
•When replacing the start battery or supportbattery in a vehicle with Start/Stop, anAbsorbed Glass Mat (AGM) must be used.
•The greater the current consumption in thevehicle, the more the generator has to oper-ate and the battery is charged. This increasesfuel consumption.
•When the start battery's charge is below theminimum permitted level, the Start/Stopfunction will be disabled.
When the Start/Stop function is temporarily disa-bled due to high current consumption:
•The engine will auto-start, even if the brakepedal is depressed.
The support battery does not normally requiredmore service than the start battery. If questionsarise, consult a Volvo retailer or trained and quali-fied Volvo service technician.
CAUTION
When connecting an external start battery ora battery charger, the Start/Stop function maybe temporarily disabled if the negative termi-nal on the vehicle's start battery is used toconnect an external start battery or a batterycharger. Only the negative connection pointin the engine compartment may be used as aground point.