wheel YAMAHA GRIZZLY 350 2014 Owners Manual
[x] Cancel search | Manufacturer: YAMAHA, Model Year: 2014, Model line: GRIZZLY 350, Model: YAMAHA GRIZZLY 350 2014Pages: 144, PDF Size: 3.34 MB
Page 10 of 144

Axle boots ................................................ 8-35
Brake light switches ................................. 8-35
Checking and lubricating the cables ........ 8-36
Checking and lubricating the front and rear brake levers .................................... 8-37
Checking and lubricating the brake pedal ...................................................... 8-37
Checking the wheel hub bearings ............ 8-38
Lubricating the steering shaft ................... 8-38
Battery ...................................................... 8-39
Replacing a fuse ...................................... 8-41
Replacing a headlight bulb ....................... 8-43
Adjusting a headlight beam ...................... 8-45
Replacing the tail/brake light bulb ............ 8-45
Removing a wheel .................................... 8-45
Installing a wheel ...................................... 8-46
Troubleshooting ....................................... 8-47
Troubleshooting chart .............................. 8-48
CLEANING AND STORAGE .......................... 9-1 Cleaning ..................................................... 9-1
Storage ....................................................... 9-2
SPECIFICATIONS ...................................... 10-1
CONSUMER INFORMATION ...................... 11-1 Identification numbers .............................. 11-1
U1NS62E0.book Page 3 Monday, April 8, 2013 4:59 PM
Page 21 of 144

2-2
2
●Never operate at speeds too fast for your skills
or the riding conditions. Always go at a speed
that is proper for the terrain, visibility, operating
conditions, and your experience.●Never attempt wheelies, jumps, or other stunts.●Always inspect your ATV each time you use it to
make sure it is in safe operating condition. Al-
ways follow the inspection and maintenance
procedures and schedules described in this
manual.●Always keep both hands on the handlebars and
both feet on the footboards of the ATV during
operation.●Always go slowly and be extra careful when op-
erating on unfamiliar terrain. Always be alert to
changing terrain conditions when operating the
ATV.●Never operate on excessively rough, slippery or
loose terrain until you have learned and prac-
ticed the skills necessary to control the ATV on
such terrain. Always be especially cautious on
these kinds of terrain.●Always follow proper procedures for turning as
described in this manual. Practice turning at low
speeds before attempting to turn at faster
speeds and never turn at excessive speeds.
●Never operate the ATV on hills too steep for the
ATV or for your abilities. Practice on smaller hills
before attempting larger hills.●Always follow proper procedures for climbing
hills as described in this manual. Check the ter-
rain carefully before you start up any hill. Never
climb hills with excessively slippery or loose sur-
faces. Shift your weight forward. Never open the
throttle suddenly. Never go over the top of a hill
at high speed.●Always follow proper procedures for going down
hills and for braking on hills as described in this
manual. Check the terrain carefully before you
start down any hill. Shift your weight backward.
Never go down a hill at high speed. Avoid going
down a hill at an angle that would cause the ve-
hicle to lean sharply to one side. Go straight
down the hill where possible.●Always follow proper procedures for crossing
the side of a hill as described in this manual.
Avoid hills with excessively slippery or loose sur-
faces. Shift your weight to the uphill side of the
ATV. Never attempt to turn the ATV around on
any hill until you have mastered the turning tech-
nique described in this manual on level ground.
Avoid crossing the side of a steep hill if possible.
U1NS62E0.book Page 2 Monday, April 8, 2013 4:59 PM
Page 24 of 144

2-5
24. Once immediate safety hazards are con-
firmed not to exist, you may remove your hel-
met to more closely inspect your vehicle.
Check for external signs of wear, broken
parts, fluid leaks, cracks in the frame, suspen-
sion damage, wheel damage, and so on. Fuel,
oil, and coolant usually give off a noticeable
odor.
5. If your vehicle will not restart or if it is unsafe to ride, then turn off all vehicle systems (en-
gine stop switch, main switch, and fuel cock),
and then signal or go for help.
Aftermarket Parts, Accessories, and Modifica-
tions
While you may find aftermarket products similar in
design and quality to genuine Yamaha accesso-
ries, recognize that some aftermarket accessories
or modifications are not suitable because of poten-
tial safety hazards to you or others. Installing after-
market products or having other modifications
performed to your vehicle that change any of the
vehicle’s design or operation characteristics can
put you and others at greater risk of serious injury
or death. You are responsible for injuries related to changes in the vehicle. Keep the following guide-
lines in mind, as well as those provided under
“Loading” when mounting accessories.
●Never install accessories that would impair the
performance of your ATV. Carefully inspect the
accessory before using it to make sure that it
does not in any way reduce ground clearance,
limit suspension travel, steering travel or control
operation.●Accessories fitted to the ATV can create instabil-
ity due to improper weight distribution.●Bulky or large accessories may seriously affect
the stability of the ATV.●Certain accessories can displace the operator
from his or her normal riding position. This im-
proper position limits the freedom of movement
of the operator and may limit control ability,
therefore, such accessories are not recom-
mended.●Use caution when adding electrical accessories.
If electrical accessories exceed the capacity of
the ATV’s electrical system, an electric failure
could result, which could cause a dangerous
loss of lights or engine power.
U1NS62E0.book Page 5 Monday, April 8, 2013 4:59 PM
Page 27 of 144

3-2
3
EBU17712Controls and instruments
TIPThe ATV you have purchased may differ slightly
from the figures shown in this manual.
1. Rear brake lever
2. Handlebar switches
3. Starter (choke)
4. Parking brake lock plate
5. Horn switch
6. Drive select lever
7. Speedometer
8. Main switch
9. Fuel tank cap
10.On-Command four-wheel-drive switch
11.Throttle lever
12.Front brake lever
123410
567 891112
U1NS62E0.book Page 2 Monday, April 8, 2013 4:59 PM
Page 29 of 144

4-2
4
EBU17816Indicator lights and warning light For EuropeFor Oceania
EBU30820Neutral indicator light “ ” (For Europe)/“NEU-
TRAL” (For Oceania)
This indicator light comes on when the transmis-
sion is in the neutral position.EBU30810Reverse indicator light “ ” (For Europe)/“RE-
VERSE” (For Oceania)
This indicator light comes on when the transmis-
sion is in the reverse position.
1. Reverse indicator light “R”
2. Neutral indicator light “N”
3. On-Command four-wheel-drive indicator light “ ”
4. Oil temperature warning light “ ”
43
1
2
1. Reverse indicator light “REVERSE”
2. Neutral indicator light “NEUTRAL”
3. On-Command four-wheel-drive indicator light “ ”
4. Oil temperature warning light “ ”
U1NS62E0.book Page 2 Monday, April 8, 2013 4:59 PM
Page 30 of 144

4-3
4
EBU26932Oil temperature warning light “ ”
This warning light comes on when the engine over-
heats. When this occurs, stop the engine as soon
as it is safe to do so, and allow it to cool.
The electrical circuit of the warning light can be
checked by turning the key to “ON”, with the engine
stop switch set to “ ”, and then pushing the start
switch.
If the warning light does not come on while the start
switch is being pushed, or if the warning light re-
mains on after the start switch is released, have a
Yamaha dealer check the electrical circuit. If the warning light stays on when the engine is
cool, have a Yamaha dealer check the electrical
circuit.NOTICEECB00010●The engine may overheat if the ATV is over-
loaded. In this case, reduce the load to spec-
ification.●Start the engine after making sure that the
warning light is out. Continuous use while
the warning light is on may cause damage to
the engine.
EBU17952On-Command four-wheel-drive indicator
light “ ”
This indicator light comes on when the On-Com-
mand four-wheel-drive switch is set to the “4WD”
position.TIPDue to the synchronizing mechanism in the differ-
ential gear case, the light may not come on until
the ATV starts moving.EBU18023Speedometer This speedometer is equipped with an odometer
and a tripmeter. The tripmeter can be reset to zero
with the reset knob. Use the tripmeter to estimate
how far you can ride on a tank of fuel before going
to reserve. This information will enable you to plan
fuel stops in the future.
U1NS62E0.book Page 3 Monday, April 8, 2013 4:59 PM
Page 33 of 144

4-6
4
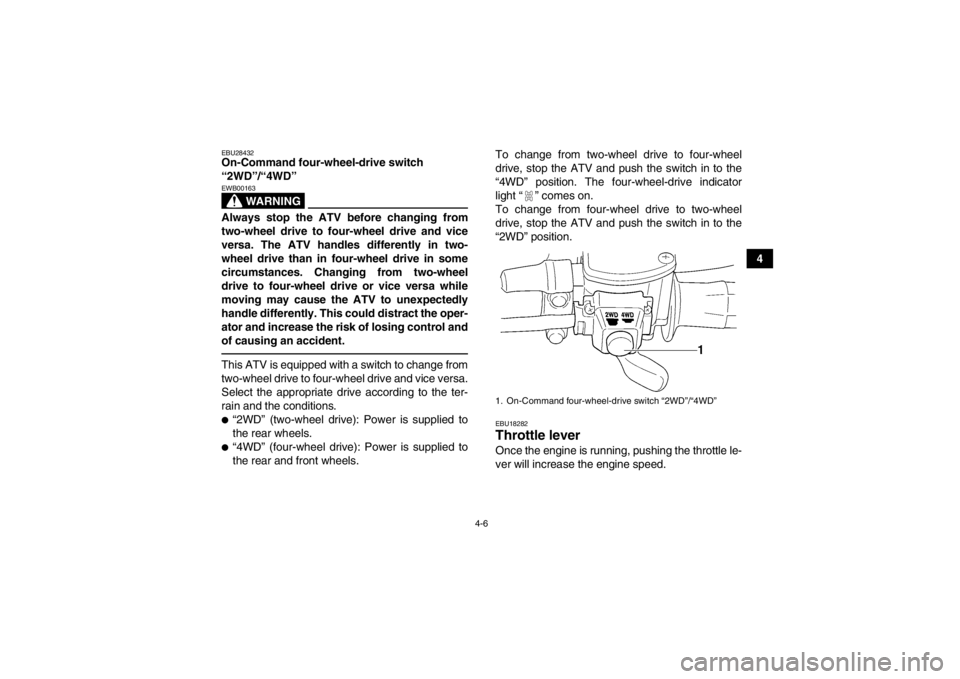
EBU28432On-Command four-wheel-drive switch
“2WD”/“4WD”
WARNING
EWB00163Always stop the ATV before changing from
two-wheel drive to four-wheel drive and vice
versa. The ATV handles differently in two-
wheel drive than in four-wheel drive in some
circumstances. Changing from two-wheel
drive to four-wheel drive or vice versa while
moving may cause the ATV to unexpectedly
handle differently. This could distract the oper-
ator and increase the risk of losing control and
of causing an accident.This ATV is equipped with a switch to change from
two-wheel drive to four-wheel drive and vice versa.
Select the appropriate drive according to the ter-
rain and the conditions.●“2WD” (two-wheel drive): Power is supplied to
the rear wheels.●“4WD” (four-wheel drive): Power is supplied to
the rear and front wheels.To change from two-wheel drive to four-wheel
drive, stop the ATV and push the switch in to the
“4WD” position. The four-wheel-drive indicator
light “ ” comes on.
To change from four-wheel drive to two-wheel
drive, stop the ATV and push the switch in to the
“2WD” position.
EBU18282Throttle lever Once the engine is running, pushing the throttle le-
ver will increase the engine speed.1. On-Command four-wheel-drive switch “2WD”/“4WD”
U1NS62E0.book Page 6 Monday, April 8, 2013 4:59 PM
Page 48 of 144

5-2
5
Front brake Check operation. If soft or spongy, have Yamaha dealer bleed hy-
draulic system.
Check brake pads for wear , and replace if necessary.
Check brake fluid level in reservoir, and add specified brake fluid to specified level if necessary.
Check hydraulic system for leakage. Correct if necessary. 5-3, 8-27, 8-29, 8-30
Rear brake Check operation, and correct if necessary.
Lubricate cables if necessary.
Check lever and pedal free play, and adjust if necessary. 5-3, 8-27, 8-30
Throttle lever Make sure that operation is smooth. Lubricate cable and lever hous-
ing if necessary.
Check lever free play, and adjust if necessary. 5-4, 8-26
Control cables Make sure that operation is smooth. Lubricate if necessary. 8-36
Wheels and tires Check wheel condition, and replace if damaged.
Check tire condition and tread depth. Replace if necessary.
Check air pressure. Correct if necessary. 5-4
Brake pedal Make sure that operation is smooth. Lubricate pedal pivoting point if
necessary. 8-37
Brake levers Make sure that operation is smooth. Lubricate lever pivoting points if
necessary. 8-37
Axle boots Check for cracks or damage, and replace if necessary. 8-35
Chassis fasteners Make sure that all nuts, bolts and screws are properly tightened. 5-6
Instruments, lights and
switches Check operation, and correct if necessary. 5-6
ITEM ROUTINE PAGEU1NS62E0.book Page 2 Monday, April 8, 2013 4:59 PM
Page 57 of 144

6-5
6
0–160 km (0–100 mi) or 0–10 hours
Avoid prolonged operation above 1/2 throttle. Vary
the speed of the ATV regularly. Do not operate it at
one set throttle position.
160–320 km (100–200 mi) or 10–20 hours
Avoid prolonged operation above 3/4 throttle. Rev
the engine freely, but do not use full throttle at any
time.
320 km (200 mi) or 20 hours and beyond
The ATV can now be operated normally.
NOTICEECB00220If any engine trouble should occur during the
engine break-in period, immediately have a
Yamaha dealer check the ATV.EBU20702Parking When parking the ATV, apply the brake pedal, shift
the drive select lever into the forward position, stop
the engine, apply the parking brake, and then turn
the fuel cock to “OFF”.
EBU20764Parking on a slope
WARNING
EWB00831Avoid parking on hills or other inclines. Park-
ing on a hill or other incline could cause the
ATV to roll out of control, increasing the
chance of an accident. If you must park on an
incline, place the ATV transversely across the
incline, shift the drive select lever to the for-
ward position, stop the engine, apply the park-
ing brake, and then block the front and rear
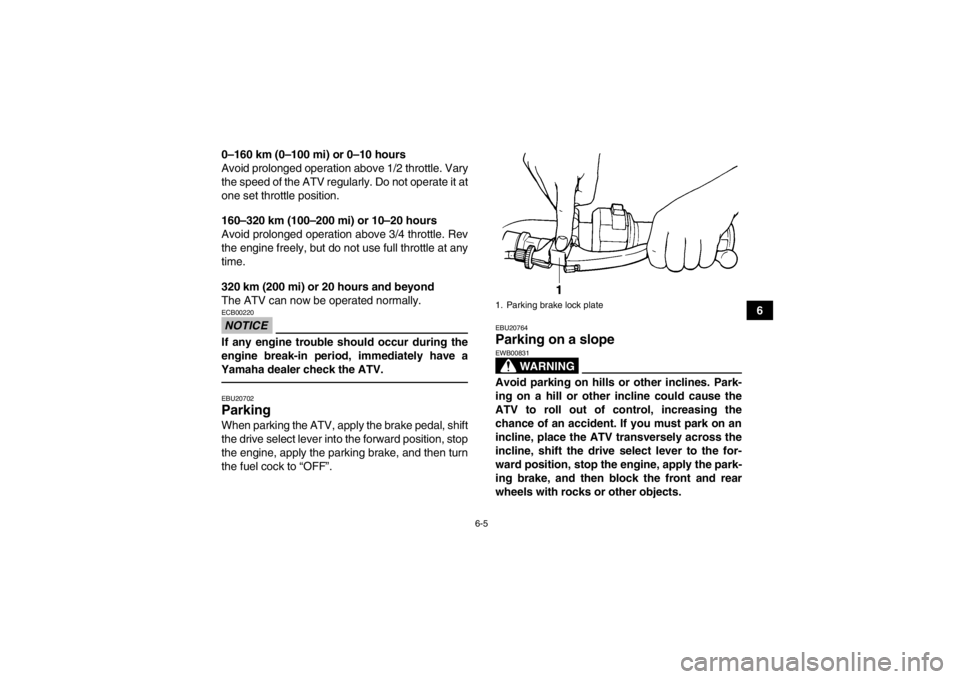
wheels with rocks or other objects.1. Parking brake lock plate
U1NS62E0.book Page 5 Monday, April 8, 2013 4:59 PM
Page 67 of 144

7-7
7
Drive more slowly than you would without a load.
The more weight you carry, the slower you should
go. Although conditions vary, it is good practice to
drive slowly (shift into first gear or low drive if avail-
able on this model) whenever you are carrying
heavier loads or when towing a trailer. During operation
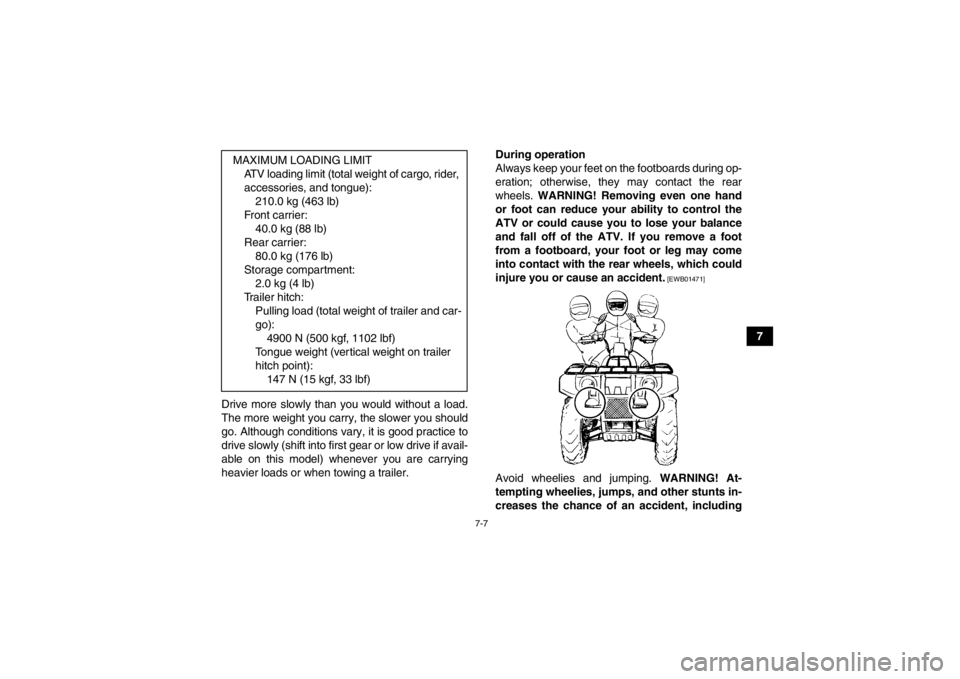
Always keep your feet on the footboards during op-
eration; otherwise, they may contact the rear
wheels.
WARNING! Removing even one hand
or foot can reduce your ability to control the
ATV or could cause you to lose your balance
and fall off of the ATV. If you remove a foot
from a footboard, your foot or leg may come
into contact with the rear wheels, which could
injure you or cause an accident.
[EWB01471]
Avoid wheelies and jumping. WARNING! At-
tempting wheelies, jumps, and other stunts in-
creases the chance of an accident, including
MAXIMUM LOADING LIMIT
ATV loading limit (total weight of cargo, rider,
accessories, and tongue):210.0 kg (463 lb)
Fron t c a rr ie r : 40.0 kg (88 lb)
Rear carrier: 80.0 kg (176 lb)
Storage compartment: 2.0 kg (4 lb)
Trailer hitch: Pulling load (total weight of trailer and car-
go): 4900 N (500 kgf, 1102 lbf)
Tongue weight (ver tical weight on trailer
hitch point): 147 N (15 kgf, 33 lbf)
U1NS62E0.book Page 7 Monday, April 8, 2013 4:59 PM