YAMAHA GRIZZLY 350 2016 Owners Manual
Manufacturer: YAMAHA, Model Year: 2016, Model line: GRIZZLY 350, Model: YAMAHA GRIZZLY 350 2016Pages: 146, PDF Size: 3.35 MB
Page 121 of 146
8-38
8
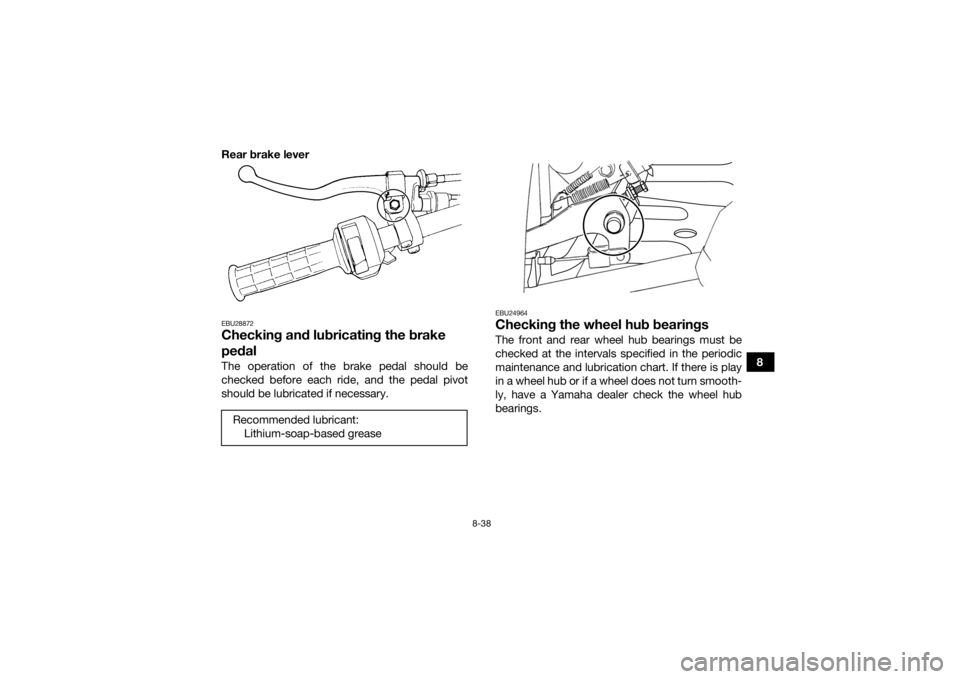
Rear brake lever
EBU28872Checking and lubricating the brake
pedalThe operation of the brake pedal should be
checked before each ride, and the pedal pivot
should be lubricated if necessary.
EBU24964Checking the wheel hub bearingsThe front and rear wheel hub bearings must be
checked at the intervals specified in the periodic
maintenance and lubrication chart. If there is play
in a wheel hub or if a wheel does not turn smooth-
ly, have a Yamaha dealer check the wheel hub
bearings.
Recommended lubricant:
Lithium-soap-based grease
U1NS64E0.book Page 38 Thursday, June 25, 2015 8:36 AM
Page 122 of 146
8-39
8
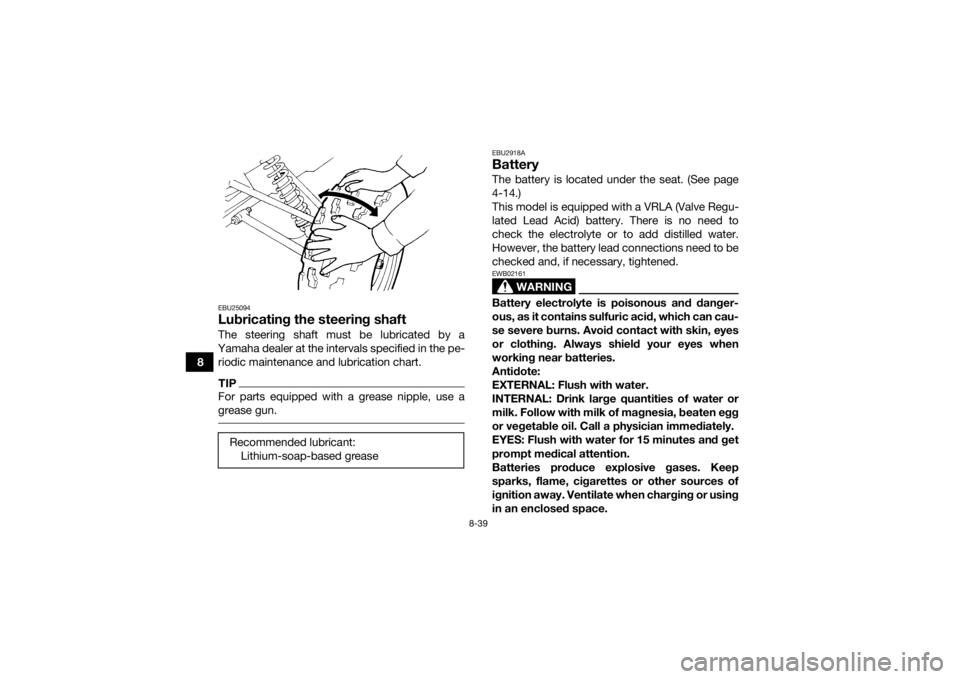
EBU25094Lubricating the steering shaftThe steering shaft must be lubricated by a
Yamaha dealer at the intervals specified in the pe- riodic maintenance and lubrication chart.TIPFor parts equipped with a grease nipple, use a
grease gun.
EBU2918ABatteryThe battery is located under the seat. (See page
4-14.)
This model is equipped with a VRLA (Valve Regu-
lated Lead Acid) battery. There is no need to
check the electrolyte or to add distilled water.
However, the battery lead connections need to be
checked and, if necessary, tightened.
WARNING
EWB02161Battery electrolyte is poisonous and danger-
ous, as it contains sulfuric acid, which can cau-
se severe burns. Avoid contact with skin, eyes
or clothing. Always shield your eyes when
working near batteries.
Antidote:
EXTERNAL: Flush with water.
INTERNAL: Drink large quantities of water or
milk. Follow with milk of magnesia, beaten egg
or vegetable oil. Call a physician immediately.
EYES: Flush with water for 15 minutes and get
prompt medical attention.
Batteries produce explosive gases. Keep
sparks, flame, cigarettes or other sources of
ignition away. Ventilate when charging or using
in an enclosed space.
Recommended lubricant:
Lithium-soap-based grease
U1NS64E0.book Page 39 Thursday, June 25, 2015 8:36 AM
Page 123 of 146
8-40
8
KEEP OUT OF REACH OF CHILDREN.
NOTICEECB00621Never attempt to remove the battery cell seals,
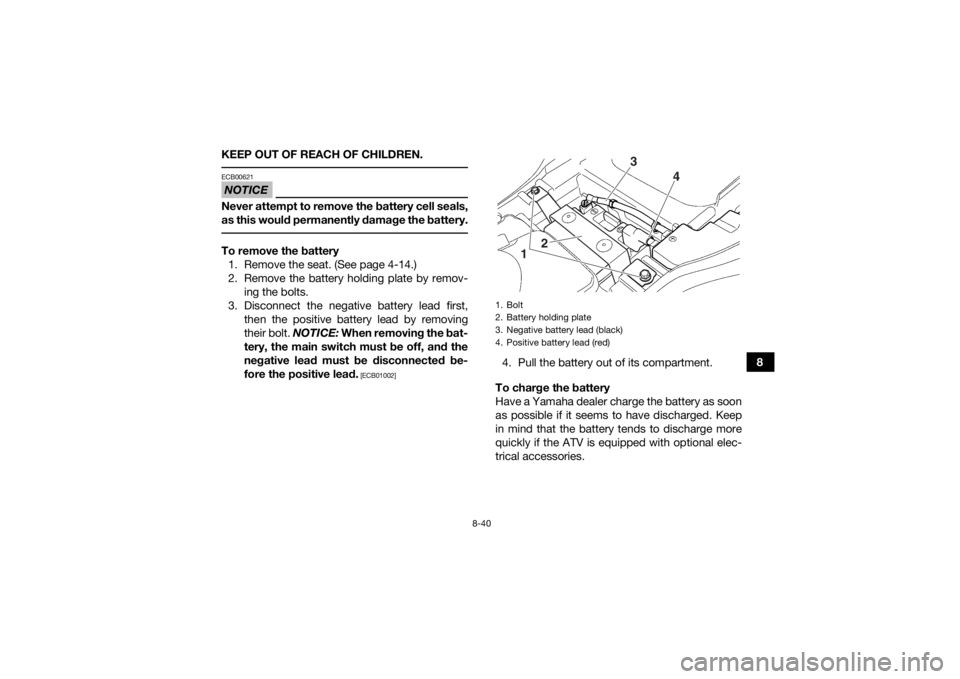
as this would permanently damage the battery. To remove the battery
1. Remove the seat. (See page 4-14.)
2. Remove the battery holding plate by remov- ing the bolts.
3. Disconnect the negative battery lead first, then the positive battery lead by removing
their bolt. NOTICE: When removing the bat-
tery, the main switch must be off, and the
negative lead must be disconnected be-
fore the positive lead.
[ECB01002]
4. Pull the battery out of its compartment.
To charge the battery
Have a Yamaha dealer charge the battery as soon
as possible if it seems to have discharged. Keep
in mind that the battery tends to discharge more
quickly if the ATV is equipped with optional elec-
trical accessories.1. Bolt
2. Battery holding plate
3. Negative battery lead (black)
4. Positive battery lead (red)
1 2 3
4
U1NS64E0.book Page 40 Thursday, June 25, 2015 8:36 AM
Page 124 of 146
8-41
8
NOTICEECB00932To charge a VRLA (Valve Regulated Lead Acid)
battery, a special (constant-voltage) battery
charger is required. Using a conventional bat-
tery charger will damage the battery. To store the battery
If the ATV will not be used for more than one
month, remove the battery, fully charge it, and
then place it in a cool, dry place.
If the battery will be stored for more than two
months, check it at least once a month and fully
charge it if necessary.NOTICEECB00941Always keep the battery charged. Storing a
discharged battery can cause permanent bat-
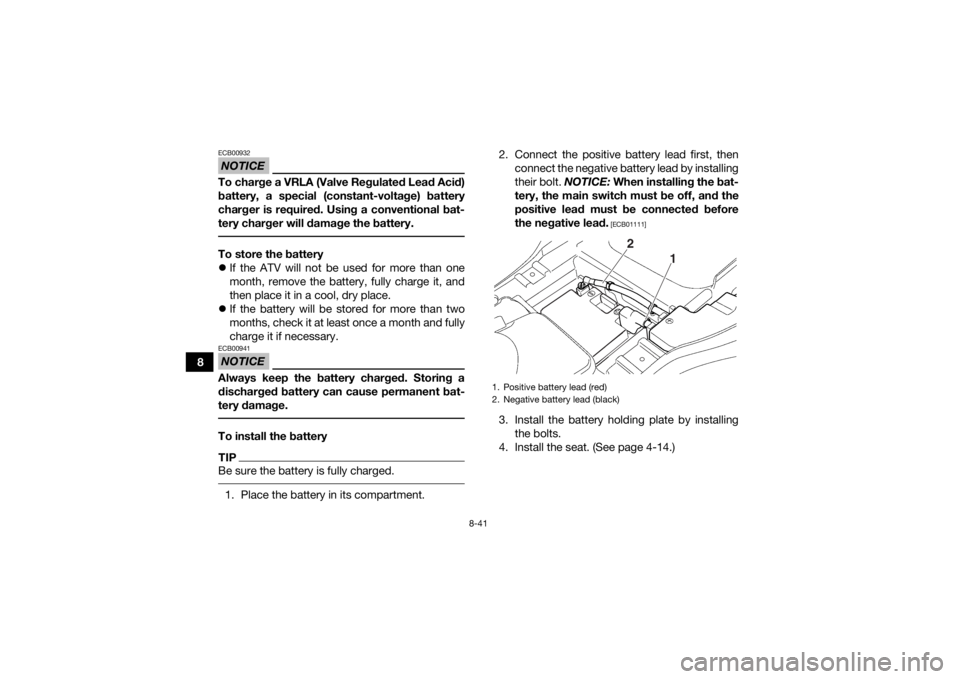
tery damage. To install the batteryTIPBe sure the battery is fully charged. 1. Place the battery in its compartment. 2. Connect the positive battery lead first, then
connect the negative battery lead by installing
their bolt. NOTICE: When installing the bat-
tery, the main switch must be off, and the
positive lead must be connected before
the negative lead.
[ECB01111]
3. Install the battery holding plate by installing the bolts.
4. Install the seat. (See page 4-14.)1. Positive battery lead (red)
2. Negative battery lead (black)
2
1
U1NS64E0.book Page 41 Thursday, June 25, 2015 8:36 AM
Page 125 of 146
8-42
8
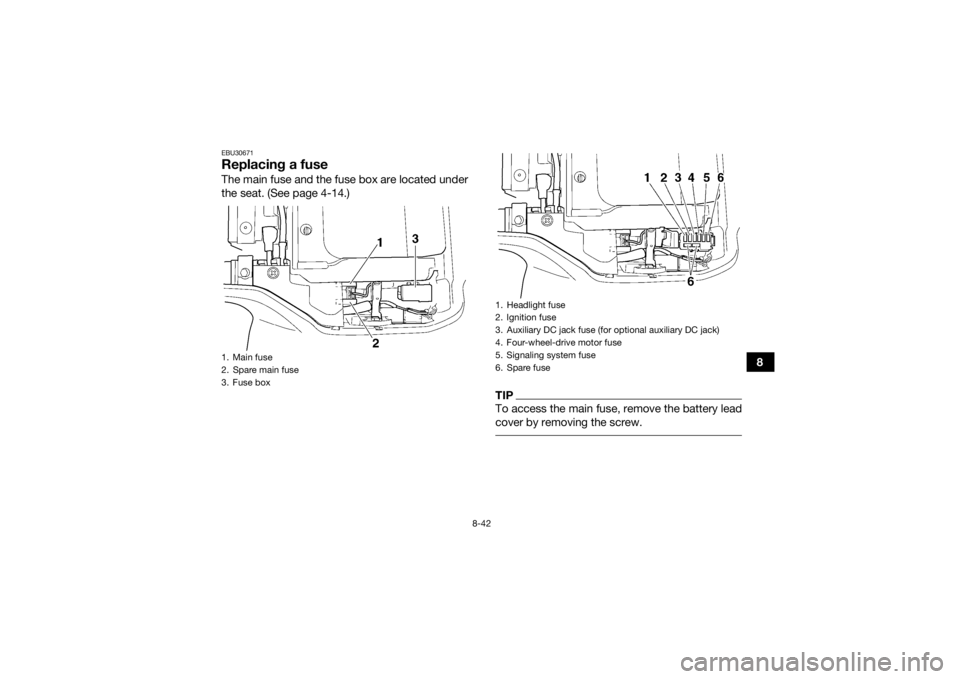
EBU30671Replacing a fuseThe main fuse and the fuse box are located under
the seat. (See page 4-14.)
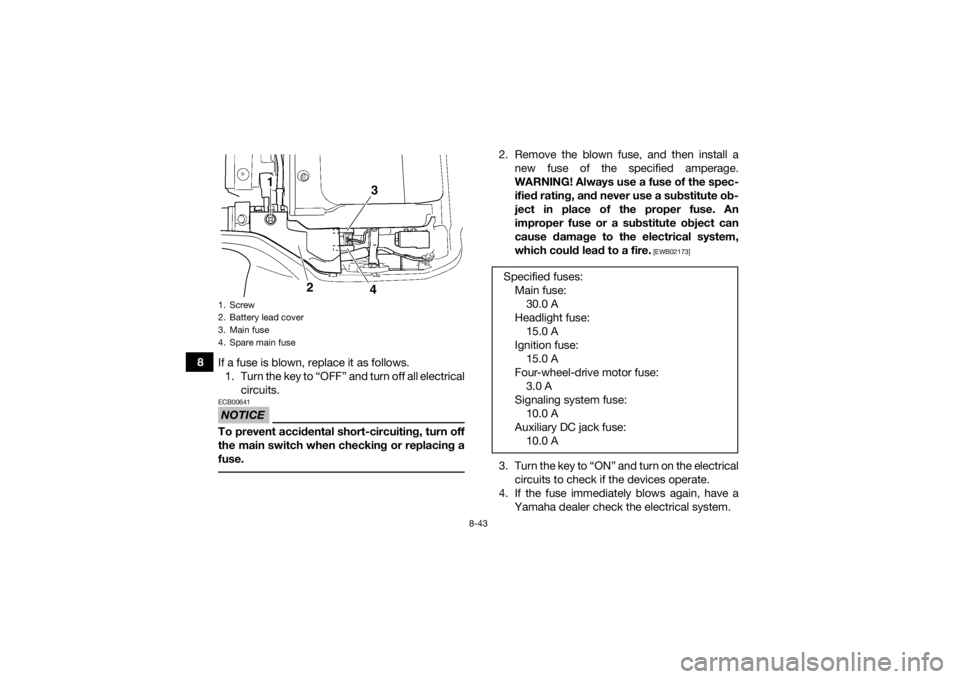
TIPTo access the main fuse, remove the battery lead
cover by removing the screw.
1. Main fuse
2. Spare main fuse
3. Fuse box
1. Headlight fuse
2. Ignition fuse
3. Auxiliary DC jack fuse (for optional auxiliary DC jack)
4. Four-wheel-drive motor fuse
5. Signaling system fuse
6. Spare fuse
U1NS64E0.book Page 42 Thursday, June 25, 2015 8:36 AM
Page 126 of 146
8-43
8If a fuse is blown, replace it as follows.
1. Turn the key to “OFF” and turn off all electrical circuits.
NOTICEECB00641To prevent accidental short-circuiting, turn off
the main switch when checking or replacing a
fuse.
2. Remove the blown fuse, and then install anew fuse of the specified amperage.
WARNING! Always use a fuse of the spec-
ified rating, and never use a substitute ob-
ject in place of the proper fuse. An
improper fuse or a substitute object can
cause damage to the electrical system,
which could lead to a fire.
[EWB02173]
3. Turn the key to “ON” and turn on the electricalcircuits to check if the devices operate.
4. If the fuse immediately blows again, have a Yamaha dealer check the electrical system.
1. Screw
2. Battery lead cover
3. Main fuse
4. Spare main fuse
43
2
1
Specified fuses:Main fuse:30.0 A
Headlight fuse: 15.0 A
Ignition fuse: 15.0 A
Four-wheel-drive motor fuse: 3.0 A
Signaling system fuse: 10.0 A
Auxiliary DC jack fuse: 10.0 A
U1NS64E0.book Page 43 Thursday, June 25, 2015 8:36 AM
Page 127 of 146
8-44
8
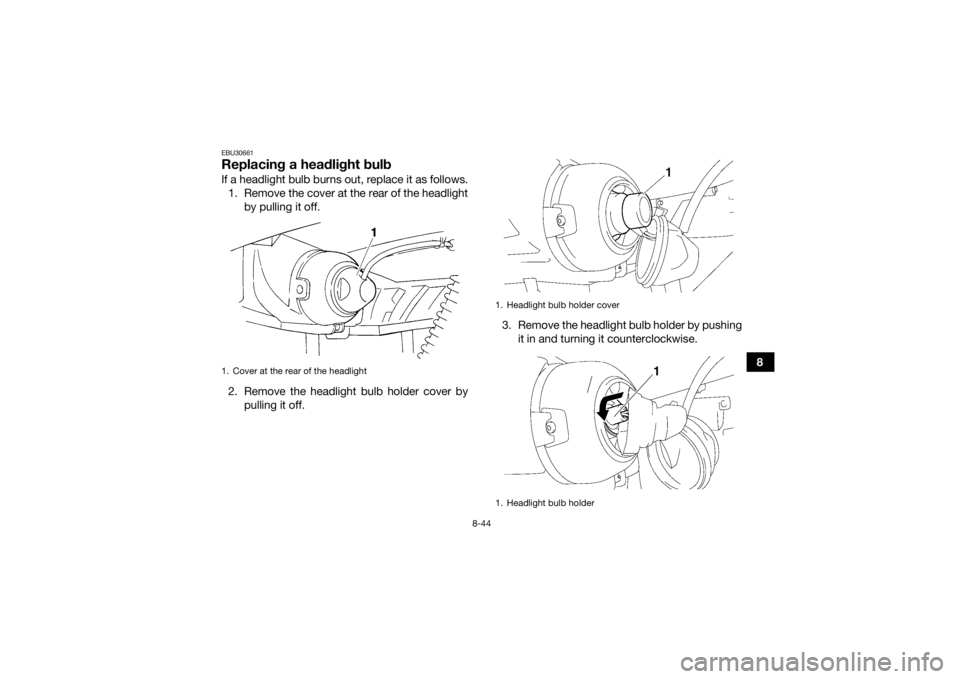
EBU30661Replacing a headlight bulbIf a headlight bulb burns out, replace it as follows.1. Remove the cover at the rear of the headlight by pulling it off.
2. Remove the headlight bulb holder cover by pulling it off. 3. Remove the headlight bulb holder by pushing
it in and turning it counterclockwise.1. Cover at the rear of the headlight
1. Headlight bulb holder cover
1. Headlight bulb holder
1
U1NS64E0.book Page 44 Thursday, June 25, 2015 8:36 AM
Page 128 of 146
8-45
84. Remove the burnt-out bulb by pulling it out.
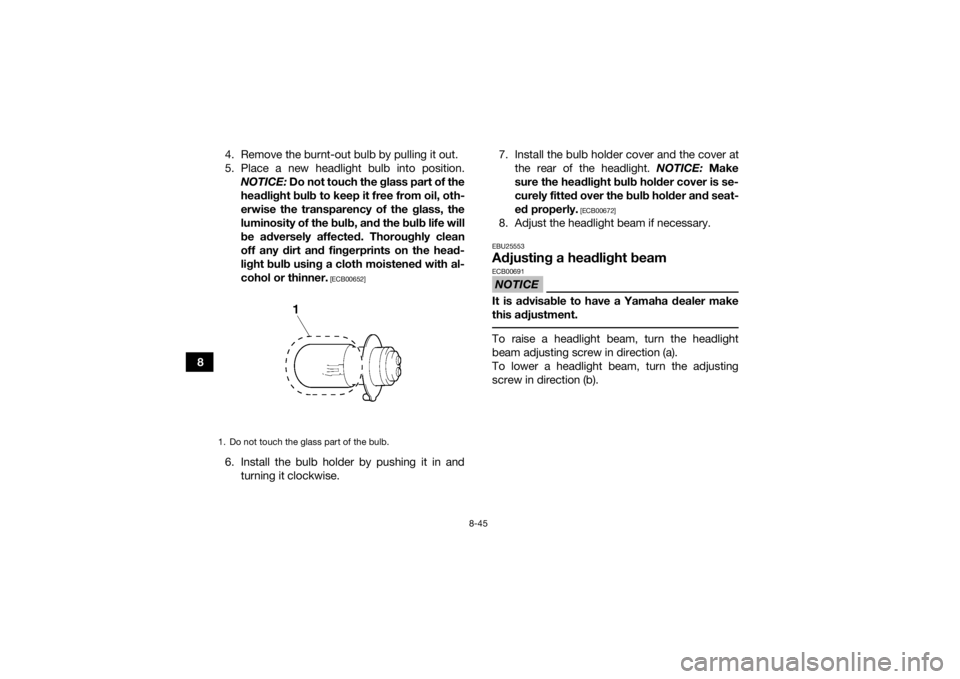
5. Place a new headlight bulb into position.
NOTICE: Do not touch the glass part of the
headlight bulb to keep it free from oil, oth-
erwise the transparency of the glass, the
luminosity of the bulb, and the bulb life will
be adversely affected. Thoroughly clean
off any dirt and fingerprints on the head-
light bulb using a cloth moistened with al-
cohol or thinner.
[ECB00652]
6. Install the bulb holder by pushing it in and turning it clockwise. 7. Install the bulb holder cover and the cover at
the rear of the headlight. NOTICE: Make
sure the headlight bulb holder cover is se-
curely fitted over the bulb holder and seat-
ed properly.
[ECB00672]
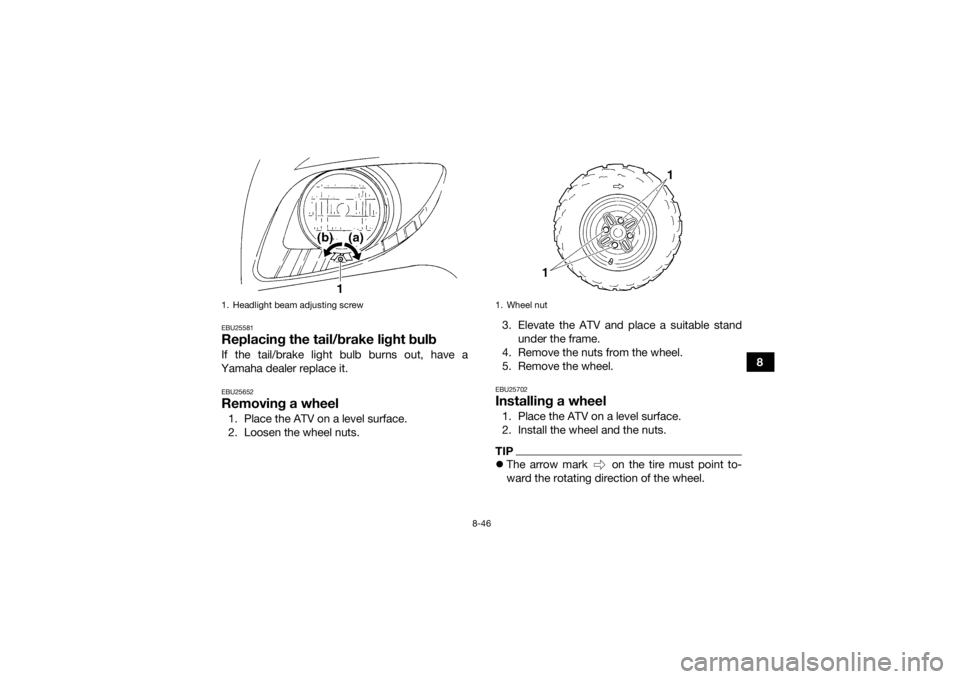
8. Adjust the headlight beam if necessary.EBU25553Adjusting a headlight beamNOTICEECB00691It is advisable to have a Yamaha dealer make
this adjustment. To raise a headlight beam, turn the headlight
beam adjusting screw in direction (a).
To lower a headlight beam, turn the adjusting
screw in direction (b).
1. Do not touch the glass part of the bulb.U1NS64E0.book Page 45 Thursday, June 25, 2015 8:36 AM
Page 129 of 146
8-46
8
EBU25581Replacing the tail/brake light bulbIf the tail/brake light bulb burns out, have a
Yamaha dealer replace it.EBU25652Removing a wheel1. Place the ATV on a level surface.
2. Loosen the wheel nuts. 3. Elevate the ATV and place a suitable stand
under the frame.
4. Remove the nuts from the wheel.
5. Remove the wheel.
EBU25702Installing a wheel1. Place the ATV on a level surface.
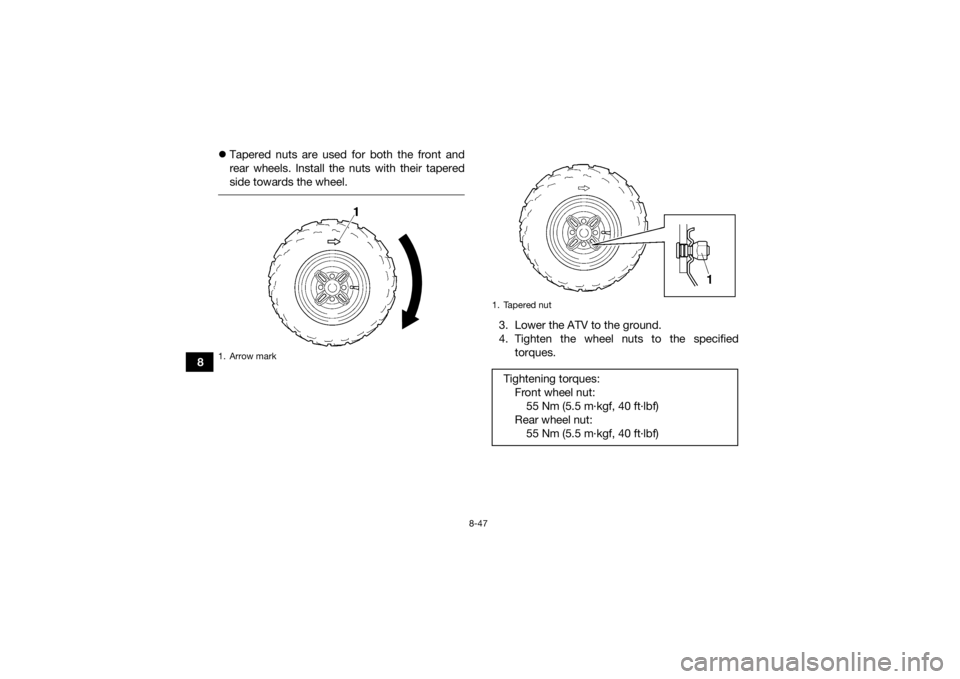
2. Install the wheel and the nuts.TIP The arrow mark on the tire must point to-
ward the rotating direction of the wheel.
1. Headlight beam adjusting screw
1. Wheel nut
U1NS64E0.book Page 46 Thursday, June 25, 2015 8:36 AM
Page 130 of 146
8-47
8
Tapered nuts are used for both the front and
rear wheels. Install the nuts with their tapered
side towards the wheel.
3. Lower the ATV to the ground.
4. Tighten the wheel nuts to the specified
torques.
1. Arrow mark
1. Tapered nutTightening torques:Front wheel nut:55 Nm (5.5 m·kgf, 40 ft·lbf)
Rear wheel nut: 55 Nm (5.5 m·kgf, 40 ft·lbf)
U1NS64E0.book Page 47 Thursday, June 25, 2015 8:36 AM