fuel YAMAHA GRIZZLY 700 2014 User Guide
[x] Cancel search | Manufacturer: YAMAHA, Model Year: 2014, Model line: GRIZZLY 700, Model: YAMAHA GRIZZLY 700 2014Pages: 174, PDF Size: 4.2 MB
Page 48 of 174
4-18
4Your Yamaha engine has been designed to use
regular unleaded gasoline with a research octane
number of 91 or higher (95 or higher for Europe). If
knocking (or pinging) occurs, use a gasoline of a
different brand. Use of unleaded fuel will extend
spark plug life and reduce maintenance costs.
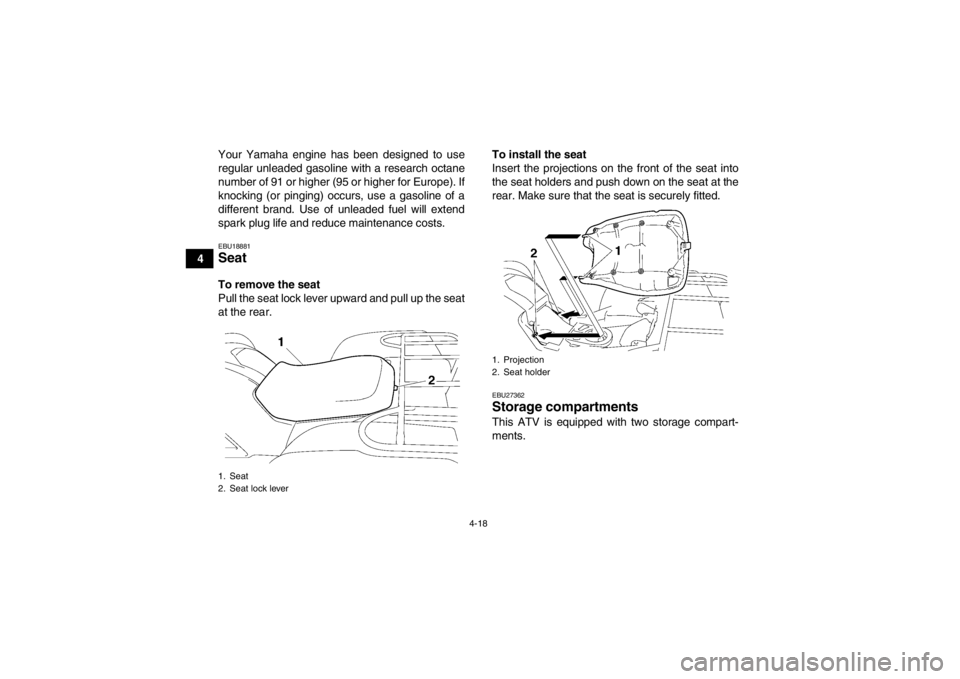
EBU18881Seat To remove the seat
Pull the seat lock lever upward and pull up the seat
at the rear. To install the seat
Insert the projections on the front of the seat into
the seat holders and push down on the seat at the
rear. Make sure that the seat is securely fitted.
EBU27362Storage compartments This ATV is equipped with two storage compart-
ments.
1. Seat
2. Seat lock lever
1. Projection
2. Seat holder
U2BG60E0.book Page 18 Monday, May 20, 2013 3:04 PM
Page 55 of 174
5-1
5
EBU19201
PRE-OPERATION CHECKS
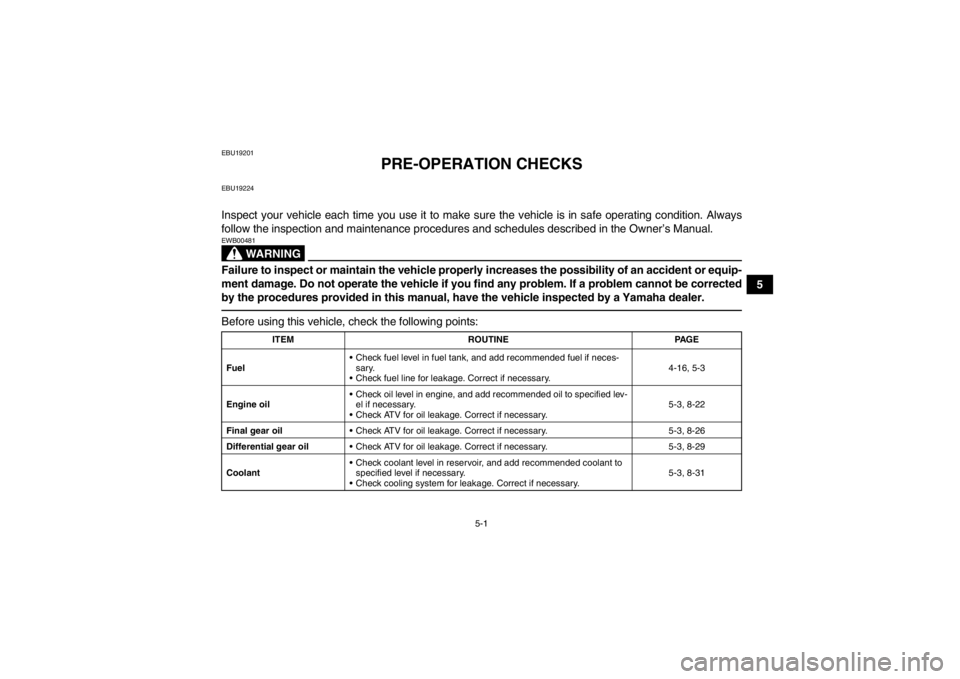
EBU19224Inspect your vehicle each time you use it to make sure the vehicle is in safe operating condition. Always
follow the inspection and maintenance procedures and schedules described in the Owner’s Manual.
WARNING
EWB00481Failure to inspect or maintain the vehicle properly increases the possibility of an accident or equip-
ment damage. Do not operate the vehicle if you find any problem. If a problem cannot be corrected
by the procedures provided in this manual, have the vehicle inspected by a Yamaha dealer.Before using this vehicle, check the following points:
ITEMROUTINE PAGE
Fuel Check fuel level in fuel tank, and add recommended fuel if neces-
sary.
Check fuel line for leakage. Correct if necessary. 4-16, 5-3
Engine oil Check oil level in engine, and add recommended oil to specified lev-
el if necessary.
Check ATV for oil leakage. Correct if necessary. 5-3, 8-22
Final gear oil Check ATV for oil leakage. Correct if necessary. 5-3, 8-26
Differential gear oil Check ATV for oil leakage. Correct if necessary. 5-3, 8-29
Coolant Check coolant level in reservoir, and add recommended coolant to
specified level if necessary.
Check cooling system for leakage. Correct if necessary. 5-3, 8-31
U2BG60E0.book Page 1 Monday, May 20, 2013 3:04 PM
Page 57 of 174
5-3
5
EBU19541Fuel Make sure that there is sufficient fuel in the tank.
(See page 4-16.)EBU19560Engine oil Make sure that the engine oil is at the specified lev-
el. Add oil as necessary. (See page 8-22.)EBU19590Final gear oil Make sure that the final gear oil is at the specified
level. Add oil as necessary. (See page 8-26.)EBU19600Differential gear oil Make sure that the differential gear oil is at the
specified level. Add oil as necessary. (See page
8-29.)EBU19631Coolant Make sure that the coolant is at the specified level.
Add coolant as necessary. (See page 8-31.)
TIPThe coolant level must be checked on a cold en-
gine since the level varies with engine tempera-
ture.EBU29082Front and rear brakes Brake levers and brake pedal●Check that there is no free play in the front and
rear brake levers. If there is free play, have a
Yamaha dealer check the brake system.●Check for correct free play in the brake pedal. If
the free play is incorrect, adjust it. (See page
8-49.)●Check the operation of the brake levers and
pedal. They should move smoothly and there
should be a firm feeling when the brakes are ap-
plied. If not, have a Yamaha dealer check the
brake system.
Brake fluid level
Check the brake fluid level. Add fluid if necessary.
(See page 8-47.)
U2BG60E0.book Page 3 Monday, May 20, 2013 3:04 PM
Page 95 of 174
8-3
8
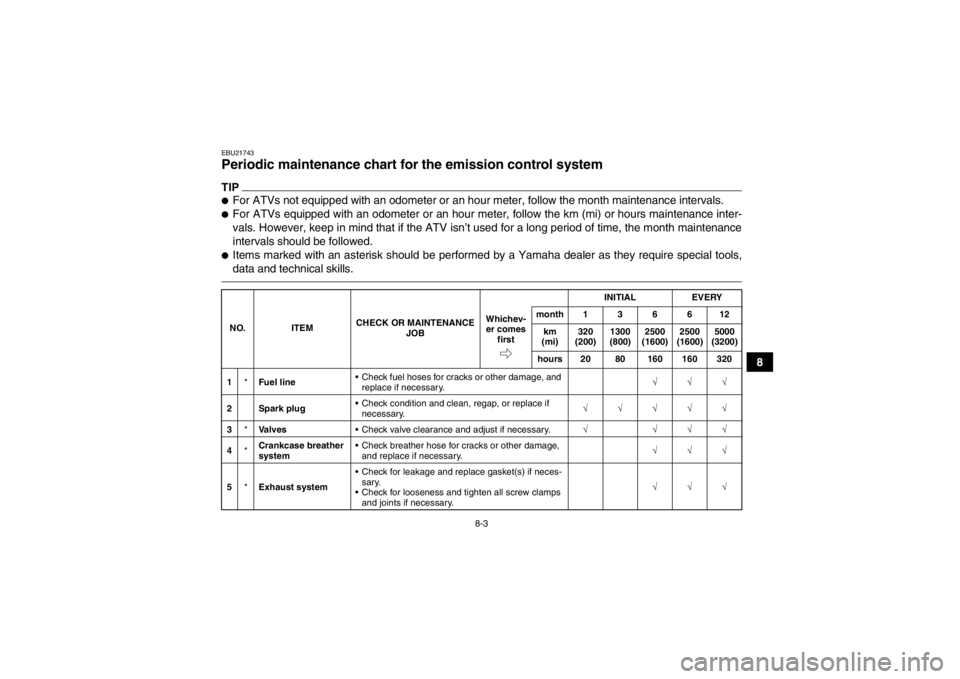
EBU21743Periodic maintenance chart for the emission control system TIP●For ATVs not equipped with an odometer or an hour meter, follow the month maintenance intervals.●For ATVs equipped with an odometer or an hour meter, follow the km (mi) or hours maintenance inter-
vals. However, keep in mind that if the ATV isn’t used for a long period of time, the month maintenance
intervals should be followed.●Items marked with an asterisk should be performed by a Yamaha dealer as they require special tools,
data and technical skills.NO.ITEM CHECK OR MAINTENANCE
JOB INITIAL
EVERY
Whichev- er comes first month136612
km
(mi) 320
(200) 1300
(800) 2500
(1600) 2500
(1600) 5000
(3200)
hours 20 80 160 160 320
1 *Fuel line Check fuel hoses for cracks or other damage, and
replace if necessary. √√√
2 Spark plug Check condition and clean, regap, or replace if
necessary. √√√√√
3 *Valves Check valve clearance and adjust if necessary. √ √√√
4 *Crankcase breather
system Check breather hose for cracks or other damage,
and replace if necessary. √√√
5 *Exhaust system Check for leakage and replace gasket(s) if neces-
sary.
Check for looseness and tighten all screw clamps and joints if necessary. √√√
U2BG60E0.book Page 3 Monday, May 20, 2013 3:04 PM
Page 133 of 174
8-41
8
6. Wash the sponge material gently, but thor-
oughly, in solvent. WARNING! Always use
parts cleaning solvent to clean the sponge
material. Never use low-flash-point sol-
vents or gasoline to clean the sponge ma-
terial because the engine could catch fire
or explode.
[EWB01941]
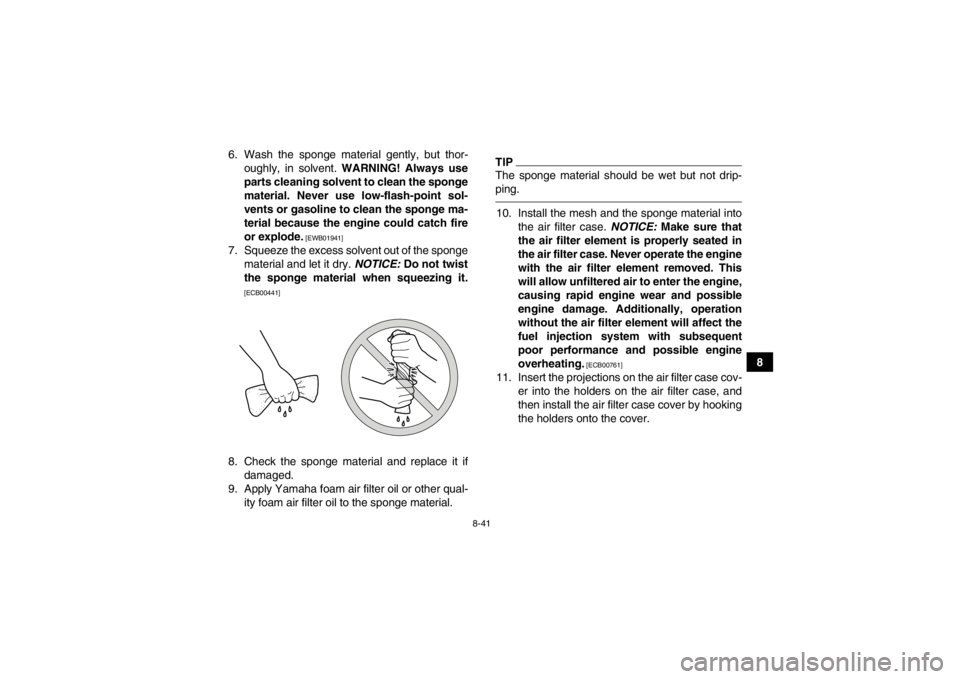
7. Squeeze the excess solvent out of the sponge material and let it dry. NOTICE: Do not twist
the sponge material when squeezing it.
[ECB00441]
8. Check the sponge material and replace it if damaged.
9. Apply Yamaha foam air filter oil or other qual- ity foam air filter oil to the sponge material.
TIPThe sponge material should be wet but not drip-
ping.10. Install the mesh and the sponge material into the air filter case. NOTICE: Make sure that
the air filter element is properly seated in
the air filter case. Never operate the engine
with the air filter element removed. This
will allow unfiltered air to enter the engine,
causing rapid engine wear and possible
engine damage. Additionally, operation
without the air filter element will affect the
fuel injection system with subsequent
poor performance and possible engine
overheating.
[ECB00761]
11. Insert the projections on the air filter case cov- er into the holders on the air filter case, and
then install the air filter case cover by hooking
the holders onto the cover.
U2BG60E0.book Page 41 Monday, May 20, 2013 3:04 PM
Page 137 of 174
8-45
8
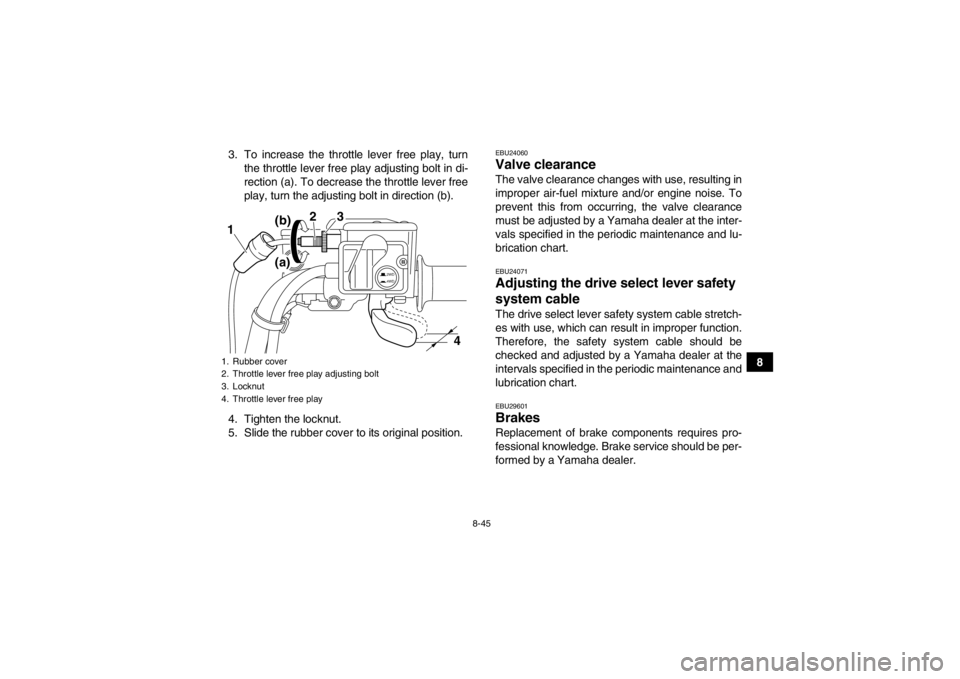
3. To increase the throttle lever free play, turn
the throttle lever free play adjusting bolt in di-
rection (a). To decrease the throttle lever free
play, turn the adjusting bolt in direction (b).
4. Tighten the locknut.
5. Slide the rubber cover to its original position.
EBU24060Valve clearance The valve clearance changes with use, resulting in
improper air-fuel mixture and/or engine noise. To
prevent this from occurring, the valve clearance
must be adjusted by a Yamaha dealer at the inter-
vals specified in the periodic maintenance and lu-
brication chart.EBU24071Adjusting the drive select lever safety
system cable The drive select lever safety system cable stretch-
es with use, which can result in improper function.
Therefore, the safety system cable should be
checked and adjusted by a Yamaha dealer at the
intervals specified in the periodic maintenance and
lubrication chart.EBU29601Brakes Replacement of brake components requires pro-
fessional knowledge. Brake service should be per-
formed by a Yamaha dealer.
1. Rubber cover
2. Throttle lever free play adjusting bolt
3. Locknut
4. Throttle lever free play
2WD
4WD
3
2
1
4
(b)
(a)
U2BG60E0.book Page 45 Monday, May 20, 2013 3:04 PM
Page 151 of 174
8-59
8
EBU30520Replacing a fuse
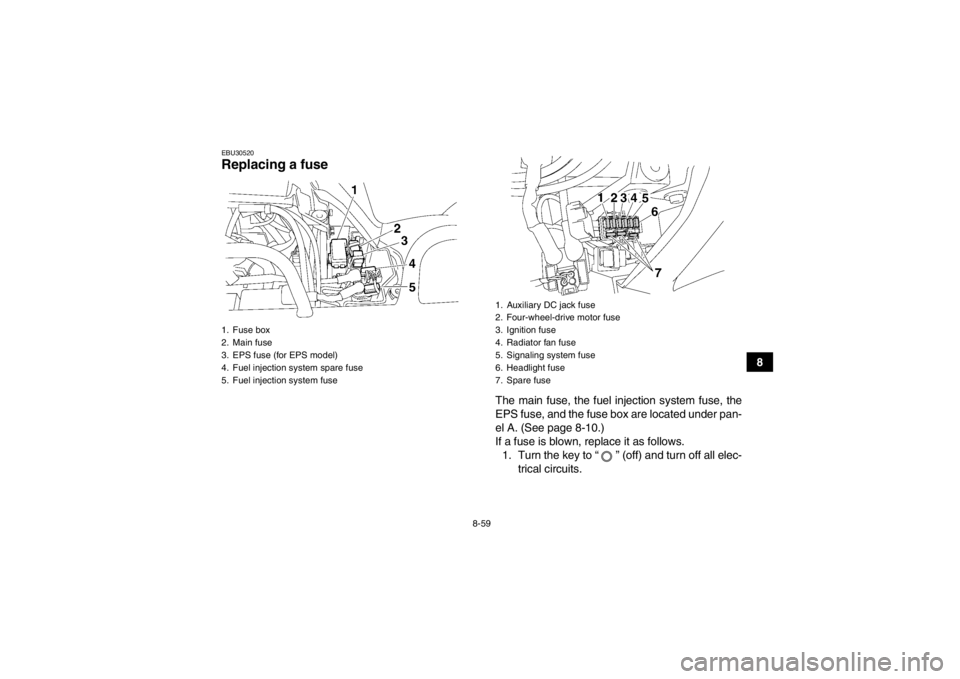
The main fuse, the fuel injection system fuse, the
EPS fuse, and the fuse box are located under pan-
el A. (See page 8-10.)
If a fuse is blown, replace it as follows.1. Turn the key to “ ” (off) and turn off all elec- trical circuits.
1. Fuse box
2. Main fuse
3. EPS fuse (for EPS model)
4. Fuel injection system spare fuse
5. Fuel injection system fuse
1. Auxiliary DC jack fuse
2. Four-wheel-drive motor fuse
3. Ignition fuse
4. Radiator fan fuse
5. Signaling system fuse
6. Headlight fuse
7. Spare fuse
U2BG60E0.book Page 59 Monday, May 20, 2013 3:04 PM
Page 152 of 174
8-60
8
NOTICEECB00640To prevent accidental short-circuiting, turn off
the main switch when checking or replacing a
fuse.2. Remove the blown fuse, and then install anew fuse of the specified amperage.
WARNING! Always use a fuse of the spec-
ified rating, and never use a substitute ob-
ject in place of the proper fuse. An
improper fuse or a substitute object can
cause damage to the electrical system,
which could lead to a fire.
[EWB02172]
3. Turn the key to “ ” (on) and turn on the elec-trical circuits to check if the devices operate.
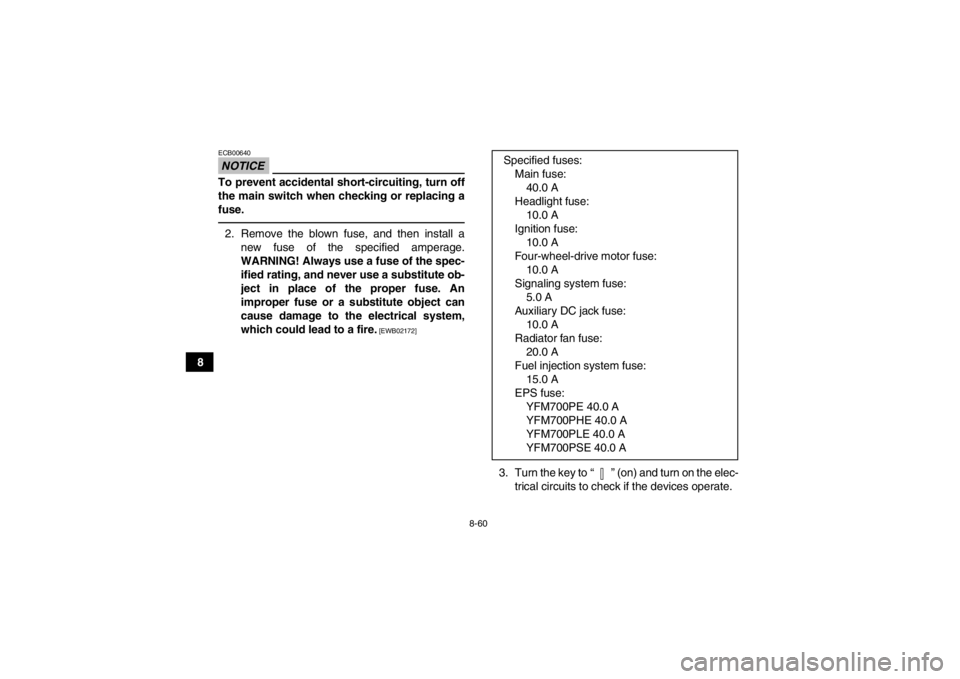
Specified fuses:
Main fuse:40.0 A
Headlight fuse: 10.0 A
Ignition fuse: 10.0 A
Four-wheel-drive motor fuse: 10.0 A
Signaling system fuse: 5.0 A
Auxiliary DC jack fuse: 10.0 A
Radiator fan fuse: 20.0 A
Fuel injection system fuse: 15.0 A
EPS fuse: YFM700PE 40.0 A
YFM700PHE 40.0 A
YFM700PLE 40.0 A
YFM700PSE 40.0 A
U2BG60E0.book Page 60 Monday, May 20, 2013 3:04 PM
Page 157 of 174
8-65
8
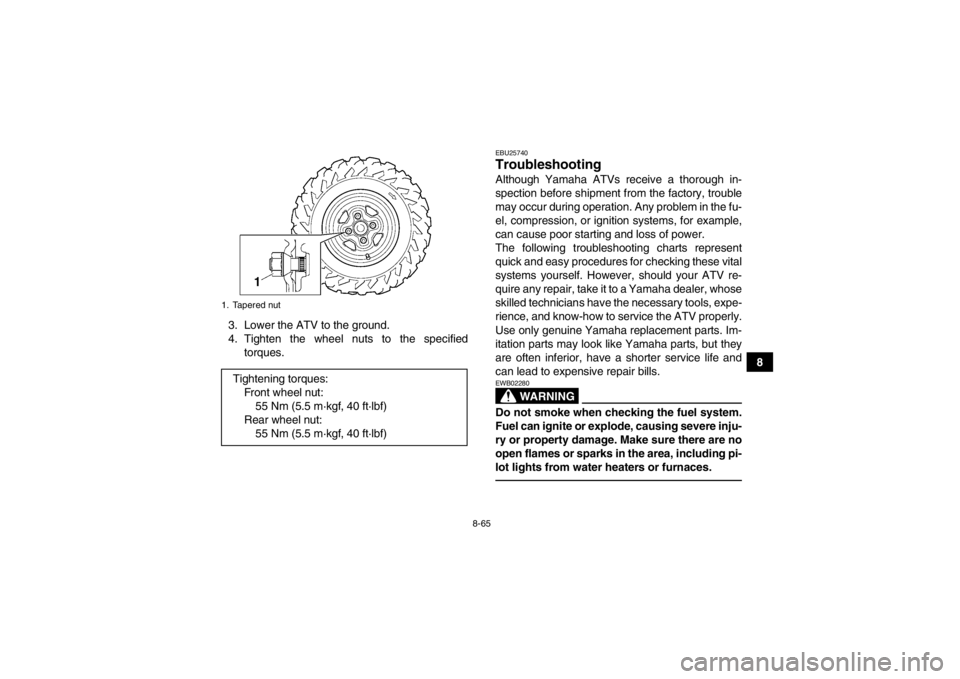
3. Lower the ATV to the ground.
4. Tighten the wheel nuts to the specified
torques.
EBU25740Troubleshooting Although Yamaha ATVs receive a thorough in-
spection before shipment from the factory, trouble
may occur during operation. Any problem in the fu-
el, compression, or ignition systems, for example,
can cause poor starting and loss of power.
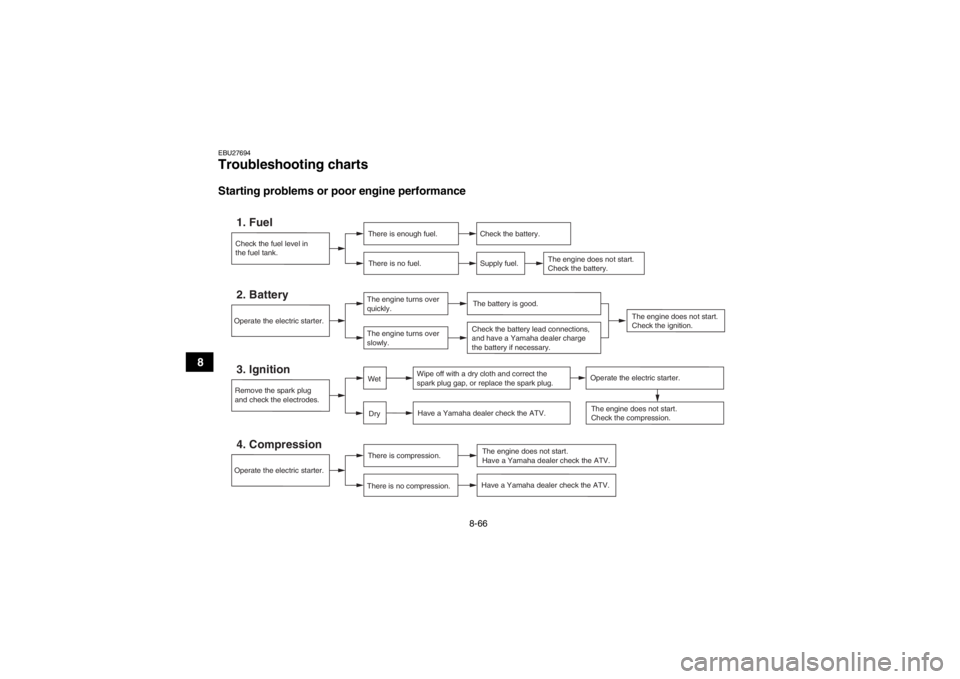
The following troubleshooting charts represent
quick and easy procedures for checking these vital
systems yourself. However, should your ATV re-
quire any repair, take it to a Yamaha dealer, whose
skilled technicians have the necessary tools, expe-
rience, and know-how to service the ATV properly.
Use only genuine Yamaha replacement parts. Im-
itation parts may look like Yamaha parts, but they
are often inferior, have a shorter service life and
can lead to expensive repair bills.
WARNING
EWB02280Do not smoke when checking the fuel system.
Fuel can ignite or explode, causing severe inju-
ry or property damage. Make sure there are no
open flames or sparks in the area, including pi-
lot lights from water heaters or furnaces.
1. Tapered nutTightening torques:Front wheel nut:55 Nm (5.5 m·kgf, 40 ft·lbf)
Rear wheel nut: 55 Nm (5.5 m·kgf, 40 ft·lbf)
U2BG60E0.book Page 65 Monday, May 20, 2013 3:04 PM
Page 158 of 174
8-66
8
EBU27694Troubleshooting charts Starting problems or poor engine performance
Check the fuel level in
the fuel tank.1. Fuel
There is enough fuel.There is no fuel.
Check the battery.
Supply fuel.
The engine does not start.
Check the battery.
Operate the electric starter.4. Compression
There is compression.
There is no compression.
The engine does not start.
Have a Yamaha dealer check the ATV.
Remove the spark plug
and check the electrodes.3. Ignition
Wipe off with a dry cloth and correct the
spark plug gap, or replace the spark plug. Have a Yamaha dealer check the ATV.
The engine does not start.
Check the compression.
DryWet
Operate the electric starter.
Have a Yamaha dealer check the ATV.
The engine does not start.
Check the ignition.
Operate the electric starter.2. Battery
The engine turns over
quickly.
The engine turns over
slowly.
The battery is good.Check the battery lead connections,
and have a Yamaha dealer charge
the battery if necessary.
U2BG60E0.book Page 66 Monday, May 20, 2013 3:04 PM